
Steam Classic VX69 - Steam cleaner VAX - Free user manual and instructions
Find the device manual for free Steam Classic VX69 VAX in PDF.


| Product Type | Steam Cleaner (Steam Mop) |
| Brand | Vax |
| Model | Steam Classic VX69 |
| Voltage | 220-240V ~ 50/60Hz |
| Power | 1300W |
| Weight | 2.1 kg |
| Cord Length | 5 m |
| Water Tank Capacity | 330 ml |
| Water Tank Material | High-temperature resistant plastic |
| Floorhead Material | Plastic with steam vents |
| Accessories Included | Microfibre pad, carpet glider, concentration nozzle, cooling tray |
| Pad Type | Microfibre (machine washable up to 40°C) |
| Steam Ready Time | Approximately 30 seconds |
| Heating Element | Internal boiler with thermostat and thermal cut-out |
| Safety Features | Thermal cut-out, auto shut-off on overheat, IPX4 splash protection |
| Suitable Surfaces | Hard floors (sealed), carpets (with glider), tiles, sealed wood |
| Not Suitable For | Waxed floors, unsealed wood, acrylic, velvet, leather, delicate fabrics |
| Usage | Indoor household use only |
| Warranty | Invalidated if safety instructions not followed |
| Country of Origin | Made in China to Vax specifications |
Frequently Asked Questions - Steam Classic VX69 VAX
User questions about Steam Classic VX69 VAX
0 question about this device. Answer the ones you know or ask your own.
Ask a new question about this device
Download the instructions for your Steam cleaner in PDF format for free! Find your manual Steam Classic VX69 - VAX and take your electronic device back in hand. On this page are published all the documents necessary for the use of your device. Steam Classic VX69 by VAX.
USER MANUAL Steam Classic VX69 VAX
natural_image
White Vax vacuum cleaner with orange handle and black handle, no visible text or symbols on bodyvax.com.au
vax.co.nz

Basic safety precautions
READ ALL THE INSTRUCTIONS BEFORE USING THIS APPLIANCE
This steam mop is intended for household use only and NOT for commercial or industrial use.
When using the cleaner basic safety precautions should always be observed, including the following:
- Only use the steam mop indoors away from rain and moisture and keep the area you're cleaning well lit
- Turn OFF the on/off switch on the steam mop controls before disconnecting or connecting from the mains supply
- Always unplug the steam mop and allow it to cool before connecting or disconnecting accessories or performing any maintenance
- Children should be supervised to ensure that they do not play with the appliance
- This appliance is not intended for use by children and persons with reduced physical, sensory or mental capabilities or lack of experience and knowledge, unless they have been given supervision or instruction concerning use of the appliance by a person responsible for their safety
- Please refer to floor manufacturer's care recommendations before use, and test your flooring/carpet/rugs by running the steam mop over a small hidden area, if no pile distortion or no damage occurs continue cleaning. Not suitable for use on wax polished floors or furniture, acrylic surfaces and synthetic, velvet or steam/water sensitive materials
- Keep fingers, hair and loose clothing from moving parts and openings whilst using the steam mop
- This steam mop should not be used to clean electrical appliances such as microwaves, oven, televisions and electrical heating systems etc

WARNING: Danger of scalding
WARNING: The stick steam mop head gets very hot during operation.
IMPORTANT: The steam mop is equipped with a thermostat and a thermal cut-out. If for any reason the unit should overheat, the thermostat will automatically turn the unit off. Should this occur, unplug the steam mop from the electrical outlet and turn off the switch. Let the unit cool, remove and empty the water tank. To re-start the machine, plug it into an electrical outlet and switch it back on.
IMPORTANT: We recommend the use of a Residual Current Device with a Residual Current rating of 30mA or less.
IMPORTANT: This steam mop may not be suitable for all floating floorboards or sealed floors – please check with your floorboard manufacturer first prior to use.
DAMAGE TO THE STEAM MOP CAUSED AS A DIRECT RESULT OF NOT ADHERING TO THE GENERAL SAFETY INFORMATION AND THE INSTRUCTIONS IN THIS USER GUIDE INVALIDATES THE WARRANTY
PLEASE KEEP THESE INSTRUCTIONS FOR FUTURE REFERENCE

Let's talk safety

Don'ts
- Don't touch any hot areas/accessories on your steam mop. It's normal for the steam mop and accessories to heat up during use, always allow them to cool down before handling
- Don't use the steam mop if it has been dropped, if there are visible signs of damage or if it is leaking, if it has been immersed in water or left outdoors
- Don't handle the plug or use the steam mop with wet hands
- Don't pull or carry this steam mop by the power cord
- Don't use the power cord as a handle, pull the power cord around corners or sharp edges or close a door over the power cord
- Don't attempt to remove blockages with sharp objects as this may cause damage to the steam mop, remove blockages only as instructed in this guide
- Don't unplug steam mop by pulling on the power cord or run over the power cord. If the power cord or plug is damaged please contact our Customer Care Line
- Don't aim the steam mop at people, animals, plants and electrical components such as interior of ovens or wires. Never touch the floor head from a short distance (there is a risk of scalding)

Do's
- Always fill the clean water tank with water only, never add perfume, stain remover or products containing alcohol. Filling the clean water tank with hot or boiling water will damage the machine and invalidate your warranty
• Always make sure tank is fitted correctly before using the steam mop - Always vacuum your carpets thoroughly and ensure hard floor areas are free from grit and debris before using the steam mop
• Always carry the steam mop by the handle - Always unplug the steam mop before carrying out any maintenance or when unattended
- Turn off all controls on the steam mop before disconnecting or connecting the power cord, after use always wrap the power cord around the cord clips provided
• Take extra care when cleaning on stairs
• Always protect the power cable from heated surfaces or near open flames - Store the steam mop in a cool, dry area away from children
-
Before storing the steam mop please ensure all water is removed from the tank
-
Don't use the steam mop with incorrect voltage as this may result in damage or injury to the user. The correct voltage is listed on the ratings label
- Don't leave this steam mop unattended while it is connected to the supply mains
- Do not use this steam mop with a damaged cord or plug. If the supply cord is damaged return the steam mop to an authorised Service Agent
- Do not use without the tank cap in place. Ensure that the water tank cap has been screwed down fully before use
- Never immerse the steam mop in water or in other liquids
- Do not operate the steam mop without water in the tank
- Do not use the unit on leather, wax polished furniture or floors, synthetic fabrics, velvet or other delicate steam or water sensitive materials
- Do not use on acrylic surfaces
- Do not overfill the tank. Do not exceed the maximum prescribed filling level
WARNING: Never leave the steam mop in one spot on any surface for an extended period of time, as this may damage the floor surface.
- The force and heat of the steam may have an adverse effect on some materials.
Always check whether a surface is suitable for treatment with the steam by carrying out a test before hand on a concealed area
• The steam mop must be kept level during operation - Always remove the mains plug from the socket and allow the steam mop to cool down completely before topping up with water
- In wet rooms, e.g. bathrooms, connect the appliance to sockets with an RCD adaptor connected in series
- Be very careful when cleaning tiled walls with sockets
WARNING: Always switch off and unplug the steam mop from the electrical outlet before assembling, opening or emptying the water tank, or before connecting/disconnecting the attachments.
Thank you for buying this Steam Cleaner.
Taking care of your hard floors and above floor cleaning
The Steam Classic is a lightweight steam cleaner, designed to make the chore of cleaning hard floors and above floor cleaning such as bathrooms and kitchens as easy and efficient as possible and this user guide will help you to get the most out of your machine.
The incredible power of steam eliminates 99.9% of harmful germs and bacteria around the home, breaking down stubborn grease and grime and leaving every surface spotless and hygienic for a healthier home environment.
Taking care of your Steam Cleaner
Also inside this guide are instructions on maintaining your new machine, so that it's always ready when you are to tackle your hard floors and above floor cleaning.
We're here if you need us
For troubleshooting simply visit or call:
vax
Australia: 1300 VAX AUS (1300 829 287)* vax.com.au
New Zealand: 0800 VAX NZL (0800 829 695)* vax.co.nz
*Monday – Friday: 8:30am -5:00pm
Calls are charged at the standard local rate. Please make note of the serial number and model number of the product before calling.
Contents
Let's talk safety
Getting to know your machine
Getting started
Using your machine
Taking care of your machine
What to do if it goes wrong
Getting in touch
Accessories
Steam Cleaner
Included with your machine
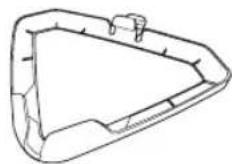
Carpet glider
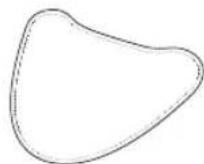
Microfibre pad
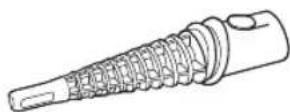
Concentration nozzle
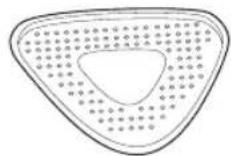
Cooling tray

Getting to know your machine
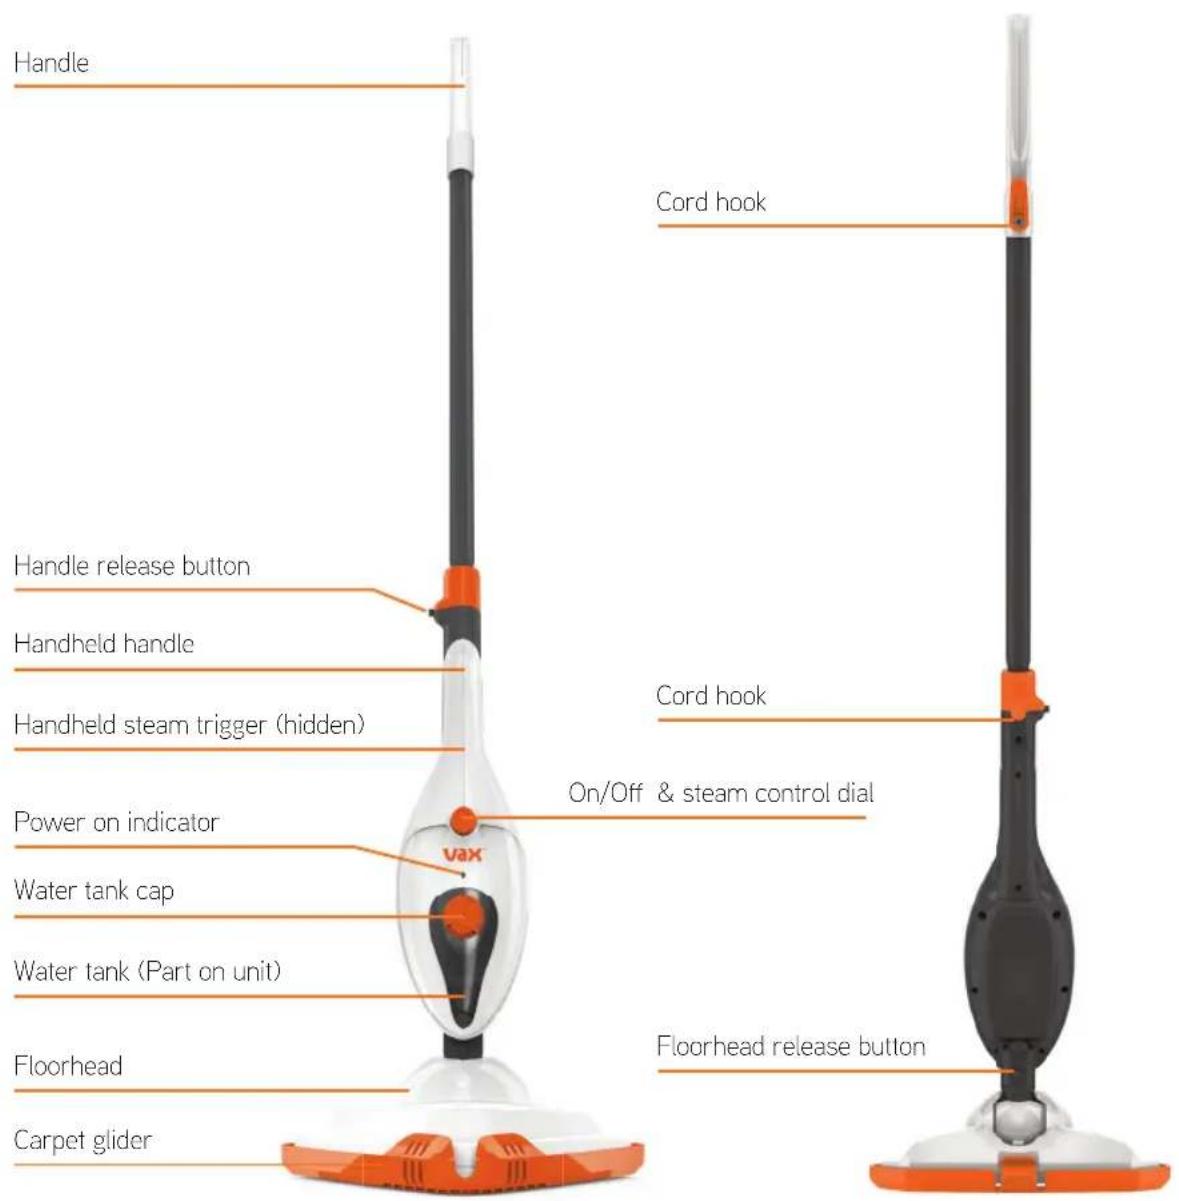
Technical Specification
Model VX69
Voltage 220-240V \~ 50/60Hz
Wattage 1300W
Cord length 5m
Weight 2.1kg
Subject to technical change without notice.
Accessories
Microfi bre pads VTHSP & VTHSP4

This product moots applicable regulatory requirements

Imagul Use Only

1980 FISUOEN
IPX4
Made in China to our exact specifications
*To purchase consumables and accessories, please visit vax.com.au
PLEASE READ 'LET'S TALK SAFETY' AT THE BEGINNING BEFORE USE
CAUTION:
• The steamer and accessories get very hot during use, always allow them to cool down before handling.
• Always unplug and switch off the steamer when assembling or disassembling.
• Always switch off the steamer before emptying the water tank or changing the cloths/accessories.
IMPORTANT:
- Please refer to floor manufacturer's care recommendations before use and test the steamer on a hidden area of flooring to begin with. Check with flooring manufacturer for suitability on sealed floors prior to use.
- Test for colour fastness in a small hidden area of upholstery/fabric to check for colour removal before use.
- When using the steamer, basic safety precautions should always be observed.
- Don't aim the steamer at people, animals, plants and electrical components or wires. Never touch the steam jet or floorhead from a short distance (there is a risk of scalding).
- The steamer is equipped with a thermostat and a thermal fuse. If for any reason the steamer overheats it will switch off. If this happens turn off and unplug the steamer, allow to cool for at least 2 to 4 hours and re-try.
- Don't use hot or boiling water to fill or clean water tank.
Assembling your steamer
natural_image
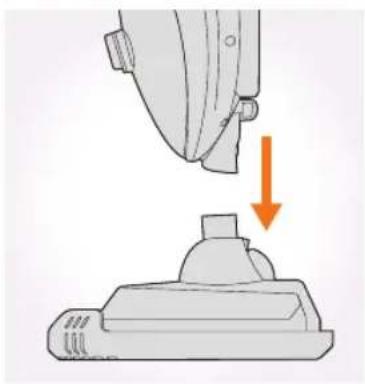
Diagram showing a mechanical component with an arrow indicating downward motion (no text or symbols present)Push the main body down into the floorhead until it clicks into place.
natural_image
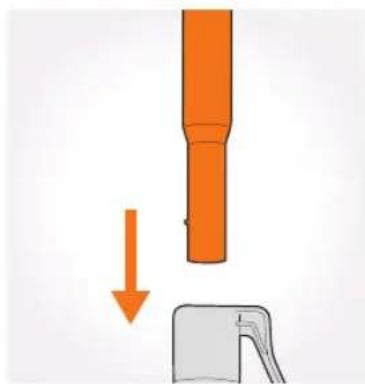
Diagram showing a mechanical component with an orange shaft and a gray base, both pointing downward (no text or symbols)Push the handle into main body until it clicks into place. The collar should be gripped when connecting or releasing the handle.
natural_image
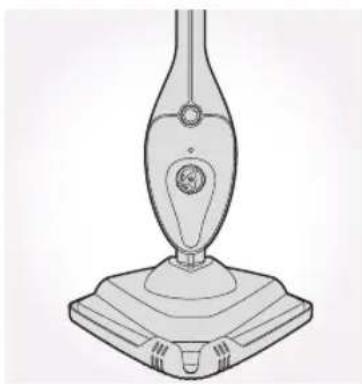
Line drawing of a vacuum tube device with a base and top component (no text or symbols)Stand the steamer upright by pushing the main body forward to lock into position.

Using your machine
Filling the water tank
IMPORTANT: Never turn the steamer over when water is in the tank, as some water may leak through the air valve. It is normal for the water tube to make a rattling sound inside the water tank during use.
IMPORTANT: Always fill the clean water tank with WATER ONLY. No solutions, detergents, alcohol or perfume to be used.
natural_image
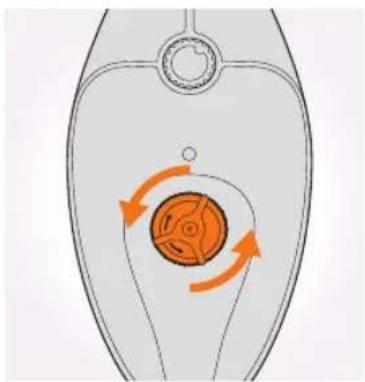
Diagram of a device with orange circular components and directional arrows indicating rotation or movement (no text or symbols)Remove floorhead and handle and place steamer on flat surface. Twist water tank cap anticlockwise and lift to remove.
natural_image
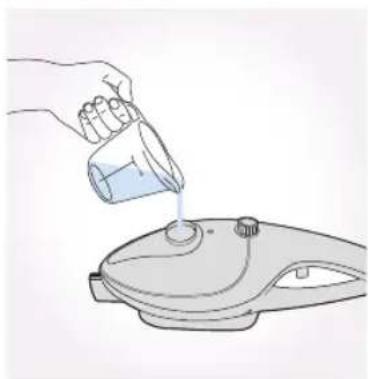
Illustration of a hand pouring liquid into a small air conditioner (no text or symbols)Do not fill directly from tap or over sink. Keep steamer on fill at surface. Use a Measuring Jug to fill the tank with 330ml of water.
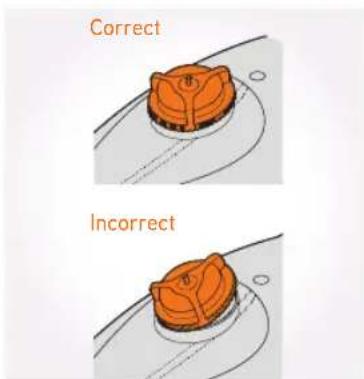
Replace cap, align tabs and twist clockwise to tighten.
Using your machine

Cleaning hard floors
IMPORTANT: Never use the steamer without a Microfibre Pad attached to the floorhead. Never leave the steamer on one spot for an extended period of time or with a damp or wet Microfi bre Pad attached as this may damage the floor surface.
natural_image
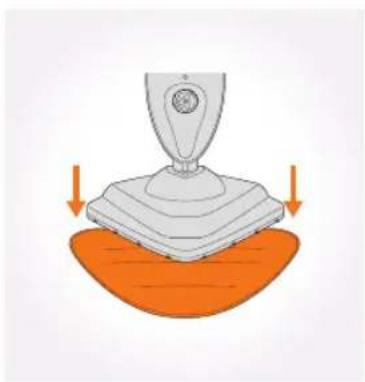
Illustration of a robotic arm gripping a device with orange base (no text or symbols)Place the Microfi bre Pad on the floor white side facing up. Place the floorhead onto Microfi bre Pad making sure the Microfi bre Pad covers the entire floorhead.
natural_image
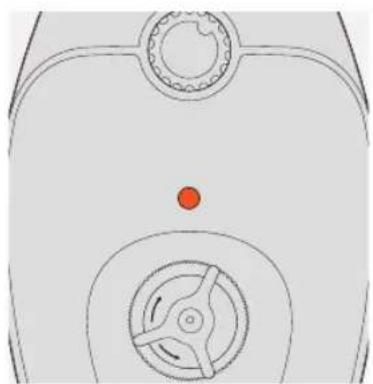
Top-down diagram of a mechanical component with a red dot and three circular features (no text or symbols)Plug into mains, turn dial to 'ON'; the red light will illuminate to indicate power on. The steamer will be ready after approximately 30 seconds. There will be no sounds for the first 30 seconds whilst it is heating up.
natural_image
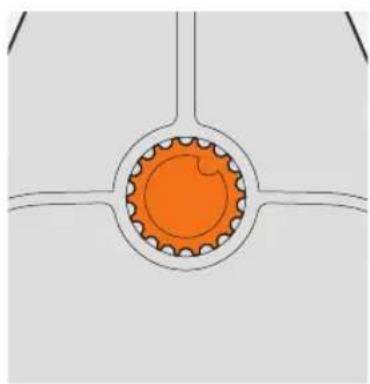
Pure diagram of a mechanical gear or valve component without any text, numbers, or symbolsTo steam your floors twist the steam control dial to desired setting. Steam is activated automatically. Take care when changing settings during cleaning.
natural_image
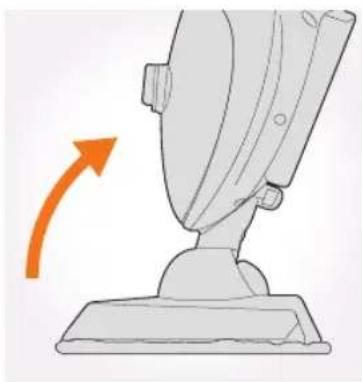
Illustration of a robotic arm with an orange arrow indicating motion (no text or symbols)Place foot onto the floor and pull handle backwards to recline.
natural_image
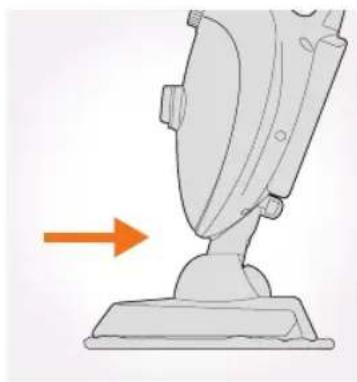
Diagram of a mechanical device with an orange arrow pointing to a base (no text or symbols present)Move the steamer slowly backwards and forwards across the floor paying particular attention to high traffic areas.
natural_image
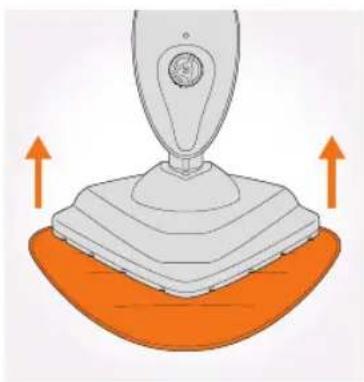
Diagram of a robotic manipulator with orange base and orange top, showing movement arrows (no text or symbols)Turn dial to 'OFF' position and allow steamer to cool, the red light will switch off. Hold corner of pad down with your foot and lift steamer to peel away.

Using your machine
Refreshing Carpets
natural_image
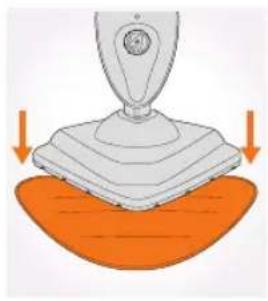
Illustration of a robotic arm gripping a mechanical component with orange base (no text or symbols)Place the Microfi bre Pad on the floor white side facing up. Place steamer onto pad making sure the entire pad covers the floorhead.
natural_image
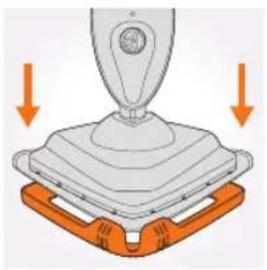
Diagram of a robotic arm gripping a layered device with orange base (no text or symbols)With Microfi bre Pad attached, push steamer into front of the Carpet Glider, then place back of the floorhead into the clip. The Carpet Glider should only be used when refreshing carpets.
natural_image
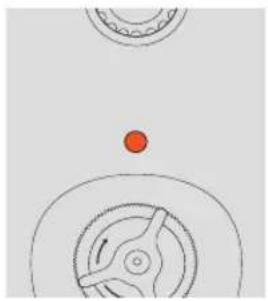
Simple line drawing of a mechanical component with a red dot above, no text or symbols present.Plug into mains, turn dial to 'ON' position, the red light will illuminate to indicate power on. There will be no sounds for the fi rst 30 seconds whilst it is heating up.
natural_image
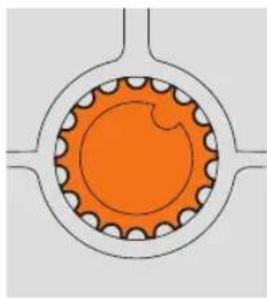
Pure mechanical gear diagram without any text, numbers, or symbolsTwist the steam control dial to desired setting. Steam is activated automatically. Take care when changing settings during cleaning.
natural_image
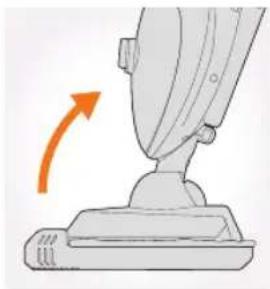
Illustration of a mechanical component with an orange arrow indicating rotation (no text or symbols)Place your foot on floorhead and pull handle backwards to recline.
natural_image
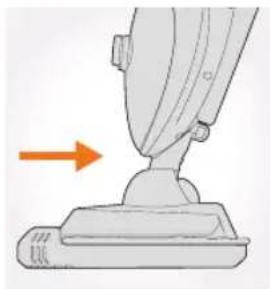
Diagram of a mechanical device with an arrow indicating direction (no text or symbols present)Move the steamer slowly backwards and forwards across the carpet paying particular attention to high traffic areas.
natural_image
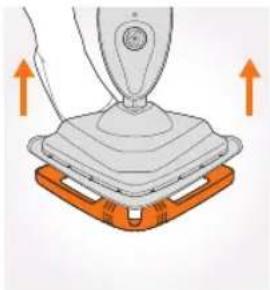
Diagram of a robotic device with orange arrows indicating upward motion (no text or symbols)To release the Carpet Glider, place your foot on clip and push down. Lift steamer to remove.
IMPORTANT: When using on carpets, always make sure the Microfibre Pad is used and covers the floorhead entirely before using the Carpet Glider. Only use the Carpet Glider when refreshing carpets, not for hard floors.
Using your machine

Using the machine as a handheld
natural_image
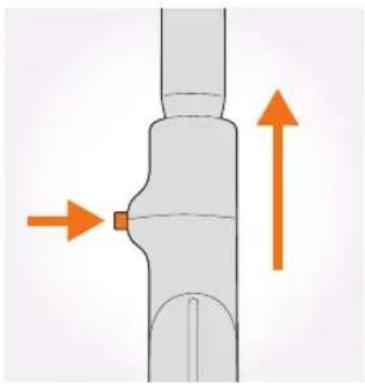
Diagram of a mechanical component with two orange arrows indicating direction (no text or symbols)Push handle release button and lift handle to remove. The collar should be gripped with one hand when releasing the handle with the other hand.
natural_image
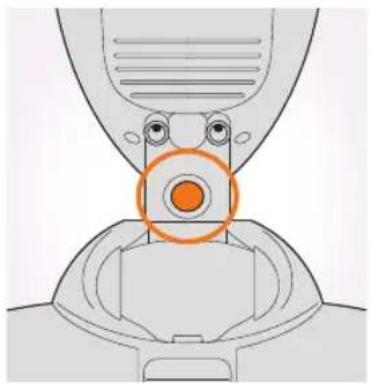
Diagram of a robotic arm with an orange circular highlight on the head (no text or symbols present)Press accessory release button and lift steamer to release floorhead.
natural_image
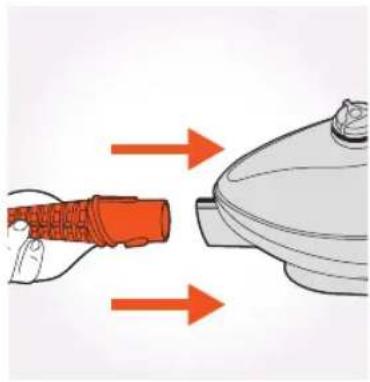
Illustration of a hand holding an orange connector to a device, with arrows indicating direction (no text or symbols)Push Concentration Nozzle into steamer until it clicks into place.
natural_image
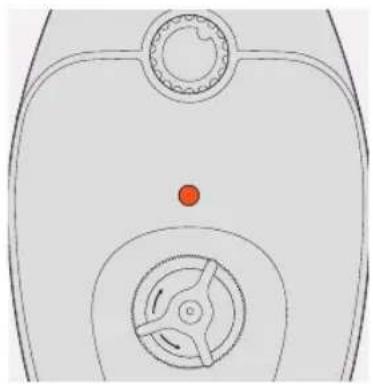
Top-down diagram of a mechanical component with central hub and circular features (no text or symbols)Plug into mains, turn the dial to 'on' position. The red light will illuminate to indicate power on.
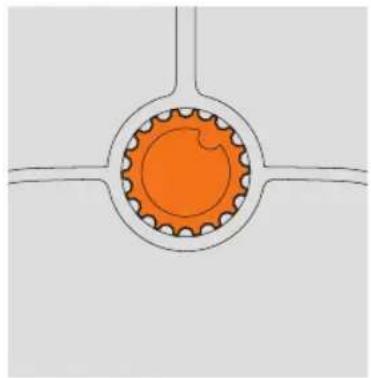
natural_image
Pure diagram of a mechanical gear or valve component with no text, numbers, or symbolsTwist the steam control dial to desired setting.
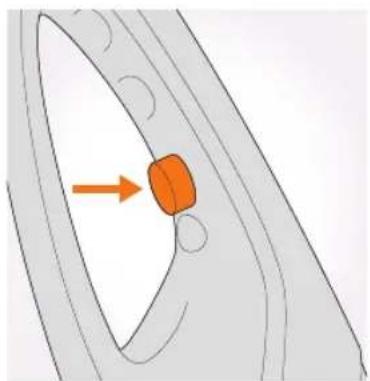
natural_image
Diagram of a vehicle wheel with an orange component and directional arrow, no text or symbols presentTo produce steam squeeze the trigger in short bursts. Don't hold the trigger continuously to prevent over wetting. Allow 30 seconds for steamer to warm up. No sound will be heard until trigger is pressed. No steam will be visible until after 30 seconds.
Taking care of your machine
Emptying the water tank
IMPORTANT: Don't use bleach or fabric softener when washing the Microfibre Pad. Always allow the steamer to fully cool down before removing the Microfi bre Pad.
IMPORTANT: Never remove the water tank cap with the product upright as water could leak out—always remove the floorhead and handle and place on a flat surface before removing the water tank cap.
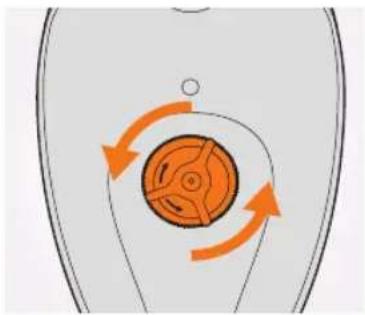
natural_image
Diagram of a circular device with orange arrows indicating rotational or feedback motion (no text or symbols)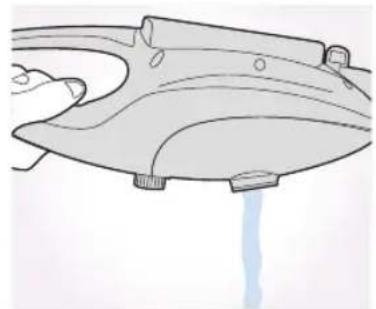
natural_image
Line drawing of a hand washing a small appliance with a blue liquid droplet (no text or symbols)Unplug, remove fl oorhead and handle place steamer on fl at surface. Twist water tank cap anticlockwise and lift to remove.
Cleaning the microfi bre pad
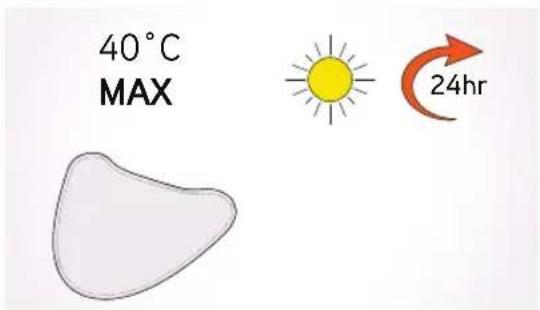
The Microfi bre Pad is machine washable (Max 40°C) allow to fully dry again before use.
Taking care of your machine

Clearing blockages
IMPORTANT: Turn dial on steamer to 'OFF' position, switch off at mains and unplug safely. Allow to fully cool down before performing maintenance or troubleshooting checks.
natural_image
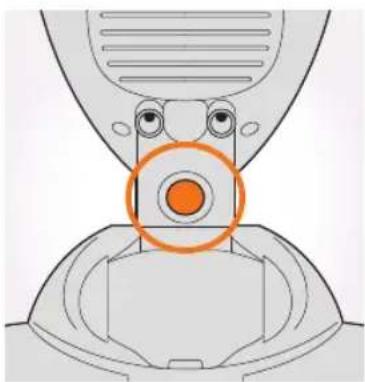
Diagram of a mechanical device with an orange circular highlight on the nose (no text or symbols)Push the accessory floorhead release button and lift the main body from the floorhead to remove. Also remove the handle.
natural_image
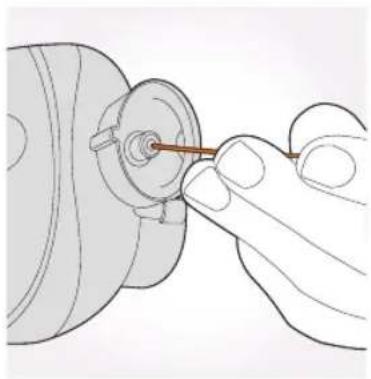
Line drawing of a hand turning a mechanical component with a red rod (no text or symbols)Use a small thin object such as a paperclip to insert into the nozzle and clear any blockage.
natural_image
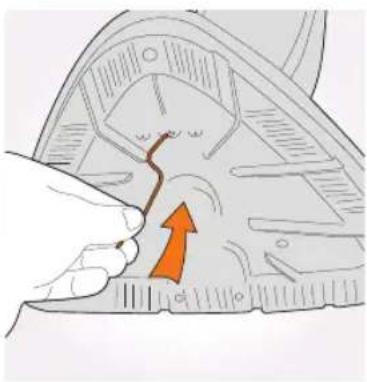
Illustration of a hand inserting a plug into a mechanical component with an orange arrow indicating direction (no text or symbols)To clear a blockage in the floorhead, remove the Microfi bre Pad from the floorhead, insert a small thin object, such as a paperclip, into the steam holes to remove any blockage.
What to do if it goes wrong
SolutionProblem
There is an accessory missing.
- Check the 'This pack contains' panel on the box to make sure the part is included with your steamer.
- If it is missing, we're here to help. Simply call us on
AUS: 1300 VAX AUS (1300 829 287)
NZ: 0800 VAX NZL (0800 829 695)
The steamer has no power
- Check the on/off control dial position.
- Check the amber light is illuminated.
- The plug may not be fully pushed into the electrical socket.
- Check the fuse in the plug if this needs replacing, always replace with a SAA 10amp fuse.
Why is the steamer not producing steam?
- There may be no water in water tank, check the water tank has water.
- Check the water tank cap is securely fitted onto the water tank.
- The water may not yet be at temperature. The steamer will take approximately 30 seconds to heat up.
- Steam path may be blocked. Go to 'Maintenance Section'.
- Check steam control dial has been turned to 'on'.
• Water tank level may be low, refi ll with water. - If using as a stick mop - handle may not be fully inserted. Release handle, press handheld trigger to check steam is working. Re-insert handle until it clicks into place.
Why won't the Microfi bre pad pick up dirt?
- The Microfi bre Pad may already be saturated or dirty.
Taking care of you
We're here if you need us. For trouble shooting, simply call or visit:
Australia: 1300 829 287*
vax.com.au
New Zealand: 0800 829 695*
vax.co.nz
*Monday-Friday 8.30am to 5.00pm

Notes
Notes
vax
Distributed by
Techtronic Industries Australia Pty Ltd
31 Gilby Road, Mount Waverley, VIC 3149, Melbourne, Australia
Careline AU: 1300 VAX AUS (1300 829 287) www.vax.com.au
Techtronic Industries N.Z. Limited
2 Landing Drive, Mangere, Auckland, 2022, New Zealand
Careline NZ: 0800 VAX NZL (0800 829 695) www.vax.co.nz
- Basic safety precautions
- READ ALL THE INSTRUCTIONS BEFORE USING THIS APPLIANCE
- Let's talk safety
- Don'ts
- Do's
- Thank you for buying this Steam Cleaner.
- Taking care of your hard floors and above floor cleaning
- Taking care of your Steam Cleaner
- We're here if you need us
- vax
- Contents
- Steam Cleaner
- Included with your machine
- Technical Specification
- Accessories
- PLEASE READ 'LET'S TALK SAFETY' AT THE BEGINNING BEFORE USE
- CAUTION:
- IMPORTANT:
- Assembling your steamer
- Using your machine
- Filling the water tank
- Cleaning hard floors
- Refreshing Carpets
- Using the machine as a handheld
- Taking care of your machine
- Emptying the water tank
- Cleaning the microfi bre pad
- Clearing blockages
- What to do if it goes wrong
- SolutionProblem
- Taking care of you
Brand : VAX
Model : Steam Classic VX69
Category : Steam cleaner