
Giselle PCGI8523AB - Lighting Quoizel - Free user manual and instructions
Find the device manual for free Giselle PCGI8523AB Quoizel in PDF.


| Product Type | Chandelier |
| Brand | Quoizel |
| Model | Giselle PCGI8523AB |
| Category | Lighting |
| Light Source | 17W LED (Integrated) |
| Voltage | 120V AC |
| Material | Metal and Glass |
| Mounting Type | Ceiling Mount (Hardwired) |
| Installation | Professional installation recommended |
| Safety | Turn off power at circuit breaker before installation; consult licensed electrician if unsure |
| Package Contents | Fixture body, crossbar, glass & end caps, mounting hardware |
| Hardware Included | Lock screws (2), outlet box screws (2), wire connectors (3) |
| Energy Efficient | Yes |
| Usage | Indoor |
| Cleaning | Wipe with soft, dry cloth; avoid harsh chemicals |
| Assembly Required | Yes |
| Style | Traditional/Classic |
Frequently Asked Questions - Giselle PCGI8523AB Quoizel
User questions about Giselle PCGI8523AB Quoizel
0 question about this device. Answer the ones you know or ask your own.
Ask a new question about this device
Download the instructions for your Lighting in PDF format for free! Find your manual Giselle PCGI8523AB - Quoizel and take your electronic device back in hand. On this page are published all the documents necessary for the use of your device. Giselle PCGI8523AB by Quoizel.
USER MANUAL Giselle PCGI8523AB Quoizel
natural_image
Illustration of various tools including a ladder, screwdriver, pliers, and tape (no text or symbols)LightSourceTools Required
17W LED
⚠️ Warnings and Cautions
Turn off the electricity at the circuit breaker before installation. Consult a licensed electrician if in doubt about installation.
Package Contents
Preparation: Identify and inspect all parts before beginning the installation.
Missing or damaged parts? Contact your original place of purchase.
PARTS BAG

B Lock Screw x 2
C Outlet Box Screw x 2
D Wire Connector x 3

Table of Contents
Glass& End Caps

natural_image
Technical illustration of a 3D rectangular block with two small inset views, labeled 'STEP 1' at the bottom (no other text or symbols)Crossbar
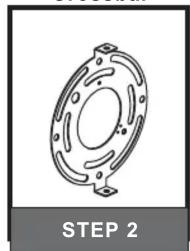
natural_image
Technical line drawing of a mechanical flange component (no text or symbols)Wiring

natural_image
Pure electrical circuit lines without any symbolsFixture Body

natural_image
Mechanical assembly diagram showing a gear and shaft assembly (no text or symbols)STEP 1

STEP 2
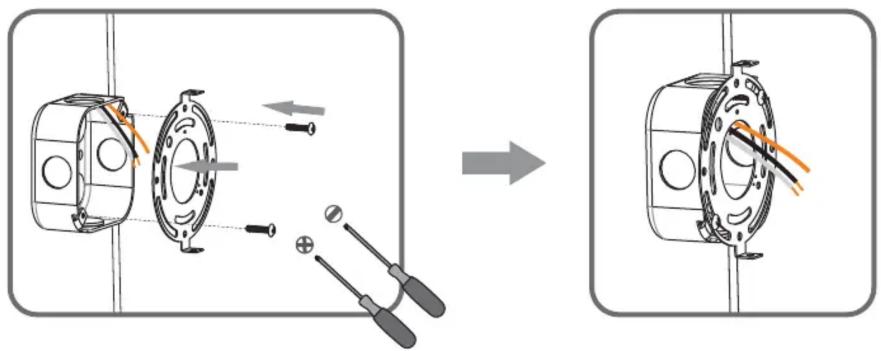
natural_image
Mechanical assembly diagram showing a disassembly of a mechanical component into a housing, with tool tips and wiring visible (no text or labels)STEP 3
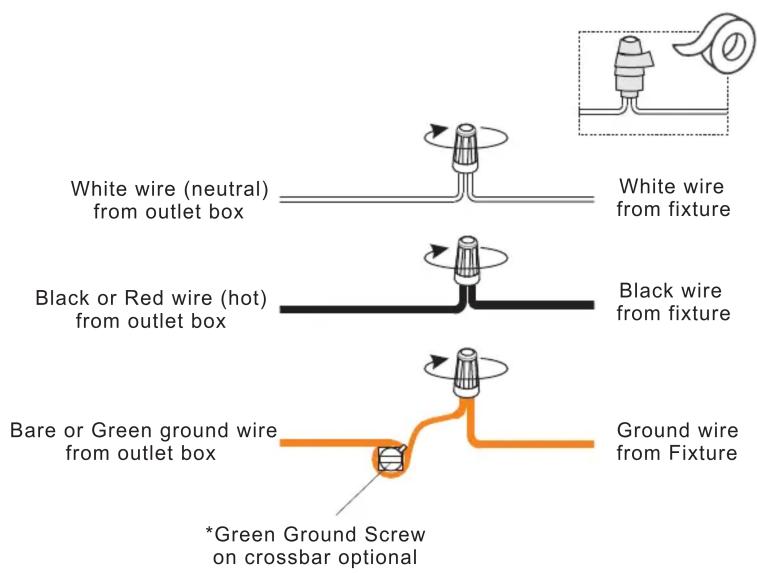
STEP 4

natural_image
Technical illustration showing a mechanical assembly before and after modification, with no visible text or symbols.Brand : Quoizel
Model : Giselle PCGI8523AB
Category : Lighting