KATVSWC75LA - Support pour écran plat Kogan - Free user manual and instructions
Find the device manual for free KATVSWC75LA Kogan in PDF.


| Product Type | Flat Screen Wall Mount |
| Brand | Kogan |
| Model | KATVSWC75LA |
| Compatible Screen Sizes | 32" to 75" |
| VESA Compatibility | 200x200 to 600x400 mm |
| Weight Capacity | 50 kg (110 lbs) |
| Material | Steel, powder coated |
| Tilt Range | +15° / -15° |
| Swivel Range | ±90° |
| Level Adjustment | ±3° |
| Distance from Wall | 50 mm (low profile) |
| Installation Type | Stud wall required |
| Hardware Included | All mounting hardware and spacers |
| Color | Black |
| Product Weight | 3.5 kg (7.7 lbs) |
| Max Mounting Plate Dimensions | 600x400 mm |
| Warranty | 1 year |
Frequently Asked Questions - KATVSWC75LA Kogan
User questions about KATVSWC75LA Kogan
0 question about this device. Answer the ones you know or ask your own.
Ask a new question about this device
Download the instructions for your Support pour écran plat in PDF format for free! Find your manual KATVSWC75LA - Kogan and take your electronic device back in hand. On this page are published all the documents necessary for the use of your device. KATVSWC75LA by Kogan.
USER MANUAL KATVSWC75LA Kogan
natural_image
Technical line drawing of a mechanical frame assembly with mounting brackets and a remote control unit (no text or symbols)KOGAN SMARTERHOME™ SWIVELLING FLIP DOWN TV CEILING MOUNT
(SUITABLE FOR 32-75" TVS)
KATVSWC75LA
Safety & Warnings 3
Components 5
Overview 7
Pairing the Remote 8
Connect to SmarterHome™ App 9
Google Home Control 12
Amazon Alexa Control 16
Installation 20
Operation 28
Troubleshooting 29
Notes 30
Notes:
Read the entire instruction manual before you start installation and assembly.
Read the entire user guide before you start installation and assembly. If you have any questions regarding any of the instructions or warnings, contact your local distributor for assistance.
CAUTION: Use with products heavier than the rated weights indicated may result in instability causing possible injury.
- Please closely follow the assembly instructions. Improper installation may result in damage or serious personal injury.
- Safety gear and proper tools must be used. This product should only be installed by professionals.
- This product is designed to be installed on solid concrete walls, masonry walls or wood stud walls.
- Make sure that the supporting surface will safely support the combined weight of the equipment and all attached hardware and components.
- Use the mounting screws provided and DO NOT OVER TIGHTEN mounting screws.
- This product contains small items that could be a choking hazard if swallowed. Keep these items away from children.
- This product is intended for indoor use only. Using this product outdoors could lead to product failure and personal injury.
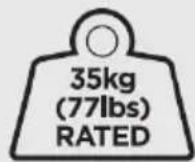
- Never exceed the maximum load capacity of 35kg or it may result in product failure or personal injury.
- This product is intended for indoor use only. Using this product outdoors could lead to product failure and personal injury.
- Do not disassemble or modify the electronic components of the product in any way.
IMPORTANT: Ensure that you have received all parts according to the component list prior to installation. If any parts are missing or faulty, contact help.Kogan.com before proceeding.
MAINTENANCE: Check that the product is secure and safe to use at regular intervals (at least every three months).
Electrical Safety Instructions
- The appliance is only to be used with the power cord provided with the appliance. Do not use with any other power cord.
- Do not disassemble or modify the power cord in any way.
- Never operate this product with a damaged power cord or plug. If any part is damaged, cease use immediately and contact help.Kogan.com for support.
- Do not operate this product in an environment exposed to moisture or if the electrical components have been in contact with water or other liquids.
- Do not clean the product while connected to an electrical outlet.
- Do not disassemble or replace components while connected to an electrical outlet.
- When the product is not being used, disconnect the power cord from the electrical outlet and place the power plug out of reach of children.
VESA Compatible
200x100 200x200 300x200
200x400 400x200 300x300
400x300 400x400 600x400
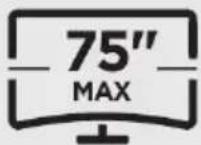
FLAT/CURVED
Disposal
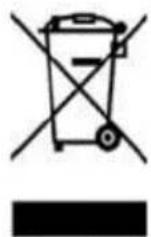
This marking indicates that this appliance should not be disposed with other household wastes. To prevent possible harm to the environment or human health from uncontrolled waste disposal, recycle it responsibly to promote the sustainable reuse of material resources.
COMPONENTS
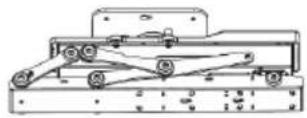
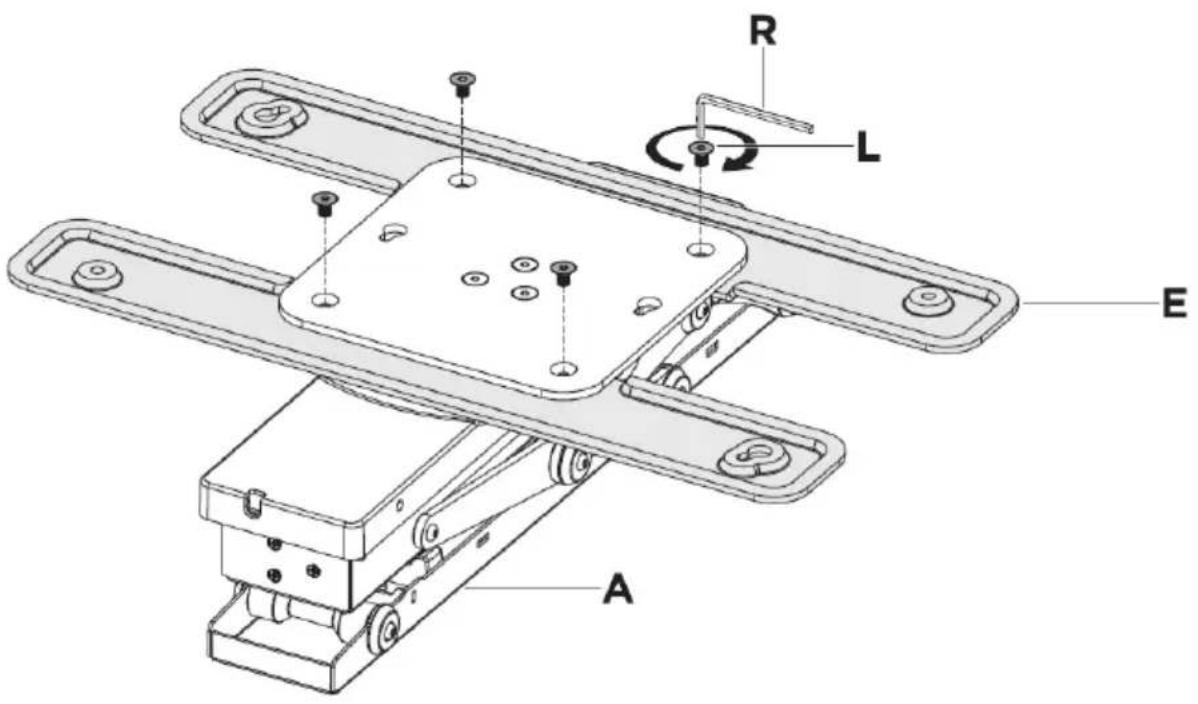
A Ceiling Mount (x1)
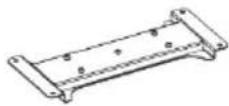
B Centre Bracket (x1)
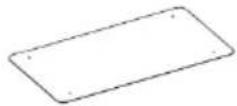
C Template (x1)
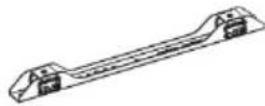
D TV Bracket (short) (x2)
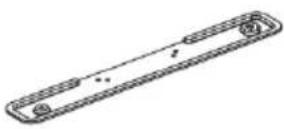
E Ceiling Mount Bracket (x2)
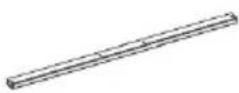
F TV Bracket (long) (x2)
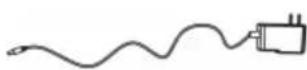
G Power Adaptor (x1)
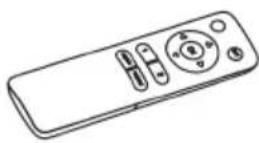
H Remote (x1)
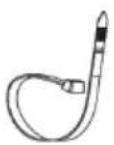
I Cable Tie (x4)
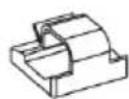
J Cable Guide (x2)

KM6 Nut (x4)
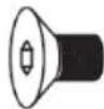
LM6x10 Screw (x4)
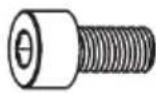
M M4x8 Screw (x4)
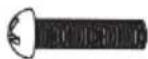
N M6x25 Screw (x4)

- M6x10
Grub Screw (x4)
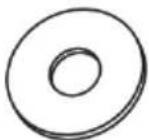
P D6 Washer (x4)
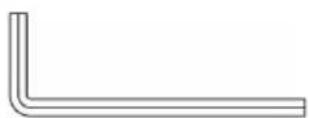
Q Allen Key (3mm) (x1)
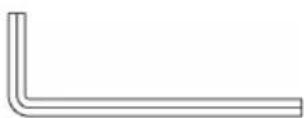
R Allen Key (4mm) (x1)
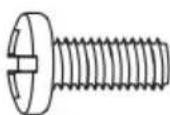
M-A M6x14 Screw (x4)
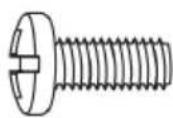
M-B M8x14 Screw (x4)
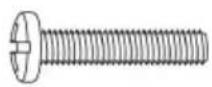
M-C M6x30 Screw (x4)
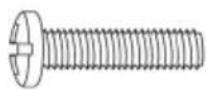
M-D M8x35 Screw (x4)
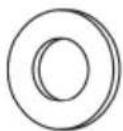
M-E D8 Washer (x4)
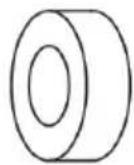
M-F Spacer (x4)
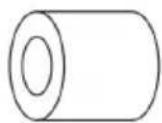
M-G Spacer (x4)
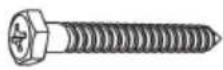
W-A ST6.3x55 Screw (x4)
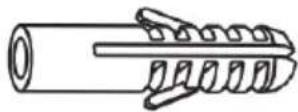
W-B Wall Anchors (x4)
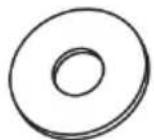
W-C D6 Washer (x2)
Tools Required
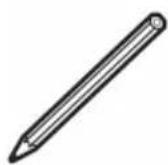
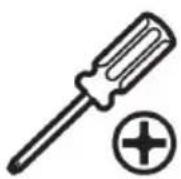
Pen/pencil Phillips Head
Screwdriver
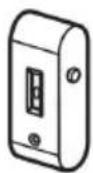
Stud Finder
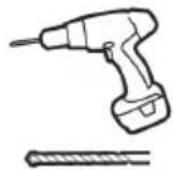
Drill & Drill Bit
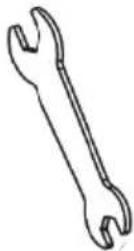
Open spanner 10mm
OVERVIEW
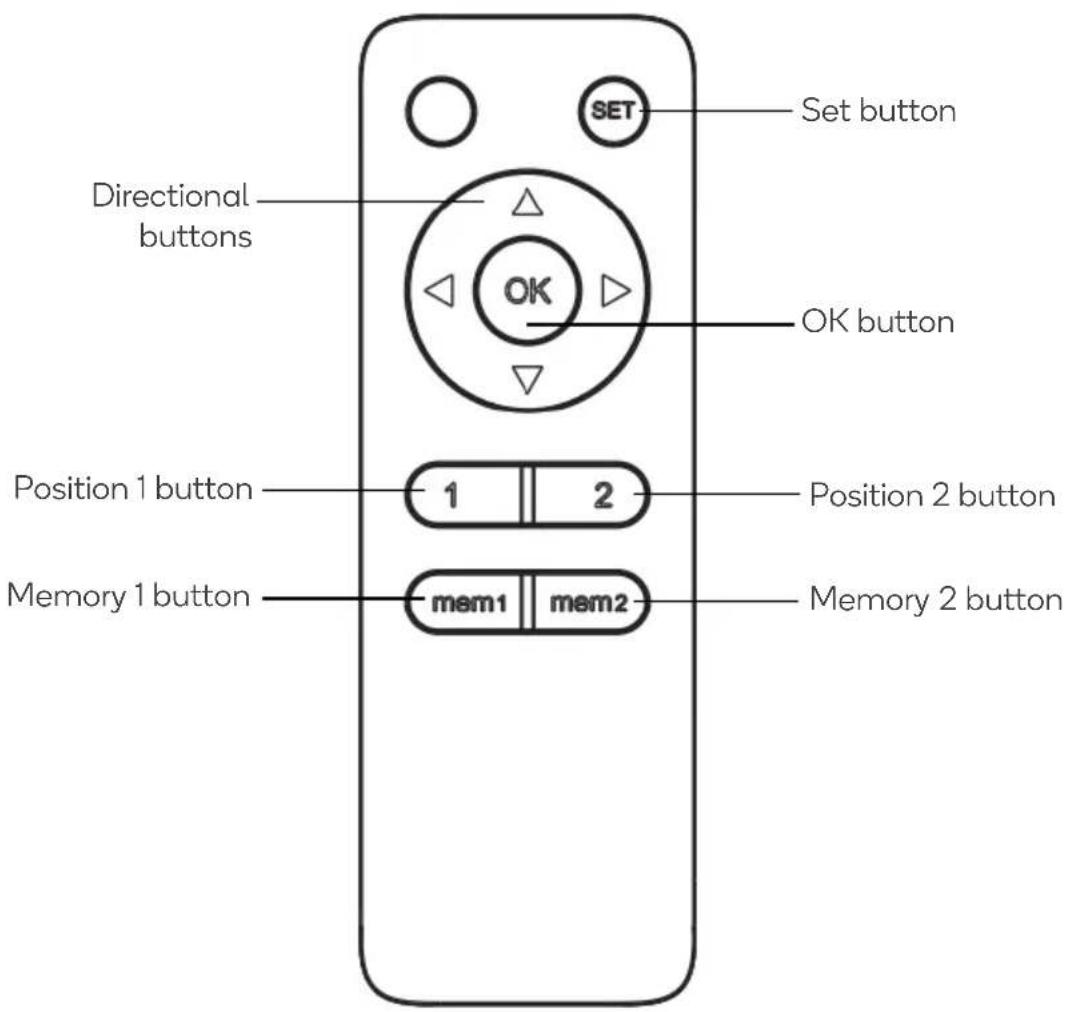
Remote
PAIRING THE REMOTE
-
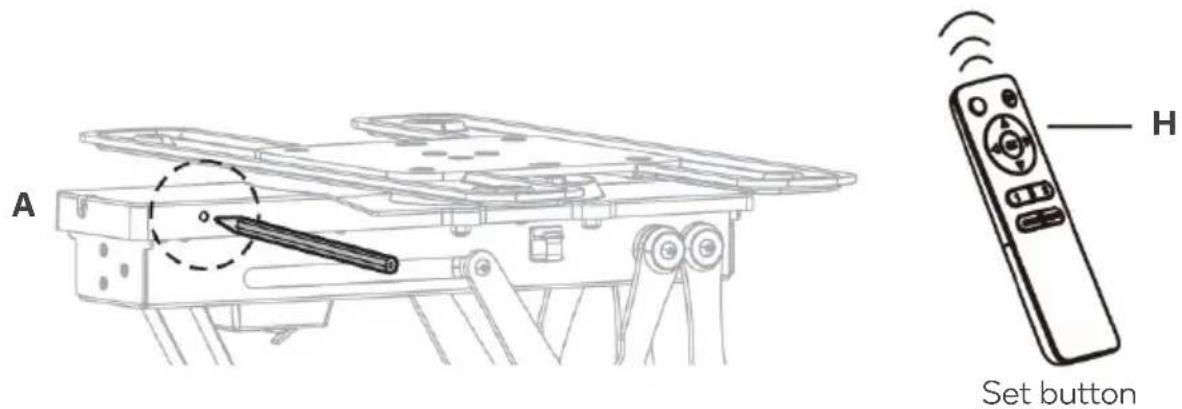
Insert x2 AAA batteries (not included) into the remote (H). Connect the power adaptor (G) to the ceiling mount (A) and then using a pin or other small item (such as a paperclip) press the code button located on the side of the TV mount. The TV mount will emit a 'beep' indicating the control box is reading for pairing.
-
Press the "Set" button on the remote, you will hear a series of 'beeps' for 10 seconds. When the unit stops beeping, the remote has been successfully paired to the ceiling mount.
Note: The ceiling mount can be paired with up to 20 remotes. To clear all remote data and reset the SmarterHomeTM app connection. Press and hold the "Set" button for 5 seconds. The unit will emit 2 'beeps' to confirming it has been reset.
CONNECT TO SMARTERHOME™ APP
Install App
Download the "Kogan SmarterHome" app from the Play Store (Android) or App Store (iOS).
Play Store (Android)
App Store (iOS)

To Register:
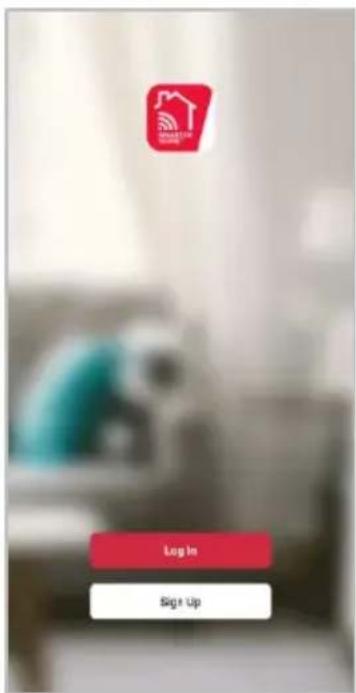
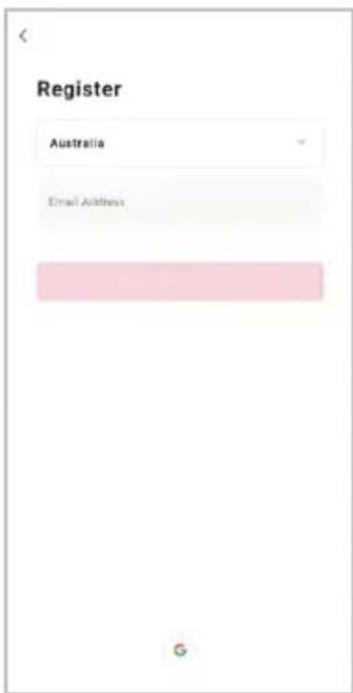
- If you already have a SmarterHome account, select 'Log In'. To register a new account, select 'Sign Up'.
- The system will automatically recognise your country. If needed, you can manually select your country from the drop-down box. Enter your email address and tap 'Get Verification Code' to continue.
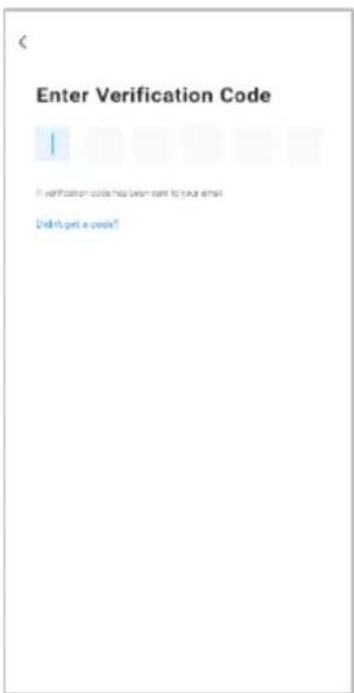
- A 6-digit code will be sent to the submitted email address. Enter this code before the one-minute timer expires.
- Continue to the next page and complete your SmarterHome profile.
Set Device in Pairing Mode
Set the device in pairing mode by pressing and holding the "Set" button on the remote for 5 seconds. The unit will emit 2 'beeps' confirming it is pairing mode.
Add Device Through Network
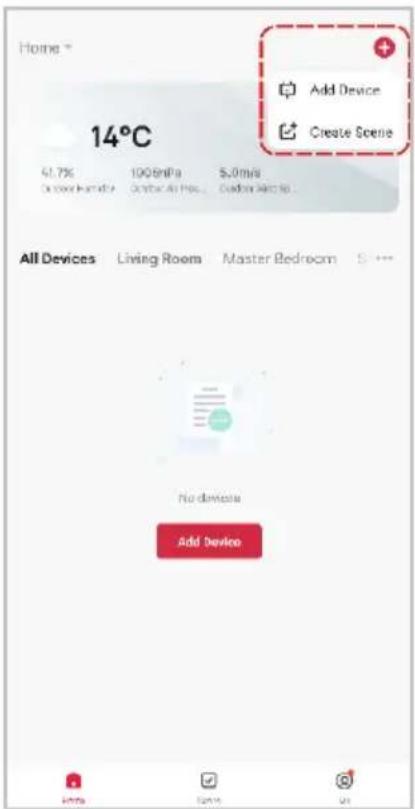
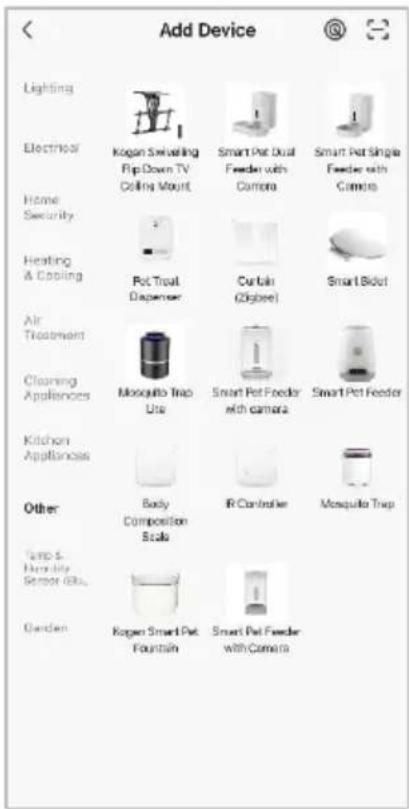
- Once registered, tap "Add Device" on the app's home page, or the "+" in the upper right corner, to add a new device through the network.
- Select the product type from the list of options in the app (Other > Kogan Swivelling Flip Down TV Ceiling Mount).
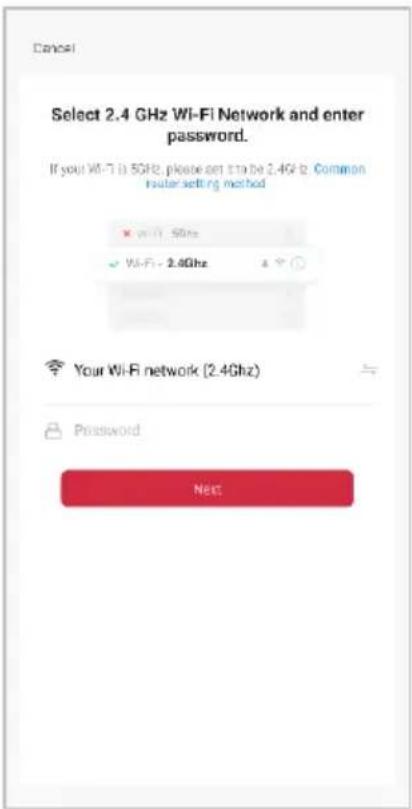
- Enter your Wi-Fi details. It is important that your SmarterHome™ device and the app are connected to the same Wi-Fi network during setup.
Notes:
- The device and the app have to use the same Wi-Fi network.
• The device is only compatible with 2.4Ghz networks. -
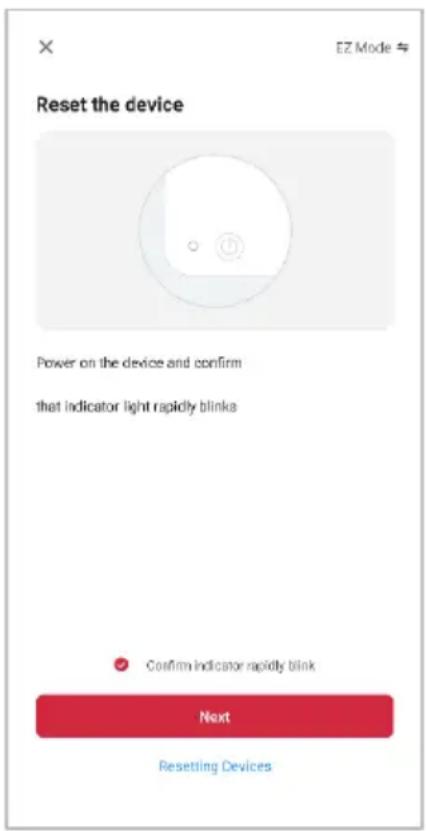
Depending on the product, Steps 3 and 4 may be in opposite order.
-
Ensure that the device is in pairing mode, with the indicator flashing rapidly, and tap "Confirm light is rapidly flashing".
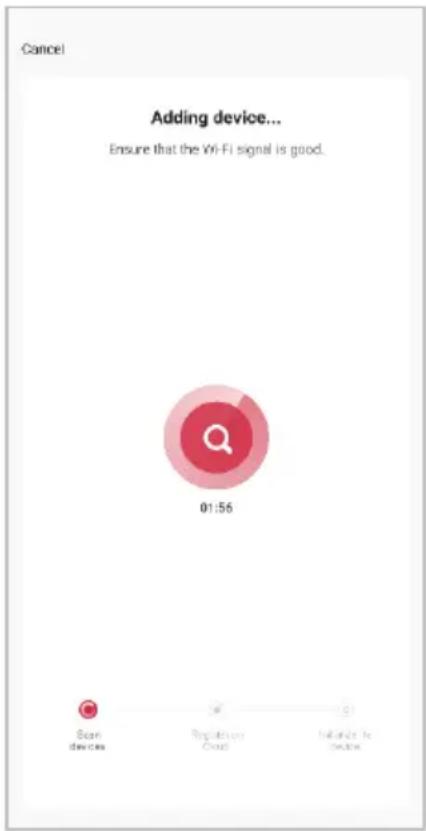
- The device will commence the pairing process and connect to the app. Ensure your Wi-Fi router, mobile phone, and the SmarterHome™ device are kept close until connection is complete.
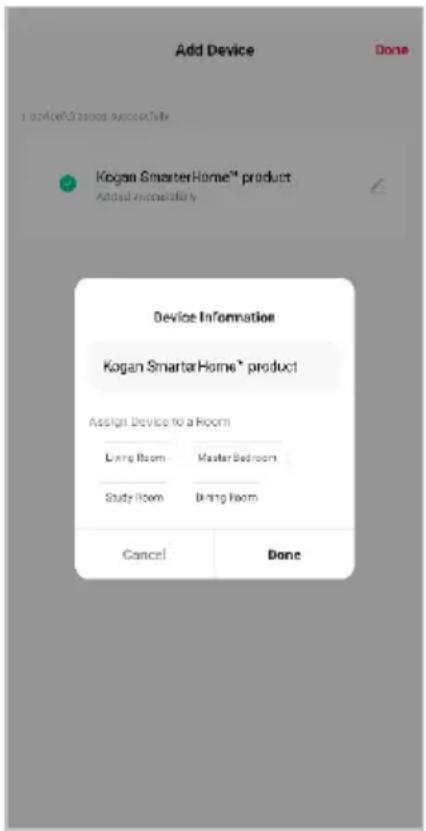
- After successfully being added, you will have the option to rename the device and assign it to a location. It will now be listed on the app's home page. Tap the device listing to enter its control page.
Note:
Once connected, you can select Create Scene from the “+” in the upper right corner (or from the Scene tab) to group connected SmarterHome™ products and automate their functions.
GOOGLE HOME CONTROL
Note:
You will need to have set up a Google Home account prior to linking your Kogan SmarterHome™ device.
Adding "SmarterHome" to the Google Home app
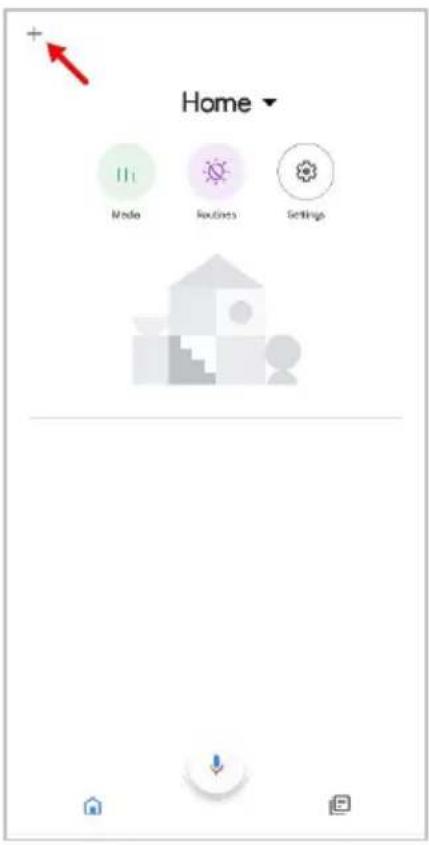
- From the home page of the Google Home app, select the "+" icon (top left corner, see arrow in the below screenshot) to access the 'Add and manage' page.
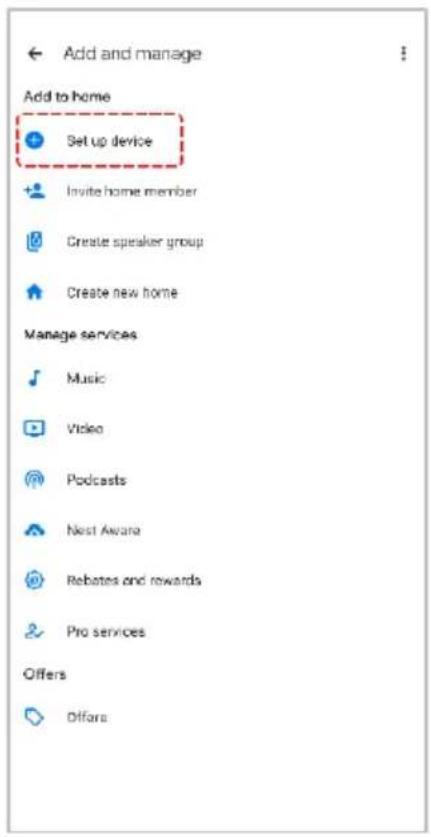
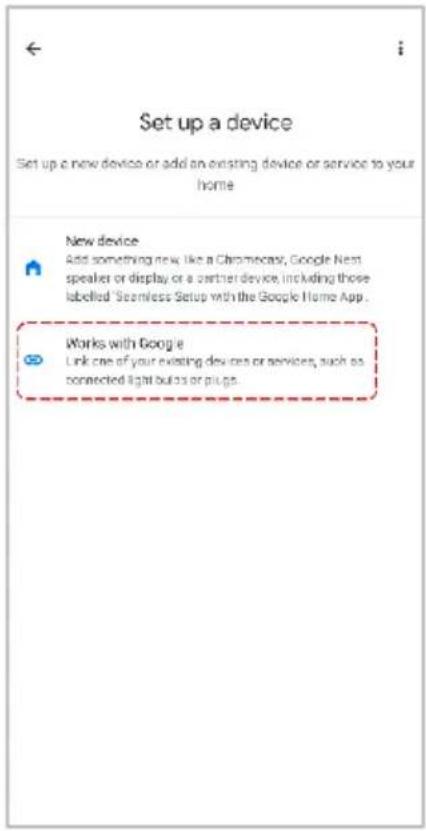
- Select 'Set up device', then select the 'Works with Google' option.
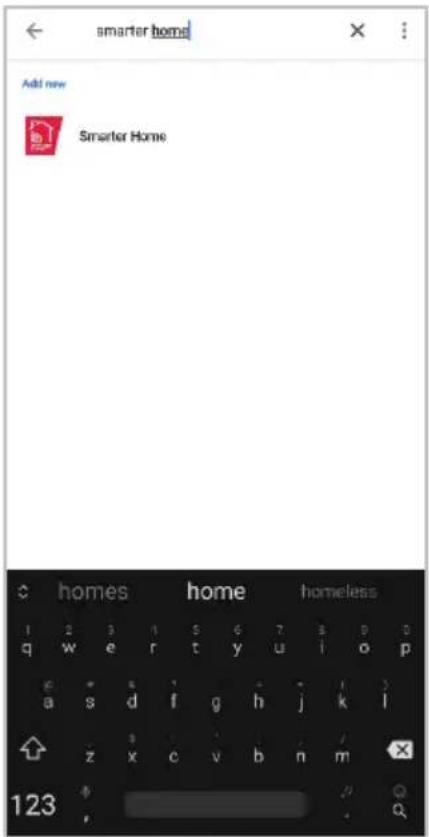
- Select the search bar and type 'Smarter Home' to locate the Kogan SmarterHome™ service.
- From here, you will be prompted to sign into your SmarterHome™ account using either your email or mobile phone number, depending on which method you used to register your account.
- Select "Kogan SmarterHome™" from the app options.
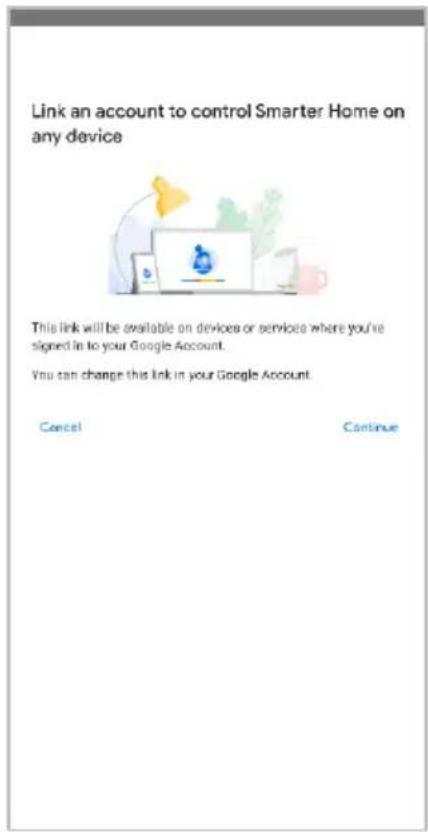
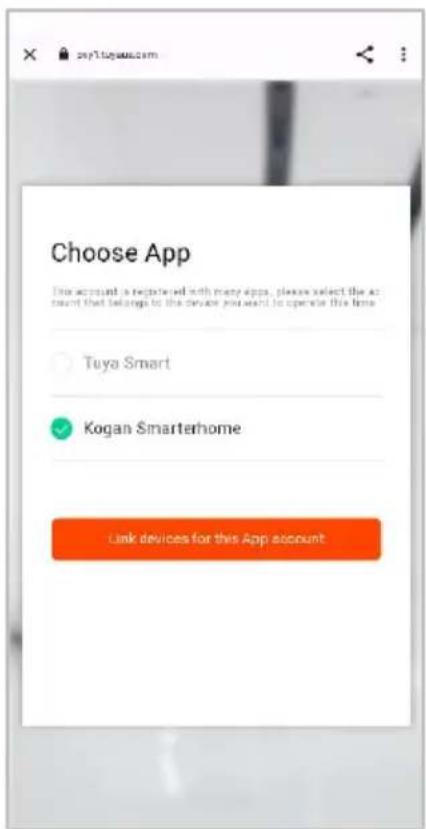
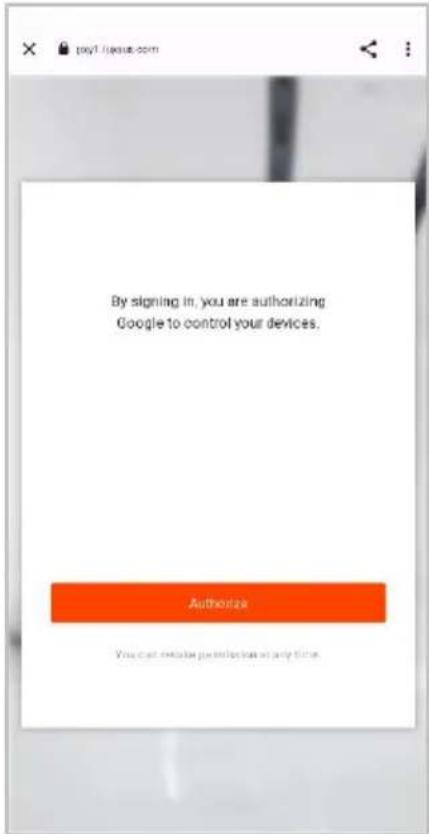
- Tap 'Authorise' to grant Google permission to access the SmarterHome™ app and your devices.
- Once connected, the app will display any compatible devices linked to your SmarterHome™ account. From here you can assign them to rooms and set up any routines. Tap on any of the devices to view a list of available commands.
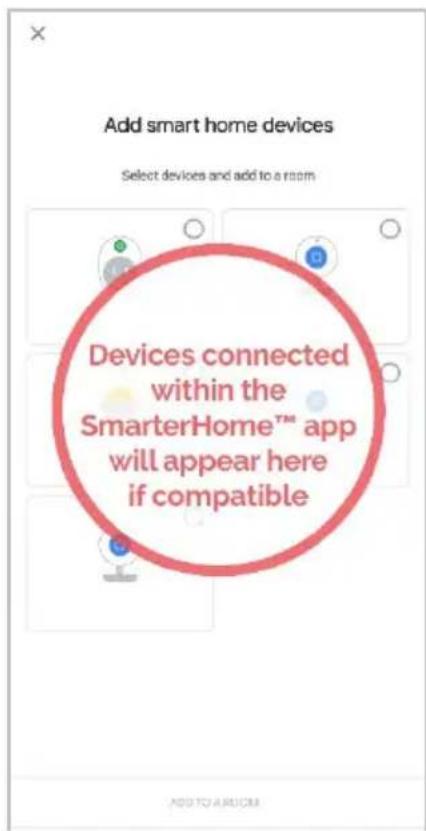
Note:
Please note that Google Home can only control the base/core functions of any compatible SmarterHome™ devices. To make full use of this product's smart functionality, please use the Kogan SmarterHome™ app.
Google Home Voice Control
| Controls | Voice Commands |
| Upward movement | Ok Google, setto up. |
| Downward movement | Ok Google, setto down. |
| Turn left | Ok Google, setto left. |
| Turn right | Ok Google, setto right. |
| Stop movement | Ok Google, setto stop. |
| Save current position to Memory 1 | Ok Google, setto Memory one. |
| Save current position to Memory 2 | Ok Google, setto Memory two. |
| Save current position to Memory 3 | Ok Google, setto Memory three. |
| Move to position to Memory 1 | Ok Google, setto position one. |
| Move to position to Memory 2 | Ok Google, setto position two. |
| Move to position to Memory 3 | Ok Google, setto position three. |
| Move to initial position | Ok Google, setto home. |
AMAZON ALEX CONTROL
Note:
You will need to have set up an Alexa account prior to linking your Kogan SmarterHome™ device.
Adding "SmarterHome" to the Alexa app
- From the home page of the Alexa app, select the “≡” icon in the bottom-right and select “Skills & Games” from the sidebar.
- Select the search bar and type 'Smarter Home' to locate the Kogan SmarterHome™ skill.
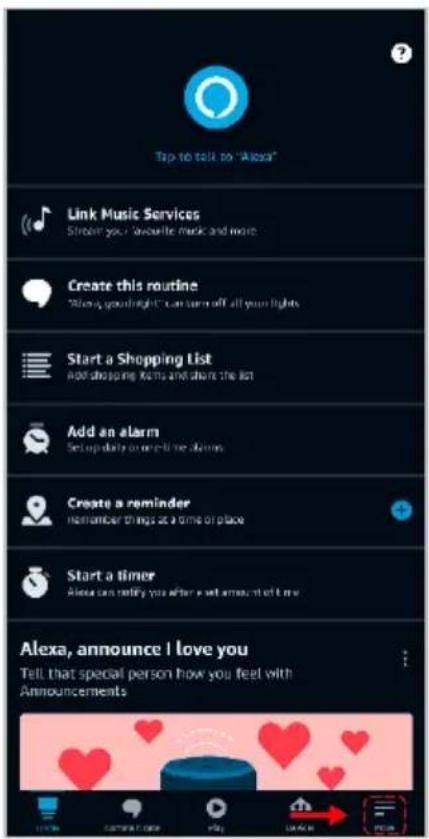
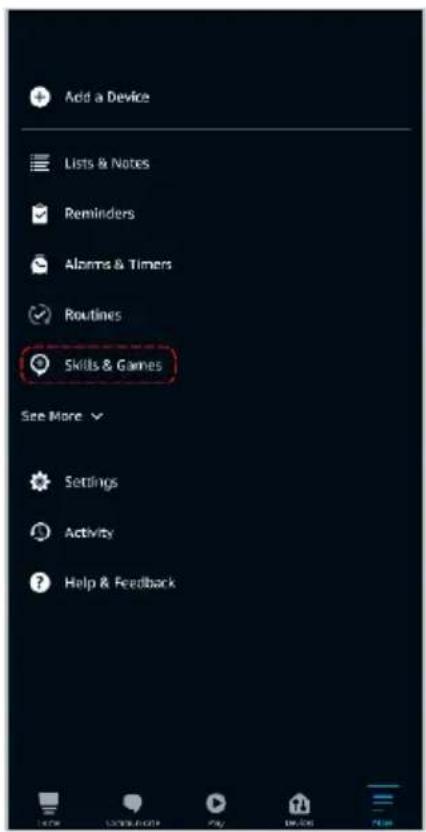
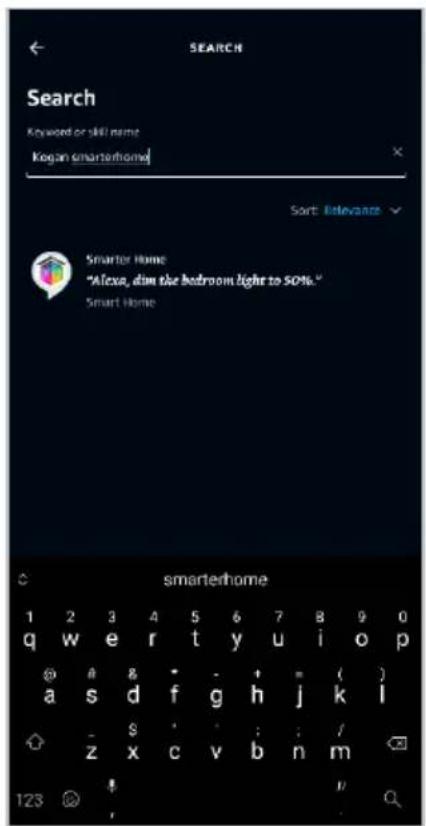
- Tap 'Enable to Use' to add the Kogan SmarterHome™ skill to Alexa.
- From here, you will be prompted to sign into your SmarterHome™ account using either your email or mobile phone number, depending on which method you used to register your account.
- Select "Kogan SmarterHome™" from the app options.
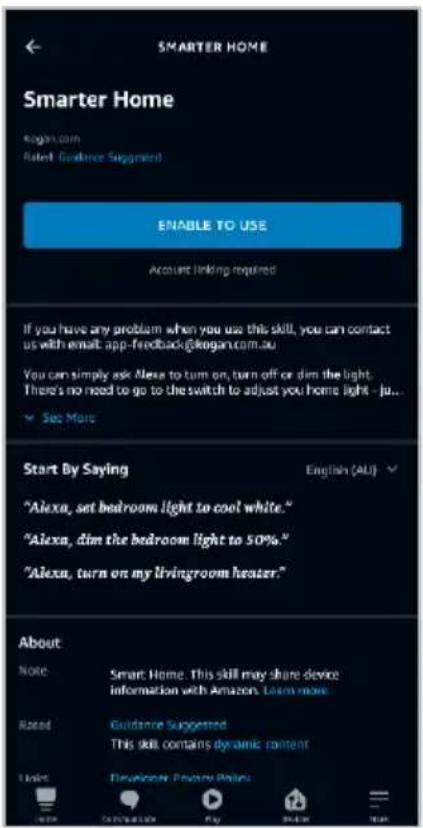
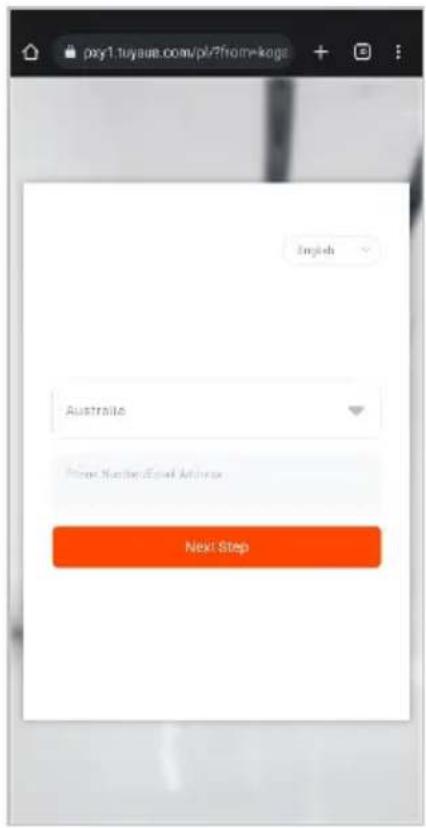
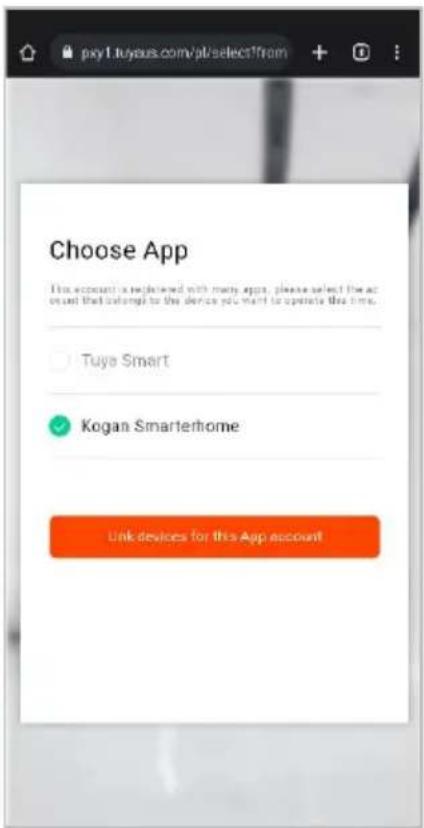
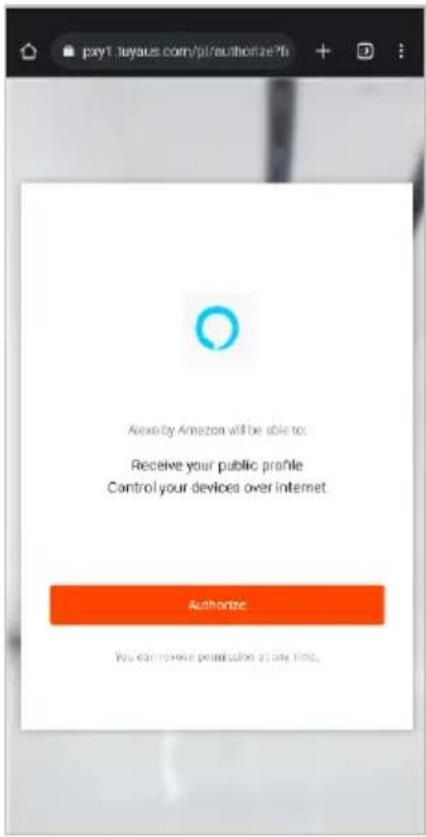
- Tap 'Authorise' to grant Alexa permission to access the SmarterHome™ app and your devices.
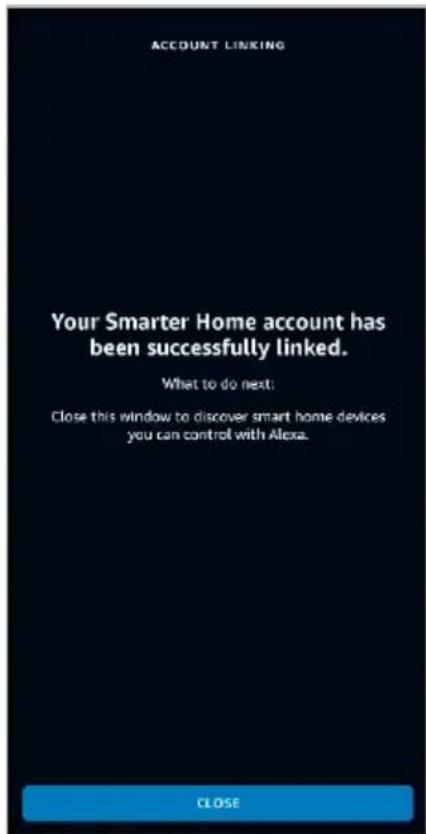
- Once connected, the app will perform a search and display the devices linked to your SmarterHome™ account. When your devices have successfully connected to the Alexa app, you will be able to control your Kogan SmarterHome™ devices via Alexa's voice commands.
Note:
Please note that Alexa can only control the base/core functions of any compatible SmarterHome™ devices. To make full use of this product's smart functionality, please use the Kogan SmarterHome™ app.
Amazon Alexa Voice Control
| Controls | Voice Commands |
| Upward movement | Alexa, setto up. |
| Downward movement | Alexa, setto down. |
| Turn left | Alexa, setto left. |
| Turn right | Alexa, setto right. |
| Stop movement | Alexa, setto stop. |
| Save current position to Memory 1 | Alexa, setto Memory one. |
| Save current position to Memory 2 | Alexa, setto Memory two. |
| Save current position to Memory 3 | Alexa, setto Memory three. |
| Move to position to Memory 1 | Alexa, setto position one. |
| Move to position to Memory 2 | Alexa, setto position two. |
| Move to position to Memory 3 | Alexa, setto position three. |
| Move to initial position | Alexa, setto home. |
INSTALLATION
WARNING: Ensure the mounting surface will safely support the
combined weight of the ceiling mount and all attached hardware.
Do not exceed the maximum load capacity of 35kg.
If you are not confident in installing this product or unsure as to what additional hardware you require, consult a licensed trade professional before proceeding.
Step 1:
Step 2:
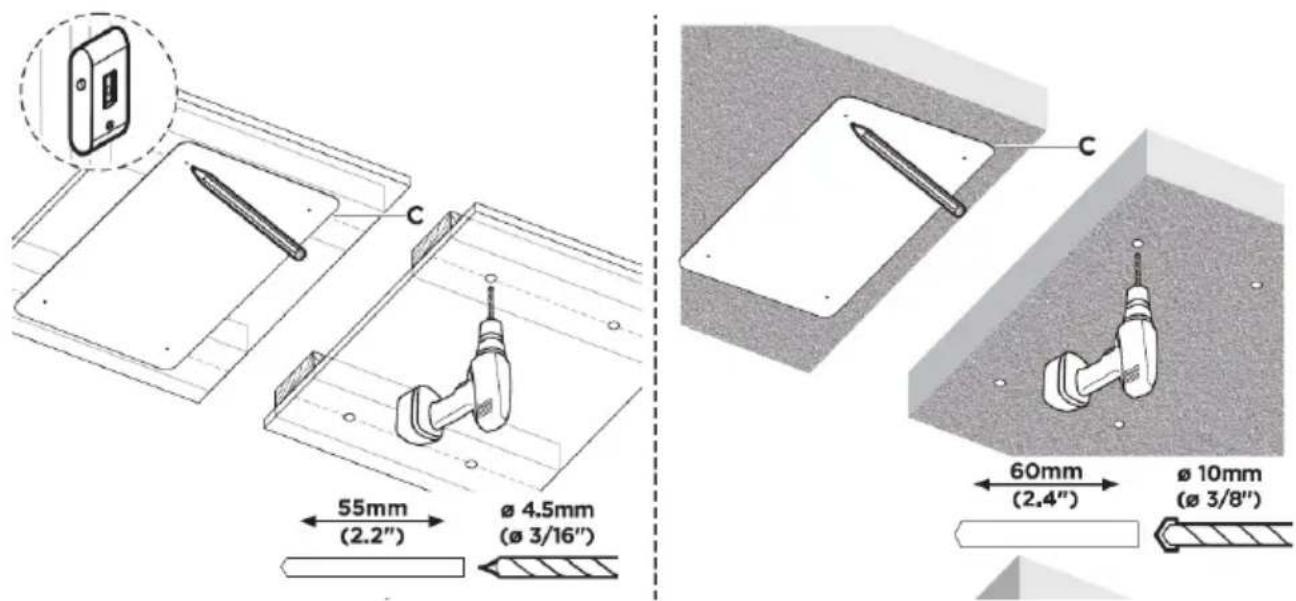
Using a pencil and the template (C), mark the desired holes position for the mount on your ceiling. If mounting on dry wall or plaster-board, use a stud finder first to check positions of studs and ensure the position is free from electrical wiring. Using a drill, create the pilot holes.
Drywall / plaster: Use a Φ4.5mm or 3/16" drill bit, drilling 55mm deep - 4 holes
Masonry / concrete: Use a Φ10mm or 3/8" drill bit, drilling 60mm deep - 4 holes
Step 3:
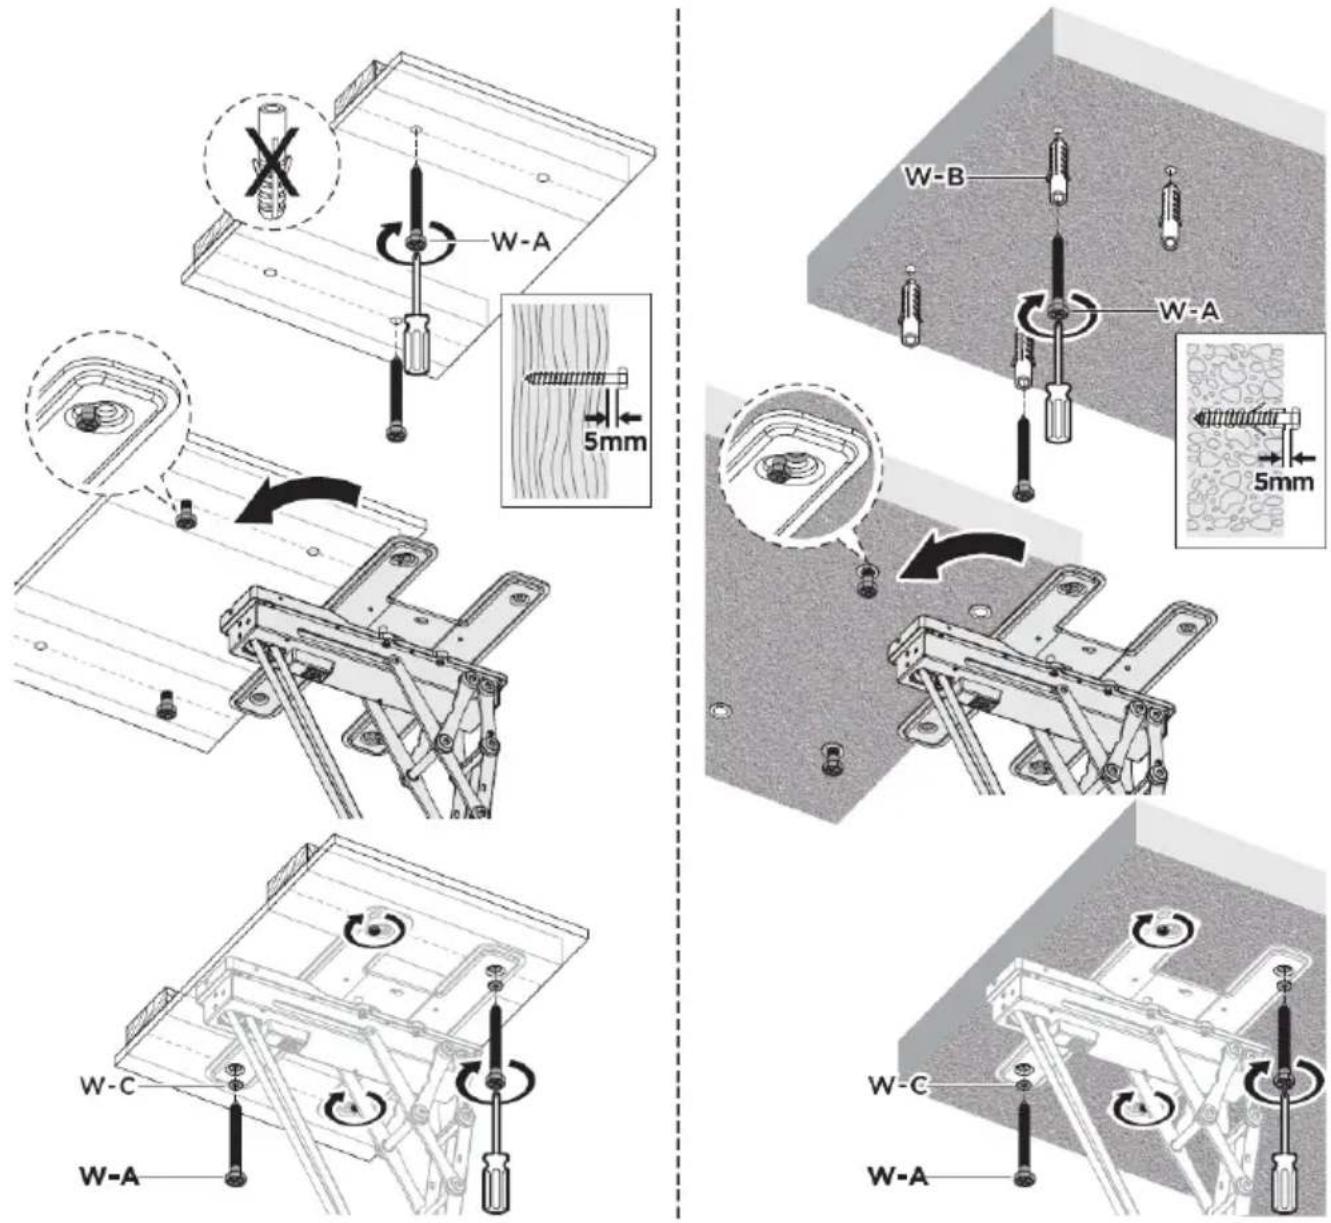
Drywall / plaster: Attach 2 ST6.3x55 screws (W-A) to the ceiling, in the positions shown below. Ensure a 5mm excess is left between the head of the screw and the ceiling surface. Do not use wall anchors.
Attach the ceiling mount to the screws and secure it in place using the x2 remaining ST6.3x55 screws (W-A) and x2 D6 washers (W-C).
Masonry / concrete: Insert wall anchors (W-B) into the drilled holes. Attach 2 ST6.3x55 screws (W-A) to the ceiling, in the positions shown below. Ensure a 5mm excess is left between the head of the screw and the ceiling surface.
Attach the ceiling mount to the screws and secure it in place using the x2 remaining ST6.3x55 screws (W-A) and x2 D6 washers (W-C).
Step 4:
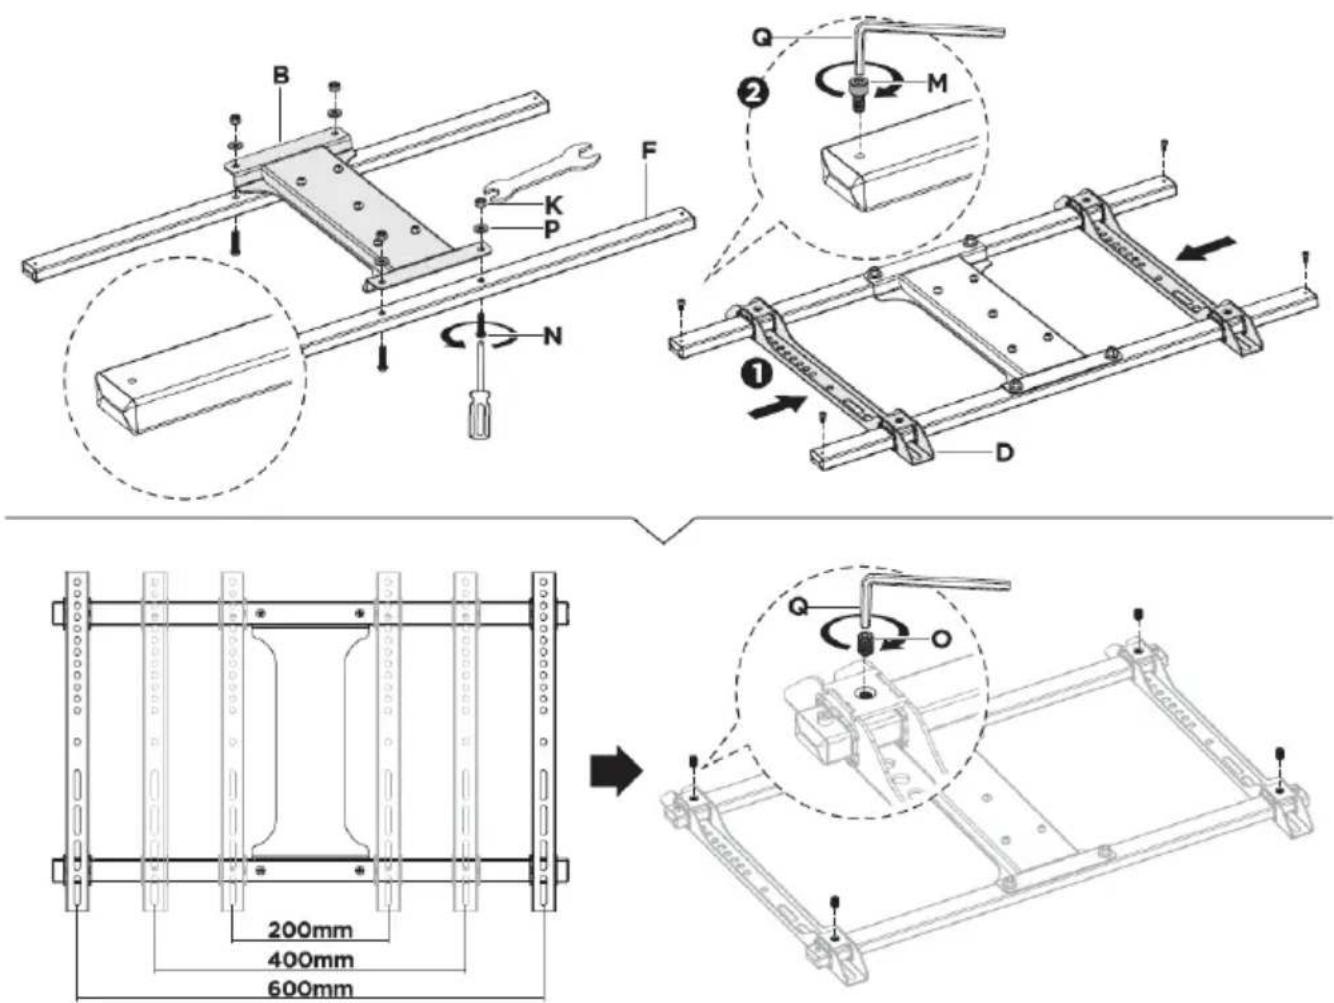
- Attach the centre bracket (B) to the x2 long TV brackets (F) using x4 M6x25 screws (N), x4 D6 washers (P) and the x4 M6 nuts (K).
- Slide the x2 short TV brackets (D) onto the long TV brackets and attach x4 M4x8 screws (M) in the positions shown.
- Adjust the short TV brackets to your required size and secure them in place using the x4 M6x10 grub screws (O).
Step 5:
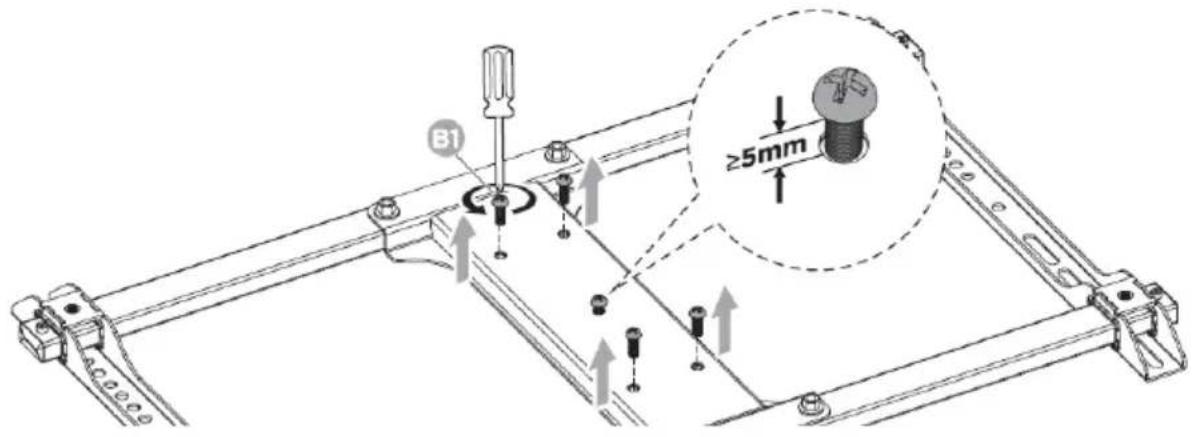
- Remove the x4 VESA screws (B1) from the centre bracket and retain them for later use.
- Undo the middle screw on the centre bracket approximately 5mm.
Step 6:
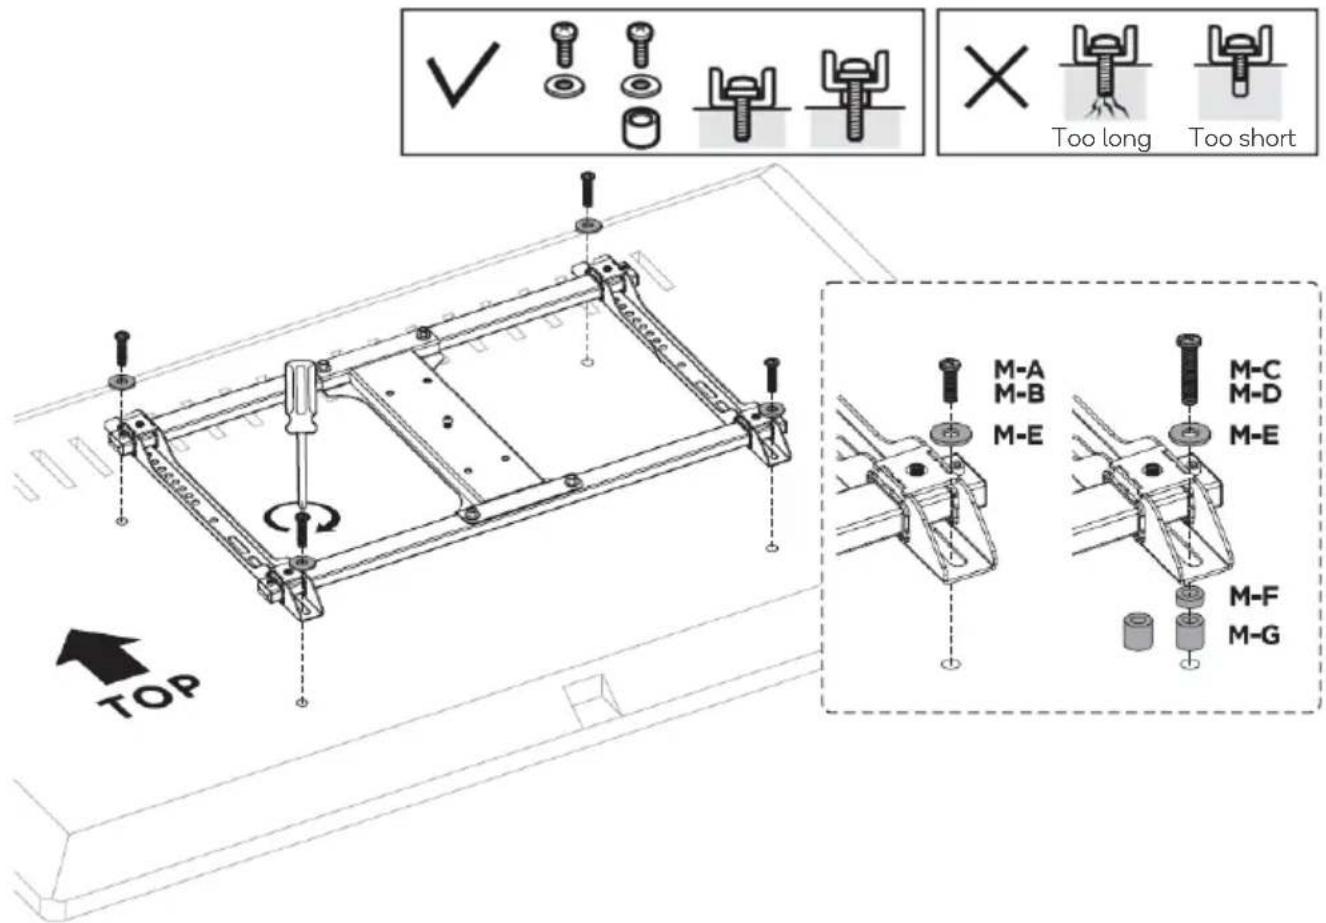
Align the brackets (B) with your TV's VESA holes and secure using supplied screws ("M-" set), Washer (M-E) and spacers (M-F, M-G) depending on required length.
Step 7:
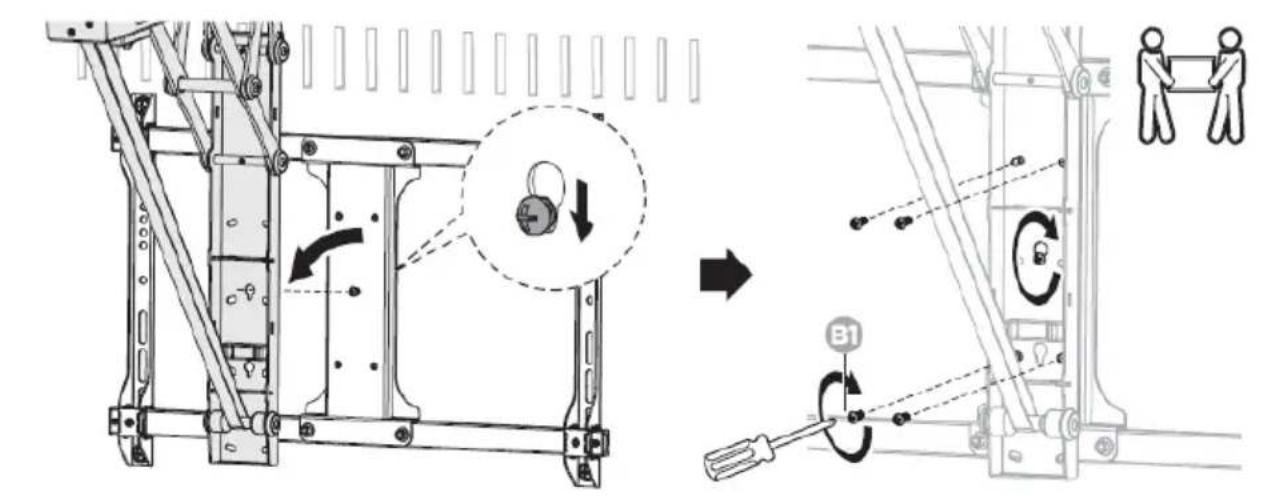
- Hook the TV with brackets installed onto the ceiling mount. 2 people should carry the TV to prevent damage.
- Once in place, fasten the previous removed VESA screws (B1) to secure the brackets in place.
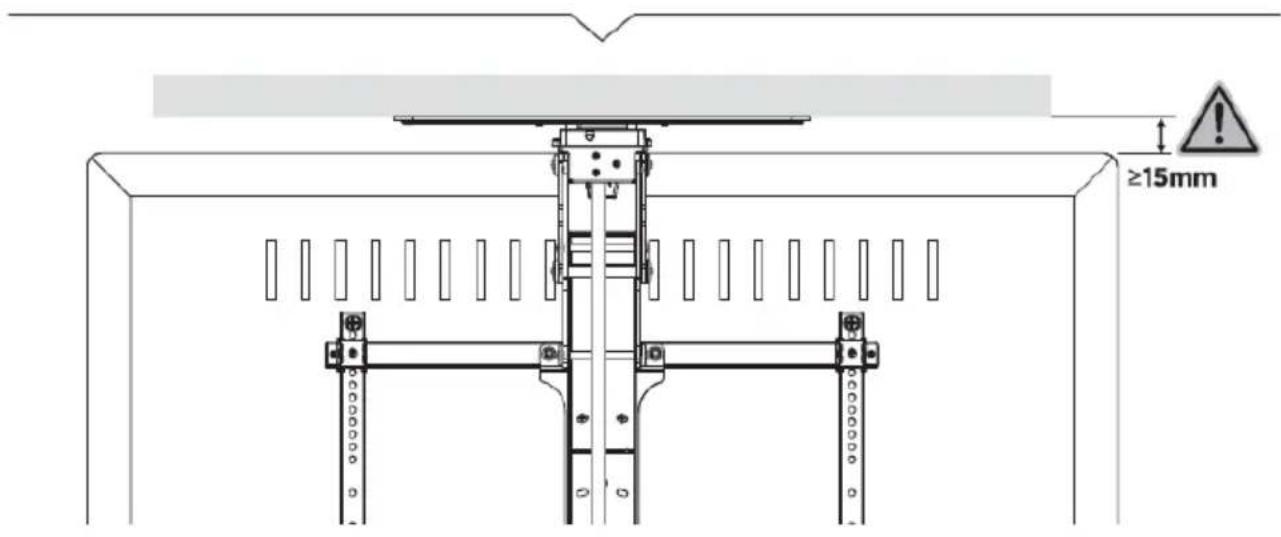
WARNING: Ensure there is a gap of ≥ 15mm between the top of the TV and the ceiling.
Step 8:
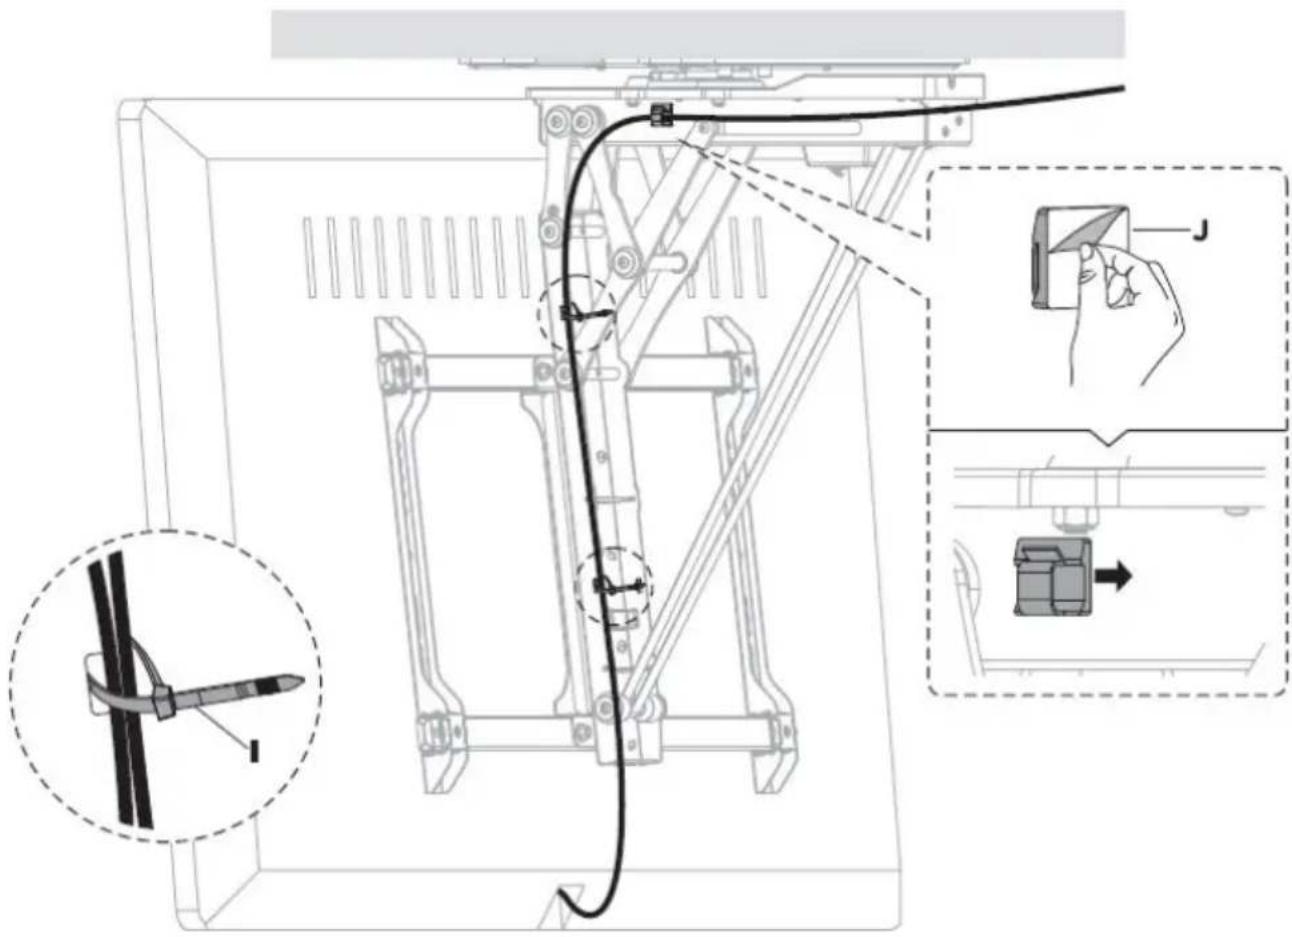
Peel the backing from the cable guides (J) and along with the cable ties (I), secure the cables to the ceiling mount as shown below. Note: Ensure there is enough slack left in the cables to allow for movement.
WARNING: Ensure the cables are kept clear from the moving parts and will not be damaged when the ceiling mount it closed.
Step 9:
Connect the power adapter (G) to the electrical outlet. Use the remote to adjust the position of the TV.
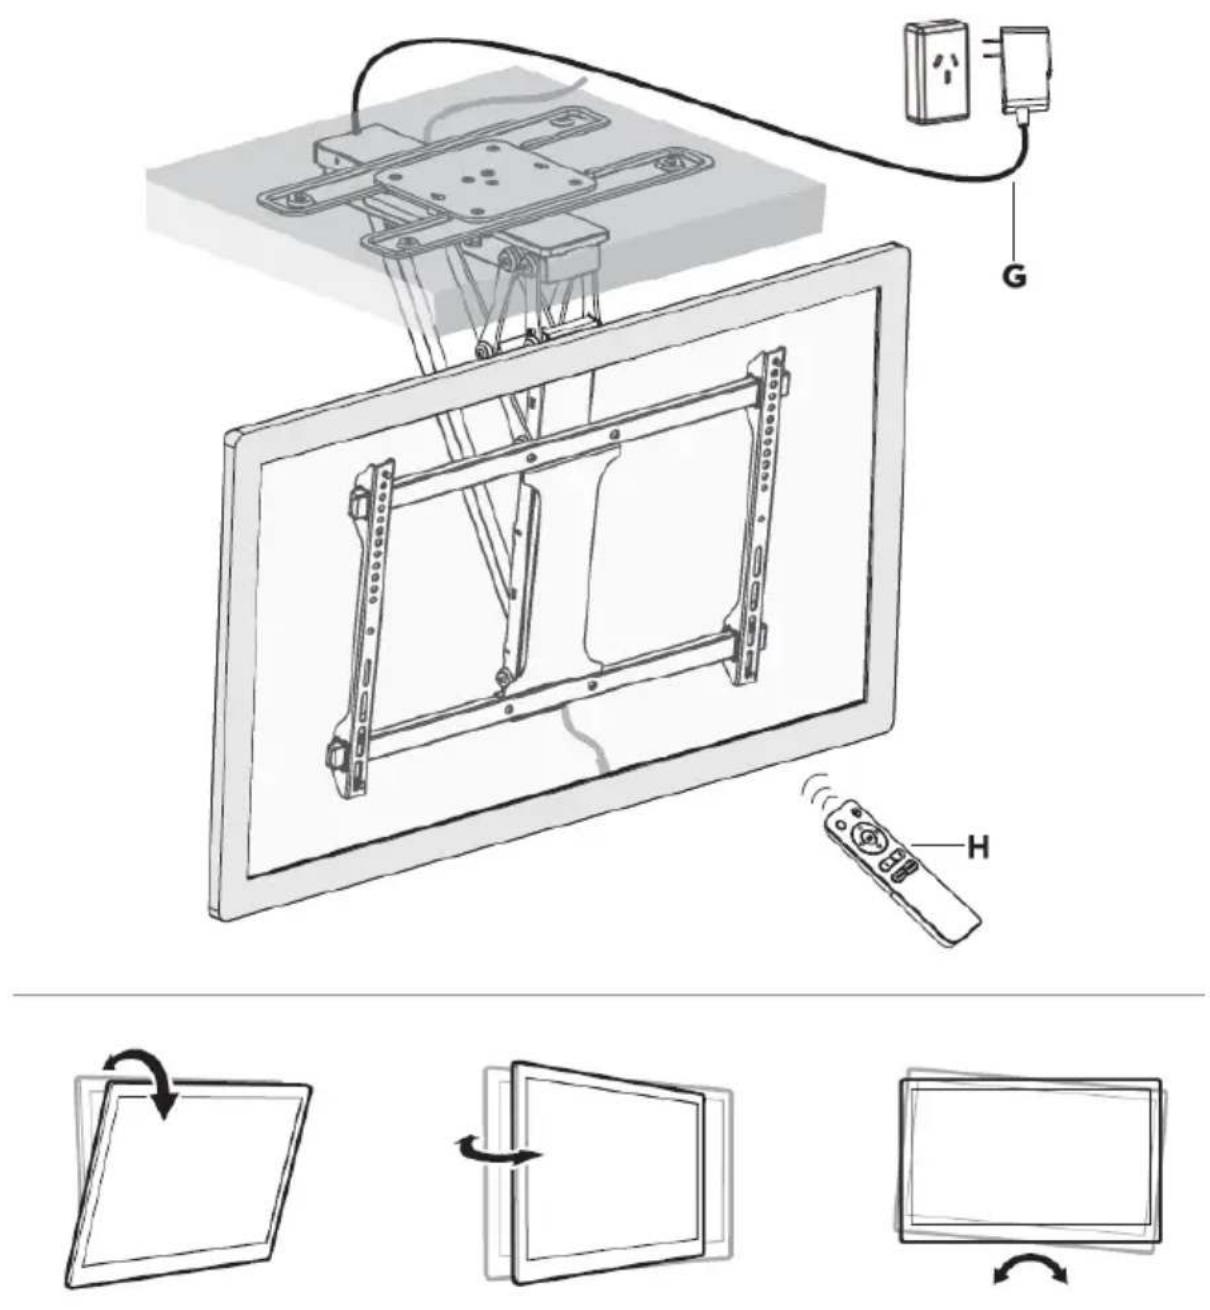
WARNING: Do not operate the mount until it has been fully mounted and installed.
OPERATION
Adjusting the Upward/Downward Movement
- Ensure the remote has been paired to the ceiling mount (refer to Assembly section). Note: Even if/when ceiling mount is unplugged after initial pairing, you will not have to pair the ceiling mount to the remote again.
- Press and release UP directional button ( ), the ceiling mount will swivel upwards to the lowest profile position against the ceiling.
- Press and release DOWN directional button (▽), the ceiling mount will swivel downwards to the maximum angle position (75° by default).
- Press the "OK" button to stop motion. Note: Ensure to clear all obstacles within the range of motion before operating the ceiling mount.
Adjusting the Left/Right Movement
- Press and release LEFT directional button (◀), the ceiling mount will swivel to the left (90° by default).
- Press and release RIGHT directional button (▷), the ceiling mount will swivel to the left (90° by default).
- After swivelling the TV mount to the left or right by 90°, press the “OK” button to return the mount to its default position (middle position).
Storing a Position to Memory
- Position 1: When the TV Mount is in the desired position, press and hold "Mem1" button for 2 seconds. You will hear a single "beep" sound indicating the position has been successfully saved in Position 1.
- Position 2: When the TV Mount is in the desired position, press and hold "Mem2" button for 2 seconds. You will hear a single "beep" sound indicating the position has been successfully saved in Position 2.
Recalling a Saved Position
- To recall the first saved position, press "1" button, the TV wall mount will automatically swivel to position 1.
- To recall the second saved position, press "2" button, the TV wall mount will automatically swivel to position 2.
TROUBLESHOOTING
This troubleshooting section will help you identify and solve the minor problems caused by unusual operation of the electric system of the electric TV mount. These simple procedures can solve most issues encountered in everyday use.
Resetting the Mount
If the TV mount can't be adjusted to the highest position (0° degree against the ceiling) or the lowest position (max. tilting position), unplug and re-plug the power adapter. Then press and hold the "OK" button for 5 seconds the mount will retract to the highest position, that means the system has been successfully reset.
| Problem | Possible Cause | Solution |
| Remote stops responding after 24 hours without operation | Remote fault | Contact help.Kogan.com for support. |
| Remote stops responding Low batteries | Replace the batteries have power. If the problem isn't solved, contact help.Kogan.com for a replacement remote. If the problem is still not solved after the replacement, contact help.Kogan.com for a replacement unit. | |
| TV mount is not operational. | Power adaptor not plugged in properly | Plug in the power adaptor correctly. If there is no buzzer contact help.Kogan.com for a replacement power adaptor. If the problem is still not solved after the replacement, contact help.Kogan.com for a replacement unit. |
| Abnormal noises Potential | unit malfunction | Contact help.Kogan.com for a replacement unit. |
| Motor not turning off or anti-collision mechanism slips | Potential unit malfunction | Contact help.Kogan.com for a replacement unit. |
NOTES
Need more information?
We hope that this user guide has given you the assistance needed for a simple set-up.
For the most up-to-date guide for your product, as well as any additional assistance you may require, head online to help.kogan.com
kogan.com
- KOGAN SMARTERHOME™ SWIVELLING FLIP DOWN TV CEILING MOUNT
- Notes:
- Electrical Safety Instructions
- Disposal
- COMPONENTS
- Tools Required
- OVERVIEW
- PAIRING THE REMOTE
- CONNECT TO SMARTERHOME™ APP
- Install App
- To Register:
- Set Device in Pairing Mode
- Add Device Through Network
- Note:
- GOOGLE HOME CONTROL
- Adding "SmarterHome" to the Google Home app
- AMAZON ALEX CONTROL
- Adding "SmarterHome" to the Alexa app
- INSTALLATION
- WARNING: Ensure the mounting surface will safely support the
- Step 2:
- Step 3:
- Step 4:
- Step 5:
- Step 6:
- Step 7:
- Step 8:
- Step 9:
- OPERATION
- Adjusting the Upward/Downward Movement
- Adjusting the Left/Right Movement
- Storing a Position to Memory
- Recalling a Saved Position
- TROUBLESHOOTING
- Resetting the Mount
- NOTES
- Need more information?
Brand : Kogan
Model : KATVSWC75LA
Category : Support pour écran plat