
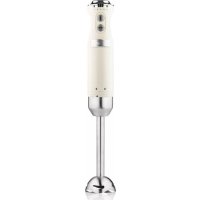
WHBL03SS - Blender WESTINGHOUSE - Free user manual and instructions
Find the device manual for free WHBL03SS WESTINGHOUSE in PDF.


| Type | Blender |
| Brand | Westinghouse |
| Model | WHBL03SS |
| Power | 500 Watts |
| Capacity | 1.5 Liters |
| Speed Settings | 2 speeds + pulse |
| Jar Material | Glass |
| Blade Material | Stainless steel |
| Base Material | Stainless steel |
| Dimensions (H x W x D) | 15.7 x 6.5 x 6.5 inches |
| Weight | 5.5 lbs |
| Cord Length | 3.3 feet |
| Dishwasher Safe Parts | Yes (jar, lid, blade assembly) |
| Safety Feature | Non-slip feet, locking lid |
| Wattage | 500W |
| Voltage | 120V / 60Hz |
| BPA Free | Yes |
| Repairability | Replacement parts available (jar, blades, lid) |
| Use | Household only |
Frequently Asked Questions - WHBL03SS WESTINGHOUSE
User questions about WHBL03SS WESTINGHOUSE
0 question about this device. Answer the ones you know or ask your own.
Ask a new question about this device
Download the instructions for your Blender in PDF format for free! Find your manual WHBL03SS - WESTINGHOUSE and take your electronic device back in hand. On this page are published all the documents necessary for the use of your device. WHBL03SS by WESTINGHOUSE.
USER MANUAL WHBL03SS WESTINGHOUSE
natural_image
Black and white photo of a Westinghouse blender with digital display and control buttons (no readable text or symbols on the device itself)1250W BLENDER INSTRUCTION MANUAL
CONTENTS
SAFETY INFORMATION
Important Safety Instructions 1 - 2
Electrical Requirements 3
SETUP AND USE
Installation Guide 3
Parts and Features 4
Blender assembly and operation 5-6
Food Recommendations 7
Recipe Recommendations 8
Chopping guide 9
CLEANING AND CARE 9
TROUBLESHOOTING....10
WARRANTY 11-12
Figures and illustrations in this User Manual are provided for reference only and may differ from the actual product appearance.
Product design and specifications may be changed without notice.
IMPORTANT SAFETY INSTRUCTIONS

DANGER
DANGER - Immediate hazards which WILL result in severe personal injury or death.

WARNING
WARNING - Hazards or unsafe practices which COULD result in severe personal injury or death.

CAUTION
CAUTION - Hazards or unsafe practices which COULD result in minor personal injury.
\*\*\*WARNING\*\*\*
Keep hair, hands, fingers and other body parts away from the the blender blades whilst in operation.
- Read all instructions carefully before using your new blender.
- Always turn the power off at the power outlet before you remove or insert the power plug. Remove by grasping the plug - do not pull on the cord.
-
Touch jug handle, jug lid and LCD Display only as some surfaces may become warm whilst the blender is in use.
-
Do not operate the blender if:
i) the cord or plug is split, melted or damaged.
ii) the blender has malfunctioned.
iii) the blender has been damaged in any manner.
If any of the above incidents occur, return your blender to the nearest authorised service center for examination, repair or adjustment.
-
This blender is not intended to be operated by means of an external timer or separate remote-control system.
-
Close supervision is necessary when any appliance is used by or near children.
-
Any appliance that has been dropped or damaged should not be used until examined by an authorised service center.
-
Do not permit the mains supply cord or plug to touch hot objects or allow the power cord to lay across the blender.
-
If the mains supply cord is damaged, it must be replaced by the manufacturer, its service agent or a similarly qualified person in order to avoid a hazard.
-
This appliance is deemed for use indoors only.
-
Never plug the appliance into the power outlet if the cutting blades are exposed. Blades should be housed within the jug.
-
Do not under any circumstances immerse the power cord, mains plug or blender body in water or any other liquid.
-
Do not at any time, insert hands or other body parts into the jug whilst in operation.
IMPORTANT SAFETY INSTRUCTIONS
- This blender can be used by children aged from 12 years old and above and by persons with reduced physical, sensory or metal capabilities or lack of experience and knowledge if they have been given supervision or instruction concerning use of the blender in a safe way and understand the hazards involved.
- Children should not play with the blender.
- Keep the blender and its cord out of reach of children less than 12 years old.
- Your blender should not be unattended while in use.
- This blender should not be used in a commercial environment such as a restaurant, hotel or hostel dining room.
- Always use this blender with a power outlet of the voltage (A.C. only) marked on the back of the blender.
- Do not use the blender for any purpose other than its intended use.
- Do not place the blender on top of any other appliance.
- Do not allow the power cord of this blender to hang over the edge of a table or bench top.
- Keep hands, fingers and utensils out of jug while blending to reduce the risk of severe injury. A scraper may be used but must only be used when the blender is not running.
-
This appliance is intended to be used in household and similar applications such as:
-
staff kitchen areas in shops, offices and other working environments;
- farm houses;
- by clients in hotels, motels and other residential type environments;
-
bed and breakfast type environments.
-
Do not place your blender on or near a hot gas flame, electrical element, heated oven or any other hot surface.
-
⚠️ WARNING: Do not blend hot liquids.
- ⚠️ WARNING: The blades are very sharp, handle with care particularly when cleaning the blades.
- ⚠️ WARNING: Do not operate the appliance continuously for longer than five minutes as the appliance may overheat.
- ⚠️ WARNING: Misuse may cause potential injury.
- ⚠️ WARNING: Be careful if hot liquid is poured into the food processor or blender as it can be ejected out of the appliance due to a sudden steaming
ELECTRICAL REQUIREMENTS
POWER SUPPLY CORD
- Do not attempt to modify the power cord or plug in any way.
- A short power supply cord is provided to reduce the risk of the user becoming in or tripping entangled over a longer cord.
- If the power supply cord is too short, do not use an extension cord. Have a qualified electrician or serviceman install an outlet near the appliance.
NOTE: Neither Westinghouse nor the retailer can accept any liability for damage to the product or personal injury resulting due to failure to observe the electrical connection procedures.
INSTALLATION GUIDE
- Carefully unpack your electric blender.
- Carefully remove packaging around the blender and power cord. Do not remove warning labels.
- Wash Jug, Lid and accessories before use.
WARNING: ⚠️ Do not under any circumstances immerse the blender body, mains cord or mains plug in water or any other liquid.
PARTS AND FEATURES

DESCRIPTION:
-
Feeding Cap.
-
LCD Display.
-
Silicone Pad.
-
Jug lid.
-
Control Panel.
-
Body.
-
2L jug.
-
Mixing Bar.
-
Connecting Shaft.
-
Brush.
Before the initial use of this product, please clean the jug assembly thoroughly. See the section "Cleaning and Maintenance" for details.
- Place all food ingredients to be processed into the jug, close the lid and tighten the feeding cap clockwise.
IMPORTANT: The amount of food must not exceed the maximum scale specified on the jug. When making warm liquids, the amount of ingredients must not exceed the 1.5L line. Note: Do not blend HOT liquids (above 40°C).
- Place the loaded jug onto the base. Check whether the jug is balanced and that there are no foreign objects between the jug and the base.

(2)

- Connect the power plug to the mains outlet and switch on the outlet.

- Press the Power key to activate the blender.

- Select the desired function on the touch control panel.

- Press the Start key to activate the selected program.

- Press the Power key to stop the machine at any time.

(1) Max continuous working time is 1 Minute.
(2) Press this key to activate the blender pulse function. When activated, the blender will operate at maximum speed. Releasing the key will cease operation.

8. Power/Stop key:
(1) This button turns the blender on. The blender will remain on until the selected function ends, or this button is pressed again. This button also acts to 'stop' the blender.
(2) When the blender has stopped but program lights remain on, pressing this button will power off the blender.
(3) When the blender has stopped, if there is no activity for 2 minutes the blender will power off automatically.

- After the processing is complete, a buzzer will sound and the blender will stop operating automatically.
Note: Do not open or remove the lid during operation.
10. Manual Operation:
Adjust the speed and blending time according to personal preference. (refer to the recipe and food recommendations for blending time and instructions for food materials.)
- Place all food materials into the jug. Check whether the jug is balanced and that there are no foreign objects between the jug and the base. Press the power button to turn the blender on.
- Select the time according to your requirements by pressing the Time + / - keys (1). Select the speed according to your requirements by pressing the Speed + / - keys (2).

- Press the Start key to being operation.

-
Upon completing the set program, the buzzer will sound and the blender will cease operation.
-
Press the Power key to stop the machine at any time.

FOOD RECOMENDATIONS
| No. | Program | Food Recommendation |
| 1 | Vegetables/FruitTime: 2mins | Suitable for vegetable and fruit smoothies/purees.Cut vegetables or fruit into 1.5-2cm pieces.Pour preferred liquid (water/milk etc) into the jug.Add sugar or seasoning according to taste preference. |
| 2 | Nut milkTime: 4mins | Add fully cooked beans, nuts, dried or fresh fruit into the jug.Pour preferred liquid (water/milk etc) into the jug.Add sugar or honey according to taste preference. |
| Soak beans or nuts for 8-12 hours in milk.Pour milk and beans/nuts solution into the jug.Add sugar or honey according to taste preference. | ||
| 3 | PasteTime: 2mins | Use fully cooked rice, corn, buckwheat, oatmeal.Pour warm water or soup/broth solution into the jug.Add sugar or salt according to taste preference. |
| 4 | SmoothiesTime: 30sec | Use 200g of your preferred fruit.Add 50ml water or milk and 200g ice. |
| 5 | SoupTime: 5mins(Blend time) | Use fully cooked beans, vegetables etc and cut into pieces of less than 2cm.Place ingredients into the jug together and blend.Add salt or seasoning according to taste preference. |
| Cut fresh beans, vegetables etc into 2cm pieces.Add ingredients and soup/stock mix into the jug and blend.Pour soup mixture into a pot and simmer for 10 minutes.Add salt or seasoning according to taste preference. | ||
| 6 | MilkshakeTime: 70sec | Prepare 100g yogurt, one tablespoon of preferred jam and 100g icecream.Place all ingredients into the jug and blend together.Add sugar or honey according to taste preference. |
Note:
- For more info please refer to food recipes.
- The blender motor is equipped with overheat protection device which will stop operation automatically if the machine is overheated due to excessive running time. In the event of overheating and subsequent shutdown, please disconnect the power cord from the mains supply and allow the blender to cool down the machine for 15 minutes.
RECIPE RECOMMENDATIONS
Nut milk
Ingredients (Serves 4)
Peanuts: 250g
Cashews: 200g
Milk: 1500ml
Sugar: 30g
Steps:
-
Bake peanuts and cashews in the oven for 10-15 minutes at 180°C.
-
Place all ingredients into the jug and press the "Nut milk" key.
Carrot Honey Juice
Ingredients (Serves 2)
Carrot: 200g
Honey: 30ml
Milk: 50ml
Water: 300ml
Ice: 50g
Steps
-
Clean and cut carrots into 2cm pieces.
-
Place all ingredients into the jug and press the "Vegetable/Fruit" key.
Black Bean Paste
Ingredients (Serves 3-4)
Cooked Black Beans: 250g
Walnuts: 8 pieces
Warm Water: 600ml
Steps
- Place all ingredients into the jug and press the "Paste" key.
Strawberr y Milkshake
Ingredients (Serves 3-4)
Strawberries: 250g
Yogurt: 200ml
Honey: 30ml
Milk: 100ml
Steps
-
Clean and cut strawberries into 2cm pieces. (remove stem and leaves).
-
Place all ingredients into the jug and press the "Milkshake" key.
Mango & Bsanana Smoothie
Ingredients (Serves 3-4)
Mango: 1 piece (250-300g)
Banana: 1 piece (150g)
Orange Juice: 500ml
Ice: 50g
Steps
-
Peel and cut mango into 2cm pieces. (remove stone).
-
Peel and cut banana into 2cm pieces.
-
Place all ingredients into the jug and press the "Smoothie" key.
CHOPPING GUIDE
| FOOD MAXIMUM | OPERATION TIME | |
| Meat 2.5cm Cubes | 15 sec.250g | |
| Herbs | 50g | 10 sec. |
| Nuts, Almonds | 15 sec.150g | |
| Cheese 2.5cm Cubes | 10 sec.100g | |
| Bread | 80g | 10 sec. |
| Onions Chopped into 1/4 | 10 sec.200g | |
| Biscuits | 10 sec.150g | |
| Soft Fruit | 10 sec.200g | |
CLEANING AND CARE
- ⚠️ WARNING: Do not under any circumstances immerse the power cord, mains plug or blender body in water or any other liquid.
- ⚠️ WARNING: Do not attempt to clean the unit whilst it is still plugged into the electrical power outlet. Always unplug the unit before cleaning.
- Do not use harsh or abrasive cleaning agents. The outside surface may be wiped clean with a soft, damp cloth and dried thoroughly. If necessary, a mild dishwashing detergent may be applied to the cloth but not directly applied to the blender.
- Soaking the jug, lid, and lid cap accessories in water will assist in the removal of sticky or tough to remove substances. In most instances, running warm water over the accessories is sufficient to remove most substances.
- When washing, non-abrasive cloths and plastic bristle kitchen brushes may be used to remove stubborn food particles from the jug and accessories. Do not use abrasive cloths and cleaning materials as they will damage the surfaces.
- Ensure the blender and all accessories are dried thoroughly after cleaning.
- Store in a dry place away from steam and humidity where possible.
TROUBLESHOOTING
BEFORE CALLING FOR SERVICE
If the blender fails to operate:
- Check to make sure the blender is plugged in correctly and securely. If it is not, remove the plug from the outlet, wait 10 seconds and plug it back in securely.
- Check for a blown or tripped circuit breaker in your home. If these seem to be working correctly, test another appliance in the same outlet to ensure the outlet is working correctly.
IF NONE OF THE ABOVE SOLVES THE PROBLEM, DO NOT TRY TO ADJUST OR REPAIR THE BLENDER YOURSELF.
CUSTOMER SERVICE
In the event you believe your blender to be defective, please return it along with your sales receipt to the place of purchase for resolution.
For any enquiries, please call our service center on: Tel: 1300 883 109
TROUBLESHOOTING
Troubleshoot your problem by using the chart below. If the blender still does not operate correctly, it may be defective.
| TROUBLE | POSSIBLE CAUSE | POSSIBLE REMEDY |
| The blender fails to work and the digital display is not showing. | The jug is not positioned properly. | Remove the jug and place back onto the blender base again. |
| The blender fails to work but the digital display is showing. | The motor overheat protection function has been activated. | Unplug the machine and allow to cool for 15 minutes. |
| No reaction when pressing keys but the digital display is showing. | Water or residue on the touch panel or hands of operator. | Wipe touch panel with a dry cloth. Shut blender down and restart. |
| The blade is unable to rotate and/or motor is struggling. | Food material is too hard, too large or too much in the jar. | Remove some foods and cut into smaller pieces. Adjust to higher speed. |
| Abnormal noise when in operation. | The main body or the jug is not installed properly/unbalanced. | Remove jug and check for obstructions. Re-seat onto blender base. |
LIMITED WARRANTY
- Nothing in this warranty affects the consumers rights under the Australian Consumer Law. The benefits to the Consumer under this Warranty are in addition to the rights and remedies of the buyer under any Consumer Guarantees. The Australian Consumer Law requires that we confirm that:
Our goods come with guarantees that cannot be excluded under the Australian Consumer Law. You are entitled to a replacement or refund for a major failure and for compensation for any other reasonably foreseeable loss or damage. You are also entitled to have the goods repaired or replaced if the goods fail to be of acceptable quality and the failure does not amount to a major failure.
- Subject to Clause 1, the Seller warrants that Westinghouse branded products will be free of manufacturing defects and will perform to the Seller's specifications subject to the following clauses.
- The benefit of this Warranty extends only to the owner of the property in which the Products manufactured or supplied by the Seller are installed and used by the owner for the duration of the Warranty Period.
- The Warranty commences on the date of the purchase of the product and continues for the benefit of the Owner for the Warranty Period. If within the Warranty Period a manufacturing defect is discovered in the Product, or the Product fails to perform to the Seller's specifications as a result of some defect in material or workmanship in the Product, then the Seller will at its own discretion:
a.) Repair or replace the Product at the cost of the Seller, including but not limited to labour and travel costs. Goods repaired or replaced under this Warranty will be warranted for the remaining period of the Warranty.
b.) Refund the purchase price paid by the consumer.
- The Warranty does not apply to Product that:
a.) Has failed due to excessive wear and tear beyond what is considered to be reasonable.
b.) Has been misused or neglected.
c.) Has been damaged accidentally or by acts of God including fire and flooding.
d.) Has been used or operated contrary to operating or maintenance instructions.
e.) Has been damaged by the Consumer or a third party authorised to act for the consumer in transit from the Sellers store to the Consumer.
-
In order to make a claim under the Warranty, the Owner must, where possible return the goods to the Seller's store at the Owner's cost. Proof of purchase must be supplied in all cases.
-
The seller will examine any returned Products and if the Seller determines that there is an apparent defect through no fault of the Owner, the Seller will:
a.) Make note of the Owner's contact details including the Owner's telephone number which the owner can be contacted during business hours, postal address and e-mail address.
b.) Make note of the defects reported by the Owner.
c.) Take back the defective goods from the owner and determine within a reasonable time through dialogue with the Seller whether the goods are defective.
d.) Advise the owner within a reasonable time frame whether it accepts or rejects the Product claim.
e.) If the Seller accepts the return of the Product, the Seller must arrange to have
i) The Product repaired or,
ii) Replace the damaged or faulty Product or,
iii) Refund the purchase price.
-
The Seller will not accept any returned Product which has not been returned strictly in accordance with this Warranty.
-
For the purpose of this Warranty:
a.) Australian Consumer Law means the law as set out in Schedule 2 of the Competition and Consumer Act 2010 (Cth).
b.) Consumer means the Purchaser of goods from the seller.
c.) Consumer means a Consumer as that term is set out in section 3 of the Australian Consumer Law.
d.) Consumer Guarantees means the guarantees under the Australian Consumer Law.
e.) Implied terms means any guarantees, conditions, warranties or other terms implied by any Australian Commonwealth, State or Territory laws, (excluding the Australian Consumer Law) or the law of any other jurisdiction.
f.) Owner has the meaning set out in clause 3.
g.) Warranty means this warranty.
h.) Product means the Product/s bought by the Owner from the Seller that fall under this warranty.
i.) Warranty Period means:
i) In relation to Cast Iron Cookware: 3 Year Limited Warranty.
ii) In relation to Non-Stick Cookware: 3 Year Limited Warranty
iii) In relation to Cooking Utensils: 3 Year Limited Warranty
iv) In relation to Knives/Knife Block Sets: 3 Year Limited Warranty
v) In relation to Stainless Steel Cookware: 10 Year Limited Warranty
vi) In relation to Chopping boards: 1 Year Limited Warranty
vii) In relation to Small Appliances: 1 Year Limited Warranty

natural_image
White crown icon on a solid blue background, enclosed in a circle (no text or symbols)Westinghouse
INNOVATION YOU CAN BE SURE OF
www.westinghousesmallappliances.com.au
CUSTOMER SERVICE - AU: 1300 883 109
info@westinghousesmallappliances.com.au
CUSTOMER SERVICE - NZ: 0508 776 546
info@westinghousesmallappliances.co.nz
IMPORTED AND DISTRIBUTED BY RVM AUSTRALIA PTY LTD.
11 Tamara Drive, Cockburn Central, WA 6164
MADE IN CHINA
© 2021 RVM AUSTRALIA PTY LTD. ALL RIGHTS RESERVED.
WESTINGHOUSE, and INNOVATION YOU CAN BE SURE OF
are trademarks of Westinghouse Electric Corporation
Used under license by RVM AUSTRALIA PTY LTD. ALL RIGHTS RESERVED.


- CONTENTS
- SAFETY INFORMATION
- SETUP AND USE
- IMPORTANT SAFETY INSTRUCTIONS
- DANGER
- WARNING
- CAUTION
- \*\*\*WARNING\*\*\*
- ELECTRICAL REQUIREMENTS
- POWER SUPPLY CORD
- INSTALLATION GUIDE
- PARTS AND FEATURES
- DESCRIPTION:
- Power/Stop key:
- Manual Operation:
- FOOD RECOMENDATIONS
- Note:
- RECIPE RECOMMENDATIONS
- Nut milk
- Carrot Honey Juice
- Black Bean Paste
- Strawberr y Milkshake
- Mango & Bsanana Smoothie
- CLEANING AND CARE
- TROUBLESHOOTING
- BEFORE CALLING FOR SERVICE
- CUSTOMER SERVICE
- LIMITED WARRANTY
- Westinghouse
- INNOVATION YOU CAN BE SURE OF
Brand : WESTINGHOUSE
Model : WHBL03SS
Category : Blender