
INFINITY V-035B - Steam cleaner VAX - Free user manual and instructions
Find the device manual for free INFINITY V-035B VAX in PDF.


| Product Type | Steam Cleaner |
| Brand | Vax |
| Model | INFINITY V-035B |
| Dimensions (L x W x H) | 30 x 25 x 20 cm |
| Weight | 3.5 kg |
| Power Supply | 220-240V ~ 50/60Hz |
| Power Consumption | 1500 Watts |
| Water Tank Capacity | 1.2 Liters |
| Steam Pressure | 3.5 bar |
| Heating Time | Approx. 30 seconds |
| Continuous Steam Time | Up to 40 minutes |
| Functions | Steam cleaning, sanitizing, degreasing |
| Accessories Included | Floor mop head, squeegee, small brush, funnel |
| Safety Features | Auto shut-off when water is empty, pressure relief valve |
| Descaling Interval | Every 2-3 months |
| Warranty | 2 years |
| Repairability | Modular design; spare parts available online |
Frequently Asked Questions - INFINITY V-035B VAX
User questions about INFINITY V-035B VAX
0 question about this device. Answer the ones you know or ask your own.
Ask a new question about this device
Download the instructions for your Steam cleaner in PDF format for free! Find your manual INFINITY V-035B - VAX and take your electronic device back in hand. On this page are published all the documents necessary for the use of your device. INFINITY V-035B by VAX.
USER MANUAL INFINITY V-035B VAX
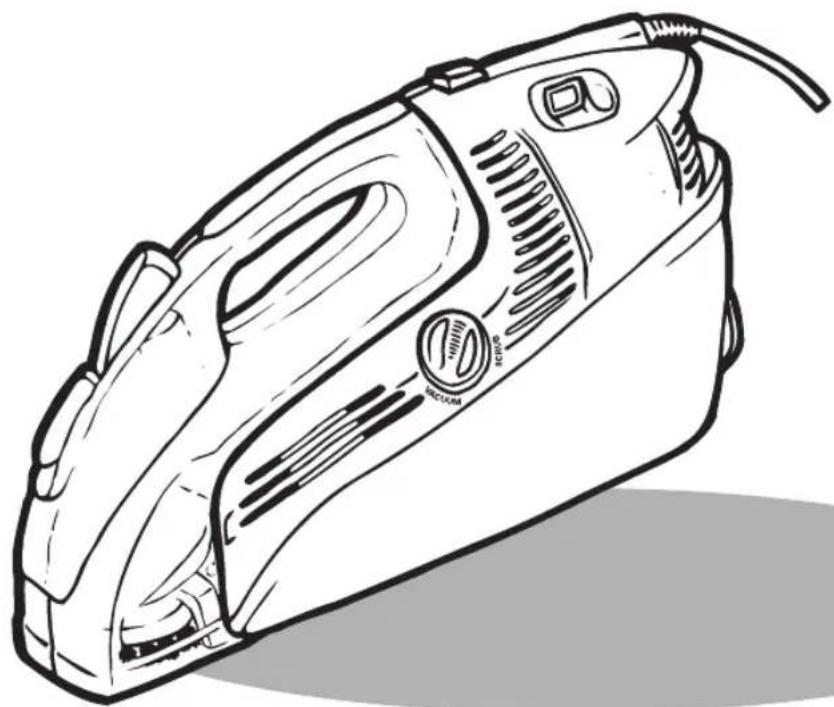
Handheld Carpet Washer
INFINITY
by vax
Vax model number:
V-035B
natural_image
Line drawing of a steam iron with control buttons and ventilation slots (no text or symbols)instruction manual
www.vax.co.uk
Please read carefully before using this cleaner. Always fully extend the mains cable before use Retain for future reference.
www.vax.co.uk
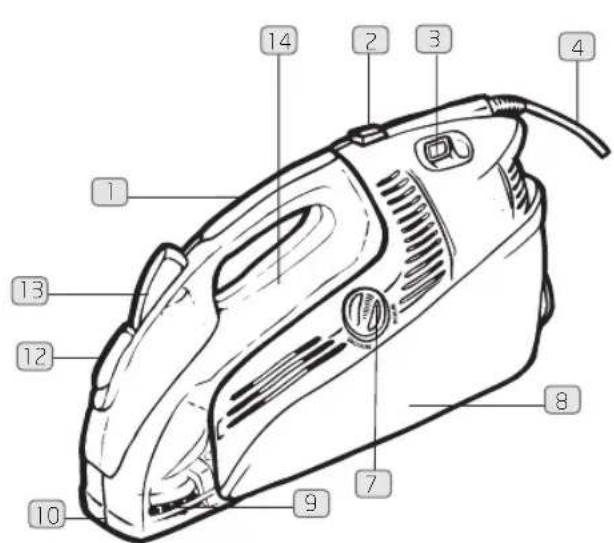
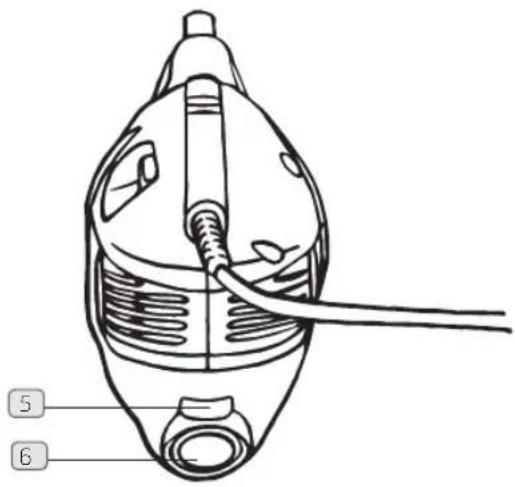
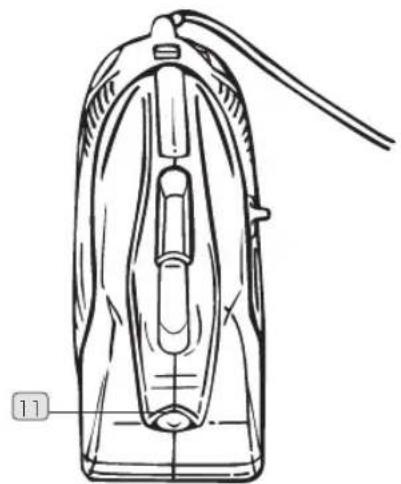
1. Diagram
V-035B
natural_image
Line drawing of a washing machine with handle and internal components (no text or symbols)Fig.1/1

Handle

Clean solution tank latch

On/Off switch

Power cord

Dirty water tank latch

Drain cap

Vacuum/Scrub selector

Dirty water tank

Rotating scrub brush

Vacuum nozzle

Spray nozzle

Cord wrap

Spray trigger

Clean solution reservoir
2. Safety Information
For Household Use Only
When using the vacuum cleaner, basic safety precautions to recharge, should always be observed, including the following:

WARNING: Do not use outdoors.
-
Do not charge the unit outdoors.
-
Turn off the vacuum cleaner control before or connecting or disconnecting from the mains supply.
-
Children should be supervised to ensure that they do not play with the appliance.
-
This appliance is not intended for use by persons the (including children) with reduced physical, sensory or mental capabilities, or lack of experience and knowledge, unless they have been given supervision or instruction concerning use of the appliance by for person responsible for their safety.
-
Use only as described in this manual. Use only the manufacturer's recommended attachments.
-
Do not use with damaged cord or plug. If the appliance is not working, as it should, has been dropped, damaged, left outdoors, or dropped into water, return it to a Vax Authorised Service Agent or suitably qualified person for examination, repair or adjustment.
-
Do not abuse the cord. Keep the cord away from heated surface. Do not pull the cord around sharp edges or corners. Do not close the cord in a door.
-
Do not handle the plug or appliance with wet hands.
-
This product contains rechargeable Ni-Cad batteries. Do not throw batteries into fire or expose them to high temperatures, as they may burst.
-
Do not use with any opening blocked; keep free of dust, lint, hair, and anything that may reduce airflow.
-
Keep hair, loose clothing, fingers and all parts of the body away from openings and moving parts.
-
Do not pick up hot coals, cigarette butts, matches or anything hot, smoking or burning objects.
-
Do not pick up flammable or combustible materials (lighter fluid, petrol, kerosene, etc) or use in the presence of explosive liquids or vapour.
-
Do not vacuum up harmful or toxic material (chlorine bleach, ammonia, drain cleaner, etc).
-
Do not use without the filter in place.
-
Do not vacuum up hard or sharp objects such as glass, mails, screws, coins, etc.
-
Turn off all controls before unplugging.
-
Take extra care when cleaning on stairs
- Store the appliance indoors in a cool, dry area.
- Use only the charge supplied by the manufacturer
WARNING: Always switch off and unplug the hand vac from the electrical outlet before assembling, opening or emptying the dirt container, or before connecting/disconnecting the attachments.
IMPORTANT: Washing filters improves the hand vac performance. Make sure all the filters are completely dry before inserting back into the hand vac.
www.vax.co.uk
3. How to Operate
Unscrew the cap from the back of the clean solution tank (Fig.3/4).
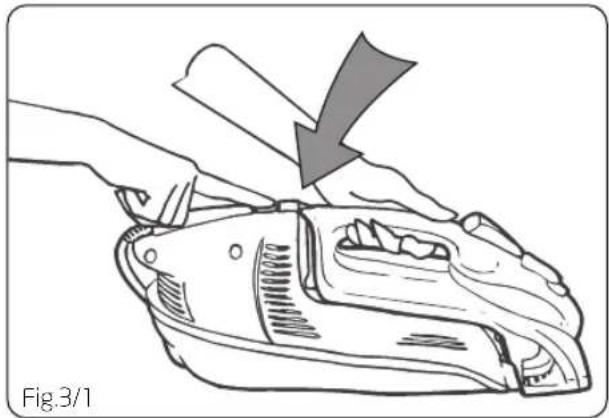
Grasp solution tank handle and press the clean solution tank latch (Fig.3/1).
natural_image
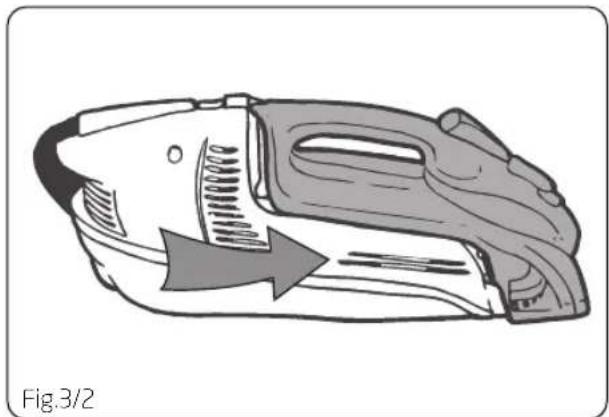
Line drawing of a hand using a tool to adjust or install a device, with no visible text or symbols.Slide the solution tank away from the cleaner until tabs on the tank are disengaged from the slots on cleaner (Fig.3/2).
natural_image
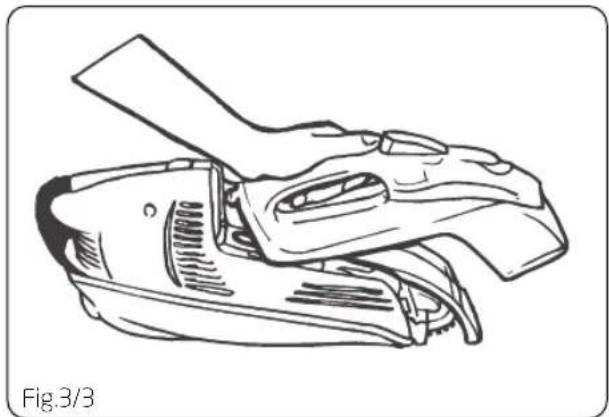
Line drawing of a handheld device with a directional arrow indicating motion (no text or symbols)Lift the clean solution tank to remove (Fig.3/3).
natural_image
Line drawing of a mechanical component with a handle and internal structure (no text or symbols)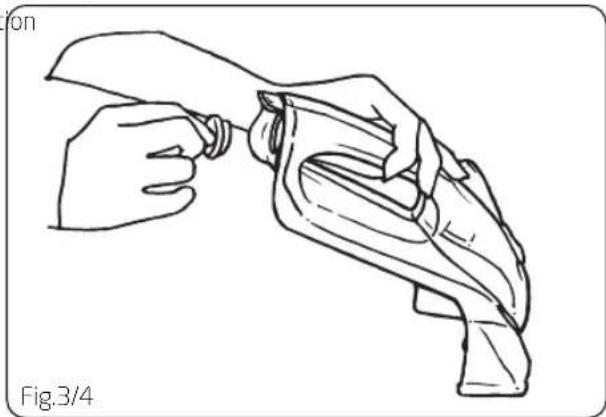
natural_image
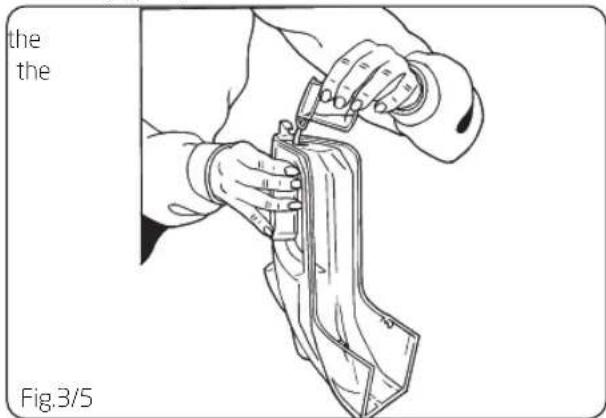
Line drawing of a hand holding a tool, no text or symbols presentFill the solution tank with 15ml of Vax AAA carpet cleaner (Fig.3/5).
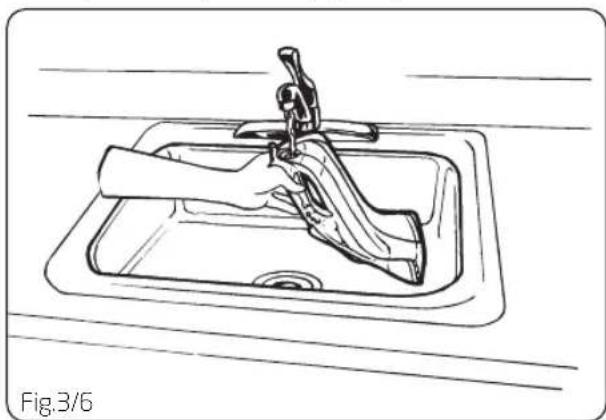
Slowly fill the remainder of the clean solution tank with warm (max 40°C) water (Fig.3/6).
natural_image
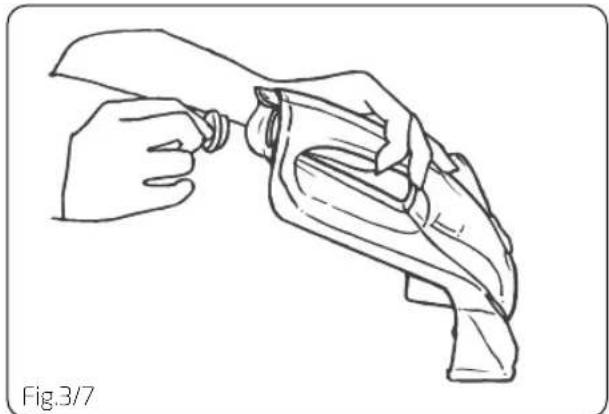
Line drawing of a hand washing a kitchen sink with a faucet (no text or symbols)Replace the cap (Fig.3/7).
natural_image
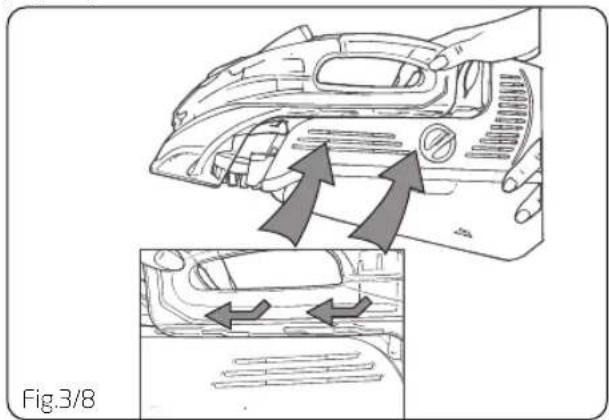
Line drawing of hands holding a tool, no text or symbols presentLine up the tabs on the clean solution tank with the slots on the the cleaner and slide the tank toward the clearer (Fig.3/10, Fig.3/8).
Carpet/upholstery cleaning
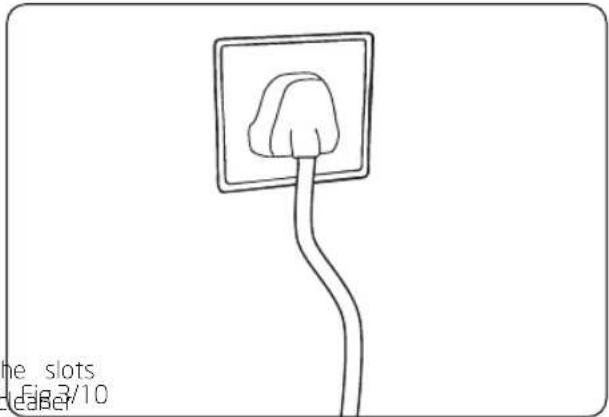
Plug cord into an electrical socket (Fig.3/10).
natural_image
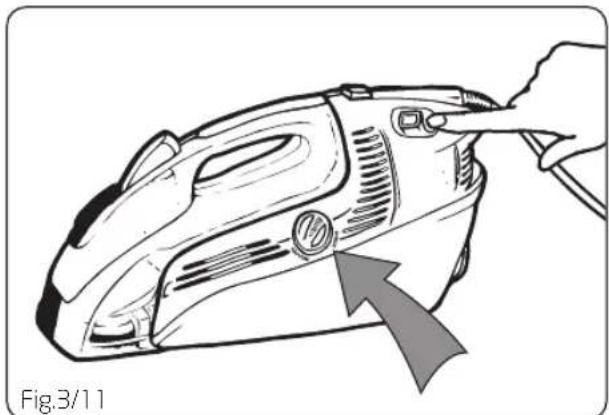
Simple line drawing of a plug with a bulb inserted into a socket (no text or symbols)Turn the power switch 'ON' (Fig.3/11).
natural_image
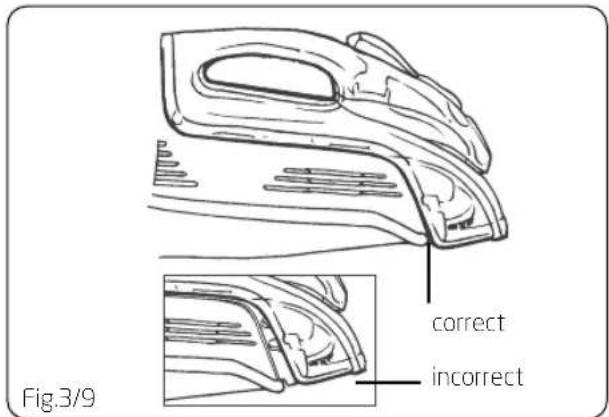
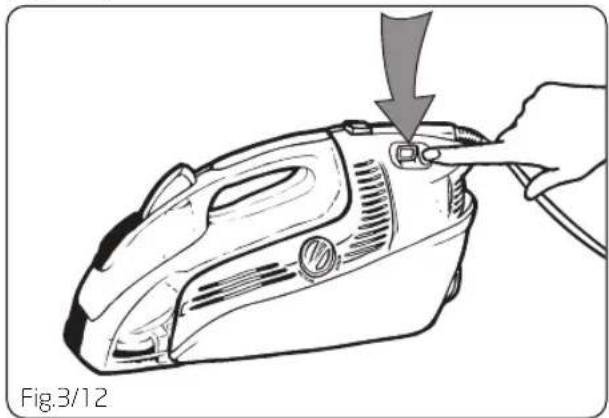
Diagram showing a hand pressing down on a car's side panel with arrows indicating motion or movement (no text or symbols)Make sure the clean solution tank is aligned properly Turn the Vacuum/Scrub selector knob towards 'Vacuum' (Fig.3/9). and remove as much liquid as possible from the spill or spot NOTE: Failure to install the clean solution tank correct (Fig.3/12).
natural_image
Line drawing of a hand using a tool to adjust or install a device, with an arrow indicating the process (no text or symbols present)will result in poor dirty water pick-up.
natural_image
Line drawing of a hand using a power tool to adjust or install a small electronic device (no text or symbols present)www.vax.co.uk

IMPORTANT: Do not overwork any area of carpet, as this may damage carpet fibres. 4. Emptying & cleaning the dirty
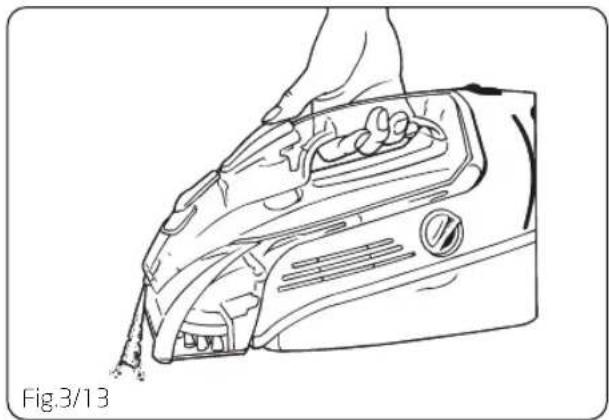
Depress the spray trigger to spray solution onto the Allow the cleaning solution to penetrate stain for 2 minutes (Fig.3/13).
natural_image
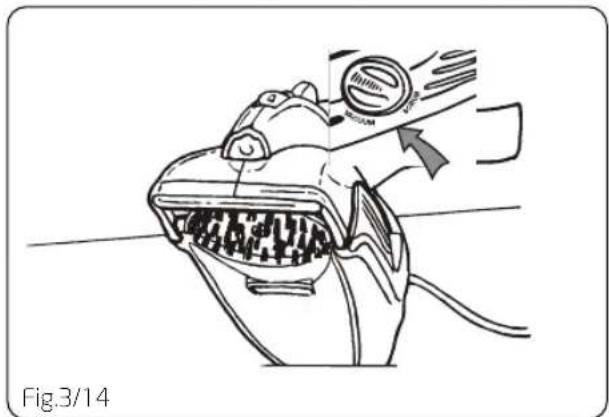
Line drawing of a hand using an iron on a device (no text or symbols)Turn the Vacuum/Scrub selector to 'Scrub' and use rotating scrub brush on the area in a forward and backward motion, using steady strokes (Fig.3/14).
natural_image
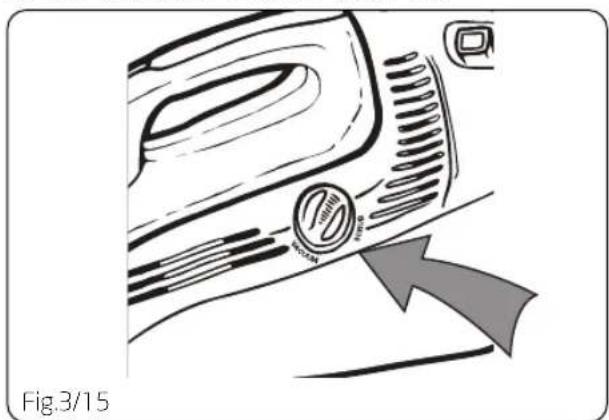
Line drawing of a fish head with an arrow indicating direction, no text or symbols presentTurn the Vacuum/Scrub selector back to 'Vacuum' to up the remaining moisture (Fig.3/15).
natural_image
Diagram of a car's side profile showing airflow direction and valve placement (no text or symbols)NOTE: Do NOT remove the dirty water tank with the unit in the upright position. You should empty the tank when the dirty water in the tank reaches the 'Full' line on the dirty water tank, or, when the float shuts off airflow, this will be indicated by a change in the pitch of the motor and reduced suction. Finally, you should also empty the dirty water tank after use and rinse clean, before storage.
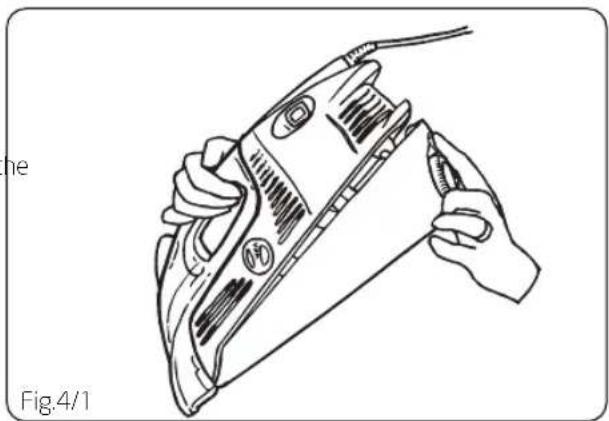
With one hand hold the cleaner by the handle, with the other grasp the sides of the dirty water tanks and push the latch to release (Fig.4/1).
natural_image
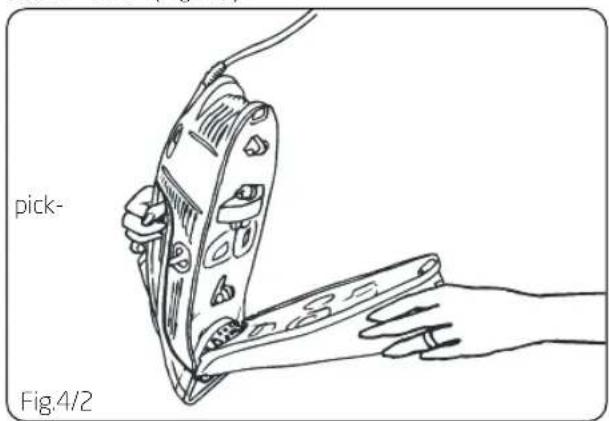
Line drawing of a hand using a power iron to clean or install a device (no text or symbols present)Grasp and pull the cleaner UP and AWAY from the dirty water tank (Fig.4/2).
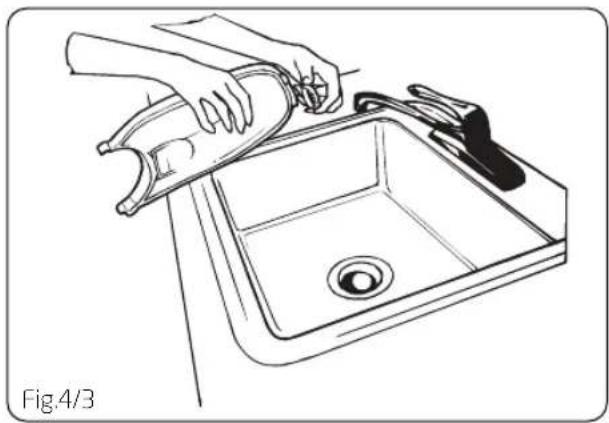
Unscrew the dirty water tank drain cap (Fig.4/3).
natural_image
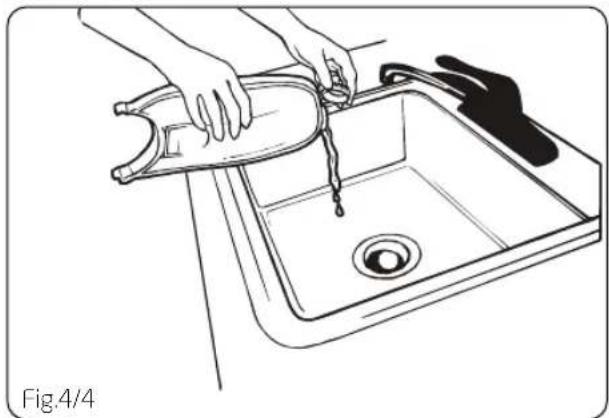
Line drawing of hands cleaning a sink with a tool, labeled Fig.4/3 (no text or symbols on the diagram itself)Empty the dirty water tank into the sink and replace cap (Fig.4/4).
natural_image
Line drawing of a kitchen sink with hands pouring liquid from a container (no text or symbols)Cleaning the dirty water tank
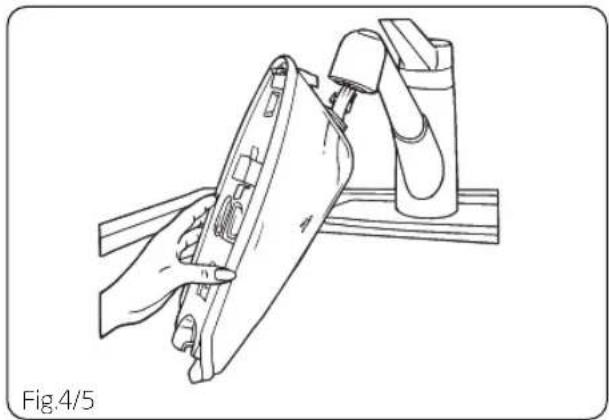
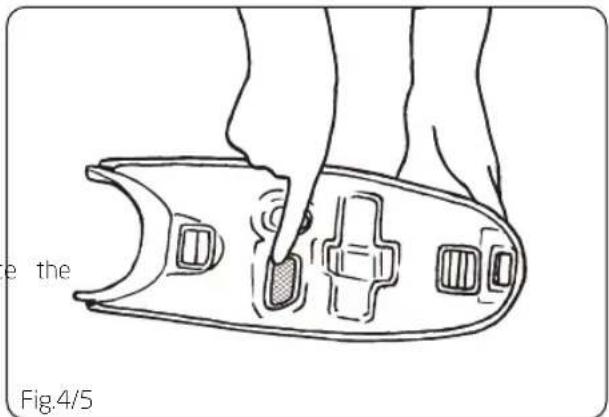
Rinse the dirty water tank with warm (max 40°C) tap water.
Dry thoroughly before storing to prevent mildew from forming (Fig.4/5).
natural_image
Line drawing of a hand holding a device with a tool, next to a mechanical device (no text or symbols)Cleaning the filter
Check the filter located on top of the dirty water tank periodically and clean by rinsing with water when dirty (Fig.4/6).
NOTE: Make sure to replace the filter after cleaning.
Returning the dirty water tank to the base of the cleaner
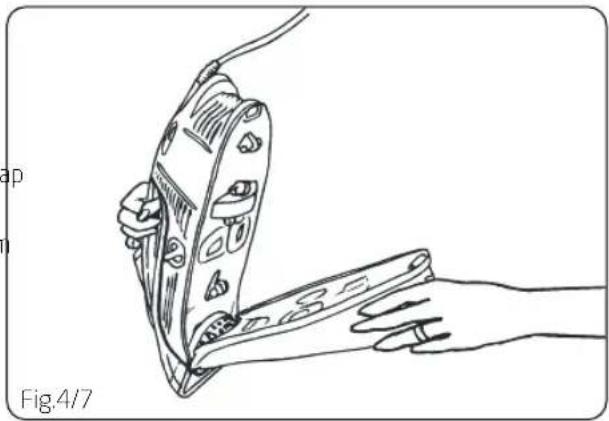
Grasp the handle and hook the front of the dirty water tank securely into the base of the cleaner (Fig.4/7).
The dirty water tank has 2 tabs on the underside, which MUST latch into the underside of the base of the cleaner.
natural_image
Line drawing of a hand holding a device with a mechanical component, labeled Fig.4/7 (no text or symbols on the diagram itself)www.vax.co.uk
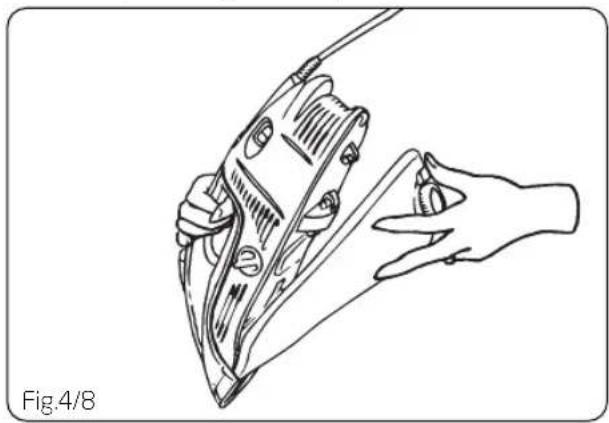
while making sure the front of the dirty water tank is hooked on the base, push the rear of the tank into the 5 How to store the cleaner
base of the cleaner and push down until it latches. Lift up the cord wrap and use it to secure the cord as it dirty water tank will need to be emptied once or twips around the cleaner (Fig.5/1).
fill up of the clean solution tank (Fig.4/8).
NOTE: Failure to install the dirty water tank correctly will result in poor dirty water pickup.
natural_image
Line drawing of a hand holding a tool, showing mechanical components and a close-up view (no text or symbols)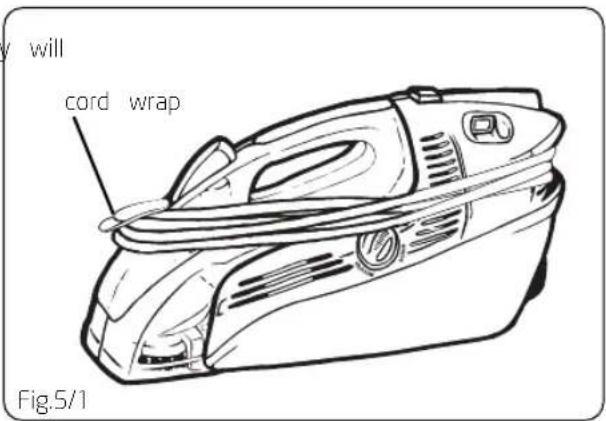
6. Troubleshooting
WARNING: To reduce the risk of personal injury, unplug the vacuum cleaner before performing maintenance or troubleshooting checks.
PROBLEM: Cleaner won't run
Cause: Power cord not firmly pushed into a mains socket.
Solution: Plug cord in firmly.
Cause: Blown fuse or tripped circuit breaker.
Solution: Check fuse/breaker. Replace fuse or reset breaker.
Cause: Needs service.
Solution: Call Vax Care 0870 606 1248.
PROBLEM: Hand Vac won't pick up/loss of suction.
Cause: Dirty water tank is not installed correctly.
Solution: Review dirty water tank removal and replacement.
Cause: Dirty water tank is full.
Solution: Empty the dirty water tank.
PROBLEM: Water escaping from the Cleaner
Cause: Dirty water tank is full.
Solution: Empty the dirty water tank.
Cause: Dirty water tank is not installed correctly.
Solution: Review dirty water tank removal and replacement.
Cause: Solution tank not installed correctly.
Solution: Review solution tank installation.
PROBLEM: Cleaner won't dispense
Cause: Spray nozzle clogged
Solution: Clean thoroughly.
Cause: Solution tank not installed properly
Solution: Review solution tank installation.
7. UK Service & Help
Vax Care 0870 6061248
Monday-Friday 8.00am to 8.00pm.
Saturday-Sunday 9.00am to 5.00pm.
Any queries or concerns about using the Vax, call the Vax Careline. Calls are charged at the UK national rate.
Please make a note of the serial number and model number of the carpet cleaner before calling. There are over 400 approved Vax Service Agents in the UK. For the nearest Service Agent, please call the Vax Careline.
www.vax.co.uk

8. Technical Specification
Adaptor voltage: 230-240V \~50Hz
Wattage: 200W
Cord length: 5.9m (approx)
Capacity: 0.26l clean
0.321 dirty
Filter: foam pad filter
Subject to technical change without notice.
www.vax.co.uk
This page has been left intentionally blank
This page has been left intentionally blank
vax®
EEC STATEMENT OF COMPLIANCE
Manufacturer/EEC importer: Vax Limited, hereby on our own responsibility, declare that the V-035B Infinity by Vax is manufactured in compliance with the following Directives:
EMC: 2004/108/EC Electromagnetic Compatibility Directive

Waste electrical products should not be disposed of with household waste. Please recycle facilities exist. Check with your Local Authority or retailer for recycling advice.
Vax Ltd., Kingswood Road, Hampton Lovett, Droitwich, Worcestershire, WR9 OQH, UK email: info@vax.co.uk - website: www.vax.co.uk
- Handheld Carpet Washer
- INFINITY
- Diagram
- Safety Information
- For Household Use Only
- WARNING: Do not use outdoors.
- How to Operate
- Carpet/upholstery cleaning
- Cleaning the dirty water tank
- Cleaning the filter
- Returning the dirty water tank to the base of the cleaner
- Troubleshooting
- UK Service & Help
- Technical Specification
- EEC STATEMENT OF COMPLIANCE
Brand : VAX
Model : INFINITY V-035B
Category : Steam cleaner