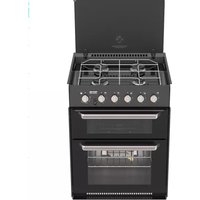
Caprice SOH72 - Cooker THETFORD - Free user manual and instructions
Find the device manual for free Caprice SOH72 THETFORD in PDF.


| Product Type | Cooker (Gas Hob with Oven) |
| Brand | Thetford |
| Model | Caprice SOH72 |
| Overall Dimensions (HxWxD) | 140 x 500 x 500 mm |
| Weight | 25 kg |
| Gas Connection | G1/2" rear connection, suitable for LPG or Natural Gas (convertible) |
| Gas Consumption | Max total: 8.5 kW (varies by burner) |
| Electrical Supply | 12 V DC (for ignition and oven light) |
| Number of Burners | 4 (varying sizes: 1x fast, 2x semi-rapid, 1x auxiliary) |
| Oven Type | Static gas oven with thermostat |
| Oven Capacity | Approx. 45 L |
| Grill | Gas grill integrated inside oven compartment |
| Ignition | Electronic spark ignition (battery or 12V) |
| Flame Safety Device | Yes, thermocouple on all burners and oven |
| Control Knobs | Push-and-turn with safety lock |
| Oven Door | Removable double-glazed door for easy cleaning |
| Cleaning | Enamel interior and burner caps dishwashable |
| Spare Parts Availability | Full range of spare parts available from Thetford or authorized dealers |
| Certification | CE, ECE R10 (for caravan use) |
Frequently Asked Questions - Caprice SOH72 THETFORD
User questions about Caprice SOH72 THETFORD
0 question about this device. Answer the ones you know or ask your own.
Ask a new question about this device
Download the instructions for your Cooker in PDF format for free! Find your manual Caprice SOH72 - THETFORD and take your electronic device back in hand. On this page are published all the documents necessary for the use of your device. Caprice SOH72 by THETFORD.
USER MANUAL Caprice SOH72 THETFORD
natural_image
Exterior view of a black and silver electric stove oven with four stoves and open lid (no visible text or symbols)Cooker Caprice 440-700 Series
User Manual
DECLARATION OF CONFORMITY
We: THETFORD Ltd
Address: Unit 6 Brookfields Way, Manvers, Rotherham, S63 5DL Telephone: (+44) (0) 844 997 1960. Fax: (+44) (0) 844 997 1961
Declare that
Product Types; Domestic build-in gas and dual-fuel cookers
Model Number/Description; Caprice MK 3 Cookers, SOH44XXX Series, SOH72XXX Series, SOH73XXX Series, SOH74XXX Series. Minigrill MK 3 Cookers SHG72XXX Series and SHG73XXX Series.
Satisfy the essential requirements of the Gas Appliances Directive 2009/142/EC and are manufactured in accordance with the harmonised European standards; EN 30-1-1:2008+A1:2010 & A2 2010 + A3:2013, EN 30-2-1:1998+A1:2003+A2:2005.
Satisfy the essential requirements of the Low Voltage Directive 2014/35/EU where applicable and is manufactured in accordance with the harmonised European standards; EN 60335-1: 2010, EN 60335-2-6: 2002, EN 60335-2-102: 2006.
Satisfy the essential requirements of the Electro Magnetic Compatibility Directive 2014/30/EU and is manufactured in accordance with the harmonised European standards: EN 55014-1: 2006 + A1:2009 + A2:2011, EN55014-2: 1997 + A1:2001 + A2: 2008, EN 61000-3-2:2006 + A1:2009 + A2:2009 & EN 61000-3-3:2013.
We also declare that the production of each specific model will be in conformity with the type as described in the EC type-examination certificate:
EC419 Rev.3 Issued by Intertek
We also declare that the production of each specific model will be in conformity with the type as described in Test Report(s):
04013800/A & 06022215 issued by Intertek, and TR/15/049 issued by BSI.
Name: Petrus Struys
Title/Position: Director
Place & date of issue:
Signature

EN
Original User Manual
Contents
1 Introduction....2
2 Symbols....2
3 Safety....3
4 Main components....7
5 Before use....7
6 Use of the burners....8
7 Use of the electric hotplate (if applicable)....9
8 Use of the grill....10
9 Use of the oven.... 11
10 Safe cooking.... 11
11 Temperature control....13
12 Maintenance and cleaning....14
13 Gas leaks.... 15
14 Troubleshooting....15
15 Servicing....16
16 Putting in storage....16
17 Technical specifications....17
18 Disposal....18
19 Questions....18
20 Warranty....18
1. Introduction
This is the user manual for your Thetford cooker. Read the safety instructions and information on use and maintenance of the cooker carefully before continuing. This will enable you to use the cooker safely and efficiently. Retain this manual for future reference.
For the latest version of this manual, please visit www.thetford.com.
2. Symbols
Key to symbols:

Warning. Risk of injury and/or damage.

Caution. Hot surface. Risk of injury and/or damage.
Attention. Important information.
Note. Information.
3. Safety
This appliance may be used by children aged 8 years or older and persons with reduced
physical, sensory or mental capabilities and/or
lack of experience and knowledge only if they are supervised or have been given instructions on the safe use of this appliance and understand the potential hazards.
Keep children younger than 8 years away from the appliance, except under constant supervision.
Do not allow children to play with the appliance.
Do not allow children to clean or maintain this equipment unattended.
Use only parts supplied by the manufacturer.
Do not change or adjust anything on the appliance, unless the change is authorised by the manufacturer or its representative.
If the power cord is damaged, it must be replaced by the manufacturer, its service agent or similarly qualified persons in order to avoid a hazard.
Use the appliance for cooking only and not for anything else, for example room heating. This can


lead to carbon monoxide poisoning and overheating. The manufacturer cannot be held liable for damage resulting from improper use or incorrect setting of the controls.

This appliance is not intended to be operated by means of an external timer or separate remote-control system.

The use of this gas cooking appliance results in the production of heat, moisture and products of combustion in the room in which it is installed.
Ensure the room has sufficient ventilation when the appliance is in use. During prolonged use, additional ventilation may be needed by opening a window or increasing the extraction force of the hood.

Never extinguish a cooking fire with water. Turn the burner off and cover the flame with a lid or a fire blanket.

The burners and pan supports are hot during and after use. Allow all parts to cool before touching them, as this can cause serious injury.

Unattended cooking on a hob with fat or oil can be dangerous and may result in fire. Do not leave the appliance unattended when in use.

The use of inappropriate hob guards can cause accidents.

Do not store items on the cooking surface of the hob.

The food shelves and trays in the appliance are hot during and after use. Allow all parts to cool before
touching them, as this can cause serious injury.
Always use oven gloves when removing the shelves and trays.

Do not store items in the appliance.

Do not put heavy objects on the open appliance door.

The appliance and accessible parts become hot when the grill is in use. Young children should be kept away.

Caution, hot surfaces. Door must be open when grill is in use.



In the event that abnormal drift in cooking temperature of the oven is observed, have the thermostat checked by a qualified service engineer.

Care should be taken not to overload the oven, allowing adequate spacing to ensure free circulation of heat.

Do not use steam cleaners or pressure washers to clean the appliance. See Maintenance and cleaning for instructions.

Do not allow oil or fat to build up on the appliance. Clean the appliance after each use.

The glass lid may snap shut towards the end of lowering due to the travel-lock action of the hinges. Make sure all fingers are clear of the appliance when closing the lid.

Do not use harsh abrasive cleaners or sharp metal scrapers to clean the surface of the glass, since they can scratch the glass surface which may result in shattering of the glass.

Remove any spillage from the glass lid before opening the lid.

Do not shut the glass lid when the burners are lit or still warm.

4. Main components
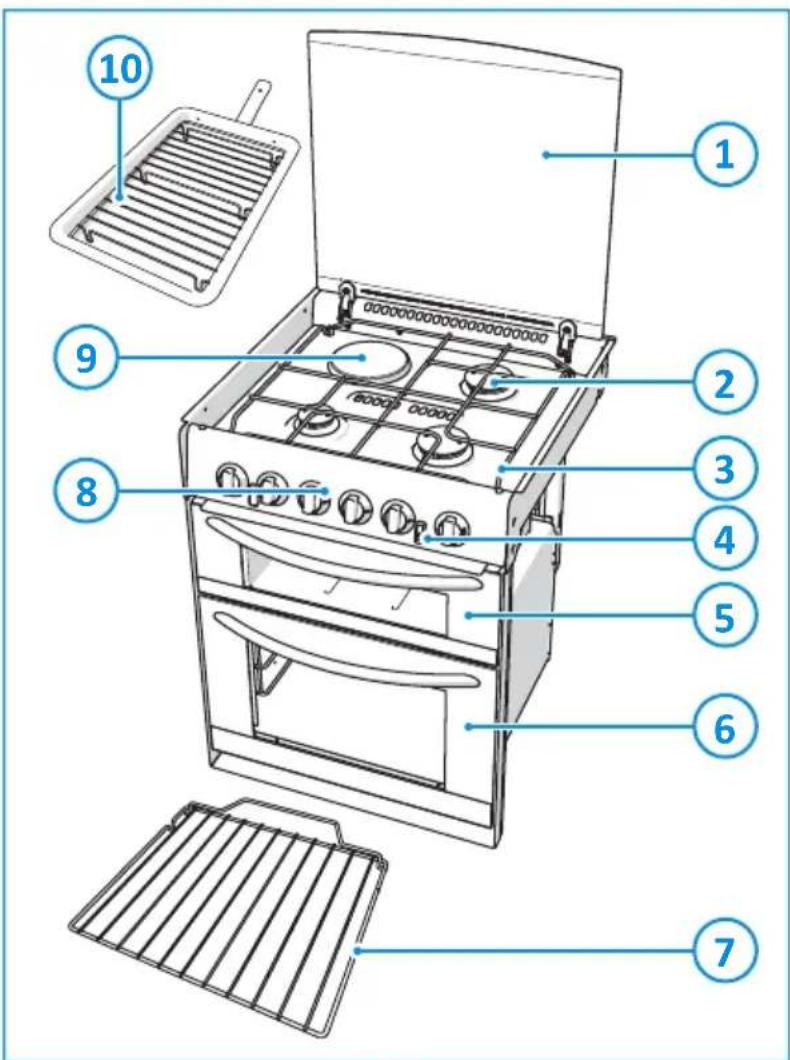
1.iGlass lid
2.iGas burners
3.iPan supports
4.iSpark ignition (optional)
5.iGrill
6.i0ven
7.i0ven shelf
8.iControl panel
9.iElectric hotplate (Dual Fuel only)
10.iGrill pan
The types of burners may vary depending on the type of appliance. Refer to Technical specifications for further details.
5. Before use
Before using the appliance:
■ Ensure that all packaging materials have been removed.
■ Clean the appliance with warm water and household detergent and dry carefully with a soft cloth.
■ Ensure that the gas supply is connected and turned on.
■ Ensure that the appliance is connected to the 12V DC battery for the spark ignition.
■ Ensure that the pan supports are positioned properly.
■ Ignite the gas burners and let them burn to expel odours and vapours first.
- Ignite the burner and heat the grill for about 20 minutes to eliminate any residual factory lubricants that might impart unpleasant smells to the food being cooked. Smoke may occur during this procedure. Open any windows and turn on mechanical ventilators to help remove the smoke.
- Ignite the burner and heat the oven for about 30 minutes at 200ircC to eliminate any residual factory lubricants that might impart unpleasant smells to cooked food. Smoke may occur during this procedure. Open any windows and turn on mechanical ventilators to help remove the smoke.
Dual Fuel only:
■ Ensure the electricity is connected and switched on.
■ Prime the hotplate by switching on the hotplate for a short period, without a pan, to harden and burn off the coating. Use a medium to high setting for 3 – 5 minutes. Allow adequate ventilation to disperse any smoke that occurs during this process. Allow the hotplate to cool.
- Season the hotplate by heating the hotplate for 30 seconds on a medium setting and then switching off. Pour a minimal amount of unsalted vegetable oil onto a clean dry cloth or paper towel, and apply a thin coat of oil to the hotplate surface. Wipe off any excess oil, then heat the hotplate on a medium setting for 1 minute. Occasional seasoning will help to maintain the hotplate's appearance.

Only use LPG (Liquefied Petroleum Gas). The appliance operates on propane or butane. Propane is preferred over butane, because butane provides poor performance at an ambient temperature below 10irc C and cannot be used at an ambient temperature below 5irc C.
6. Use of the burners
 |  |  |
 |  | |
 |  |
For the exact location of the control knobs, see Main components.
Turning on:
■ Push and turn the control knob.
■ Turn the control knob anti-clockwise to the full rate position.
- For automatic ignition models: The automatic ignition sparks and lights.
- For non-ignition models: Hold a lit match or gas match to the burners.
- Keep the control knob pressed for about 10-15 seconds and then release it.
■ Adjust the height of the flame.

If the burner accidentally extinguishes turn the control knob to the 0 position and wait at least 1 minute before re-igniting the burner.

If the burner has not lit within 15 seconds turn the control knob back to the 0 position and release it. Wait at least 1 minute and repeat the steps above to turn on the appliance.
Turning off:
■ Turn the control knob clockwise to the 0 position to turn off the burner.

Always make sure the control knob is in the 0 position when you have finished using the gas burners.

Do not shut the glass lid when the burners are lit or still warm.
7. Use of the electric hotplate (if applicable)

For the exact location of the control knob, see Main components.
Turning on:
■ Rotate the control knob either clockwise or anti-clockwise to the required position (1 - 6) .

For maximum efficiency, a correctly sized pan with a flat heavy gauge base should be used. The pan size should be the same or slightly larger than the hotplate (up to 1" / 2.5cm oversize).
Turning off:
■ Turn the control knob to the 0 position to turn off the hotplate.

Always make sure the control knob is in the off position when you have finished using the hotplate.

Do not shut the glass lid when the hotplate is turned on or still warm.
8. Use of the grill

natural_image
Simple diagram with concentric circles and small flame icons, no text or symbols presentFor the exact location of the control knob, see Main components.
Turning on:
■ Open the door and push the control knob.
■ Continue pressing the control knob and turn it anti-clockwise to the full rate position.
- For spark ignition models: Push the ignition button.
- For non-ignition models: Hold a lit match or gas match to the burner.
- Keep the control knob pressed for about 10-15 seconds and then release it.
■ Adjust the required heat setting.
■ Depending on the food to be cooked, the correct grilling height can be achieved by inverting the pan trivet into either the high or low position.
■ The grill pan supplied is multi-functional, for use in grill or oven and the handle design allows removal or insertion whilst the pan is in use. Always remove the handle when the pan is in use.

The grill door must remain open when lighting and using the grill.

If the burner accidentally extinguishes turn the control knob to the 0 position and wait at least 1 minute before re-igniting the burner.

If the burner has not lit within 15 seconds turn the control knob back to the 0 position and release it. Wait at least 1 minute and repeat the steps above to turn on the appliance.

Although the grill heats up quickly, it is recommended that a few minutes preheat be allowed.

It is normal for the flames on this burner to develop yellow tips as the grill heats up.
Turning off:
■ Turn the control knob clockwise to the 0 position to turn off the burner.

Always make sure the control knob is in the 0 position when you have finished using the grill.
9. Use of the oven
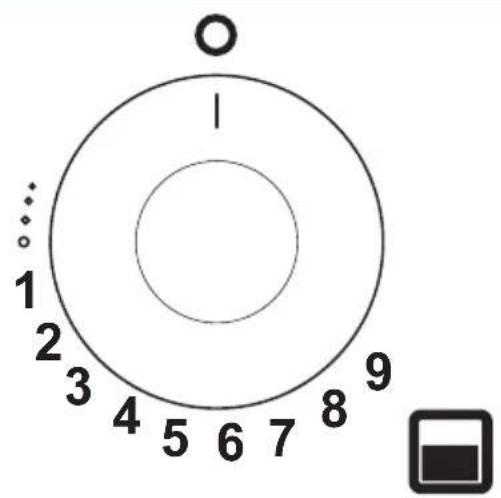
For the exact location of the control knob, see Main components.
Turning on:
■ Open the door and push in the control knob.
■ Continue pressing the knob and turn it anti-clockwise to the full rate position (240°C, gas mark 9).
- For spark ignition models: Push the ignition button.
- For non-ignition models: Hold a lit match or gas match to the burner.
- Keep the control knob pressed for about 10-15 seconds and then release it.
■ Adjust the required heat setting.
■ Place the oven shelf in the required position and close the door.

Ignition must always be carried out with the oven door open.

If the burner accidentally extinguishes turn the control knob to the 0 position and wait at least 1 minute before re-igniting the burner.

If the burner has not lit within 15 seconds turn the control knob back to the 0 position and release it. Wait at least 1 minute and repeat the steps above to turn on the appliance.

Although the oven heats up quickly, a 10 minute preheat is recommended. The oven should reach full temperature in about 15-20 minutes.
Turning off:
■ Turn the control knob clockwise to the 0 position to turn off the burner.

Always make sure the control knob is in the 0 position when you have finished using the oven.
10. Safe cooking
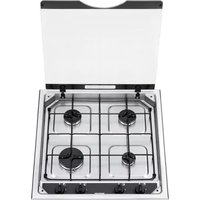
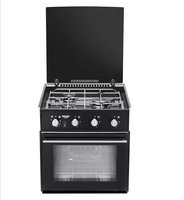
- Do not allow cooking vessels to overlap the edges of the appliance – use the correct sizes of pans and position them centrally over the burners.
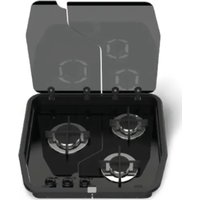
SOH440
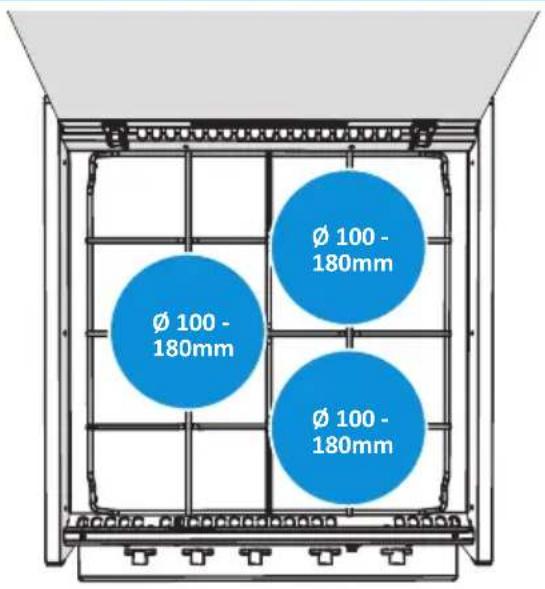
SOH720

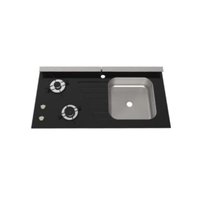
SOH730

SOH740

■ Ensure that there is at least a 10mm gap between the pans and the edges of the hob.
■ Turn the pans so that the handles do not overhang the front of the appliance.
■ Ensure that the flame of the gas burner heats the bottom of the pan, not the sides.
■ The pans and trays supplied with this appliance are the maximum sizes. Do not use larger pans and trays. They may restrict good circulation of heat, which may increase cooking times.
■ The oven shelf allows good circulation at the rear of the oven.
■ A raised bar at the rear of the shelf prevents trays or dishes making contact with the back of the oven.
■ To remove a shelf, pull it forward until it stops, raise at the front and remove.
■ To place a shelf in the oven, lower it at the front and slide it backward until it stops.
■ Do not leave the appliance unattended when in use.
■ Do not use the appliance while the vehicle is moving.
■ Turn the control knob back to the 0 position after cooking.
- Keep the appliance clean and prevent accumulation of grease and food scraps.

Never cover slots or holes in the appliance and never cover a shelf with materials such as aluminium foil. That restricts the airflow and may cause carbon monoxide poisoning.

The food shelves and trays in the appliance are hot during and after use. Allow all parts to cool before touching them, as this can cause serious injury. Always use oven gloves when removing the shelves and trays.
11. Temperature control
The temperature in the oven is controlled by a thermostatic gas tap and is variable over the range 130irc C to 240irc C.
The table below provides a guide to the approximate temperatures at each of the shelf positions with respect to the gas mark setting. Good use can be made of the temperature variation between the shelf positions, as several dishes requiring different temperatures may be cooked at the same time. In this way maximum benefit can be obtained from the gas used to heat the oven.
Table 1: Temperature zones
| Gas markiDis |  |  |  | |
| 1/4 - 1/2i90°Ci110°Ci130°CiMeringues | ||||
| 1i110°Ci130°Ci150°CiStewed fruit | ||||
| 2i120°Ci140°Ci160°CiRich fruit cake, rice pudding | ||||
| 3i130°Ci150°Ci170°CiBaked custard, shortbread fingers | ||||
| 4i140°Ci160°Ci185°CiVictoria sponge | ||||
| 5i155°Ci180°Ci200°CiWhisked sponges, ginger nuts | ||||
| 6i170°Ci190°Ci215°CiShort crust pastry | ||||
| 7i185°Ci210°Ci230°CiBread, scones, flaky pastry | ||||
| 8i200°Ci220°Ci245°CiPuff pastry | ||||
| 9i215°Ci240°Ci260°CiQuickbrowning | ||||

Care should be taken not to overload the oven, allow adequate spacing to ensure free circulation of heat.

When roasting with aluminium foil ensure the foil does not impair circulation of heat or block any oven flue outlet.
12. Maintenance and cleaning
Thetford recommends an annual inspection service by an approved service centre. Between annual servicing, clean the appliance regularly after use. Before any cleaning work is started, the appliance should have been left to cool and be disconnected from the gas and electrical supplies.
■ Always remove any spills or contamination immediately after use with soap and hot water. Towel dry the surface with a soft cloth.
■ Use a non-abrasive multi-purpose cream cleaner and a nylon scourer pad to clean more stubborn dirt or grease.
■ Use a proprietary stainless steel cleaner or polish to remove superficial surface scratching.

Do not use abrasive cleaners, metal scouring pads or hard brushes. They could damage the appliance.

If you clean the burner rings, ensure that the holes are not clogged.

Do not use harsh abrasive cleaners or sharp metal scrapers to clean the glass surface, since they can scratch the glass surface which may result in shattering of the glass.

Do not leave wet cloths, cleaning pads, residues of food or cleaning products or other dirt to dry on the surface. It can cause pitting, marking or even rusting.

Always clean in the direction of the brushed finish and not across the grain.
Cleaning agents containing bleach should not be left in contact with stainless steel.
Mineral content in water (such as iron or lime scale) can affect the appearance of the metal.
Remove any spillage from the glass lid before opening the lid.
The control knobs can be removed for cleaning. The knobs are easy to replace.
EN
13. Gas leaks
As soon as you smell gas:
■ Ensure that all burners are turned off.
■ Extinguish all naked lights and do not smoke.
■ Shut off the gas supply at the gas bottle immediately.
■ Do not use electrical switches.
■ Open all doors and windows.

LPG is heavier than air. Escaping gas accumulates at lower levels. By following the strong, unpleasant smell of gas, you can determine where the leak is located. To investigate where it is exactly, use a special leak detection spray. Never use an open flame to find the leak!
14. Troubleshooting
| ProblemiPossible causeiSolution | ||
| Burners do not burn or burn un-evenly | Gas bottle is emptyGas tap is closedBurner caps are not correctly positionedBurners are wet or clogged | Change gas bottleOpen tapAllow caps to cool, then re-position themDry or clean burners |
| Spark ignition does not sparki12 | V DC battery is dischargedConnections are looseIgnition points are wet or dirty | Charge batterySecure connectionsDry or clean ignition points |
| Control knobs do not function | Knobs are mounted incorrectly | Install knobs correctly |

If you cannot solve a problem, contact the authorised local Service Centre or Thetford Customer Service in your country.
15. Servicing
All servicing must be carried out by an approved competent person. Before any service work is started, the appliance should have been left to cool and be disconnected from both the gas and electrical supplies. After each service the appliance must be checked for gas soundness and electrical safety.
For service, please contact your authorised local Service Centre giving details of the model and serial number on the data badge plus date of purchase.
| Model Name & Series Number | ||||
| G30G31 | CAT I3 +(28-30/37)BUTANE 28-30mbarPROPANE 37mbar | CAT I3 B/P(30)BUTANE 30mbarPROPANE 30mbar | THETFORD | |
| Qn | Power kW (g/hr) | Model Number | Spark Ignition | |
| Voltage ~ 50 Hz | ||||
| CE | Pin Number | Serial Number | Power kW | |
| Country Codes 1 Country Codes 2 | QC Pass | Order No | ||
16. Putting in storage
■ Close the gas valve at the gas bottle.
■ Dual Fuel only: Disconnect the electrical supply.
■ Spark ignition models only: Disconnect the battery.
■ Ensure that the control knobs are in the 0 position.
■ Close the glass lid.
■ Close the grill door.
■ Close the oven door.
■ Wipe the appliance clean and dry.
17. Technical specifications
Table 2: Burner specifications
| SOH720 seriesiSOH740 series | ||||||||
| Gas inputInjectoriGas inputInjector | ||||||||
| SabafiSomipressiSabafiSomipress | ||||||||
| kWig/hrimmikWig/hrimm | ||||||||
| Gas burn-ers | 3 x 1.51 x 1.0 | 3 x 1081 x 72 | 0.620.50 | 0.610.52 | 2 x 1.51 x 2.5 | 2 x 1081 x 180 | 0.620.78 | 0.610.77 |
| Oven burn-er | 1.5i108 | i0.59i0.59 | i1.5i108 | i0.59i0.59 | ||||
| Grill burneri | .6i115i0.6 | 2i0.62i1.6 | i115i0.6 | 2i0.62 | ||||
| Totali8.6i619 | i8.6i619 | |||||||
| SOH730 seriesiSOH440 series | ||||||||
| Gas inputInjectoriGas inputInjector | ||||||||
| kWig/hrimmikWig/hrimm | ||||||||
| SabafiSomipressiSabafiSomipress | ||||||||
| Gas burn-ers | 2 x 1.51 x 1.0 | 2 x 1081 x 72 | 0.620.50 | 0.610.52 | 2 x 1.51 x 2.5 | 2 x 1081 x 180 | 0.620.78 | 0.610.77 |
| Hotplate burner | 1 x 800W 230-240V ~ 50Hz | |||||||
| Oven burn-er | 1.5i108i0.59i0.59i1.5i108i0.59i0.59 | |||||||
| Grill burneri1.6i115i0.62i0.62i1.6i115i0.62i0.62 | ||||||||
| Totali7.1 | (gas)800W(elec-tric) | 511i8.6i619 | ||||||


This appliance is suitable for use with LPG (Liquefied Petroleum Gas) and should not be used with any other gas.
This appliance must be earthed.
Energy consumption measurement and calculations in accordance with EN60350-2 2013
| Thetford appliance model identification | Cooking zonesiType of hob (watt) | Diameter of cooking zone | Energy consumption ECelectric\ hob Wh/kg |
| Caprice Dual Fuel cook-ers SOH730 series | 1i800W solid | hotplate | 115mmi193.1 |
To reduce energy use on the hob while cooking:
■ Use the correct size of pan – a pan which fits the hotplate will use less energy than one that is too large or too small.
■ Use the minimum heat setting to maintain simmering or boiling – additional heat is just wasted.
■ Cover pans or kettles with a lid whenever possible – this helps to retain heat.
■ Do not use old, damaged or distorted pans, they will reduce efficiency.
18. Disposal
Your product has been designed and manufactured with high quality materials and components, which can be recycled and reused. When your product has reached its end of life, dispose of the product according to the local rules. Do not dispose of the product with the normal household waste. The correct disposal of your old product will help prevent potential negative consequences to the environment and human health.
19. Questions
If you have questions about your product, parts, accessories or authorised services:
■ Visit www.thetford.com.
If you cannot solve a problem, contact the authorised local Service Centre or Thetford Customer Service in your country.
20. Warranty
Thetford BV offers the end users of its products a three-year warranty. In the case of malfunction within the warranty period, Thetford will replace or repair the product. In this situation, the costs of replacement, labour costs for the replacement of defective components and/or the costs of the parts themselves will be paid for by Thetford.
Purchased spare parts carry a one-year warranty. Any fitting and/or labour costs are not covered by warranty.
- To submit a claim under this warranty, the user must take the product to an authorised Thetford Service Partner. The claim will be assessed there.
- Components replaced during repair under warranty become the property of Thetford.
3.iThis warranty does not prejudice current consumer protection laws. - This warranty is not valid in the case of products that are used for commercial purposes.
- Warranty claims falling into one of the following categories will not be honoured:
■ The product has been improperly used or the instructions in the manual have not been followed;
■ The product has not been installed in accordance with the instructions;
■ Modifications have been made to the product;
■ The product has been repaired but not by an authorised Thetford Service Partner;
■ The serial number or product code has been tampered with or removed;
■ The product has been damaged by misuse.
EN
THETFORD
EUROPEAN HEADQUARTERS
Thetford B.V. EUROPEAN HEADQUARTER
The Netherlands 4870 AD Etten-Leur
The Netherlands
T+31 76 504 22 00
F+31765042300 T+31(0)765042200
Einfo@thétfordeu F+31(0)765042300
E info@thetford.eu
UNITED KINGDOM
Theford Ltd UNITED KINGDOM
Unit 6 Thetford Ltd.
Brookfields Way Unit 6
Manvers Rotherham Brookfields Wau
S63 5DL, England Manvers, Rotherham
United Kingdom S63 5DL, England
United Kingdom
T+44 844 997 1960
F+448449971961 F+448449971960
Einfogb@thetford.eu F+44(0)8449971961
E infogb@thetford.eu
GERMANY
95800 CERGY 11, Rue Rosa Luxembourg
France CS 40204 Eragny sur Oise 95614 Cergy Pontoise Cedex
France
T+33 1 30 37 58 23
F +33 1 30 37 97 67
Einfo@thatford.eu 58 23
F +33 (0)1 30 37 97 67
E infof@thetford.eu
ITALY
Thetford Italy c/o Tecma s.r.l.
Via Flaminia Methodo Italy c/o Tecma s.r.l.
MERCARENT AND PORTUGAL
Representative Office Scandinavia
SCANDINAVIA Hartverkaregatan 32D
5Theford B.V. Storp
Representative Office Sverige
Scandinavia
Hönekullavägen 13
43544 Mölnlycke
TSverige 336 35 80
F +46 31 44 85 70
Einfo@theford.e580
F +46 (0)31448570
E infos@thetford.eu
AUSTRALIA
Thetford Australia Pty. Ltd.
41 Lara Way
CASTRALIA Campbellfield VIC 3061
Thetford Australia Pty. Ltd.
41 Lara Way
Campbellfield VIC 3061
Australia
T+61 3 9358 0700
F+61393577060
Einfoau@metford.eu
F.61(0)393577060 www.theford.com.au
E infoau@thetford.eu
www.thetford.com.au
©Thetford 2016
CHINA
Thetford China
Rm. 1207, Coastal Building
(EastBlock)
HThetford (Shen, Zhang) Trade District.
Rm 1207, Coastal Building Shenzen, 518054
China (Fast Block) Hai De San Dao
Nanshan, Shenzhen 518059
T580755 8627 1393
F +86 755 8627 1673
Einfo@thetford.cn 363
www.theford.cn 2005
E infocn@thetford.eu
www.thetford.cn
- Cooker Caprice 440-700 Series
- DECLARATION OF CONFORMITY
- EN
- Original User Manual
- Contents
- Introduction
- Symbols
- Safety
- Main components
- Before use
- Dual Fuel only:
- Use of the burners
- Turning on:
- Turning off:
- Use of the electric hotplate (if applicable)
- Use of the grill
- Use of the oven
- Safe cooking
- Temperature control
- Maintenance and cleaning
- Gas leaks
- Troubleshooting
- Servicing
- Putting in storage
- Technical specifications
- Disposal
- Questions
- Warranty
- THETFORD
- EUROPEAN HEADQUARTERS
- UNITED KINGDOM
- GERMANY
- ITALY
- AUSTRALIA
- CHINA
Brand : THETFORD
Model : Caprice SOH72
Category : Cooker