
Digiscoping - Lens Adapter Praktica - Free user manual and instructions
Find the device manual for free Digiscoping Praktica in PDF.


| Product Type | Lens Adapter |
| Brand | Praktica |
| Model | Digiscoping |
| Compatibility | Praktica spotting scopes and cameras with standard filter threads |
| Material | Aluminum alloy with black anodized finish |
| Thread Size | 52mm (standard camera filter thread) |
| Dimensions (Diameter x Length) | ≈ 52mm x 20mm |
| Weight | Approximately 30g |
| Mounting Type | Screw-on via standard filter threads |
| Primary Function | Connect a camera to a spotting scope for digiscoping |
| Compatible Camera Types | Compact cameras, DSLRs, and mirrorless cameras with 52mm filter thread |
| Included Accessories | Adapter ring only (no lens or scope) |
| Cleaning | Wipe with a soft, lint-free cloth; avoid liquids |
| Storage | Keep in a dry, dust-free place |
| Safety Warning | Do not force the adapter onto threads; ensure proper alignment |
| Repairability | Non-repairable; replace if damaged |
| Warranty | Standard manufacturer warranty (check with retailer) |
| Country of Origin | China (typical for Praktica accessories) |
| Manual Availability | PDF download from Praktica website or user manual sites |
Frequently Asked Questions - Digiscoping Praktica
User questions about Digiscoping Praktica
0 question about this device. Answer the ones you know or ask your own.
Ask a new question about this device
Download the instructions for your Lens Adapter in PDF format for free! Find your manual Digiscoping - Praktica and take your electronic device back in hand. On this page are published all the documents necessary for the use of your device. Digiscoping by Praktica.
USER MANUAL Digiscoping Praktica
Attach your SLR camera to your spotting scope in a matter of seconds and take photographs at long range. All you need is an SLR camera, a spotting scope with an eyepiece diameter 28-42mm, the PRAKTICA Digiscoping Camera Adapter and a T2 Mount.
Set up is easy, just follow these simple steps!
- Screw the DSLR camera adapter onto the T2 Mount.
- Place the camera adapter over the spotting scope eyepiece and screw into the thread.
- Remove your DSLR lens from your camera body and then attach your camera to the T2 Mount.

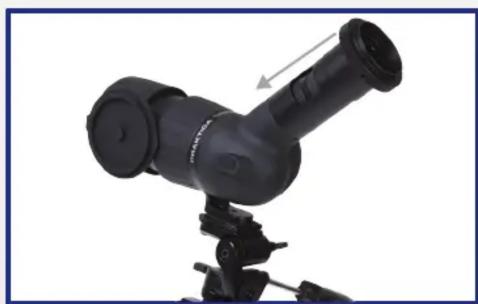
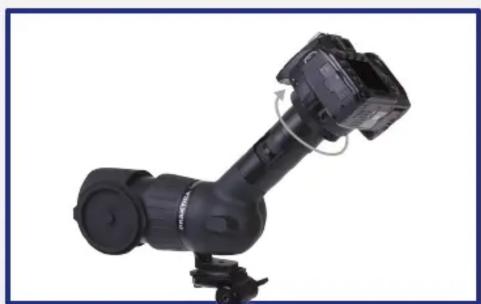
When using an adapter the range of exposure modes and metering is limited. On most cameras you can use manual or aperture-priority modes, and centre-weighted metering.
It's important to note that you cannot adjust the aperture when using a spotting scope. Use the automatic ISO setting on your camera to adjust the exposure without relying simply on the shutter speed. Limit the ISO to 1600, and set the minimum shutter speed to 1/500 sec to get sharp results.
You will have to use manual focus when digiscoping, and this can be difficult to judge due to the limited depth of field and the small maximum apertures of most spotting scopes. Roughly focus the scope on your subject then fine tune your focusing slowly until it is spot-on.
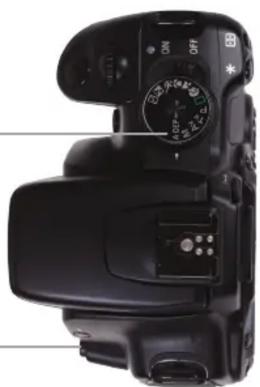
When finished press the camera lens release button on your DSLR to dismantle the T2 Mount.
DSLR Camera Settings
Shutter speed at minimum of 1/500 sec Limit ISO to 1600
Set to centre weighted metering
![DNS MENU 2.1..8..1..2 1/500 F00 ISO 1600 M AVB MF L [1486] ISO AF WB](/content/2026/05/981146/images/5d80d74a49b014dd53833d942d7e46dfd7219a9563123d254e99045498cacfaf.jpg)
Use Manual or Aperture
Priority modes
Lens release button
dismantles the mount

Brand : Praktica
Model : Digiscoping
Category : Lens Adapter