CFC-610 - Cables for Computers and Peripherals Auray - Free user manual and instructions
Find the device manual for free CFC-610 Auray in PDF.


| Product Type | Cable Replacement Kit |
| Brand | Auray |
| Model | CFC-610 |
| Compatibility | Auray CFP series carbon fiber boom poles (bottom exit and side exit XLR) |
| Cable Type | High-quality coiled cable |
| Connector 1 | Right-angle XLR (Neutrik®) |
| Connector 2 | TA3 (mini XLR, Rean®) |
| Design | Solderless, easy replacement |
| Strain Relief | Unique system absorbs tension at tip exit and TA3 connector |
| Included Accessories | Hex key, nylon line (for cable routing) |
| Required Tools (not included) | Small slotted screwdriver |
| Warranty | 1-year limited warranty |
| Manufacturer | Auray (Gradus Group) |
| Country of Origin | Not specified |
| Weight | Approx. 0.2 lbs (est.) |
| Cable Length | Approx. 3 ft (coiled, est.) |
Frequently Asked Questions - CFC-610 Auray
User questions about CFC-610 Auray
0 question about this device. Answer the ones you know or ask your own.
Ask a new question about this device
Download the instructions for your Cables for Computers and Peripherals in PDF format for free! Find your manual CFC-610 - Auray and take your electronic device back in hand. On this page are published all the documents necessary for the use of your device. CFC-610 by Auray.
USER MANUAL CFC-610 Auray
Cable Replacement Kit
for CFP Series Carbon Fiber Boom Poles
Owner's Manual
Introduction
Thank you for choosing Auray.
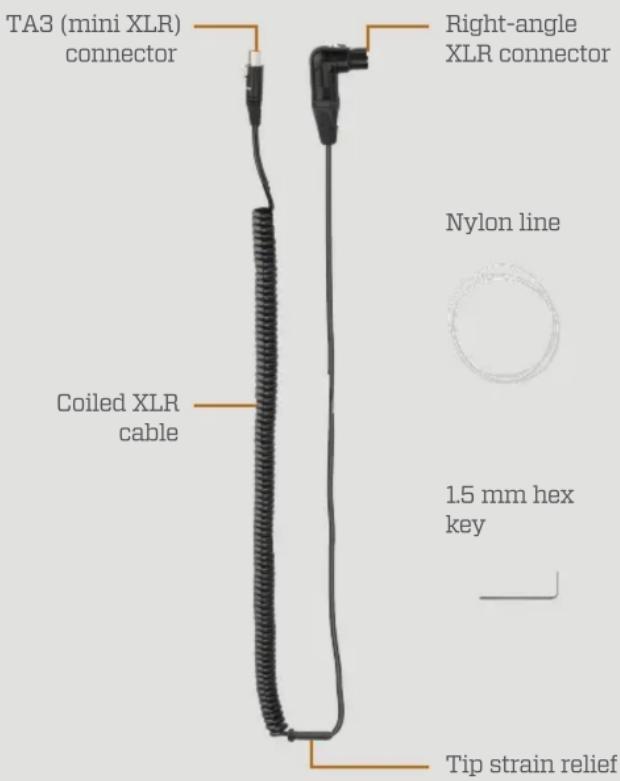
The Auray CFC replacement kit provides a replacement cable for the Auray CFP carbon fiber boom pole. Auray's solderless design provides a fast and easy solution for cable replacement.
The high-quality coiled cable features a right-angle XLR connector manufactured by Neutrik ^® , and a TA3 (mini XLR) connector manufactured by Rean ^® (a registered trademark of Neutrik ^® ) for secure locking connections and flawless signal transfer. This cable also features Auray's unique strain relief system that absorbs tension and protects the cable from damage at the edge of the tip exit and at the T3 connector. The included hex key and a small slotted screwdriver (not included) are the only tools needed for this cable replacement procedure that will assure long-lasting and trouble-free operation of your CFP boom pole.
Replacing the Cable - Boom Pole with Bottom Exit XLR
Remove the old cable
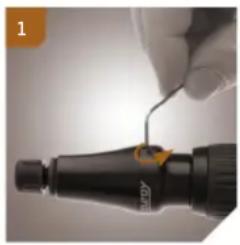
- Use the hex key to loosen the set screw on the tip. 1
- Remove the tip by unscrewing it. 2
- Lift the cable and strain relief out of the tip exit slot. 3
Tip: Before proceeding, push a small length of cable into the tube from the tip of the pole. This will give you enough slack to complete the following steps.
- Unscrew the bottom housing from the base of the boom pole. 4
- Unscrew the plastic TA3 strain relief. 5
- Disconnect the TA3 connector by pressing on the locking tab and gently removing the connector from the mount.
Note: The TA3 connector should easily disconnect. Do not force or pull on the cable to disconnect it. Doing so could damage the housing or the connector.
- Use a small slotted screwdriver to reach inside the strain relief and depress the locking tab of the TA3 connector. 6 With the locking tab depressed, you can slide the strain relief over the TA3 connector and off of the cable. Set the strain relief piece aside.
natural_image
Close-up of a hand holding a pen tip with a circular arrow indicating motion (no text or symbols visible)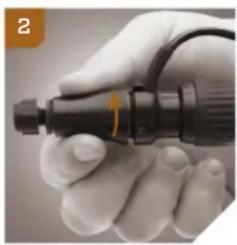
natural_image
Close-up of a gloved hand holding a handheld electronic device (no visible text or symbols)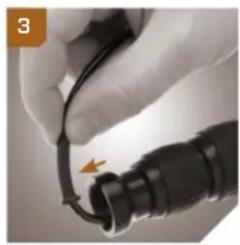
natural_image
Close-up of a hand holding a black cable with a yellow arrow pointing to it, next to a black connector (no text or symbols visible)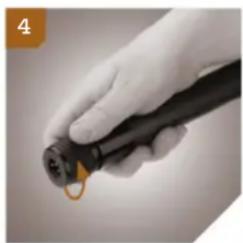
natural_image
Close-up of a hand holding a black handheld device with a yellow ring, no visible text or symbols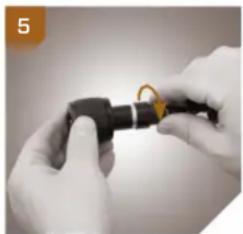
natural_image
Close-up of hands holding a black mechanical component with a yellow ring, no visible text or symbols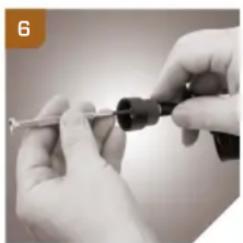
natural_image
Close-up of hands holding a small mechanical tool or tool, no visible text or symbolsAlternative: Use a wire cutter to snip the cable at the base of the TA3 connector. Remove the strain relief, and set it aside.
Important: Once you have performed this step, the cable will be unusable. If you plan on using the cable again at a later point, don't proceed with this alternative step.
- Remove the cable by pulling it out from the top of the pole.
Install the replacement cable
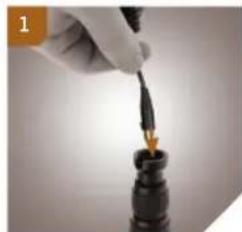
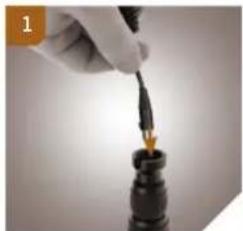
- Holding the boom pole upright, insert the replacement cable into the top of the boom pole, 1 and snake it through the tubing until the TA3 connector is exposed at the bottom of the pole. 2
Note: If the cable does not move smoothly through the tubing, use the included nylon line: tie the line to the TA3 connector and drop it through the tubing from the top. 3 Pull the string from the bottom of the boom pole to snake the cable through the tubing. Make sure to remove the line before continuing.
-
Fit the narrow side of the strain relief over the TA3 connector, and push it past the TA3 connector's locking tab. 4
-
Plug the TA3 connector to the bottom housing by inserting it into the TA3 mount and pushing in until it clicks.
Note: When properly aligned, the TA3 connector will easily slide into place. Do
natural_image
Close-up of a hand holding a small object with a pointed tip, emitting orange light from a black cylindrical object (no text or symbols visible)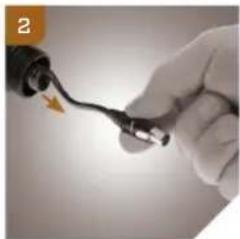
natural_image
Close-up of a hand holding a black cable with an orange arrow pointing to it, against a plain background (no text or symbols visible)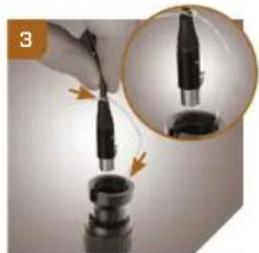
natural_image
Close-up of a hand using a pen to apply liquid onto a small cylindrical object, with an inset showing the same tool (no text or symbols visible)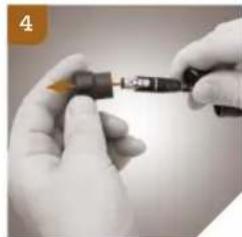
natural_image
Close-up of gloved hands holding a small object with a pen, no visible text or symbols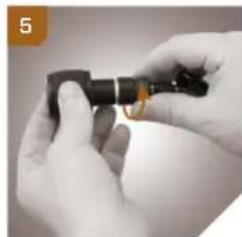
natural_image
Close-up of hands holding a small mechanical component (no visible text or symbols)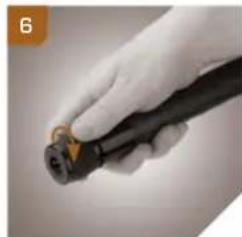
natural_image
Hand holding a black handheld device with a small orange button, against a plain background (no text or symbols visible)not try to force the connector into the mount. Doing so could damage the connector or the mount.
-
Screw the threaded end of the strain relief onto the threaded fitting on the bottom housing 5
-
Screw the bottom housing onto the end of the boom pole. 6
-
Place the strain relief of the cable into the tip exit slot.
-
Replace the tip by screwing it on, and secure it by tightening the set screw with the hex key.
Replacing the Cable - Boom Pole with Side Exit XLR
Remove the old cable
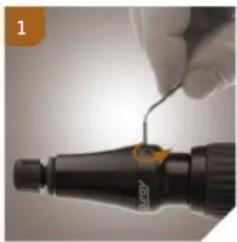
- Use the hex key to loosen the set screw on the tip. 1
- Remove the tip by unscrewing it. 2
- Lift the cable and strain relief out of the tip exit slot. 3
Tip: Before proceeding, push a small length of cable into the tube from the tip of the pole. This will give you enough slack to complete the following steps.
- Unscrew the side exit housing, 4 and move the plastic strain relief cap so that the TA3 connector inside the housing is exposed.
5 Disconnect the TA3 connector by pressing on the locking tab and gently remove the connector from the mount. 5
Note: The TA3 connector should easily disconnect. Do not force or pull on the cable to disconnect it. Doing so could damage the housing or the connector.
- Use a small slotted screwdriver to reach inside the strain relief and depress the locking tab of the TA3 connector. With the locking tab
natural_image
Close-up of a hand holding a small tool tip next to a black handheld device (no visible text or symbols)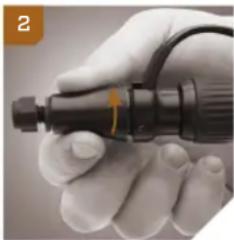
natural_image
Close-up of a gloved hand holding a black cylindrical device with a cable, no visible text or symbols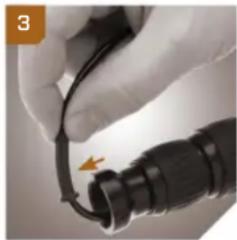
natural_image
Close-up of a hand holding a black cable with a small connector, no visible text or symbols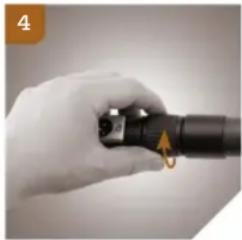
natural_image
Close-up of a hand holding a black cylindrical object with an arrow indicating rotation (no text or symbols visible)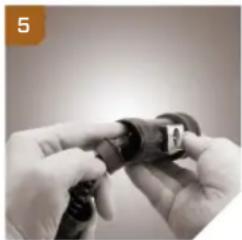
natural_image
Close-up of hands holding a small electronic component, possibly a plug or connector (no visible text or symbols)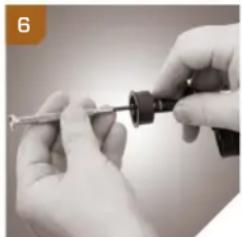
natural_image
Close-up of hands holding a small mechanical component (no visible text or symbols)depressed, you can slide the strain relief over the TA3 connector and off of the cable 6 Set the strain relief piece aside.
Alternative: Use a wire cutter to snip the cable at the base of the TA3 connector. Remove the strain relief, and set it aside.
Important: Once you have performed this step, the cable will be unusable. If you plan on using the cable again at a later point, don't proceed with this alternative step.
- Remove the cable by pulling it out from the top of the pole.
Install the replacement cable
- Holding the boom pole upright, insert the replacement cable into the top of the boom pole, 1 and snake it through the tubing until the TA3 connector is exposed at the bottom of the pole. 2
Note: If the cable does not move smoothly through the tubing, use the included nylon line. Tie the string to the TA3 connector, 3 and drop it through the tubing from the top. Pull the line from the bottom of the boom pole to snake the cable through the tubing. Make sure to remove the line before continuing.
-
Fit the narrow side of the strain relief over the TA3 connector, and push it past the TA3 connector's locking tab. 4
-
Plug the TA3 connector into the side-exit XLR housing by inserting it into the TA3 mount and pushing in until it clicks.
Note: When properly aligned, the TA3 connector will easily slide into place. Do not try to force the connector into the
natural_image
Close-up of a hand holding a small object with a lit flame, possibly a tool or device (no visible text or symbols)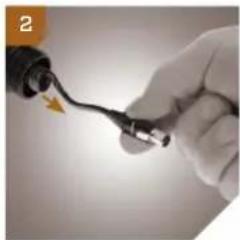
natural_image
Close-up of a hand holding a black cable with a yellow arrow pointing to it, against a plain background (no text or symbols visible)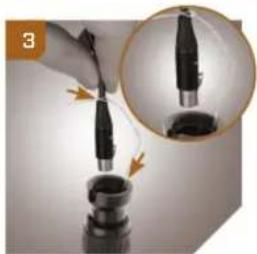
natural_image
Close-up of a hand holding a pen tip, with an inset magnified view showing the tip being pointed (no text or symbols visible)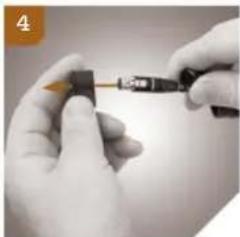
natural_image
Close-up of gloved hands holding a small electronic component (no visible text or symbols)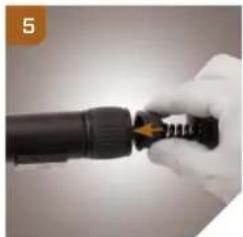
natural_image
Close-up of a hand holding a black connector with a yellow arrow pointing to it, against a plain background (no text or symbols visible)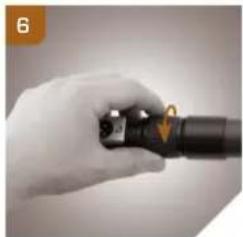
natural_image
Close-up of a hand holding a black cylindrical object with a metallic knob, no visible text or symbolsmount. Doing so could damage the connector or the mount.
-
Push the strain relief all the way into the side exit housing so it sits over the TA3 connector. 5
-
Screw the side exit housing onto the end of the boom pole. 6
-
Place the strain relief of the cable into the tip exit slot.
-
Replace the tip by screwing it in, and secure it by tightening the set screw with the hex key.
-
Please read and follow these instructions, and keep this manual in a safe place.
- Handle the product with care.
• Use only parts provided by the manufacturer.
• Make sure the item is intact and that there are no missing parts. - Do not attempt to disassemble or repair the equipment—doing so will void the warranty, and Auray will not be responsible for any damage.
• All photos are for illustrative purposes.
One-Year Limited Warranty
This Auray product is warranted to the original purchaser to be free from defects in materials and workmanship under normal consumer use for a period of one (1) year from the original purchase date or thirty (30) days after replacement, whichever occurs later. The warranty provider's responsibility with respect to this limited warranty shall be limited solely to repair or replacement, at the provider's discretion, of any product that fails during normal use of this product in its intended manner and in its intended environment. Inoperability of the product or part(s) shall be determined by the warranty provider. If the product has been discontinued, the warranty provider reserves the right to replace it with a model of equivalent quality and function.
This warranty does not cover damage or defect caused by misuse, neglect, accident, alteration, abuse, improper installation or maintenance. EXCEPT AS PROVIDED HEREIN, THE WARRANTY PROVIDER MAKES NEITHER ANY EXPRESS WARRANTIES NOR ANY IMPLIED WARRANTIES, INCLUDING BUT NOT LIMITED TO ANY IMPLIED WARRANTY OF MERCHANTABILITY OR FITNESS FOR A PARTICULAR PURPOSE. This warranty provides you with specific legal rights, and you may also have additional rights that vary from state to state.
To obtain warranty coverage, contact the Auray Customer Service Department to obtain a return merchandise authorization (“RMA”) number, and return the defective product to Auray along with the RMA number and proof of purchase. Shipment of the defective product is at the purchaser’s own risk and expense.
For more information or to arrange service, visit www.aurayaudio.com or call Customer Service at 212-594-2353.
Product warranty provided by the Gradus Group. www.gradusgroup.com
Auray is a registered trademark of the Gradus Group. © 2016 Gradus Group LLC. All Rights Reserved.
Brand : Auray
Model : CFC-610
Category : Cables for Computers and Peripherals