CGP220 - Piano Kurzweil - Free user manual and instructions
Find the device manual for free CGP220 Kurzweil in PDF.


| Product Type | Digital Piano |
| Keyboard | 88-note, fully-weighted, graded hammer-action with adjustable touch sensitivity (10 levels) |
| Voices | 128 preset voices + 8 drum kits |
| Polyphony | 64 voices |
| Effects | Reverb, Echo, Delay, Chorus; dual processors |
| Sound System | 4 amplifiers, 4 speakers, 200 watts stereo |
| Rhythm Patterns | 98 preset patterns + metronome (5 patterns) |
| Recorder | 2-track song recorder with rhythm accompaniment; 20 user song locations |
| Demo Songs | 51 built-in classical demonstration songs |
| Connections | MIDI In/Out/Thru, USB (Plug & Play), Audio In/Out (RCA), 2 headphone jacks (1/4") |
| Pedals | 3 built-in pedals (Soft, Sostenuto, Sustain); optional continuous controller pedal (CC-1) |
| Power Supply | AC 100-240V, 50/60Hz, auto-detecting; 3A, 250V max |
| Auto Power Off | Yes, with selectable time (15 min, 30 min, 1/2/4 hours) or disabled |
| Dimensions (W x D x H) | 54 3/4" x 19 5/8" x 34 1/2" (1399 x 498 x 876 mm) with lid closed |
| Weight | 221 lbs (100 kg) |
| Accessories Included | AC power cord, matching bench, user manual, warranty card |
| Finish | Ebony Polish |
| Display | 16-character alphanumeric LCD with contrast control |
| Splits & Layers | Split mode (adjustable split point) and Layer mode (adjustable volume/transposition) |
| Special Features | 6 user Favorite presets, Transpose (-24 to +24 semitones), Tune (A=440 ±100 cents), quick-access Piano button |
Frequently Asked Questions - CGP220 Kurzweil
User questions about CGP220 Kurzweil
0 question about this device. Answer the ones you know or ask your own.
Ask a new question about this device
Download the instructions for your Piano in PDF format for free! Find your manual CGP220 - Kurzweil and take your electronic device back in hand. On this page are published all the documents necessary for the use of your device. CGP220 by Kurzweil.
USER MANUAL CGP220 Kurzweil
The lighting light in the unrefined symbol with an via-lateral charge is introduced to avoid the water in the presence of a white liquid "angrenous voltager" within the products procedure that may be at sufficient resolution to provide a risk of electric shock to persons.
The examination point within an aquilateral range is introduced to avoid the user to the presence of important operating and maintenance (servicing) instruction in the literature accompanying the product.
IMPORTANT SAFETY & INSTALLATION INSTRUCTIONS
INSTRUCTIONS PERTAINING TO THE RISK OF FIRE, ELECTRIC SHOCK, OR INJURY TO PERSONS
WARNING: When using electric products, basic precautions should always be followed, including the following.
1. Road all of the Safety and Installation Instructions and Explanation of Graphic Symbols before using the product.
2. Do not use this product near water - for example, more a ballbuck, washboat, kitchen sink, in a wet basement, or near a swimming pool or the life.
8. This product should only be used with a stand or eet that is recommended by the manufacturer.
4. This product, either alone or in combination with an impulse and speakers or headphones, may be capable of producing sound levels that could cause permanent hearing loss. Do not operate for a long period of time at a high volume level or at a fixed that is uncomfortable. If you experience any hearing loss or ringing in the case, you should consult on ecologists.
5. This product should be located so that its location or position does not interfere with its proper ventilation.
6. This product should be inclined away from best sources such as radiators, heat registers, or other products that produce heat.
7. This product should be connected to a power supply only of the type described in the operating instructions or as marked on the product.
- This product may be equipped with a polarized line plug (one blade wider than the other). This is a safety fixture. If you are undire to insert the plug into the outlet, contact an electrician to replace your chocolate outlet. I'm not defined the safety purpose of the plug.
- The power supply cord of the product should be unplugged from the outlet when left unused for a long period of time. When unplugging the power supply cord, do not part on the cord, but grasp it by the plug.
- Cause should be taken out that aspects do not fall and liquid are not spilled into the enclosure through openings.
- The product should be serviced by qualified service personnel where: A. The power supply cost or the plug has been damaged; B. Objects have fallen, or kurd has been spilled into the product; C. This product has been exposed to iron; D. The product does not appear in the operating normally or exhibits a marked change in performance;
- Do not attempt to service for product beyond that described in the user maintenance instructions. All other servicing should be referred to qualified service personnel.
- WARNING: Do not place objects on the product's power supply cord, or place the product in a position where anyone could trip over, walk on, or mill anything near sums of any type. Do not show the product in next or be installed over cords of any type. Improper installations of this type prevent the possibility of a few thousand smaller purposes injury.
RADIO AND TELEVISION INTERFERENCE
WARNING: Changes or modifications to the instrument not expressly approved by Kurzwell could void your authority to operate the instrument. IMPORTANT: When connecting this product to accessories and/or other equipment use only high quality thickied cables.
NOTE: This instrument has been tested and found to comply with the limits for a Close B digital doctor, pursuant to Part 15 of the FCC Rules. Those limits are designed to provide reasonable protection against harmful interference in a residential installation. This instrument generates use, and can reduce radio frequency energy and, if not installed and used in accordance with the instructions, may cause harmful interference to radio communications. However, there is no guarantees that interference will not matter in a particular mechanism. If this instrument uses cause harmful interference to radio or television reception, which can be determined by turning the instrument off and on, the user is encouraged to try to correct the interference by sum or more of the following measures:
- Connect or reducts the routing scheme.
- Increase the separation between the instrument and the receiver.
- Connect the instrument into an outlet on a circuit other than the one to which the receiver is connected.
- If necessary consult your dealer or an experienced radiostelevision technoln for additional suggestions.
The normal function of this product may be disturbed by strong electro magnetic interference. If so, simply read the product to normal normal operation by following the instruction manual. In case the function could not resume, please use the product in another location.
NOTICE: This apparatus does not exceed the Class B limits for radio noise emissions from digital apparatus set out in the Radio Interference Regulations of the Canadian Department of Communications.
AVIS: Le présent apparaé numerique n'élé par de brute radiocélectrique déposant les limites applicables aux apparels numeriques de la class B prescitera dans le Régulament sur le brouillage radiocélectrique article par la ministère des Communications en Canada.
SAVE THESE INSTRUCTIONS
IMPORTANT SAFETY INSTRUCTIONS
- Read these instructions.
- Keep these instructions.
- Head all warnings
- Follow all instructions.
- Do not use this apparatus near water.
-
Clean only with dry cloth.
-
Do not block any of the ventilation openings. Install in accordance with the manufacturer's instructions.
-
Do not install near any heat sources such as radiators, heat registers, stoves, or other apparatus (including amplifiers) that produce heat.
-
Do not defeat the safety purpose of the polarized or grounding-type plug. A polarized plug has two blades with one wider than the other. A grounding type plug has two blades and a third grounding prong. The wide blade or the third prong is provided for your safety. If the provided plug does not fit into your outlet, consult an electrician for replacement of the obsolete outlet.
-
Protect the power cord from being walked on or pinched, particularly at plugs, convenience receptacles, and the point where they exit from the apparatus.
-
Only use attachments/accessories specified by the manufacturer.
- Use only with a cart, stand, tripod, bracket, or table specified by the manufacturer, or sold with the apparatus. When a cart is used, use caution when moving the cart/apparatus combination to avoid injury from tip-over.
-
Unplug this apparatus during lightning storms or when unused for long periods of time.
-
Refer all servicing to qualified service personnel. Servicing is required when the apparatus has been damaged in any way, such as power-supply cord or plug is damaged, liquid has been spilled or objects have fallen into the apparatus, the apparatus has been exposed to rain or moisture, does not operate normally, or has been dropped.
-
Allow adequate ventilation for the power adapter. Do not hide it under a carpet or behind a curtain or place it in an enclosed space where heat buildup can occur.
WARNING: To reduce the risk of fire or electric shock, do not expose this apparatus to rain or moisture.
Do not expose this equipment to dripping or splashing and ensure that no objects filled with liquids, such as vases, are placed on the equipment. To completely disconnect this equipment from the AC Mains, disconnect the power supply cord plug from the AC receptacle.
©2014 Young Chang Co., Ltd. All rights reserved. Kurzwell® is a product line of Young Chang Co., Ltd. Kurzwell®, Young Chang®, V.A.S.T®, Andante®, and CGP220 ^™ are trademarks of Young Chang Co., Ltd. All other trademarks and copyrights are property of their respective companies. Product features and specifications are subject to change without notice.
Kurzweil International Contacts
Contact the appropriate Kurzweil office listed below to locate your local Kurzweil representative.
US Customers:
American Music & Sound
925 Broadbeck Drive. #220
Newbury Park, CA
Tel 800 431 2609
Fax 866 707 0717
info@americanmusicandsound.com
Customers outside the US:
Young Chang Co., LTD.
9th Floor, Bldg 102, I-Park
Jeongia-Dong, Bundang-Gu, Seongnam-Si
Gyennogi-Dn 463-859
South Korea
Tel: +92 31 788 7900
www.venipps.co.kr
www.youngchang.com
(2)本次股东大会的召集和召开情况

www.kurzweil.com

support@kurzweil.com

www.facebook.com/kurzweilmusicsystems/

www.twitter.com/KurzweilMusic

www.youtube.com/user/KurzweilTutorials
TABLE OF CONTENTS
| INTRODUCTION | 1 |
| Primary Features | 1 |
| Andante CGP220 Carton Content | 1 |
| GETTING STARTED | |
| Assembly Instructions for Andante CGP220 | 2 |
| Power Switch | 4 |
| Sound and Volume | 4 |
| Headphone Jacks | 4 |
| Quick Start | 5 |
| OVERVIEW | |
| Input/Output Panel | 6 |
| Front Panel Display, Buttons and Controls | 7 |
| Button Operations | 10 |
| Operating Modes | 11 |
| DEMO MODE | 12 |
| Selecting Demo Songs 12 | |
| Voice Demo 12 |
| VOICE MODE | 13 |
| Selecting Voices 13 | |
| Changing Category Default Voices 14 | |
| Using Variations 14 | |
| Storing a Favorite Voice 14 |
| LAYER MODE......15 | |
| Layer Mode Navigation Buttons | 15 |
| Layer Mode Parameters | 15 |
| Saving Layered Voices | 16 |
| SPLIT MODE | 18 | |
| Split Mode Navigation Buttons | 18 | |
| Selecting Split Mode Voices | 18 | |
| Split Mode Parameters | 18 | |
| Saving and Changing Split Voices | 20 | |
| RHYTHM MODE | 21 |
| Entering Rhythm Mode | 21 |
| Selecting and Playing a Rhythm Pattern | 21 |
| Using a Practice Metronome Pattern | 22 |
| Changing the Default Rhythm Pattern | 22 |
| Changing the Rhythm Tempo | 22 |
| Rhythm Mode Parameters | 23 |
CONTENTS, CONTINUED
Chapter 1
INTRODUCTION
RECORDING 24
Enabling Rhythms while Recording 24
Using a Metronome while Recording 24
Recording Track 1 24
Recording Track 2 25
Selecting a Song 25
Recording over a Track 26
Erasing A Track 26
Punch-Ins 26
Erasing A Song 27
FUNCTION MODE 28
Selecting and Saving Function Parameters 28
Transpose 28
Effect Level 28
Touch 29
Tune 29
MIDI Channel 29
Metronome 30
Rec Rhythm 30
Local Control 30
Auto Power Off 30
Auto Power Off Time 30
Audio Input 30
Hard Reset (Restoring Factory Defaults) 31
OS/Objects Version 31
MIDI 32
About MIDI 32
MIDI Channels 32
MIDI In and Out and Thru Ports 32
USB MIDI Connection 33
Using Windows applications for MIDI control 33
APPENDIX 34
Andante CGP220 MIDI Implementation Chart 34
Voice List 35
Rhythm Patterns 37
Demo Song List 38
Andante CGP220 Features 39
INDEX 40
page ii
Congratulations on your purchase of the Kurzweil Andante CGP220. You are certain to enjoy many hours exploring the variety of features as well as the beautiful preset voices.
The Andante CGP220 is designed with the same sound technology from the world acclaimed Artis and PC3 Series keyboards. It includes Kurzweil's new German Grand piano.
Primary Features
• 85-Note, Fully-Weighted, Graded Hammer-Action Keyboard
• 4 Amplifier, 4 Speaker, 200 Watt Stereo Sound System
• 128 Preset Voices
• 98 Preset Rhythm Patterns
• 8 Drum Kits
• 16-character alphanumeric LCD display
• Layering, Split, Transpose, Tuning
• Variation, Metronome, and Tempo buttons
- 6 user "Favorites" presets
• 10 levels of keyboard sensitivity
• Two track recording with 20 User song presets
• Dedicated button to select the Grand Piano voice
- Preset Effects including Reverb, Echo, Delay, and Chorus
• 51 Built In Demo Songs & Voice Demo feature
• Stereo Audio Input and Output Jacks
• 2 Headphone Jacks
• Standard MIDI In, Out and Thru
• USB "Plug & Play" Computer Port
- Matching Bench Included
Andante CGP220 Carton Content
Your new Andante CGP220 carton should have the following:
• Andante CGP220 instrument (main cabinet)
- AC power cord
- Piano Bench
• Andante CGP220 legs (3) and pedal box (with support rods and bolts)
- Warranty Card
• Andante CGP220 User's Manual (this manual)
If you are missing any of the above, please contact your Kurzweil dealer. It is always a good idea to save the Andante CGP220 cartons, in case they are needed for shipment.
Follow the procedure on the following pages to assemble the Andante CGP220.
Chapter 2
GETTING STARTED
Assembly Instructions for Andante CGP220
In addition to the main piano cabinet, your CGP220 should come with the parts shown below. Three people will be need to complete the assembly, as the piano cabinet must first rest on the floor with support. Then the entire instrument must be lifted once the legs are securely attached.
| Item | Part Name | Shape | Q'ty | Screw | Q'ty |
| 1 | LEG | 3 | 12 | ||
| 2 | PEDAL BOX |  | 1 | 2 | |
| 3 | PEDAL SUPPORT ROD |  | 2 | 8 |
STEP 1:
A) Place piano cabinet and legs on a carpeled floor or blanket. Till the cabinet so that the underside is accessible.
B) Align each of the 3 legs to the foot holes, as shown, using the hexagon wrench provided to secure each leg with 4 bolts. Be sure to tighten all screws.
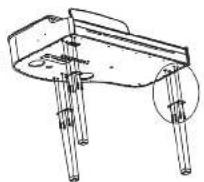
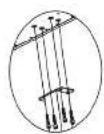
STEP 2:
Align the pedal box with the pedal box assembly holes, as shown, and secure with 2 bolts, using the hexagon wrench to firmly lighten them.
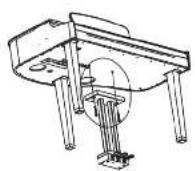
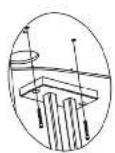
page 2 page 3
Chapter 2
GETTING STARTED
STEP 3:
Place main piano unit facing forward. First set pedal support rods into the rear of the pedal box, then line up the other end of the rod to the support rod holes on the underside of the main cabinet. Use the 8 screws provided to secure the rods.
STEP 4:
Move the piano into an upright position.
Using 3 people, one near each leg, lift the piano body straight upward with legs parallel to the floor. Then tilt backward until all 3 legs are vertical. Finally, lower the body until the legs touch the floor.
To avoid possible damage, don't let the weight of the body rest on the legs until they are vertical.
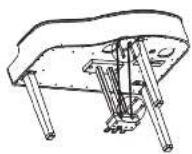


CAUTION: THE PIANO CABINET WILL NOT SAFELY SIT UNSUPPORTED ON THE LEGS UNTIL ALL OF THE BOLTS ARE IN PLACE. HAVE AN ASSISTANT HOLD THE CABINET WHILE THE BOLTS ARE BEING SECURED.
RAISING THE PIANO LID:
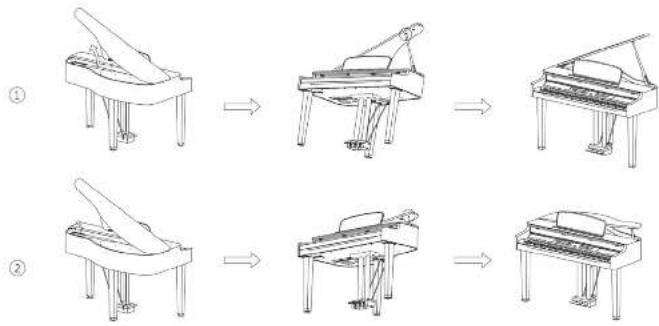
The CGP220 has lid support rods allowing two (optional) open positions: low and high. Raise the lid, then lift the support rod, holding the lid with your hand while seating the rod in the desired hole on its underside. The long rod will lift in the inner hole (for high position, shown in Fig. 1 below) and the short rod into the outer hole (for the low position, shown in Fig. 2). Be sure you have seated the rod correctly, so that the lid will remain safely supported when open.
flowchart
graph LR
    A["①"] --> B["②"]
    B --> C["③"]
    C --> D["④"]
    D --> E["⑤"]
Chapter 2
GETTING STARTED
Power Switch
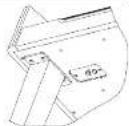
Connect the power cord to the AC receptacle on the underside of the Andante CGP220. Standard AC current supplies the Andante CGP220's power. Before connecting the Andante CGP220's AC power cord, make sure that the power switch (located on the left, underneath the keyboard) is in the OFF position. Then connect the power cord to an AC outlet.
Turn power on by using the switch is located underneath the left of the keyboard.
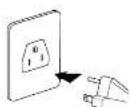
The AC plug space will vary.

CAUTION: The CGP220 runs on AC power and works with voltages from 100 - 240 volts at 50-60 Hz. The voltage level is detected and set automatically by the CGP220. Do not attempt to connect to a non-standard AC power source.
While the unit is performing its power-up routine some of the front panel button LEDs will flash. After a couple of seconds, the display will read 1 Concert Piano. The Andante CGP220 is now ready to play.
Use the Quick Start instructions on the following pages for the basic steps to change Voices, play Rhythm Patterns, and play one of the 51 Demo Songs.
Sound and Volume
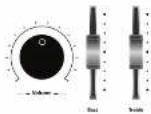
Before turning on the Andante CGP220, it's always a good idea to set the volume at its minimum setting (all the way to the left). For a generally comfortable level of volume while playing, set the knob at its middle position.
The Volume Control is located on the left side of the control panel. Turn this knob from left to right to increase the volume.
Headphone Jacks
The Andante CGP220 has two 1/4" headphone jacks conveniently located under the keyboard, near the left leg on the cabinet underside. Plugging in headphones provides privacy during practice. Both jacks operate the same so two people can play and hear the music together. When headphones are connected the Andante CGP220's speakers are silent.
page 4 page 5
Chapter 2
GETTING STARTED
Quick Start
Playing the Voices
- Turn on the power.
- The Voice button LED is lit and the first voice (1 Concert Piano) is ready to play.
- To play another voice, press any category button and play.
- There are a number of different voices available under each category button. Press the Prev- or +Next button to step through the available voices.
- There are two Voice Bank rows and an LED at the beginning of each row that, when lit, tells you it is the active row. To select a voice from a category listed in the second Voice Bank row, press the Voice button.
- The LED at the beginning of the second row should be lit.
- Select a category button and play.
- Press the Voice button again to return to the top row.
Playing a Rhythm Pattern
- Press the Rhythm button.
- Select a Rhythm Pattern from one of the categories and pressing a category button.
- There are a number of different rhythm patterns available under each category button. Press the Prev- or +Next button to step through the available rhythm patterns.
- Press the Play/Stop button, located on the top left side, to start the rhythm.
- Press the Play/Stop button again to stop it.
Playing a Demo Song
- Press the Demo button.
- The first demo song immediately plays. The Andante CGP220 continues to play each of the 51 demo songs until you press the Play/Stop, Demo or Voice buttons.
- At any time you can press the Play/Stop button to start or stop playing a demo song.
- Press the Prev-or+Next button to play the previous or next demo song
- Simultaneously press the Prev- and +Next buttons to jump ahead 10 songs at a time.
- Press the Voice button to exit Demo Mode.
Chapter 3
OVERVIEW
Input/Output Panel
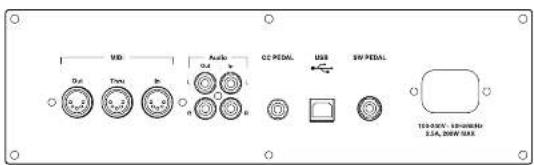
The Input/Output panel is located on the underside of the piano body, behind the power switch and headphone jacks.
Audio In and Audio Out
Audio Out (RCA jacks) may be used to connect the Andante CGP220 to external audio equipment, such as an outboard mixer, powered speakers, or recording device.
Audio In jacks are used to connect the Andante CGP220's internal speakers to other devices such as a digital audio player or CD player. Always turn off the Andante CGP220's power before plugging or unplugging cables into the Audio In jacks.
The Andante CGP220's Volume and Tone Controls do not affect the volume or tone of the sound coming from the Audio In jacks. Therefore it is best to use a device that has its own output level control and to use that to adjust the sound volume from the external device.
MIDI In, Out and Thru
Use the MIDI In, Out and Thru ports to connect the Andante CGP220 to other MIDI devices to receive and send MIDI data.
CC Pedal (Volume/Expression Pedal)
This jack is used to connect a continuous controller pedal for volume and expression control. Our keyboards require a pedal with a TRS 14" connector and 10k linear potentiometer. Most manufacturers EXCEPT Yamaha and Korg make pedals with the same specifications and should work. Yamaha and Korg pedals typically use an exponential potentiometer and therefore will not work correctly. The CC-1 pedal is available from Kurzwell. You can order a pedal through your local Kurzwell dealer.
USB
Connect a USB cable to this port to send and receive MIDI or to connect to a computer for system updates.
page 6 page 7
Chapter 3
OVERVIEW
Front Panel Display, Buttons and Controls
The features labelled on the Andante CGP220's front panel below are discussed in detail in the following chapters. Throughout this manual button names are shown in Bold Type, and display screen text in Italic Type.
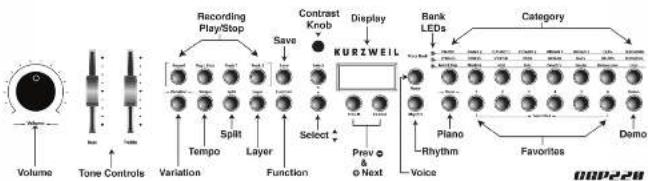
Display Screen
Display
The alphanumeric LCD screen displays 16 characters, indicating the current instrument mode or parameter settings.
LCD Contrast control
To the left of the Kurzwell logo is a potentiometer that controls the LCD display contrast. Turning this small knob allows you to adjust the display visibility for different lighting environments.
Mode Select Buttons
Voice Button
Press this button to enter Voice Mode.
Rhythm Button
Press this button to enter Rhythm Mode.
Piano Button
No matter which mode is active, you may select this button to immediately return to the Concert Piano voice (the first voice of the Piano category).
Chapter 3
OVERVIEW
Navigation Buttons
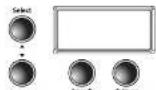
Select ▲ and ▼ Buttons
Use these buttons to move through the list of available parameters for the current mode. These buttons are used in Function, Split, Layer, and Rhythm Modes only.
Prev-Button
Press this button to select the next lower Voice, Rhythm Pattern, user song or parameter value. When using the melronome or playing a Rhythm pattern, use this button to decrease the tempo. This button is also used to tune or transpose downward.
+Next Button
Press this button to select the next higher Voice, Rhythm Pattern, user song or parameter value. When using the metronome or playing a Rhythm Pattern, use this button to increase the tempo. This button is also used to tune or transpose upward.
Bank LEDs and Category Buttons

Bank LEDs
These three LEDs are indicators for the three category banks (two voice and one rhythm). Press the Voice or Rhythm button to select a bank. All LED indicates the active bank.
Category Buttons
Press one of the category buttons to select a voice or rhythm pattern group; then use the Prev- or +Next button to step through options in that group.
Favorites Buttons

Favorites 1 through 6
Select one of 6 previously stored favorite sounds by pressing the Favorites button assigned to it. Store the current sound (with any active splits and layers) by pressing and holding the desired Favorites button until the word Saved appears on the display.
page 8 page 9
Chapter 3
OVERVIEW
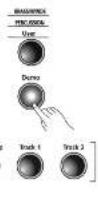
Demo Button
Press the Demo button to begin playing the classical piano demonstration songs. Press Demo again to leave Demo Mode.
Recording and Play/Stop Buttons
Record Button
Press this button to begin recording.

Play/Stop Button
Select this button to play or stop recording, user songs, Rhythm Patterns, and Demos.
Track 1 and Track 2 Buttons
Use these buttons to select the track to record.
Variation and Tempo Buttons
Variation Button
For most voices, pressing the Variation button will enable a pad layer, string layer, or effect
Tempo Button
Use the Tempo button to access the tempo of the metronome and Rhythm Patterns, then make changes with Prev- or +Next buttons.

Mode and Save Buttons
Save Button
Press the Save button to save a user song or to save split and layered voices. The display will prompt you to choose a memory location.
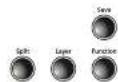
Function Button
Press the Function button to enter Function Mode. Global functions affecting the instrument overall may be adjusted in this mode.
Layer Button
Press the Layer button to enter Layer Mode and create 2 layered voices.
Split Button
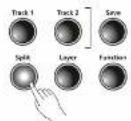
Press the Split button to enter Split Mode and create split voices.
Chapter 3
OVERVIEW
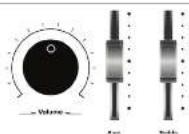
Volume and Tone Controls
These adjust the Andanie CGP220 speaker and headphone audio volume and tone (bass and treble). The Volume control does not affect the volume of the sound coming from external sources through the Audio In jacks.
Button Operations
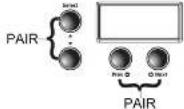
Button Pairs
Certain button pairs, when pressed simultaneously, have other functions. The Andante COP220 has two button pairs: Select ▲ and ▼ and Prev. i + Next.
Using the Select ▲ and ▼ pair allows you to quickly jump to a particular parameter.
Using the Prev-/+Next pair allows you to reset certain parameters to a default value, or to jump quickly through a list of options.
Press and Hold Buttons
When held down, some buttons perform additional functions. Below is a brief description of these buttons.
Category Buttons
In Voice or Rhythm Mode, pressing a category button selects the default or first voice for that category. You can change the default voice or rhythm. To do so, select the voice or rhythm you want to use as the default. Press and hold the category button until the display reads SAVED, then the ID number. Release the button when SAVED shows on the display.
Prev- and +Next Buttons
Press and hold either button and it will repeat until it is released.
Favorites Buttons
Press and hold one of the six Favorites buttons to store the current voice, layer or split.
page 10 page 11
Chapter 3
OVERVIEW
Operating Modes
Most of the Andante CGP220's features are organized in groups called modes. The Andante CGP220 has six operating modes that allow players to configure and combine these features, and to save settings for quick access to desired sounds.
The following chapters describe each of the operating modes.
- Chapter 4 DEMO MODE explains how to play the pre-recorded songs in the Andante CGP220.
• Chapter 5 VOICE MODE explains how to access the variety of different voices available.
■ Chapter 6 LAYER MODE describes techniques for combining voices and rhythms. - Chapter 7 SPLIT MODE explains how to get different sounds from separate sections of the keyboard.
• Chapter 6 FUNCTION MODE describes a variety of special functions in the Andante CGP220.
• Chapter 9 RHYTHM MODE explains how to access the stored rhythms and play along with them.
• Chapter 10 RECORDING explains how to record musical sequences, both alone and in combination
with stored rhythms.
• Chapter 11 MIDI introduces the Musical Instrument Digital Interface functions in the Andante CGP220.
Chapter 4
DEMO MODE
The Andante CGP220 has 51 pre-recorded songs performed in a variety of styles. You can also preview specific voices in Demo Mode Voice demo option.
Selecting Demo Songs
The Demo button is located on the far right side of the front panel, the last button on the second row.
When you press the Demo button to enter Demo Mode the first song, a Brahms Rhapsody will begin to play. Its song number and name appears will display on the LCD screen. When the first song ends, the next demo song begins to play. This continues through all 51 demo songs.
Press the Play/Stop button to start or stop playing a demo song.
To skip through the demo song list and select a different song to play, press the Prev-button to select previous demo song or the +Next button to select the next demo song. You may press the Play/Stop button to stop the current demo song, then press the Play/Stop again to start the next demo song selected.
To skip forward 10 songs at a time, press the Prev- / +Next button pair simultaneously.
In Demo Mode, keyboard keys A0 through B4 are assigned to each demo song. To select a demo song using the keyboard, first press the Record button then press and release its corresponding key.
See the Appendix for a complete list of the demo songs and their corresponding keyboard keys.
To exit Demo Mode, press either the Demo, Voice or Piano buttons.
Voice Demo
The Voice Demo is a small song that shows how a particular voice sounds. This allows you to preview any sound without playing it. To activate the voice demo, follow these steps:
- Press Voice to enter Voice Mode and choose your category for sounds.
- Advance using +Next and Prev- buttons to select a voice to preview or demo.
- Press and hold the Demo button. The chosen voice will play the demo song. The Voice demo will stop once it reaches the end of the song.
- To stop the demo at any time, press the Play/Stop button. You can also select the Piano button or any other category button to stop the demo.
- To switch to another voice demo, simply repeat these steps.

Chapter 5
VOICE MODE
When you turn on the Andanla CGP220, Voice Mode is active and the Concert Piano voice is already selected and ready to play. Concert Piano is the default voice and the first voice in the Piano 1 category.
In Voice Mode, voices are selected first by choosing one of two Voice Banks, then a category.

There are two rows of Voice Bank categories and one row of Category buttons. Categories generally group instruments by type.
To the left of each Voice Bank category row is an LED. A lit LED indicates the active Voice Bank. To select the second Voice Bank row, press the Voice button again. Its LED lights and the second row of categories is active.
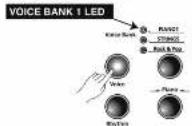
Selecting Voices
If the Andante CGP220 is not already in Voice Mode, press the Voice button, to return to your sounds.
Press the button for the category you want. Its LED lights and the default voice for that category is selected.
To select another voice from the category, press the Prev- or +Next button to navigate through the available voices. If you are pressing the +Next button and reach the last voice of the category, the Andante CGP220 automatically advances to the first voice of the next category. If you are pressing the Prev- button and reach the first voice of the category, the Andante CGP220 automatically moves to the last voice of the previous category.
Press the Prev- / +Next button pair to select the default or first voice of the current category. If the first voice of a category is already selected, pressing the Prev- / +Next button pair selects the first voice of the next category. This cycles through and wraps back to the first category.
A complete list of the Voices by category is included in the Appendix.
page 12 page 13
Chapter 5
VOICE MODE
Changing Category Default Voices
Pressing a Category button selects the default or "first" voice for that category. You can change the default voice for that category. Follow these simple steps:
In Voice Mode, select the category and press the Prev- and Next+ buttons to find your desired sound to save as your default. Press and hold its Category button until the display reads SAVED. Release the button when SAVED shows on the display. Your new sound is now saved as the first or default voice for that category.
Using Variations
For most voices, pressing the Variation button will enable a pad layer. string layer, or effect.

Storing a Favorite Voice
You can quickly save any voice or layered sounds as a favorite. Just select a voice, or layer, then press and hold one of the six Favorites buttons. The voice is now stored in that location.
page 14 page 15
Chapter 6
LAYER MODE
In addition to the many presets already available in the Andante CGP220, you can create layered voices and add even more depth and breadth to its rich sounds. Layering combines two of the Andante CGP220 voices enabling you to play both voices together.
There are three parameters available in Layer Mode: Voice, Volume, and Transposition. Changing the value of a parameter determines the characteristics of the layer.
Depending on the selected parameter some buttons operate differently. The following is a description of the Layer Mode navigation buttons.
Layer Mode Navigation Buttons
Select ▲ and ▼ Buttons
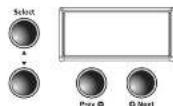
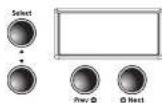
In Layer Mode. Use these buttons to step through the available parameters.
Prev- or +Next Buttons
To change the value of parameter, press the Prev- or +Next button. For the Layer Voice parameter, use these buttons to step through the category voices. In Layer Volume or Layer Transposition, use these buttons to increase or decrease a value.
Pressing the Prev- or +Next button pair together will reset the current parameter back to factory default value.
Category Buttons
In Layer Voice, use this button to select another voice category; it behaves in the same manner as in Voice Mode. If the Layer Volume or Layer Transposition parameter is active, pressing a category button returns the Andante CGP220 to the Layer Voice parameter.
Layer Mode Parameters
Layered Voice
Select the voice you want as your primary voice, by choosing a sound type in the Category section. Advance with the Prev- or +Next buttons to find your voice.
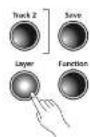
Next, press the Layer button to enter Layer Mode. When the Layer button is pressed, the current voice becomes the primary layer voice. The Layer button LED lights and secondary voice of the layer appears on the screen. (The default is 55, Adagio Strings, or the last secondary voice selected since the Instrument was switched on). The primary voice is now layered with the secondary voice.
Chapter 6
LAYER MODE
To change to a different secondary sound, the Voice button's LED must be lit. Choose the category you want on Row 1 or Row 2 by pressing the Voice button to switch rows. Select the category of sound you desire. Advance with the Prev- or +Next buttons to find your desired sound.
The new sound chosen is now your secondary sound. Remaining in Layer Mode, only the secondary sound can be changed. You must start over to change your primary sound and create your desired combination.
To exit Layer Mode, press the Layer button again.
Volume Balance
This parameter sets the balance volume between the 2 layered sounds.
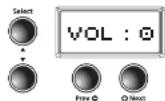
Press the Layer button to enter Layer Mode. Press the Select▲ button to set the volume between the layered voices. The display reads VOL:0 (the default setting) or the last setting selected since the instrument was switched on.
Use the Prev- button to decrease the volume of the secondary voice. The range is from 0 to -9. Press the +Next button to increase the volume of the secondary voice. The range is from 0 to +9. This will allow you to customize the balance between your two voices.
Layer Octave Transposition
This parameter sets the transposition of the secondary voice relative to the primary voice.
In Layer Mode, press the Select▲ button until the screen displays: XPOSE:0.
To transpose the secondary voice up an octave, press the +Next button once. The screen will display 12. Press the +Next button twice to move up 2 octaves. The screen will display 24. To lower an octave, simply reverse the steps by pressing Prev- button to change or lower the octaves for the secondary voice. The default setting is 0, or the last setting selected since the instrument was switched on.
Saving Layered Voices
Using Favorite Buttons
Once you have created your layered sound, select a Favorite button 1-6 to store the layered voice. Press and hold any Favorite button. The layered voice is now stored in that location.
To Exit Layer Mode, press the Layer button again.

page 16 page 17
Chapter 6
LAYER MODE
If you have already saved a layered voice as a Favorite and want to make a change, select the Favorite first, then press the Layer button to enter Layer Mode.
Using the Save Button
Once you have created your layered sound, press the Save button located to the left of the screen. The first empty location in the Favorites will be displayed. The display reads: Save Voice As.. F(# of empty location). Press the +Next button to choose a different location. Press the Save button again to save the layered voice.
If all Favorite locations have been used, pressing the Prev- or +Next buttons will step through all six locations, allowing you to choose one to overwrite.
Chapter 7
SPLIT MODE
Creating a Split allows you to divide the Andante CGP220 keyboard into an upper and lower region. For example, you can create a split and play a Piano Voice with the right hand and a Bass Voice with the left hand.
Split Mode Navigation Buttons
Depending on the selected parameter and the current mode, some buttons operate differently. The following is a description of the Split Mode navigation buttons.
Select ▲ and ▼ Buttons
Use these buttons to step through the parameters.
Prev- and +Next Buttons
For the Split Voice parameter, use these buttons to step through the category voices. In Split Key, Split Volume or Split Transposition, use these buttons to increase or decrease a value.
Category Button
In Split Voice, use this button to select another category; it acts the same as it would in Voice Mode. If the Split Key, Split Volume or Split Transition parameter is active, pressing a category button returns the Andante CGP220 to the Split Voice parameter.
Selecting Split Mode Voices
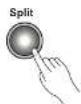
Select the voice you want to use as your primary voice. Press the Split button to enter Split Mode. The Split button is located on the left side of the front panel.
When the Split button is pressed, the current voice becomes the primary (right hand) split voice.
The default secondary voice ID is 105, P Bass, and the default split key is F#3, or the last settings selected since the instrument was switched on.
To exit Split Mode, press the Split button again.
Split Mode Parameters
There are four parameters available in Split Mode:
• Secondary or "Left Hand" Voice
- Split Key Position
- Split Volume Balance
• Secondary or "Left Hand" Octave Change
In Split Mode, use the Select▲ and ▼ buttons to step through the parameters. Presa the Prev- or +Next buttons to make your changes to that parameter.
page 18 page 19
Chapter 7
SPLIT MODE
Split Voice Change for Secondary or Left Hand
Press the Split button, and the secondary voice parameter is selected. The default secondary voice is 105. P Bass, or the last secondary voice selected since the instrument was switched on. To choose a different voice as the secondary voice, press the category voice you desire, then press the Prev- or +Next buttons to advance to your selected sound. The new sound will now become your default "left hand" or secondary voice.
Pressing the Prev- / +Next button pair will reset to the factory default voice setting.
Changing Split Key
In Split Mode, press the Select ▲ button until you see the display KEY:F#3 (the default split key setting is F#3, or the last setting selected since the instrument was switched on). The split key is the highest key of the secondary voice. Press the Prev- or +Next buttons to change the position of the split key. Pressing the +Next button will take you to the next highest key. Pressing the Prev-button will take you down a step. You can select any split point across all 88 keys from A0 to C8.
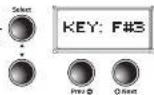
Pressing the Prev-/+Next button pair will reset the F#3 factory default split
Balance Split Volume
This parameter sets the volume between the two split sounds.
In Split Mode, press the Select▲button until you arrive at the screen display VOL.0. This is the Split Balance Volume. Press the Prev-button from -1 to -9 to decrease the volume of the secondary voice (left hand). Press the +Next button from +1 to +9 to decrease the volume for the primary voice (right hand). The value range of this parameter is -9 to +9. The default Split Volume is 0, or the last setting selected since the instrument was switched on.
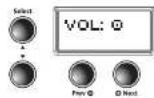
Pressing the Prev-/+Next button pair will reset back to the factory default split volume.
Split Octave Transposition
This parameter sets the transposition of the secondary voice relative to the primary voice.
In Split Mode, press the Select ▲ button, until the screen displays XPOSE:12 ST. (The default setting is 12 ST, or the last setting selected since the instrument was switched on.) Press the Prev- or Next+ button to change octaves for the left hand or the secondary voice.
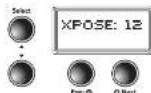
Pressing the Prev- / +Next button pair will reset the octave back to 12, the factory default setting
Chapter 7
SPLIT MODE
Chapter 8
RHYTHM MODE
Saving and Changing Split Voices
Using Favorite Buttons
Once you have created your split sound, select a Favorite button 1-6 to store the split voice. Press and hold any Favorite button. The split voice is now stored in that location.
To Exit Split Mode, press the Split button again.

If you have already saved a spill voice as a Favorite and want to make a change, select the Favorite first, then press the Split button to enter Split Mode.
Using the Save Button
Once you have created your split sound, press the Save button located to the left of the screen. The first empty location in the Favorites will be displayed. The display reads: Save Voice As.. F(# of empty location). Press the +Next button to choose a different location. Press the Save button again to save the split voice.
If all Favorite locations have been used, pressing the Prev- or
+Next buttons will step through all six locations, allowing you to choose one to overwrite.
page 20 page 21
The Andante CGP220 includes 98 rhythm patterns with a wide variety of musical styles. The labels directly above the Category buttons list the different rhythm categories. A complete list of the available rhythm patterns is provided in the Appendix.
Entering Rhythm Mode
Press the Rhythm button to enter Rhythm Mode. The Rhythm button's LED lights up as well as the Rhythm Bank LED. The display shows the ID number of the current rhythm pattern.
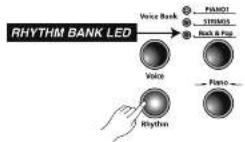
Selecting and Playing a Rhythm Pattern
There are eight category buttons in the Rhythm Bank. The first seven buttons are for the rhythm patterns and are grouped by style. The eighth button, labeled User, is for user recorded songs.
After you select a category, press the Prev- and +Next buttons to step through the rhythm patterns. When you reach the end of a category the Andante CGP220 automatically advances to the next or previous category. It will also advance to the User category. If there are no user recorded songs, it will bypass the User category and go to the next or previous category.
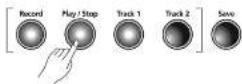
Once you've chosen your desired rhythm, press the Play/Stop button (on the left side) to play your rhythm. Press the Play/Stop button again to stop your rhythm. Once you select a rhythm pattern, it is remembered as the current pattern in Voice Mode. If you save a voice as a Favorite, the current rhythm pattern is also saved.
Chapter 8
RHYTHM MODE
Using a Practice Metronome Pattern
- Select the Metronome category in the Rhythm Bank.
- Use the +Next and/or Prev- buttons to select one of the 5 available on-board metronome patterns (ID #301-305). For example: #305 is a simple 1/4 note metronome. See the list of Rhythm Patterns in the Appendix of this manual for details.
- Press Play/Stop to start the metronome.
- Press Play/Stop again to stop the metronome.
- To set the tempo, see the Changing the Rhythm Tempo section below.
- To set the volume, see the Volume section below.
- You can press and hold one of the six Favorites buttons to store the current Rhythm/Metronome pattern and voice selection to that selected location. The selection can be recalled at any time by pressing the same Favorite button again.
Changing the Default Rhythm Pattern
Pressing a category button selects the default rhythm pattern for that category. You can change the default rhythm pattern. To do so, select the pattern you want for the default rhythm. Press and hold the Category button until the display reads SAVED and shows the ID number. Release the button when SAVED appears on the display.
NOTE: The default rhythm pattern is ID number 1, Bellad1.
Changing the Rhythm Tempo
You can change the tempo of the Andante CGP220's rhythm patterns. The default tempo is 120 BPM (beats per minute), but it can range from 20 to 300 BPM.
To change the tempo, press the Tempo button. Its LED lights and the display shows the current tempo. Press the Prev- button to decrease the tempo or press the +Next button to increase the tempo.
If no action is performed after pressing the Tempo button, the button will 'time out' and the Andante CGP220 will exit the Tempo parameter and return to its previous state. You can also exit the Tempo parameter by pressing the Tempo button again.
To return to the default setting of 120 BPM, press the Prev-/+Next button pair.
Tempo changes affect all rhythm patterns, even Favorites. To save your desired Tempo setting, press and hold any one of the Favorites buttons.
page 22 page 23
Chapter 8
RHYTHM MODE
Rhythm Mode Parameters
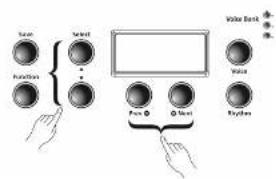
The available parameters in Rhythm Mode are: Rhythm ID and Volume. Press the Select▲ and ▼ button to select a Rhythm Mode parameter.
Rhythm ID
The default parameter is Rhythm ID. Pressing the Select▲ and ▼button pair defaults to this parameter.
The Prev- / +Next button pair advances to the first rhythm of the current category. If you continue to press the Prev- / +Next pair you can advance to the first rhythm in each category. This cycles through and wraps back to the first category. If there are no user recorded songs, the display shows the song ID, U1, and EMPTY.
Volume
Use the Rhythm Mode volume parameter to change the volume of the rhythm pattern for playback or recording. The volume range is from 1 (minimum) to 9 (maximum). The default volume setting is 9 (maximum). Press the Select ▲ or ▼ button. The display reads VOL:X (X represents the current volume setting). Press the Prev- or +Next button to increase or lower the volume.
Changing the volume affects all rhythm patterns, even Favorites. To reset the volume to the default setting, press the Prev- / +Next button pair.
flowchart
graph TD
    A["Hand"] --> B["Control Button"]
    B --> C["Sound"]
    B --> D["Rhythm"]
    C --> E["Pens 0"]
    D --> F["Pens 1"]
    E --> G["Monitor"]
    F --> H["Monitor"]
Chapter 8
RECORDING
The Andante CGP220's two-track recorder allows you to record two voice tracks and a rhythm pattern accompaniment. Favorites can be used to give you even more versatility while recording. For example, you can have a Favorite split voice such as Piano and Bass recorded in Track 1 and a layered favorite in Track 2.
Enabling Rhythms while Recording
If you want to have a rhythm pattern play while recording, select the Function button to enter Function Mode Press the Select ▲ and ▼ buttons to step through the list of parameters. The default setting for the REC RHYTHM parameter is OFF. Press the Prev- or +Next button to change the value to ON.
You can leave this parameter set to ON and still record without a rhythm playing. Select Rhythm ID number 351, which is the "no rhythm" pattern, and no rhythm will play.
Using a Metronome while Recording
The default setting for the metronome is also OFF. Follow the instructions described above to enter Function Mode. Select the METRO:Off parameter and change its setting to METRO:Rec. This will allow the metronome to play during recording.
Recording Track 1
- Select the voice you want to use for Track 1. If you've saved a split or layered sound to Favorites, you can choose one of those.
-
If you want a rhythm accompaniment, press the Rhythm button and select a pattern for your recording. Be sure you've enabled Rhythms for recording.
-
Press Track 1
-
Press Record.
If you are using the metronome, it will count off one measure before recording begins.
- Press Play/Stop to begin the recording.
Perform the song now.
-
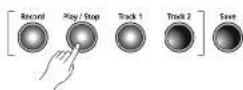
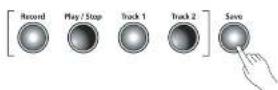
Press Play/Stop to end the recording. The Save button's LED starts flashing and the display shows SAVE RHYTHM AS:(U1 - U20). These represent the number of the first available empty user song locations. There are 20 available song locations.
-
Press the +Next button to advance to a different User Song number.
-
Press the Save button. Your song is now saved in one of the user songs.
page 24 page 25
Chapter 9
RECORDING
Recording Track 2
You can add a second track to an existing user song. Start by selecting the voice you want to use for Track 2. If you've saved a split or layered sound to Favorites, you can choose one of those.
To select the desired User Song, follow these steps.
- Press the Rhythm button.
- Press User button — on the upper side on the far right end of the button row.
- Press Prev- or Next+ to navigate to the correct song (U1 through U20).
To add your track, proceed as follows:
- Press Track 2.
- Press Record. The display shows the RECORD READY message.
- Press Play/Stop to begin the recording.
Perform the second part of your song now. Track 1 will be playing while you are recording Track 2.
- Press Play/Stop to end the recording.
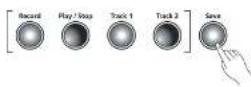
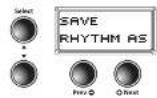
The Save button's LED starts flashing and the display shows SAVE RHYTHM AS:(U1 - U20). There are 20 available song locations. You can now save your song to the same User Song location, or choose a new location.
- Press the +Next button to advance to a different User Song location (U1 - U20).
- Press Save to store the song to the User Song location.
Selecting a Song
- Press the Rhythm button.
- Press User category button located to the far right of the Rhythm bank.
- Use the +Next and/or Prev-bullons to select one of U1 - U20.
You can now listen to the song you've selected.
- Press Play/Stop to listen to your song.
- Press Play/Stop again to stop the playback.
Chapter 9
RECORDING
Recording over a Track
You can replace the recording on a track with a fresh performance.
- Select the User Song (see "Selecting a Song" above).
- Press the button corresponding to the track you wish to record over - for example, Track 1.
- Press Record.
- Press Play/Stop to begin. Play the new performance for the selected track (the previously recorded performance will be erased until Play/Stop is pressed again).
- Press Play/Stop when the song end is reached.
- Press Save to store the song.
Erasing A Track
You can erase an entire track by recording "nothing" over the old track.
- Select the User Song (see "Selecting a Song" above).
- Press the track button corresponding to the track you wish to record over - for example, Track 1
- Press Record.
- Press Play/Stop to begin. Let the song run through its entire duration. Do not play on the piano keys.
- Press Play/Stop when the song end is reached.
- Press Save to store the song.
Punch-Ins
"Punching in" is a way to edit or correct mistakes on a recording without re-recording the entire track.
- Select the User Song (see "Selecting a Song" above).
- Press the button corresponding to the track you wish to record over - for example, Track 1.
- Press Play/Stop to begin playing the song.
- When the song reaches the part you need to correct, press Record. Play the corrected notes.
- Press Play/Stop to finish the punch-in. If you don't press the Play/Stop button after you punch-in, you will erase the remaining portion of the track.
- Press Save to store the song.
page 26 page 27
Chapter 9
RECORDING
Erasing A Song
You can erase a user song completely (including the Rhythm) by record a new "blank" song and saving this blank song over the old user song.
- Press the Rhythm button.
- Using the +Next and/or Prev- buttons, select #351 "No Rhythm". Rhythm #351 is a 'blank.' (Moving backwards through the list pressing Prev - several times will often get you there quickest.)
- With Rhythm #351 selected, press Record.
- Press Play/Stop to begin recording
- Press Play/Stop to end the recording. You can do this anytime after the start.
The Save button's LED starts flashing and the display shows SAVE RHYTHM AS:(U1 - U20). There are 20 available song locations.
-
Using the +Next and/or Prev- buttons, select the User Song to erase, for example "U1."
-
Press Save and the selected User Song (U1 in our example) will be erased completely.
Chapter 9
FUNCTION MODE
The Function Mode includes parameters that allow you to change the behavior of the entire instrument globally. The following are available parameters in Function Mode:
- Transpose
- Effect Level
- Touch Sensitivity
• Tune
• MIDI Channel - Metronome
• Rec Rhythm - Local Control
• Auto Power Off
• Auto Power Off Time - Hard Reset
- OS/Object
Selecting and Saving Function Parameters
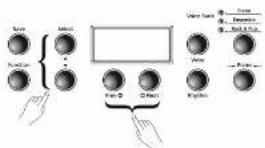
Press the Function button to enter Function Mode. Pressing the Select ▲ or ▼ button allows you to choose one of the parameters listed above. Once you choose a parameter, you will use the Prev- or +Next buttons to navigate the values of that parameter. Pressing the Function button a second time will exit this mode.
Transpose
The Transpose parameter allows you to adjust the overall pitch of the keyboard up or down in semilone intervals.
Press the the Select ▲ or ▼ button until the screen displays Transpose:0, which is the factory default. To transpose the pitch up, press the +Next button for each semitone up in pitch. To lower or transpose down, Press the Prev- button to lower the semitone pitch. Pressing the Prev- +Next button pair will reset the Transposition back to factory default of 0. The transposition has a range of -24 to +24. This offers a two octave transposition range up or down.
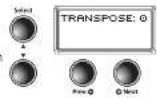
Effect Level
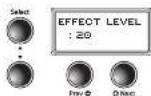
The Effect parameter controls the level of the reverb effects used on a voice. Press the Select▲ or ▼ button until the screen reads EFFECT LEVEL:20 (factory default). To increase the reverb effect, press the +Next button for your desired effect. To lower or reduce the reverb effect press the Prev- button. You can adjust the effect level from 0% (no effect) to 100%. Pressing the Prev- / +Next button pair will reset the effect level back to factory default of 20%.
page 28 page 29
Chapter 9
FUNCTION MODE
Touch
Use this parameter to adjust the keyboard touch sensitivity to your playing technique.
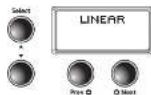
Press the Select ▲ or ▼ button until the screen displays Touch:Linear (factory default). To change the setting, press the +Next button to advance to the next desired Touch. Press the Prev-button down to reverse the steps. The following are the available settings:
Linear
Best Dynamic Range for instruments (Factory Default Setting).
Light (1-3)
For players with a light touch. Adjust this parameter to achieve a good dynamic range. These settings are from Light 1, a slightly light touch, to Light 3, a very light touch.
Hard (1-3)
For players with a heavier touch. Adjust this parameter to achieve a good dynamic range. These settings range from Hard 1, a slightly harder touch, to Hard 3, a very hard touch.
Piano Touch Best for piano dynamics.
Easy Touch Light touch, especially for younger players.
GM Receive Select this when playing General MIDI songs.
The Touch setting is remembered across power cycles. Pressing the Prev-1+Next button pair will reset the Touch level back to factory default of Linear.
Tune
This parameter allows you to adjust the Andante CGP220 tuning to match other instruments or recordings.
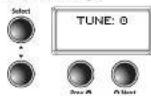
Press the Select ▲ or ▼ button until the display reads TUNE:0 (factory default is A - 440). To increase the tuning. Press the +Next button from 0 to 100 cents. To lower or reduce the tuning, press the Prev- button from 0 to -100 cents. Pressing Prev- / +Next button pair will reset the tuning back to factory default of 0 or A-440.
MIDI Channel
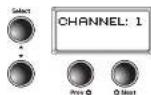
This parameter controls the MIDI transmit channel used for Voice Mode. Press the Select ▲ or ▼ button until the display reads CHANNEL: 1 (Factory Default). You can select Channels 1 through 9, or Channels 11 through 15. Channel 10 is reserved for rhythm playback and Channel 16 for the metronome.
Pressing the Prev-1 +Next button pair will reset the MIDI Channel back to the factory default of 1.
For more information on MIDI, see Chapter 11.
Chapter 10
FUNCTION MODE
Chapter 10
FUNCTION MODE
Metronome
This parameter has three settings: On, Rec or Off. The default setting is Off, or no metronome. If you choose On the metronome sounds while playing or recording. To hear the metronome only while recording, choose Rec.
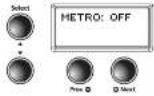
In Function Mode, press the Select ▲ or ▼ button until the display reads METRO: OFF (factory default). To change to On press the +Next button once. The metronome sounds while playing or recording. To change to Rec press the +Next button again. This allows you to hear the metronome only while recording. Pressing the Prev- +Next button pair will reset the Metronome back to Off (factory default).
The Metronome setting is remembered across power cycles.
Rec Rhythm
This parameter controls whether a rhythm pattern plays during recording. The default for this parameter is Off. If you record a song and want the rhythm pattern recorded as well, be sure to change this parameter to On.
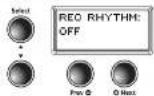
Press the Select ▲ or ▼ button until the display reads REC RHYTHM: OFF (factory default). To change to On press the +Next button once. Press Prev- to turn Rec Rhythm to Off.
The Rec Rhythm setting is remembered across power cycles.
Local Control
When you play the Andante CGP220 keyboard you hear the resident or "local" voices, because this parameter is normally set to On. When using your Andante CGP220 with an external sequencer or computer, turn this setting to Off to avoid creating a MIDI loop which may result in stuck notes or "echoes."
Auto Power Off
This energy-saving feature will automatically shut off power to the unit after a period of inactivity. Simply turning the power switch off and on will power up the unit once again. This allows you to reduce overall power consumption, and also extends the lifetime of the Instrument. Press the Select ▲ or ▼ button until the display reads AutoPowerOff. Selling options are Enabled or Disabled.
Auto Power Off Time
With Auto Power Off Enabled, you may set the length of inactivity time until power is shut down. Use the Prev- +Next buttons to select your setting. Options are 15 min, 30 min, 1 hour, 2 hours or 4 hours.
Once the AutoPowerOff inactivity period has begun, any human interaction (playing the keyboard, etc.) will reset the timer.
Audio Input
The parameter enables or disables the audio input jack. In some situations, the user playing the Andante CGP220 may notice a high frequency noise when not using the Audio Input (that is, with no signal applied to the input jacks). Selling Audio Input to Disabled will overcome this. The default setting for this parameter is Enabled. The chosen setting will be remembered across power cycles.
page 30 page 31
Hard Reset (Restoring Factory Defaults)
This function resets the Andante CGP220 to the original factory default settings. All user changes, saved Favorites, and user recorded songs are erased. This action cannot be undone.
- In Function Mode press the Select ▲ or ▼ buttons until the display reads HARD RESET?.
- To perform the Hard Reset function press the +Next button once.
- The display now reads CONFIRM?
- Press the +Next button again confirm and to reset the Andante CGP220. The unit will then erase its user memory, restore all factory settings and reboot.
If you want to cancel the Hard Reset and remain in Function Mode, press the Prev-button to confirm. Press any other button to exit Function Mode.
There is an alternate method for a Hard Reset your Andante CGP220:
- Hold the C8 key down while switching on the power.
- Continue to hold C8 down until you see "RESETTING" (scrolling) in the display then release.
OS/Objects Version
To check for possible updates to your operating system in Function Mode press the Select ▲ or ▼ buttons one step past HARD RESET?. This will display the current operating software and objects version.
The display first shows the OS version, then the Object version. Visit the Kurzweil website (www.kurzweil.com) to verify that your Andante CGP220 has the latest versions. These are located under the Downloads tab for the Andante CGP220. Complete installation instructions are included in the downloaded files. A standard USB cable will be required for this operation.
Chapter 11
MIDI
About MIDI
MIDI is the acronym for Musical Instrument Digital Interface. It is the industry standard protocol which allows the exchange of musical data between electronic musical instruments, devices (such as a sequencer), and computers. MIDI enables MIDI-equipped devices designed by different manufacturers to communicate MIDI data to each other.
MIDI data is sent or received using standard MIDI cables to connect to other MIDI devices or a USB cable to connect to a computer. The Andante CGP220 is equipped with conventional MIDI In, Out and Thru ports, and a USB port. The current line of Kurzweil products have a standard class-compliant USB-MIDI implementation. They do not require the installation of any additional drivers.
MIDI Channels
Similar to television channels, MIDI protocol transmits multiple channels of MIDI performance data. Typical MIDI instruments can play up to 16 channels at the same time. Each channel can be assigned its own voice.
To change and/or assign MIDI channels, enter Function Mode and select the MIDI Channel parameter. See the MIDI Implementation chart at the end of this chapter for details.
MIDI In and Out and Thru Ports
The Andante CGP220 is equipped with the conventional MIDI In, Out and Thru ports. The MIDI In port is used to receive MIDI data from another MIDI device; the MIDI Out port is used to transmit the MIDI data generated by the Andante CGP220 to another MIDI device; the MIDI Thru port passes MIDI In data along to an external device.
When you connect the MIDI Out of the Andante CGP220 to the MIDI In of another instrument, you can play the sounds of both instruments simultaneously from the Andante CGP220's keyboard.

When you connect the MIDI In of the Andante CGP220 to the MIDI Out of another controller, you can control the Andante CGP220 using the other controller.

Depending on your system setup, you may want to use the Andante CGP220's MIDI thru port to pass MIDI information from a MIDI controller or computer sequencer to the Andante CGP220 and on to the next device in your system.
page 32 page 33
Chapter 11
MIDI
USB MIDI Connection
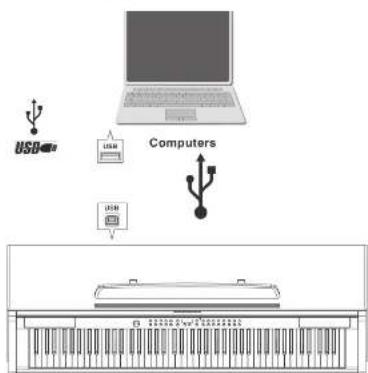
In addition to the conventional MIDI In, Out and Thru ports, the Andante CGP220 also has a USB (Universal Serial Bus) port on the panel on the underside of the piano. You can connect the Andante CGP220 directly to a computer with a USB cable. This connection transmits and receives MIDI data between the Andante CGP220 and the computer,
The Andante CGP220 supports the "Plug and Play" feature used in the Windows XP or higher and Macintosh operating systems. No drivers are required to use this connection; but you may need to enable MIDI on your computer's sound and audio control panel.
To use the Andante CGP220 as a MIDI controller with a computer, use any Type-A to Type-B USB cable. By default, the Andante CGP220 acts as a MIDI controller (not a hard drive) when connected to a computer.
If you have a sequencer program installed on your computer, you can use this USB connection to record and play your music. The Andante CGP220's recorder is actually a simple sequencer and the performance you record into the Andante CGP220's memory is MIDI performance data. Using a computer-based sequencer program provides unlimited memory, editing, and the ability to post on the Internet.
flowchart
graph TD
    A["USB"] --> B["Computer"]
    B --> C["Keyboard Layout"]
    D["USB"] --> E["Computer"]
    E --> F["Keyboard Layout"]
    style A fill:#f9f,stroke:#333
    style B fill:#ccf,stroke:#333
    style C fill:#cfc,stroke:#333
    style D fill:#fcc,stroke:#333
    style E fill:#cff,stroke:#333
    style F fill:#ffc,stroke:#333
Using Windows applications for MIDI control
Certain apps (like Windows Media Player - WMP) released with Windows Vista or later can no longer play MIDI songs triggering external MIDI devices; WMP is only routed to the internal Microsoft GS Synthesizer.
This means the MIDI app you choose to use must natively offer its own built-in MIDI mapping abilities. Most commercial MIDI software products for PC have a configuration screen which includes the MIDI device mapping necessary to route to an external MIDI device such as the Andante CGP220.
APPENDIX
Andante CGP220 MIDI Implementation Chart
Model: CGP220
Manufacturer:
Young Chang
Date: 12/28/2014
Version 2.20
| Function | Transmitted | Recognized | Remarks | |
| Basic Channel | Default | 1 | 1 | Menorized |
| Charged | 1 - 16 | 1 - 16 | ||
| Mode | Default | Mode 3 | Mode 3AI | Use Multi mode for multi-limited applications |
| Messages | ||||
| Allied | ||||
| Note Number | 0 - 127 | 0 - 127 | Key Range: A0-C8 | |
| True Voice | 12 - 120 | 12 - 120 | ||
| Velocity | Note ON | O | O | |
| Note OFF | O | O | ||
| Allen Touch | Keys | X | X | |
| Channels | X | O | ||
| Pitch Banner | X | O | ||
| Control Change | 0, 32 Bank Select (MSB, LSB)7. Volume10. Pan11. Expression64. Sustatin Pedal66. Soderluo Pedal80. Sound Variation | 0 0 - 3132 - 63 (LSB)64 - 127 | ||
| Program Change | O 0 - 127 | O 0 - 127 | ||
| True # | 0 - 127 | 0 - 127 | ||
| System Exclusive | O | O* | ||
| System Common | Song Fee. | X | O | |
| Song Sel. | X | O | ||
| Tuna | X | X | ||
| System Real Time | Clock | X | O | |
| Messages | X | O | ||
| Aux Messages | Local Control | X | O | |
| All Notes Off | X | O | ||
| Active Sense | X | X | ||
| Reset | X | X | ||
| Note: Specifications subject to change without notes. *Manufacturer's ID = 07 Davina ID: default = 3 O = yes X = no | ||||
APPENDIX
Voice List
| ID Name |
| PIANO 1 |
| 1 Concert Piano |
| 2 Rock Piano |
| 3 Recita Piano |
| 4 Bright Classical |
| 5 Parlor Piano |
| 6 Jazz Piano |
| 7 Radlin Pop Piano |
| 8 Upright Piano |
| PIANO 2 |
| 9 Piano & Pad |
| 10 Piano & Choir |
| 11 Piano & Harp |
| 12 R&B Keys |
| 13 Soul Piano |
| 14 Pub Piano |
| 15 Dark & Distant |
| 16 Triple Strike |
| E. PIANO 1 |
| 17 Steve's Rhds |
| 18 Duke's Dyno Rhds |
| 19 Fagn Phaser |
| 20 Xftad BelltoneRhds |
| 21 WoodstockClunker |
| 22 Supertramp Wurly |
| 23 Wha'd I SayWrly |
| 24 Aust CityLintsWrly |
| E PIANO 2 |
| 25 FM EP 2 |
| 26 Elec Grand Stack |
| 27 Rich EP+Pad |
| 28 Tight Brighton FM |
| 29 Gabriel's Melt |
| 30 UK Pop CP70 |
| 31 Misty Mountain EP |
| 32 No Quarter Pnt |
| ID Name |
| ORGAN 1 |
| 33 Classic B3 |
| 34 Soul Perc |
| 35 Testify |
| 36 Classic Traffic |
| 37 Mr Smith |
| 38 VAS Bars1-3.8&9 |
| 39 Doors Vox |
| 40 Farfisa |
| ORGAN 2 |
| 41 All Stops |
| 42 AllStops AllVox |
| 43 Chapel Organ |
| 44 Pipe Stops |
| 45 16' Open Flute |
| 46 16' Fed Reed |
| 47 16' Vol |
| 48 Paris CmboAccordin |
| CLAV |
| 49 Real Supasticious |
| 50 Black Cow Clav |
| 51 Joe's Clav |
| 52 Hiya Ground sw |
| 53 TrampiedUnder O6 |
| 54 Steve Fuzz |
| 55 Harpsichord |
| 56 SIBarque Harpsi |
| BRASS/WINDSv |
| 57 High End Horns |
| 58 Mostly Saxes |
| 59 Brass Fanfare |
| 60 Low Orch Brass |
| 61 BassoryOboe |
| 62 Lead Trumpet |
| 63 Solo Trombone |
| 64 Fluid Clarinet |
| ID Name | |
| STRINGS | |
| 65 Adagio Strings | |
| 66 Slow String Trem | |
| 67 Adagio Tuttli Eves | |
| 68 Adagio Octaves | |
| 69 Full Pizzicato | |
| 70 Winds & Strings | |
| 71 Gothic Climax | |
| 72 Solo Harp | |
| VOICES | |
| 73 Mixed Choir | |
| 74 Manhattan Voices | |
| 75 Choir Complete | |
| 76 Cathedral Vox | |
| 77 Asash Vocals | |
| 78 Jazzy Ballad Vox | |
| 79 Bright Syn Vox | |
| 80 Antique AhhChorus | |
| SYNTHS | |
| 81 Super Saw | |
| 82 Classic SynBrass | |
| 83 80's Heaven | |
| 84 80's Lead Synth | |
| 85 PolySynth Stack | |
| 86 Classic Saws | |
| 87 Big Old Jupiter | |
| 88 Square Bell | |
| PADS | |
| 89 Film Score Pad | |
| 90 Majestic Pad | |
| 91 Fairight Pad | |
| 92 Evolving Pad | |
| 93 Lush Pad | |
| 94 Lush Rhythm Pad | |
| 95 Add A Pad 1 | |
| 96 Add a Pad 2 | |
| GUITAR | |
| 97 Rich | Caster |
| 96 Rich | Les |
| 99 Super | StudioCast |
| 100 Kinds | Krunchy |
| 101 Red | Hot/StudioStr |
| 102 Boutique | Six Str |
| 103 Boutique | 12 Str |
| 104 Dull | Illiere |
| BASS | |
| 105 P-Bass | |
| 106 Monown Bass | |
| 107 E-Bass | |
| 108 Flea | Bootsy |
| 109 Jaco | Fretless |
| 110 AC | Buzzer Bass |
| 111 The | Way It Is |
| 112 Bass | Pedal |
| DRUMS | |
| 113 Kit 1 | Open Rock |
| 114 Kit 2 | J Geils |
| 115 Kit 3 | West Boxy |
| 116 Kit 4 | Beatbox101 |
| 117 Kit 5 | Brush |
| 118 Kit 6 | Latin Kit |
| 119 Kit 7 | Drum&Bass |
| 120 Kit 8 | Skrlx |
| PERCUSSION | |
| 121 Col | Asle |
| 122 Ch | mes/Glock |
| 123 Real | Vibes |
| 124 Stereo | Martimba |
| 125 Xylphone | |
| 126 Carlon | |
| 127 Basic | Orch Perc |
| 128 Orch | Timpani |
APPENDIXAPPE
Rhythm Patterns
| ID Name |
| ROCK & POP |
| 1 Belle1 |
| 2 Belle2 |
| 3 Belle3 |
| 4 Belle4 |
| 5 Belle5 |
| 6 Belle6 |
| 7 Belle7 |
| 8 Belle8 |
| 9 Pop1 |
| 10 Pop2 |
| 11 Pop3 |
| 12 Pop4 |
| 13 Pop5 |
| 14 Pop6 |
| 15 Pop7 |
| 16 Pop8 |
| 17 Rock9 |
| 18 Rock10 |
| 19 Rock11 |
| 20 Rock12 |
| 21 Rock13 |
| 22 Rock14 |
| 23 Rock15 |
| 24 Rock16 |
| 25 Tristed Rock |
| 26 Twist |
| MODERN |
| 51 R&S Dance1 |
| 52 R&S Dance2 |
| 53 R&S Dance3 |
| 54 R&S Dance4 |
| 55 R&S Dance5 |
| 56 R&S Dance6 |
| 57 R&S Dance7 |
| 58 Urban1 |
| 59 Urban2 |
| 60 Club1 |
| 61 Club2 |
| 62 Acid House |
| 63 Electro |
| 64 New Jack |
| 65 Gospel |
| ID Name |
| LATIN |
| 101 Latin1 |
| 102 Latin2 |
| 103 Latin3 |
| 104 Latin4 |
| 105 Latin5 |
| 106 Latin6 |
| 107 Cha Cha |
| 108 Salsa |
| 109 Rumba |
| 110 Santaa |
| 111 Santaa 2 |
| 112 Bonna Nova |
| 113 Sol Clave |
| 114 Calypso |
| 115 SolgoCalypso |
| 116 Solgo |
| 117 Mambo 1 |
| 118 Mambo 2 |
| JAZZ |
| 151 Jazz1 |
| 152 Jazz2 |
| 153 Jazz3 |
| 154 Jazz4 |
| 155 Jazz5 |
| 156 Jazz6 |
| 157 Jazz7 |
| 158 Jazz8 |
| 159 Spy Jazz |
| COUNTRY |
| 201 Country1 |
| 202 Country2 |
| 203 Country3 |
| 204 Country4 |
| 205 Country5 |
| 206 Country6 |
| 207 Country7 |
| 208 Country8 |
| ID Name |
| WORLD |
| 251 Poka |
| 252 Reggae 1 |
| 253 Reggae 2 |
| 254 Reggae 3 |
| 255 Reggae 4 |
| 256 Nango 1 |
| 257 Nango 2 |
| 258 Mopsum |
| 259 Khanva |
| 260 Allobest |
| 261 March |
| 262 Reggaeton 1 |
| 263 Reggaeton 2 |
| 264 Reggaeton 3 |
| 265 Reggaeton 4 |
| 266 Kpanlogo |
| METRONOME |
| 301 1/4 Melronome |
| 302 Metro MP 1/8nt |
| 303 Metro MP 1/16nt |
| 304 Metro MP 3/4 |
| 305 Metro MP 6/8 |
| USER |
| 351 NoDrunSong |
APPENDIX
Demo Song List
| ID Name |
| 401 Brahms-Rhapsody |
| 402 Prelude I |
| 403 Inventon NO.4 |
| 404 Inventon NO.8 |
| 405 Prelude II |
| 406 ARIA Goldberg |
| 407 Fuga II |
| 408 Sonathe Op.36 |
| 409 Klavier stuck |
| 410 Piano Sonate |
| 411 Rondo in D |
| 412 Piano Sonate K.3 |
| 413 Piano Sonate K.5 |
| 414 Minusale in G |
| 415 Bagatelle No.25 |
| 416 Sonathe Op.55 |
| 417 March Militaire |
| 418 Moments Musicaux |
| 419 Impromptu No.2 |
| 420 Impromptu No.4 |
| 421 La Chevaleresque |
| 422 Without Words |
| 423 Venetanisches |
| 424 Sostleruto |
| 425 Valse KK |
| 426 5 Mazurkas |
| 427 Valse Op.69 No.2 |
| 428 Granda Valse |
| 429 Valse Op.64 No.2 |
| 430 Nocturne No.2 |
| 431 Valse Op.64 No.1 |
| 432 Preludes in Db |
| 433 Fantakie-Improm |
| 434 Traumerel |
| 435 Frolicher Landma |
| 436 Von fremden Land |
| 437 Liebus traumel#3 |
| 438 Dolly's Dreaming |
| 439 Fruhlingsstimmen |
| 440 The Swan |
| ID Name |
| 441 Blumenlied |
| 442 Valsette |
| 443 Old French Air |
| 444 Mazurka |
| 445 Polka |
| 446 Baracaille |
| 447 Humoreska |
| 448 Suite Peer Gynt |
| 449 Suite Bergamasque |
| 450 Reverie |
| 451 Arabesque I |
APPENDIX
Andante CGP220 Features
| Keyboard | 98-Note, Graded Hamman-Action Keyboard with adjustable touch sensitive keys |
| Preset Programs | 126 Expressive sounds. 8 Drum Kits |
| Splits/Layers | Split Layer, easy access with adjustable relative volume |
| Effects | Dual admience and effect processors (reverbersion and chorus). Rich and complex effects from the PC3 Sants. |
| Drum Patterns | 98 prerecorded Interactive patterns in a variety of styles |
| Recorder/Sequencer | 2 Track Song Recorder with accompanying rhythm track |
| Sound System | 4-speaker, 4-simulator, 200-wac stereo sound system |
| Headphones | (2) 1/4" stereo headphone outs |
| I/O Jacks | MIDI In, Out and Thin connectors2 RCA Stereo Input & 2 RCA Stereo Output Jacks |
| USB | (1) Port, "Plug and Play" USB functionality allows MIDI over USB for connecting to/from an external computer sequencer, no software driver needed |
| Pedals | 3 Pedals Soft, Soetenuto, Sustam. Optional Volume/expression Pedal Unit |
| Polyphony | 64 voices |
| Finish | Ebony Polish |
| Dimensions | 54 3/4" x 34 1/2" x 19 5/8" d (1399mm x 876mm x 498mm) |
| Weight | 221 lbs (100kg) |
| Power | 90-250V AC 50/60 Hz free voltage 3A, 250V maximum- |
INDEX
A
assembly 2
audio in and out .....10
audio input 30
auto power off .....30
B
bank 5,8,30
bass 10
C
category 8, 10, 13, 14, 15, 18
CC Pedal 6
D
default 10, 13, 14, 15, 16, 18, 19, 22
demo 5,9,38
display ....7
F
edit 26,33
effect 1,28
erasing 26, 27
expression pedal .....6
F
factory default .....15, 19, 28, 29, 30, 31
favorites 8, 10, 14, 17, 20, 24
front panel 4,7
function 8,9,11,24,28
II
hard reset 31
headphones 4,10
|
ID (Rhythm ID) .....23
J
jacks 4,6
jump 5
K
keyboard 28, 29, 30, 32
page 40 page 41
L
legs 2.3
list 8,12,13,21,24,35,38
local control ....30
M
melronome 8,9,22,24,29,30
MIDI 6,29,30,32,33,34
modes 8,11
N
navigation 8,15,18
0
operating modes .....11
OS/Objects 31
P
pcdal 1.6
play 4,5,12,13,24,32,33
player 6, 11, 29, 33
playing 4,5,12,21,25,26,29,30
power 4,6,30,31
press and hold .....10, 14, 16, 20, 22
punch-in 26
Q
quick start ....5
R
recording 6,9,24,30
rec rhythm 30
reset 10, 15, 19, 23, 28, 31
restore 31
rhythm patterns .....4, 9, 21, 22
s
saving 16,20,28
selecting 12, 13, 18, 21, 25, 28
semitone 28
sequencer 30, 32, 33
song 1,5,9,12,21,23,33,38
speakers 4,6
split 8,9,18,24
storing 14
switch 12, 16, 30
T
tempo 9,22
tone 6,10
touch 29
track 9,24,26
transpose 8,16,28
transposition .....15, 16, 18, 19
treble 10
func 29
U
update 6,31
USB 6,31,32,33
user song 24, 25, 26, 27
v
value 8,10,15,18,19,28
variation 9,14
version 31
voice 5,7,8,12,13,30,32,35
volume 6,10,16,19,23
volume pedal ......6
INDEX
KURZWEIL
www.kurzweil.com CGP220 User Manual
www.facebook.com/kurzweilmusicsystems 910571-001
- IMPORTANT SAFETY & INSTALLATION INSTRUCTIONS
- RADIO AND TELEVISION INTERFERENCE
- IMPORTANT SAFETY INSTRUCTIONS
- Kurzweil International Contacts
- US Customers:
- Customers outside the US:
- CONTENTS, CONTINUED
- INTRODUCTION
- RECORDING 24
- FUNCTION MODE 28
- MIDI 32
- APPENDIX 34
- INDEX 40
- Primary Features
- Andante CGP220 Carton Content
- GETTING STARTED
- Assembly Instructions for Andante CGP220
- STEP 1:
- STEP 2:
- STEP 3:
- STEP 4:
- RAISING THE PIANO LID:
- Power Switch
- Sound and Volume
- Headphone Jacks
- Quick Start
- Playing the Voices
- Playing a Rhythm Pattern
- Playing a Demo Song
- OVERVIEW
- Audio In and Audio Out
- MIDI In, Out and Thru
- CC Pedal (Volume/Expression Pedal)
- USB
- Front Panel Display, Buttons and Controls
- Display Screen
- Display
- LCD Contrast control
- Mode Select Buttons
- Voice Button
- Rhythm Button
- Piano Button
- Navigation Buttons
- Select ▲ and ▼ Buttons
- Prev-Button
- +Next Button
- Bank LEDs and Category Buttons
- Bank LEDs
- Category Buttons
- Favorites Buttons
- Favorites 1 through 6
- Demo Button
- Recording and Play/Stop Buttons
- Record Button
- Play/Stop Button
- Track 1 and Track 2 Buttons
- Variation and Tempo Buttons
- Variation Button
- Tempo Button
- Mode and Save Buttons
- Save Button
- Function Button
- Layer Button
- Split Button
- Volume and Tone Controls
- Button Operations
- Button Pairs
- Press and Hold Buttons
- Prev- and +Next Buttons
- Operating Modes
- DEMO MODE
- Selecting Demo Songs
- Voice Demo
- VOICE MODE
- Selecting Voices
- Changing Category Default Voices
- Using Variations
- Storing a Favorite Voice
- LAYER MODE
- Layer Mode Navigation Buttons
- Prev- or +Next Buttons
- Layer Mode Parameters
- Layered Voice
- Volume Balance
- Layer Octave Transposition
- Saving Layered Voices
- Using Favorite Buttons
- Using the Save Button
- SPLIT MODE
- Split Mode Navigation Buttons
- Category Button
- Selecting Split Mode Voices
- Split Mode Parameters
- Split Voice Change for Secondary or Left Hand
- Changing Split Key
- Balance Split Volume
- Split Octave Transposition
- RHYTHM MODE
- Saving and Changing Split Voices
- Entering Rhythm Mode
- Selecting and Playing a Rhythm Pattern
- Using a Practice Metronome Pattern
- Changing the Default Rhythm Pattern
- Changing the Rhythm Tempo
- Rhythm Mode Parameters
- Rhythm ID
- Volume
- RECORDING
- Enabling Rhythms while Recording
- Using a Metronome while Recording
- Recording Track 1
- Recording Track 2
- Selecting a Song
- Recording over a Track
- Erasing A Track
- Punch-Ins
- Erasing A Song
- FUNCTION MODE
- Selecting and Saving Function Parameters
- Transpose
- Effect Level
- Touch
- Tune
- MIDI Channel
- Metronome
- Rec Rhythm
- Local Control
- Auto Power Off
- Auto Power Off Time
- Audio Input
- Hard Reset (Restoring Factory Defaults)
- OS/Objects Version
- MIDI
- About MIDI
- MIDI Channels
- MIDI In and Out and Thru Ports
- USB MIDI Connection
- Using Windows applications for MIDI control
- APPENDIX
- Andante CGP220 MIDI Implementation Chart
- INDEX
- A
- B
- C
- D
- F
- II
- |
- J
- K
- L
- M
- N
- 0
- P
- Q
- R
- s
- T
- U
- v
Brand : Kurzweil
Model : CGP220
Category : Piano