
KS09 - Air conditioner Kaden - Free user manual and instructions
Find the device manual for free KS09 Kaden in PDF.


| Product Type | Portable Air Conditioner |
| Model | KS09 |
| Brand | Kaden |
| Cooling Capacity | 9000 BTU/h |
| Recommended Room Size | Up to 20 m² |
| Energy Efficiency Ratio (EER) | 2.8 |
| Power Supply | 220-240 V ~ 50 Hz |
| Power Consumption (Cooling) | 1050 W |
| Dimensions (W x D x H) | 43 x 38 x 72 cm |
| Weight | 28 kg |
| Noise Level (Low/High) | 52 / 56 dB(A) |
| Refrigerant Type | R-410A |
| Airflow Rate | 350 m³/h |
| Functions | Cooling, Fan, Dehumidification, Sleep Mode |
| Remote Control | Yes |
| Timer | 24-hour programmable |
| Filter Type | Washable mesh filter |
| Maintenance | Clean filter every 2 weeks; drain condensate periodically |
| Safety Features | Overheat protection, auto shut-off, tip-over switch |
| Installation | Window kit included for exhaust hose |
| Accessories Included | Exhaust hose, window kit, remote control, user manual |
| Repairability | Spare parts available through authorized service centers |
Frequently Asked Questions - KS09 Kaden
User questions about KS09 Kaden
0 question about this device. Answer the ones you know or ask your own.
Ask a new question about this device
Download the instructions for your Air conditioner in PDF format for free! Find your manual KS09 - Kaden and take your electronic device back in hand. On this page are published all the documents necessary for the use of your device. KS09 by Kaden.
USER MANUAL KS09 Kaden
WALL MOUNTED AIR CONDITIONER
Owner's Manual
KS Series
KS09 | KS12 | KS18
KS24 | KS28

natural_image
Line drawing of a rectangular electronic device with a flat panel and side connectors (no text or symbols)kaden ^
Table of Contents
- Safety Precautions 3
- Unit Specifications and Features 5
- Manual Operation (Without Remote) 9
- Care and Maintenance 10
- Troubleshooting 12
Important note:
Read this manual carefully before installing or operating your new air conditioning unit. Make sure to save this manual for future reference.
1. Safety Precautions
Read Safety Precautions Before Installation
Incorrect installation due to ignoring instructions can cause serious damage or injury.
The seriousness of potential damage or injuries is classified as either a WARNING or CAUTION.

This symbol indicates that ignoring instructions may cause death or serious injury.

This symbol indicates that ignoring instructions may cause moderate injury to your person, or damage to your unit or other property.

WARNING
This appliance can be used by children aged from 8 years and above and persons with reduced physical, sensory or mental capabilities or lack of experience and knowledge if they have been given supervision or instruction concerning use of the appliance in a safe way and understand the hazards involved. Children shall not play with the appliance. Cleaning and user maintenance shall not be made by children without supervision.
Installation warnings
- Ask an authorized professional to install this air conditioner. Inappropriate installation may cause water leakage, electric shock, or fire.
- All repairs, maintenance and relocation of this unit must be performed by a licensed service technician. Inappropriate repairs can lead to serious injury or product failure.
Warnings for product use
- If an abnormal situation arises (like a burning smell), immediately turn off the unit and pull the power plug. Call your dealer for instructions to avoid electric shock, fire or injury.
- Do not insert fingers, rods or other objects into the air inlet or outlet. This may cause injury, since the fan may be rotating at high speeds.
- Do not use flammable sprays such as hair spray, lacquer or paint near the unit. This may cause fire or combustion.
- Do not operate the air conditioner in places near or around combustible gases. Emitted gas may collect around the unit and cause explosion.
- Do not operate the air conditioner in a wet room (e.g., bathroom or laundry room). This can cause electrical shock and cause the product to deteriorate.
- Do not expose your body directly to cool air for a prolonged period of time.

WARNING
Electrical warnings
- Only use the specified power cord. If the power cord is damaged, it must be replaced by the manufacturer, certified service agent or licensed electrical contractor.
- Keep power plug clean. Remove any dust or grime that accumulates on or around the plug. Dirty plugs can cause fire or electric shock.
- Do not pull power cord to unplug unit. Hold the plug firmly and pull it from the outlet. Pulling directly on the cord can damage it, which can lead to fire or electric shock.
- Do not use an extension cord, manually extend the power cord, or connect other appliances to the same outlet as the air conditioner. Poor electrical connections, poor insulation, and insufficient voltage can cause fire.
Cleaning and maintenance warnings
- Turn off the device and pull the plug before cleaning. Failure to do so can cause electrical shock.
- Do not clean the air conditioner with excessive amounts of water.
- Do not clean the air conditioner with combustible cleaning agents. Combustible cleaning agents can cause fire or deformation.

CAUTION
- If the air conditioner is used together with burners or other heating devices, thoroughly ventilate the room to avoid oxygen deficiency.
- If you are not going to use the air-conditioner for a long time, disconnect the power from the main isolator.
- During storms or bad weather turn off the unit and disconnect the power from the main isolator.
• Make sure that water condensation can drain unhindered from the unit. - Do not operate the air conditioner with wet hands. This may cause electric shock.
- Donot use device for any other purpose than its intended use.
- Do not climb onto or place objects on top of the outdoor unit.
- Do not allow the air conditioner to operate for long periods of time with doors or windows open, or if the humidity is very high.
2. Unit Specifications and Features
Unit Parts
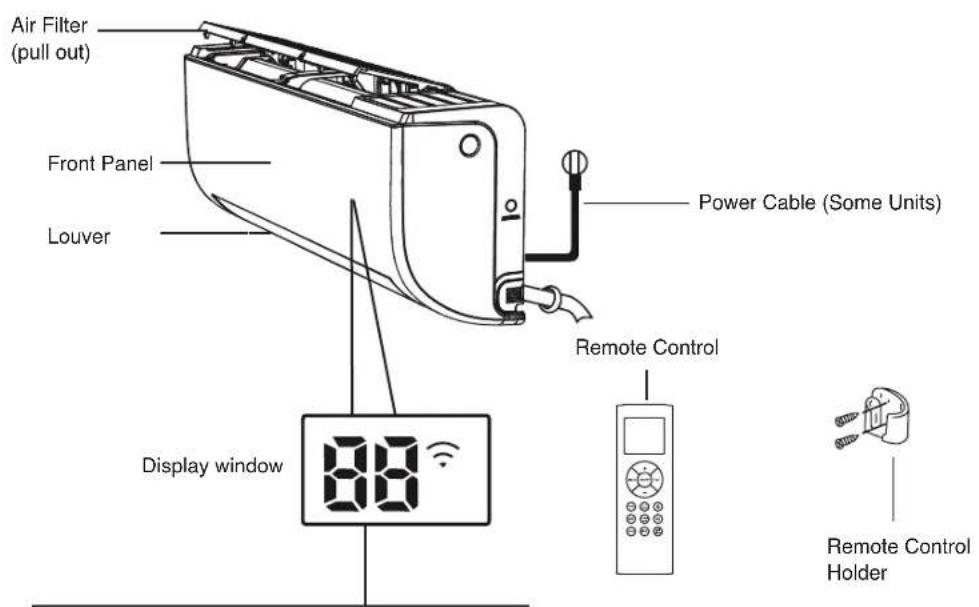
" ON " for 3 seconds when:
- TIMER ON is set
- SWING, TURBO, or SILENT features are turned on
“OF” for 3 seconds when:
- TIMER OFF is set
- SWING, TURBO, or SILENT features are turned off
“ cF ” when anti-cold air feature is turned on
“df” when defrosting
“SC” when unit is self-cleaning
“FP” when freeze protection is turned on
“ 📤 ” when Wireless Control feature is activated
“88” When ECO function is activated, the ‘88’ illuminates gradually one by one as E -- C -- 0 --set temperature-- E..... in one second interval.
In other modes, the unit will display your temperature setting. In Fan mode, the unit will display the room temperature.
Display Code Meanings
Achieving Optimal Performance
Optimal performance for the COOL, HEAT, and DRY modes can be achieved in the following temperature ranges. When your air conditioner is used outside of these ranges, certain safety protection features will activate and cause the unit to perform less than optimally.
Inverter Split Type
| COOL mode HEAT mode DRY mode | ||
| Room Temperature 17°C – 32°C 0°C – 30°C 10°C – 32°C | ||
| Outdoor Temperature -15°C – 50°C -15°C – 30°C 0°C – 50°C |
To further optimize the performance of your unit, do the following:
- Keep doors and windows closed.
- Limit energy usage by using TIMER ON and TIMER OFF functions.
- Do not block air inlets or outlets.
• Regularly inspect and clean air filters.
For a detailed explanation of each function, refer to the Remote Control Manual.
Other Features
- Auto-Restart
If the unit loses power, it will automatically restart with the prior settings once power has been restored. - Mute Operation
Press the LED button on the remote control can turn off the indoor screen display, and also turn off the air conditioner buzzer, which creates a comfortable and quiet environment. - Wireless Control
Wireless control allows you to control your air conditioner using your mobile phone and a Wireless connection.
For the USB device access, replacement, maintenance operations must be carried out by a professional.
- Louver Angle Memory
When turning on your unit, the louver will automatically resume its former angle.
• Refrigerant Leakage Detection
The indoor unit will automatically display "EC" when it detects refrigerant leakage.
For a detailed explanation of your unit's advanced functionality (such as TURBO mode and its self-cleaning functions), refer to the Remote Control Manual.
Setting Angle of Air Flow
Setting vertical angle of air flow
While the unit is on, use the vertical SWING button to set the direction (vertical angle) of airflow.
- Press the vertical SWING button once to activate the louver. Each time you press the button, it will adjust the louver by 6°. Press the button until the direction you prefer is reached.
- To make the louver swing up and down continuously, press and hold the vertical SWING button for 3 seconds. Press it again to stop the automatic function.
Setting horizontal angle of air flow
While the unit is on, use the horizontal SWING button to set the direction (horizontal angle) of airflow.
- Press the horizontal SWING button once to activate the louvre. Each time you press the button, it will adjust the louvre by 6° Press the button until the direction you prefer is reached.
- To make the louvre swing side to side continuously, press and hold the horizontal SWING button for 3 seconds. Press it again to stop the automatic function.
Note on louver angles
When using COOL or DRY mode, do not set louver at too vertical an angle for long periods of time. This can cause water to condense on the louver blade, which will drop on your floor or furnishings. (See Fig. A)
When using COOL or HEAT mode, setting the louver at too vertical an angle can reduce the performance of the unit due to restricted air flow.
Do not move louver by hand. This will cause the louver to become out of sync. If this occurs, turn off the unit and unplug it for a few seconds, then restart the unit. This will reset the louver.
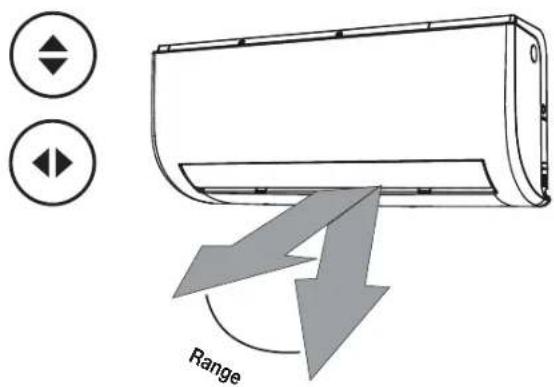

Caution: Do not keep louver at too vertical an angle for long periods of time. This can cause water condensation to drip on your furnishings.
Fig. A

CAUTION
Do not put your fingers in or near the blower and suction side of the unit. The high-speed fan inside the unit may cause injury.

Sleep Operation
The SLEEP function is used to decrease energy use while you sleep (and don't need the same temperature settings to stay comfortable). This function can only be activated via remote control.
Press the SLEEP button when you are ready to go to sleep. When in COOL mode, the unit will increase the temperature by 1^ C after 1 hour, and will increase an additional 1^ C after another hour. When in HEAT mode, the unit will decrease the temperature by 1^ C after 1 hour, and will decrease an additional 1^ C after another hour.
It will hold the new temperature for 5 hours, then the unit will turn off automatically.
Note
The SLEEP function is not available in FAN or DRY mode.

flowchart
graph LR
    A["Set temperature"] --> B["+/- 1°C"]
    B --> C["+/- 1°C"]
    C --> D["7 hours timer off"]
    D --> E["Saving energy during sleep"]
3. Manual Operation (Without Remote)
How to operate your unit without the remote control
In the event that your remote control fails to work, your unit can be operated manually with the MANUAL CONTROL button located on the indoor unit. Note that manual operation is not a long-term solution, and that operating the unit with your remote control is strongly recommended.
Unit must be turned off before manual operation.
To operate your unit manually:
- Locatethe MANUAL CONTROL button on the right-hand side panel of the unit.
- Pressthe MANUAL CONTROL button one time to activate FORCED AUTO mode.
- Pressthe MANUAL CONTROL button again to activate FORCED COOLING mode.
- Pressthe MANUAL CONTROL button a third time to turn the unit off.
CAUTION
The manual button is intended for testing purposes and emergency operation only. Please do not use this function unless the remote is lost and it is absolutely necessary. To restore regular operation, use the remote control to activate the unit.

4. Care and Maintenance
Cleaning Your Indoor Unit

Before cleaning or maintenance
Always turn off your air conditioner and disconnect its power supply before cleaning or maintenance.

CAUTION
Only use a soft, dry cloth to wipe the unit clean. If the unit is especially dirty, you can use a cloth soaked in warm water to wipe it clean.
- Donotuse chemicals or chemically treated cloths to clean the unit
- Donotuse benzene, paint thinner, polishing powder or other solvents to clean the unit. They can cause the plastic surface to crack or deform.
- Do not use water hotter than 40°C to clean the front panel. This can cause the panel to deform or become discolored.
Cleaning Your Air Filter
A clogged air conditioner can reduce the cooling efficiency of your unit, and can also be bad for your health. Make sure to clean the filter once every two weeks.
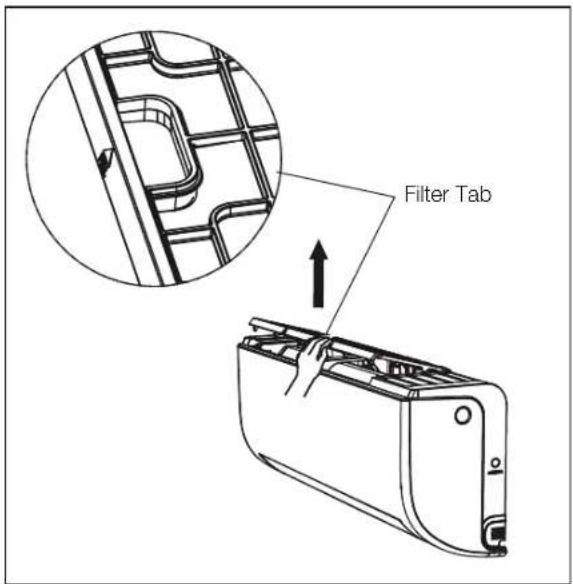
- The air filter is under the top air inlet grill.
- Grip the tab on the end of the filter, lift it up, then pull it towards yourself.
- Clean the large air filter with warm, soapy water. Be sure to use a mild detergent.
- Rinse the filter with fresh water, then shake off excess water.
-
Dry it in a cool, dry place, and refrain from exposing it to direct sunlight.
-
When dry, slide it back into the indoor unit.

natural_image
Line drawing of a mechanical component or housing with no visible text or symbols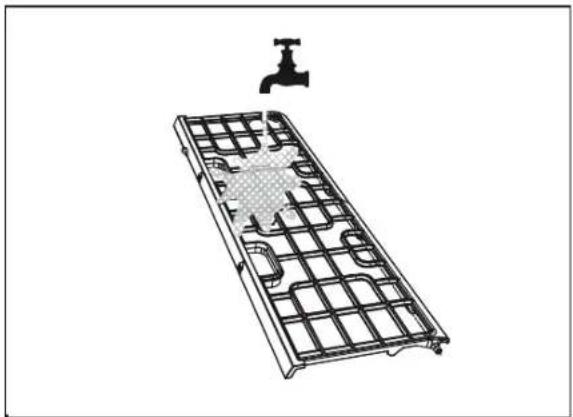
natural_image
Technical line drawing of a modular device with a faucet and grid layout (no text or symbols)
CAUTION
- Before changing the filter or cleaning, turn off the unit and disconnect its power supply.
- When removing filter, do not touch metal parts in the unit. The sharp metal edges can cut you.
- Do not use water to clean the inside of the indoor unit. This can destroy insulation and cause electrical shock.
- Do not expose filter to direct sunlight when drying. This can shrink the filter.
- Any maintenance and cleaning of outdoor unit should be performed by an authorized dealer or a licensed service provider.
- Any unit repairs should be performed by an authorized dealer or a licensed service provider.
Maintenance – Long Periods of Non-Use
If you plan not to use your air conditioner for an extended period of time, do the following:
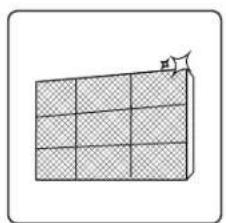
natural_image
Simple 3D grid diagram with a small arrow pointing upward on the top-right corner (no text or symbols)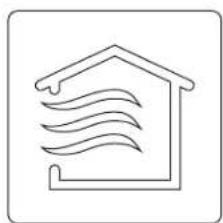
natural_image
Simple line drawing of a house with wavy lines inside, enclosed in a square frame (no text or symbols)Clean all filters Turn on FAN function until
unit dries out completely

natural_image
Simple line drawing of a crossed-out triangular symbol (no text or numbers)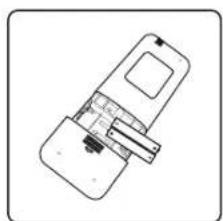
natural_image
Technical line drawing of a mechanical device with no visible text or symbolsTurn off the unit and remove batteries
disconnect the power
from remote control
Maintenance – Pre-Season Inspection
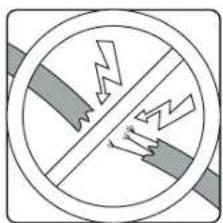
After long periods of non-use, or before periods of frequent use, do the following:

natural_image
Diagram of a 3D grid structure with a small directional arrow pointing upward (no text or symbols)Check for damaged wires Clean all filters


natural_image
Simple line drawing of a handheld device with a handle and internal components (no text or symbols)Check for leaks Replace batteries
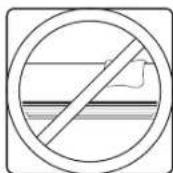
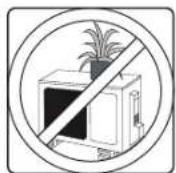
Make sure nothing is blocking all air inlets and outlets
5.Troubleshooting

Safety precautions
If ANY of the following conditions occurs, turn off your unit immediately!
• The power cord is damaged or abnormally warm
- You smell a burning odor
• The unit emits loud or abnormal sounds
- A power fuse blows or the circuit breaker frequently trips
• Water or other objects fall into or out of the unit
Do not attempt to fix these yourself! Contact an authorized service provider immediately!
Common Issues
The following problems are not a malfunction and in most situations will not require repairs.
| Issue Possible Causes | |
| Unit does not turn on when pressing ON/OFF button | The Unit has a 3-minute protection feature that prevents the unit from overloading. The unit cannot be restarted within three minutes of being turned off. |
| The unit changes from COOL/HEAT mode to FAN mode | The unit may change its setting to prevent frost from forming on the unit. Once the temperature increases, the unit will start operating in the previously selected mode again. |
| The set temperature has been reached, at which point the unit turns off the compressor. The unit will continue operating when the temperature fluctuates again. | |
| The indoor unit emits white mist | In humid regions, a large temperature difference between the room's air and the conditioned air can cause white mist. |
| Both the indoor and outdoor units emit white mist | When the unit restarts in HEAT mode after defrosting, white mist may be emitted due to moisture generated from the defrosting process. |
| The indoor unit makes noises | A rushing air sound may occur when the louver resets its position. |
| A squeaking sound may occur after running the unit in HEAT mode due to expansion and contraction of the unit's plastic parts.Low hissing sound during operation: This is normal and is caused by refrigerant flowing through both indoor and outdoor units. | |
| Both the indoor unit and outdoor unit make noises | |
| Low hissing sound when the system starts, has just stopped running, or is defrosting: This noise is normal and is caused by the refrigerant stopping or changing direction. | |
| Squeaking sound: Normal expansion and contraction of plastic and metal parts caused by temperature changes during operation can cause squeaking noises. | |
| The outdoor unit makes noises | The unit will make different sounds based on its current operating mode. |
| Dust is emitted from either the indoor or outdoor unit | The unit may accumulate dust during extended periods of non-use, which will be emitted when the unit is turned on. This can be mitigated by covering the unit during long periods of inactivity. |
| The unit emits a bad odor | The unit may absorb odors from the environment (such as furniture, cooking, cigarettes, etc.) which will be emitted during operations. |
| The unit's filters have become moldy and should be cleaned. | |
| The fan of the outdoor unit does not operate | During operation, the fan speed is controlled to optimize product operation. |
| Operation is erratic, unpredictable, or unit is unresponsive | Interference from cell phone towers and remote boosters may cause the unit to malfunction.In this case, try the following:Disconnect the power, then reconnect.Press ON/OFF button on remote control to restart operation. |
Note
If problem persists, contact a local dealer or your nearest customer service center. Provide them with a detailed description of the unit malfunction as well as your model number.
Troubleshooting
When troubles occur, please check the following points before contacting a service technician.
| Issue Possible Causes | Possible Causes | |
| Temperature setting may be higher than ambient room temperature | Lower the temperature setting | |
| The heat exchanger on the indoor or outdoor unit is dirty | Contact a qualified service technician | |
| The air filter is dirty | Remove the filter and clean it according to instructions | |
| The air inlet or outlet of either unit is blocked | Turn the unit off, remove the obstruction and turn it back on | |
| Poor Cooling Performance | Doors and windows are open | Make sure that all doors and windows are closed while operating the unit |
| Excessive heat is generated by sunlight | Close windows and curtains during periods of high heat or bright sunshine | |
| Too many sources of heat in the room (people, computers, electronics, etc.) | Reduce amount of heat sources | |
| Low refrigerant due to leak Contact a qualified service technician | ||
| SILENT function is activated | SILENT function can lower product performance by reducing operating frequency. Turn off SILENT function. | |
| Issue Possible Causes Possible Causes | ||
| The unit is not working | Power failure Wait for the power to be restored | |
| The power is turned off Turn on the power | ||
| The fuse is burned out Contact a qualified service technician | ||
| Remote control batteries are dead Replace batteries | ||
| The Unit's 3-minute protection has been activated | Wait three minutes after restarting the unit | |
| Timer is activated Turn timer off | ||
| The unit starts and stops frequently | There's too much or too little refrigerant in the system | Contact a qualified service technician |
| Incompressible gas or moisture has entered the system. | Contact a qualified service technician | |
| The compressor is broken Contact a qualified service technician | ||
| The voltage is too high or too low Contact a qualified service technician | ||
| Poor heating performance | The outdoor temperature is extremely low Use other heating device | |
| Cold air is entering through doors and windows | Make sure that all doors and windows are closed during use | |
| Low refrigerant due to leak Contact a qualified service technician | ||
| Indicator lamps continue flashingError code appears in the window display of indoor unit:• E0, E1, E2...• P1, P2, P3...• F1, F2, F3... | The unit may stop operation or continue to run safely.If the indicator lamps continue to flash or error codes appear, wait for about 10 minutes. The problem may resolve itself. If not, disconnect the power, then connect it again. Turn the unit on.If the problem persists, disconnect the power and contact a qualified service technician. | |
Note
If your problem persists after performing the checks and diagnostics above, turn off your unit immediately and contact Customer Care 1800 080 055.
kaden ^
- Owner's Manual
- Table of Contents
- Important note:
- Safety Precautions
- Read Safety Precautions Before Installation
- WARNING
- Installation warnings
- Warnings for product use
- Electrical warnings
- Cleaning and maintenance warnings
- CAUTION
- Unit Specifications and Features
- Achieving Optimal Performance
- Inverter Split Type
- Other Features
- Setting Angle of Air Flow
- Setting vertical angle of air flow
- Setting horizontal angle of air flow
- Note on louver angles
- Sleep Operation
- Note
- Manual Operation (Without Remote)
- Care and Maintenance
- Cleaning Your Indoor Unit
- Cleaning Your Air Filter
- Maintenance – Long Periods of Non-Use
- Maintenance – Pre-Season Inspection
- 5.Troubleshooting
- Safety precautions
- Common Issues
- Troubleshooting
- kaden °
Brand : Kaden
Model : KS09
Category : Air conditioner