CM111GM - Microwaves Caple - Free user manual and instructions
Find the device manual for free CM111GM Caple in PDF.


| Product Type | Microwave Oven |
| Brand | Caple |
| Model | CM111GM |
| Capacity | 25 L |
| Microwave Power | 900 W |
| Display Type | Digital LED |
| Control Type | Touch Buttons + Rotary Dial |
| Dimensions (W x H x D) | 485 x 280 x 400 mm |
| Weight | 14 kg |
| Power Supply | 230 V / 50 Hz / 1300 W |
| Functions | Defrost, Reheat, Cook, Auto Menus |
| Power Levels | 10 |
| Timer | Yes, up to 99 minutes |
| Door Type | Drop-down with handle |
| Interior Material | Enamel (easy to clean) |
| Interior Light | Yes |
| Child Lock | Yes |
| Turntable | Yes, 315 mm diameter |
| Cleaning | Wipe with damp cloth |
| Spare Parts Availability | Available through service centers |
| Repairability | Repairable by qualified technician |
Frequently Asked Questions - CM111GM Caple
User questions about CM111GM Caple
0 question about this device. Answer the ones you know or ask your own.
Ask a new question about this device
Download the instructions for your Microwaves in PDF format for free! Find your manual CM111GM - Caple and take your electronic device back in hand. On this page are published all the documents necessary for the use of your device. CM111GM by Caple.
USER MANUAL CM111GM Caple
Sense Combination Microwave Instruction Manual
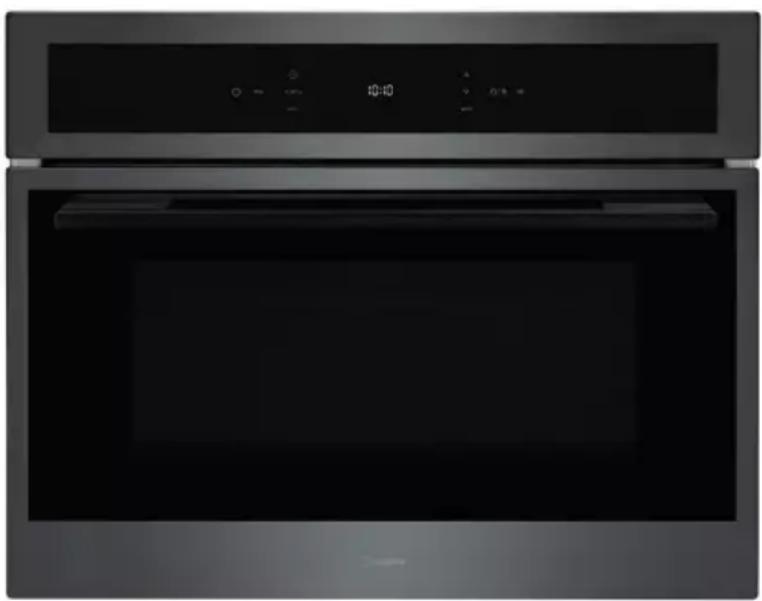
CM111
natural_image
Modern stainless steel oven with digital display and control buttons (no visible text or symbols)CONTENTS
Warnings 3
Environmental Protection 10
Warranty 10
Installation 11
Fitting the Appliance 12
Dimensions 13
Electronic Connection 14
Control Panel / Display 15
Accessories 17
Operation 19
Microwave Oven Functions 22
Auto Cooking 24
Defrost Time Table 26
Demo Mode 27
Care and Maintenance 28
Removing the Oven Door 29
Troubleshooting 30
Technical Data 31
Caple Contact Details 32
SAFETY INSTRUCTIONS
Read carefully all the instructions contained in this manual. It provides you with important information regarding the safe installation, use and maintenance of the appliance as well as useful advice for getting the best out of your microwave oven. Keep this booklet in a safe place for future reference. After removing the packing, check that the appliance is not damaged in any way.
Be careful not to leave the packing materials (plastic sheeting, expanded polystyrene etc.) where children can get at them, as they can be dangerous.
IMPORTANT:
Do not use the oven door handle to move the appliance, such as to remove it from the packaging.
ATTENTION:
The microwave oven is an appliance which, for its nature, becomes hot during use, especially the glass door.
It is therefore a good rule that children do not approach the microwave oven when it is functioning, particularly when the grill is in use.
Before you use the microwave oven for the first time, heat the empty oven at max. temperature for 1 hour using fan heat, removing any unpleasant smells and smoke caused
by working residues and thermal insulation. Make sure you do this in a well ventilated area.
Never roast or bake on the oven base.
This appliance is intended to be used in household and similar applications such as:
- Staff kitchen areas in shops, offices and other working environments.
-Farm Houses. - By clients in hotels, motels and other residential type environments.
-Bed and breakfast type environments.
The electrical system of this appliance may be used safely only when it is correctly connected to an efficient earthing system in compliance with the safety standards currently in effect.
The manufacturer will not be held liable for any damages that might arise out of incorrect or improper use of the appliance.
The following items are potentially dangerous, and therefore, appropriate measures must be taken to prevent children and the disabled from coming into contact with them:
Controls and the appliance in general
- Packaging (bags, polystyrene, nails, etc.)
- The appliance immediately after use of the oven or grill due to the heat generated.
-The appliance when no longer in use (potentially dangerous parts must be made safe).
WARNING:
Accessible parts will become hot when in use. To avoid burns and scalds children should be kept away.
During use the appliance becomes hot, Care should be taken to avoid touching heating elements inside the oven.
- If the door or door seals are damaged, the oven must not be operated until it has been repaired by a Caple approved engineer.
- It is hazardous for anyone other than a competent person to carry out any service or repair operation that involves the removal of a cover which gives protection against exposure to microwave energy.
- Liquids and other foods must not be heated in sealed containers since they are liable to explode.
- Only use utensils that are suitable for use in microwave ovens.
- When heating food in plastic or paper containers, keep an eye on the oven due to the possibility of ignition.
- The microwave oven is intended for heating food and beverages. Drying of food or clothing and heating of warming pads, slippers, sponges, damp cloth and similar may lead to risk of injury, ignition or fire.
- The oven should be cleaned regularly and any food deposits removed.
- Failure to maintain the oven in a clean condition could lead to deterioration of the surface that could adversely affect the life of the appliance and possibly result in a hazardous situation.
WARNING:
To reduce the risk of burns, electric shock, fire, injury to persons or exposure to excessive microwave energy:
- Make sure that all the packing materials are removed from the inside of the door.
WARNING:
-Check the oven for any damage, such as misaligned or bent door, damaged door seals and sealing surface, broken or loose door hinges and latches and dents inside the cavity or on the door. If there is any damage, do not operate the oven and contact Caple service immediately.
- This microwave oven must be placed on a flat, stable surface to hold its weight and the heaviest food likely to be cooked in the oven.
- Do not place the microwave oven where heat, moisture, or high humidity are generated, or near combustible materials.
-Do not operate the microwave oven when empty. -Do not operate this appliance if it has a damaged cord or plug, if it is not working properly or if it has been damaged or dropped. If the supply cord is damaged, it must be replaced by Caple or an approved engineer in order to avoid a hazard.
-Microwave heating of liquids can result in delayed eruptive boiling, therefore care has to be taken when handling the container.
-Do not fry food in the microwave oven. Hot oil can damage oven parts and utensils and even result in skin burns.
- Eggs in their shell and whole hard-boiled eggs should not be heated in microwave ovens since they may explode even after microwave heating has ended.
- Pierce foods with heavy skins such as potatoes, whole squashes, apples and chestnuts before cooking.
- The contents of feeding bottles and baby jars should be stirred or shaken and the temperature should be checked before serving in order to avoid burns.
- Utensils should be checked to ensure that they are suitable for use in microwave oven.
WARNING:
Liquid or other food must not be heated in sealed containers since they are liable to explode.
WARNING:
It is hazardous for anyone other a trained person to carry out any service or repair operation which involves the removal of any cover which gives protection against exposure to microwave energy.
-This appliance is not intended for use by persons (including children) with reduced physical, sensory or mental capabilities, or lack of experience and knowledge, unless the have been given supervision or instruction concerning use of the appliance by a person responsible for their safety.
-Children should be supervised to ensure that they do not play with the appliance.
-When heating food in plastic or paper containers, check the oven frequently for the possibility of ignition.
-Remove wire ties from paper or plastic bags before placing bag in oven.
- If smoke is observed. Switch off or unplug the appliance and keep the door closed in order to stifle any flames.
- Do not leave paper products, cooking utensils or food in the cavity when not in use.
WARNING:
The appliance and its accessible parts become hot during use.
Care should be taken to avoid touching heating elements.
Children less than 8 years of age shall be kept away unless continuously supervised.
This appliance can be used by children aged from 8 years and above and persons with reduced physical, sensory or mental capabilities or lack of experience and knowledge if they have been given supervision or instruction concerning use of the appliance in a safe way and understand the hazards involved. Children shall not play with the appliance. Cleaning and user maintenance shall not be made by children without supervision.
During use the appliance becomes hot. Care should be taken to avoid touching heating elements inside the oven.
WARNING:
Accessible parts may become hot during use. Young children should be kept away.
ENVIRONMENTAL PROTECTION
Waste electrical products should not be disposed of with household waste. Please recycle where facilities exist. Check with your Local Authority or retailer for recycling advice. This appliance is marked according to the European Directive on Waste Electrical and Electronic Equipment (WEEE).
By ensuring this product is disposed of correctly, you will help prevent potential negative consequences for the environment and human health, which could otherwise be caused by inappropriate waste handling of this product. The symbol on the product indicates that this product may not be treated as household waste. Instead it shall be handed over to the applicable collection point for the recycling of electrical and electronic equipment. Disposal must be carried out in accordance with local environmental regulations for waste disposal.
For more detailed information about treatment, recovery and recycling of this product, please contact your local council, your household waste disposal service or the retailer where you purchased the product.
CE DECLARATIONS OF CONFORMITY CE
This appliance has been manufactured to the strictest standards and complies with all applicable legislation, Low Voltage Directive (LVD) and Electromagnetic Compatibility (EMC).
UKCA DECLARATIONS OF CONFORMITY UK CA
This appliance has been manufactured to the strictest standards and complies with all applicable legislation.
WARRANTY:
Your new appliance is covered by warranty. The warranty card is enclosed - if it is missing, you must provide the following information to your retailer in order to receive a replacement: date of purchase, model and serial number (placed on the inside of the appliance storage drawer). Registration can also be completed online by visiting www.caple.co.uk.
Ensure you keep your warranty card safe, you may need to show it to Caple Service together with proof of purchase.
If you fail to show your warranty card you will incur all repair charges. Spare parts are only available from Caple Service and spare parts authorised centres.
INSTALLATION
Installation should be carried out according to the instructions by a professionally qualified person only.
The manufacturer declines all responsibility for any damage to persons, animals or materials due to incorrect installation.
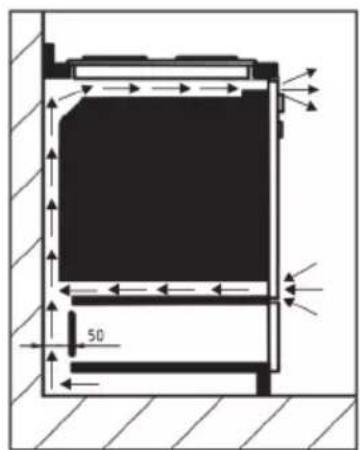
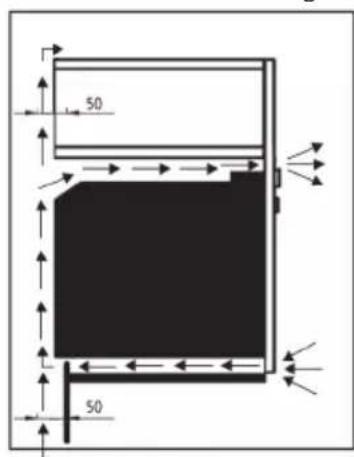
The Combi-Microwave requires a sufficient supply of cool air for efficient operation. Make sure that the supply of cool air is not hindered in any way (e.g. by fitting heat insulation strips in the cabinet carcase). Furthermore the required supply of cool air must not be excessively heated by other heat sources.
ATTENTION:
Before use, remove all plastic films protecting some parts of the appliance (fascia - panel, parts in stainless steel, etc.)
Do not use the appliance to heat a room.
When the appliance is not in use, we recommend you turn it off, isolate it from the electrical supply.
IMPORTANT:
Isolate your microwave oven from the electrical supply before performing installation or maintenance.
FITTING THE APPLIANCE
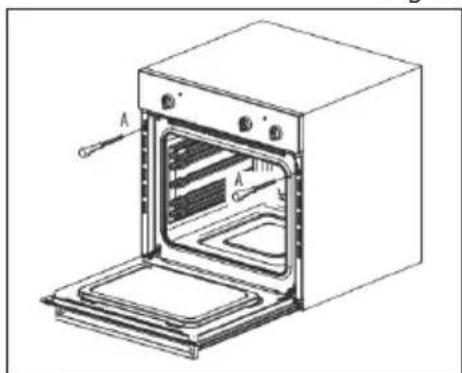
Fit the appliance into its surround (beneath a worktop or above another appliance in a tall housing) by inserting screws into the 4 holes (A - fig.3) that can be seen in the frame of the oven when the door is open.
natural_image
Line drawing of an open oven with labeled components (no text or symbols present)Fig 3.
Fig 1.
For the most efficient air circulation, the microwave oven should be fitted according to the dimensions shown in fig.1.
NOTE:
To aid ventilation, we suggest leaving a small gap of around 3mm between the top of the plinth and underside of the cabinet to allow fresh air to circulate around the oven.
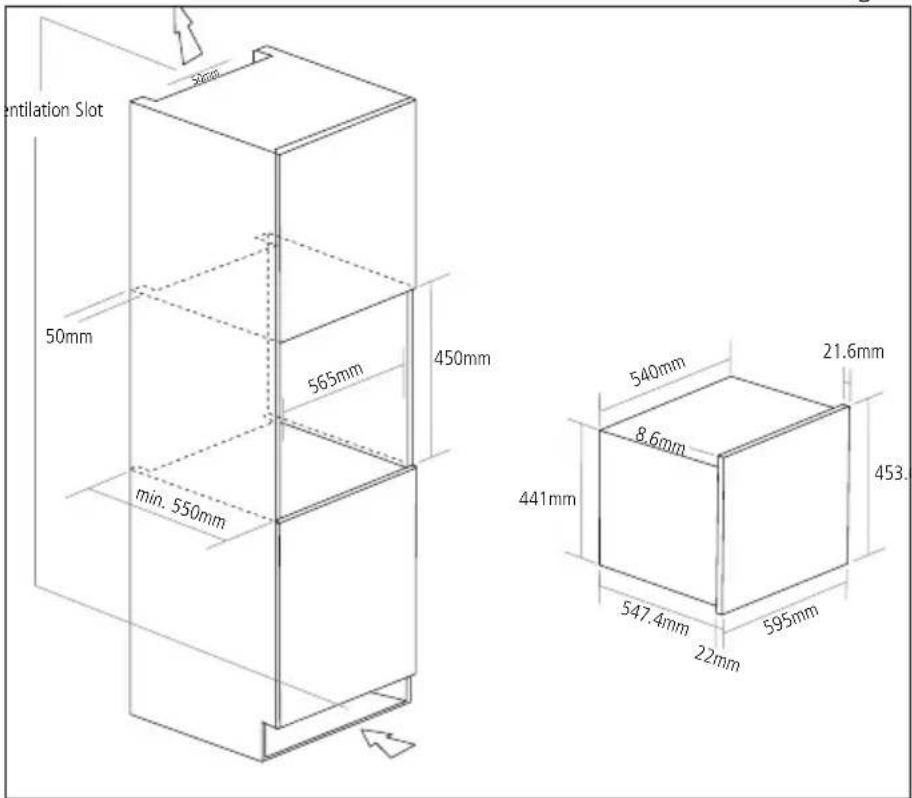
Fig 5.Fig 4.
The rear panel of the cabinet must be removed so that air can circulate freely. The panel to which the microwave oven is fitted should have a gap of at least 50mm at the rear for ventilation (fig.4 & fig.5).
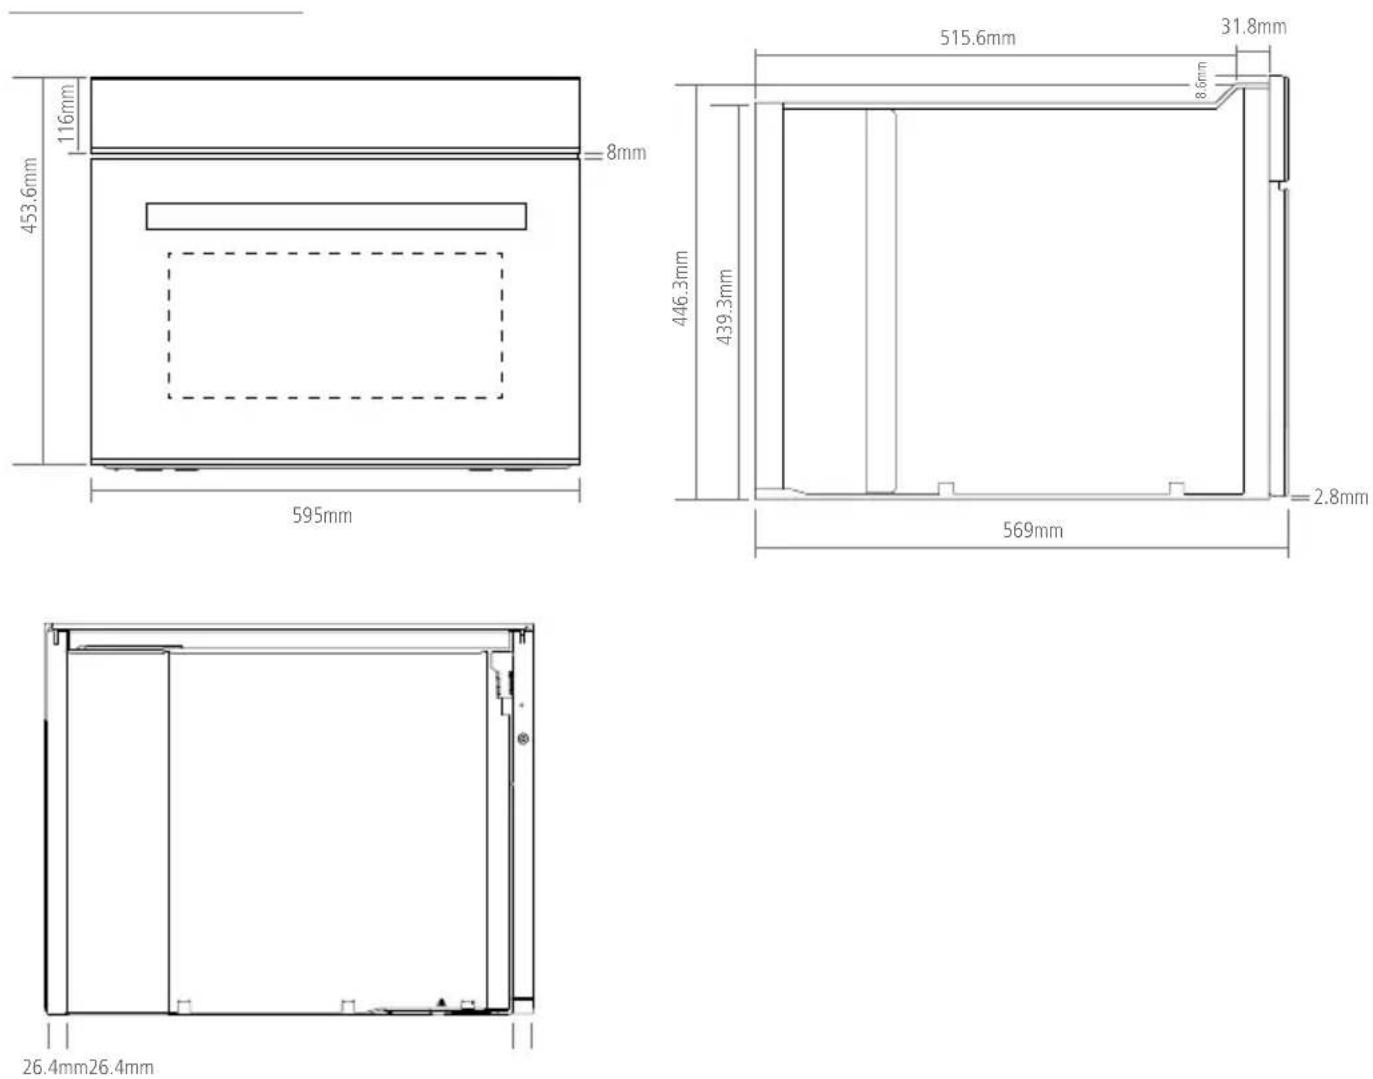
See below for full dimensional drawings of your microwave oven to help with installation.
For a built-in oven microwave to work well the cabinet must be of the right type.
The panels of the adjoining furniture should be heat resistant. Particularly when the adjoining furniture is made of veneered wood, the adhesives should be able to withstand a temperature of 120^ C. Plastic materials or adhesive which cannot withstand this temperature may become deformed or unstuck.
To comply with safety regulations, once the appliance has been fitted it should not be possible to make contact with the electrical parts.
All parts which offer protection should be fixed in such a way that they cannot be removed without the use of a tool.
MICROWAVE OVEN DIMENSIONS
ELECTRICAL CONNECTION
WARNING:
This appliance must be earthed.
Check that the power rating of the mains supply is suitable for the maximum power of the appliance as indicated on the rating label.
The fuse rating for this appliance is 13amp.
The appliance is supplied with a mains lead it should be "Hard wired" as follows:
- The "yellow/green" earth wire, which must be connected to a terminal, and has to be about 10mm longer than the other wire.
- The neutral wire has to be connected to the terminal marked with a letter N.
- The Live wire should only be connected to the terminal marked L.
Mains connection can also be made by fitting a double pole switch with a minimum gap between the contacts of 3mm, proportionate to the load and complying with the regulations in force.
THE YELLOW/GREEN EARTH WIRE SHOULD NOT BE CONTROLLED BY THE SWITCH.
When a double pole switch is used for mains supply connection it should be easily accessed, once the appliance is in position.
IMPORTANT:
The mains supply cable should be positioned so that it is never subjected to temperatures which are more than 50^ C above ambient temperature.
The electrical safety of the appliance can only be guaranteed when it has been correctly connected to a properly earthed mains electrical supply, as laid down in the current regulations for electrical safety.
The manufacturer cannot be held responsible for any damage to persons or objects due to lack of an earth connection.
The ovens are designed to operate with a mono-phase alternating current of 220-240V, 50Hz.
BEFORE THE INSTALLATION OF THE APPLIANCE, CHECK THE SPECIFICATIONS ON THE RATING LABEL.
CONTROL PANEL
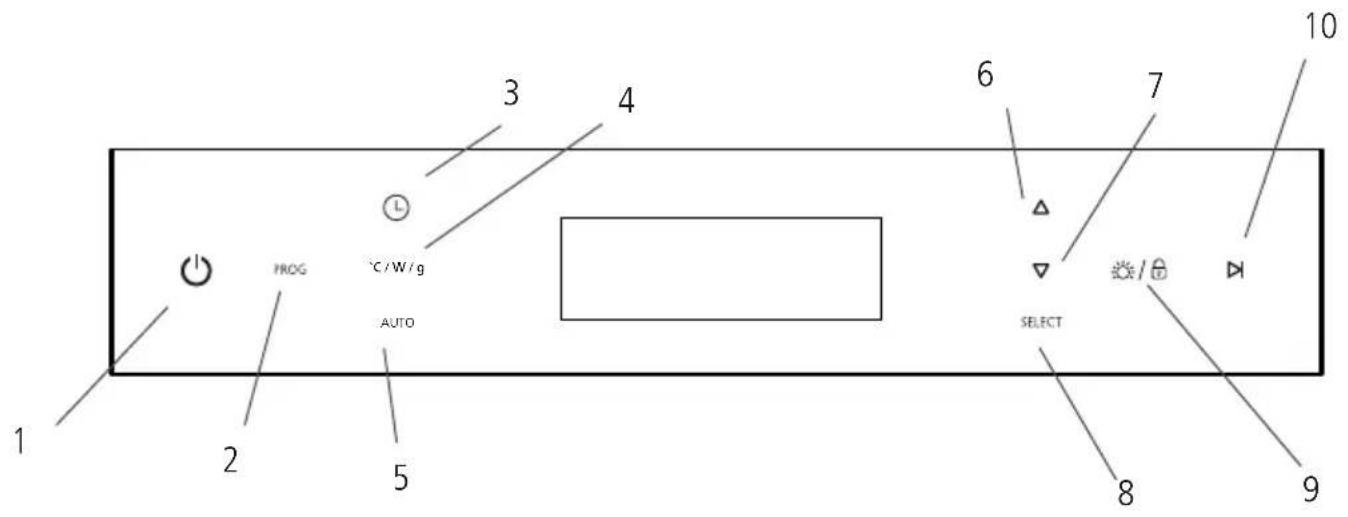
- Power
- Programme
- Timer
- Temperature °C / Power (watts) / Weight (grams)
- Auto cooking
- Up
- Down
- Select
- Light / Child lock
- Start / Pause
DISPLAY
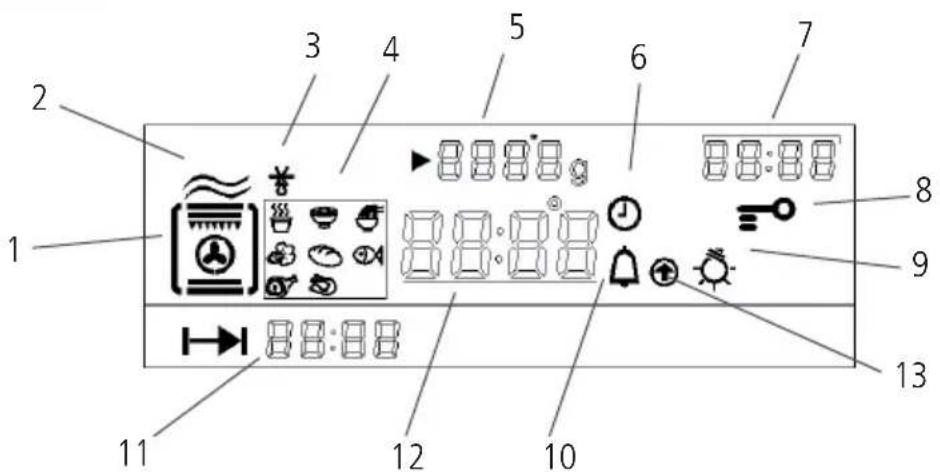
- Programme / Function
- Timer
- Microwave
- Time
- Defrost
- Child Lock
- Auto Cooking
- Light
- Temperature / Power / Weight (grams)
-
Alarm
-
Duration Time
-
Temperature / Time Display
-
Heating Indicator
NOTE:
The Heating indicator will turn on to show the oven is heating up. When the oven reaches the set temperature this indicator will turn off.
The same indicator will turn back on at some points during cooking when the oven falls slightly below the set temperature.
This is normal, and will turn off again when the set temperature is regained.
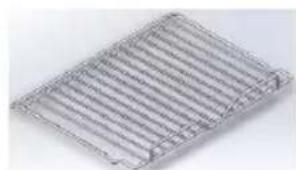
WIRE SHELF (FIG.1)
The wire shelf allows you to brown or grill food. The shelf can be used for normal fan heat, conventional cooking and grilling functions only. It must not be used for any microwave function.
If a microwave function is selected, ensure the wire shelf has been removed before the start.
natural_image
Metallic grid-like structure with vertical slats, no text or symbols visibleFig. 1
WARNING:
Do not use the wire shelf with any microwave function. This could damage the shelf or even your microwave oven. The wire shelf is for normal convection/Fan cooking or grilling only.
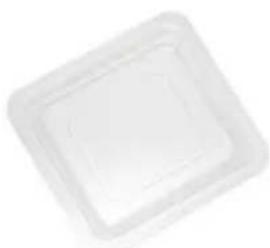
GLASS TRAY (FIG.2)
The glass tray allows you to cook foods on normal fan heat, conventional cooking, grilling functions, microwave and combi-microwave functions.
natural_image
Plain white square object with rounded corners, no text or symbols visibleFig. 2
WARNING:
Do not use the glass tray on or under a flame or other direct heat source.
Do not drop or hit the tray against hard objects or strike utensils against it.
Handle the glass tray with care to prevent breakage, chipping, cracking or severe scratching. Do not use or repair the tray if it is chipped, cracked or severely scratched.
Avoid sudden changes in temperature to the glass tray.
Do not use the Grill Rack supplied with the glass tray with any microwave function. This could damage the rack or even your microwave oven. The wire rack is for normal convection/Fan cooking or grilling only.
Do not use the glass tray on the bottom of the appliance cavity. The glass tray should be used on the side shelf supports only.
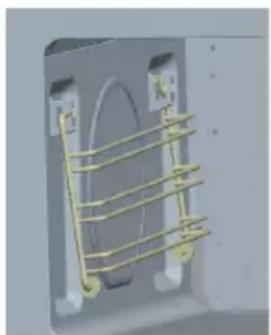
THE SIDE SHELF SUPPORTS (FIG.3)
2 hook-on shelf supports allow you to use the accessories on three levels. Three cooking levels are available, depending on the method used and the type of food. With the Grill setting, the accessories (shelf or tray) are placed on the first level for thick foods like roasts and on the third level for thinner foods like sausages. In normal cooking modes, the shelf or tray should be used on the first or second levels depending on the item(s) being cooked.
natural_image
3D rendering of a wall-mounted heating element with yellow metal bars and a curved pipe (no text or symbols visible)Fig. 3
GLASS BASE PLATE (FIG.4)
When microwaving, foods and beverages can be placed on the Glass base plate. The Glass base plate protects the bottom of the microwave cavity from any scratches, marks or spillages. It can also be easily removed for cleaning by either hand or in the dishwasher.
natural_image
Pure black background with a faint crosshair and no visible text, numbers, or symbols.Fig. 4
NOTE:
Always remove the wire shelf when using microwave functions, as this could damage the oven.
OPERATION
Press the ⏻ button to turn the oven on. When turned on, the display will light up and the time of day will be shown.
PROGRAMME / FUNCTION:
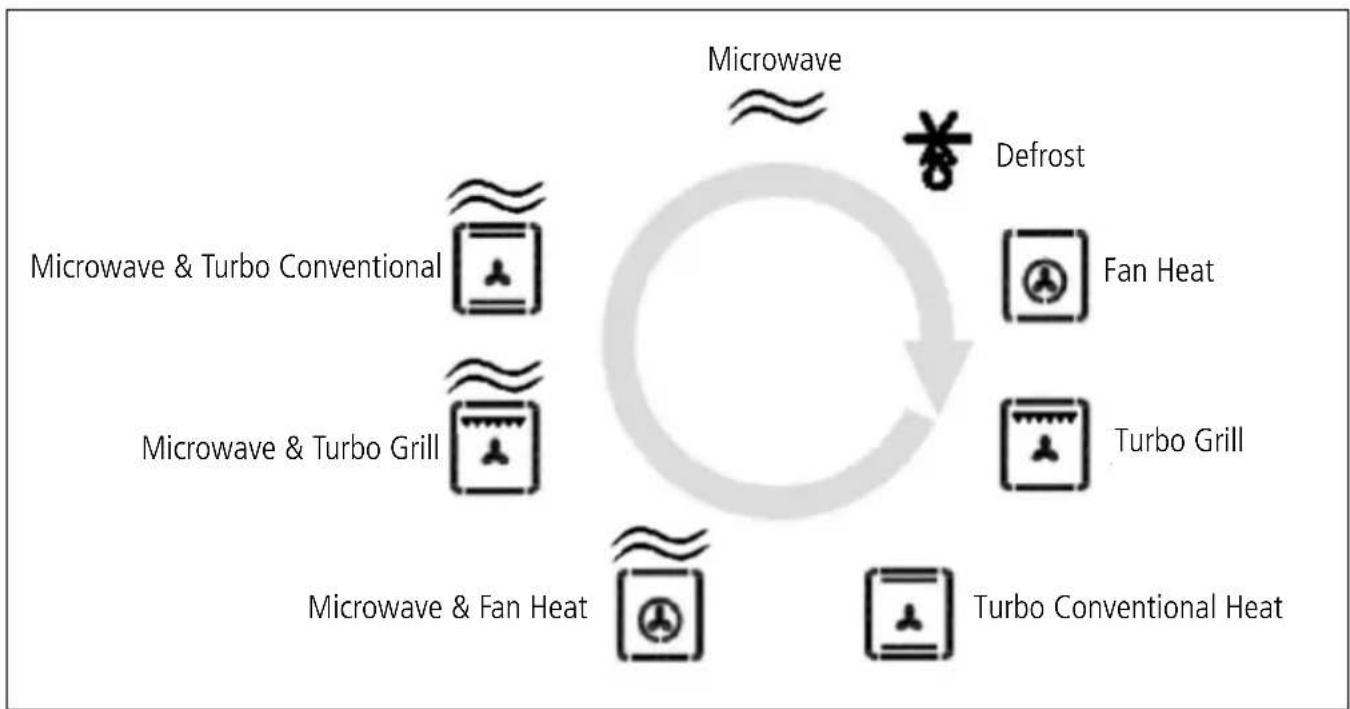
To select a function, press the PROG button to toggle through the functions and press SELECT once you have reached the required function. Press the °C/W/g button to enter the temperature (°C), power (W) or weight (g) mode depending on what function has been selected.
To adjust the temperature, power or weight, use the / keys followed by SELECT to confirm.
Once confirmed, press the ▶ button to start cooking. The main timer will show the actual temperature, with the set temperature shown above this.
flowchart
graph TD
    A["Microwave & Turbo Conventional"] --> B["Defrost"]
    C["Microwave & Turbo Grill"] --> D["Fan Heat"]
    E["Microwave & Fan Heat"] --> F["Turbo Grill"]
    G["Turbo Conventional Heat"] --> H["Defrost"]
    I["Microwave & Turbo Conventional"] --> J["Defrost"]
    K["Microwave & Turbo Grill"] --> L["Fan Heat"]
    M["Microwave & Fan Heat"] --> N["Turbo Grill"]
    O["Microwave & Turbo Conventional"] --> P["Defrost"]
    Q["Microwave & Turbo Grill"] --> R["Fan Heat"]
    S["Microwave & Fan Heat"] --> T["Turbo Grill"]
    U["Microwave & Turbo Conventional"] --> V["Defrost"]
    W["Microwave & Turbo Grill"] --> X["Fan Heat"]
    Y["Microwave & Fan Heat"] --> Z["Turbo Grill"]
    AA["Microwave & Turbo Conventional"] --> AB["Defrost"]
    AC["Microwave & Turbo Grill"] --> AD["Fan Heat"]
    AE["Microwave & Fan Heat"] --> AF["Turbo Grill"]
    AG["Microwave & Turbo Conventional"] --> AH["Defrost"]
    AI["Microwave & Turbo Grill"] --> AJ["Fan Heat"]
    AK["Microwave & Fan Heat"] --> AL["Turbo Grill"]
LIGHT FUNCTION:
Press the 🎨/ 🔒 button once to turn the internal microwave oven lights on & off. The lights will automatically turn off after 3 minutes of no operation.
When the light is activated the ⚙ symbol will be shown on the display.
CHILD LOCK:
Hold the 🎨/ 🔒 button for 2-3 seconds to activate the child lock. To deactivate, press and hold the 🎨/ 🔒 button again for 2-3 seconds.
When the Child lock is activated, the ^ symbol will be shown on the display.
ALARM SETTING:
To set the Alarm/minute minder, press the Ⓛ button until the △ symbol starts to flash. Use △ / ▽ to adjust the time, and then press SELECT to confirm. If you want to cancel the alarm, set the alarm time back to '0.00' and press SELECT to confirm.
When the time is up, the alarm will sound for 90 seconds, and the △ symbol will begin to flash. To stop the alarm, press any button.
SETTING THE TIME:
To set the time, turn the oven on, and then press and hold the Ⓛ button for 3 seconds until the time begins to flash. Adjust the time using the △ / ▽ and then press SELECT to confirm.
When the oven is first turned on or restarts, the time must be set before using the oven.
STANDBY MODE:
To save energy, the display will automatically turn off after a few minutes of no use.
DURATION COOKING(0-10HRS)
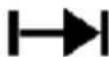
Once a function and temperature have been selected, press the Ⓛ button and the Duration time will start to flash. Press △ / ▽ to adjust the time, and then SELECT to confirm. Once the time is up, the alarm will sound and the oven will switch off.
Press any of the buttons to turn off the alarm △ / ▽, SELECT, and Ⓛ
To cancel Duration cooking set the cooking time to '0:00' and confirm.
MICROWAVE OVEN FUNCTIONS
Press the PROG button to select the following functions.
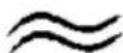 | MICROWAVE:Default power P100 (power range P10-P100).To adjust the power, press △ /▽ until the correct power is reached followed by SELECT.Default time is 30 seconds. To adjust the time press the button followed by the △ /▽ and SELECT to confirm.The time will increase in 30 seconds increments (Max 60mins).Note: The Duration time when using the microwave function will display 'minutes : seconds', in all other functions it will show 'hours : minutes'.Finally press ▶ to start the programme. | 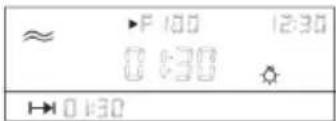 |
 | DEFROST:Default weight 1000g (weight range 100-2000g).To adjust the weight press the °C/W/g button followed by the △ /▽ and SELECT to confirm.Finally press ▶ to start the programme. The default time will be adjusted according to the set weight (See the 'Defrost time table' for more info). | 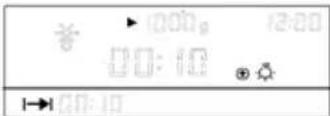 |
 | FAN HEAT:Default temperature 200°C.To adjust the temperature press °C/W/g followed by △ /▽ .Press SELECT to confirm.The default time is 1.00hr. To Adjust the time, press the button followed by the △ /▽ and SELECT to confirm.Finally press ▶ to start the programme. | 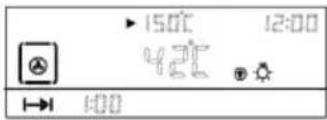 |
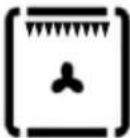 | TURBO GRILL:Default temperature 200°C (Temperature range 50-220°C).To adjust the temperature press °C/W/g followed by △ /▽ .Press SELECT to confirm.The default time is 1.00hr. To Adjust the time, press the button followed by the △ /▽ and SELECT to confirm.Finally press ▶ to start the programme. | 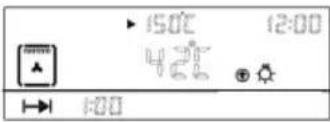 |
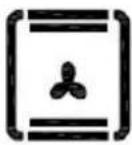 | TURBO CONVENTIONAL:Default temperature 200°C (Temperature range 50-220°C).To adjust the temperature press °C/W/g followed by △/▽.Press SELECT to confirm.The default time is 1.00hr. To Adjust the time, press the button followed by the △/▽ and SELECT to confirm.Finally press ▶ to start the programme. | 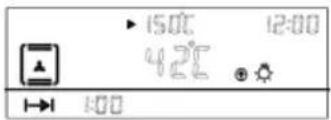 |
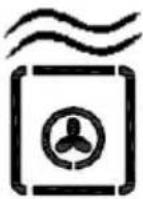 | MICROWAVE & FAN HEAT:Microwave default power P50 (Power range P10-P50).Fan heat default temperature 200°C (Temperature range 50-220°C).Press °C/W/g once to enter the Microwave power mode, and then again to enter the fan heat temperature mode. These can both then be adjusted using the △/▽ keys followed by SELECT to confirm.The default time is 1.00hr. To Adjust the time, press the button followed by the △/▽ and SELECT to confirm.Finally press ▶ to start the programme. | 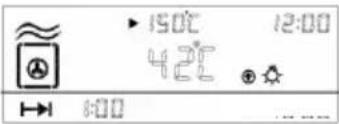 |
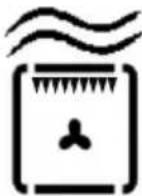 | MICROWAVE & TURBO GRILL:Microwave default power P50 (Power range P10-P50).Turbo grill default temperature 200°C (Temperature range 50-220°C).Press °C/W/g once to enter the Microwave power mode, and then again to enter the Turbo grill temperature mode. These can both then be adjusted using the △/▽ keys followed by SELECT to confirm.The default time is 1.00hr. To Adjust the time, press the button followed by the △/▽ and SELECT to confirm.Finally press ▶ to start the programme. | 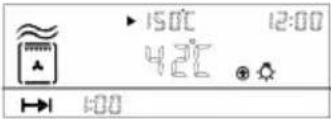 |
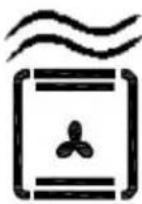 | MICROWAVE & TURBO CONVENTIONAL HEAT:Microwave default power P50 (Power range P10-P50). Turbo grill default temperature 200°C (Temperature range 50 - 220°C).Press °C/W/g once to enter the Microwave power mode, and then again to enter the Turbo conventional temperature mode. These can both then be adjusted using the △/▽ keys followed by SELECT to confirm.The default time is 1.00hr. To Adjust the time, press the button followed by the △/▽ and SELECT to confirm.Finally press ▶ to start the programme. | 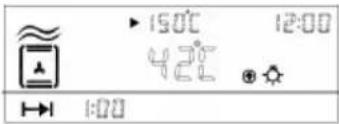 |
WARNING:
All programmes which include the Microwave function do not require pre-heating, and must only be used with food inside the oven.
The wire shelf and the grill rack cannot be used with any microwave function ≈
AUTO COOKING
Example:
| SYMBOL DESCRIPTION DISPLAY | ||
 | Milk (Auto programme)Press the Auto programme button until the Milk symbol is displayed.Press the °C/W/g to enter the Weight selection. Use the △ /▽ to adjust the weight and press SELECT to confirm.The default time will be adjusted according to the weight selected.Finally press ▶ to start the programme. | 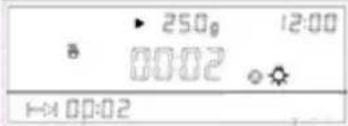 |
AUTO COOKING FUNCTIONS
| SYMBOL | DEFAULT WEIGHT | WEIGHT ALTERNATIVES | FUNCTION | DURATION |
| [KxH6] Milk | 250g | 250 | Microwave | 2 |
| 500 | Microwave | 4 | ||
 Soup Soup | 500g | 500 | Microwave | 19 |
| 800 | Microwave | 22 | ||
 Noodles Noodles | 300g | 300 | Microwave | 5 |
| 600 | Microwave | 8 | ||
 Vegetables Vegetables | 200g | 100 | Microwave | 2 |
| 200 | Microwave | 4 | ||
| 300 | Microwave | 5 | ||
| 400 | Microwave | 6 | ||
| 500 | Microwave | 7 | ||
| 600 | Microwave | 8 | ||
 Bread Bread | 200g | 100 | Microwave | 1 |
| 200 | Microwave | 2 | ||
| 300 | Microwave | 3 | ||
 Fish Fish | 500g | 100 Microwave 3 | ||
| 200 Microwave 5 | ||||
| 300 Microwave 6 | ||||
| 400 Microwave 7 | ||||
| 500 Microwave 8 | ||||
| 600 Microwave 9 | ||||
| 700 Microwave 10 | ||||
| 800 Microwave 11 | ||||
| 900 Microwave 12 | ||||
| 1000 Microwave | ||||
 Meat Meat | 500g | 200 Microwave 7 | ||
| 300 Microwave 8 | ||||
| 400 Microwave 10 | ||||
| 500 Microwave 12 | ||||
| 600 Microwave 14 | ||||
| 800 Microwave 16 | ||||
| 100 Microwave 19 | ||||
 Chicken Chicken | 1000g | 200 Microwave + Grill 15 | ||
| 400 Microwave + Grill 20 | ||||
| 600 Microwave + Grill 25 | ||||
| 800 Microwave + Grill 30 | ||||
| 1000 Microwave + Grill 32 | ||||
| 1200 Microwave + Grill 35 | ||||
| 1400 Microwave + Grill 40 | ||||
| 1600 Microwave + Grill 46 | ||||
| 1800 Microwave + Grill 52 | ||||
| 2000 Microwave + Grill 56 |
DEFROST TIME TABLE
The maximum weight for defrost is 2000g. The default defrost time will be adjusted according to different weight selected.
| WEIGHT(GRAMS) | TIME(MINUTES) | WEIGHT(GRAMS) | TIME(MINUTES) |
| 100 3 1100 22 | |||
| 200 5 1200 24 | |||
| 300 6 1300 26 | |||
| 400 8 1400 28 | |||
| 500 10 1500 30 | |||
| 600 12 1600 32 | |||
| 700 14 1700 34 | |||
| 800 16 1800 36 | |||
| 900 18 1900 38 | |||
| 1000 20 2000 40 |
TO TURN ON DEMO MODE:
Press the ⏻ button to turn the oven on (in standby mode). Press and hold the ▶ button for 5 seconds. The alarm will beep 3 times, and ▶ will appear in the top right of the display to confirm the oven has entered demo mode.
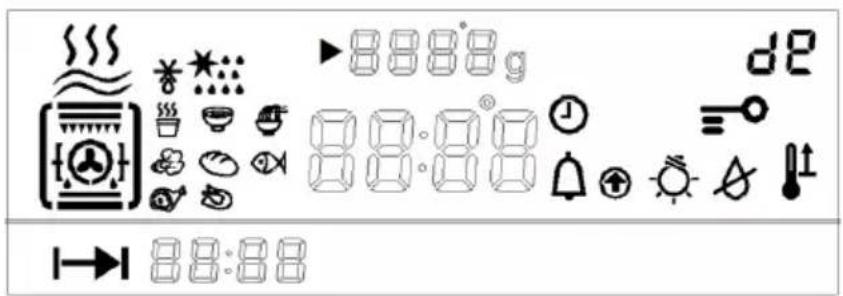
In demo mode, the normal operation of the cooling fan, circulation fan, and lighting work normally, however all heating elements and other functions are disabled.
If the oven is turned off, it will remain in Demo mode when the over is turned back on.
TO TURN OFF DEMO MODE:
Press the ⏻ button to enter standby mode, then press and hold the ▷ button for 5 seconds. The alarm will beep 3 times, and the dE will disappear from the display to confirm the system has exited Demo mode, and is ready for normal use.
CARE AND MAINTENANCE
IMPORTANT:
Unplug your oven before cleaning, or performing maintenance.
To extend the life of your microwave oven, it must be cleaned frequently, keeping in mind the following:
DO NOT USE STEAM EQUIPMENT TO CLEAN THE APPLIANCE
To protect against the risk of electrical shock, do not immerse the unit, cord or plug in water or other liquid or sprinkle water to clean the appliance.
Don't clean the appliance when it still hot! The inside and external surface of the oven should preferably be cleaned by damp cloth when it is cooled down.
Wash all accessories in hot soapy water or in a dishwasher, wipe dry with a paper or cloth towel.
If you use your oven for an extended period of time, condensation may form. Dry it using a soft cloth.
There is a seal surrounding the oven opening which guarantees its perfect functioning. Check the condition of this seal on a regular basis. If necessary, clean it and avoid using abrasive products or objects to do so. Should it become damaged, please contact Caple Service. We recommend you avoid using the oven until it has been repaired.
Never line the oven bottom with aluminium foil, as the consequent accumulation of heat could compromise the cooking and even damage the enamel.
Clean the glass door using damp cloth and dry it with a soft cloth.
Do not use harsh abrasive cleaners or sharp metal scrapers to clean the oven door glass since they can scratch the surface, which may result in shattering of the glass.
REMOVING THE OVEN DOOR
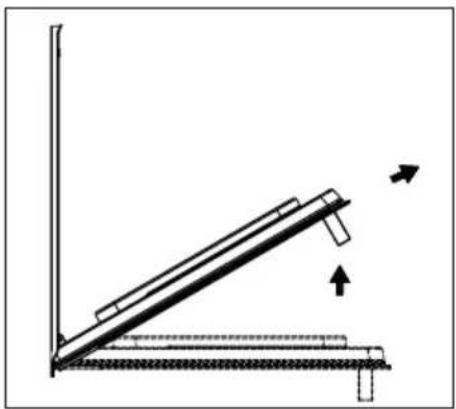
To make it easier to clean the inside of your oven, the oven door can be easily removed, by proceeding as follows (fig. 11):
- Open the door completely and lift the 2 levers "B" (fig.11-1).
- Now, shutting the door slightly, you can lift it out by pulling out the hooks "A" as shown in figure 2.
To reassemble the door:
- With the door in a vertical position, insert the two hooks "A" into the slots;
- Ensure that seat "D" is hooked perfectly onto the edge of the slot (move the oven door backwards and forward slightly).
- Keep the oven door open fully, unhook the 2 levers "B" downwards and then shut the door again.
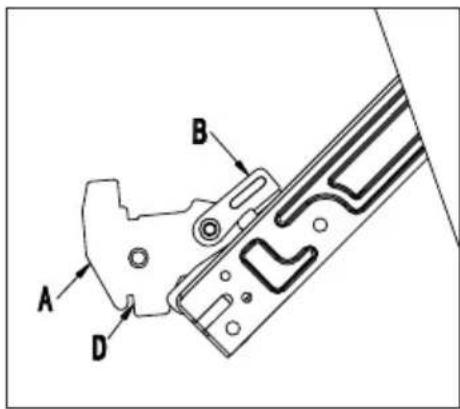
Fig. 11-1
natural_image
Diagram of a ladder leaning against a wall, with arrows indicating upward motion (no text or symbols)Fig.11-2
TROUBLESHOOTING
| The oven does not operate Check it is switched on at | the mains.There has been a power cut.The time is not set. |
| The control panel is not working Check to see if the child lock is on.If so, hold the lock key to turn it off. | |
| The interior lamp does not illuminate Contact Caple service. | |
| E2 error code appears on the screen Interior sensor error. Contact Caple service. | |
TECHNICAL DATA
| BUILT-IN COMBINATION MICROWAVES | |
| Rated Voltage 220 - 240V | |
| Rated Frequency 50Hz | |
| Rated Grill Power 2550W | |
| Rated Microwave Input Power 1500W | |
| Combination Power 2550W | |
| Microwave Rated Output Power 1000W | |
| Volume 40L |

caple
Caple Service
Fourth Way
Avonmouth
T: 0117 938 1900
Bristol
E: service@caple.co.uk
BS11 8DW
www.caple.co.uk
- Sense Combination Microwave Instruction Manual
- CM111
- CONTENTS
- SAFETY INSTRUCTIONS
- IMPORTANT:
- ATTENTION:
- WARNING:
- ENVIRONMENTAL PROTECTION
- CE DECLARATIONS OF CONFORMITY CE
- UKCA DECLARATIONS OF CONFORMITY UK CA
- WARRANTY:
- INSTALLATION
- FITTING THE APPLIANCE
- NOTE:
- ELECTRICAL CONNECTION
- THE YELLOW/GREEN EARTH WIRE SHOULD NOT BE CONTROLLED BY THE SWITCH.
- BEFORE THE INSTALLATION OF THE APPLIANCE, CHECK THE SPECIFICATIONS ON THE RATING LABEL.
- CONTROL PANEL
- DISPLAY
- WIRE SHELF (FIG.1)
- GLASS TRAY (FIG.2)
- THE SIDE SHELF SUPPORTS (FIG.3)
- GLASS BASE PLATE (FIG.4)
- OPERATION
- PROGRAMME / FUNCTION:
- LIGHT FUNCTION:
- CHILD LOCK:
- ALARM SETTING:
- SETTING THE TIME:
- STANDBY MODE:
- DURATION COOKING(0-10HRS)
- MICROWAVE OVEN FUNCTIONS
- AUTO COOKING
- DEFROST TIME TABLE
- TO TURN ON DEMO MODE:
- TO TURN OFF DEMO MODE:
- CARE AND MAINTENANCE
- DO NOT USE STEAM EQUIPMENT TO CLEAN THE APPLIANCE
- REMOVING THE OVEN DOOR
- TROUBLESHOOTING
- TECHNICAL DATA
- caple
Brand : Caple
Model : CM111GM
Category : Microwaves