
RX24TI - Digital Timer DIMPLEX - Free user manual and instructions
Find the device manual for free RX24TI DIMPLEX in PDF.


| Product Type | Digital Timer (Programmable) |
| Brand | Dimplex |
| Model | RX24TI |
| Dimensions (Approx.) | 85 mm × 85 mm × 35 mm |
| Weight (Approx.) | 120 g |
| Power Supply | 2 × AAA batteries (1.5 V) |
| Number of Programs | 8 ON/OFF programs per day |
| Minimum Program Interval | 1 minute |
| Display Type | LCD digital display |
| Countdown Function | Yes (1 min to 23 hrs 59 min) |
| Random Function | Yes (simulates presence) |
| Summer/Winter Time | Automatic changeover |
| Max Load | 2300 W (resistive), 575 W (inductive) |
| Material | Flame-retardant plastic |
| Mounting | Wall plug or screw mount |
| Maintenance | Wipe with a dry, soft cloth |
| Safety | Not for outdoor use |
| Spare Parts | Contact Dimplex customer service |
| Repairability | Replace batteries; for other issues, consult manual |
| General Information | Digital timer for home appliances |
Frequently Asked Questions - RX24TI DIMPLEX
User questions about RX24TI DIMPLEX
0 question about this device. Answer the ones you know or ask your own.
Ask a new question about this device
Download the instructions for your Digital Timer in PDF format for free! Find your manual RX24TI - DIMPLEX and take your electronic device back in hand. On this page are published all the documents necessary for the use of your device. RX24TI by DIMPLEX.
USER MANUAL RX24TI DIMPLEX
RXTI24 - 24 Hour Timer
TIDN24P001 Issue 0
IMPORTANT: THESE INSTRUCTIONS SHOULD BE READ CAREFULLY AND RETAINED FOR FUTURE REFERENCE
Installation
Switch the heater off and remove the plug-in protective cover from the right hand side of the thermostat unit at the back of the heater. Remove the 24-hour plug in timer from its box and plug it into the slide in compartment now exposed. Switch the heater on at the mains supply.
Mode Selection
There are three different operating modes. Press MODE to cycle through these:
MAN OFF - heating is permanently Off - see Fig. 1.
This is also the default screen.
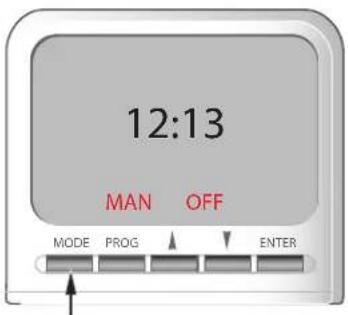
Fig. 1
MAN ON - heating is permanently On - see Fig. 2.
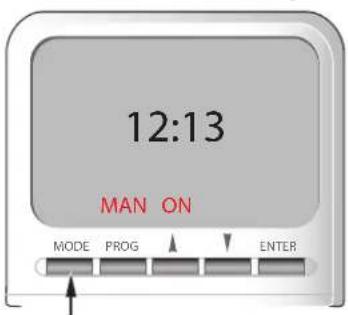
Fig. 2
AUTO - runs the programmed times - see Fig. 3.
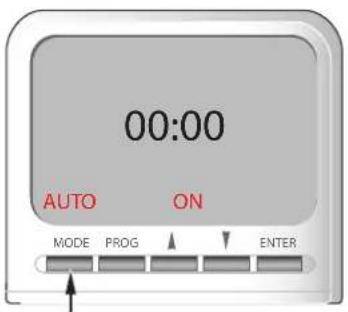
Fig. 3
Set Time
Press the PROG key once to set time. The ① appears on the screen (see Fig. 4) and the hours can be set using the ▲▼ keys. Press ENTER when finished setting the hours. Set minutes using the ▲ keys and press ENTER.
Time is now set.
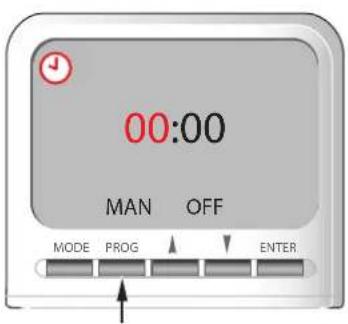
Fig. 4
Set Program
A maximum of four program periods can be set as follows;
Press PROG twice (see Fig. 5). The program settings can now be entered (starting with P1 ON, where P1 ON is the first ON time setting).
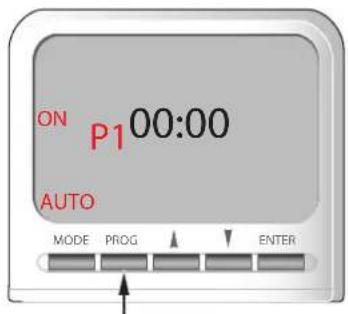
Fig. 5
a) set P1 ON time:
Set the hours using ▲▼ and press ENTER. Then set the minutes using ▲▼ and press ENTER.
NOTE: Time is set in 10 minute blocks.
Then set P1 OFF time:
Set the hours using ▲ and press ENTER.
Then set the minutes using ▲ and press ENTER. If only one program is required, press PROG now to return to default display OR
b) set P2 ON and OFF times: repeat procedure as 'a)' above. c) set P3 ON and OFF times: repeat procedure as 'a)' above.
d) set P4 ON and OFF times: repeat procedure as 'a)' above. After programming P4 the default screen is automatically displayed. To leave program settings unchanged press ENTER continually. At any time during programming, pressing PROG will exit to the default display.
Timer must be in AUTO mode to run Set Programs.
Key Lock
To lock the keypad press ENTER and release, then press MODE within 1 second (see Fig. 6). The key symbol will appear on the screen when the keypad is locked.
To unlock the keypad repeat the action above. If any of the buttons on the keypad are pressed when
it is locked, the light will automatically come on.
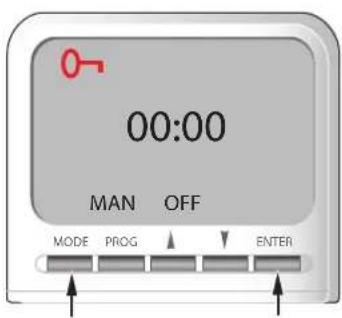
Fig. 6
The Advance Function
When in AUTO mode, if ▲ is pressed for longer than 2 seconds the program will advance to the next programmed setting. When the ADVANCE function is active ADVANCE will be displayed on the screen (see Fig. 7).
To cancel advance press ▼ for longer than 2 seconds e.g. If
present time is 14:00 and P1 ON is at 17:00 and P1 OFF is 19:00, if ▲ is held for 2 seconds then
ADVANCE appears on the screen. The heater comes on and remains on until 19:00. ADVANCE disappears from the screen at 17:00 as set program is then running.
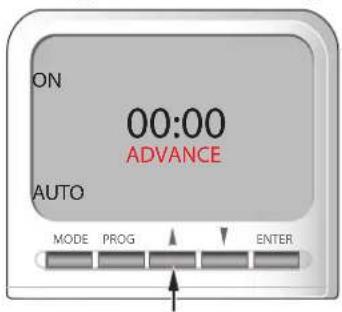
Fig. 7
Brand : DIMPLEX
Model : RX24TI
Category : Digital Timer