
SB22110N - Bread maker SWAN - Free user manual and instructions
Find the device manual for free SB22110N SWAN in PDF.


| Product Type | Bread Maker |
| Brand | Swan |
| Model | SB22110N |
| Power Supply | 220-240V~, 50Hz, 550W |
| Number of Programmes | 12 (Basic, French, Whole Wheat, Quick, Sweet, Gluten Free, Ultra Fast, Dough, Jam, Cake, Sandwich, Bake) |
| Loaf Sizes | 650g (1.5lb) and 800g (2lb) |
| Crust Colour Options | Light, Medium, Dark |
| Delay Timer | Up to 13 hours in 10-minute increments |
| Keep Warm Function | Automatic 1-hour keep warm after baking |
| Memory Function | Resumes programme if power restored within 10 minutes |
| Control Panel | Menu, Colour, Loaf Size, Start/Stop, Time+, Time- buttons with LCD display |
| Non-Slip Feet | Yes |
| Safety Features | Grounded plug, automatic shut-off, child safety (use by 8+ years under supervision) |
| Cleaning & Maintenance | Hand wash bread pan and paddle; do not use dishwasher; wipe housing with damp cloth |
| Spare Parts | Kneading paddle (SB22110N-01), Bread pan (SB22110N-02), Cup, spoon & paddle hook set (SB22110N-03) |
| Warranty | 2 years (UK and Ireland) |
Frequently Asked Questions - SB22110N SWAN
User questions about SB22110N SWAN
0 question about this device. Answer the ones you know or ask your own.
Ask a new question about this device
Download the instructions for your Bread maker in PDF format for free! Find your manual SB22110N - SWAN and take your electronic device back in hand. On this page are published all the documents necessary for the use of your device. SB22110N by SWAN.
USER MANUAL SB22110N SWAN
Bread Maker
Model: SB22110N
Helpline: 0333 220 6050
v1.0

IMPORTANT INFORMATION - RETAIN FOR FUTURE USE
When using any electrical appliance, basic safety precautions should always be followed including the following:
- PLEASE READ ALL INSTRUCTIONS.
- Before using check that the voltage of wall outlet corresponds to that shown on the rating plate.
- Do not operate any appliance with a damaged cord or plug or after the appliance malfunctions, or it is dropped or damaged in any manner. Return the appliance to manufacturer or the nearest authorized service agent for examination, repair or electrical or mechanical adjustment.
- Do not touch hot surfaces.
- To protect against electric shock, do not immerse cord, plugs, or housing in water or other liquid.
- Unplug from outlet when not in use, before putting on or taking off parts, and before cleaning.
- Do not let cord hang over edge of table or hot surface.
- The use of accessory attachments not recommended by the appliance manufacturer may cause injuries.
- Do not place on or near a hot gas or electric burner, or in a heated oven.
- Do not touch any moving or spinning parts of the machine when baking.
- Never switch on the appliance without properly placed bread pan filled with ingredients.
- Never beat the bread pan on the top or edge to remove the pan as this may damage the bread pan.
- Metal foils or other materials must not be inserted into the bread maker as this can give rise to the risk of a fire or short circuit.


IMPORTANT INFORMATION - RETAIN FOR FUTURE USE
- This appliance can be used by children aged from 8 years and above and persons with reduced physical, sensory or mental capabilities or lack of experience and knowledge if they have been given supervision or instruction concerning use of the appliance in a safe way and understand the hazards involved. Children shall not play with the appliance. Cleaning and user maintenance shall not be made by children unless they are older than 8 and supervised
- Keep the appliance and its cord out of reach of children less than 8 years.
- Never cover the bread maker with a towel or any other material, heat and steam must be able to escape freely. A fire can be caused if it is covered by, or comes into contact with combustible material
- Do not operate the appliance for other than its intended use
• Always use the appliance on a secure, dry level surface - Do not use outdoors.
- This appliance has been incorporated with a grounded plug. Please ensure the wall outlet in your house is well earthed.
- This appliance is intended to be used in household and similar applications such as: Staff kitchen areas in shops, offices and other working environments; – Farm houses; By clients in hotels, motels and other residential type environments; Bed and breakfast type environments.
- The appliance is not intended to be operated by means of an external timer or separate remote-control system.
- Do not operate the unit without bread pan placed in the chamber to avoid damaging the appliance.

CAUTIONS AND WARNINGS

CAUTION: SURFACES BECOME HOT DURING USE. ALWAYS USE OVEN GLOVES WHENEVER POSSIBLE

CAUTION: PLEASE ENSURE YOUR WORK TOP IS ABLE TO WITHSTAND A TEMPERATURE OF AT LEAST 60 DEGREES CENTIGRADE FOR EXTENDED PERIODS. IF IN DOUBT, MOUNT THE PRODUCT ON A SUITABLE WOODEN PLINTH.

THE BREAD MAKER HAS NON-SLIP FEET BUT THE KNEADING ACTION CAN CAUSE IT TO MOVE SLIGHTLY ON THE WORK TOP. PLEASE ALLOW ADEQUATE SPACE AND DO NOT SITE THE MACHINE NEAR THE EDGE OF THE COUNTER TOP.
DO NOT SITE ON A WET OR GREASY WORK TOP.

TECHNICAL DATA
Description: Bread Maker
Model: SB22110N
Input Voltage: 220-240V\~
Frequency: 50Hz
Power consumption: 550 Watts


YOUR BREAD MAKER
Before first use, carefully remove all packaging and familiarise yourself with the various parts of your product. Feel free to try out all the controls etc. You won't damage anything. Just keep your hands out of there!
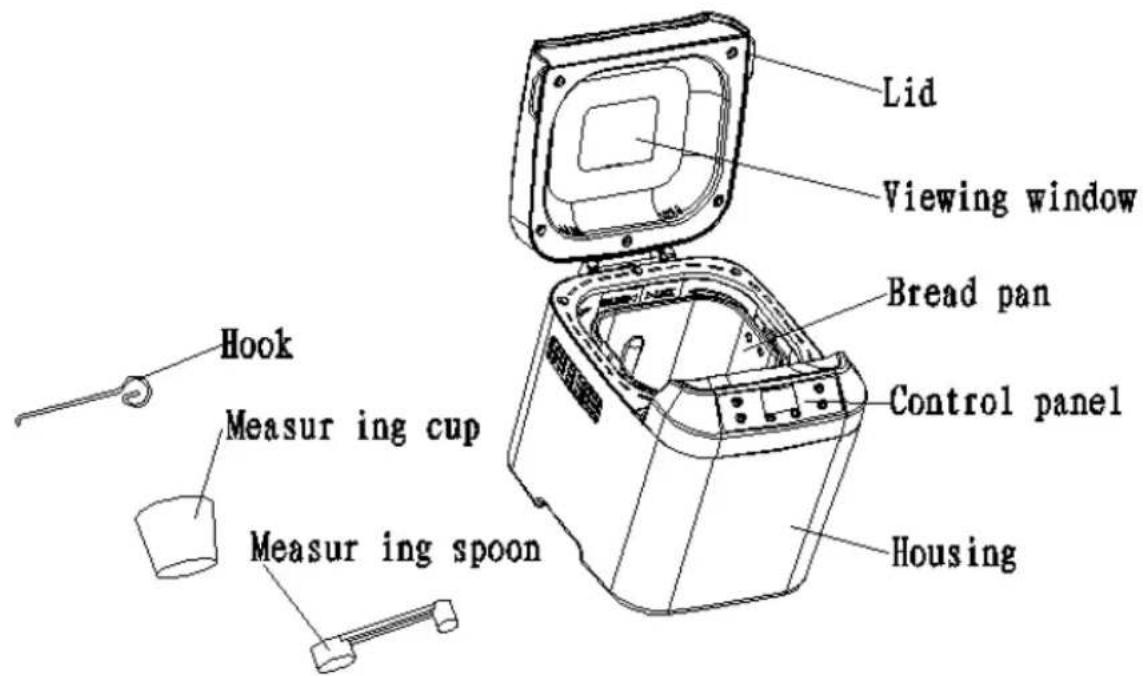
Control Panel

Menu Button: Press repeatedly to cycle through the 12 various programmes.
Colour button: To select light, medium or dark crust (not available on all programmes
Start/stop button: Press to start the process. Press and hold for 3 seconds to pause/cancel the process.
Loaf button: Press to select small or large loaf size. Default is large.

LET'S MESS WITH IT!
USE YOUR LOAF! READ ALL THE SAFETY INSTRUCTIONS FIRST. As riveting as they are, you really should read them instead of skipping to this bit.
Remove the bread pan (turn anti-clockwise to unlock and lift it out of the machine). Wash the bread pan, paddle, cup and spoon in warm, soapy water. Rinse and dry thoroughly. Please DON'T put any of the non-stick parts in the dishwasher - or they won't stay non-stick for very long!
Put the mixing paddle onto the peg in the bread pan. You need to turn the paddle to align it with the flat side on the spindle, then it will slide right over. Then return the bread pan to the machine (turn clockwise to lock).
As soon as the bread maker is plugged into power supply, a beep will be heard and "1 3:00" will be displayed. But the colon between the "3" and "00" doesn't flash constantly. This means the programme isn't running yet.
The number “1” on the left of the display is the default program (Basic). There are 12 of those in total. The arrow points to “800g” and “MEDIUM” crust is selected. These are the default settings.
Start/Stop Button
The button is used for starting and stopping the selected baking programme.
To start a program, press the START/STOP button once. A short beep will be heard, the indicator will light up, and the two colon dots in the time display begin to flash and the programme starts.
Any other button is inactive except the START/STOP button after a programme has begun. To stop the programme, press the START/STOP button for about 3 seconds. The machine will beep and stop. This feature will help to prevent any unintentional disruption to the operation of the programme. If accidentally you start a programme whilst familiarising yourself with the controls simply press the START/STOP button for 3 seconds to reset. No harm done.
Menu Button
The MENU button is used to set different programs. Each time it is pressed (accompanied by a short beep) the programme will vary. Press the button repeatedly to cycle through the 12 menu options. The menu option number will be shown on the left of the display.

PROGRAMMES & SETTINGS
1. BASIC
For white and mixed breads, that mainly consist of white flour. The bread has a compact consistency. You can adjust the bread crust browning by setting the COLOUR button. If white bread is your thing, then this is the setting you will use the most.
These days, flour manufacturers have cottoned on the fact that more people use bread makers. Many have formulated their flour to work very well in these machines. You may find that BASIC setting can be used for wholemeal or brown too.
2. FRENCH
For light breads that have little or no fat content. Normally the bread is fluffy and has a crispy crust. It doesn't keep for as long due to low fat content - and it doesn't come out as sticks!
3. WHOLE WHEAT
Whole wheat flour requires longer kneading and rising steps. The bread will usually be more compact and heavy due to the lower gluten content in these types of flour. Very often, the recipe will call for some white flour to be added too - to help the whole meal develop the gluten required to help the bread rise.
4. QUICK
Shorter kneading and rising steps. Although faster, it gives a smaller, more dense loaf - but still very edible.
5. SWEET
For breads with additives such as fruit juices, grated coconut, raisins, dry fruits, chocolate or added sugar. Due to a longer rising step, the bread will be light and airy.
6. GLUTEN FREE
The ingredients to create gluten-free breads are unique and depend a lot on the brand of flour you buy. While they are yeast breads, the dough is generally wetter and more like a batter. It is also important not to over-mix or over-knead gluten-free dough. There is only one rise, and due to the high moisture content, baking time is increased. Mix-ins (added ingredients) must be added at the very beginning of the cycle with other basic ingredients. Most gluten free flours have a bread recipe with them - use that for best results.
7. ULTRA FAST
Why would you even need this? If you're the high powered type who likes eating door steps and doesn't have time to let the bread develop properly, then this is the programme for you! Actually, this programme can be used for cakes too (see below)

PROGRAMMES & SETTINGS
8. DOUGH
Kneading and rising steps, but without baking. Saves wear and tear on your knuckles. Remove the dough and use for making bread rolls, pizza etc. Do the final rising step outside the machine.
9. JAM
Boiling jams and marmalades (in case you forgot how to use a saucepan).
10. CAKE
Kneading, rise/rest and baking, but for breads made with soda or baking powder. See also ULTRA FAST and GLUTEN FREE settings. They can give similar results.
11. SANDWICH
Kneading, rise and baking for baking light texture bread with a thinner crust. Doesn't come out sliced. You have to do that yourself.
12. BAKE
For additional baking of breads that are too light or not baked through. In this programme there are no kneading or rising steps. This is actually more useful than it might sound. Ingredients vary a LOT, so can give different results. Sometimes breads/cakes need a bit more baking time. You can also remove the bread pan from the machine and pop it in a regular oven - but this is easier.
COLOUR
With this button you can select light, medium or dark colour for the crust. This button is not available for the following programmes: CAKE, SANDWICH, BAKE, DOUGH, JAM.
LOAF [size]
Select the weight 650g or 800g (1.5lb - 2lb in old money. It modifies the kneading, rising and baking steps depending on loaf size selected. Note: The default when plugged in is 800g. However, if you set a 650g loaf going on the 800g setting, it's not the end of the world.
This button is only applicable for the following program: BASIC, FRENCH, WHOLE WHEAT, SWEET, SANDWICH and GLUTEN FREE.
DELAY (TIME+, TIME-)
If you want to set the machine so your bread is ready for a later time (eg overnight ready for the morning and the best wake up smell ever) you can use this button to set the delay timer.

PROGRAMMES & SETTINGS
The timer works in 10 minute increments and the display will show the total (including process time). Example: It's 11pm and you want to wake up to fresh bread at 7am.
Select the programme you need, then keep pressing the TIME+ button until the display reads 8:00 (8 hours) The maximum delay is 13 hours. Note: For time delayed baking, do not use any easily perishable ingredients such as eggs, fresh milk, fruits, onions, etc.
KEEP WARM
Bread can be automatically kept warm for 1 hour after baking. During keeping warm, if you would like to take the bread out, switch the programme off by pressing the START/STOP button.
MEMORY
If the power supply is accidentally interrupted during the course of making bread, as long as the power is reconnected within 10 minutes, the programme will simply resume from where it left off. Very handy if you switch off the wrong plug by mistake! If power is interrupted for more than 10 minutes, it's game over for your loaf unfortunately.
TEMPERATURES
The machine will work well in a wide range of temperatures, but there may be some difference in loaf size between a very warm room and a very cold room. We suggest that the room temperature should be within the range of 15 °C to 34°C. Water temperature below 10 °C might not activate the yeast and the bread will not rise. Water temperature over 35 °C may kill the yeast prematurely
WARNING DISPLAY & ERROR MESSAGES
If the display shows "H HH" after you have pressed START/STOP button, the temperature inside is still too high to make bread reliably. Then the program has to be stopped. Open the lid and let the machine cool down for 10 to 20 minutes.
If the display shows "E EE" after you have pressed START/STOP button, it means there is a problem with the machine or programme. Try switching off for 20 minutes then back on again. If the error persists you will need to call service number on front of this book.
WHAT'S THAT SMELL?
You may notice a slight odour and even the odd whisp of vapour when baking your first loaf. This is normal as protective oils on the element evaporate on first use. It will only happen once. The fresh bread smell will always win!

MAKING BREAD
HOW TO MAKE BREAD (boring but necessary version) Skip to "Your First Loaf" section and come back to this if you get it wrong!
- Set the appliance on the firm and even surface.
- Before making bread, weigh the ingredients you need respectively with kitchen scales or use the measuring cup and spoon provided.
- Remove the pan from the machine. Fix the kneading blade onto the drive shaft.
- Place ingredients into the bread pan. Usually the water or liquid should be added first, then add sugar, salt and flour, always add yeast or baking powder as the last ingredient
- Best way to add yeast or rising agents: With finger make a small indentation on one side of the flour. Add yeast to indentation, ensure it does not come into contact with the liquid ingredients or salt.
- Place pan back into the machine and turn to lock it into position
- Close the lid gently.
- Press the MENU button until your desired programme number is selected.
- Press the Colour button to select the desired crust colour.
- Press the LOAF SIZE button to select the desired size.
- Set the delay time by pressing "TIME+ or TIME-"button. This step may be skipped if you want the bread maker to start working immediately.
- Press the START/STOP button once to start the programme, and the indicator will light up.
- For the program of Basic, French, Whole wheat, Sandwich, Cake and Gluten free, beeps sound will be heard during operation. This is to prompt you to add solid ingredients where necessary.
- Open the lid and put in some ingredients. It is possible that steam will escape through the vent in the lid during baking. This is normal. BE VERY CAREFUL WHEN OPENING THE LID AS THE MACHINE MAY STILL BE RUNNING
- Once the process has been completed, ten beeps will be heard. You can press START/STOP button for about 3 seconds to stop the process and take out the bread. Open the Lid and while using oven mitts, turn the bread pan in anti-clockwise and take out the bread pan.
- CAUTION: THE BREAD PAN AND BREAD MAY BE VERY HOT! ALWAYS HANDLE WITH CARE.
- Let the bread pan cool down for 5 mins before removing the bread. Turn bread pan upside down onto a wire cooling rack or clean cooking surface and gently shake until bread falls out. If it doesn't come out at first then shake harder! Gently hold the top of the loaf with oven mitt or your loaf may end up bouncing across the kitchen floor, which is quite discouraging.
- Let the bread cool for about 20 minutes before slicing. It is recommended slicing bread with electric knife, or coarsely serrated knife (Swan sells those too!)


MAKING BREAD
- If you are out of the room or have not pressed START/STOP button at the end of operation, the bread will be kept warm automatically for 1 hour, when keep warm is finished, one beep will be heard.
- Don't leave the bread in the machine with the lid closed after the keep warm step or the condensation will return to the bread and make it soggy!
- Now this part cannot be stressed enough. Once the loaf has cooled:
USE THE SUPPLIED HOOK TO CAREFULLY REMOVE THE KNEADING PADDLE FROM THE BOTTOM OF THE LOAF.
Replacement paddles are expensive and we love to sell them. But we are quite sure you don't want to keep buying them.
Note: It is advised to store any uneaten bread in a sealed plastic bag or vessel. Bread can be stored for about three days at room temperature (in a nice Swan bread bin). In the refrigerator (yep, Swan sells those too!), storage time could be as much as ten days.
HINTS, TIPS AND SHOPPING LIST
- STRONG WHITE BREAD FLOUR has high gluten content. It has good elastic properties and is better at holding the bubbles made by the yeast during the rising process. This leads to a larger loaf with a lighter texture. When shopping for bread flour, always look for STRONG flour specifically for bread making.
- STRONG WHOLE-WHEAT FLOUR is ground from grain. It contains wheat skin and gluten. Whole-wheat flour is heavier with more fibre than white flour. The bread made with 100% whole-wheat flour usually has a texture like flat packed furniture, so many recipes usually combine whole-wheat flour with white flour to achieve the best results.
- DRIED MILK POWDER. Gives the bread a nice malty taste and reduces the need for more oil, butter or fat. It's also good for bread made with the delay timer as it will not spoil while sitting in the bread pan.
- YEAST. Use active dry yeast for bread making. All supermarkets sell it. It is best bought in the individual sachets (not tubs). Each sachet typically contains 7 grammes.. This is more than you need for this machine. Once opened discard any unused yeast. It won't even keep until the next day!
- WATER. Hard water gives unpredictable results. Bottled water that has been stored at room temperature water is best
- SALT. Basic table salt will work just fine but keep it away from the yeast while it is sitting in the bread maker. Salt is important for the taste of the loaf but it will


MAKING BREAD
inhibit the yeast. You can tweak the salt content a little but be aware that it can have a marked effect on the size of your finished loaf.
- SUGAR. Regular granulated sugar is fine. Once the yeast is activated, the sugar will feed it. That means it is a vital ingredients in most loaves. You can tweak the sugar content a little but be aware that it can also have a marked effect on the size of your finished loaf.
- EGGS can improve bread texture, make the bread more nourishing and larger in size, the egg should be room temperature and pre-mixed before adding to the bread pan.
- FATS like butter, oil etc. can make bread softer and increase storage life. Butter should be melted or chopped to small pieces before using.
- BAKING POWDER or SODA is used for rising the Ultra Fast bread and cake. As it does not need rise time, and it can produce bubbles to soften the texture of bread utilizing chemical principles rather than the organic method of yeast.
INGREDIENT MEASUREMENT
One of the most important steps for making good bread is proper measuring of ingredients. It is strongly suggested to use digital scales instead of the measuring cup until you become more adept at making bread. Use the supplied measuring spoon for tbsp and tsp quantities.
- Weighing liquid ingredients. These can be measured with measuring cup or by weight. TIP: Water can easily be weighed out since 250ml of water is the same as 250g of water! One of the many joys of the metric system!
- Dry measuring can be done by gently spooning ingredients into the measuring cup and then once filled, leveling off with a knife. When measuring small amounts of dry ingredients, the measuring spoon should be used. Measurements should be level, not heaped as this small difference could throw out the critical balance of the recipe.
- Adding sequence. The sequence of adding ingredients should be noted. Generally speaking, the sequence is: liquid ingredient, eggs, salt and milk powder etc. When adding the ingredients, the flour shouldn't be wetted by liquid completely. The yeast can only be placed on the dry flour. And yeast should not touch the salt. When you use the delay function for a long time, avoid adding perishable ingredients such as eggs, milk or fresh fruit ingredients.

YOUR FIRST LOAF
It is important to us (and you) that your first experience of machine bread making is a good one! So let's start with a step-by-step first white loaf. We're making the 650g size here.
Put the paddle in the bread pan first. Doing it after you add the ingredients is messy. This has never happened to us - ever;)
| Ingredients. Add to bread pan in the order listed Amount | |
| 1. Water.Room temperature. If you live in a hard water area, use bottled. | 270ml |
| 2. Strong white bread flourRegular plain flour won’t cut it. | 430g |
| 3. Butter.Measure with spoon provided. | 1 tbsp |
| 4. Sugar.Measure with spoon provided | 1 tbsp |
| 5. Salt.Measure with spoon provided | 1 tsp |
| Active dried yeast.In sachets, not tubs, Measure with spoon provided. Keep it away from the salt! | 1 tsp |
Machines don't forgive.
Measure accurately. Weigh the water if you can. It's more accurate. Salt and yeast are measured in TEASPOONS (small end). When adding the yeast, make a dent in the flour and pour it in there to keep it away from the salt.
Machines don't forgive.
Put the loaded bread pan in the machine, close the lid and plug it in. The machine will beep and BASIC [1] programme will be shown. Press LOAF button to select 650g size (not the end of the world if you forget that bit). Press START/STOP to set it going.
TIP: Just let it run. Don't be tempted to open the lid during the mixing process. Certainly don't be tempted to put your hands in. The machine won't stop and won't think twice about adding your fingers to the recipe without your permission!

HOW DID IT TURN OUT?
The machine has beeped to tell you your loaf is ready!
- Switch off and unplug it.
- Open the lid and using oven mitts or similar, turn the bread pan anti-clockwise and remove it from the machine.
- Holding with BOTH hands, tip the bread pan upside down. Then shake! Keep your gloved fingers over the top so the load doesn't go bouncing across your kitchen floor.
- If it doesn't come out, shake it harder!
- Set the loaf on a wire rack to cool for at least 20 mins before removing the paddle from the base (use the hook provided).
- DON'T forget that last bit. We'll gladly send you a new paddle, but they're not free!

These are ours. The smaller was using the above recipe. The large using the 800g recipe. They didn't last long.
We're sure yours turned out like these but if they didn't, don't despair! Have a look at the next couple of pages to see where it might have gone wrong.
Most of the time it's the ingredients - not you, and not the machine.

TROUBLE AT T' MILL
| No Problem Cause Solution | |||
| 1 Smoke from ventilation holes when baking | Some ingredients stick to the heating element or nearby. On first use, preserving oils from the element will evaporate | To clean element and oven cavity, unplug the bread maker and allow to cool then clean the element and oven cavity | |
| 2 Bread bottom crust is too thick | Bread left in breadpan too long | Remove bread from pan as soon as it is cool enough to do so safely | |
| 3 Difficulty removing kneading paddle from pan | Kneading paddle sticks to shaft in bread pan | After removing loaf, soak breadpan in hot water for 10 minutes. This will re-lease the kneading paddle | |
| 4 Difficulty mixing, Machine sounds strained | Not enough liquid in mixture Add liquid 1 tbsp at a time | ||
| 5 Display reads H:HH after pressing START/STOP button | Temperature inside bread-maker is too hot | Press START/STOP button for 3 seconds. Remove bread pan. Allow machine to cool down | |
| 6 Motor runs but dough isn't moving | Breadpan is not properly in place or kneading paddle not present | Press START/STOP button for 3 seconds to cancel programme. Refit paddle and/or breadpan | |
| 7 Bread rises to press against the lid of the machine | Too much yeast. Water too warm. Environment too warm | Adjust yeast quantity downward on next recipe. Observe water and room temperatures stated above | |
| 8 Bread size is small or doesn't rise | Not enough yeast or yeast missing? Too much salt. Water temp too low/high. Room too cold | Don't forget the yeast! Happens to the best of us! | |
| 9 Dough overflows Too much | liquid in mixture Reduce liquid or | next loaf | |
| 10 Loaf sinks in middle 1. Flour used not strong enough. 2. Yeast temperature too high or ferment rate too rapid. 3. Excessive water. 4. Friends unimpressed | 1. Only use strong flour. 2. Observe points on temperatures. Only use good quality active dry yeast in sachets. 3. Reduce water on next loaf. 4. Don't show this one to your friends | ||


TROUBLE AT T' MILL
| 11 Bread is dense 1. Too much flour or not enough water. 2. Too many fruit ingredients. 3. Too much wholewheat flour | 1. Adjust water/flour mix on next loaf. 2, Reduce wet ingredients like fruit. 3. Wholewheat flour should be mixed with white flour - usually 50/50 | |
| 12 Large cavities in loaf Too much water or yeast.Water temperature is too high | Reduce yeast a little and observe correct water temperature range | |
| 13 Dry flour on outside of finished loaf | Too much gluten from flour or added ingredients like bananas or butter | Reduce accordingly |
| 14 Crust is too thick and dark when making cakes | Sugar causes both of these effects | Stop bake step a little earlier if necessary |

CLEANING & MAINTENANCE
Disconnect the machine from the power and let it cool down prior to cleaning.
Please don't put the bread pan or the paddle in the dishwasher. It reduces the life of the non-stick surface considerably.
- Bread pan: Rub inside and outside with a damp cloth. Do not use any sharp or abrasive agents for the consideration of protecting the non-stick coating. The pan must be dried completely prior to installing.
- Kneading blade: If the kneading blade is difficult to remove from the axle, in such an event fill the container with warm water and allow it to soak for about 10 minutes. The kneading blade can then be easily removed for cleaning. Also wipe the blade carefully with a damp cotton cloth.
- Lid and view window: Clean the lid inside and outside with a slightly damp cloth.
- Housing: Gently wipe the outer surface of housing with a wet cloth. Do not use any abrasive cleaner to clean as this would degrade the high polish of the surface. Never immerse the housing into water for cleaning.
- Before the bread maker is packed away for storage, ensure that it has completely cooled down, clean and dry, put the spoon and the kneading blade in the pan, and close the lid


RECIPES
PROGRAMME 1 (BASIC) RECIPES. ADD INGREDIENTS IN ORDER SHOWN:
Basic White
| Loaf size 1.5lb (680g) 2lb (800g) | ||
| Water 270ml 360ml | ||
| Strong white bread flour 430g 570g | ||
| Sugar 1 tbsp 1 1/2 tbsp | ||
| Butter/Margarine 1 tbsp 1 1/2 tbsp | ||
| Salt 1 tsp 1 tsp | ||
| Fast Action Dried Yeast 1 tsp 1 tsp [yes the same] |
Note: Yes the 800g loaf uses the same amount of yeast. You could get away with a bit more but it depends on the brand of flour. There is also a risk of over-rising.
Herb Bread
| Loaf size 1.5lb (680g) 2lb (800g) | ||
| Water 270ml 360ml | ||
| Strong white bread flour 430g 570g | ||
| Sugar 1 tbsp 1 1/2 tbsp | ||
| Olive oil 1 tbsp 1 1/2 tbsp | ||
| Salt 1 tsp 1 tsp | ||
| Dried basil | 11/2 tsp | 2 tsp |
| Dried thyme | 11/2 tsp | 2 tsp |
| Dried marjoram | 11/2 tsp | 2 tsp |
| Fast Action Yeast | 11/4 tsp | 11/4 tsp |
Notes: little bit more yeast for this recipe. You can also use 1tsp and set the Whole-wheat setting instead.

RECIPES
PROGRAMME 1 (BASIC) RECIPES. ADD INGREDIENTS IN ORDER SHOWN:
Raisin Bread
| Loaf size 1.5lb (680g) 2lb (800g) | ||
| Water 270ml 360ml | ||
| Strong white bread flour 430g 570g | ||
| Sugar 2 tbsp 3 tbsp | ||
| Butter/Margarine 3 tbsp 4 tbsp | ||
| Salt 11/2 tsp 2 tsp | ||
| Dried cinnamon 3/4 tsp 1 tsp | ||
| Fast Action Yeast 11/4 tsp 11/4 tsp | ||
| Raisins (add at beeps) 1/2 cup 3/4 cup |
Notes: Bit more fat and sugar in this one. Loaf won't be as light and fluffy.
Cheese n Onion Bread
| Loaf size 1.5lb (680g) 2lb (800g) | ||
| Water 240ml 300ml | ||
| Strong white bread flour 430g 570g | ||
| Sugar 1 tbsp 1 1/2 tbsp | ||
| Grated cheddar cheese | 1 cup 1 1/2 cup | |
| Salt 0 tsp 0 tsp | ||
| Onion granules/powder | 1 1/2 tbsp | 2 tbsp |
| Fast Action Yeast 1 1/4 tsp | 1 1/2 tsp |
Notes: need to watch the moisture content on this one. Keep checking. If it looks too wet, add 1-2 tbsp flour. No salt or butter needed because there is plenty in the cheese.

RECIPES
PROGRAMME 2 (FRENCH BREAD). ADD INGREDIENTS IN ORDER SHOWN:
Bread with just 3 ingredients! If you're a flour connoisseur (and who isn't) try to get the best bread flour you can for this, as all the flavour will come from the flour.
| Loaf size 1.5lb (680g) 2lb (800g) | ||
| Water 270ml 360ml | ||
| Strong white bread flour 430g 570g | ||
| Fast Action Yeast 1 1/4 tsp 1 1/4 tsp |
Notes: Use FRENCH setting. Use the best artisan, white flour you can find. Add 1 tbsp of dried milk for a nice malty taste.
PROGRAMME 3 (WHOLEWHEAT BREAD). ADD INGREDIENTS IN ORDER SHOWN:
Wholewheat/granary bread
| Loaf size 1.5lb (680g) 2lb (800g) | ||
| Water 270ml 360ml | ||
| Strong wholemeal bread flour 300g | 400g | |
| Strong white bread flour 130g 170g | ||
| Sugar 11/2 tbsp 2 tbsp | ||
| Butter/Margarine 2 tbsp 3 tbsp | ||
| Salt | 11/2 tsp | 2 tsp |
| Fast Action Yeast 1 tsp | 1 tsp |
Notes: Some supermarkets are specifically milling their flour so that no white needs to be added. Check the packet.
Eg: Sainsbury's granary flour can be used as is - without white flour
If in doubt use white and wholewheat as above.
Here's ours using the above recipe:


RECIPES
PROGRAMME 4 (QUICK BREAD). ADD INGREDIENTS IN ORDER SHOWN:
Oatmeal bread
| One size | |
| Milk 240ml | |
| Beaten eggs 2 | |
| Sugar 1/4 cup | |
| Sunflower oil 1/2 tbsp | |
| Syrup/treacle 2 tbsp | |
| Salt 1 tsp | |
| Plain flour (not bread flour) 300g | |
| Porridge oats 1 cup | |
| Baking powder 1/2 tsp | |
| Bicarbonate of soda 1/2 tsp |
Notes: Use default loaf size setting on machine. All ingredients should be room temperature.
PROGRAMME 5 (SWEET BREAD). ADD INGREDIENTS IN ORDER SHOWN:
Fruit loaf
| Loaf size 1.5lb (680g) 2lb (800g) | ||
| Water 270ml 320ml | ||
| Strong wholemeal bread flour 430g | 570g | |
| Sugar 50g 70g | ||
| Milk powder 21/2 tbsp | 3 tbsp | |
| Butter/Margarine | 2 tbsp | 3 tbsp |
| Salt 11/2 tsp 2 tsp | ||
| Nutmeg | 3/4 tsp | 1 tsp |
| Fast Action Yeast | 1 tsp | 1 tsp |
| Dried mixed fruit [add at beeps] | 1/2 cup | 3/4 cup |
Add fruit etc at the beeps.

RECIPES
PROGRAMME 6 [GLUTEN FREE]
Basic Gluten Free Bread
| One size 2lb | |
| Water 230ml | |
| Gluten free fibre bread mix 500g | |
| Sugar 3 tbsp | |
| Milk powder 4 tbsp | |
| Butter/Margarine 4 tbsp | |
| Salt 2 tsp | |
| Dry Yeast (comes with bread mix) 1 | packet |
Variation: Add 50g sun dried tomatoes and substitute butter/Margarine for olive oil
PROGRAMME 7 (ULTRAFAST). ADD INGREDIENTS IN ORDER SHOWN:
Small Fastbake Loaf
| One size 1.5lb | |
| Water 270ml | |
| Strong white bread flour 430g | |
| Sugar 4 tbsp | |
| Butter/Margarine 2 tbsp | |
| Salt 1 tsp | |
| Fast Action Yeast whole sachet (7g) |
Notes: All ingredients should be room temperature. A loaf in 58 minutes is great when you are pushed for time, but expect the loaf to be smaller and denser than those on the Basic setting. This setting can also be used for some gluten free breads.

RECIPES
PROGRAMME 8 (DOUGH). ADD INGREDIENTS IN ORDER SHOWN:
White bread rolls
| One size | |
| Water 300ml | |
| Strong white bread flour 470g | |
| Sugar 2 tbsp | |
| Butter/Margarine 2 tbsp | |
| Salt 11/2 tsp | |
| Fast Action Yeast 11/2 tsp |
Notes: When process is finished, remove bread pan from machine then turn out the dough on to floured surface. Knead gently then separate into 6-8 balls. Place on lightly greased baking tray and brush with melted butter. Cover and allow to rise for about 25 minutes. Bake for about 18-20 mins on gas 5 (180C)

Wholewheat/granary bread rolls
| One size | |
| Water 270ml | |
| Strong wholemeal bread flour 300g | |
| Strong white bread flour 130g | |
| Sugar 11/2 tbsp | |
| Butter/Margarine 2 tbsp | |
| Salt 11/2 tsp | |
| Fast Action Yeast 1 tsp |
Notes: When process is finished, remove bread pan from machine then turn out the dough on to floured surface. Knead gently then separate into 6-8 balls. Place on lightly greased baking tray and brush with melted butter. Cover and allow to rise for about 25 minutes. Bake for about 18-20 mins on gas 5 (180C)
For granary loaf substitute wholemeal flour for granary flour.

RECIPES
PROGRAMME 8 (DOUGH). ADD INGREDIENTS IN ORDER SHOWN:
Pizza Dough
| One size | |
| Water 240ml | |
| Strong white bread flour 400g | |
| Sugar 2 tbsp | |
| Butter/Margarine 1 tbsp | |
| Salt 11/2 tsp | |
| Fast Action Yeast 1 tsp |
Notes: When process is finished, remove bread pan from machine then turn out the dough on to floured surface (use cornmeal for best results). Shape into flat round pizza base. Place on lightly greased tray and brush with melted butter or olive oil. Cover and allow to rise for 15 mins. Add toppings. Bake at gas 6 (200C) 18-20 mins or until golden brown on top
PROGRAMME 9 (JAM).
Raspberry & apple jam
| Frozen raspberries 200g | |
| Chopped baking apple 125g | |
| Jam sugar 220g | |
| Lemon juice 3 tbsp |
Notes: Rasberries will go mushy after defrosting so measure them out while they are still frozen.
Put all the ingredients into breadpan (make sure paddle is attached first). Select Jam programme and start the machine.
In the meantime warm a 400g jar
When process has finished, check consistency. Use tongs to remove mixing paddle. Take pan from machine and carefully fill the warmed jar.
PLEASE TAKE GREAT CARE WHEN POURING. JAM IS EXTREMELY HOT!

RECIPES
PROGRAMME 10 (CAKE).
Sponge Cake
| In a separate bowl recommended | |
| Melted butter 225g | |
| Caster sugar 225g | |
| Eggs 3 medium | |
| Self raising flour 225g | |
| Zest and juice of 1 lemon | |
| Vanilla essence 1/4 tsp |
Method: Lightly mix in separate bowl then pour into bread pan - don't forget to put the paddle in first. Crust will be quite dark due to sugar content. Ours turned out well! No soggy bottoms here!
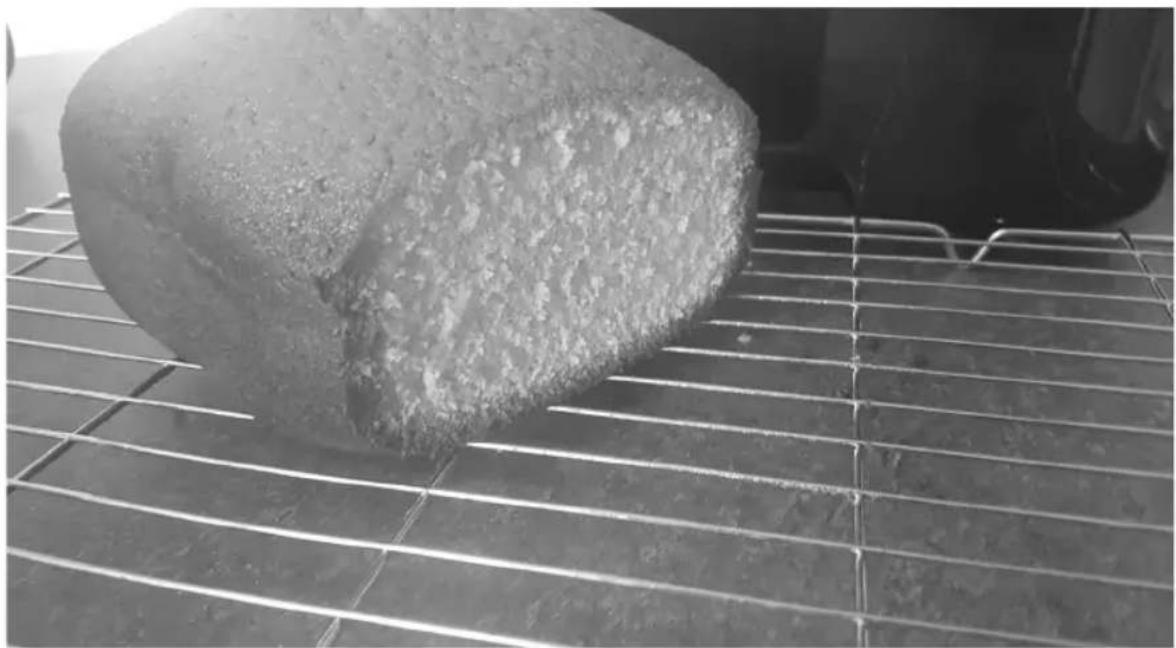
You can add pieces of dried fruit at the beeps but do keep them light or they might sink to the bottom!

RECIPES
PROGRAMME 11 (SANDWICH). ADD INGREDIENTS IN ORDER SHOWN:
Sandwich bread
| Loaf size 1.5lb (680g) 2lb (800g) | |||
| Water 250ml 320ml | |||
| Strong white bread flour 430g 570g | |||
| Sugar 2 tbsp 3 tbsp | |||
| Butter/Margarine 2 tbsp 3 tbsp | |||
| Salt 11/2 tsp 2 tsp | |||
| Fast Action Yeast 1 tsp 11/4 tsp |
All ingredients should be room temperature. White flour can be substituted for strong brown or soft grain flour.

EPIC FAIL?
If you have the occasional loaf fail, don't despair. It happens to us all the time. It was never the machine's fault but something we did wrong!
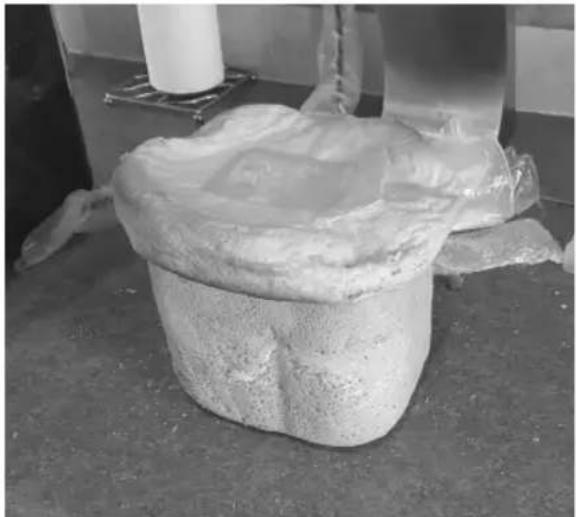
Too much yeast. The loaf literally hit the roof (of the bread maker) leaving quite a mess to clean up!
Whatever happens and no matter how cross it make us, we NEVER throw the mixing paddle in the bin!
Swan 25
Swan 96
| Weight/Time | ||||||||||
| 1. BASIC | 2. FRENCH | 3. WHOLE WHEAT | 4. QUICK | 5. SWEET | ||||||
| 800g 650g 800g 650g | 800g 650g / 800g 650g | |||||||||
| 03:00:02 | 53:03:50:03:40:03:40:03:32:02:10:02 | 55 | 02:50 | |||||||
| 03:00:02 | 53:03:50:03:40:03:40:03:32:02:10:02 | 55 | 02:50 | |||||||
| 800g 650g 800g 650g | 800g 650g | |||||||||
| 03:00:02 | 53:03:50:03:40:03:40:03:32:02:10:02 | 55 | 02:50 | |||||||
| 800g 650g 800g 650g | 800g 620g | |||||||||
| 03:00:02 | 53:03:50:03:40:03:40:03:32:02:10:02 | 55 | 02:50 | |||||||
| 800g 650g 800g 650g | 80G 650g | |||||||||
| 03:00:02 | 53:03:50:03:40:03:40:03:32:02:10:02 | 55 | 02:50 | |||||||
| 800g 650g 800g 650g | ||||||||||
| 03:00:02 | 53:03:50:03:40:03:40:03:32:02:10:02 | 55 | 02:50 | |||||||
| 800g 650g 800g 650g | ||||||||||
| 03:00:02 | 53:03:50:03:40:03:40:03:32:02:10:02 | 55 | 02:50 | |||||||
| 800g 650g 800g 650g | ||||||||||
| 800g 650g 800g 650g | ||||||||||
| 03:00:02 | 53:03:50:03:40:03:40:03:32:02:10:02 | 55 | 02:50 | |||||||
| 800g 650g 800g 650g | ||||||||||
| 03:00:02 | 53:03:50:03:40:03:40:03:32:02:10:02 | 55 | 02:50 | |||||||
| WATER | 4. QUICK | 5. SWEET | ||||||||
SB2210N time setting of each programme
Swan 27
| Weight/Time | ||||||||||
| 6. Gluten tree 7. ULT RA FAST 8. DOUGH 9. JAM | 10.CAKE 1.SANDWICH | |||||||||
| 800 g 650 g 800 g 650 g / / 800 g 650 g | ||||||||||
| 02:55 | 02:50 | 01:38 | 01:28 | 01:30 | 01:20 | 01:50 | 03:00 | 02:55 | ||
| 02:55 | 02:50 | 01:38 | 01:28 | 01:30 | 01:20 | 01:50 | 03:00 | 02:55 | ||
| Mixing 1 | 12 | 12 | 13 A | 13 A | 25 | / | 7 | 17 | 17 | |
| Rising 1 | 10 | 5 | / | / | 15 | 4 | 40 | 40 | 40 | |
| Mixing 2 | 13 A | 13 A | 5 | 5 | / | / | 10 A | 8 A | 8 A | |
| Rising 2 | 30 | 30 | 30 | / | 9 | 25 | 25 | |||
| Rising 3 | 40 | 40 | 40 | 35 | 45 Mixing and heating at the same time] | / | 35 | 35 | ||
| Keep warm | 70 | 70 | 50 | 45 | / | 20 | 80 | 55 | 50 | |
| Fruit signal time | 02:25 | 02:25 | 01:26 | 01:16 | / | / | 01:34 | 02:04 | 01:59 | |
SB221 10N time setting SB221 10N time setting of each programme

SPARES
When ordering spare parts, please use the following references:
SB2211ON-01: Kneading paddle
SB22110N02: Bread pan
SB2211ON-03: Cup, spoon & paddle hook set
www.swan-brand.co.uk

DISPOSAL OF UNIT

Appliances bearing the symbol shown here may not be disposed of in domestic rubbish. You are required to dispose of old electrical and electronic appliances like this separately. Please visit www.recycle-more.co.uk or www.recyclenow.co.uk for access to information about the recycling of electrical items. Please visit www.weeeireland.ie for access to information about the recycling of electrical items purchased in Ireland. The WEEE directive, introduced in August 2006, states that all electrical items must be recycled, rather than taken to landfill.
Please arrange to take this appliance to your local Civic Amenity site for recycling, once it has reached the end of its life.

WARRANTY
This product is guaranteed for 2 years from the date of original purchase. If any defect arises due to faulty materials of workmanship the faulty products must be returned to the place of purchase. Refunds or replacement is at the discretion of the store.
The following conditions apply:
- The product must be returned to the retailer with proof of purchase.
- The product must be installed and used in accordance with the instructions contained in this instruction guide.
- It must be used only for domestic purposes.
- It does not cover wear and tear, damage, misuse or consumable parts.
• Swan Products Ltd has limited liability for incidental or consequential loss or damage.
• This guarantee is valid in the UK and Eire Only.

BS PLUG
The wires in the mains lead are coloured in accordance with the following code:
BLUE NEUTRAL
BROWN LIVE
GREEN/YELLOW EARTH
As the colours of the wire in the mains lead of this appliance may not correspond with the colour markings identifying the terminals on your plug, proceed as follows: The wire which is coloured BLUE must be connected to the terminal which is marked with the letter N or coloured black. The wire which is coloured BROWN must be connected to the terminal which is marked with the letter L or coloured red. The wire which is coloured GREEN/YELLOW must be connected to the terminal which is marked with the letter E or (earth symbol) and is coloured GREEN or GREEN/YELLOW.
WARNING: THIS APPLIANCE MUST BE EARTHED
Swan
28


SWAN BRAND HERITAGE
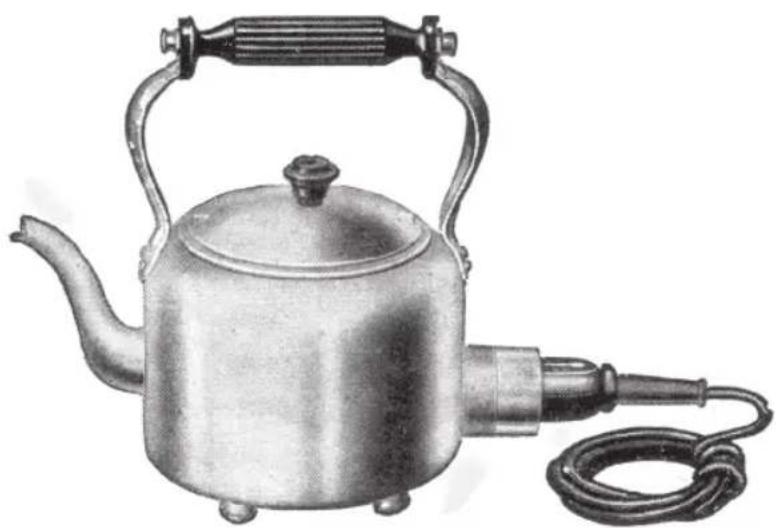
Did you know...
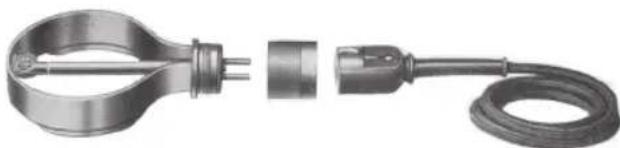
In 1933 Swan were the first to develop an electric heating element that could be immersed in water. This led to the Swan kettle range that could boil up to six pints of water in just over nine minutes - pretty hot for the time! These days it takes about two minutes for a Swan kettle to boil.


NOTES


NOTES



www.swan-brand.co.uk
Follow us online




www.swan-brand.co.uk
Copyright © Swan Products Ltd. PO Box 3117, Stoke-on-Trent ST4 9GD
- BREAD MAKER
- IMPORTANT INFORMATION - RETAIN FOR FUTURE USE
- WHEN USING ANY ELECTRICAL APPLIANCE, BASIC SAFETY PRECAUTIONS SHOULD ALWAYS BE FOLLOWED INCLUDING THE FOLLOWING
- CAUTIONS AND WARNINGS
- TECHNICAL DATA
- YOUR BREAD MAKER
- LET'S MESS WITH IT
- START/STOP BUTTON
- MENU BUTTON
- PROGRAMMES & SETTINGS
- BASIC
- FRENCH
- WHOLE WHEAT
- QUICK
- SWEET
- GLUTEN FREE
- ULTRA FAST
- DOUGH
- JAM
- CAKE
- SANDWICH
- BAKE
- COLOUR
- LOAF [SIZE]
- DELAY (TIME+, TIME-)
- KEEP WARM
- MEMORY
- TEMPERATURES
- WARNING DISPLAY & ERROR MESSAGES
- WHAT'S THAT SMELL
- MAKING BREAD
- USE THE SUPPLIED HOOK TO CAREFULLY REMOVE THE KNEADING PADDLE FROM THE BOTTOM OF THE LOAF
- HINTS, TIPS AND SHOPPING LIST
- INGREDIENT MEASUREMENT
- YOUR FIRST LOAF
- MACHINES DON'T FORGIVE
- HOW DID IT TURN OUT
- TROUBLE AT T' MILL
- CLEANING & MAINTENANCE
- RECIPES
- PROGRAMME 2 (FRENCH BREAD). ADD INGREDIENTS IN ORDER SHOWN
- PROGRAMME 3 (WHOLEWHEAT BREAD). ADD INGREDIENTS IN ORDER SHOWN
- PROGRAMME 6 [GLUTEN FREE]
- PROGRAMME 7 (ULTRAFAST). ADD INGREDIENTS IN ORDER SHOWN
- PROGRAMME 9 (JAM)
- EPIC FAIL
- SPARES
- WWW.SWAN-BRAND.CO.UK
- DISPOSAL OF UNIT
- WARRANTY
- THE FOLLOWING CONDITIONS APPLY
- BS PLUG
- SWAN BRAND HERITAGE
- DID YOU KNOW
- NOTES
Brand : SWAN
Model : SB22110N
Category : Bread maker