ACO-PRO - Pneumatic tool Ozito - Free user manual and instructions
Find the device manual for free ACO-PRO Ozito in PDF.


| Brand | Ozito |
| Model | ACO-PRO |
| Product Type | Pneumatic Cut-Off Tool |
| Weight | 0.76 kg |
| No Load Speed | 20,000/min |
| Wheel Diameter | 76.2 mm (3") |
| Air Inlet | 1/4" BSP |
| Average Air Consumption | 170 L/min (6 CFM) |
| Operating Pressure | 90 psi (max) |
| Lock-Off Lever | Yes, prevents accidental start |
| Cutting Disc Included | 76.2 mm (3") cutting disc |
| Spindle Lock | For blade changes |
| Guard | Fixed guard for safety |
| Spare Parts Available | Guard lock nut (SPACOPRO-28), 3" cutting blade (SPACOPRO-29), blade bolt & washer (SPACOPRO-30A), spanner (SPACOPRO-33) |
| Lubrication | Oil after each use |
| Safety Equipment Needed | Safety goggles, ear protection, dust mask |
| Intended Use | Cutting metal, tile, plastic (with appropriate disc) |
Frequently Asked Questions - ACO-PRO Ozito
User questions about ACO-PRO Ozito
0 question about this device. Answer the ones you know or ask your own.
Ask a new question about this device
Download the instructions for your Pneumatic tool in PDF format for free! Find your manual ACO-PRO - Ozito and take your electronic device back in hand. On this page are published all the documents necessary for the use of your device. ACO-PRO by Ozito.
USER MANUAL ACO-PRO Ozito
Av. Air Consumption: 170l/min (6cfm)
No Load Speed: 20,000/min
Wheel Diameter: 76.2mm (3")
Air Inlet: 1/4" BSP
Weight:
0.76kg
ACO-PRO
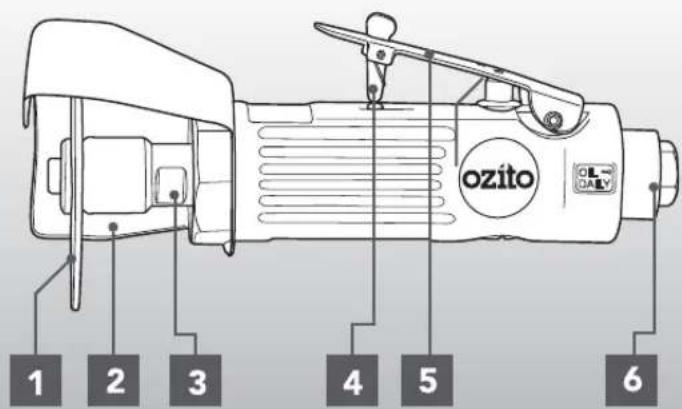
KNOW YOUR PRODUCT
1 Cutting Disc
2 Guard
3 Spindle
4 Lock-off Lever
5 On/Off Trigger
6 Air Inlet
GENERAL AIR TOOL SAFETY WARNINGS

WARNING! Read all safety warnings and all instructions. Failure to follow the warnings and instructions may result in electric shock, fire and/or serious injury.
Save all warnings and instructions for future reference. The term "power tool" in the warnings refers to your mains-operated (corded) power tool or battery-operated (cordless) power tool.
- Work area safety
a. Keep work area clean and well lit. Cluttered or dark areas invite accidents.
b. Do not operate power tools in explosive atmospheres, such as in the presence of flammable liquids, gases or dust. Power tools create sparks which may ignite the dust or fumes.
c. Keep children and bystanders away while operating a power tool. Distractions can cause you to lose control.
d. Dress properly. Do not wear loose clothing or jewellery. Keep your hair, clothing and gloves away from moving parts. Loose clothes, jewellery or long hair can be caught in moving parts.
e. Check the maximum pressure rating of any tools or accessories that you intend using with the compressor. The output pressure of the air from the compressor must be regulated so that it never exceeds the rated pressure of the tool or accessory.
f. Always wear safety goggles or glasses when using the air compressor. Never point the nozzle of an accessory towards any part of your body or towards another person.
g. Drain the moisture from the tank daily. It will help prevent corrosion.
h. Use safety equipment including safety goggles or shield, ear protection, breathing respirator mask and protective clothing.
i. Air tools should not be used in a potentially explosive environment.
j. Use safety equipment including safety goggles or shield, ear protection, breathing or respirator mask and protective clothing.
k. The tool must be used only for its prescribed purpose. Any use other than those mentioned in this Manual will be considered a case of misuse. The user and not the manufacturer shall be liable for any damage or injury resulting from such cases of misuse.

WARNING! In the event that an air line is cut or broken, the air supply must be turned off at the compressor. A broken air line which is not supported is extremely dangerous and up around very quickly, both with the capability of striking people, and blowing foreign s into the air.
Do not attempt to catch the air line but immediately keep bystanders well clear and turn off the air supply to the hose, turn off the compressor at the On / Off button, and then remove the hose from the compressor.
This appliance is not intended for use by persons (Including children) with reduced physical, sensory or mental capabilities, or lack of experience and knowledge, unless they have been given the supervision or instruction concerning use of the appliance by a person responsible for their safety.
Children should be supervised to ensure that they do not play with the appliance.
AIR CUT-OFF TOOL SAFETY WARNINGS

WARNING! Do not use accessories which are not specifically designed and recommended by the tool manufacturer. Just because the accessory can be attached to power tool, it does not assure safe operation.
- The rated speed of the accessory must be at least equal to the maximum speed marked on the power tool. Accessories running faster than their rated speed can break and fly apart.
- Wear personal protective equipment. Depending on application, use face shield, safety goggles or safety glasses. As appropriate, wear dust mask, hearing protectors, gloves and workshop apron capable of stopping small abrasive or workpiece fragments. The eye protection must be capable of stopping flying debris generated by various operations. The dust mask or respirator must be capable of filtrating particles generated by your operation. Prolonged exposure to high intensity noise may cause hearing loss.
- Never place your hand near the rotating accessory. Accessory may kickback over your hand.
- Do not position your body in the area where power tool will move if kickback occurs. Kickback will propel the tool in direction opposite to the wheel's movement at the point of snagging.
DESCRIPTION OF SYMBOLS
| Warning |  | Read instruction manual | |
| Wear ear protection |  | Wear eye protection | |
| /min | Revolutions orreciprocation per minute |  | No load speed |
- Do not attach a saw chain woodcarving blade or toothed saw blade. Such blades create frequent kickback and loss of control.
- Use special care when working corners, sharp edges etc. Avoid bouncing and snagging the accessory. Corners, sharp edges or bouncing have a tendency to snag the rotating accessory and cause loss of control or kickback.
- Wheels must be used only for recommended applications. For example: do not grind with the side of cut-off wheel. Abrasive cut-off wheels are intended for peripheral grinding, side forces applied to these wheels may cause them to shatter.
- Always use undamaged wheel flanges that are of correct size and shape for your selected wheel. Proper wheel flanges support the wheel thus reducing the possibility of wheel breakage. Flanges for cut-off wheels may be different from grinding wheel flanges.
- Do not "jam" the cut-off wheel or apply excessive pressure. Do not attempt to make an excessive depth of cut. Overstressing the wheel increases the loading and susceptibility to twisting or binding of the wheel in the cut and the possibility of kickback or wheel breakage.
- Do not restart the cutting operation in the workpiece. Let the wheel reach full speed and carefully re-enter the cut. The wheel may bind, walk up or kickback if the power tool is restarted in the workpiece.
SPARE PARTS
Guard Lock Nut SPACOPRO-28
3" Cutting Blade SPACOPRO-29
Blade Bolt & Washer SPACOPRO-30A
Spanner
SPACOPRO-33
Spare parts can be ordered from the Special Orders Desk at your local Bunnings Warehouse.
For further information, or any parts not listed here, visit www.ozito.com.au or contact Ozito Customer Service:
Australia 1800 069 486
New Zealand 0508 069 486
Email: enquiries@ozito.com.au
CONNECTING TO COMPRESSOR
-
Remove black plastic cap from the air inlet.
-
Wrap the threaded male end with teflon tape in a clockwise direction.
-
Screw the male nitto fitting clockwise into the air inlet.
-
Pull back the sleeve on hose fitting, insert male end & release sleeve on hose fitting.
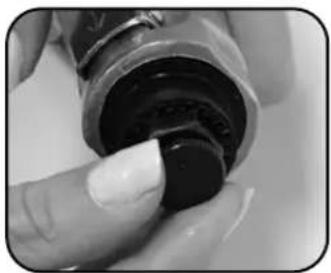
natural_image
Close-up of a finger pressing down on a black circular object (no visible text or symbols)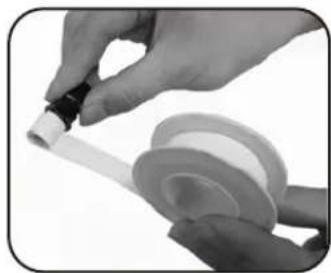
natural_image
Close-up of hands holding a small object with a black-and-white cap, next to a spool of paper (no text or symbols visible)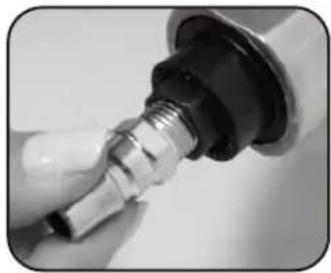
natural_image
Close-up of a hand holding a metallic connector with threaded shaft (no visible text or symbols)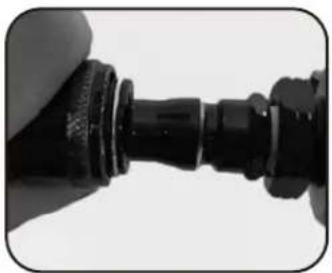
natural_image
Close-up of a black plastic connector with threaded ends, held by a hand (no text or symbols visible)Note: This tool is rated at 90psi. Ensure your compressor is set no higher than 90psi.
ATTACHING TOOLS
Note: Disconnect the tool from the air supply before performing the below operations.
-
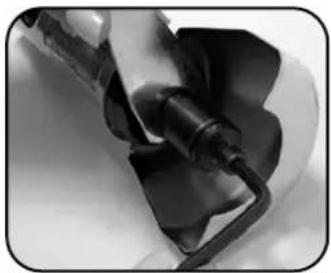
Undo the spindle using the provided hex key and spanner turning in opposite directions.
-
Place the cutting disc onto the spindle with the metal ring facing down.
-
Place washer and blade bolt onto the spindle.
-
Tighten the blade bolt using the provided hex key and spanner in opposite directions.
natural_image
Close-up of a mechanical component with a curved handle and black material (no visible text or symbols)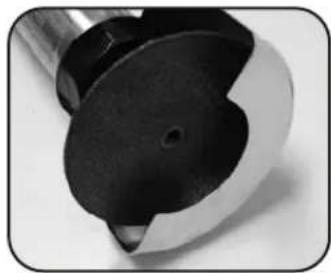
natural_image
Close-up of a black and white mechanical component with a circular opening (no text or symbols visible)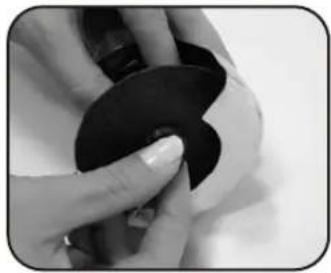
natural_image
Close-up of hands holding a black circular object with a glossy finish (no text or symbols visible)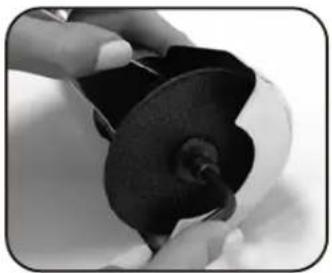
natural_image
Close-up of hands holding a black mechanical component with a pointed tip (no visible text or symbols)OPERATION
-
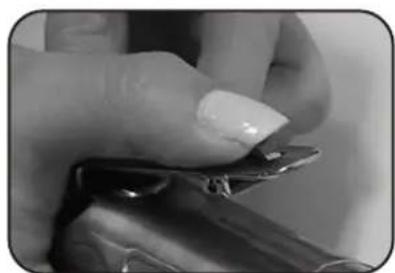
Push and hold the lock-off lever forward.
-
To turn the tool on squeeze the on/off trigger.
-
To turn off, release the on/off trigger.
natural_image
Close-up of a hand holding a small object with a metallic clip (no visible text or symbols)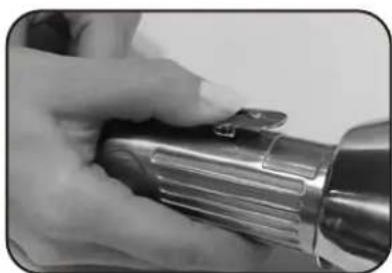
natural_image
Close-up of hands holding a metallic tool, no visible text or symbols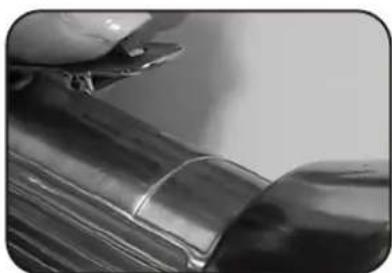
natural_image
Close-up of a hand using a tool to cut or apply material, no visible text or symbolsMAINTENANCE
- Keep the ventilation vents of the cut-off tool clean at all times, if possible, prevent foreign matter from entering the vents.
- If the enclosure of the tool requires cleaning, do not use solvents but a moist soft cloth only. Never let any liquid get inside the tool; never immerse any part of the cut-off tool into a liquid.
- Oil the cut-off tool after each use.
TROUBLESHOOTING
If the air cut-off tool fails to work effectively, perform the following checks:
- Check the air inlet is free of any dirt or blockages.
- Ensure the tool is lubricated properly.
- Check that the pressure on the air compressor is within its working range. If not, let the compressor rest to re-pressurise / refer to the compressor instruction manual.
Brand : Ozito
Model : ACO-PRO
Category : Pneumatic tool