T14012 - Oven Tower - Free user manual and instructions
Find the device manual for free T14012 Tower in PDF.


| Product Type | Countertop Convection Oven |
| Brand | Tower |
| Model | T14012 |
| Dimensions (W x D x H) | 45 x 35 x 28 cm |
| Weight | 9.5 kg |
| Power Consumption | 1500 W |
| Voltage | 220-240 V / 50-60 Hz |
| Capacity | 30 liters |
| Cooking Functions | Bake, Broil, Convection, Toast, Reheat |
| Temperature Range | 80°C to 230°C |
| Timer | Mechanical timer up to 60 minutes |
| Interior Light | Yes |
| Racks Included | 2 chrome-plated wire racks |
| Baking Tray | 1 enamel baking tray |
| Crumb Tray | Slide-out crumb tray for easy cleaning |
| Control Type | Dial knobs for temperature, function, and timer |
| Door Type | Drop-down door with cool-touch handle |
| Safety Features | Automatic shut-off, overheat protection |
| Cleaning | Wipe interior with damp cloth; non-stick interior coating |
| Spare Parts Availability | Replacement racks and trays available from Tower website |
| Warranty | 1 year limited warranty |
Frequently Asked Questions - T14012 Tower
User questions about T14012 Tower
0 question about this device. Answer the ones you know or ask your own.
Ask a new question about this device
Download the instructions for your Oven in PDF format for free! Find your manual T14012 - Tower and take your electronic device back in hand. On this page are published all the documents necessary for the use of your device. T14012 by Tower.
USER MANUAL T14012 Tower
Safety and Instruction Manual
PLEASE READ CAREFULLY
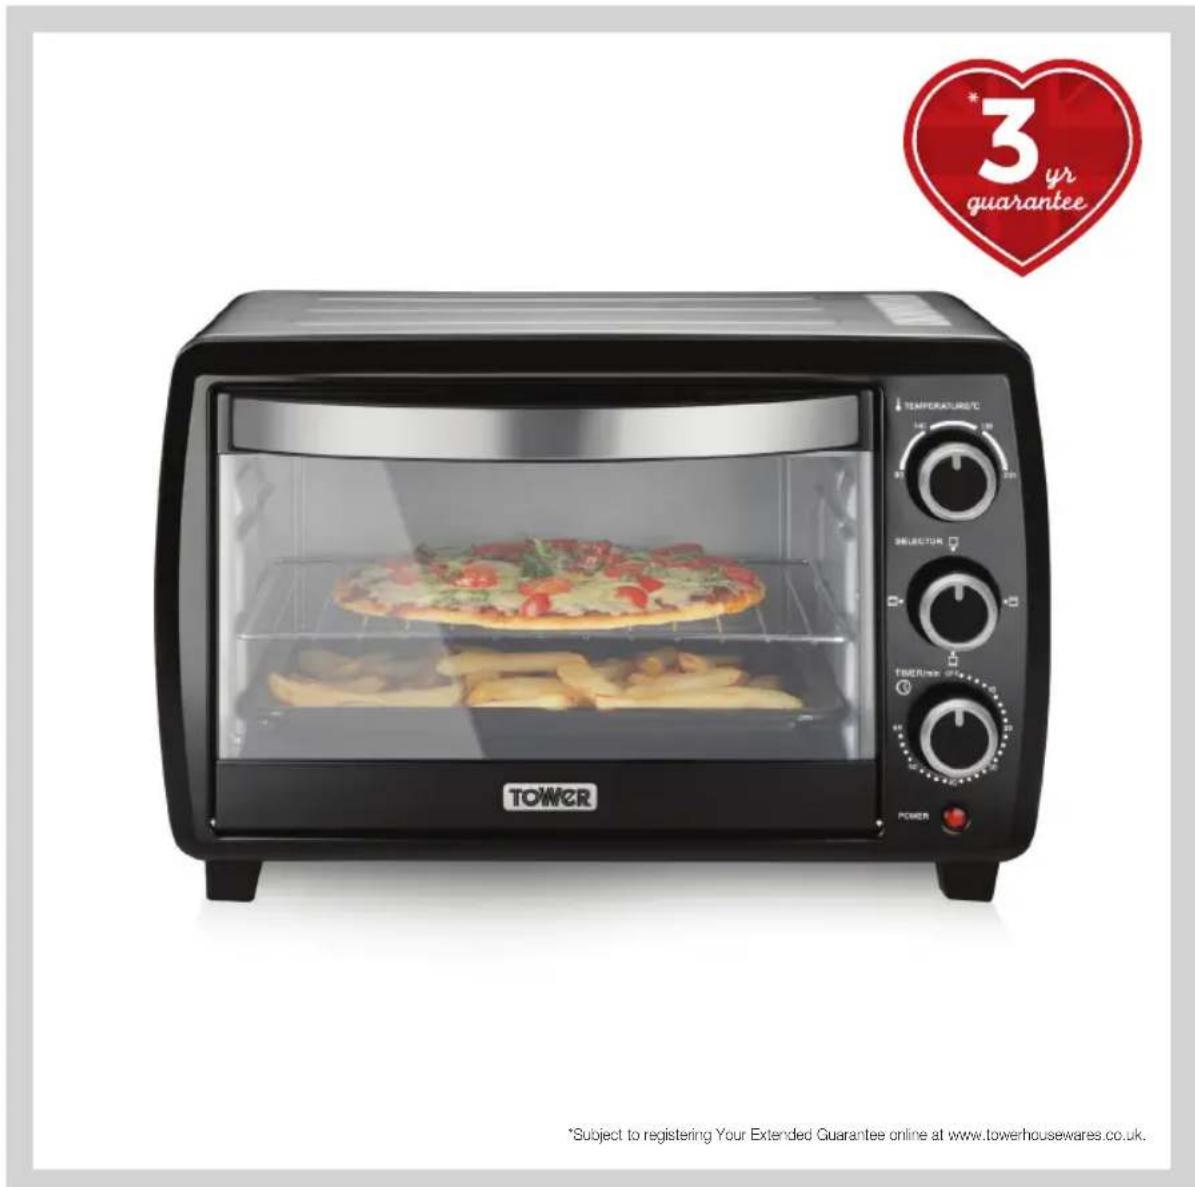
23 Litre
Mini Oven
*Subject to registering Your Extended Guarantee online at www.towerhousewares.co.uk.
TOWER®
over 100 years of quality
1912 Midland Metal Spinners was founded by George Cadman, who was then 65 years old, as a metal holloware manufacturing company, in St. Mark's Street, Wolverhampton. They later moved into the Tower and Fort Works in Pelham Street, which ultimately gave rise to the famous Tower brand name.
1937 Tower exhibited some of their latest holloware designs at the British Industries Fair. As you can see from the original poster, their stand No. A410 must have been a great sight as it promoted their "Beautiful, inexpensive, untarnishable Plate, at prices all can afford to pay".
natural_image
Three metallic kitchenware items: a kettle, a pot, and a steamer (no text or symbols visible)Bake, Grill & Toast
The Tower 23L Stainless Steel Mini Oven bakes, toasts, grills and roasts, providing you with a versatile appliance that works just like a conventional oven but takes up half the space.
Featuring a compact design, this appliance will fit in any kitchen. Adjustable temperature between 90 and 230 degrees means your meals will always be cooked to perfection and accessories including a rotisserie fork and handle mean you're covered for every culinary eventuality.
1961 Tower became one of the largest manufacturers of aluminium holloware, electric kettles, tea pots and other household articles with over 1,000 employees.
1974 Russell Hobbs took ownership of the expanding Tower brand.

Towerbrand
CONTENTS:
Please read this Manual carefully BEFORE using the appliance for your own safety.
Thank you for purchasing this Tower 23 Litre Mini Oven.
It has been designed to provide many years of trouble-free cooking. There are many benefits to using a Tower Mini Oven:
- Roast, bake, and grill a wide variety of meals with one compact device.
- Adjustable temperature between 90°C and 230°C
- 3 hot plate settings – independent/dual.
- 3 oven functions
- 60 minutes timer with bell
- Compact stainless steel design
- Accessories included: baking tray, wire rack and tray handle.
Contents:
- Specifications
Components and structure
Technical information
- Important Safety Information
- Using your Tower Appliance
- Cleaning & Care
- Recycling
- Wiring Safety
- Warranty Information
- Troubleshooting
- Your Receipt
See back page for Customer Service Information
1 SPECIFICATIONS:
Components
This box contains:
Tray Handle
Wire rack
Baking Tray
Instruction Manual
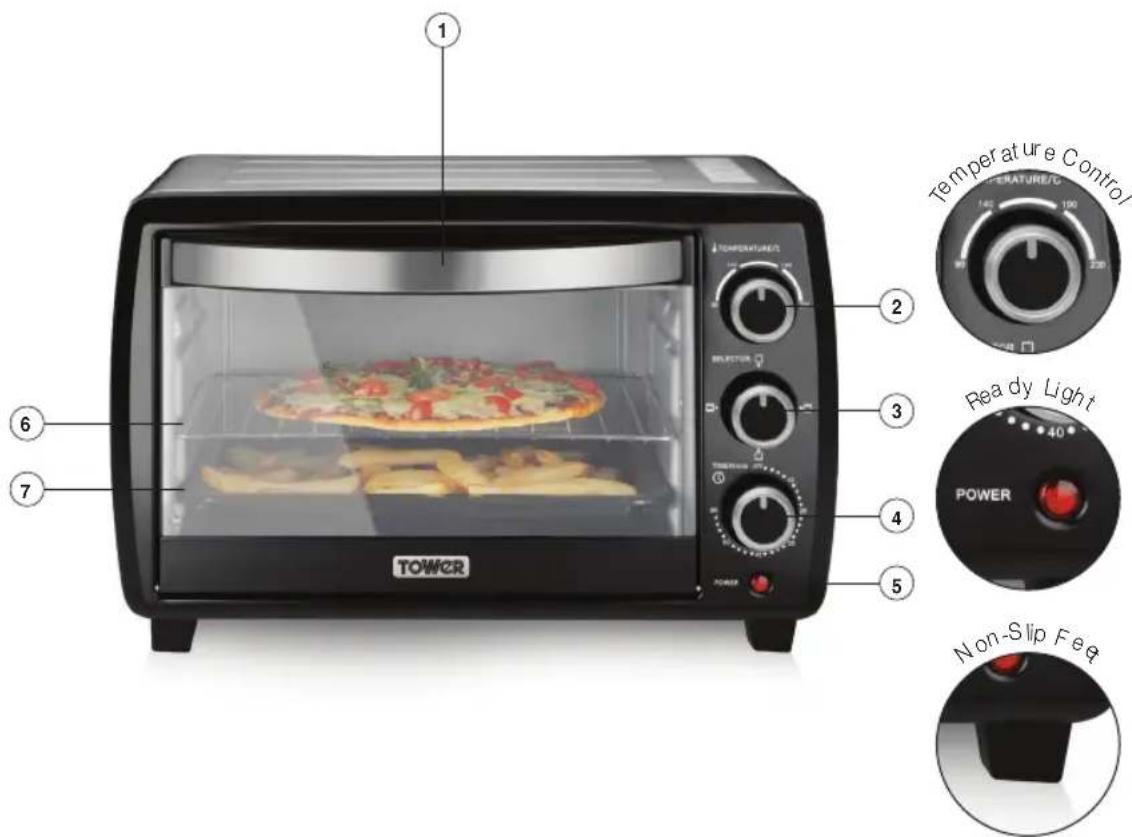
Structure of your appliance:
-
Door handle
-
Temperature control
-
Function control
-
Timer control
-
Power indicator
-
Wire rack
-
Bake tray
Technical Data
Description: Mini Oven
Model: T14012
Rated Voltage: 220-240V \~50/60Hz
Power: 1500W
Documentation
We declare that this product conforms to the following product legislation in accordance with the following directive(s):
2004/108/EC Electromagnetic Compatibility Directive.
2006/95/EC Low Voltage Directive.
2011/65/EU Restriction of Hazardous Substances Directive.
1935/2004/EC Materials & Articles in Contact With Food (LFGB section 30 & 31).
2009/125/EC Eco-design of energy related products.
RKW Quality Assurance, United Kingdom.
Guarantee
The spares and accessories are guaranteed for 1 year from date of purchase.
The main body and housing are guaranteed for the extended free warranty subject to registration.
If any defect arises due to faulty materials of workmanship, the faulty products must be returned to the place of purchase.
Refund or replacement is at the discretion of the retailer.
Should you encounter problems or require a replacement part, contact The Tower Customer Service Department on: +44 (0) 333 220 6066.
Any necessary spare parts may be ordered from the Tower website.
Your warranty becomes void should you decide to use non Tower spare parts. Spare parts can be purchased from www.towerhousewares.co.uk
2 IMPORTANT SAFETY INFORMATION
Please read these notes carefully BEFORE using your Tower appliance
- Check that the voltage of the main circuit corresponds with the rating of the appliance before operating.
- Please ensure that the appliance is used on a stable, level, and heat resistant surface.
- Do not immerse cords, plugs or any part of the appliance in water or any other liquid.
- Do not leave the appliance unattended while it is operating.
- Close supervision is necessary when any appliance is used by or near children or pets.
- This appliance can be used by children aged from 8 years and above and persons with reduced physical, sensory or mental capabilities or lack of experience and knowledge if they have been given supervision or instruction concerning use of the appliance in a safe way and understand the hazards involved.
- Children shall not play with the appliance.
- Cleaning and user maintenance shall not be made by children without supervision.
- Switch off at the wall socket
then remove the plug from the socket when not in use or before cleaning.
- If the supply cord or appliance is damaged, stop using the appliance immediately and seek advice from the manufacturer or its service agent or a similarly qualified person.
- Do not let the cord hang over the edge of a table or counter or let it come into contact with any hot surfaces.
- The use of accessory attachments is not recommended by the appliance manufacturer, apart from those supplied with this product.
- Do not pull the plug out by the cord as this may damage the plug and/or the cable.
- Do not use this product for anything other than its intended use.
- This appliance is for household use only.
- Do not carry the appliance by the power cord.
- Do not use the appliance outdoors.
-
Do not touch hot surfaces, use handles or knobs.
-
Do not place on or near gas or electric cookers.
- When operating the oven keep at least four inches of space on all sides of the oven to allow for adequate air circulation and ventilation.
- Moving this appliance whilst it is hot or cooling is not recommended.
- Do not cover any part of the oven with metal foil.
- Do not clean with metal scouring pads or abrasive materials as this may cause damage to the appliance and may touch electrical parts, creating a risk of electric shock to the user.
- Oversized foods or metal utensils must not be inserted in an electric oven as they may create a fire or risk of electric shock.
- Ensure that the appliance is not sited near combustible materials such as curtains, blinds or towels and ensure that nothing covers this appliance.
- Do not use containers constructed of anything other than metal or glass.
- Do not place any of the following materials in the oven: cardboard, plastic, paper, or anything similar.
- Do not store any materials, other than recommended accessories, in this oven when hot.
- Always wear protective, insulated oven gloves when inserting or removing items from the hot oven and remember that the top of this appliance may become very hot.
- External timers, extension leads should not be used with this appliance as these could increase the risk of fire.
• Always wear protective, insulated oven mitts/gloves when handling, inserting or removing items from the appliance.
- In the unlikely event the appliance develops a fault, stop using it immediately and seek advice from the service department:
+44 (0) 333 220 6066
3 USING YOUR APPLIANCE
Before first use:
- Remove the parts from the packaging.
- Place the oven on a flat, dry surface.
- Remove any promotional labels or stickers.
- Plug in and heat the oven empty for around 10 minutes at 230°C with the upper and lower heating elements on.
- Dispose of the packaging in a responsible manner.
- Your appliance is now ready for normal use.
Note: There may be some smoke and a slight burning smell emitted during first use. This is normal and just a product of any leftover manufacturing residue. This is not a malfunction and will stop after the first few uses.
Using your appliance:
- Insert the wire rack or baking tray into the oven, onto the required shelf.
- Plug the oven in and preheat as required by your recipe.
- Set the temperature dial and the oven function dial. The front indicator light will show when the heaters are on.
- Using oven gloves, place the food to be cooked into the oven.
- Set the timer by turning it clockwise.
- Once the time is up, the timer will ring, reminding you to remove your food from the oven.
Note: Some food may require turning halfway through cooking time. Always follow the instructions on the food packaging.
Settings:
Turn each dial clockwise to select the setting you require.
Temperature Dial: Set the temperature by turning the temperature dial clockwise to select the required temperature for your recipe. The temperature control varies between 100°C and 230°C.
Timer Dial: Set the timer by turning the timer dial clockwise to select the required time for your recipe. The timer can be set from 0 to 60 minutes. The oven will turn off automatically once the selected time has been reached, and a bell will sound to let you know your food is done.
Oven Function Dial: There are 3 functions to choose from, depending on what you are going to cook.
| Function Control Panel Icon | Uses | |
| Heaters off | ||
| Grill (Upper heating elements) | Use when toasting bread and grilling chicken, bacon, sausage etc. | |
| Conventional (Upper & Lower Heating elements) | Use when roasting meat and vegetables, for ready meals, casseroles, bread, cakes and more. | |
| Lower heating (lower heating elements) | This setting can be used for most of the same food that can be cooked in the conventional oven, but will take longer to cook the food. | |
Accessories:
The baking tray and rack can be slotted into any of the slats inside the oven, depending on the food you want to cook. For example, if you are cooking a roast chicken, you would place the tray on the lowest slots of Mini Oven.
If you are cooking a dish and would like the top part browned and cooked the most, you would place the tray on either the top or second slot.
| Accessory | Uses How to use | with tray handle |
Baking tray 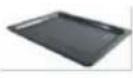 | Use for almost all oven cooked foods, including roast chicken and cake. | 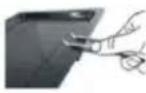 |
Wire rack Dry 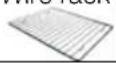 | food such as baked potatoes | 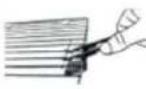 |
Baking tray with wire rack 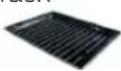 | Use as a grill for food that may drip, such as sausages, bacon, fish etc. |
4 CLEANING & CARE
It is important that you clean the appliance after each use to prevent an accumulation of grease and avoid unpleasant odours.
Excess grime may also increase the cooking times.
Allow the appliance to cool and unplug from outlet before cleaning.
Do not use abrasive cleaners or sharp utensils to clean the oven, as scratching may weaken it and cause shattering.
Inner: Wipe the inside of the Mini Oven with a hot, damp sponge cloth. Dry before next use. A mild spray or oven cleaner can be used. Apply to the sponge, not the oven.
Outer: Clean outside of appliance with a damp sponge and dry with a clean towel.
Door: Wipe the glass with a hot damp sponge. Clean the glass with a glass cleaner spray if desired. Dry with a clean towel.
Accessories: The wire rack, baking tray and tray handle can all be washed as normal kitchenware.
Let all parts and surfaces dry thoroughly prior to plugging oven in and using.
IMPORTANT!
Do not use the appliance if damp. Ensure the appliance is completely clean and dry before storing.
Storage
Unplug power cord from the power outlet and clean as instructed.
Store on a flat, dry level surface out of reach of children.
5 RECYCLING
DISPOSAL OF THE UNIT
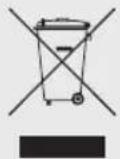
Appliances bearing the symbol shown here may not be disposed of in domestic rubbish. You are required to dispose of old electrical and electronic appliances like this separately.
Please visit www.recycle-more.co.uk or www.recyclenow.co.uk for access to information about the recycling of electrical items.
Please visit www.weeeireland.ie for access to information about the recycling of electrical items purchased in Ireland.
The WEEE directive, introduced in August 2006, states that all electrical items must be recycled, rather than taken to landfill.
Please arrange to take this appliance to your local Civic Amenity site for recycling, once it has reached the end of its life.
6 WIRING SAFETY FOR UK USE ONLY
IMPORTANT
As the colours in the mains lead of this appliance may not correspond with the coloured markings identifying the terminals in your plug, please proceed as follows:
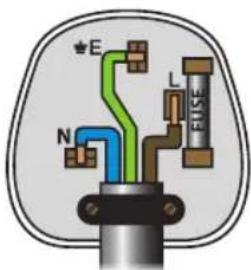
The wires in the mains lead are coloured in accordance with the following code:
Blue neutral [N] Brown live [L] Green/Yellow [EARTH]
Plug Fitting Details (Where Applicable).
The wire coloured blue is the neutral and must be connected to the terminal marked [N] or coloured black.
The wire coloured brown is the live wire and must be connected to the terminal marked [L] or coloured red.
The wire coloured green/yellow must be connected to the terminal marked with the letter [E] or marked ⚠.
On no account must either the brown or the blue wire be connected to the [EARTH] terminal ⚠.
Always ensure that the cord grip is fastened correctly.
The plug must be fitted with a fuse of the same rating already fitted and conforming to BS 1362 and be ASTA approved.
If in doubt consult a qualified electrician who will be pleased to do this for you.
Non-Rewireable Mains Plug
If your appliance is supplied with a non-rewireable plug fitted to the mains lead and should the fuse need replacing, you must use an ASTA approved one (conforming to BS 1362 of the same rating).
If in doubt, consult a qualified electrician who will be pleased to do this for you.
If you need to remove the plug - disconnect it from the mains - and then cut it off the mains lead and immediately dispose of its safely. Never attempt to reuse the plug or insert it into a socket outlet as there is a danger of an electric shock.
WARNING:
This Appliance MUST be Earthed
7 WARRANTY

We hope that you will enjoy your Tower Mini Oven for many years. As a thank you for purchasing one of our fantastic products, we are giving you 3 years peace of mind.
To receive your 3 year guarantee, simply register your appliance online by visiting www.towerhousewares.co.uk
natural_image
Exterior view of a modern food toaster oven with a pizza on the front (no visible text or symbols)This product is guaranteed for 12 months from the date of original purchase.
If any defect arises due to faulty materials of workmanship, the faulty products must be returned to the place of purchase.
Refund or replacement is at the discretion of the retailer.
The Following Conditions Apply:
- The product must be returned to the retailer with proof of purchase.
- The product must be installed and used in accordance with the instructions contained in this instruction guide.
- It must be used only for domestic purposes.
- It does not cover wear and tear, damage, misuse or consumable parts.
- Tower has limited liability for incidental or consequential loss or damage.
This guarantee is valid in the UK and Eire Only.
The standard one year guarantee is only extended to the maximum available for each particular product upon registration of the product within 28 days of purchase. If you do not register the product with us within the 28 day period, your product is guaranteed for 1 year only.
To validate your extended warranty, please visit www.towerhousewares.co.uk and register with us online. Alternatively, call our customer registration line on +44 (0) 333 220 6066.
Please note that length of extended warranty offered is dependent on product type and that each qualifying product needs to be registered individually in order to extend its warranty past the standard 1 year.
Extended warranty is only valid with proof of purchase.
8 TROUBLE SHOOTING & FAQ'S
| Problem Solution | |
| Food is cooking too slowly, too quickly, or burning. | The oven temperature may be too low or high.If food is cooking too quickly, try lowering the shelf. If food is cooking too slowly, move the shelf up. |
| Steam is coming from the oven | This is a normal occurrence when cooking foods with high water content.Take care when opening the oven as steam may escape when you open the door. |
| The oven is not cooking evenly | Check you are using the correct temperature for the recipe as the temperature may be too high.The food/dish may not be placed centrally on the tray. |
| There is a smell of burning in the oven | There may be a build-up of grease in the oven or on the wire rack. Always wipe down the oven inside after use, once it has cooled completely. Always wash the wire rack after each use to remove any grease build-up. |
9 YOUR RECEIPT
Affix your store receipt to this page for safe keeping.

TOWER®
thank you!
We hope you enjoy your appliance for many years. As a thank you for purchasing one of our fantastic products, we are giving you an extra 2 years peace of mind.
*To receive your extra 2 years guarantee, register your appliance online by visiting:
www.towerhousewares.co.uk
Should you have a problem with your appliance, or need any spare parts, please call our Service Department on: +44 (0) 333 220 6066
Your warranty becomes void should you decide to use non Tower spare parts. Spare parts can be purchased from www.towerhousewares.co.uk

great british design, innovation and excellence since 1912
- Safety and Instruction Manual
- PLEASE READ CAREFULLY
- Litre
- Mini Oven
- TOWER®
- Bake, Grill & Toast
- CONTENTS:
- Please read this Manual carefully BEFORE using the appliance for your own safety.
- SPECIFICATIONS:
- Components
- Structure of your appliance:
- Technical Data
- Documentation
- Guarantee
- IMPORTANT SAFETY INFORMATION
- Please read these notes carefully BEFORE using your Tower appliance
- USING YOUR APPLIANCE
- Before first use:
- Using your appliance:
- Settings:
- Accessories:
- CLEANING & CARE
- IMPORTANT!
- Storage
- RECYCLING
- DISPOSAL OF THE UNIT
- WIRING SAFETY FOR UK USE ONLY
- IMPORTANT
- Plug Fitting Details (Where Applicable).
- Non-Rewireable Mains Plug
- WARNING:
- This Appliance MUST be Earthed
- WARRANTY
- YOUR RECEIPT
- thank you!
Brand : Tower
Model : T14012
Category : Oven