
Lyra X3030 - Media player RCA - Free user manual and instructions
Find the device manual for free Lyra X3030 RCA in PDF.


| Product Type | Portable Media Player |
| Model | Lyra X3030 |
| Brand | RCA |
| Display | 1.8-inch color LCD (128x160 pixels) |
| Storage Capacity | 2GB internal flash memory (approx. 500 songs) |
| Supported Audio Formats | MP3, WMA, WAV |
| Supported Video Formats | AMV (converted) |
| Photo Viewer | JPEG, BMP |
| FM Radio | 76-108 MHz with presets |
| Voice Recording | Built-in microphone, WAV format |
| Battery Type | Internal Lithium-ion rechargeable (3.7V, 500mAh) |
| Battery Life | Up to 12 hours audio playback |
| Charging | USB 2.0 (5V, 500mA), approx. 2 hours |
| Connectivity | USB 2.0 Mini-B, 3.5mm headphone jack |
| Dimensions | 90 x 50 x 15 mm (3.5 x 2.0 x 0.6 inches) |
| Weight | 95 g (3.4 oz) with battery |
| Operating System | Proprietary firmware (upgradeable) |
| PC Compatibility | Windows 2000/XP/Vista/7, Mac OS X |
| Care Instructions | Clean with soft dry cloth; avoid moisture and extreme temperatures |
| Safety | Do not disassemble; keep away from water and heat sources |
| Spare Parts / Repairability | Battery and screen not user-replaceable; contact RCA support |
Frequently Asked Questions - Lyra X3030 RCA
User questions about Lyra X3030 RCA
0 question about this device. Answer the ones you know or ask your own.
Ask a new question about this device
Download the instructions for your Media player in PDF format for free! Find your manual Lyra X3030 - RCA and take your electronic device back in hand. On this page are published all the documents necessary for the use of your device. Lyra X3030 by RCA.
USER MANUAL Lyra X3030 RCA
Changing Entertainment. Again.
WARNING
To reduce the risk of fire or electric shock, do not expose this product or AC charger to rain or moisture.
CAUTION
RISK OF ELECTRIC SHOCK DO NOT OPEN
To reduce the risk of electric shock, do not remove cover (or back). No user serviceable parts inside. Refer servicing to qualified service personnel.

This symbol indicates "dangerous voltage" inside the product that presents a risk of electric shock or personal injury.

This symbol indicates important instructions accompanying the product.
FCC and Industry Canada Information
This device complies with part 15 of the FCC Rules. Operation is subject to the following two conditions: (1) This device may not cause harmful interference, and (2) this device must accept any interference received, including interference that may cause undesired operation.
This equipment has been tested and found to comply with the limits for a Class B digital device, pursuant to Part 15 of FCC Rules. These limits are designed to provide reasonable protection against harmful interference in a residential installation. This equipment generates, uses, and can radiate radio frequency energy and, if not installed and used in accordance with the instructions, may cause harmful interference to radio communications. However, there is no guarantee that interference will not occur in a particular installation. If this equipment does cause harmful interference to radio or television reception, which can be determined by turning the equipment off and on, the user is encouraged to try to correct the interference by one or more of the following measures.
- Reorient or relocate the receiving antenna.
- Increase the separation between the equipment and receiver.
- Connect the equipment into an outlet on a circuit different from that to which the receiver is connected.
- Consult the dealer or an experienced radio/TV technician for help.
This Class B digital apparatus complies with Canadian ICES-003.
FCC Regulations state that unauthorized changes or modifications to this equipment may void the user's authority to operate it.
Technical Specification
Product: Lyra Portable Multi-media Recorder Brand: RCA
Model: X3030
The apparatus should not be exposed to dripping or splashing and no objects filled with liquids, such as vases, should be placed on the apparatus.
Product Registration
Please fill out the product registration card and return it immediately. Returning this card allows us to contact you if needed.
Product Information
Keep your sales receipt for proof of purchase to obtain warranty parts and service and attach it here. Record the serial number and model numbers — both numbers are located on the product.
Model No. ____ Serial No. ____
Purchase Date: ____ Place of purchase: ____
End-User License Agreement
IMPORTANT: READ CAREFULLY BEFORE DOWNLOADING OR INSTALLING THIS SOFTWARE!
THIS END USER LICENSE AGREEMENT (THIS "EULA") IS A LEGAL AGREEMENT BETWEEN YOU AND THOMSON INC., OR ANY THOMSON GROUP ENTITY, AS DEFINED BELOW (COLLECTIVELY "THOMSON ENTITY"), FOR THE RCA OR THOMSON BRANDED PORTABLE DIGITAL AUDIO/VIDEO DEVICE APPLICATION/DRIVER SOFTWARE PROGRAM AND ASSOCIATED DOCUMENTATION, IF ANY (COLLECTIVELY, THE "PROGRAM"). THIS EULA CONTAINS IMPORTANT LEGAL LIMITATIONS, RESTRICTIONS AND DISCLAIMERS, AND ALSO SPECIFIES THE DURATION OF YOUR LICENSE.
ACKNOWLEDGMENT
BY INSTALLING THE PROGRAM OR CLICKING ON THE ACCEPTANCE BUTTON OF THE PROGRAM, COPYING OR OTHERWISE USING THE PROGRAM, YOU ACKNOWLEDGE AND AGREE THAT YOU HAVE READ THIS EULA, UNDERSTAND IT, AND AGREE TO BE BOUND BY ITS TERMS AND CONDITIONS. YOU MAY USE THE PROGRAM ONLY IN ACCORDANCE WITH THIS EULA, AND ANY SUCH USE IS HEREBY UNDERSTOOD TO BE CONDITIONAL UPON YOUR SPECIFIC AGREEMENT TO THE UNMODIFIED TERMS SET FORTH HEREIN. IF YOU DO NOT AGREE WITH ALL OF THE TERMS OF THIS EULA, CLICK ON THE REJECTION BUTTON AND/OR DO NOT INSTALL THE PROGRAM AND/OR DO NOT USE THE PROGRAM.
1. LICENSE
(a) Under this EULA, you are granted a license (i) to use the Program on a single workstation, and (ii) to make one (1) copy of the Program into any machine-readable form for backup of the Program, provided the copy contains all of the original Program's proprietary notices.
(b) You may transfer the Program and license to another party only as a part of the Thomson/RCA branded Portable Digital Audio/Video Device (“A/V Device”), and only if the other party agrees to accept the terms and conditions of this EULA. If you transfer the Program, you must at the same time either transfer all copies to the same party or destroy any copies not transferred.
(c) The terms of this EULA will govern any software upgrades or updates provided by THOMSON Entity that replace and/or supplement the original Program, unless such upgrade or update is accompanied by separate license terms and conditions in which case the terms of that separate license will govern. You acknowledge and agree that THOMSON Entity may automatically download upgrades or updates to the Program software to your computer in order to update, enhance, and/or further develop the Program.
2. LICENSE RESTRICTIONS
(a) Except for the licenses expressly granted to you in this EULA, no other licenses or rights are granted or implied.
(b) You may not (i) make the Program available over a network where it could be used by multiple computers at the same time; (ii) modify, translate, reverse engineer, decompile, disassemble (except to the extent that this restriction is expressly prohibited by law), or create derivative works based upon the Program; or (iii) copy the Program, except as expressly permitted herein. You agree that you shall only use the Program in a manner that complies with all applicable laws in the jurisdictions in which you use the Program, including, but not limited to, applicable restrictions concerning copyright and other intellectual property rights.
(c) The Program may contain pre-release code that does not perform at the level of a final code release. In such case, the Program may not operate properly. Updated versions of the Program may be downloaded from www.rca.com (if purchased in the United States) and www.thomson-lyra.com (if purchased in Europe).
(d) THOMSON Entity is not obligated to provide support services for the Program.
(e) The Program is provided with “RESTRICTED RIGHTS”. Use, duplication, or disclosure by the U.S. Government is subject to restrictions as set forth in subparagraph (c)(1)(ii) of DFARS 252.227-7013, or FAR 52.227-19, or in FAR 52.227-14 Alt. III, as applicable.
3. TERM AND TERMINATION
(a) Your license is effective on the date you accept this EULA and remains in effect until this EULA is terminated by either party.
(b) You may terminate this EULA and the associated license, without any notice or delay, by destroying or permanently erasing the Program and all copies thereof.
(c) If you fail to comply with any of the terms of this EULA, in whole or part, your license will automatically terminate without notice from THOMSON Entity.
(d) Upon termination of this EULA and your associated license, you shall cease all use of the Program and destroy or permanently erase the Program and all full or partial copies thereof.
4. WARRANTY DISCLAIMER
THE PROGRAM IS PROVIDED "AS IS" WITHOUT WARRANTY OF ANY KIND, EITHER EXPRESSED OR IMPLIED, INCLUDING, BUT NOT LIMITED TO THE IMPLIED WARRANTIES OF MERCHANTABILITY, FITNESS FOR A PARTICULAR PURPOSE, TITLE OR NON-INFRINGEMENT. THE ENTIRE RISK AS TO THE QUALITY AND PERFORMANCE OF THE PROGRAM IS WITH YOU. SHOULD THE PROGRAM PROVE DEFECTIVE, YOU (AND NOT THOMSON ENTITY, ITS SUPPLIERS, OR ITS DEALERS) ASSUME THE ENTIRE COST FOR ALL NECESSARY REPAIR OR CORRECTION.
This exclusion of warranty may not be allowed under some applicable laws. As a result, the above exclusion may not apply to you, and you may have other rights depending on the law that applies to you.
5. OWNERSHIP RIGHTS
All title and intellectual property rights in and to the Program and any copies thereof are owned by THOMSON Entity or its suppliers. All title and intellectual property rights in and to the content which may be accessed through use of the Program is the property of the respective content owner and may be protected by applicable copyright or other intellectual property laws and treaties. This license grants you no rights to use such content.
6. LIMITATION OF LIABILITY
(a) TO THE MAXIMUM EXTENT PERMITTED BY APPLICABLE LAW, IN NO EVENT SHALL THOMSON ENTITY, OR ITS DEALERS BE LIABLE FOR ANY SPECIAL, INCIDENTAL, INDIRECT, OR CONSEQUENTIAL DAMAGES WHATSOEVER (INCLUDING, WITHOUT LIMITATION, DAMAGES FOR LOSS OF PROFITS, BUSINESS INTERRUPTION, CORRUPTION OF FILES, LOSS OF BUSINESS INFORMATION, OR ANY OTHER PECUNIARY LOSS) REGARDLESS OF CAUSE OR FORM OF ACTION, INCLUDING CONTRACT, TORT, OR NEGLIGENCE, ARISING OUT OF YOUR USE OF OR INABILITY TO USE THE PROGRAM, EVEN IF THOMSON ENTITY HAS BEEN ADVISED OF THE POSSIBILITY OF SUCH DAMAGES. BECAUSE SOME STATES AND JURISDICTIONS DO NOT ALLOW THE EXCLUSION OR LIMITATION OF LIABILITY OF CONSEQUENTIAL OR INCIDENTAL DAMAGES, THE ABOVE LIMITATION MAY NOT APPLY TO YOU.
(b) YOU ASSUME RESPONSIBILITY FOR THE SELECTION OF THE APPROPRIATE PROGRAM TO ACHIEVE YOUR INTENDED RESULTS, AND FOR THE INSTALLATION, USE, AND RESULTS OBTAINED.
7. WINDOWS MEDIA
The software embedded within your A/V Device (the "Device Firmware") contains software licensed from Microsoft that enables you to play Windows Media Audio (WMA) files ("WMA Software"). The WMA Software is licensed to you for use with your A/V Device under the following conditions. By installing and using this version of the Device Firmware, you are agreeing to these conditions. IF YOU DO NOT AGREE TO THE END USER CONDITIONS OF THIS SECTION 7, DO NOT INSTALL OR USE THIS VERSION OF THE DEVICE FIRMWARE.
The WMA Software is protected by copyright and other intellectual property laws. This protection also extends to documentation for the WMA Software, whether in written or electronic form.
GRANT OF LICENSE.
The WMA Software is only licensed to you as follows:
You may use this version of the Device Firmware containing the WMA Software only as such use relates to your A/V Device.
You may not reverse engineer, decompile, or disassemble the WMA Software, except and only to the extent that such activity is expressly permitted by applicable law.
You may transfer your right to use the Device Firmware only as part of a sale or transfer of your A/V Device, on the condition that the recipient agrees to the conditions set forth herein. If the version of the Device Firmware that you are transferring is an upgrade, you must also transfer all prior versions of the Device Firmware that you have which include the WMA Software.
MICROSOFT IS NOT PROVIDING ANY WARRANTY OF ANY KIND TO YOU FOR THE WMA SOFTWARE, AND MICROSOFT MAKES NO REPRESENTATION CONCERNING THE OPERABILITY OF THE WMA SOFTWARE.
The WMA Software is of U.S. origin. Any export of this version of the Device Firmware must comply with all applicable international and national laws, including the U.S. Export Administration Regulations, that apply to the WMA Software incorporated in the Device Firmware.
Content providers are using the digital rights management technology for Windows Media contained in your A/V Device ("WM-DRM") to protect the integrity of their content ("Secure Content") so that their intellectual property, including copyrights, in such content is not misappropriated. Your A/V Device uses WM-DRM software to play Secure Content ("WM-DRM Software"). If the security of the WM-DRM Software in your A/V Device has been compromised, owners of Secure Content ("Secure Content Owners") may request that Microsoft revoke the WM-DRM Software's right to acquire new licenses to copy, display, and/or play Secure Content. Revocation does not alter the WM-DRM Software's ability to play unprotected content. A list of revoked WM-DRM Software is sent to your A/V Device whenever you download a license for Secure Content from the Internet or from a computer. Microsoft may, in conjunction with such license, also download revocation lists onto your A/V Device on behalf of Secure Content Owners.
8. THIRD PARTY SOFTWARE
ANY THIRD PARTY SOFTWARE THAT MAY BE PROVIDED WITH THE PROGRAM IS INCLUDED FOR USE AT YOUR OPTION. IF YOU CHOOSE TO USE SUCH THIRD PARTY SOFTWARE, THEN SUCH USE SHALL BE GOVERNED BY SUCH THIRD PARTY'S LICENSE AGREEMENT, AN ELECTRONIC COPY OF WHICH WILL BE INSTALLED IN THE APPROPRIATE FOLDER ON YOUR COMPUTER UPON INSTALLATION OF THE SOFTWARE. THOMSON ENTITY IS NOT RESPONSIBLE FOR ANY THIRD PARTY'S SOFTWARE AND SHALL HAVE NO LIABILITY FOR YOUR USE OF THIRD PARTY SOFTWARE.
9. GOVERNING LAW
If you acquired this A/V Device in the United States, this EULA shall be governed and construed in accordance with the laws of the State of Indiana, U.S.A. without regard to its conflict of laws principles. If you acquired this A/V Device within the European Union, this EULA shall be governed and construed in accordance with the laws of France, without regard to its conflict of laws principles. If you acquired this A/V Device outside the United States or the European Union, then local law may apply.
10. GENERAL TERMS
This EULA can only be modified by a written agreement signed by you and THOMSON Entity, and changes from the terms and conditions of this EULA made in any other manner will be of no effect. If any portion of this EULA shall be held invalid, illegal, or unenforceable, the validity, legality, and enforceability of the remainder of the Agreement shall not in any way be affected or impaired thereby. This EULA is the complete and exclusive statement of the agreement between you and THOMSON Entity, which supersedes all proposals or prior agreements, oral or written, and all other communications between you and THOMSON Entity, relating to the subject matter of this hereof. “THOMSON Group Entity” when used in this EULA shall mean any person, corporation, or other organization, domestic or foreign, including but not limited to subsidiaries, that is directly or indirectly controlled by Thomson, French company. For purposes of this definition only, the term “control” means the possession of the power to direct or cause the direction of the management and policies of an entity, whether by ownership of voting stock or partnership interest, by contract, or otherwise, including direct or indirect ownership of more than fifty percent (50%) of the voting interest in the entity in question.
ZiLOG Software End-User License Agreement
ZiLOG CORPORATION AND/OR ITS SUBSIDIARIES ("ZiLOG") IS WILLING TO LICENSE THE SOFTWARE TO YOU AS AN INDIVIDUAL, THE COMPANY, OR THE LEGAL ENTITY THAT WILL BE UTILIZING THE SOFTWARE ONLY ON THE CONDITION THAT YOU ACCEPT ALL OF THE TERMS OF THIS LICENSE AGREEMENT. READ THE TERMS AND CONDITIONS OF THIS LICENSE AGREEMENT CAREFULLY BEFORE USING THE SOFTWARE. THIS IS A LEGAL AND ENFORCEABLE CONTRACT BETWEEN YOU AND THE LICENSOR. BY OPENING THIS PACKAGE, BREAKING THE SEAL, CLICKING ON THE "AGREE" OR "YES" BUTTON OR OTHERWISE INDICATING ASSENT ELECTRONICALLY, OR LOADING THE SOFTWARE, YOU AGREE TO THE TERMS AND CONDITIONS OF THIS AGREEMENT. IF YOU DO NOT AGREE TO THESE TERMS AND CONDITIONS, CLICK ON THE "I DO NOT AGREE," "NO" BUTTON, OR OTHERWISE INDICATE REFUSAL, AND MAKE NO FURTHER USE OF THE SOFTWARE.
IF YOU DO NOT AGREE WITH THE TERMS AND CONDITIONS OF THIS AGREEMENT, OR DO NOT WANT THEM TO BE BINDING ON YOU, YOU SHOULD PROMPTLY RETURN THE PACKAGE UNOPENED FOR A FULL REFUND.
ONLY SOMEONE WHO HAS APPROVAL AND AUTHORITY FROM THE COMPANY WHICH WILL BE THE USER ("LICENSEE") OF THIS SOFTWARE MAY AGREE (OR REFUSE TO AGREE) TO THE LEGALLY BINDING LICENSE AGREEMENT BELOW; THE AGREEMENT CONTAINS IMPORTANT LEGAL LIMITATIONS, RESTRICTIONS AND DISCLAIMERS AND ALSO SPECIFIES THE DURATION OF THE LICENSE.
THE LICENSEE MAY USE THE SOFTWARE ONLY IN ACCORDANCE WITH THE LICENSE AGREEMENT BELOW, AND ANY SUCH USE IS HEREBY UNDERSTOOD TO BE CONDITIONAL UPON YOUR SPECIFIC AGREEMENT TO THE UNMODIFIED LICENSE AGREEMENT. NO CONTRACT INVOLVING THE USE OF THE SOFTWARE MAY BE CREATED IN ANY OTHER MANNER (UNLESS THE LICENSEE AND ZiLOG, INC. HAVE PREVIOUSLY SIGNED A SEPARATE FORMAL WRITTEN AGREEMENT COVERING THE SOFTWARE).
Windows is a registered trademark of Microsoft Corporation in the United States and other countries.
Audible.com is a registered trademark of Audible, Inc.
DivX is a registered trademark of DivXNetworks, Inc.
Yahoo! Music Engine is a trademark of Yahoo! Inc.
Chapter 1: Before You Begin
Things to consider before you get started....3
Computer System Requirements ....3
Caution While Driving....3
Back up your data....3
Important Battery Information....4
Check For Updates....4
Unpack the box and check your parts....4
What you want to do....5
Overview of buttons and jacks....6
Docking Station (Back view) 9
Connecting the Docking Station to Your Components....10
Why You Should Connect the IR Blaster 11
How to Find the Remote Sensor....11
Placing the IR Blaster....11
Setting Up Your Lyra Portable Multi-Media Recorder....12
Clock 12
Signal Type 12
Software Setup 13
Install software in your computer (Windows XP and 2000 support only)....13
Insert the Included CD-ROM into the CD-ROM Drive....13
Updating the Lyra Software....14
Connecting the Lyra Recorder to the Computer....14
LyraDJ 15
Transferring Files to Your Lyra Recorder 16
Transferring Files via Windows Media Player 10 (Windows XP only)....16
Transfer Files via Windows Explorer (Drag and Drop)....17
Disconnecting Your Lyra from the Computer 17
Chapter 2: The Remote Control
Explanation of the Buttons....18
Find out if the remote can operate your TV 20
Programming the remote to operate your TV....20
Direct Entry 20
Automatic Code Search 20
Programming the remote to operate other components 21
Direct Entry 21
Automatic Code Search 21
Using the remote to operate other components 21
Know the mode 21
Understanding the INPUT button....22
Chapter 3: Using the Seup Menu
Setup Menu....23
Display Settings Menu....24
Record Settings Menu 24
Audio/Video Settings Menu....26
Clock Settings Menu....27
Chapter 4: Playing Files
Basic Screen Information....28
Basic Operation....29
Recording Video to Your Lyra Recorder 30
Recording from an Audio/Video Component 30
Transferring Video Files to Lyra Recorder 31
Playing Video 32
Video Options Menu 33
Video Settings Banner....33
Viewing Video Content on your Lyra Recorder....34
Recording Audio to Your Lyra Recorder 35
Recording from Your Stereo System....35
Recording from Your Computer ....36
Transferring Audio Files to Your Lyra Recorder 37
Transferring Predefined Audio Playlists to your Lyra Recorder 37
Playing Music 38
Music Options Menu 38
Playing Music Playlists....39
Music Playback Screen....40
Playing Your Lyra Recorder in Your Car Stereo....41
Playing Your Lyra Recorder on Your Stereo System....42
Transferring Photos Files to Your Lyra Recorder....43
Viewing Photos....43
Photo Options Menu 44
Photo Settings Banner....44
Creating a Photo Slideshow 45
Viewing a Photo Slideshow....45
Photo Slideshow Settings Banner 45
Viewing Photos on Your TV 46
Playing Audibles 47
Audible Options Menu....47
Audible Playback Screen 48
Audible Settings Banner 48
Viewing Files 49
Files Options Menu....49
Options Menu Items 50
Using the On-Screen Keyboard....51
Portable Hard Drive Capability 51
High-Speed Card Reader 52
Copying Files from the Memory Card to the Lyra Recorder 52
Copying Files from the Lyra Recorder to the Memory Card 53
Chapter 5: Additional Information
Tips and Troubleshooting....54
Frequently Asked Questions....55
USB Protocol....56
Remote Code List....57
Limited Warranty (U.S.) 60
Things to consider before you get started...
This user's guide reflects features implemented in versions 1.05.04 or higher of the Lyra Portable Multi-media Recorder software/firmware. Please visit www.rca.com/digitalaudiodownloads for more information about the latest software and updates available for your device. To find out which version of software your device is using, select Setup from the main menu, then press the down arrow button to highlight About Lyra. The software version is listed, along with free hard drive space, etc.
Computer System Requirements
- Pentium III 500 MHz or higher recommended
- Windows ^ 2000 with Service Pack 3, or XP
- Internet Explorer 5.0 or higher
- Internet access
• 100 MB free hard disk space for the software
• 256 MB RAM (512 MB recommended) - CD-ROM/DVD-ROM drive capable of digital audio extraction
- USB port (2.0 recommended)
- Installed sound card
• 16-bit color video card
| File Supported File Formats Supported Video Code Format | |
| Audio mp3, Windows Media TM audio (WMA) | |
| Photos JPEG, JPG, BMP, TIFF, GIF | |
| Video AVI, WMV, MPG, ASF, MP4 MPEG4- SP, MPEG4-ASP, WMV simple profile, DivX 4,5 | |
Warning
Use of this product is for your personal use only. Unauthorized recording or duplication of copyrighted material may infringe upon the rights of third parties and may be contrary to copyright laws.
Caution
- Keep product out of direct sunlight. Exposure to direct sunlight or extreme heat (such as inside a parked car) may cause damage or malfunction.
- Do not expose to rain or moisture.
Caution While Driving
Use of headphones while operating an automobile or moving vehicle is not recommended and is unlawful in some states and areas. Be careful and attentive on the road. Stop operation of the unit if you find it disruptive or distracting while driving.
Back up your data
As with any device that has a hard drive or rotating magnetic media, you should back up the drive regularly. RCA and Thomson Inc. are not responsible for lost data.
Disclaimer: This document may describe features that are not currently implemented or available for the X3030 Lyra Portable Multi-media Recorder. Please visit www.rca.com/digitalaudiodownloads for more information about the latest software and updates available for the Lyra Recorder.
Things to consider before you get started... (continued)
Important Battery Information
- The battery used in this device may present a risk of fire or chemical burn if mistreated. Do not separately recharge, disassemble, heat above 100°C (212°F), or incinerate.
- Do not attempt to open the unit. No user serviceable parts inside.
- Do not disassemble or dispose product in fire.
• Use only the specified chargers which were packaged with the product. Use of another charger may present a risk of fire or explosion. - Keep charger plugged in to device for at least 30 minutes before attempting to operate device if battery is completely run down and is insufficient to power up device.
Check For Updates
Visit http://www.rca.com/digitalaudiodownloads for the latest news and firmware upgrades for the Lyra Recorder. You must update your system after new downloads have been made in order for the new applications to be executed. Go to the website for more information.
Unpack the box and check your parts
Your Lyra Recorder came with everything you need to make music and video portable—all of the items shown below should have been packed in the box with your Lyra Recorder.
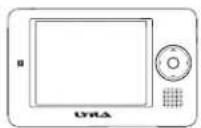
Lyra Portable Multi-media Recorder model number X3030
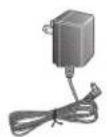
AC power supply
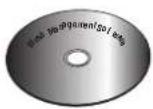
Music Management CD contains the Lyra Recorder Applications & Yahoo! Music Engine software
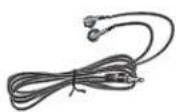
Ear Buds- plug into the Headphones jack on the side of the Lyra Recorder
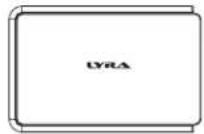
Protective cover
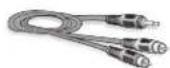
Line out cable — connects Lyra Recorder to a component, such as a TV, with video and audio input capability.
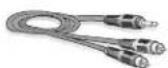
Line in cable — connects Lyra Recorder to a component, such as a VCR, with video and audio output capability.
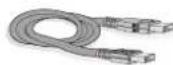
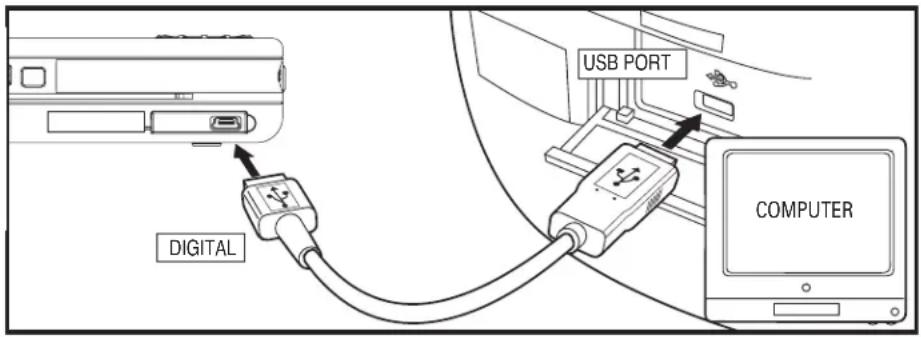
Mini USB cable Plug the small end into the USB port on Lyra Recorder, and plug the other end into your computer's USB port.
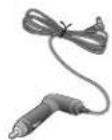
Car adapter.
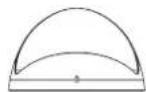
Docking station — charges the Lyra Recorder and allows connection to a TV or other video source.
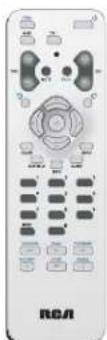
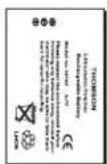
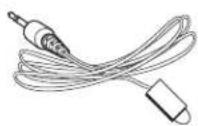
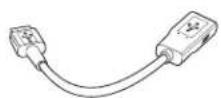
Remote control Battery pack IR blaster USB adapter
What you want to do Go to page...
The items below are four main features of the Lyra Portable Multi-media Recorder.
If you're a first time Lyra Recorder user
Install software....13

Video
Recording video 30
Transferring video 31
Playing video....32

Music
Recording audio....35
Transferring audio files 37
Playing audio ....38

Photos
Transferring photo files....43
Viewing photo files....43

Audible
Playing audio books 47
Overview of buttons and jacks
The following pages explain what each button does — some of the buttons have more than one function depending upon whether or not you're playing music, videos, or viewing photos.
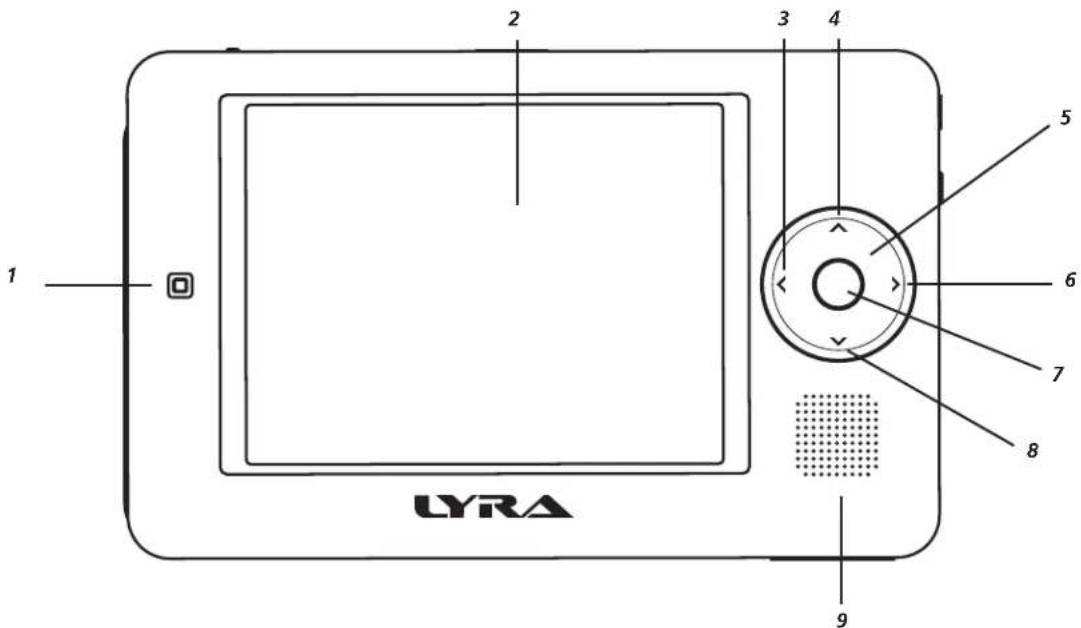
Front View
- Remote control sensor
- LCD (Liquid Crystal Display) screen – This is where the Lyra Recorder's user interface and multimedia content appear.
- Left arrow button – Moves highlight left. When you're playing a file, press and release to skip back to the previous file (press and hold to scan backwards in the audio or video file that's playing).
- Up arrow button – Moves highlight up.
- Touchpad - Volume control and menu/file navigation. Slide your finger clockwise or counterclockwise.
- Right arrow button - Moves highlight right. When you're playing a file, press and release to skip forward to the next file (press and hold to scan forward in the audio or video file that's playing). Press and hold to play audio folder.
- SELECT button- Menu displayed, selects a highlighted item. During playback, advanced options menu displayed. Volume graphic is displayed, toggles between headphone and speaker output. The OK button on the remote acts as the SELECT button.
- Down arrow button - Moves highlight down.
- Speaker
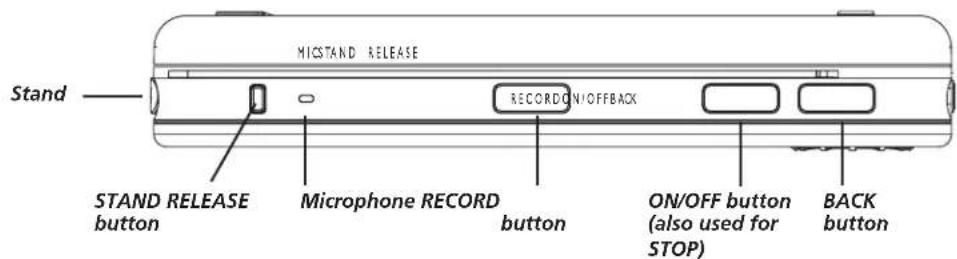
Top View
Stand- Flip the stand out to place the Lyra Recorder upright on a surface.
STAND RELEASE button – Press to release the stand from the left side of the Lyra Recorder.
MIC (internal microphone)
RECORD button – Displays the Recording Mode options menu.
ON/OFF button – Turns the Lyra Recorder on or off. Press once stops playback. Press and hold turns the Lyra Recorder off.
BACK button – Press to return to the previous menu. Clears most on-screen dialogs and allows file navigation during music playback. Also used when recording to return to the Options menu banner.
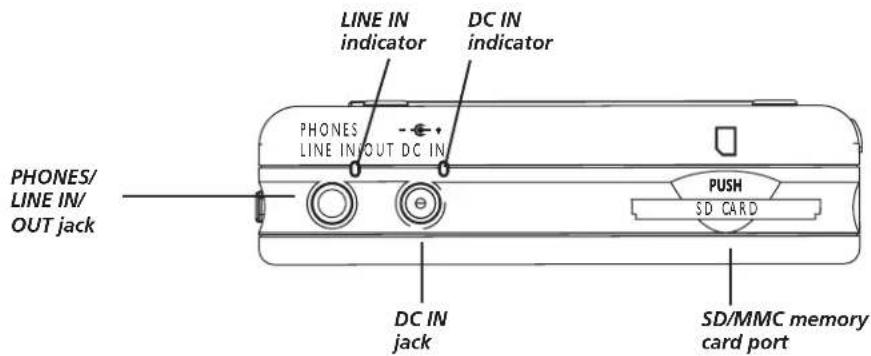
right Side View
PHONES and LINE IN/OUT jack – Insert the supplied car buds to hear sound. Attach the line in or line out cable here when you're connecting the Lyra Recorder to an audio/video component, such as a stereo receiver, TV, VCR, or camcorder.
LINE/OUT indicator – Indicates when the Lyra is connected to a video source when recording.
DC IN jack and indicator – Plug in the AC power adapter here. When you plug in the AC adapter, the Lyra Recorder's battery automatically starts charging. The indicator lights up next to the jack to let you know the power is connected.
SD/MMC memory card port – Insert an SD/MMC memory card to copy files to your Lyra Recorder. When connected to a computer, the card port functions as a high-speed card reader.
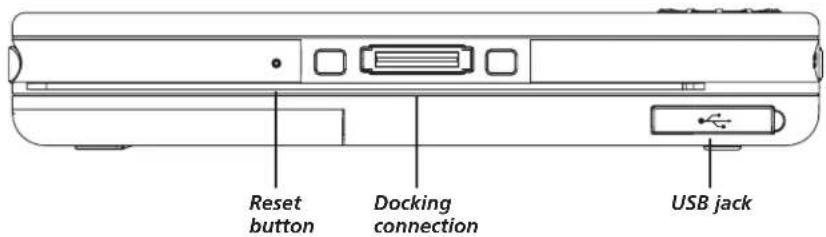
Bottom View
Reset button – If your Lyra Recorder appears to be locked up, press the Reset button (the unit will be reset).
Docking connection - This is where the Lyra Recorder connects to the docking station.
USB jack - Attach the small end (Type mini-B) on the USB cable here. Attach the large end (Type A) to your computer.
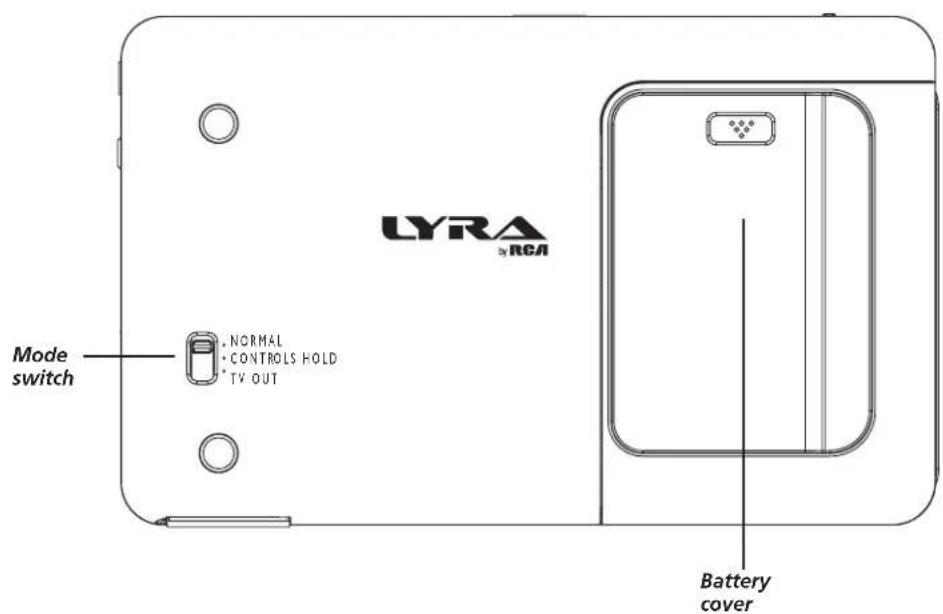
Back View
Mode switch
NORMAL – Slide the switch to the NORMAL position for normal operation (button lock off).
CONTROLS HOLD – Locks the Lyra Recorder's buttons. Slide the switch to the CONTROLS HOLD (button lock on) position (the icon appears in the display to remind you that you've locked the buttons).
TV OUT – If you've connected a cable to the LINE OUT jack, slide the switch to TV OUT to display the Lyra Recorder's content on your TV.
Battery cover
Provides access to Li-ion battery.
8 Chapter 1
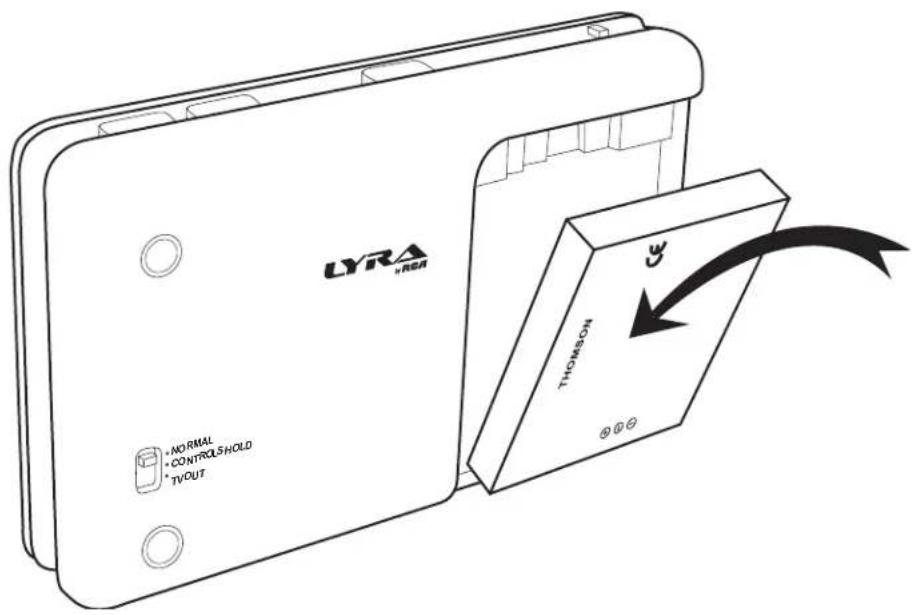
Note: Remove Battery from packaging and install as shown below. The provided Li-ion battery needs to be charged for at least 4 hours by the supplied AC/DC adapter.
Docking Station (Back view)
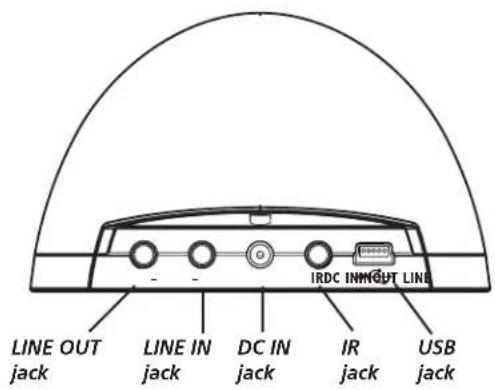
LINE OUT jack - Attach the line out cable here when you're connecting the Lyra Recorder to an audio/video input component, such as a stereo receiver, TV, VCR, set-top box, or camcorder.
LINE IN jack – Attach the line in cable here when you're connecting the Lyra Recorder to an audio/video output component, such as a stereo receiver, TV, VCR, or camcorder.
DC IN jack – Plug in the AC power adapter here. When you plug in the AC adapter, the Lyra Recorder's battery automatically starts charging.
IR jack – Attach the IR blaster here in order to control your VCR, cable box, satellite receiver, etc. for timer recordings.
USB jack – Attaches to your computer or other USB host device. Attach the small end plug (Type mini-B) on the USB cable. Attach the large end (Type A) to your computer.
natural_image
Line drawing of two connected USB connectors (no text or symbols)USB Adapter
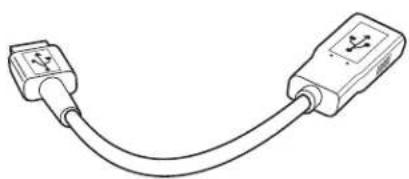
Use the USB Adapter cable to connect USB Drives (Flash, Thumb Drives) to your Lyra Recorder to manage content stored on these devices (NOTE: Not all USB Drives may be able to be recognized by the Lyra Recorder). After connecting the USB drive to your Lyra Recorder via the provided USB Adapter cable, select Files from the main menu of the Lyra Recorder. An item labeled "USB Device" will be displayed in the left side of the Files screen, if the Lyra Recorder successfully recognized your drive. You can browse the folders and files stored on the drive, copy folders or files over to the hard drive of the Lyra Recorder from the drive or view/play supported media files directly from your USB drive.
Connecting the Docking Station to Your Components
The docking station is a convenient way to connect your components (TV, set-top box, and other video sources) for easier recording and playing of files.
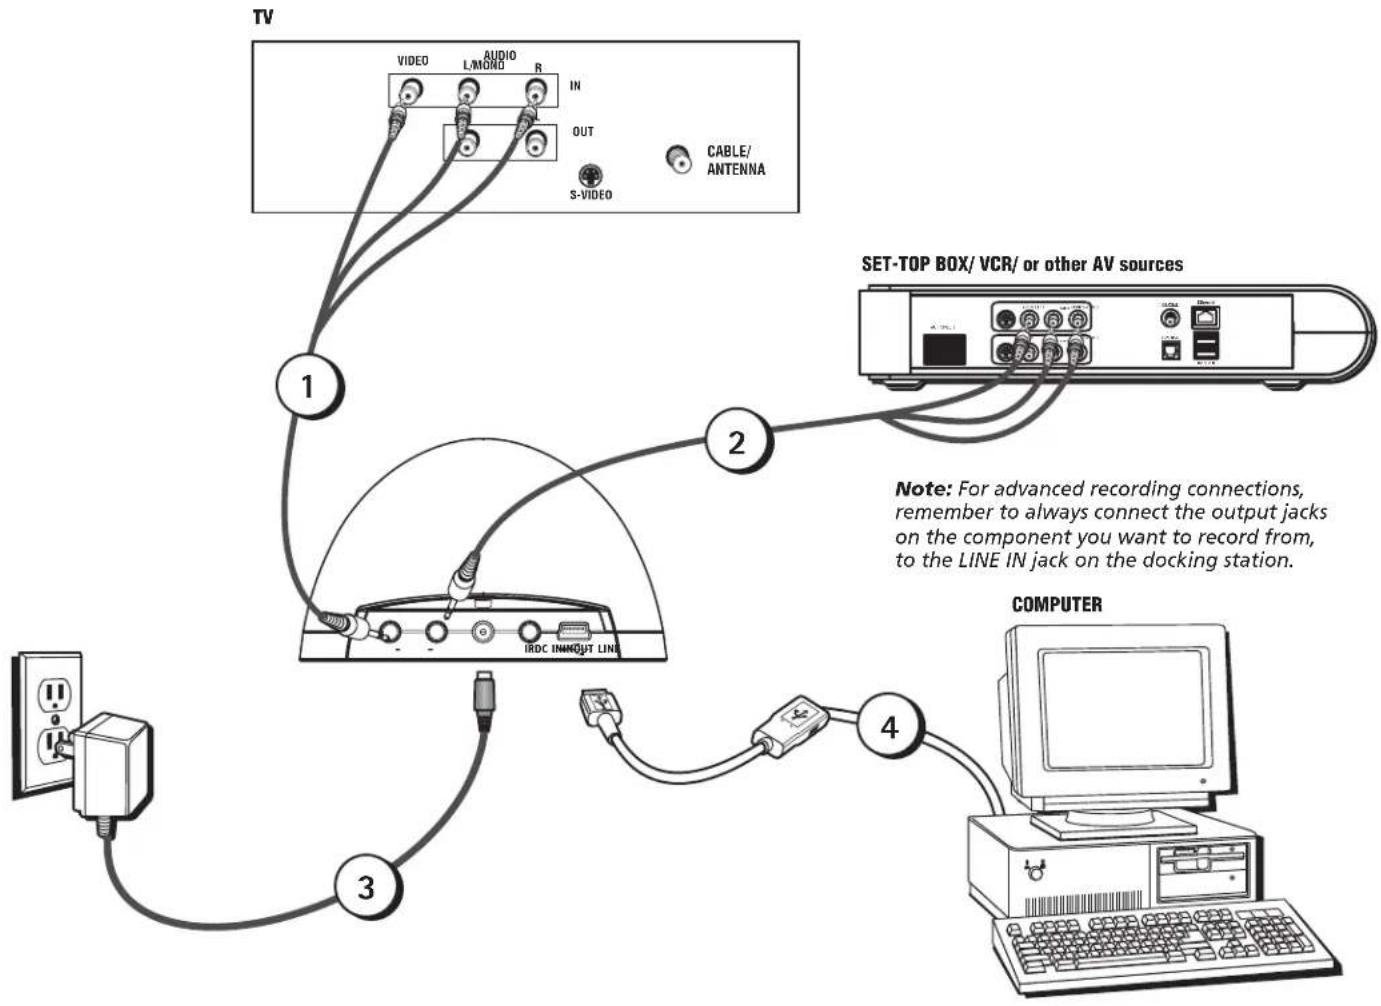
1. Connect the Docking Station to the TV
Connect the stereo mini plug of the included audio/video cable to the LINE OUT jack on the back of the docking station. Connect the 3 plugs on the end of the cable to the AUDIO R and L input jacks on the back of the TV (color coded, red and white), and to the VIDEO INPUT jack (yellow).
2. Connect the Docking Station to the Set-top Box
Connect the stereo mini plug of the included audio/video cable to the LINE IN jack on the back of the docking station. Connect the 3 plugs on the end of the cable to the AUDIO R and L output jacks on the back of the set-top box (color coded, red and white), and to the VIDEO OUTPUT jack (yellow).
3. Plug the power cord into the docking station DC IN jack and into an AC outlet.
4. Connect the Docking Station to the Computer
Connect the mini USB plug of the included USB adapter to the USB jack on the back of the docking station. Connect the other end of the adapter to a USB cable, then connect that cable to an available USB jack on your computer.
flowchart
graph TD
    TV["TV"] -->|1| SET-TOP["SET-TOP BOX/VCR or other AV sources"]
    SET-TOP -->|2| IRDC["IRDC INNOUT LINE"]
    SET-TOP -->|3| Computer["COMPUTER"]
    SET-TOP -->|4| S-Video["S-VIDEO"]
    SET-TOP -->|IN| Audio["L/MOND AUDIO"]
    SET-TOP --> Audio
    SET-TOP --> Audio
    SET-TOP --> Audio
    SET-TOP --> Audio
    SET-TOP --> Audio
    SET-TOP --> Audio
    SET-TOP --> Audio
    SET-TOP --> Audio
    SET-TOP --> Audio
    SET-TOP --> Audio
    SET-TOP --> Audio
    SET-TOP --> Audio
    SET-TOP --> Audio
    SET-TOP --> Audio
    SET-TOP --> Audio
    Note["Note: For advanced recording connections, remember to always connect the output jacks on the component you want to record from, to the LINE IN jack on the docking station."]
Why You Should Connect the IR Blaster
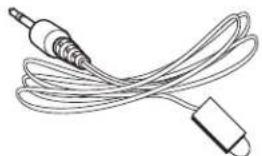
The supplied IR blaster cable allows your Lyra Portable Multi-media Recorder to control your cable box, satellite receiver, VCR, or other AV sources for timer recordings.
How to Find the Remote Sensor
You have to place the IR blaster in front of the remote sensor on the VCR, satellite receiver, or cable box (see diagram below). Some cable components have the remote sensor labeled on the unit. If the remote sensor isn't labeled, you need to use the remote control that came with the VCR, satellite receiver, or cable box to locate the sensor.
- Turn off the VCR, satellite receiver, or cable box.
- Hold the remote control (not the one that came with your Lyra Recorder, but the one that came with the component you're attaching the IR blaster to) so that it is touching the front of the device.
- Slowly move the remote control across the front of the component while you continually press the power button. You must press and release the power button each time you move the remote (holding down the button won't work).
- When the component turns on, you've located the remote sensor.
natural_image
Line drawing of a coiled cable with two connectors (no text or symbols)IR blaster cable
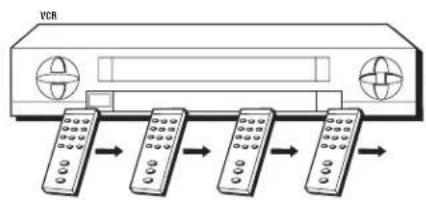
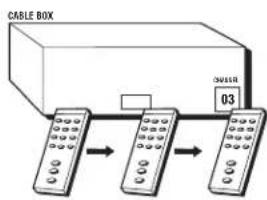
flowchart
graph LR
    A["CABLE BOX"] --> B["Device 1"]
    A --> C["Device 2"]
    A --> D["Device 3"]
    B -->|→| C
    C -->|→| D
    style A fill:#f9f,stroke:#333
    style B fill:#ccf,stroke:#333
    style C fill:#ccf,stroke:#333
    style D fill:#ccf,stroke:#333
Placing the IR Blaster
Place the IR blaster in front of the remote sensor on your VCR, satellite receiver, or cable box approximately one inch away from the remote sensor (see below).
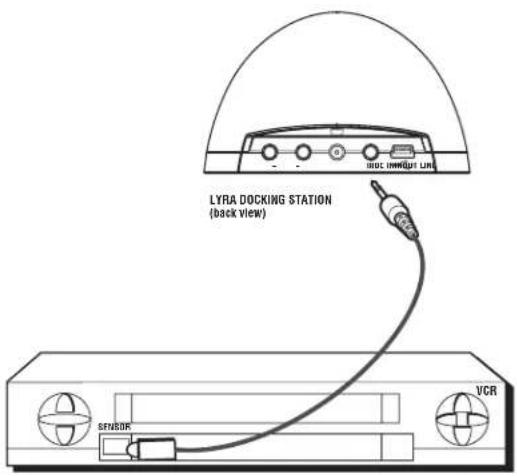
Connect to IR jack on the back of the docking station
Setting Up Your Lyra Portable Multi-Media Recorder
There are a few things you'll want to set up the first time you use your Lyra Recorder, including setting the clock and the type of signal you want to use if you are connecting the unit to an external TV.
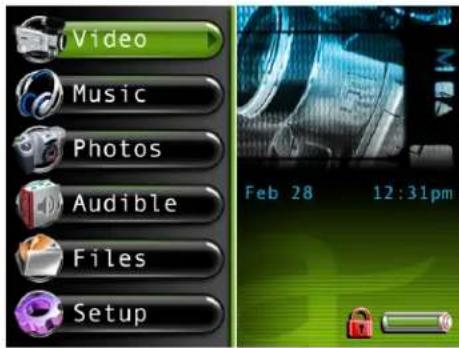
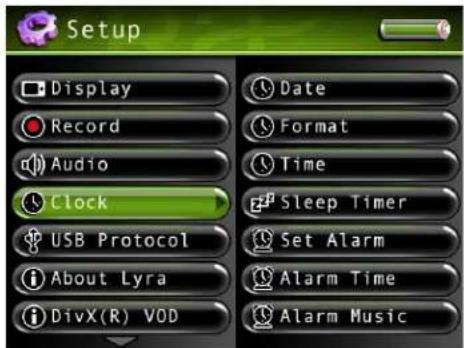
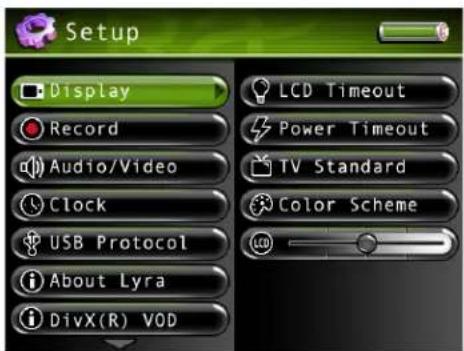
Clock
- From the main menu, press the arrow buttons to highlight Setup. Press SELECT or the right arrow button to enter the Setup menu.
- Use the arrow buttons or touchpad to highlight Clock, and press the right arrow or SELECT to enter the Clock menu.
- Press the right arrow or SELECT to highlight the month setting, then press the up or down arrow to select the current month. Press the right arrow to highlight the day, then press the up or down arrow to select the current day. Follow the same procedure to set the year.
-
Return to the other Clock menu options by pressing the left arrow several times. Then use the up or down arrow to highlight the desired setting.
-
To set the hour format and time, follow the same procedure as above.
-
When finished, press the left arrow button to return to the previous menu.
Note: For more advanced time settings, including setting the sleep and alarm timers, see the Clock Settings Menu section in Chapter 3.
Signal Type
If you want to connect the Lyra Recorder to an external TV, you may have to set the signal type (NTSC or PAL). NTSC (National Television Standards Committee) is the North American standard, while PAL (Phase Alternation by Line) is used in some European countries and elsewhere.
- From the main menu, press the arrow buttons to highlight Setup. Press SELECT to enter the Setup menu.
- Display should already be highlighted, so press the right arrow to enter the Display menu.
- Use the arrow buttons or touchpad to highlight TV Standard, and press the right arrow to enter the TV Standard menu.
- Use the arrow buttons or touchpad to change the desired settings (NTSC or PAL).
- When finished, press the left arrow button to return to the previous menu.
Software Setup
Install software in your computer (Windows XP and 2000 support only)
The Audio/Video Management CD that came with your Lyra Portable Multi-media Recorder contains the software components that you will need to make your Lyra Recorder work properly. These components do the following:
- View the User's Guide and documentation for the Lyra Recorder
• Install and use the Lyra DJ software to automatically create playlists on your Lyra Recorder
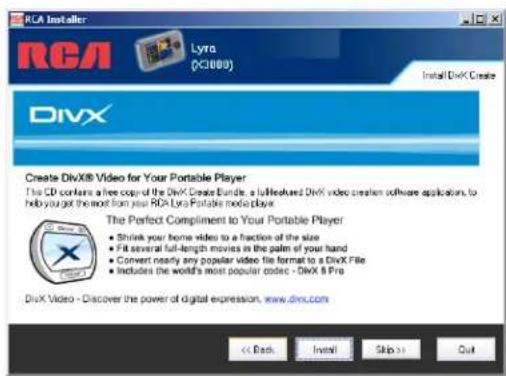
• Install and use the Divx software to create and convert video files for viewing on your Lyra Recorder
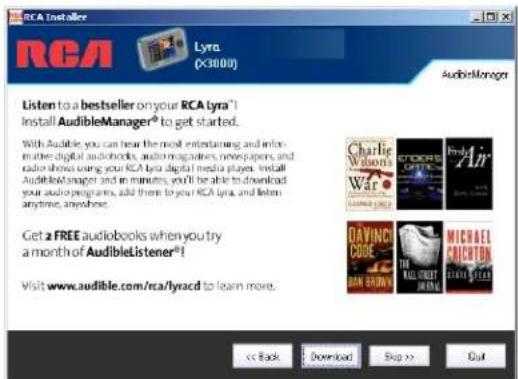
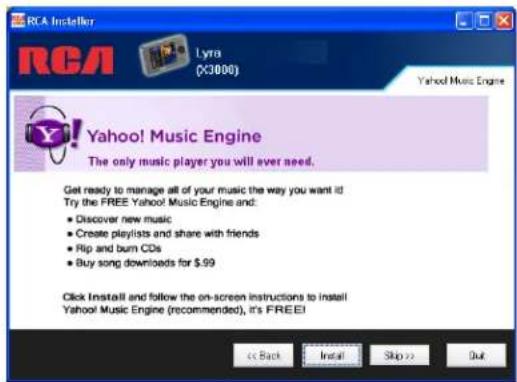
• Install and use the Yahoo! Music Engine™ software to organize your music collection and transfer the music to your Lyra Recorder - Download the Audible Manager Software and configure it to transfer audio files to your Lyra Recorder
- The Yahoo! Music Engine software compresses audio files (from music CDs) to mp3 or many other popular formats so you can play them on your Lyra Portable Multi-media Recorder. The Yahoo! Music Engine software also enables you to download files from the internet that are already compressed and then transfer those files to your Lyra Recorder (or play the music on your computer).
Insert the Included CD-ROM into the CD-ROM Drive
- Turn on your computer and place the Audio/Video Management CD that came with your Lyra Portable Multi-media Recorder into your computer. Important: Windows 2000 users must have Service Pack 3 or later installed in order for proper device operation.
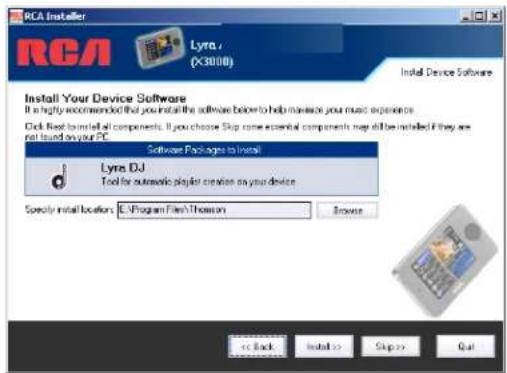
- If the setup screen does not appear, double click My Computer, double click your CD-ROM drive icon, and double click Install to run the installer.
- Follow the on-screen instructions to install the available software components.
Updating the Lyra Firmware
You can upgrade your Lyra Recorder by downloading the latest firmware from http://www.rca.com/digitalaudiodownloads.
Notes: If any audio files were added to the device through Windows Explorer or if the firmware is upgraded, you must profile your contents in order for the new files to appear on the Lyra Recorder. The Lyra Recorder may ask you if you want to profile once you have disconnected. Highlight and select Yes.
To see what software version is currently on your Lyra Recorder, enter the Setup menu and select About Lyra. Go to page 23 for more details.
After you have downloaded the latest firmware, follow the steps on the website to update your Lyra Recorder.
Connecting the Lyra Recorder to the Computer
Important: In order to transfer secure music files using Windows XP to your Lyra Recorder, you must set the USB Protocol setting to MTP in the Setup menu before connecting your Lyra. The Lyra Recorder does not support copy-protected content if you are using Windows 2000. See page 56 for more important information.
Connect the Lyra Recorder to your computer with the mini USB cable provided. Turn on the unit by pressing the ON/OFF button. When in MSC mode, the Lyra Recorder will appear as a Removable Disk in My Computer (Windows Explorer). When connected in MTP mode the Lyra Recorder will appear as a Windows Portable Device in My Computer (Windows Explorer).
If an SD/MMC memory card is properly inserted, an additional drive letter may also be accessed as a Removable Disk drive letter through Windows Explorer if the decoder is set to use the MSC USB protocol. The Lyra Recorder also functions as a high-speed SD/MMC card reader.
Note: The SDIMMC memory card feature is not available in Windows when the Lyra Recorder is connected using the MTP USB protocol.
For information on disconnecting the USB cable, go to the end of this chapter.
Notes: It might take several seconds for the Lyra Recorder to be detected, especially in Windows 2000. Click Refresh in My Computer or Explorer to make sure the device has been detected.
The Lyra Recorder can transfer files at a high-speed mode of USB 2.0. This is up to 40 times faster than USB 1.1. If USB 2.0 port is available on your computer, use it to connect to your Lyra Recorder. The Lyra Recorder is still backward compatible with the older USB 1.1 ports; however, you won't be able to take full advantage of the potential speed increase.
LyraDJ
LyraDJ is software that can easily generate playlists for you, after analyzing the acoustic characteristics of your songs, the software will create sets of related content that you can listen to and enjoy.
Important Note:
- LyraDJ will only work with mp3 files.
- LyraDJ will only work with files that are on the Lyra Recorder.
-
LyraDJ will only work on files in a folder called Music.
-
LyraDJ will only work in MSC (Mass Storage Class) USB protocol mode. The Lyra Recorder's default is set to MTP, so you'll need to change the setting if you want to use LyraDJ. In the Setup menu, select USB Protocol and change the setting to MSC. Go to page 56 for more information on the USB protocols.
Multiple level sub folders under the Music folder are allowed and recommended for optimum device performance and ease of finding content. For example D:\Music\Artist1\Album1\Song1.mp3
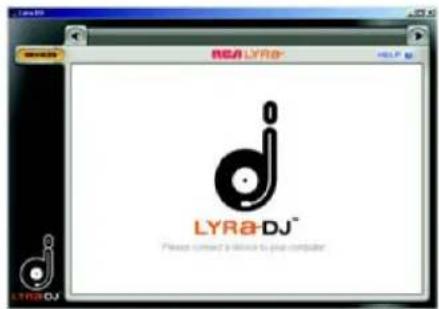
- Start LyraDJ.
- The software will ask you to connect the Lyra Recorder to the computer via USB cable.
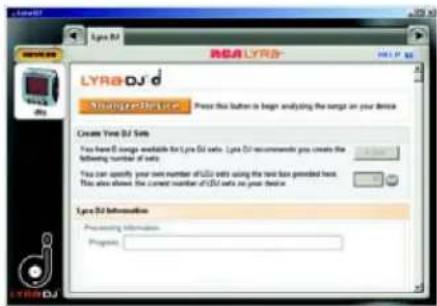
- Click Analyze to start analyzing songs in the Lyra Recorder.
- Make sure the Lyra Recorder has at least 64 songs or else the software will not be able to generate a playlist.
- When the analysis is completed, the software will create playlists (the number of playlists created will vary, depending on the total number of songs stored in the Lyra Recorder), you can save these playlists into the Lyra Recorder.
- For more information about LyraDJ, click Help at the top right corner.
Transferring Files to Your Lyra Recorder (MTP USB Protocol)
Important: Secure music download files must be transferred to your Lyra Recorder through Windows Media Player 10 or higher (Windows Media Player 10 is only available to Windows XP users.) or the application recommended by the online music download service that you are using. Please visit the online music download service's website where you purchased your content from for more details on transferring secure music to your player.
Some wma files may be Digital Rights Management (DRM) protected. You must acquire licenses for DRM protected files before they can be played on the player. For more information, go to www.microsoft.com/windows/windowsmedialdrm.
The Lyra Recorder doesn't support copy-protected content if you are using Windows 2000.
For more information on Windows Media Player 10, go to www.microsoft.com/windows/windowsmedia/mp10.
You can transfer files to your Lyra Recorder via Windows Explorer on My Computer.
If your Lyra Recorder isn't already connected to your computer, connect the Lyra Recorder to the computer using the provided Mini-USB cable as illustrated on page 14.
Note: Do not disconnect the USB cable while files are being transferred (downloaded) to the Lyra Recorder. Doing so may corrupt system files or the files being downloaded.
In Windows Explorer, when the device is opened in MTP mode, and Windows Media Player 10 is uninstalled, "Data" and "Media" views will be displayed for the device.
The Data View is used to manage data content on the device, such as text files. The Media View is used to manage media content supported by the device for playback, such as audio and video files.
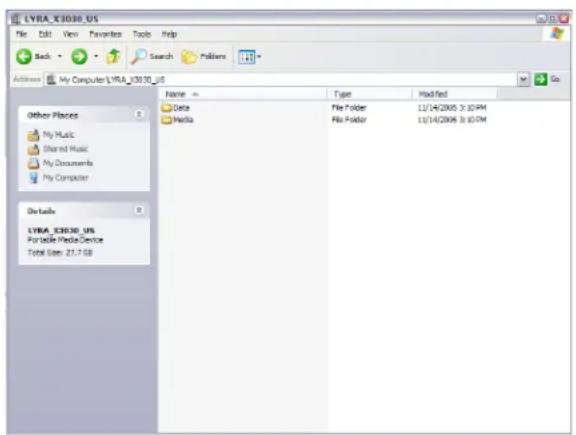
You can copy files to / delete files from the device through Windows Explorer, but you cannot open or edit the files directly from the device. If you want to edit files currently stored on your device, you will need to copy the files from the device to another location (drive) in the system.
Transferring Files via Windows Media Player 10 (Windows XP only)
Important: In order to transfer protected files using Windows XP to your Lyra Recorder, you must set the USB Protocol setting to MTP in the Setup menu before connecting your Lyra. See page 56 for more information.
If you want to take your music collection with, you can easily synchronize items in your library to your portable device. The Sync feature in Windows Media Player 10 allows you to synchronize files from your library to your portable device. For complete details, see the Synchronizing content to devices topic in the Windows Media Player 10 help documentation or go to www.microsoft.com/windows/windowsmedia/mp10.
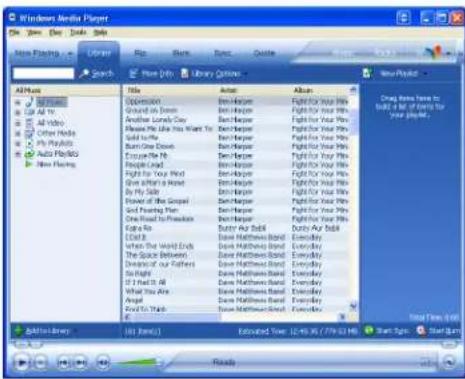
- Connect your Lyra Recorder to the computer and open Windows Media Player, select Library from the menu bar, a screen will appear as shown below Note: Content displayed will vary depending on the content on your computer.
-
From the left column, select the songs, categories and/or playlist items you want to copy to the Lyra Recorder.
-
Drag the selected items to the right column.
-
Select Sync from the menu bar, a screen will appear as shown below:
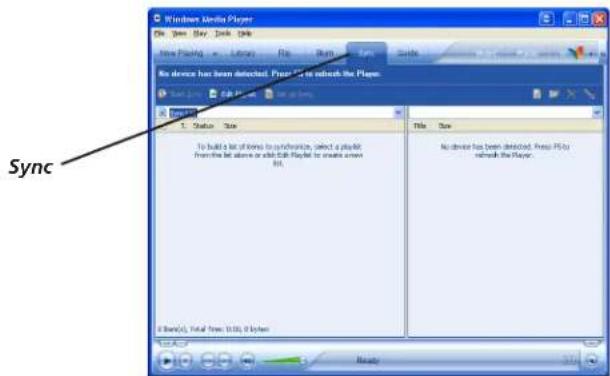
- Select Start Sync, the selected items will now be automatically transferred to your Lyra Player.
Important: Make sure all data is transferred to the Lyra Recorder before unplugging the USB cable.
Transfer Files via Windows Explorer (MSC USB Protocol)
If your Lyra Recorder isn't already connected to your computer, connect the Lyra Recorder to the computer using the provided USB cable and turn on the unit (NOTE: Before connecting USB, change setup protocol to MSC). The Lyra Recorder will appear as a new removable drive letter in Windows.
From Windows Explorer, highlight all the files/folders you want to transfer to your Lyra Recorder and copy/paste them to the drive letter that is associated with it.
Note: If any audio files were added to the device through Windows Explorer, you must profile your contents after file transfer in order for the new files to appear on the Lyra Recorder. The Lyra Recorder will ask you if you want to profile once you have disconnected. Highlight and select Yes.
Disconnecting Your Lyra from the Computer (MSC USB Protocol)
Before disconnecting your device, to ensure there is no loss of data from the System Tray, left click on the icon and select Unplug or Eject Hardware (the Unplug or Eject Hardware screen appears). Select the drive(s) corresponding to your Lyra player and click Stop.
The Stop a Hardware Device screen appears. Select the device to be stopped again for confirmation and click OK. You can also stop your Lyra Recorder by right clicking on the icon from the system tray and selecting the drive(s) corresponding to your player.
Chapter 2: The Remote Control
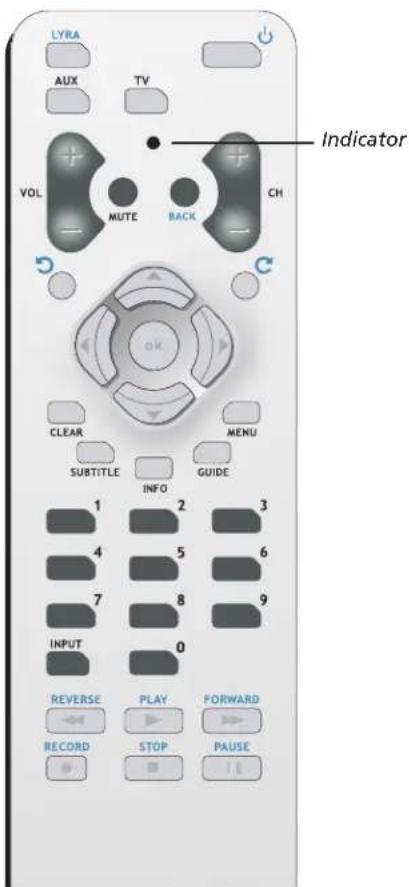
The Universal Remote Control that came with your Lyra Recorder operates most RCA, GE, and Proscan branded components.
Additionally, the remote is capable of being programmed to operate many other brands and models of TVs, satellite receivers, audio/video receivers, or cable boxes.
Button Descriptions for Lyra Mode
In addition to operating your Lyra Recorder, the remote that came with it can operate your other components. However, this page only describes the buttons on the remote you will use with your Lyra Recorder.
For descriptions of remote control buttons that can be used with your other components, go to the next page.
Indicator Used to indicate status of remote control when programming it to operate other components. Also, indicates when batteries are low by flickering when you press a button on the remote.
0-9 (Number buttons) Use the number buttons to input information in the menu system.
Skip back arrow ☐ When viewing photos, rotates the picture counter-clockwise.
Skip forward arrow C When viewing photos, rotates the picture clockwise.
Arrow buttons (up, down, left, right) Use the arrow buttons to highlight options that appear on the screen (the arrow buttons move the highlight in the corresponding directions — up arrow moves the highlight up; left arrow moves the highlight left, etc.).
Left arrow When watching video, skips back 30 seconds at a time.
Right arrow When watching video, skips forward 30 seconds at a time.
Power ⏻Turns the Lyra Recorder on and off.
BACK Returns you to the previous menu.
FORWARD Searches forward.
LYRA Turns on the Lyra Recorder and puts the remote in Lyra mode.
OK When a menu is on the screen, selects the highlighted item.
PAUSE Pauses play or recording.
PLAY Begins play.
RECORD Brings up record menu.
REVERSE Searches backward.
STOP Stops playback or recording.
Button Descriptions for Other Components
The remote operates most brands of other components (VCRs, DVD players, satellite receivers, etc.). The following list provides basic information about how these buttons operate in these modes.
Indicator Used to indicate status of remote control when programming it to operate other components. Also, indicates when batteries are low by flickering when you press a button on the remote.
0-9 (Number buttons) Use the number buttons to input information in the menu system.
Arrow buttons (up, down, left, right) Use the arrow buttons to highlight options that appear on the screen (the arrow buttons move the highlight in the corresponding directions — up arrow moves the highlight up; left arrow moves the highlight left, etc.).
Power ⏻Turns on and off compatible components.
AUX (Auxiliary) Puts the remote in auxiliary mode to operate a component (such as a cable box, VCR, DVD player, satellite receiver or audio receiver) that you've programmed to work with this button.
BACK When watching TV, goes back to the previous channel.
CH + When watching TV, goes to the next channel in the channel list.
CH - When watching TV, goes to the previous channel in the channels list.
CLEAR Removes some on-screen menus and displays.
GUIDE Brings up the guide for your TV, if available.
INFO In TV or AUX mode, displays the on-screen Info Display.
MENU Accesses the main menu.
MUTE Lowers the volume to its minimum level. Press again to restore volume.
SUBTITLE Toggles the available subtitles for some compatible DVD players.
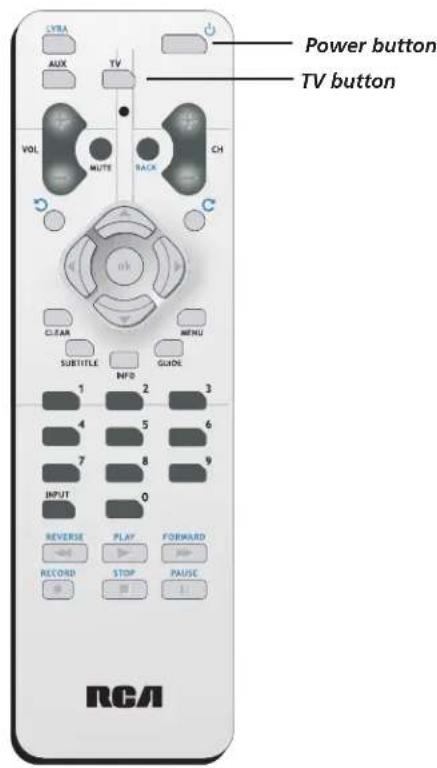
TV Puts the remote in TV mode in order for it to operate your TV. This remote is already programmed to operate RCA, GE, and Proscan brand TVs. This remote is capable of being programmed to operate many brands of TVs.
VOL +/- If your remote is capable of operating your TV, increases and decreases the volume level. Does not control the Lyra Recorder's volume, it must be adjusted on the unit itself.
Find out if the remote can operate your TV
This remote control is designed to operate most RCA, GE, and Proscan TVs.
- Press the TV button.
- Press the ON•OFF button (if the TV turns on or off, this remote will operate the TV).
- If that doesn't work, you can try programming the remote by following the instructions below.
Programming the remote to operate your TV
There are two ways to program this remote control to operate other brands of TVs: Direct Entry and Automatic Code Search (both methods are described below).
Note: This remote may not be compatible with all brands and models of televisions. It may also not operate all the functions of your TV.
Direct Entry
- 'Turn on the TV.
- Look up the brand and code number(s) from the list on page 57.
- Press and hold the TV button on the remote.
- Keep holding down the TV button, and enter the first code from the code list for your brand.
- Release the TV button.
- Point the remote toward the TV and press the ON•OFF button to see if the TV turns off. If it doesn't, press the TV button and then press ON•OFF. If you get no response, follow steps 1-5 again, but enter the next code from the code list for your brand of television.
Note: If you try all the codes for your TV brand and none work, try the Automatic Code Search method. If Automatic Code Search doesn't work, the remote is not compatible with your TV.
Automatic Code Search
The Automatic Code Search method tests all of the codes for a specific component button. If you want to stop the automatic code search without programming any of your components, press CLEAR until the indicator on the remote turns off.
- Turn on the TV.
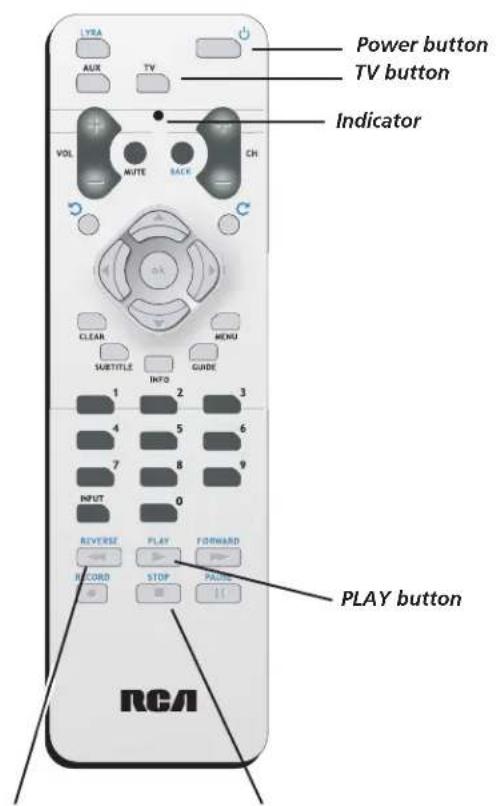
- Press and hold the TV button. While you continue pressing the TV button, press and hold the ON•OFF button until the indicator light on the remote turns on— then release both buttons.
- Point the remote at the TV. Press and release PLAY, then wait 5 seconds or until the indicator on the remote stops flashing.
At this point the remote is searching for the correct code to program (you'll know it's found the correct code when the TV turns off, go to step 4). If, after 5 seconds, the TV doesn't turn off, press PLAY again to tell the remote to search the next set of codes.
Continue pressing PLAY until the TV turns off or you have searched through all of the codes. The indicator flashes when all the codes have been searched, the TV button turns off, and the remote exits Automatic Code Search. If the TV does not turn off after trying all the codes, the remote can't be programmed to operate your brand of TV—you'll have to use the remote that came with your TV.
- When the TV turns off, the remote has found the proper code. Press and release REVERSE, then wait 2 seconds. Repeat this step until the TV turns back ON.
STOP buttonREVERSE button To finish, press and hold STOP until the indicator on the remote turns off.
Programming the remote to operate other components
There are two ways to program this remote control to operate other brands of satellite receivers or cable boxes: Direct Entry and Automatic Code Search (both methods are described below).
Note: This remote may not be compatible with all brands and models of components. It may also not operate all the functions of your component.
Direct Entry
-
Point the remote toward the component and press the ON•OFF button to see if it turns off. If it doesn't, press the AUX button and then press ON•OFF. If you get no response, follow steps 1-5 again, but enter the next code from the code list for your brand of component.
-
Turn on the component (VCR, DVD player, cable box, satellite receiver, etc.).
- Look up the brand and code number(s) from the list on page 57.
- Press and hold the AUX button on the remote.
- Keep holding down the AUX button, and enter the first code from the code list for your brand.
- Release the AUX button.
Note: If you try all the codes for your brand and none work, try the Automatic Code Search method. If Automatic Code Search doesn't work, the remote is not compatible with your component.
Automatic Code Search
The Automatic Code Search method searches all of the codes for a specific component button. If you want to stop the automatic code search without programming the remote, press CLEAR until the indicator on the remote turns off.
- Turn on the component (VCR, DVD player, cable box, satellite receiver, etc.
- Press and hold the AUX button. While you continue pressing the AUX button, press and hold the ON•OFF until the indicator light on the remote turns on— then release both buttons.
- Point the remote at the component, in this example a DVD player. Press and release PLAY, then wait 5 seconds or until the indicator on the remote stops flashing.
At this point the remote is searching for the correct code (you'll know it's found the correct code when the DVD player turns off, go to step 4). If, after 5 seconds, the DVD player doesn't turn off, press PLAY again to tell the remote to search the next set of codes.
Continue pressing PLAY until the DVD player turns off or you have searched through all of the codes. The indicator flashes when all the codes have been searched, the indicator turns off, and the remote exits Automatic Code Search. If the component does not turn off after trying all the codes, the remote can't be programmed to operate your brand —you'll have to use the remote that came with your component.
- When the DVD player turns off, the remote has found the proper code. Press and release REVERSE, then wait 2 seconds. Repeat this step until the DVD player turns back ON.
- To finish, press and hold STOP until the indicator on the remote turns off.
Using the remote to operate other components
Know the mode
Once you've programmed the remote to operate other components, you need a basic understanding of how the remote control works. The codes in the remote control that make a component act a specific way are mode dependent— if you want to change settings in your TV's menu, you must press the TV button before you press the MENU button so the remote control knows that you want to access the TV's menu system.
To summarize, to operate the Lyra Recorder you must press the LYRA button; to operate the TV, you must press the TV button; to operate products like satellite receivers or cable boxes, you must press the AUX button.
Understanding the INPUT button
Another important button is the INPUT button. The INPUT button accesses program material from a specific component (eg: VID1/VID2/Front). We call these channels, Video Input Channels, because you are telling the component to send the video (and audio) that corresponds to the Video Input jack you used to connect the component to the Lyra.
Setup Menu
The Setup menu allows you to make changes to the Audio, Video, and Photo settings, as well as make changes to the main functions of the Lyra Portable Multi-media Recorder.
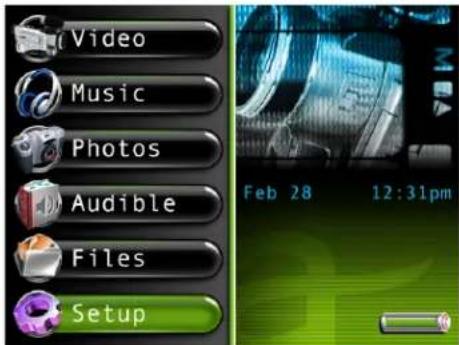
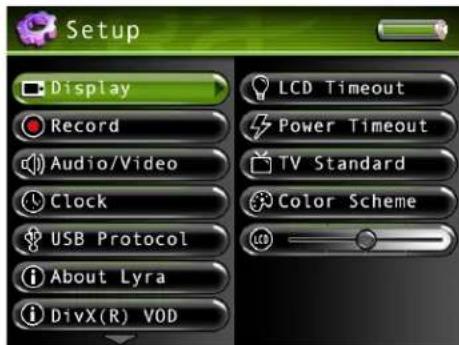
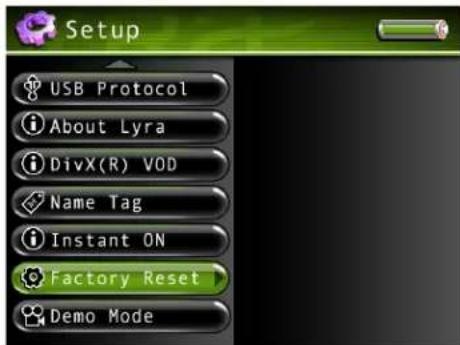
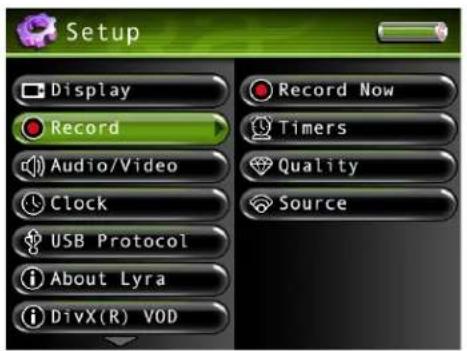
From the main menu, press the up or down arrow button to highlight Setup. Press SELECT to view the Setup menu. The following options appear:
Display Press the right arrow button to view the Display settings. Options within the Display settings are explained later in the Display Settings Menu section.
Record Press the right arrow button to view the Record settings. Options within the Record settings are explained later in the Record Settings Menu section.
Audio/Video Press the right arrow button to view the Audio/Video settings. Options within the Audio/Video settings are explained later in the Audio/Video Settings Menu section.
Clock Press the right arrow button to view the Clock settings. Options within the Clock settings are explained later in the Clock Settings Menu section.
USB Protocol Press the right arrow button to select a USB protocol - MTP or MSC. The default is MTP. See page 56 for more information.
About Lyra Displays information about your Lyra Recorder: file info, hard drive capacity, available hard drive space, and software version.
DivX ^® VOD (Video on Demand) Displays your DivX registration number and the DivX website.
Name Tag Press the right arrow button to enter personal information about yourself, including your name and contact information in case your Lyra Recorder is lost or stolen. Choose the line you want to edit, and press the right arrow button. Go to Using the On-Screen Keyboard on page 48 for more information.
Instant On Enabled If used within 48 hours the Lyra Recorder will return to the exact spot when it was powered off.
Factory Reset Press the right arrow button to reset the Lyra Recorder to the factory default settings (your equalizer settings will not be affected). A confirmation screen appears, when off, making sure you want to reset the settings.
Demo Mode ON Allows demo video to play (if available) when powered on.
Demo Mode OFF The demo video will not play when the Lyra Recorder is powered on.
Tip
To exit a menu at any time, press the BACK button.
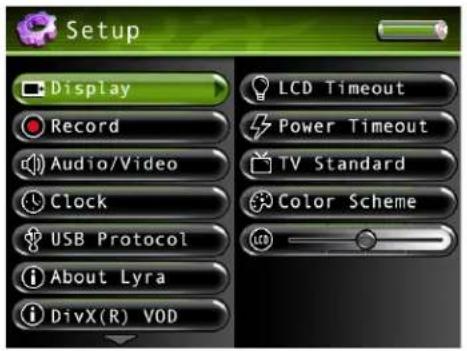
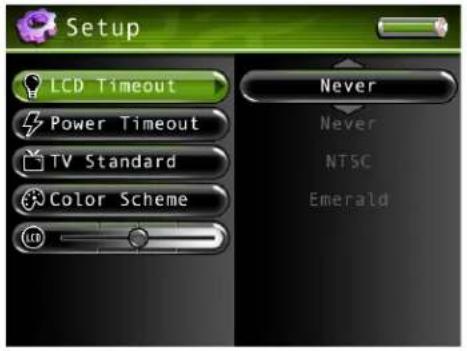
Display Settings Menu
LCD Timeout Press the right arrow button to set a time for the LCD screen backlight to turn off: Never, 2 minutes, 30 seconds, 20 seconds, 15 seconds, 10 seconds, 5 seconds, 2 seconds, and Off.
Power Timeout Press the right arrow button to set a time for the power of the unit to turn off: Never, 10 minutes, 5 minutes, 2 minutes, and 1 minute.
TV Standard Press the right arrow button to set the television signal type: NTSC (National Television Standards Committee) is the North American television standard, or PAL (Phase Alternation by Line) is used in some European countries and elsewhere.
Note: Settings will not effect the LCD, only the line out jacks.
Color Scheme Press the right arrow button to set the desired color scheme for the menu system: Emerald, Sapphire, Citrine, and Amethyst. The default is Emerald.
LCD Brightness Press the right or left arrow to increase or decrease the brightness of the LCD screen. To exit LCD Brightness, press the up or down arrow or the BACK button.
Record Settings Menu
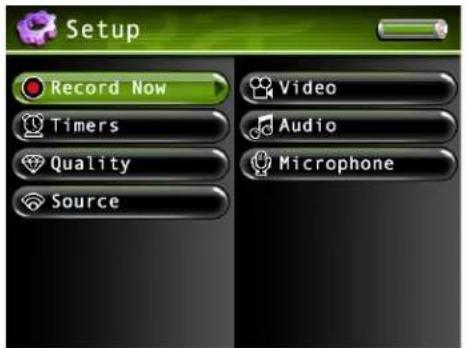
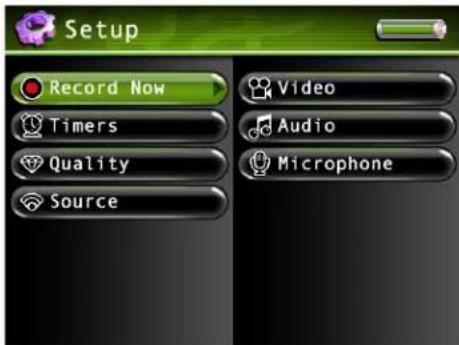
Record Now Press the right arrow button to record content. You can record from an external source or internal microphone.
Video Allows you to record from a connected component, such as a camcorder or satellite receiver.
Audio Allows you to record from a connected audio component, such as an audio/video receiver.
Microphone Allows you to record music or sound using the Lyra's internal microphone.
Notes:
- During video record, video must be present before recording can start.
- The Lyra Recorder cannot record video that is Macrovision® Protected.
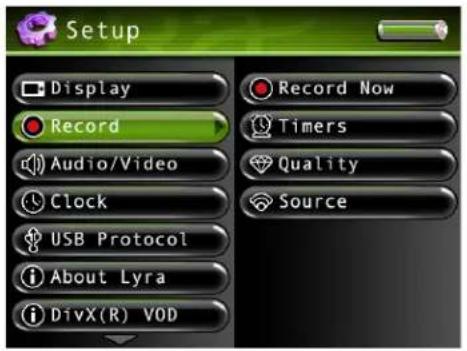
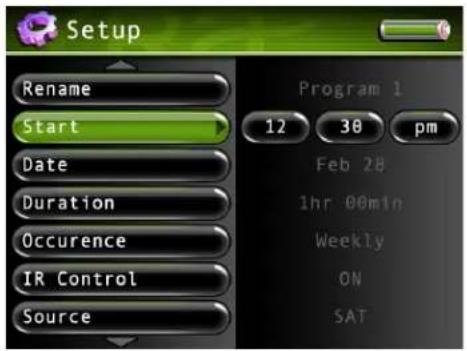
Timers Allows you to set timers for your recordings. Press the right arrow button to choose the timer you want. Press the right arrow again to enter, the following timer settings appear. Use the arrow buttons to make your selections.
Status Turns the timer on or off
Rename Name of the timer recording
Start The time you want to record
Date The date you want to record
Duration How long you want to record: 1 hour - 4 hours
Occurrence How often you want the timer to record at this time: Once, Daily, Weekly
IR Control If set to on, turns on the component you want to record from, and tunes it to the desired channel. You must set up the IR control settings for the source in the Record Source menu.
Source The audio/video source you want to record from. What is displayed depends on whether the IR control is on or not. The following appears:
• If IR control is off: Microphone, Audio, and Video
- If IR control is on: HDTV, TV, Cable box, Satellite, DVR, VCR, and Radio
Channel The channel you want to record (only active if IR Control is on)
Clear Clears the current timer
Quality Allows you to choose the quality of your recordings. Each type of recording has several options.
Video Quality Options include low, medium, and high quality.
Audio Quality Options include 64 kbps (kilobits per second) or 128 kbps.
Mic Quality Options include 32 kbps and 64 kbps.
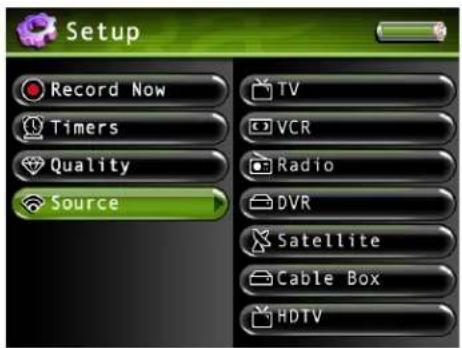
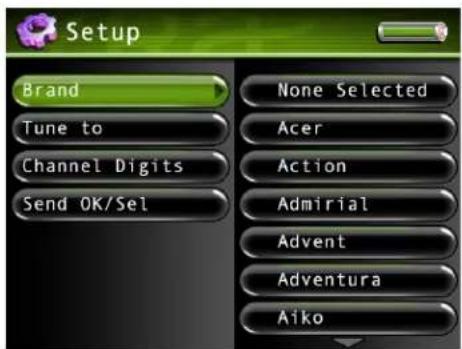
Source Allows you to select the type of component and brand you have so that the Lyra Recorder can control it for timer recordings.
Important: The options in the Source menu must be set and the IR blaster cable must be connected properly for this feature to work. See page 11 for more information.
Note: This feature can only be used when the Lyra Recorder is connected to a powered docking station.
Press the right arrow button to choose the component you want to set, choose the brand, and then a set of IR codes. If you try all the codes and none work, the component is not compatible with the Lyra Recorder. The components are as follows:
TV
VCR
Radio
DVR
Satellite
Cable Box
HDTV
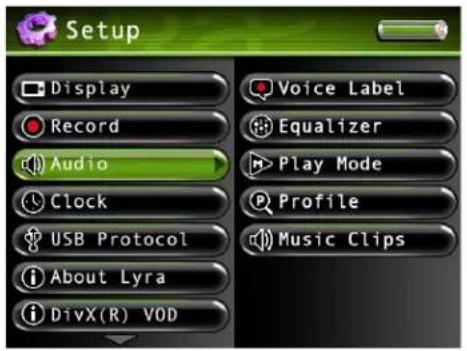
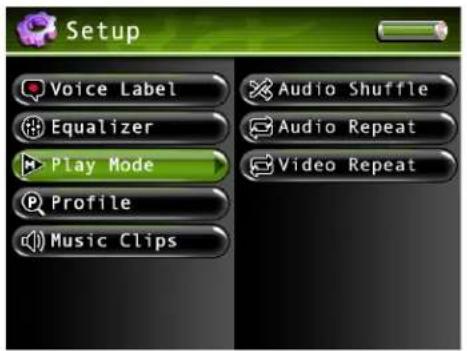
Audio Settings Menu
Voice Label Allows you to record a voice message to any file. Press the right arrow button and then the up or down arrow to turn the voice label on or off. The default is Off.
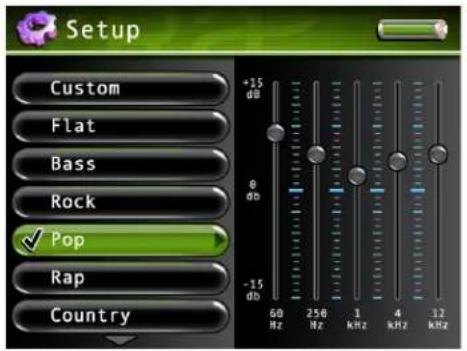
Equalizer Allows you to select a specific equalizer setting to adjust the various levels of the audio output for different types of audio content. Press the right arrow button (the EQ screen appears). Press the up or down arrow button or touchpad to select a specific equalizer setting. For example, the equalizer settings for Bass make the bass sounds more prominent during playback.
You can change any of the presets, and doing so automatically selects the Custom preset to store your settings. Try adjusting the decibels (dB on the left side of the screen) of each frequency band (60Hz-12kHz on the bottom part of the screen). Press the right arrow button to select the frequency band you want to adjust. Then press the up or down arrow button or touchpad to adjust the decibel of the frequency band.
Play Mode Press the right arrow to select one of the playback options. Then use the up or down arrow button to adjust:
Audio Shuffle
Off Songs from the sorting category selected are played in the order they appear.
On Songs/sub-categories from the current sorting category are played in random order.
Audio Repeat
None Songs from the sorting category selected are not repeated.
One Repeats current song being played.
All Repeats all songs based on their order in the current sorting mode (Audio, Album, etc.)
Video Repeat
Off Selected video plays once.
On Replays current video.
All Plays selected video repeatedly.
Profile Allows you to run the Profiler Application on the device to sort all available audio content stored on the hard drive of the device. This is necessary so the Lyra Recorder can find files recordings and navigate your audio.
Music Clips Allows you to play a short music clip of a song when it is highlighted while navigating the menus. Press the right arrow button to set the music clip options. The following options appear. Use the up and down arrow buttons to scroll through the options.
Status Turns the music clips feature on and off.
Duration Sets the amount of time the audio clip is played: 3, 5, 7, 10, and 20 seconds. The default is 5 seconds.
Offset Sets the number of seconds from the beginning of the audio file to start playing the clip: 0, 5, 10, 20, and 30 seconds. The default is 10 seconds.
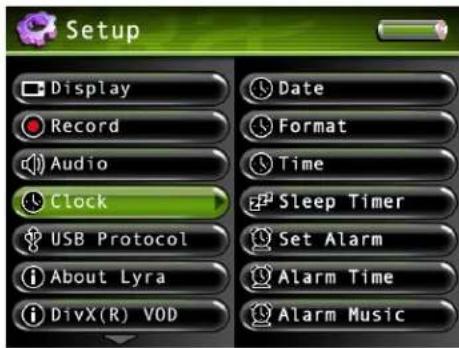
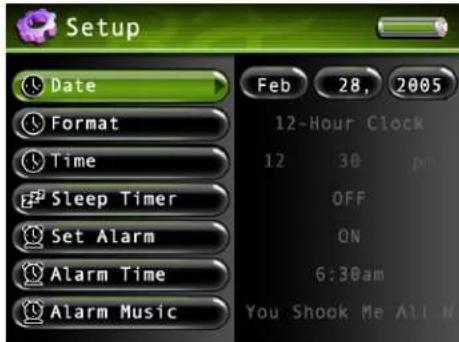
Clock Settings Menu
Date Press the right arrow button to highlight the month setting, then press the up or down arrow button to select the current month. Press the right arrow button to highlight the day, then press the up or down arrow button to select the current day. Follow the same procedure to set the year.
Format Press the right arrow button to select the Format setting: 12-Hour Clock or 24-Hour Clock. Press the up or down arrow button to select the desired setting.
Time Press the right arrow button to highlight the hour setting, then press the up or down arrow button to select the current hour. Press the right arrow button to highlight the minutes, then press the up or down arrow button to select the minutes. Finally, press the right arrow button to highlight the time of day: AM or PM, and use the up or down arrow buttons to select the correct setting (if you are using 12-hour clock format).
Sleep Timer Allows you to set the timer for the Lyra to turn off: 15 minutes to 2 hours, in 15-minutes increments.
Set Alarm Press the right arrow then the up or down arrow to turn the alarm on or off.
To disable the alarm, set the Set Alarm setting to off.
Note: You must power the unit off from the Home or Navigation Screens for the Alarm to function.
Alarm Time Press the right arrow button to highlight the hour setting, then press the up or down arrow button to select the hour you want the alarm to come on. Press the right arrow button to highlight the minutes, then press the up or down arrow button to select the minutes. Finally, press the right arrow button to highlight the time of day: AM or PM, and use the up or down arrow buttons to select the correct setting (if you are using 12-hour clock format).
Alarm Music Allows you to select the music you want to play when the alarm starts. Use the arrow buttons to navigate through your music to select the song.
Note: Because subscription music content can expire, it is suggested that you do not use this type of content for your alarm.
Chapter 4: Playing Files
Basic Information
The Lyra Portable Multi-media Recorder is able to play video and music, view pictures, and also store any computer files. The 20 GB hard drive storage allows you to:
- Store and view up to approximately 80 hours of video
- Record and play up to approximately 300 hours of music (record quality at 64kbps)
- Store and view up to approximately 100,000 JPEG images
Note: Audio only mp3 encoded at 128kbps; Video (with audio) encoded at 480kbps; JPEG images assume average of 150KB per file. Actual recording time and available storage space vary depending on system requirements, bitrate, and other factors.
You can find out how much availability is on your hard drive by going to the Setup menu and selecting About Lyra (go to page 23 for more information).
Basic Screen Information
While viewing the Video, Audio, Photos, or Files menu, the same type of information appears on-screen.
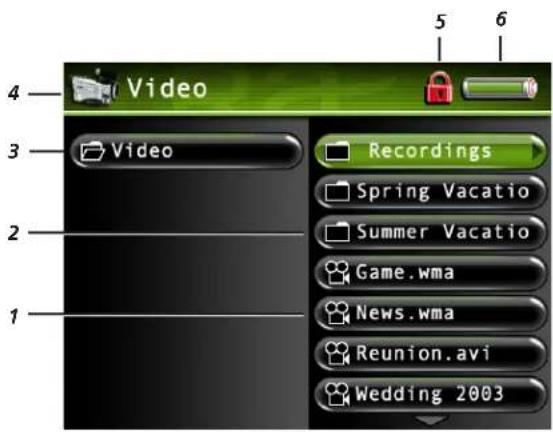
1 film icon – in this example, it's a video file.
2 The subfolder, which may contain additional files.
3 file or folder name highlighted in the menu system.
4 The mode you are in- Video, Music, Photos, Audible, Files, or Setup along with the mode icon.
5 The Lock icon is displayed if the CONTROLS HOLD on the back of the unit is switched on. The device's buttons will be inactive (locked) when CONTROLS HOLD is switched on.
6 The Battery icon displays how much power remains on the battery (full green bar indicates 75%-100%, is 50%-75%, 25%-50%, red bar indicates below 25%, indicates the battery is dead and needs recharging). When the AC/DC adapter is connected and the battery is charging, the battery icon will be animated to indicate charging mode is active.
Note: Before it is fully charged, the built-in battery needs to be charged 4 hours by the supplied AC/DC adapter.
Basic Operation
The information in this section presumes you've successfully transferred files to your Lyra Recorder, and you're ready to play different types of files.
If you need specific setup information (downloading music, transferring files, installing software), go to Chapter 1.
If you want more detailed information about the Lyra Recorder's menu system, go to page 23.
Understanding how to navigate through the Lyra Recorder's menu system, as well as how the buttons operate, will give you the information you need for basic functionality.
The main menu displays Video, Music, Photos, Audible, Files, and Setup on the left side of the LCD screen. The navigation scheme is the same no matter what menu you access:
- Press the up or down arrow buttons to highlight different items on the screen.
- Press the right arrow button to open a folder or sorting category to display the item's (Video, Music, etc.) contents.
- Press the left arrow button to close a folder or sorting category and move back one level.
- Press the up or down arrow button to highlight a file, then press SELECT button to display the Options menu, or press right arrow to start playback. Press SELECT again to pause playback. If a folder or playlist is highlighted, press right arrow to open (expand) the folder or playlist and display it's contents.
Note: All songs in a music folder can be played by pressing and holding the right arrow button.
- To pause playing a file, press SELECT to bring up the Options menu. Pause is already highlighted, so just press SELECT again.
- To stop playing a file, press the ON/OFF button on the top of the player.
- Press and release the BACK button to go back one level. Press and hold the BACK button to return to the main menu.
Adjusting the Volume
While a file is playing, use the touchpad to adjust the volume. The volume buttons on the remote control are for TV or audio receiver functionality only, and will not adjust the Lyra Recorder's volume.
Switching the Speaker and Headphones
While the volume control is displayed, you can switch between using the internal speaker or headphones. To change the sound output, start playing a file and use the touchpad to bring up the volume control. Press the SELECT button to toggle the speaker and headphone icons.
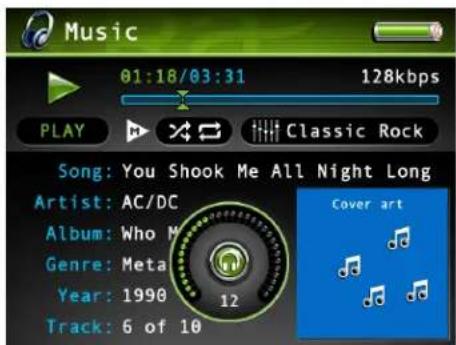
The volume control when using the headphones.
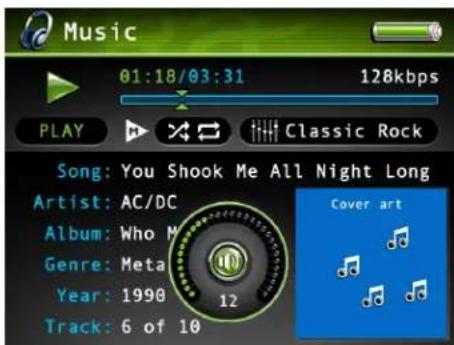
The volume control when using the internal speaker.
Recording Video to Your Lyra Recorder
Recording from an Audio/Video Component
You can record video from video components that have video output jacks, such as a 'TV, VCR, cable box, or satellite box, using the supplied Line In cable.
Notes: If you want to record at a lower quality to take up less space, or to record at a higher quality for better video, change the Video Record Quality setting in the Setup menu (go to Chapter 3). The default record quality is High. A 30-minute program recorded at this quality will take up approximately 550 MB. The file size limit when recording is 4GB, so if your file is larger than that, it will be split into multiple files.
To view recorded content on your TV, it is recommended you set the Video Record Quality to High (high quality).
To view recorded content on your Lyra Recorder, it is recommended you set the Video Record Quality to Medium (standard play).
- Make sure your Lyra Recorder is off.
- Connect the 3.5mm mini-plug end of the cable to the LINE IN/OUT jack on your Lyra Recorder.
- Connect the yellow (video) to the Video Output jack to the component. If you want to record sound, connect the red (audio right) and white (audio left) cables to the corresponding right and left Audio Output jacks on your component. See page 10.
- Turn on the power to your component, then turn on your Lyra Recorder.
Note: It is Suggested that you use the AC Power supply during recording.
- Press the RECORD button on the top of the Lyra Recorder when you're ready to record (the Recording Mode screen appears). Select the type of recording you want. Then, press PLAY on the component you're recording from (for example, a VCR).

natural_image
Mountain landscape with red autumn trees and purple peaks under a purple sky (no text or symbols)- Select recording duration from the pop-up dialog.
- Press SELECT to begin recording. Once recording begins, the record screen appears with status and elapsed time shown.
- When you're finished recording, press STOP.
- To rename the file, go to Using the On-Screen Keyboard on page 51 for information.
Transferring Video Files to Lyra Recorder (MSC USP Protocol)
You can transfer video files to your Lyra Portable Multi-media Recorder using Windows Explorer.
Important: In order to transfer video files using Windows XP to your Lyra Recorder, you must set the USB Protocol setting to MSC in the Setup menu before connecting your Lyra Recorder. The Lyra Recorder doesn't support copy-protected content if you are using Windows 2000. See page 56 for more information.
If your Lyra Recorder isn't already connected to your computer, connect it using the provided Mini-USB cable (go to page 14 for information on connecting the USB cable). Don't disconnect the USB cable during video download. Doing so may corrupt system files or the files being downloaded. It is highly recommended that the Lyra Recorder be connected to the ROOT USB PORT (the main USB port) on the PC and not a self-powered USB hub.
From Windows Explorer, open the Lyra Recorder drive. Open the drive on the computer where the files/folders you want to transfer are located, and highlight them. Drag the files/folders to the VIDEO system folder on the Lyra Recorder drive.
Helpful hint: You can also right click on your content in Windows Explorer and select Copy (or Ctrl + C). Then from the VIDEO folder, right click and select Paste (or Ctrl + V) to add the copied content.
Supported video files must be stored in the VIDEO system folder in order to be available for playback on the device (see page 32 for format information). Sub-folders may be created under the VIDEO system folder for easy navigation and organization of your video content.
Note: You must stop the USB connection before disconnecting the USB cable (go to page 17 for more information on disconnecting the USB cable).
An SD/MMC memory card can also be used to transfer video files to the Lyra Recorder. If an SD/MMC memory card is properly inserted, an additional drive is available through Windows Explorer to transfer content onto. Please ensure the correct drive is being used when transferring content from the device. Go to page 52 for more information on transferring files from the SD/MMC memory card.
Playing Video
To select and play a video from the main menu:
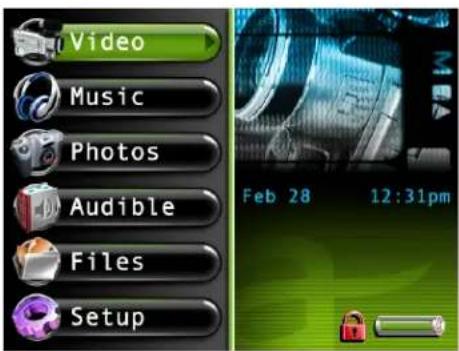
- Press the up or down arrow button to highlight Video and press SELECT. Video content appears on the right side of the screen in the same folder or file structure as it's stored on the hard drive.
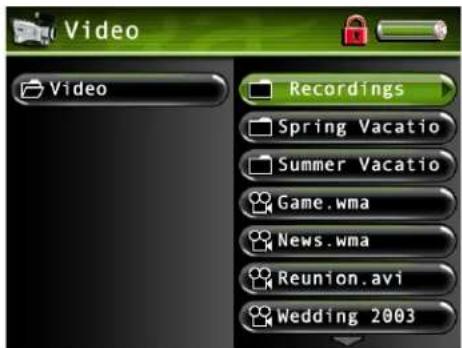
- Press the up or down arrow button to highlight the video file or video folder you want to select, for example, Spring Vacation. Then press the right arrow button.
The videos appear on the right side of the screen.
- Continue to press the up or down arrow button to highlight the video you want to play. Press the left or right arrow to move back or forward a level.
Once you have highlighted a video you want to watch, press the right arrow button or PLAY on the remote to start playback. For more advanced options, press SELECT to display the Video Options Menu (see next page).
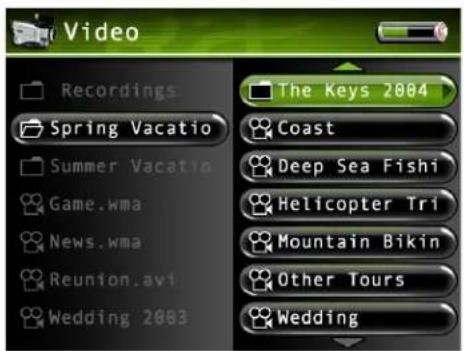
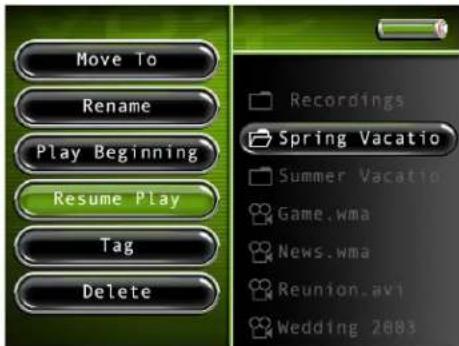
Video Options Menu
The Video Options menu allows you to use more advanced features, such as moving files, tagging files, renaming, and other file management. To bring up the Video Options menu, press SELECT when highlighting a video from the file menu. To select an option, use the up or down arrow buttons or touchpad to highlight it, and press SELECT.
Below are some of the options that appear in the Video Options menu. The specific options depend on what is available at the time. For a full list of options for the Video, Music, Photos, and Audible Options menus, see page 50.
Move To
Rename
Play Beginning
Resume Play
Tag/Untag
Delete
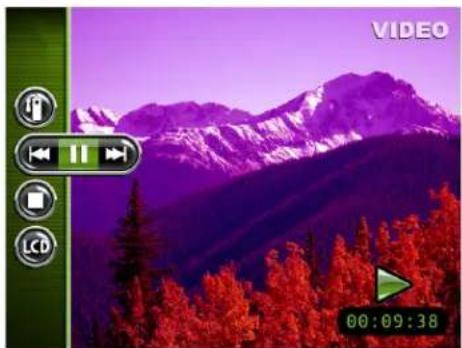
natural_image
Video player interface with playback controls and mountain landscape background (no readable text or symbols)Video Settings Banner
To change video settings for each video during playback, press the SELECT button (the Video Settings banner appears). Press the up or down arrow button to highlight different settings, then press the left arrow, right arrow or the SELECT button to make changes to the setting or choose another option. If necessary, press SELECT to confirm your choice.
To clear the Video Settings banner from the screen, press BACK or wait for it to time out. A description of the Video Settings banner follows.

Bookmarks Pressing SELECT will set a bookmark at the specific time. Pressing the right or left arrow displays a list of stored bookmarks for the current video file. Highlight a bookmark and press SELECT to go to that playback position in the video file. To delete a bookmark, highlight Delete and press SELECT.

Previous/Stop/Next Rewinds the video, pauses the video, and fast forwards video. Press the left or right arrow buttons to go backward or forward 30 seconds at a . To adjust the playback speed, press and hold the left or right arrow, then toggle the ls by pressing the left or right arrow again repeatedly.

Stop Highlight the stop graphic and press SELECT to stop playback of the current file.

LCD Brightness Adjusts the brightness of the LCD screen. Press the left and right v buttons to change the brightness.
Tip:
You can also use the remote to control many of the play options (play, pause, stop, etc). The Video Settings banner does not have to be up to do this.
Viewing Video Content on Your TV
You can view video content stored on the hard drive of your Lyra Recorder using the supplied Line Out cable if your 'TV has Audio and Video Input jacks.
- Make sure your Lyra Recorder is off.
- Connect the 3.5mm mini-plug end of the cable to the LINE OUT/IN jack on your Lyra Recorder player.
- Connect the yellow (video) to the Video Input jack. Connect the red (audio right) and white (audio left) cables to the corresponding right and left Audio Input jacks on your TV.
- 'Turn on the power to your TV, and change to the corresponding input channel on your TV.
- Turn on your Lyra Recorder. Switch the Mode switch to TV OUT (located on the back of your Lyra Recorder).
- Highlight and select Video, then find the file you want to watch on the TV. Press the right arrow button or PLAY on the remote to play it.
- When finished viewing on the TV, and to display the video on the Lyra screen again, move the Mode switch back to the NORMAL position.
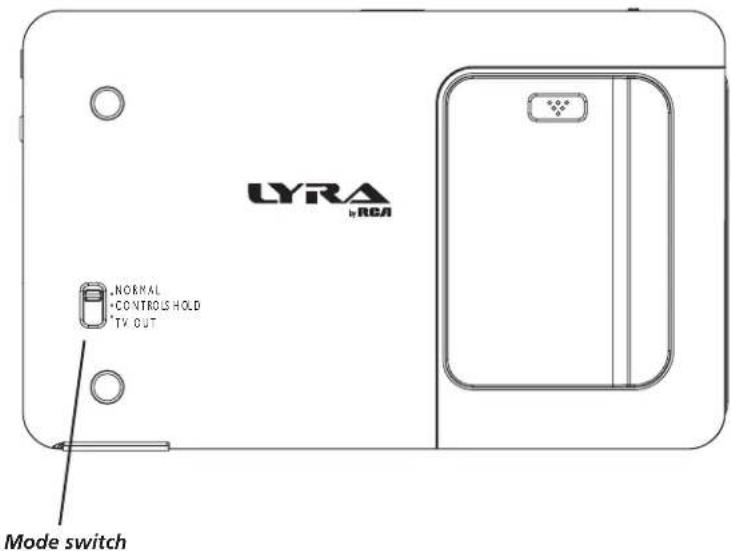
Recording Audio to Your Lyra Recorder
Recording from Your Audio Receiver
You can record audio from an audio/video component, such as an audio receiver, using the supplied Line In cable if the component has audio output jacks.
Notes: You might want to change the Audio Record Quality setting in the Setup menu (go to Chapter 3) if you want to record at a lower quality to take up less space, or to record at a higher quality for better sound. The default record quality is 128 kbps (high quality- mp3 audio).
The file size limit when recording is 2GB, so if your file is larger than that, it will be split into multiple files.
- Make sure your Lyra Recorder is off.
- Connect the 3.5mm mini-plug end of the cable to the LINE IN jack on your Lyra Recorder player.
- Connect the red (audio right) and white (audio left) cables to the corresponding right and left audio out jacks on your audio receiver. (The yellow plug will not be used for this connection).
- Turn on the power to your audio system, and select the mode you're recording from (for example, if you want to record a CD, make sure the stereo is in CD mode).
- Turn on your Lyra Recorder.
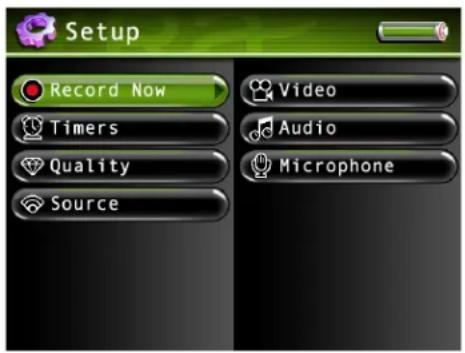
- Press the RECORD button on the top of the Lyra Recorder when you're ready to record (the Recording Mode screen appears). Select the type of recording you want. Press PLAY on the audio receiver.
- Select recording duration from the pop-up dialog.
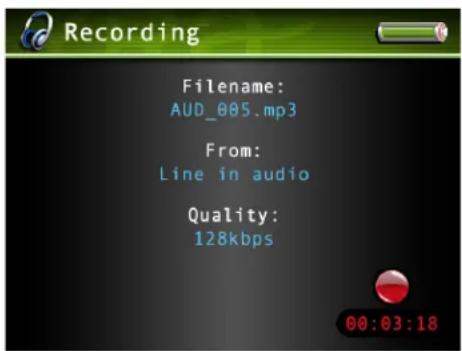
Tip:
You can also use the remote to control many of the record options.
- Press SELECT to begin recording. Once recording begins, the record screen appears with status and elapsed time, recording quality, and the file name shown.
- When you're finished recording, press STOP.
- To rename the file, go to Using the On-Screen Keyboard on page 51 for information.
If your stereo doesn't have Audio Out jacks, you can record from the headphone jack using a headphone to mini-Line In cable.
- Make sure your Lyra Recorder is off.
- Connect the smaller end of the cable (mini-Line In) to the LINE IN jack on your Lyra Recorder.
- Connect the headphone end to the headphone jack on your stereo system. Follow steps 4-8 above.
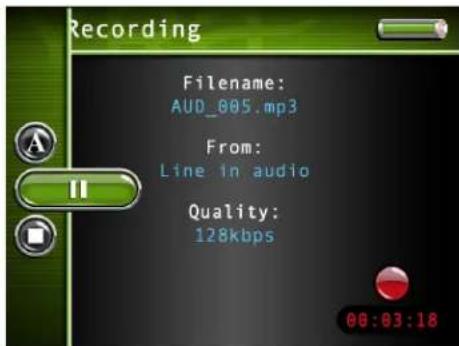
Audio Recordings Banner
To change audio settings during playback, press the SELECT button (the Audio Recordings banner appears). Press the up or down arrow button to highlight different settings, then press the left or right arrow buttons to make changes to the setting or choose another option. If necessary, press SELECT to confirm your choice.
To clear the Recordings banner from the screen, press BACK or wait for it to time out. A description of the Audio Recordings banner follows.
Rename Allows you to rename the file. Go to Using the On-Screen Keyboard on page 48 for information. Press SELECT to confirm.
Record/Pause Resumes recording and pauses recording. Press SELECT to confirm.
Stop Stops the recording. Press SELECT to confirm.
Recording Audio from Your Computer
You can record audio from your computer using a headphone/line out 3.5 mm to mini-Line In cable.
- Make sure your Lyra Recorder is off.
- Connect the smaller end of the cable (3.5mm) to the LINE IN jack on your Lyra Recorder.
- Connect the other end to the headphone or line out jack on your computer.
- Turn on the power to your computer, start your favorite music jukebox software and select the file you want to record.
Follow steps 5-10 of Recording from Your Audio Receiver.
Transferring Audio Files to Your Lyra Recorder
You can transfer audio files to your Lyra Portable Multi-media Recorder via Yahoo! Music Engine, Windows Explorer (My Computer) Windows Media Player 10, or your favorite music jukebox software.
Important: In order to transfer secure music files using Windows XP to your Lyra Recorder, you must set the USB Protocol setting to MTP in the Setup menu before connecting your Lyra Recorder. The Lyra Recorder doesn't support copy-protected content if you are using Windows 2000. See page 56 for more information. Secure music files must also be transferred using a DRM-compliant application such as Windows media Player or Yahoo! Music Engine and cannot be transferred through Windows Explorer (My Computer).
If your Lyra Recorder isn't already connected to your computer, connect it using the provided USB cable (go to page 14 for information on connecting the USB cable). Do not disconnect the USB cable from either the PC or device music while music files are being transferred to your Lyra Recorder. Doing so may corrupt system files or the files being downloaded. It is highly recommended that the Lyra Recorder be connected to the ROOT USB PORT (the main USB port) on the PC and not a self powered USB hub.
From Windows Explorer, open the Lyra Recorder drive. Open the drive where the files/folders you want to transfer are located, and highlight them. Drag the files/folders to the AUDIO system folder on the Lyra Recorder drive.
Helpful hint: You can also right click on your content in Windows Explorer and select Copy (or Ctrl + C). Then from the AUDIO folder, right click and select Paste (or Ctrl + V) to add the copied content.
It is highly recommended that all supported audio files (mp3 or other formats) be stored in the AUDIO system folder to allow for easy navigation and organization of the contents of the Lyra Recorder.
Note: In MSC mode you must stop the USB connection before disconnecting the USB cable (go to page 17 for more information on disconnecting the USB cable).
For detailed information on transferring secure music to your Lyra Recorder using a music jukebox application, see the help information provided by the application you are using.
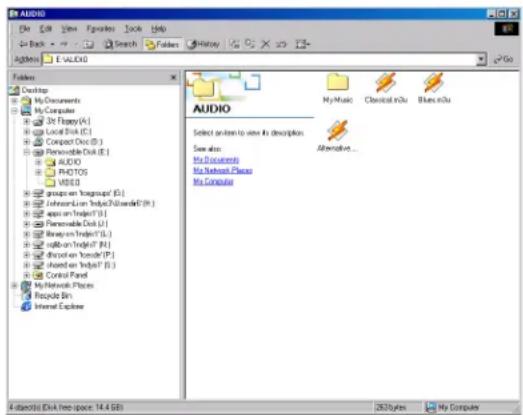
When the Lyra Recorder is in MSC mode an SD/MMC memory card can also be used to transfer audio files. If an SD/MMC memory card is properly inserted, an additional drive is available through Windows Explorer to transfer content onto. Please ensure the correct drive is being used when transferring content from the device. Go to page 52 for more information on transferring files from the SD/MMC memory card.
If files have been transferred to the Lyra Recorder from the PC, when in MSC mode you MUST re-profile the contents to ensure all content is properly sorted and recognized on the Lyra Recorder. Eject the Lyra Recorder through the tray application (see page 17), then run the profiler. In the Setup menu, go to the Audio menu and select Profile. Go to page 26 for more details on the profiler.
Note: when the Lyra Recorder is in MTP mode, you do not need to manually profile the audio content stored on the device. The device's database gets automatically updated when files are transferred via MTP mode.
Transferring Predefined Audio Playlists to your Lyra Recorder
Audio playlists can be created on your PC using Yahoo! Music Engine (or any other music management software that supports playlist files) and transferred to your Lyra Recorder. Refer to the help menu of your music management software for details on transferring playlists to your Lyra Recorder. Use Windows Explorer to transfer predefined playlists to your Lyra Recorder.
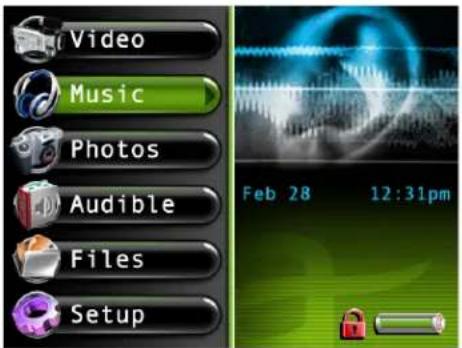
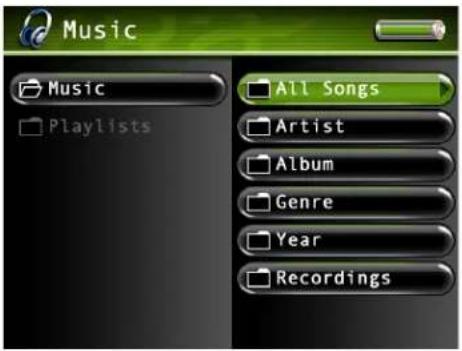
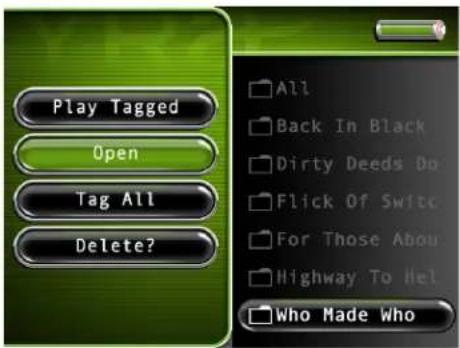
Playing Music
To select and play a song from the main menu:
- Press the up or down arrow button to highlight Music and press SELECT to enter the Music navigation mode. The following options are displayed:
All Songs – displays all available songs
Artist– displays songs according to Artist, Album, and Track
Album– displays songs according to Album and Track
Genre—displays songs according to Genre, Artist, and Song Title
Year– displays songs according to Year and Song Title
Recordings – displays all recordings you have made
-
Press the down arrow button to highlight the category you want to select a song from, for example, Artist.
-
Press the right arrow to display the list of Artists (the Artists appear on the right side of the screen).
-
Continue to press the up or down arrow button to select the artist, then press the right arrow to display the list of albums from the artist chosen, or press and hold to play the contents of the folder. Press the right arrow button to open (expand) the item and display the contents. Press the left or right arrow button to move back or forward a level in the sorting category (Artist, Album, Genre, etc.).
When you've chosen a song, press SELECT to display the Music Options Menu (or press the right arrow button to start playback for the selected category or song). The Music Options menu description follows.
Music Options Menu
The Music Options menu allows you to use more advanced features, such as opening files, tagging files, deleting, and other file management. To bring up the Music Options menu, press SELECT when navigating your music library. To select an option, use the arrow buttons or touchpad to highlight it, and press SELECT.
Below are some of the options that may appear in the Music Options menu. The specific options depend on what is available at the time. For a full list of options for the Video, Music, Photos, and Audible Options menus, see page 50.
Play Tagged
Open
Tag All
Delete?
To Playlist
Play
Creating Music Playlists
- From the Music main menu, press the up or down arrow button and highlight Playlists.
- Press SELECT and New Playlist and Open appear. Highlight and select New Playlist, and the on-screen keyboard appears so you can name the playlist. Use the arrow buttons to enter a name, or see Using the On-Screen Keyboard on page 57 for more information.
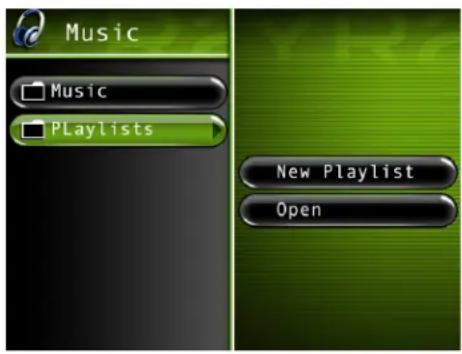
- Next, go back to the Music menu and use the arrow buttons to find the music you want to add to the new playlist. When a song is highlighted, press SELECT to bring up the Music Options menu, and highlight and select Tag to tag the song. A tag icon ( ) will appear to show that it is tagged. Repeat this step for all the songs you want in the new playlist.
- When finished, press SELECT to bring up the Music Options Menu again, and highlight and select To Playlist. All available playlists will then appear. Choose the new playlist you just created. Press SELECT. All the tagged songs will be added to your new playlist.
Playing Playlists
- From the Music main menu, press the left arrow button and highlight Playlists.
- Press the right arrow to display the available playlist files (a list of playlist files and sub-folders appear on the left side of the screen).
Note: A playlist is indicated by the playlist icon (next to the file.
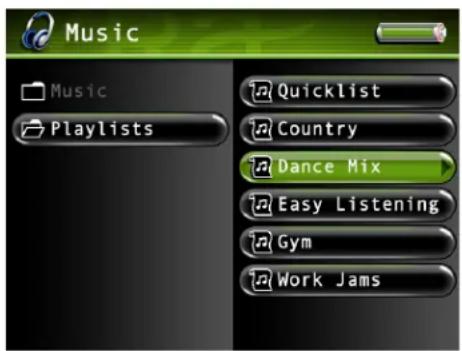
- Continue to press the up or down arrow button to highlight a playlist file. Press the right arrow with a playlist to display the contents of the file or folder. Press the left arrow to close the playlist and move back a level.
- With an audio file from a playlist highlighted, press SELECT to display the Options Menu (or press the right arrow button to start playback). The Music Playlist Options Menu description follows on the next page.
Note: To quickly play a playlist highlight the desired playlist, then press and hold the right arrow.
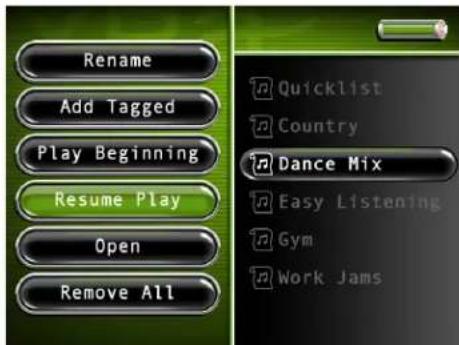
Music Playlist Options Menu
The Playlist Options menu allows you to use more advanced features, such as opening playlists, tagging, and removing, and other file management. To bring up the Playlist Options menu, press SELECT when navigating your playlists. To select an option, use the arrow buttons or touchpad to highlight it, and press SELECT.
Below are some of the options that may appear in the Playlist Options menu. The specific options depend on what is available at the time. For a full list of options for the Video, Music, Photos, and Audible Options menus, see page 50.
Rename
Add Tagged
Play Beginning
Resume Play
Open
Remove All
Music Playback Screen
The following screen is an example of what the music playback screen might look like when playing a music file.
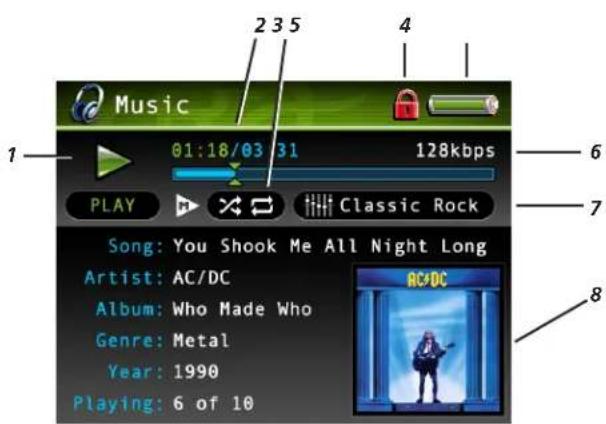
Artist, Album, Song Title, Genre, and Year- Displays the metadata(ID3) tag information contained in the file, if available. If no metadata tag information is available, the field will display Unknown.
1 Playback Mode- During playback, the play icon arrow is highlighted. When you pause playback, the pause icon is highlighted. During forward or reverse playback, the <or icons are highlighted.
2 Elapsed time/total time—The amount of time the track has played, followed by the total time.
3 Play Mode icon (Repeat and Shuffle All) – Displays current playback mode (Repeat, Shuffle, etc.). For more information about playback mode settings, go to page 26.
4 Lock icon- Displayed when the switch on the back of the unit is set to CONTROLS HOLD.
5 Battery Indicator- How much power remains on the battery. Go to page 28 for more information on battery indicator levels.
6 Encoded Bit-rate - The bit-rate the audio file was encoded in when created.
7 Equalizer Preset (Rock) - Displays the EQ preset for the currently playing song.
8 Cover art – Displays the cover art (if available) associated with the current audio file being played.
9 Volume level indicator - There are 33 steps in the volume control. Slide your finger around the touchpad to increase or decrease the volume. The volume level is displayed on screen when increasing or decreasing the volume. See page 29 for more information.
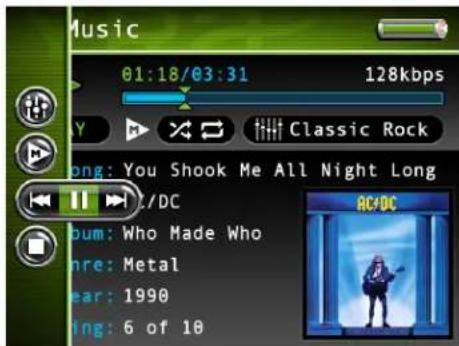
Tip:
You can also use the remote to control many of the play options (play, pause, stop, etc). The Music Settings banner does not have to be up to do this.
Music Settings Banner
To change music settings for each song during playback, press the SELECT button (the Music Settings banner appears). Press the up or down arrow button to highlight different settings, then press the left or right arrow buttons to make changes to the setting or choose another option. If necessary, press SELECT to confirm your choice.
To clear the Music Settings banner from the screen, press BACK or wait for it to time out. A description of the banner follows.

Equalizer Displays the EQ preset for the currently playing song. Press SELECT to go to the Setup menu and choose the desired EQ setting. See page 26 for more information.

Play Mode Displays current playback mode (Repeat, Shuffle, etc.). Press SELECT to go to the Setup menu and choose the desired play mode setting. See page 26 for more information.
Previous/Play/Pause/Next Rewinds, pauses, and fast forwards the music. or right arrow buttons to go backward or forward 30 seconds at a time. To SELECT key.

Stop Stops playing music. Highlight and select stop.
Playing Your Lyra Recorder in Your Car Stereo
A car power adapter is included with your Lyra Portable Multi-media Recorder, allowing you to power your Lyra Recorder from the cigarette lighter socket of a car, truck, or RV. It converts 12-volts to a 5-volt output. You can also purchase an optional cassette adapter to let you listen to the Lyra Recorder without having to wear headphones.
- If the headphones are attached, remove them. Insert the plug on the cassette adapter into the LINE IN/OUT jack on the player.
- Set the volume control on the cassette player to your normal listening level. Also set your Lyra Recorder's volume to roughly level 24.
Note: It may be necessary to slightly adjust the Lyra Recorder's volume to attain best overall sound quality.
-
Insert the cassette (Side A up) into your cassette player making sure the cord is placed in the correct position for your type of player.
-
Attach the end of the car power adapter to the DC IN jack on your Lyra Recorder.
-
Remove the cigarette lighter from the socket, and insert the car power plug into the socket.
-
Turn on your Lyra Recorder, and operate the Lyra Recorder to play music as described earlier in the chapter.
-
Control the sound level by using the volume control on the cassette player.
-
When you're finished:
A. Remove the cassette adapter from the cassette player.
B. Turn off the Lyra Recorder.
C. Remove the power plug from the cigarette lighter socket.
Cautions: Make sure to place the wire securely into the slot on the cassette in the correct direction for the type of player you have. The car power adapter is designed to be used only with vehicles having negative ground electrical systems. Use of any other power adapter may damage your Lyra Recorder and void your warranty.
Playing Your Lyra Recorder on Your Stereo System
Your Lyra Recorder came with a Line Out Cable that you can use to connect your Lyra to your audio system.
- Make sure your Lyra Recorder is off.
- Connect the 3.5mm mini-plug end of the cable to the LINE IN/OUT jack on your Lyra Recorder player.
- Connect the red (audio right) and white (audio left) cables to the corresponding right and left audio out jacks on your stereo system.
- Turn on the power to your audio system, and select the proper input setting on the audio system that corresponds with the way you've connected the Lyra Recorder to the audio system.
- Turn on your Lyra Recorder.
- Operate the Lyra Recorder to play music as described earlier in the chapter.
Transferring Photo Files to Your Lyra Recorder
You can transfer photo files to your Lyra Portable Multi-media Recorder using Windows Explorer.
If your Lyra Recorder isn't already connected to your computer, connect it using the provided Mini-USB cable (go to page 14 for information on connecting the USB cable). Do not disconnect the USB cable while photos are being downloaded to the Lyra Recorder. Doing so may corrupt system files or the files being downloaded. It is highly recommended that the Lyra Recorder be connected to the ROOT USB PORT (the main USB port) on the PC and not a self powered USB hub.
From Windows Explorer, open the Lyra Recorder drive (if MSC mode), or open the WPD device (if MTP mode) associated with your device. Open the drive on your PC where the files/folders you want to transfer are located, and highlight them. Drag the files/folders to the PHOTOS folder on the Lyra Recorder drive. (In MTP mode, photos folder maybe stored under Media View when Windows Media Player 10 has been installed.)
Supported photo files (see page 3 for formats) must be stored in the PHOTOS system folder in order to be available for viewing on the device. Sub-folders may be created under the PHOTOS system folder for easy navigation and organization of your image files.
Note: When in MSC mode, you must stop the USB connection before disconnecting the USB cable (go to page 17 for more information on disconnecting the USB cable).
An SD/MMC memory card can also be used to transfer photo files. If an SD/MMC memory card is properly inserted, an additional drive is available through Windows Explorer to transfer content onto. Please ensure the correct drive is being used when transferring content from the device. Go to page 52 for more information on transferring files from the SD/MMC memory card.
Notes: You cannot transfer to SDIMMC card if device is in MTP mode and most use MSC mode. You can view photos directly from the SDIMMC memory card on the device's screen without having to transfer the content to the Lyra Recorder hard drive.
Viewing Photos
- Press the up or down arrow button to highlight Photos and press SELECT. Photos and slideshows appear on the left side of the screen. Press the right arrow to see the available photos and folders.
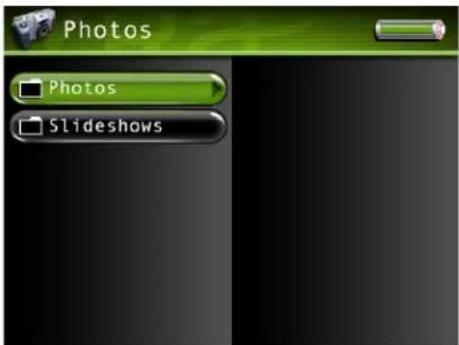
- Press the arrow buttons to highlight the photo or photo folder you want to select, for example, FlowerGarden.
When you get to the last tile thumbnail at the bottom, the screen displays the next photos or subfolders in the list. To move between screens, press the left or right arrow button.
Note: Going too far Left will take you out of the folder.
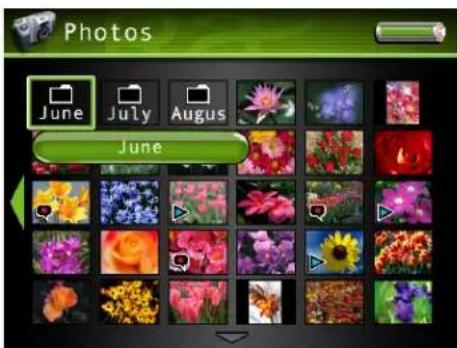
- Press the up or down arrow button to highlight a sub-folder or photo file. Once you select the photo file you want to view, press SELECT to display the Photo Options menu or PLAY on the remote to view the file automatically. The Photos Options menu descriptions are listed on the next page.
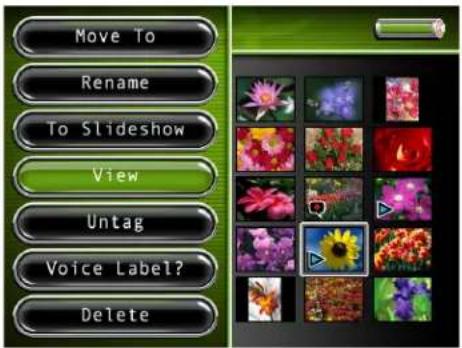
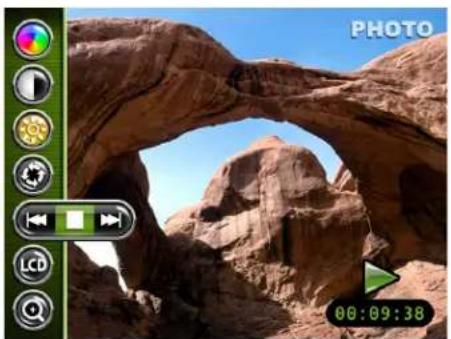
natural_image
Rock arch bridge in a desert landscape with camera control panel visible (no readable text or symbols)Photos Options Menu
The Photos Options menu allows you to use more advanced features, such as moving files, tagging files, renaming, deleting, and other file management. To bring up the Photos Options menu, press SELECT when navigating your photo library. To select an option, use the up and down arrow buttons or touchpad to highlight it, and press SELECT again to select it.
Below are some of the options that may appear in the Photos Options menu. The specific options depend on what is available at the time. For a full list of options for the Video, Music, Photos, Files, and Audible Options menus, see page 50.
Files Folder
Move To New Folder
Rename Move Tagged
To Slideshow Rename
View View All
Tag/Untag Open
Voice Label? Tag All
Delete Delete
Photo Settings Banner
To change photo settings while viewing a photo, press the SELECT button momentarily (the Photo Settings banner appears). Press the up or down arrow button to highlight different settings, then press the right and left arrow buttons to make changes to the particular setting.
To clear the Photo Settings banner from the screen, press BACK or wait for it to time out. A description of the banner follows.

Color Saturation Adjusts the richness (amount) of the color.

Contrast Adjusts the difference between the light and dark areas of the picture.

Picture Brightness Adjusts the brightness of the picture.

Picture Rotate Allows you to rotate the picture 90°. Once you change the rotation photo, the device saves this preference.
Previous/Stop/Next Goes to the previous picture, stops on the current goes to the next picture.

LCD Brightness Adjusts the brightness of the LCD screen.

Zoom Allows you to digital zoom up to 2x, 4x, or 8x on the picture. Access the logs Banner each time you want zoom and select the Zoom icon. To go back to normal continue to access Zoom until you select 1x.
Once a setting is changed, press SELECT. A screen appears asking if you want to save the setting. Select Yes to save the changes, select No if you do not want to save the changes.
Note: This only occurs with color saturation, contrast, picture brightness, and LCD brightness
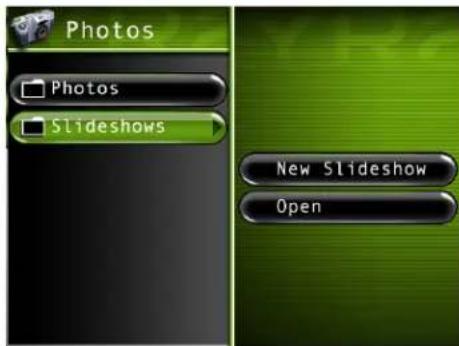
Creating a Photo Slideshow
-
From the Photos main menu, press the up or down arrow button and highlight Slideshows.
-
Press SELECT and New Slideshow and Open appear. Highlight and select New Slideshow, and the on-screen keyboard appears so you can name the slideshow. Use the arrow buttons to enter a name, or see Using the On-Screen Keyboard on page 51 for more information.
-
Next, go back to the Photos menu and use the arrow buttons to find the pictures you want to add to the slideshow. When a picture is highlighted, press SELECT to bring up the Photo Options menu, and highlight and select Tag to tag the picture. A tag icon (▶) will appear to show that it is tagged. Repeat this step for all the pictures you want in the slideshow.
-
When finished, press SELECT to bring up the Photos Options Menu again, and highlight and select To Slideshow. All available slideshows will then appear. Choose the new slideshow you just created. Press SELECT. All the tagged pictures will be added to your new slideshow.
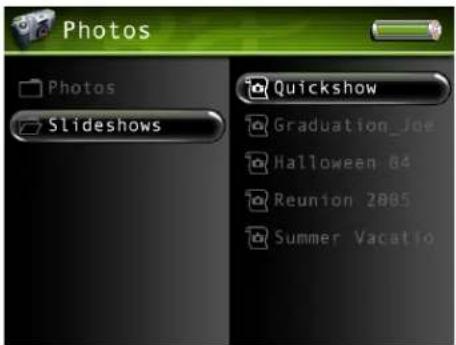
Viewing a Photo Slideshow
- From the Photos main menu, press the up or down arrow button to highlight Slideshows and press the right arrow button. All available slideshows appear.
Note: A slideshow is indicated by the slideshow icon (next to the file.
- Use the up or down arrow button to highlight the desired slideshow, and press SELECT. The Slideshow Options Menu appears, with Play Beginning highlighted. Press SELECT again to start the slideshow.
Note: A slideshow is similar to a video in that you can press the forward or reverse button at any time to go to the next or previous photo in the slideshow. You can also press the SELECT button to bring up to Photo Slideshow Settings banner to pause playback of the slideshow.
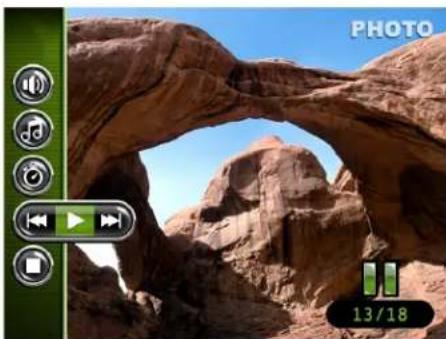
natural_image
Rock arch bridge in a desert landscape under clear blue sky, with playback controls and date stamp (13/18)Photo Slideshow Settings Banner
To change slideshow settings while viewing a slideshow, press the SELECT button momentarily (the Slideshow Settings banner appears). Press the up or down arrow button to highlight different settings, then press the right and left arrow button or SELECT to make changes to the particular setting.
To clear the Photo Slideshow Settings banner from the screen, press BACK or wait for it to time out. A description of the banner is as follows.

Slideshow Audio Allows you to choose what is played during the slideshow: Music, e Label, or Silent.

Song Allows you to choose what song or playlist is played during the slideshow.

Delay Speed Adjusts the time delay between pictures.

Previous/Play /Next Goes to the previous picture; resumes the slideshow, if bed; and goes to the next picture.

Stop Stops on the current picture.
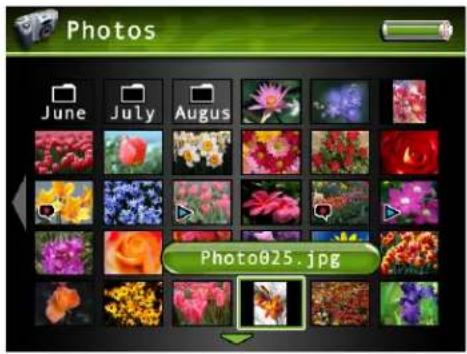
Recording Voice Labels
With this feature, you can record short audio clips to be played when you choose a picture, much like the Music Clips feature for songs.
-
Make sure the Voice Label setting is turned on in the Setup menu. Keep in mind voice labels will not be played if this setting is turned off, even if you have recorded one. See page 48 for more information.
-
Go to the Photos menu and use the arrow buttons to find the picture you want to add add a voice label to. When a picture is highlighted, press RECORD to record your voice label. When finished, press STOP. A voice icon will appear to show that it has a voice label attached to it. Repeat this step for all the pictures you want to record labels for.
Viewing Photos on Your TV
You can view photos stored on your Lyra Portable Mult-media Recorder using the supplied Line Out cable if your TV has Audio and Video Input jacks.
- Make sure your Lyra Recorder is off.
- Connect the 3.5mm mini-plug end of the cable to the LINE IN/OUT jack on your Lyra Recorder.
- Connect the yellow (video) to the Video Input jack. Connect the red (audio right) and white (audio left) cables to the corresponding right and left Audio Input jacks on your TV.
Note: If an audio file has been set to the slideshow, make sure the Audio Input jacks are properly connected to ensure you will hear the audio content. - 'Turn on the power to your TV, and change to the corresponding input channel on your TV.
- 'Turn on your Lyra Recorder. Set the Mode switch to TV OUT (located on the back of your Lyra Recorder).
- Find the photo or slideshow you want to view on the TV through the Photos menu. Press PLAY on the remote to view the photo or slideshow.
- When finished viewing on the TV, and to display the video on the Lyra screen, move the Mode Switch back to the NORMAL position.
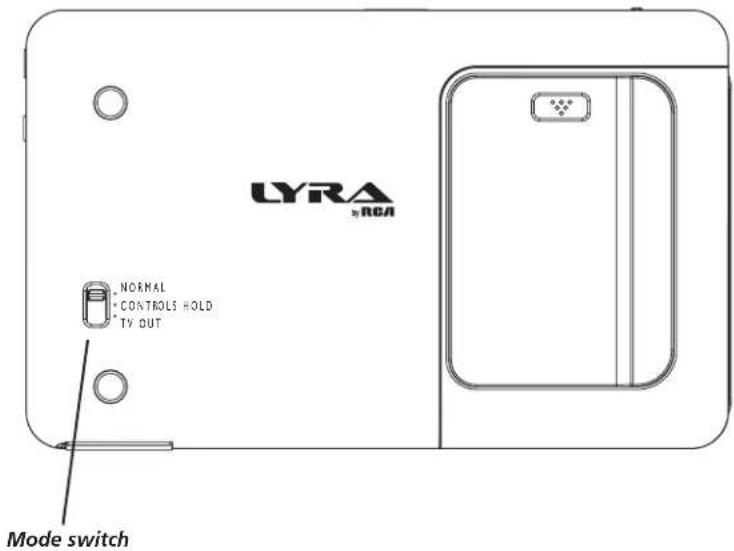
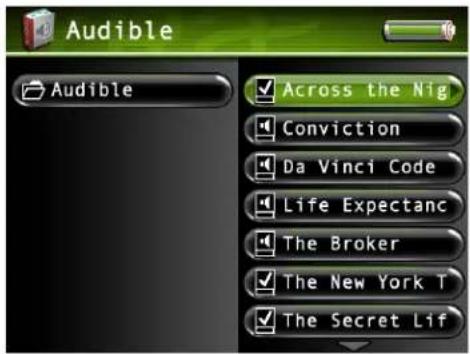
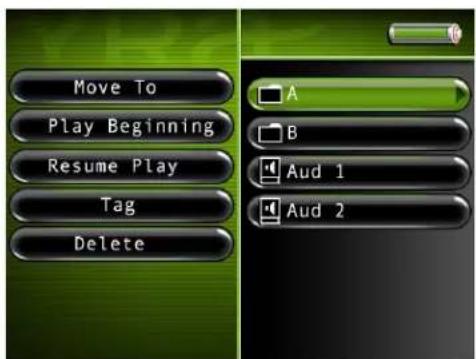
Playing Audible Files
An audible file is an audio book or other audio program that can be stored on your Lyra Portable Multi-media Recorder, just like an mp3 file or any other file.
For more information about Audible and the products it offers, visit Audible.com.
There is also an install option available on the enclosed CD that can help you get started with audible.
- From the main menu, press the up or down arrow button to highlight Audible and press SELECT. All available folders are listed first (in alphabetical order), followed by all file items (in alphabetical order).
- Press the down arrow button to highlight the file, playlist, or folder you want to select.
- Press the right arrow to display the list of files within the folder or the file contents of a playlist (the files appear on the right side of the screen).
- Continue to press the up or down arrow button to select an audible file. Once you select the file from within a folder you want to play, press SELECT to display the Audible Settings banner (or press the right arrow to start playback).
- Highlight Play Beginning and press SELECT to play the file.)
Audible Options Menu
The Audible Options menu allows you to use more advanced features, such as opening files, tagging files, deleting, and other file management. To bring up the Audible Options menu, press SELECT when navigating your files. To select an option, use the arrow buttons or touchpad to highlight it, and press SELECT again to select it.
Below are some of the options that may appear in the Audible Options menu. The specific options depend on what is available at the time. For a full list of options for the Video, Music, Photos, Files, and Audible Options menus, see page 50.
File Folder
Move To Move Tagged
Play Beginning Rename
Resume Play New Folder
Tag Open
Delete Tag All
Delete
Audible.com is a registered trademark of Audible, Inc.
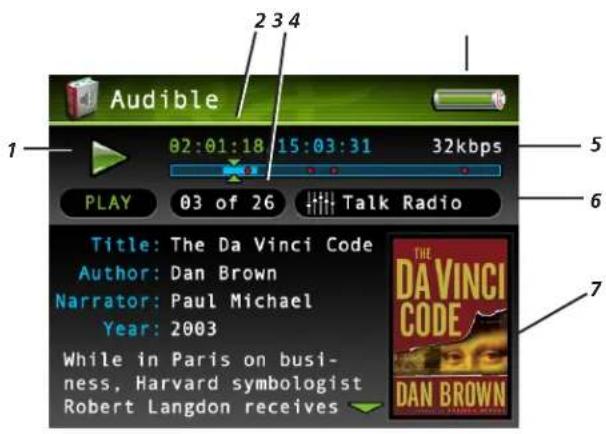
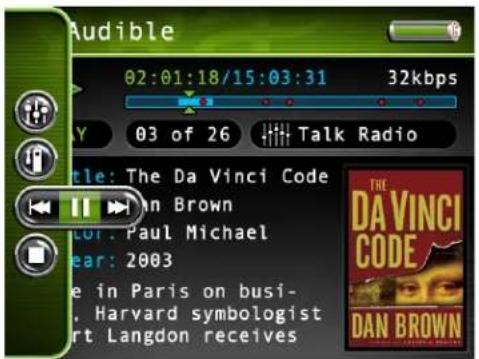
Audible Playback Screen
The following screen is an example of what an audible playback screen might look like.
1 Playback Mode- During playback, the play icon arrow is highlighted (as in graphic above). When you pause playback, the pause icon is highlighted. During forward or reverse playback, the or icons are highlighted.
2 Elapsed time/total time— The amount of time the track has played, followed by the total time.
3 Chapter number – Displays current chapter number of audible.
4 Battery Indicator- How much power remains on the battery. Go to page 28 for more information on battery indicator levels.
5 Encoded Bit-rate - The bit-rate the audio file was encoded in when created.
6 Equalizer Preset (Talk Radio) - Displays the EQ preset for the current playing audible.
7 Book Jacket Cover Art – Displays the JPG cover art (if available) associated with the current audio file being played.
Audible Settings Banner
To change settings for each audible during playback, press the SELECT button (the Audible Settings banner appears). Press the up or down arrow button to highlight different settings, then press SELECT to make changes to the setting.
To clear the Audible Setting banner from the screen, press BACK or wait for it to time out. A description of the Audible Settings banner follows.
Equalizer Preset Adjusts the equalizer preset.
Bookmarks Displays a list of stored bookmarks for the current audible. Highlight a bookmark and press SELECT to go to that playback position in the audible file. To delete a bookmark, highlight Delete and press SELECT.
Previous/Play/Pause/Next Rewinds, pauses, and fast forwards the audible.
Stop Stops the audible file playing.
Viewing Files
Files mode allows you to access all the contents on your hard drive. To view all files from the main menu:
- Press the up or down arrow button to highlight Files and press SELECT. All available folders are listed first (in alphabetical order), followed by all file items (in alphabetical order). If an SD/MMC memory card is inserted, it will be listed at the left of the list under an item named SD card. Highlight SD card and press the right arrow to display the card's contents.
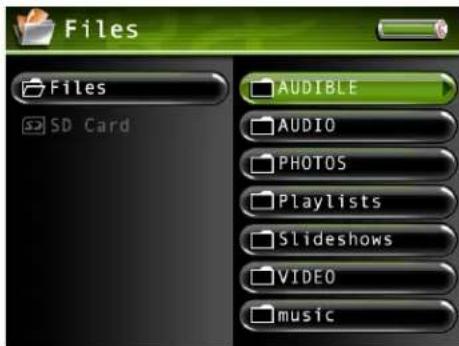
-
Press the up or down arrow button to highlight the file, playlist, or folder you want to select.
-
Press the right arrow to display the list of files within the folder or the file contents of a playlist (the files appear on the right side of the screen).
-
Continue to press the up or down arrow button to select a photo, song or video file. Once you select the file from within a folder you want to view or play, press the right arrow button. Press SELECT to bring up the Files Options Menu..
Note: If you have a file, such as expense.xls, in your folder, the file can't be viewed on the Lyra Recorder.
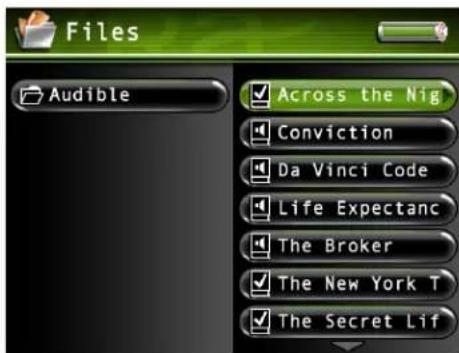
Files Options Menu
The Files Options menu allows you to use more advanced features, such as opening files, tagging files, deleting, and other file management. To bring up the Files Options menu, press SELECT when navigating your files. To select an option, use the up and down arrow buttons to highlight it, and press SELECT again to select it.
Below are some of the options that may appear in the Files Options menu. The specific options depend on what is available at the time. For a full list of options for the Video, Music, Photos, Files, and Audible Options menus, see page 50.
Files Folder
Move To Copy Tagged
Play Beginning Move Tagged
Resume Play Rename
Tag New Folder
Delete Open
Tag All
Delete
Tip
Tip: If you can't find a file, remember to check the Files menu. All files are listed here, so it would be easier to look here than in the individual menus separately.
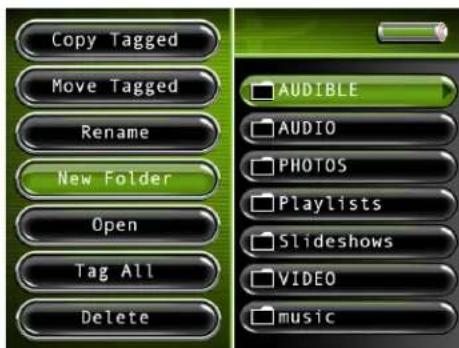
Creating Folders
-
From the Files main menu, highlight the folder you'd like to create a subfolder in.
-
Press SELECT and the file option menu will appear. Highlight and select New Folder, and the on-screen keyboard appears so you can name the folder. Use the arrow buttons to enter a name, or see Using the On-Screen Keyboard on page 51 for more information.
-
When you go back and open the folder, the subfolder you created will be there.
Options Menu Items
The Video, Music, Photos, and Files, Audible Options menus allow you to use more advanced features, such as opening files, tagging files, deleting, and other file management. To bring up the Options menus, press SELECT when navigating or playing your files. To select an option, use the up and down arrow buttons to highlight selection, and press SELECT again to select it.
Below is a brief description of all the options that may appear in the various Options menus. The specific options depend on what is available at the time.
(In alphabetical order)
Add Tagged Adds the currently tagged item to a list such as an audio playlist, quick playlist, slideshow, or quick slideshow.
Copy Tagged Copies tagged items to your desired folder.
Copy To Selects folder where tagged files will be copied. (The original version of files/folder will be unchanged).
Delete Deletes the highlighted item from the Lyra's hard drive (or SD/MMC card).
Delete Tagged Deletes the tagged item from the Lyra's hard drive (or SD/MMC card).
Delete Voice Deletes the voice label associated with a photo file.
Delete? Confirmation message displayed to make sure you want to delete the selected file.
Move Tagged Moves tagged items to your desired folder.
Move To Selects folder where tagged files will be moved. (Original files/folder will be deleted from the starting location).
New Folder Creates a new folder and allows you to name it.
New Playlist Creates a new playlist and allows you to name it.
New Slideshow Creates a new slideshow and allows you to name it.
Open Opens the highlighted item (folder, playlist, slideshow, etc.)
Play Plays the highlighted music/video/audible item.
Play All When a folder is highlighted, plays all files within the folder.
Play Beginning Plays selected file from the beginning (not the saved resume point).
Play Tagged Plays all currently tagged items in the order they were tagged within the music categories.
Remove All Removes all songs/photos from the highlighted playlist/slideshow.
Remove Photo Removes the highlighted photo from a currently playing slideshow.
Remove Song Removes the highlighted song from the current playlist.
Rename Allows you to rename a file or folder.
Resume Play Resumes playback of a video, audio, audible, playlist file from the place it was last stopped.
Save To Saves the current highlighted items in the list to a new playlist/slideshow.
Tag Tags the highlighted item.
Tag All Tags all items within a folder.
To Playlist Adds the highlighted music file to a playlist.
To Slideshow Adds the highlighted photo file to a slideshow.
Untag Untags a highlighted item.
View View the highlighted photo.
View All View all photos within a folder/slideshow.
Voice Label? Records a voice message to any picture.
Using the On-Screen Keyboard
The on-screen keyboard is used to name new files, playlists, slideshows, or folders or rename existing items. Names can be up to 32 characters in length (including file extension).
- Use the arrow buttons to navigate around the keyboard.
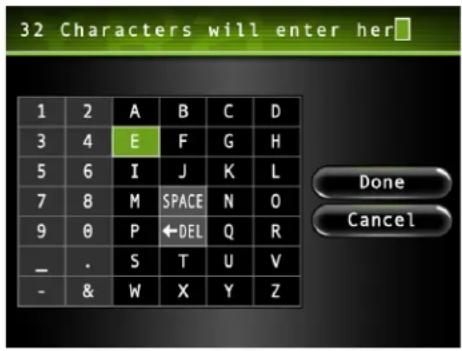
- Press SELECT when you've highlighted a character you want to add to the file/folder name. After SELECT is pressed, the highlight moves back to the SPACE key.
Note: To delete the last character entered into the file/folder name, highlight the DEL key and press SELECT.
-
When you've finished, press the right arrow button until Done is highlighted to save the specified file/folder name.
-
Highlight and select Cancel to dismiss the keyboard and undo the renamed file or created folder.
Portable Hard Drive Capability
When connected to a computer via USB, the Lyra Recorder is capable of storing any file type allowing the user a fast, convenient method of storing, retrieving, and transferring files. Including word processing files, presentations, spreadsheets and any other computer files.
Some possible uses for this feature are as follows:
- Create back-ups/archive files.
- Transport digital photo albums.
- Transport files from one computer to another computer. For example, instead of copying files at work onto a zip disk or accessing them on your home computer via e-mail or remote access, you can copy the files directly to your Lyra Recorder and access from both work and at home.
- Store Internet downloads.
- Share information.
High-Speed Card Reader
The Lyra Recorder also functions as a high-speed SD/MMC card reader when a SD/MCC memory card is properly inserted into the device.
If a memory card is properly inserted and you wish to view the contents of the card when connected to a computer via USB port, the device's USB protocol needs to be changed to MSC mode, refer to page 23 for details. Once this change is made, an additional drive will be assessable through Windows Explorer to transfer content to and from the card. All file types, not just multimedia files, may be stored on the card.
Notes: SD/MMC memory cards MUST be formatted in FAT16 or FAT32 in order to be properly detected. Other formats may result in device errors.
When using a memory card, only Music and Photo content will be available for direct playback (viewing) on the Lyra Recorder. Video content must be copied onto the device's hard drive in order to be available for playback.
See Setup menu for instructions on switching device to MSC mode.
Inserting and Removing Memory Cards
- Insert the SD/MMC card into the card slot on the right side of the unit until it clicks into place. Make sure the gold contacts on the card are facing the front of the unit.
- To remove the card, press and release the card. It will spring out.
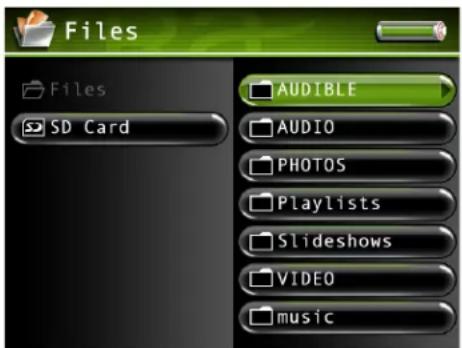
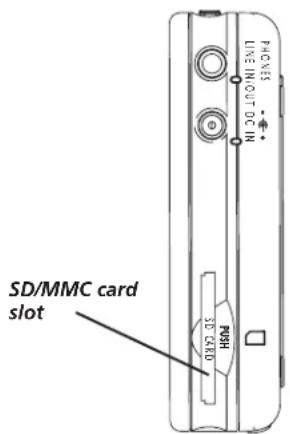
The right side of the Lyra Recorder.
Copying Files from the Memory Card to the Lyra Recorder
- With the Lyra Recorder turned on, insert the memory card into the SD/MMC memory card slot on right side of the player.
- On the main menu, highlight files and press SELECT.
- Highlight SD Card and press select, an options menu will be displayed.
- Highlight Open and press SELECT. A list of all available types of files and folders will appear including, Audible, Audio, Photos, Video, etc.
- Highlight the folder or file you wish to copy to the Lyra Recorder. If you choose a folder, the same option menu in step 3 will be displayed.
- Once you have selected the file to be copied, highlight Copy To and press SELECT.
- The Files folder then opens, highlight the folder you wish to copy the file to and press SELECT.
- The Lyra Recorder then prompts "Confirm Copy To". If you wish to continue the copying, then highlight Continue and press SELECT. Highlight and select Cancel if you wish to stop the copy process.
Copying Files from the Lyra Recorder to the Memory Card
Important: In order to transfer files remove to your Lyra Recorder, you must set the USB Protocol setting to MSC in the Setup menu before connecting to computer. Refer to page 23 on how to change USB Protocol. See page 56 for more information on USB Protocols.
- With the Lyra Recorder turned on, insert the memory card into the SD memory card slot on the right side of the player.
- Connect the Lyra Recorder to the computer using the mini USB cable provided (go to page 14 for more information on connecting the USB cable).
- Two drives will be available: SD/MMC Card will be labeled Removable Disk, and the Lyra Recorder will be labeled X3000 in the My Computer option or Windows Explorer.
- Open the SD memory card drive and the Lyra Recorder drive.
- Find the files you want to copy. Drag and drop the files or folder from the Lyra Recorder drive to the SD memory card drive.
- Stop the USB connection before disconnecting the USB cable (got to page 17 for more information on disconnecting the USB cable).
Chapter 5: Additional Information
Tips and Troubleshooting
Songs aren't listed in any of the audio sort modes (Album, Genre, Title, Audio Files).
- The contents of the Lyra Recorder haven't been profiled (sorted) since the last file transfer. When all files have been transferred to the Lyra Recorder from the PC, you MUST re-profile the contents to ensure all content is properly sorted and recognized on the Lyra Recorder. In the Setup menu, go to the Audio/Video menu and select Profile. Go to page 26 for more details on the profiler.
Lyra Recorder does not respond.
- When this happens, you can recover the unit by inserting a non-metal pointed object (e.g. toothpick) into the Reset hole, located on the bottom side of the unit to reset the device. Press ON/OFF to turn device back on.
Can't transfer copy-protected content to the Lyra Recorder using Windows 2000.
- The Lyra Recorder doesn't support copy-protected content if you are using Windows 2000. You must use Windows XP and Windows Media Player 10.
Can't transfer copy-protected content to the Lyra Recorder using Windows XP.
- In order to transfer secure music files using Windows XP to your Lyra Recorder, you must set the USB Protocol setting to MTP in the Setup menu before connecting your Lyra. See page 56 for more information.
Some .AVI video files do not play on my Lyra Recorder.
- Make sure the video is encoded in MPEG4 and the audio is encoded in mp3 audio. The .AVI files may be encoded in audio/video formats that are not currently supported by the Lyra Recorder device.
Note: The Lyra Recorder can play MPEG4-SP video content encoded with the DivX 4/5 and xVID codecs.
- When using a memory card, only Music and Photo content will be available for direct playback (viewing) on the Lyra Recorder. Video content must be copied onto the device's hard drive in order to be available for playback. All content on the memory card may also be copied to a computer for playback.
Can't bear audio through my Headphones.
- Rotate volume until volume control graphic appears. Quickly press SELECT button. Sound will toggle from speaker to headphones.
- Be sure your headphones are secure in the headphone jack.
Can't hear audio on my Video file.
- Make sure the audio has been encoded in mp3 audio.
- If connected to an audio/video component using the Line Out cable, make sure the cable is properly connected.
Video picture doesn't fill up the entire LCD screen.
- If the video you recorded was created on the computer, for example, the video frame size should be 320 pixels (width) by 240 pixels (height) (or 640 x 480) for optimal video playback on your Lyra Recorder, as well as on a TV.
Photo files don't fill up the entire LCD screen.
• The photo size should have a 4:3 aspect ratio such as 640 pixels (width) by 480 pixels (height) for optimal photo playback.
Audio files added to the hard drive through Windows Explorer via drag and drop do not appear in Audio navigation sorting categories (Artist, Album, Genre, etc.).
- The audio content of the Lyra Recorder hasn't been profiled. When all files have been transferred to the Lyra Recorder from the PC, you MUST re-profile the contents to ensure all content is properly sorted and recognized on the Lyra Recorder. In the Setup menu, go to the Audio/Video menu and select Profile. Go to page 26 for more details on the profiler.
Video files added to the hard drive through Windows Explorer via drag and drop do not appear in Video navigation mode.
- Video content must be stored on the hard drive in the VIDEO system folder in order to be properly recognized and available for playback. Sub-folders may be created under the VIDEO system folder for easy navigation and organization of your video files.
Photo files added to the hard drive through Windows Explorer via drag and drop do not appear in Photos navigation mode.
- Photo content must be stored on the hard drive in the PHOTOS system folder in order to be properly recognized and available for playback. Sub-folders may be created under the PHOTOS system folder for easy navigation and organization of your photo files.
I can't find the files I copied to the Lyra Recorder's hard drive
- If you can't find a file, remember to check the Files menu. All files are listed here, so it would be easier to look here than in the individual menus separately.
Frequently Asked Questions
How do I return to the Main menu?
- Press and hold the BACK button (located on the right side of the device) while in the menu system to return to the Main menu. A momentary press of the BACK button brings navigation up one level.
Why should I profile my content?
- Profiling the audio content on your Lyra Recorder creates the necessary sorting categories (Artist, Album, Genre, etc. from id3 tags) so your Lyra Recorder can understand it. Without profiling, the Lyra Recorder will simply act as a mass storage device; any new audio content will NOT be displayed in audio mode.
How do I profile content?
- In the Setup menu, go to the Audio/Video menu and select Profile. Go to page 26 for more details on the profiler. Note: Video and Photos content will appear in the Navigation menus based on the folder/file structures in the VIDEO and PHOTOS system folder.
Why can't I to play Video or Audio files directly from the SD/MMC memory card?
- The Lyra Recorder only allows jpeg (.jpg) photo content to be displayed from the SD/MMC memory card. Because of the memory and processing requirements, all other file types must be copied from the SD/MMC memory card to the device.
Why doesn't the Lyra automatically recognize Video, Audio, and Photo content and assign them to the appropriate folders on the Lyra?
- Because of the massive storage capacity of the Lyra Recorder, the device isn't capable of this. Video files MUST be stored in the VIDEO sub folder of the Lyra Recorder. Photo content must be stored in the PHOTOS sub folder of the Lyra Recorder.
Note: Sub folders can be created under each of the three main folders to further sort and manage your files. Example; "My summer vacation", "graduation 2003", "our first picnic", could be created under the "Photos" folder. This would allow you to locate and navigate specific folders much more quickly.
What is an ".avi file"?
- AVI stands for Audio Video Interleave and has been defined by Microsoft. It is the most common format for Audio/Video data on the PC. The Lyra Recorder plays .avi files that contain mpeg4-sp video and mp3 audio compression formats.
Why does the Lyra split up my recording into multiple files?
- The file size limit when recording is 4GB, so if your file is larger than that, it will be split into multiple files.
Why are there two files per book?
• One is the book and the other contains your bookmarks and settings.
How do I stop content from playing on the Lyra Recorder (where is the STOP button)?
- Use the ON/OFF button on the top of the Lyra Recorder. Press and release the button quickly to stop playback.
Why does the lock graphic show up on my Lyra Recorder when I press a key?
- The mode switch, found on the bottom of the device, has been moved to the “CONTROLS HOLD” position. The “CONTROLS HOLD” position locks all buttons and makes them inactive. Slide the switch to the center position marked “NORMAL” to unlock the buttons and resume normal operation.
USB Protocol
Why do I want to use MTP (Media Transfer Protocol) Mode?
MTP Mode is essential if you want to transfer copy protected or subscription content to your Lyra Recorder. Today MTP Mode is only supported in Windows XP and through Windows Media Player 10 or other special software provided by your music service provider. Please note, the Lyra Recorder doesn't support copy-protected content if you are using Windows 2000.
In MTP mode, your Lyra Recorder will no longer show up as a drive letter. So programs that were designed to work with a device that shows up as a drive letter will not be able to work directly with the Lyra Recorder.
Note: Some wma files may be Digital Rights Management protected. You must acquire licenses for DRM protected files before they can be played on the player. For more information, go to www.microsoft.com/windows/windowsmedia/drm.
Why do I want to use MSC (Mass Storage Class) Mode?
If you are using Windows 2000 you can not use MTP Mode, only MSC Mode is available. Your Lyra Recorder will always show up as an MSC device. Keep in mind, the Lyra Recorder doesn't support copy-protected content if you are using Windows 2000.
If you are using Windows XP, your Lyra Recorder will show up as a MTP device, but we have provided you with the option to switch it to MSC mode with a setting in the Setup menu of the Lyra Recorder. Once this setting is set to MSC mode, every time you connect the device to the PC it will show up as a drive letter and allow you to use any software that can work with MSC mode. This will also allow the current version of LyraDJ or any other playlist editing program to find the device.
All supported content put on the device in either mode MTP or MSC will be available to play on the device once it is disconnected from the PC. You could add standard mp3 files in the MSC mode, then run LyraDJ, profile the device, and disconnect it. Then simply switch it to MTP mode, reconnect it, and add copy protected or subscription content to it.
Remote Code List
TV
(Programmable to TV button)
HDTV
Apex 7015
Daewoo 7004
Hitachi 7005
JVC 7006
Mitsubishi 7007
Panasonic 7002
Philips 7008
Proscan 7009
RCA 7010,7000
Sampo 7011
Samsung 7003
Sharp 7013
Sony 7018,7021
Zenith 7017
HDTV Monitor
Zenith 7019
HDTV Projection Monitor
Pioneer 7001,7020
LCD HDTV
Samsung 7016
Zenith 7014
Projection HDTV
Sharp 7012
TV Monitor
Panasonic 1059
TV
Action 1037
Admiral 1064,1085,1091
Advent 1056
Aiko 1071
Akai 1034,1035
Amtron 1074
Anam 1036
Anam National 1039,1065,1074
AOC 1034,1049,1066,1067,1068
Apex 1002,1003,1004,1005
Audiovox 1037,1049,1053,1074
Bell & Howell 1064,1076
Beng 1006
Broksonic ....1034,1036,1047,1055
Carver 1061
Centurion 1069
Citek 1052
Citizen 1047,1066,1068,1071,1074,
1081,1084
Classic 1034
Colortyme 1035,1048,1066,1068
Contec Cony 1036,1037
Contec/Cony 1070,1074
Craig 1036,1037,1047,1074
Crosley 1061
Crown 1074,1079
CTX 1007,
Curtis 1034
Curtis Mathes ....1035,1061,1063,1066,1068,
1076, 1081, 1084, 1094,
1096,1097
Daewoo .....1034,1039,1049,1053,1066,
1067,1068,1071,1084
Daytron 1049,1066,1068,1084
Denon 1054
Dimensia 1063,1097
Dumont 1066,1083
Electrohome .....1034,1035,1065,1066,
1068,1072
Emerson .....1034,1035,1036,1037,1048,
1053,1055,1066,1068,1070,
1073,1074,1075,1076,1084,
1088,1095,
Envision 1035,1066,1068
Fisher 1008,1076
Fujitsu 1075
Funai 1036,1037,1074,1075
GE 1009,1010,1034,1036,1039,
1053,1062,1063,1065,1066,
1068,1077,1078,1097,1098
Goldstar .....1034,1035,1038,1066,1067,
1068,1070,1072,1084
Gradiente ....1035
Hallmark 1034,1066,1068
Harman Kardon 1034
Hisense 1058
Hitachi ....1011,1012,1013,1049,1054,
1066,1068,1070,1093
Infinity 1061,1079
Janeil 1086
JBL 1061,1079
JC Penney ......1034,1063,1066,1067,1068,
1077,1078,1081,1084,
1097,1098,
Jensen 1035,1066,1068
JVC 1001,1014,1015,1070,
1078, 1095
Kawasho 1066, 1068
Kenwood ......1034,1035,1048,1066,
1068, 1072
Kloss Novabeam ......1039,1074,1086
KTV 1036,1037,1074,1084
LG 1067
Lloyds 1048
Loewe 1079
Logik 1051,1064
Luxman 1066,1068
LXI 1034,1061,1063,1068,1076,
1079,1097,1098
Magnasonic 1034,1035,1049
Magnavox ......1016,1034,1035,1061,1066,
1068,1072,1079
Majestic 1064
Marantz ......1035,1061,1066,1068,1079
Megatron 1068
Memorex ......1034,1064,1067,1068,1076
MGA 1035,1066,1067,1068,1072
Mitsubishi .....1017,1034,1035,1066,1067,
1068,1072
Montgomery Ward 1064
Motorola 1065,1085
MTC 1034,1049,1066,1067,
1068,1081
Multitech 1074
Multivision 1080
NAD 1068,1093
NEC 1035,1048,1065,1066,
1067,1068,
Nikko 1049,1068,1071
Onwa 1036,1074
Optimus 1093
Optonica 1085
Orion 1055,1088
Panasonic ...... 1046,1018,1019,1020,1037,
1039,1049,1065,1078,1079
Philco 1034,1035,1049,1054,1061,
1065,1066,1067,1068,1070,
1072,1079
Philips ...... 1021,1022,1061,1065,1066,
1070,1072,1079
Pioneer 1023,1039,1040,1066,
1068,1093
Portland 1034,1066,1067,1068,
1071,1084
Price Club 1081
Prima 1051,1060
Prism 1078
Proscan 1062,1063,1097,1098
Proton 1034,1035,1047,1066,
1068,1070
Quasar 1024,1039,1065,1078
Radio Shack 1036,1037,1039,
1076, 1097
Radio Shack/Realistic ..... 1063,1066, 1068,
1070,1074,1076,1084
RCA 1000,1025,1036,1039,1040,
1062,1063,1065,1066,1067,
1068,1072,1094,1096,
1097,1098
Realistic 1076,1097
Runco 1083
Sampo 1026,1039,1066,1068,1084
Samsung ...... 1027,1028,1034,1048,1066,
1067,1068,1070,1072,1081,
1084,1089
Sansui 1088
Sanyo 1066,1076
Scott 1036,1037,1066,1068,1070,
1074,1075
Sears 1034,1036,1061,1063,1066,
1068,1072,1075,1076,1087,
1097,1098
Sharp 1029,1048,1050,1066,1068,
1070,1084,1085
Signature 1064
Sony 1100,1041,1042,1090,1092
Soundesign 1034,1036,1066,1068,
1074,1075
Starlite 1074
Supre-Macy 1086
Sylvania ...... 1030,1034,1035,1049,1061,
1066,1068,1072,1079
Symphonic 1037,1073,1074,1087
Tandy 1085
Tatung 1039,1047,1065
Technics 1078
Techwood ......1035,1066,1068, 1078
Teknika ....1036,1037,1049,1052,1061, 1064,1066,1067,1068,1070, 1071,1074,1075,1081,1084
Telecaption 1082
Telefunken 1048
Toshiba ....1099,1031,1032,1033,1057, 1076,1081,1082
Totevision 1084
Ultra 1049
Universal 1077
Video Concepts ....1036
Vidikron 1061
Wards ....1034,1061,1063,1064,1066, 1067,1068,1072,1073,1075, 1077,1079,1097
White Westinghouse .....1034,1049,1053
Yamaha ....1048,1049,1066,1067, 1068,1072
Zenith ....1038,1043,1044,1049,1064, 1066,1083
VCR/PVR
(Programmable to AUX button)
VCR
Admiral 2035,2074,2075
Aiwa 2056
Akai 2014,2027,2045,2046 2069,2070
Audiovox 2052
Bell & Howell 2049
Broksonic 2050
Calix 2052
Canon 2054,2055
Capehart 2017,2068
Carver 2043,2061
CCE 2060
Citizen 2029,2051,2052,2053
Colortyme 2030,2047
Craig 2019,2024,2038,2051, 2052,2060
Curtis Mathes ...2011,2013,2044,2047,2051, 2054,2055,2080
Daewoo ......2017,2036,2053,2056,2068
Daytron 2017,2036,2068
Denon 202
Dimensia 2044,2080
Electrohome 2024,2052
Emerson ......2021,2024,2039,2045,2050, 2052,2053,2054,2056, 2062,2070
Fisher 2023,2038,2049
Fuji 2046,2054
Funai 2029,2056
Garrard 2056
GE ....2013,2044,2051,2054,2055, 2071,2080
Go Video ......2004,2005,2013,2015,2019,
2020,2081
Goldstar 2013,2024,2026,2047,2052
Gradiente 2024,2056
Harman Kardon 2043,2047
Harwood 2060
Hitachi ...... 2022,2058,2059,2066,2069,2071
JBL 2032
JC Penney ...... 2013,2019,2022,2024,2047, 2048,2049,2050,2051,2052, 2054,2055,2058,2059,2060, 2061,2066
Jensen 2058,2059,2069
JVC 2021,2022,2047,2048,2049,2069,2072
Kenwood 2011,2047,2048,2049, 2069,2072
KLH 2060
Kodak 2052,2054
LG 2052
Lloyds 2011,2029,2038
Logik 2019,2060
LXI 2052
Magnasonic 2019,2024,2036
Magnavox .... 2006,2019,2043,2054,2055, 2061,2065
Marantz 2011,2026,2043,2047,2048,2049,2054,2061
Matsushita 2054
Memorex 2007,2022,2024,2025,2031,
2038,2049,2051,2052,2054,2056,2065,2074,2075
MGA 2062,2070
MGN 2013
Minolta 2022,2058,2059,2066
Mitsubishi .... 2008,2009,2024,2042,2058 2059,2062,2070,2072
Montgomery Ward 2074,2075
Motorola 2054,2074,2075
MTC 2019,2051
Multitech 2051,2056,2060
NEC 2011,2026,2047,2048,2049,2069,2072
Nikko 2052
Noblex 2051
Olympus 2054
Optimus 2024,2028,2052,2074,2075
Optonica 2063
Orion 2021,2024,2039
Panasonic .... 2010,2019,2038,2054,2055, 2067,2083
Pentax 2011,2022,2058,2059, 2066,2071
Philco 2022,2039,2054,2055,2061
Philips 2043,2054,2061,2063
Pioneer ...... 2012,2037,2048,2058,2072,2076
Portland 2017,2068
Proscan 2044,2080
Proton 2019
Quasar 2054,2055
Radio Shack 2024,2052,2063,2075
Radio Shack/Realistic ..... 2049,2051,2052,2054, 2055,2056,2063,2074,
Radix 2052
RCA 2000,2001,2012,2013,2022,
2044,2045,2051,2054,2058,
2059,2066,2071,2078,
2079,2080
Realistic ...... 2013,2024,2028,2031,2038,
2049,2051,2052,2053,2054,
2055,2056,2063,2074,2075
Ricoh 2073,2077
Runco 2065
Samsung 2013,2029,2051,2053
Sansui 2019,2048,2069,2072
Sanyo 2023,2031,2038,2049,2051
Scott 2024,2050,2053,2062
Sears ...... 2011,2022,2023,2024,2031, 2038,2049,2052,2054,2058,
2059,2066
Sharp ..... 2025,2028,2035,2063,2074,2075
Shintom 2019,2046,2059,2060
Signature 2074,2075
Signature 2000 ...... 2031,2035
Singer 2019,2054,2060,2073,2077
Sony 2014,2016,2018,2032,2033,2046,2064
STS 2054,2066
Sylvania .... 2043,2054,2055,2056,2061,2062
Symphonic 2011,2029,2038,2056
Tandy 2049
Tashiko 2052
Tatung 2069
Teac 2056,2069,2078
Technics 2054,2067
Teknika 2024,2052,2054,2056
Toshiba .... 2034,2036,2038,2040,2053, 2058,2062,2070
Totevision 2024,2051,2052
Unitec 2029
Unitech 2051
Vector Research ...... 2011,2047,2048,2053
Video Concepts .... 2011,2047,2048, 2053,2070
Wards ...... 2013,2024,2025,2028,2038,
2043,2051,2052,2053,2054,
2056,2058,2059,2060,2063,
2066,2074,2075,2079
White Westinghouse 2029
XR-1000 2054,2056,2060
Yamaha ...... 2011,2047,2048,2049,2069
Zenith 2027,2046,2065,2073,2077
DVR
Philips 2002
RePlay 2003
PVR
Tivo 2041
TV/VCR Combo
Action 2036
Broksonic 2039
Emerson 2039
GE 2015,2021
Goldstar 2024
Panasonic 2024
continued on next page
Precision 2036
Quasar 2024
Realistic 2038
Zenith 2024
Digital Network Recorder
Sony 2082
DVD
(Programmable to AUX button)
DVD Player
Aiwa 3032
Apex 3001,3002,3024,3025,3042,
3043,3044
Blaupunkt 3054
BOSE 3026,3039
Clarion 3003
Classic 3004
Daewoo 3045,3057
Denon 3033,3058,3059
Emerson 3005,3006
Fisher 3007,3034
Funai 3006,3027
GE 3013,3023,3060
GPX 3014,3
Harman Kardon 3028,3
Hitachi 3029,3
JVC 3030,3035,3040
Kenwood 3061,3062
Koss 3063
Magnavox 3036,3064
Marantz 3065
Memorex 3066
Mintek 3015
Mitsubishi 3067,3068,3069,3070
NAD 3005,3071
Nakamichi 3016
Norcent 3017,3018
Onkyo 3055,3072
Oritron 3019
Panasonic 3008,3073,3074
Philips ......3009,3031,3046,3047,3048,
3049,3085
Pioneer 3050
Proscan 3023,3075
Qwestar 3019
RCA 3000,3023,3051,3076
Sampo 3020
Samsung 3010,3077
Sanyo 3021
Sharp 3037,3078
Sherwood 3022
Sony 3011,3038,3079,3080
Sylvania 3006,3052
Techwood 3081
Toshiba 3012,3053
Yamaha 3082,3083
Zenith 3084
DVD Recorder
Irradio 3056
Home Theater/DVD
BOSE 3039
Onkyo 3055
Portable DVD
Audiovox 3041
Cable Box/ Satellite Receiver
(Programmable to AUX button)
Cable Box
ABC 5003,5004
GE 5003,5004
General Instrument ....5008,5004,5005
Hitachi 5004
Jerrold 5004,5005
Motorola ....5006,5009,5014, 5016
Philips 5015
Pioneer 5002
Proscan 5003,5004
RCA 5005
Scientific Atlanta ....5011,5012,5013
Signature 5004
Sony 5007
Timer Warner 5010
DVR
Philips 5034
Satellite/DVR
DISH Network 5036
Philips 5034
RCA 5017
Sony 5018,5019
Zenith 5023
Satellite
DirecTV 5035
Mitsubishi ....5022
Philips 5021
Pioneer 5020
Express Vu 5031
GE 5033
Hughes 5024
Panasonic 5025
Proscan 5033
RCA 5000,5001,5033
Samsung 5026
Sony 5027,5028,5029
Star Choice 5032
Toshiba 5030
Philips 5034
Audio
(Programmable to AUX button)
Receiver/Amplifier
Yamaha 4011
Receiver/Tuner
Denon 4014,4017
GE 4003
JVC 4012
Kenwood 4008
Mitsubishi 4016
Onkyo 4010
Panasonic 4015
Pioneer 4013
Proscan 4003
RCA 4003
Sony 4009
Yamaha 4011
Audio System
Hitachi 4019
JVC 4022
Kenwood 4020
Panasonic 4023
Philips 4018
Samsung 4024
Sharp 4025
Sony 4026
Technics 4027
Yamaha 4028
CD Player
BOSE 4030
Hitachi 4019
JVC 4022
Kenwood 4020
Panasonic 4023
Philips 4018
Pioneer 4029
Samsung 4024
Sharp 4025
Sony 4026
Technics 4027
Thomson 4021
Yamaha 4028
GE 4007
Proscan 4007
RCA 4007
Tuner/CD Combo
BOSE 4030
Limited Warranty (U.S.)
What your warranty covers:
- Defects in materials or workmanship.
For how long after your purchase:
- 90 days from date of purchase - Unit repair or exchange, which includes parts and labor.
- 91 days to 1 year from date of purchase - Unit repair or exchange, which includes parts only; you pay the labor.
• The warranty for rental units begins with the first rental or 45 days from date of shipment to the rental firm, whichever comes first.
What we will do:
- During the initial 90 days:
Repair or exchange the defective portion of your Hard Drive. If the unit is replaced it will be with a new or, at our option, refurbished unit.
• After the 90 days and within one year:
Repair or exchange the defective portion of your Hard Drive. If the unit is replaced it will be with a new or, at our option, refurbished unit.
We will charge you a flat rate to repair or replace a defective Hard Drive. This charge covers the labor cost for its repair.
How you get service:
- Contact us on the Internet at www.rca.com and have your unit's date of purchase and model/serial number ready. The model/serial number information is on your unit.
- Self diagnostic screens will allow you to troubleshoot your problem over the Internet.
- If after going through the troubleshooting screens, you determine that your player requires service, contact us at 1-866-449-7112. You must contact us to obtain a Service Request Number (SR) for a service repair or exchange. No returns will be accepted without the SR number.
- Proof of purchase in the form of a bill of sale or receipted invoice which is evidence that the product is within the warranty period must be presented to obtain warranty service. For rental firms, proof of first rental is also required.
• Write the SR number on the outside of the carton used to return the unit. Make sure you insure your shipment in case of damage or loss. - Carefully pack the unit using the original box and packing material if possible. Please retain all non-defective accessories that were included with your unit such as the headphones.
-
Include with the shipment:
-
Evidence of purchase date such as a bill of sale.
-
A brief note describing your unit's problem.
-
Your name, address and phone number.
• After we receive your product, it will be repaired, or a new, or at our option, refurbished unit will be shipped to you.
- Please retain a copy of all items loaded into your Hard Drive. Thomson Inc. will not be responsible for your software, firmware, information, or memory data contained in, stored on, or integrated with any products returned to Thomson Inc. for repair or exchange whether in or out of warranty.
What your warranty does not cover:
- Acts of nature, such as but not limited to lightning damage.
- Adjustment of customer controls.
- Damage from misuse or neglect.
• A unit that has been modified or incorporated into other products or is used for institutional or other commercial purposes. - Batteries.
- Units purchased, serviced or operated outside the U.S.A.
- Loss of customer's software, firmware, information, or memory data.
- Installation.
- Shipping damage if the unit was not packed and shipped in the manner prescribed by Thomson Inc..
Product Registration:
- Please complete and mail the Product Registration Card packed with your Hard Drive. It will make it easier to contact you should it ever be necessary. The return of the card is not required for warranty coverage.
Limitation of Warranty:
- THE WARRANTY STATED ABOVE IS THE ONLY WARRANTY APPLICABLE TO THIS PRODUCT. ALL OTHER WARRANTIES, EXPRESS OR IMPLIED (INCLUDING ALL IMPLIED WARRANTIES OF MERCHANTABILITY OR FITNESS FOR A PARTICULAR PURPOSE) ARE HEREBY DISCLAIMED. NO VERBAL OR WRITTEN INFORMATION GIVEN BY THOMSON INC., ITS AGENTS OR EMPLOYEES SHALL CREATE A GUARANTY OR IN ANY WAY INCREASE THE SCOPE OF THIS WARRANTY.
- REPAIR OR REPLACEMENT AS PROVIDED UNDER THIS WARRANTY IS THE EXCLUSIVE REMEDY OF THE CONSUMER. THOMSON INC. SHALL NOT BE LIABLE FOR INCIDENTAL OR CONSEQUENTIAL DAMAGES RESULTING FROM THE USE OF THIS PRODUCT OR ARISING OUT OF ANY BREACH OF ANY EXPRESS OR IMPLIED WARRANTY ON THIS PRODUCT. THIS DISCLAIMER OF WARRANTIES AND LIMITED WARRANTY ARE GOVERNED BY THE LAWS OF THE STATE OF INDIANA. EXCEPT TO THE EXTENT PROHIBITED BY APPLICABLE LAW, ANY IMPLIED WARRANTY OF MERCHANTABILITY OR FITNESS FOR A PARTICULAR PURPOSE ON THIS PRODUCT IS LIMITED TO THE APPLICABLE WARRANTY PERIOD SET FORTH ABOVE.
How state law relates to warranty:
- Some states do not allow the exclusion nor limitation of incidental or consequential damages, or limitations on how long an implied warranty lasts, so the above limitations or exclusions may not apply to you.
- This warranty gives you specific legal rights, and you also may have other rights that vary from state to state.
If you purchased your product outside the United States:
- This warranty does not apply. See your dealer for warranty information.
Visit the RCA web site at www.rca.com
Please do not send any products to the Indianapolis address listed in this manual or on the carton. This will only add delays in service for your product.
Thomson Inc.
10330 North Meridian Street
Indianapolis, IN 46290
©2006 Thomson Inc.
Trademark(s)® Registered
Marca(s) Registrada(s)
Printed in China
TOCOM 56317580

THOMSON
THOMSON

- WARNING
- CAUTION
- FCC and Industry Canada Information
- Technical Specification
- Product Registration
- Product Information
- End-User License Agreement
- ACKNOWLEDGMENT
- LICENSE
- LICENSE RESTRICTIONS
- TERM AND TERMINATION
- WARRANTY DISCLAIMER
- OWNERSHIP RIGHTS
- LIMITATION OF LIABILITY
- WINDOWS MEDIA
- GRANT OF LICENSE.
- THIRD PARTY SOFTWARE
- GOVERNING LAW
- GENERAL TERMS
- ZiLOG Software End-User License Agreement
- Chapter 1: Before You Begin
- Things to consider before you get started....3
- Unpack the box and check your parts....4
- What you want to do....5
- Overview of buttons and jacks....6
- Docking Station (Back view) 9
- Connecting the Docking Station to Your Components....10
- Why You Should Connect the IR Blaster 11
- Setting Up Your Lyra Portable Multi-Media Recorder....12
- Software Setup 13
- Updating the Lyra Software....14
- Connecting the Lyra Recorder to the Computer....14
- LyraDJ 15
- Transferring Files to Your Lyra Recorder 16
- Disconnecting Your Lyra from the Computer 17
- Chapter 2: The Remote Control
- Explanation of the Buttons....18
- Find out if the remote can operate your TV 20
- Programming the remote to operate your TV....20
- Programming the remote to operate other components 21
- Using the remote to operate other components 21
- Chapter 3: Using the Seup Menu
- Setup Menu....23
- Chapter 4: Playing Files
- Chapter 5: Additional Information
- Things to consider before you get started...
- Computer System Requirements
- Caution While Driving
- Back up your data
- Things to consider before you get started... (continued)
- Important Battery Information
- Check For Updates
- Unpack the box and check your parts
- What you want to do Go to page...
- Video
- Music
- Photos
- Audible
- Overview of buttons and jacks
- Front View
- Top View
- right Side View
- Bottom View
- Back View
- Chapter 1
- Docking Station (Back view)
- USB Adapter
- Connecting the Docking Station to Your Components
- Connect the Docking Station to the TV
- Connect the Docking Station to the Set-top Box
- Plug the power cord into the docking station DC IN jack and into an AC outlet.
- Connect the Docking Station to the Computer
- Why You Should Connect the IR Blaster
- How to Find the Remote Sensor
- Placing the IR Blaster
- Setting Up Your Lyra Portable Multi-Media Recorder
- Clock
- Signal Type
- Software Setup
- Install software in your computer (Windows XP and 2000 support only)
- Insert the Included CD-ROM into the CD-ROM Drive
- Updating the Lyra Firmware
- Connecting the Lyra Recorder to the Computer
- LyraDJ
- Important Note:
- Transferring Files to Your Lyra Recorder (MTP USB Protocol)
- Transferring Files via Windows Media Player 10 (Windows XP only)
- Transfer Files via Windows Explorer (MSC USB Protocol)
- Disconnecting Your Lyra from the Computer (MSC USB Protocol)
- Button Descriptions for Lyra Mode
- Button Descriptions for Other Components
- Find out if the remote can operate your TV
- Programming the remote to operate your TV
- Direct Entry
- Automatic Code Search
- Programming the remote to operate other components
- Using the remote to operate other components
- Know the mode
- Understanding the INPUT button
- Setup Menu
- Tip
- Display Settings Menu
- Record Settings Menu
- Notes:
- Audio Settings Menu
- Audio Shuffle
- Audio Repeat
- Video Repeat
- Clock Settings Menu
- Basic Information
- Basic Screen Information
- Basic Operation
- Adjusting the Volume
- Switching the Speaker and Headphones
- Recording Video to Your Lyra Recorder
- Recording from an Audio/Video Component
- Transferring Video Files to Lyra Recorder (MSC USP Protocol)
- Playing Video
- Video Options Menu
- Video Settings Banner
- Tip:
- Viewing Video Content on Your TV
- Recording Audio to Your Lyra Recorder
- Recording from Your Audio Receiver
- Audio Recordings Banner
- Recording Audio from Your Computer
- Transferring Audio Files to Your Lyra Recorder
- Transferring Predefined Audio Playlists to your Lyra Recorder
- Playing Music
- Music Options Menu
- Creating Music Playlists
- Playing Playlists
- Music Playlist Options Menu
- Music Playback Screen
- Music Settings Banner
- Playing Your Lyra Recorder in Your Car Stereo
- Playing Your Lyra Recorder on Your Stereo System
- Transferring Photo Files to Your Lyra Recorder
- Viewing Photos
- Photos Options Menu
- Photo Settings Banner
- Creating a Photo Slideshow
- Viewing a Photo Slideshow
- Photo Slideshow Settings Banner
- Recording Voice Labels
- Viewing Photos on Your TV
- Playing Audible Files
- Audible Options Menu
- Audible Playback Screen
- Audible Settings Banner
- Viewing Files
- Files Options Menu
- Creating Folders
- Options Menu Items
- Using the On-Screen Keyboard
- Portable Hard Drive Capability
- High-Speed Card Reader
- Inserting and Removing Memory Cards
- Copying Files from the Memory Card to the Lyra Recorder
- Copying Files from the Lyra Recorder to the Memory Card
- Tips and Troubleshooting
- Frequently Asked Questions
- How do I return to the Main menu?
- Why should I profile my content?
- How do I profile content?
- Why can't I to play Video or Audio files directly from the SD/MMC memory card?
- What is an ".avi file"?
- USB Protocol
- Remote Code List
- TV
- (Programmable to TV button)
- HDTV
- HDTV Monitor
- HDTV Projection Monitor
- LCD HDTV
- Projection HDTV
- TV Monitor
- VCR/PVR
- (Programmable to AUX button)
- VCR
- DVR
- PVR
- TV/VCR Combo
- Digital Network Recorder
- DVD
- DVD Player
- DVD Recorder
- Home Theater/DVD
- Portable DVD
- Cable Box/ Satellite Receiver
- Cable Box
- Satellite/DVR
- Satellite
- Audio
- Receiver/Amplifier
- Receiver/Tuner
- Audio System
- CD Player
- Tuner/CD Combo
- Limited Warranty (U.S.)
- What your warranty covers:
- For how long after your purchase:
- What we will do:
- How you get service:
- What your warranty does not cover:
- Product Registration:
- Limitation of Warranty:
- How state law relates to warranty:
- If you purchased your product outside the United States:
- Visit the RCA web site at www.rca.com
Brand : RCA
Model : Lyra X3030
Category : Media player