
TGV-7E - Camera accessory SONY - Free user manual and instructions
Find the device manual for free TGV-7E SONY in PDF.


| Product Type | Camera Tripod |
| Brand | Sony |
| Model | TGV-7E |
| Material | Aluminum alloy |
| Maximum Height | 150 cm (59 in) |
| Minimum Height | 40 cm (15.7 in) |
| Folded Length | 45 cm (17.7 in) |
| Load Capacity | 3 kg (6.6 lb) |
| Weight | 1.2 kg (2.6 lb) |
| Leg Sections | 4 |
| Lock Type | Flip locks |
| Head Type | Pan and tilt head |
| Quick Release Plate | Yes, compatible with Arca-Swiss |
| Bubble Level | Yes |
| Hook for Weight | Yes, at bottom of center column |
| Spike Feet | Yes, retractable |
| Power Source | None (manual operation) |
| Maintenance | Clean with dry cloth; avoid solvents |
| Safety | Ensure all locks are tight before mounting camera |
| Spare Parts Availability | Contact Sony support for replacement parts |
| Repairability | User-replaceable leg locks and rubber feet |
Frequently Asked Questions - TGV-7E SONY
User questions about TGV-7E SONY
0 question about this device. Answer the ones you know or ask your own.
Ask a new question about this device
Download the instructions for your Camera accessory in PDF format for free! Find your manual TGV-7E - SONY and take your electronic device back in hand. On this page are published all the documents necessary for the use of your device. TGV-7E by SONY.
USER MANUAL TGV-7E SONY
This mark indicates that this product is a genuine accessory for Sony video products. When purchasing Sony video products, Sony recommends that you purchase accessories with this "GENUINE VIDEO ACCESSORIES" mark.
TV TUNER UNIT
Operating Instructions
Sony Corporation © 1996 Printed in Japan

![graph TD A["TV"] --> B["VHF/UHF"] B --> C["Connecting cable (supplied)"] C --> D["Signal splitter"] D --> E["Mixer"] E --> F["UHF aerial"] F --> G["EXT ANT"] G --> H["TV"]](/content/2026/05/973968/images/ae23ef36eb32df0ec296f540e376323ec3a5f98f1871ea3e1a5fd01d683060a6.jpg)
English
Features
- The TGV-7E TV tuner unit is for a camcorder having the LCD screen and intelligent accessory shoe. • The power to the tuner unit is supplied from the camcorder.
- The tuner unit is turned on or off simultaneously with the camcorder.
- You can enjoy watching and recording TV programmes by camcorder using this unit. (The sound is monaural.)
Precautions
Operation - Do not carry the camcorder by the tuner unit. - Keep the intelligent accessory shoe contact clean. Avoid touching the contact. - Put the tuner unit in the supplied carrying case when it is not attached to the camcorder. - Prevent metal objects such as a key holder from touching the intelligent accessory shoe contact. - Hold the tuner unit while adjusting the aerial. - Should any solid object or liquid fall into the cabinet, especially into the contact, have it checked by qualified personnel before operating it any further. - Avoid rough handling or mechanical shock to the unit. - Do not wrap up the unit and operate it because heat may build up internally. - Avoid using and storing the unit in locations:
- susceptible to vibration - exposed to strong magnetic fields - near TV or radio transmitters where strong radio waves are generated - on the sand
Power sources
If the battery becomes low, the unit may not operate. Use the AC power adaptor for an important occasion.
Care
Clean the unit body with a dry, soft cloth, or a soft cloth lightly moistened with a mild detergent solution. Do not use any type of solvent, as this may damage the finish.
Getting Started
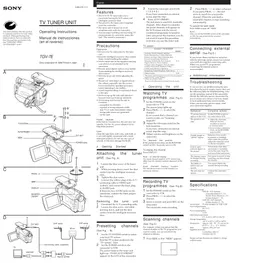
Attaching the tuner unit (See Fig. A) 1. Loosen the shoe screw of the tuner unit. 2. While pressing down, insert the shoe contact into the intelligent accessory shoe. 3. Tighten the shoe screw. 4. Connect the yellow plug of the A/V connecting cable to the VIDEO jack (yellow), and connect the black plug to the AUDIO jack. If there are two AUDIO jacks on the camcorder, connect the black plug to the white jack. Removing the tuner unit: 1. Disconnect the A/V connecting cable. 2. Loosen the shoe screw, and while pressing down, pull out the shoe contact from the intelligent accessory shoe.
1 Loosen the shoe screw of the tuner unit. 2 While pressing down, insert the shoe contact into the intelligent accessory shoe. 3 Tighten the shoe screw. 4 Connect the yellow plug of the A/V connecting cable to the VIDEO jack (yellow), and connect the black plug to the AUDIO jack. If there are two AUDIO jacks on the camcorder, connect the black plug to the white jack. Removing the tuner unit: 1 Disconnect the A/V connecting cable. 2 Loosen the shoe screw, and while pressing down, pull out the shoe contact from the intelligent accessory shoe.
3. Extend the telescopic aerial fully (1 2 3 4 5). If you have connected an external aerial, skip this step. 4. Press AUTO PRESET. The unit starts to search for receivable channels. After about two minutes, the preset channels will appear on the LCD screen and the lowest-numbered programme is tuned in. Once you preset the channels, you do not need to repeat this procedure each time you use this tuner unit.
1 Set the TV SYSTEM switch to select your local TV system. Find the TV system position in the "TV system" chart. 2 Set the POWER switch on the camcorder to VTR. The power lamp on the tuner unit lights up. "PUSH AUTO PRESET" appears in the LCD of the camcorder.
3 Extend the telescopic aerial fully (1 2 3 4 5). If you have connected an external aerial, skip this step. 4 Press AUTO PRESET. The unit starts to search for receivable channels. After about two minutes, the preset channels will appear on the LCD screen and the lowest-numbered programme is tuned in. Once you preset the channels, you do not need to repeat this procedure each time you use this tuner unit.
Australia, Austria, Bahrain, Belgium, Bosnia-Hercegovina, Croatia, Denmark, Finland, Germany, India, Indonesia, Italy, Kuwait, Luxembourg, Macedonia, Malaysia, Netherlands, New Zealand, B/G Nigeria, Norway, Oman, Pakistan, Portugal, Qatar, Singapore, Slovenia, Spain, Sweden, Switzerland, Thailand, Turkey, United Arab Emirates, Yugoslavia Hong Kong, United-Kingdom, South Africa I China, Czecho D/K * This tuner unit is designed to receive TV programmes based on PAL colour systems. ** These are common names. They may be different from formal country names.
Operating the unit
Australia, Austria, Bahrain, Belgium, Bosnia-Hercegovina, Croatia, Denmark, Finland, Germany, India, Indonesia, Italy, Kuwait, Luxembourg, Macedonia, Malaysia, Netherlands, New Zealand, B/G Nigeria, Norway, Oman, Pakistan, Portugal, Qatar, Singapore, Slovenia, Spain, Sweden, Switzerland, Thailand, Turkey, United Arab Emirates, Yugoslavia Hong Kong, United-Kingdom, South Africa I China, Czecho D/K * This tuner unit is designed to receive TV programmes based on PAL colour systems. ** These are common names. They may differ from formal country names.
programmes (See Fig. C)
1. Set the POWER switch on the camcorder to VTR.
programs (See Fig. C)
1 Set the POWER switch on the camcorder to VTR.
The power lamp lights up. 2 Press PROG. +/- to select the channel. If you cannot find a channel you want to watch, see "Scanning channels". 3 Adjust the telescopic aerial for the best reception. If you have connected an external aerial, skip this step.
4 Adjust volume and brightness on the camcorder.
To improve the picture If the picture is not clear, set the BOOSTER switch to OFF. Normally set it to ON.
To display the channel, press DISPLAY.
Note on channel display: The actual channel numbers of TV stations may differ from the channel numbers displayed on the LCD.
Last channel memory function: The unit always turns on to the channel you previously selected.
Recording TV
programmes (See Fig.B)
1 Set the POWER switch on the camcorder to VTR. 2 Press PROG. +/- to select the channel. 3 Insert a cassette and press REC on the camcorder. The camcorder starts recording.
Scanning channels
(See Fig.C)
For example, when you cannot find the channel number of the TV programme you want to watch, you can search for the channel as follows.
1 Press SEEK so that "SEEK" appears.

2 Press PROG. +/- to select a channel. If you press PROG. +/-, the unit starts to search for a receivable channel. When the unit finds a receivable channel, it stops searching automatically.
To cancel the seek mode
Press SEEK to turn off "SEEK".
Note
Once you set the POWER switch on the camcorder to OFF, the seek mode will be canceled automatically.
Connecting external aerial (See Fig.D)
If you cannot obtain satisfactory reception with the telescopic aerial, connect an external aerial with the supplied connecting cable. When you record TV programmes, connecting the external aerial is recommended.
z Additional information
Troubleshooting
If you run into any problem using the unit, first check the power supply source, then use the following table for troubleshooting. Also see the operation manual of the camcorder. Should the difficulty persist, disconnect the power source and contact your Sony dealer or local authorized Sony service facility. When you send this unit for repair, send your camcorder together.
| Symptom | Corrective actions |
| TV picture does not appear on the LCD. | Set the POWER switch on the camcorder to VTR. |
| The picture is not clear. | Adjust the telescopic aerial for the best reception or connect an external aerial.If you are near a television tower, set the BOOSTER switch to OFF. |
| Double images or “ghosts” appear. | Reflection from nearby mountains or buildings often causes this problem.Adjust the telescopic aerial for the best reception. |
| Dots or spot patterns appear on the picture. | Noises from a hair drier, automobile or motorbike can be the cause. Keep the unit away from such noises. |
| The channel cannot be changed during recording. | First pause to record or stop recording, and then change the channel. |
| The DISPLAY button does not operate. | You cannot display the channel during recording. |
| The unit does not operate. | Connect the camcorder firmly. |
Specifications
Channel coverage
THF E2 - E12 channels
(Australia channel 0 – 11)
(South Africa channel 4 – 13)
(China channel 1 – 12)
JHF E21 – E69 channels
(China channel 13 - 57)
Aerial input 75-ohm minijack for VHF/UHF
Power requirements PG72V
Power consumption
1.4 W
Operating temperature
Storage temperature
-20 °C to 60 °C (-4°F to 140°F)
Dimensions Approx. 130 · 55 · 70 mm (w/h/d)
(5 1/8 · 2 1/4 · 2 7/8 inches)
Mass Approx. 190 g (6.7 oz)
Accessories
Connecting cable
Carrying case (1)
Design and specifications are subject to change without notice.
SONY


- TV TUNER UNIT
- OPERATING INSTRUCTIONS
- ENGLISH
- FEATURES
- PRECAUTIONS
- GETTING STARTED
- ATTACHING THE TUNER UNIT (SEE FIG. A) 1. LOOSEN THE SHOE SCREW OF THE TUNER UNIT. 2. WHILE PRESSING DOWN, INSERT THE SHOE CONTACT INTO THE INTELLIGENT ACCESSORY SHOE. 3. TIGHTEN THE SHOE SCREW. 4. CONNECT THE YELLOW PLUG OF THE A/V CONNECTING CABLE TO THE VIDEO JACK (YELLOW), AND CONNECT THE BLACK PLUG TO THE AUDIO JACK. IF THERE ARE TWO AUDIO JACKS ON THE CAMCORDER, CONNECT THE BLACK PLUG TO THE WHITE JACK. REMOVING THE TUNER UNIT: 1. DISCONNECT THE A/V CONNECTING CABLE. 2. LOOSEN THE SHOE SCREW, AND WHILE PRESSING DOWN, PULL OUT THE SHOE CONTACT FROM THE INTELLIGENT ACCESSORY SHOE
- EXTEND THE TELESCOPIC AERIAL FULLY (1 2 3 4 5). IF YOU HAVE CONNECTED AN EXTERNAL AERIAL, SKIP THIS STEP. 4. PRESS AUTO PRESET. THE UNIT STARTS TO SEARCH FOR RECEIVABLE CHANNELS. AFTER ABOUT TWO MINUTES, THE PRESET CHANNELS WILL APPEAR ON THE LCD SCREEN AND THE LOWEST-NUMBERED PROGRAMME IS TUNED IN. ONCE YOU PRESET THE CHANNELS, YOU DO NOT NEED TO REPEAT THIS PROCEDURE EACH TIME YOU USE THIS TUNER UNIT
- AUSTRALIA, AUSTRIA, BAHRAIN, BELGIUM, BOSNIA-HERCEGOVINA, CROATIA, DENMARK, FINLAND, GERMANY, INDIA, INDONESIA, ITALY, KUWAIT, LUXEMBOURG, MACEDONIA, MALAYSIA, NETHERLANDS, NEW ZEALAND, B/G NIGERIA, NORWAY, OMAN, PAKISTAN, PORTUGAL, QATAR, SINGAPORE, SLOVENIA, SPAIN, SWEDEN, SWITZERLAND, THAILAND, TURKEY, UNITED ARAB EMIRATES, YUGOSLAVIA HONG KONG, UNITED-KINGDOM, SOUTH AFRICA I CHINA, CZECHO D/K * THIS TUNER UNIT IS DESIGNED TO RECEIVE TV PROGRAMMES BASED ON PAL COLOUR SYSTEMS. ** THESE ARE COMMON NAMES. THEY MAY BE DIFFERENT FROM FORMAL COUNTRY NAMES
- PROGRAMMES (SEE FIG. C)
- SET THE POWER SWITCH ON THE CAMCORDER TO VTR
- PROGRAMS (SEE FIG. C)
- RECORDING TV
- PROGRAMMES (SEE FIG.B)
- SCANNING CHANNELS
- CONNECTING EXTERNAL AERIAL (SEE FIG.D)
- Z ADDITIONAL INFORMATION
- TROUBLESHOOTING
- SPECIFICATIONS
- SONY
Brand : SONY
Model : TGV-7E
Category : Camera accessory