
RoundTrip Sport 100500 - Bike accessory THULE - Free user manual and instructions
Find the device manual for free RoundTrip Sport 100500 THULE in PDF.


| Product Type | Roof-mounted bike carrier |
| Brand | Thule |
| Model | RoundTrip Sport 100500 |
| Compatibility | Most vehicles with roof racks; fits up to 2 bikes |
| Capacity | 2 bikes (max load 30 kg) |
| Material | Aluminum and reinforced plastic |
| Dimensions (L x W x H) | 140 x 30 x 10 cm |
| Weight | 16 kg |
| Mounting Type | Thule roof rack system (requires crossbars) |
| Locking System | Integrated locks for bikes and rack attachment |
| Lighting Board | Not applicable (roof-mounted) |
| Maintenance | Periodic cleaning with mild soap and water; lubricate moving parts |
| Cleaning | Hand wash using non-abrasive cloth; do not use high-pressure washers |
| Safety Notes | Always secure bikes with straps; check tightness before driving; do not exceed speed limits |
| Spare Parts | Available from Thule dealers or online store |
| Repairability | Modular design; replacement parts can be ordered; user-replaceable parts include straps and cradles |
| Power Supply | None (manual operation) |
| Warranty | Limited lifetime warranty |
| Certifications | City Crash tested, TÜV approved |
Frequently Asked Questions - RoundTrip Sport 100500 THULE
User questions about RoundTrip Sport 100500 THULE
0 question about this device. Answer the ones you know or ask your own.
Ask a new question about this device
Download the instructions for your Bike accessory in PDF format for free! Find your manual RoundTrip Sport 100500 - THULE and take your electronic device back in hand. On this page are published all the documents necessary for the use of your device. RoundTrip Sport 100500 by THULE.
USER MANUAL RoundTrip Sport 100500 THULE
PARTS INCLUDED • PIÈCES INCLUDES • PIEZAS INCLUIDAS



| part pièce parte | description description descripcion | part number numéro de pièce numero de parte | 9002XT qty. 9002XT qté 9002XT cant. |
| A | top shell / coque supérieure / parte superior de la caja | 05325 | 1 |
| B | bottom shell / coque inférieure / base de la caja | 05327 | 1 |
| C | strap harness / harnais pour sangles / arnés para la correa | 05709 | 1 |
| D | plastic shield / protection en plastique / protector de plástico | 05328 | 1 |
| E | protective foam / mousse de protection / espuma protectora | 05329 | 2 |
| F | tie-down strap / sangle d'attache / correa de sujeción | 10169 | 2 |
| PARTS BAG / SAC DE PIÈCES / BOLSA DE PIEZAS | 05360 | 1 | |
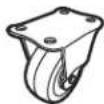
| G | caster / roulette / ruedita | 05331 | 2 |
| H | lock nut / écrou de blocage / contratuerca | 05338 | 8 |
| I | screw / vis / tornillo | 05340 | 8 |
| J | washer / rondelle / arandela | 05339 | 8 |
PRODUCT REGISTRATION / ENREGISTREMENT DE PRODUIT / REGISTRO DE PRODUCTO
Model # ____ Purchase Date ____/____/____ Place of Purchase ____
Register online at www.thule.com/register THULE 42 Silvermine Road Seymour, Connecticut 06483 (800) 238-2388
WARNINGS / LIMITATIONS • AVERTISSEMENTS / LIMITATIONS • ADVERTENCIAS / LIMITACIONES
- The Bike Travel Case is designed to accommodate bicycles of a variety of sizes and frame designs, which may require extra protection in areas susceptible to scratches and dents.
-
Wheels should be carefully packed to avoid damage to spokes.
-
La caisse de transport pour vélo est conçue pour contenir des vélos de différentes tailles et de différents modèles de cadre qui peuvent nécessiter une protection accrue à certains endroits susceptibles d'être égratignés et bosselés.
-
Les roues doivent être emballées soigneusement pour éviter d'endommager les rayons.
-
La Caja de viaje para bicicleta está diseñada para albergar bicicletas de diferente tamaño y tipo de cuadro, las que pueden necesitar de protección adicional en áreas susceptibles a rayones o abolladuras.
- Las ruedas deben cargarse con cuidado para evitar dañar los rayos.
| ASSEMBLYMONTAGEINSTALACIÓN | ||
| PREPARING YOUR BIKE TRAVEL CASE: | PRÉPARATION DE VOTRE CAISSE DETRANSPORT POUR VÉLO: | PREPARACIÓN PARA SU CAJA DEVIAJE PARA BICICLETA: |
| The Bike Travel Case will arrive in a clamshell position. Remove the top half, foam pads and plastic shield - set aside. | La caisse de transport pour vélo sera livrée en position fermée (comme un co-quillage). Retirez la partie supérieure, les coussinets en mousse et le recouvrement en plastique - les mettre de côté. | La Caja de transporte llegará cerrada.Retire la mitad superior, las planchas de espuma y la protección plástica - déjelas a un lado. |
| FOR EXTRA PROTECTION: | POUR UNE PROTECTIONSUPPLÉMENTAIRE: | PARA PROTECCIÓN ADICIONAL: |
| Using extra padding wherever possible - foam or bubble wrap secure with zipties or string works great and is readily available at your local shipping supply or hardware store. | En utilisant des protections autant que possible, de la mousse ou du film à bulles, fixez avec des colliers ou des ficelles en plastique disponibles dans votre magasin de fournitures d'emballage ou à votre quincaillerie locale. | Use acolchado adicional donde sea posible, envolviendo las piezas en envoltorio de espuma o plástico de burbujas y atándolo con cierres de cremallera o cordel que funcionan muy bien y se encuentran fácilmente en tiendas de suministros postales y ferreterías. |
| 2 |  | · Assemble wheels to bottom shell as shown.Montez les roues sur la coque inférieure, comme indiqué.Ensamble las ruedas en la parte inferior de la caja tal como se muestra. |
PACKING YOUR BIKE STEPS 3-10 / INSTALLEZ VOTRE VÉLO - ÉTAPES 3 À 10 / EMBALADO DE SU BICICLETA PASOS 3-10
| 3 | PREPARING YOUR BIKEPRÉPARATION DU VÉLOPREPARACIÓN DE LA BICICLETA | |
| Remove front and rear wheels. Remove skewers.Retirez les roues avant et arrière. Retirez les blocages de moyeux.Saque las ruedas delanteras y traseras. Saque los ejes.Unthread pedals.Dévissez les pédales.Desenrosque los pedales.Remove seat/seat post. DON'T FORGET to loosely tighten the binder bolt after the seat post has been removed.Déposez la selle/tige de selle. N'OUBLIEZ PAS de desserrer légèrement le boulon de selle une fois la tige de selle retirée.Saque el sillín y el poste del sillín. NO SE OLVIDE DE apretar un poco el perno de fijación después de sacar el poste del sillín.Position your bike for disassembly. Place items in a separate bag to ensure nothing is left behind.Préparez votre vélo pour le démonter. Placez les pièces dans des sacs individuels pour vous assurer de ne rien oublier.Prepare su bicicleta para ser desarmada. Coloque los elementos en bolsas separadas para asegurarse de no olvidar nada. | HINT: Before removing seat post, mark height using masking tape (or similar).CONSEIL: Marquez la position de votre selle avec du ruban adhésif afin de faciliter le remontage.CONSEJO: Marque la posición de su sillín concinta para facilitar la instalación posterior. | |
4


wheellayer roues capa de ruedas
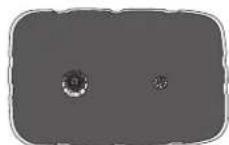

- Lay rear wheel into the rear of bottom shell cog side up followed by the front wheel. Place plastic shield over the wheels so that it rests on the shelf around the perimeter of the bottom shell. The larger hole should be positioned over the cog set. Place one layer of foam over plastic shield.
- Disassemble handlebars. Depending on your frame style you may need to either loosen handlebars and position along the top tube or remove handlebars completely and position along the fork.
HINT: Reinforce this area against metal-on-metal contact!
- Line up the right crank arm (chain side) with the chain stay tube. Cover chain with rag or other material to prevent chain oil from getting on other bike case contents.
HINT: To prevent damage while in transit, you may wish to secure the derailleur tension pulley to the chain stay using your own zip-tie.
- Secure the bike frame into a center position by threading the tie-down straps, which we have provided, through the frame and metal rings attached to the inside of the bike case.
Secure the bike frame into a center position by threading the tie-down straps, which we have provided, through the frame and metal rings attached to the inside of the bike case.
- Place seat/post either inside frame triangle or behind seat stay.
HINT: This area may require additional security against metal-on-metal contact by using your own foam padding or bubble wrap.
- Lay second foam sheet over frame. Make sure no bicycle parts are touching sides of case.
- Place top shell over bottom shell of case.
HINT: Handle and Wheel icons at the top and bottom of the top shell indicate proper alignment.
- Loosen all straps. Latch buckles then pull tabs to cinch straps snugly.
- For extra security, rings on both sides of case will accept most padlocks.

Brand : THULE
Model : RoundTrip Sport 100500
Category : Bike accessory