HOV17 - Oven ElectriQ - Free user manual and instructions
Find the device manual for free HOV17 ElectriQ in PDF.


| Product Type | Built-in Electric Oven |
| Brand | ElectriQ |
| Model | HOV17 |
| Capacity | 65 Liters |
| Energy Efficiency Class | A |
| Energy Consumption (Conventional) | 0.93 kWh |
| Energy Consumption (Fan Forced) | 0.79 kWh |
| Dimensions (H x W x D) | 595 x 595 x 548 mm |
| Weight | 30 kg |
| Color | Stainless Steel |
| Number of Cooking Functions | 8 (including Conventional, Fan, Grill, Defrost) |
| Temperature Range | 50°C – 250°C |
| Timer | Electronic with End Cooking |
| Display | LED |
| Control Type | Rotary Knobs |
| Interior Light | Yes |
| Cleaning System | Enamel Easy-Clean Interior |
| Safety Features | Child Lock, Auto Shut-off |
| Door Type | Double Glazed & Cool Door |
| Number of Shelves | 3 |
| Power Supply | 230 V ~ 50 Hz, 2.8 kW |
| Reparability | Spare Parts Available; Repairable by Professionals |
| Manual | Free Download in PDF from Official Website |
Frequently Asked Questions - HOV17 ElectriQ
User questions about HOV17 ElectriQ
0 question about this device. Answer the ones you know or ask your own.
Ask a new question about this device
Download the instructions for your Oven in PDF format for free! Find your manual HOV17 - ElectriQ and take your electronic device back in hand. On this page are published all the documents necessary for the use of your device. HOV17 by ElectriQ.
USER MANUAL HOV17 ElectriQ
natural_image
Exterior view of a modern electric stove with a white air fryer and cooking dish (no text or symbols visible)Thank3you3for3choosing3
electri ^3
Please3read3this3user3manual3before3using3this3oven3
and3keep3it3safe3for3future3reference.3Visit3our3page3www.electriQ.co.uk3
for3our3entire3range3of3Intelligent3Electricals
HOV17
33
3
3
Contents
Safety Instructions 3
Features and Parts 8
Operation 9
Cooking Guide 12
Cooking Times Table 15
Cleaning and Maintenance 16
Troubleshooting 17
SAFETY INSTRUCTIONS
Important
- Carefully read the instructions before operating the unit
- This appliance is for indoor use only.
- Rating: This unit must be only connected to a 220-240 V / 50 Hz earthed outlet. Always check the rating label against your electrical supply.
- If you are in any doubt about the suitability of your electrical supply have it checked and 7 if necessary 7 retested by a qualified electrician.
- This halogen oven has been tested and is safe to use. However7 as with any electrical appliances - use it with care.
- Disconnect the power plug from socket before dismantling7 assembling or cleaning.
- Do not clean the unit by spraying it or immersing it in water.
- Never operate this appliance if the cord or plug is damaged. Ensure the power cord is not stretched or exposed to sharp object/edges.
- 33Do3not3pull3the3mains3cable3to3disconnect3 the3mains3plug3from3the3mains.3
•33Do3not3use3the3appliance3if3any3part3or3any3accessory3is3damaged3or3defective.33
•333A3damaged3supply3cord3or3plug3should3be3replaced3by3the3manufacturer3or3a3qualified3electrician3in3order3to3avoid3a3hazard.3 - 33Avoid3touching3any3moving3parts3of3the3 appliance.3
- 33Make3sure3unit3is3assembled3correctly3before3use.3
- 33Never3insert3fingers73or3any3other3objects3into3the3moving3parts3of3the3appliance.
•33This3appliance3is3not3intended3for3use3by3persons32including3children53with3reduced3physical73sensory3or3mental3capabilities.3It3is3also3not3intended3for3use3by3those3with3a3lack3of3experience3and3knowledge73unless3they3have3been3given3supervision3or3instruction3concerning3the3use3of3the3appliance3by3a3person3responsible3for3their3safety.3 - 33Do3not3leave3children3unsupervised3with3this3appliance.
- Any service other than regular cleaning should be only performed by an authorized service representative. Failure to comply could result in a voided warranty.
- Do not use the appliance for any other purposes than its intended use.
- Always place the unit on a dry and stable surface.
- Do not use the appliance in places with high humidity (>80%RH)
- Do not immerse the appliance in water or other liquids. If the appliance is immersed in water or other liquids by mistake, do not touch the appliance with your hands. Immediately remove the mains plug from the wall socket. If the appliance is immersed in water or other liquids, discard it.
- Dispose of packaging properly keeping plastic bags away from babies and young children.
Unit Safety Protection and Performance Tips
- 33Make3sure3the3unit3is3correctly3 assembled.3The3control3panel3lid3should3fit3perfectly3the3cooking3glass3bowl3
•33The3unit3has3a3safety3protection3switch3that3will3stop3the3unit3when3you3remove3the3lid.3If3the3safety3protection3mechanism3is3broken3please3stop3using3the3unit3immediately.3
•33NEVER3INSERT3A3KNIFE3OR3ANY3OTHER3 UTENSILS3INTO3THE3CONVECTION3OVEN.3This3 may3damage3the3mechanism3and3cause3a3safety3 hazard.3Contact3with3exposed3electrical3parts3 could3result3in3electrical3shock.3 - 33Do3not3touch3the3hot3glass3bowl3or3glass3lid3when3removing3items3from3the3convection3oven.3Use3the3tongues3provided3or3alternative3implements.3The3temperature3of3the3outer3glass3surface3may3be3high3when3the3appliance3is3in3operation.3
- 33Do3not3touch3any3hot3metal3accessory3 with3bare3hands3
- 33Allow3the3appliance3to3cool3before3cleaning.3
- 33When3heating3food3remove3cardboard3 lids3from3food3containers3and3replace3them3with3 aluminium3foil3before3placing3in3the3appliance.3 When3using3aluminium3foil73keep3it3from3 touching3the3heating3element3on3the3lid.3Never3 use3cling3film73wood3or3plastic3recipients73baking3 sheets.3Any3container3placed3in3this3appliance3 must3not3be3sealed3and3must3have3enough3 capacity3to3let3liquids3expand.33
•33DO3NOT3MOVE3appliance3when3in3operation3
•33Ensure3the3power3cord3does3not3touch3the3hot3oven3housing3when3in3use3
- 33Never3leave3the3appliance3unattended3 when3in3use.33
- 33Store3the3appliance3indoors3in3a3dry3 location.33
•33Take3care3when3opening3the3lid3of3the3appliance.3Hot3steam3may3come3out33
•33This3appliance3is3not3intended3to3be3operated3by3means3of3an3external3timer3or3separate3remote-control3system.3
3
3
Features and Parts 3
3
3
3
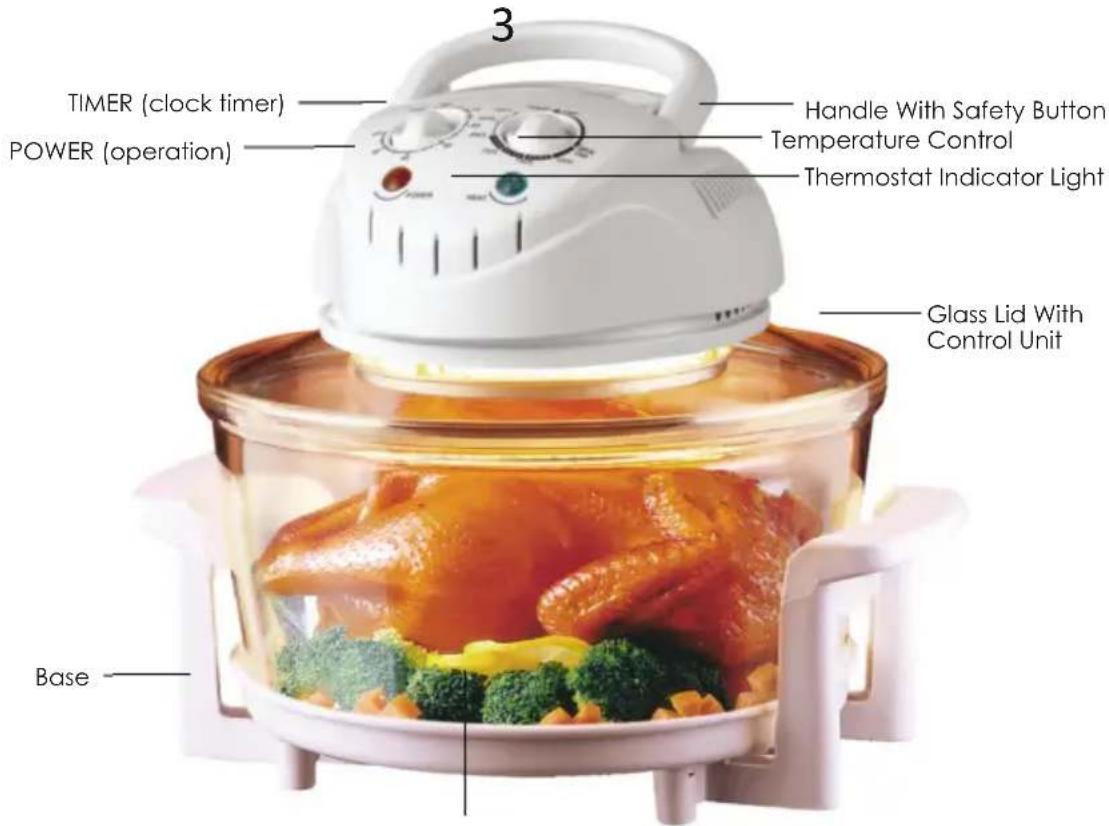
Glass Bowl
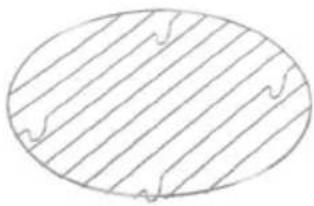
natural_image
Simple line drawing of an oval shape with diagonal stripes and small wavy marks at the center (no text or symbols)Low Rack
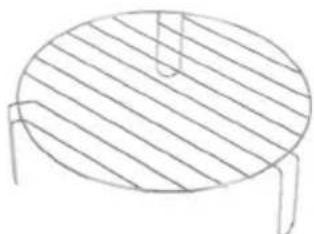
natural_image
Simple line drawing of an oval-shaped object with diagonal hatching and three legs (no text or symbols)High Rack
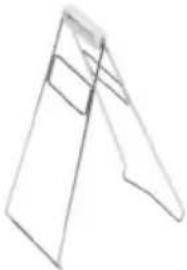
natural_image
Simple line drawing of a folded paper or sheet with no text or symbolsTongs
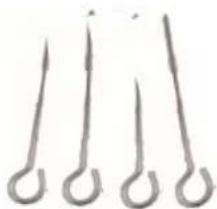
natural_image
Simple line drawing of four identical abstract shapes resembling stylized fingers or hooks (no text or symbols)Fork □ 4pcs □
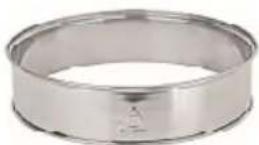
Extension Ring
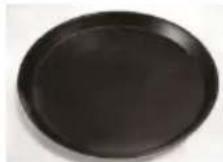
Baking or Frying Pan
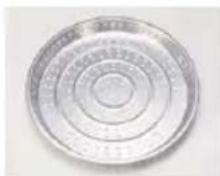
Steamer Air Frv
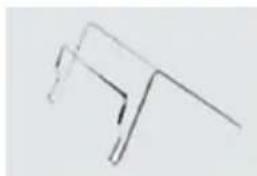
natural_image
Simple line drawing of a bent pipe or pipe with no text or symbolsLid Holder
Optional accessory:
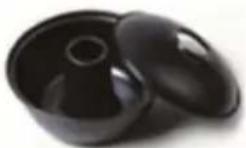
RICE COOKING BOWL
Operation
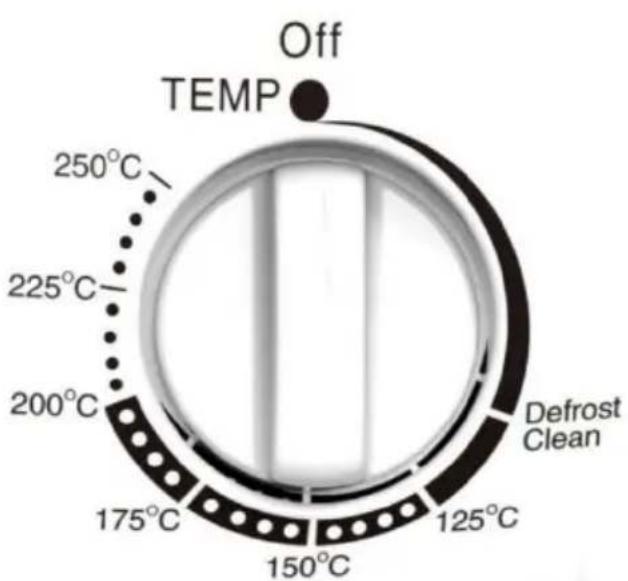
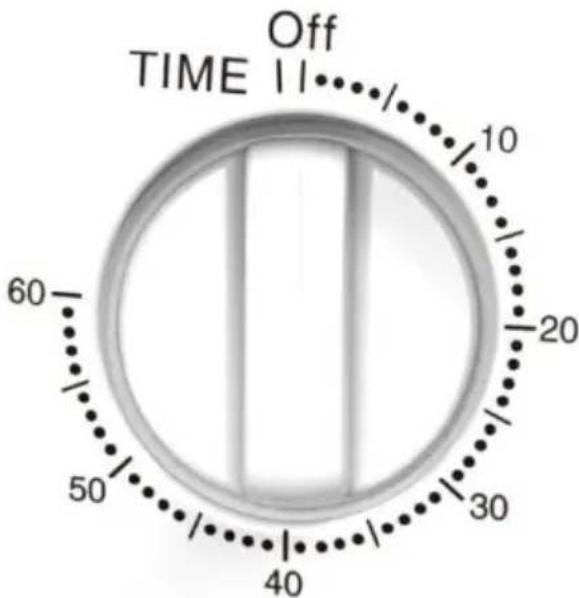
Your convection oven is very easy to use with two simple controls. You can set the cooking temperature from defrost to 250 Celsius and also the cooking timer from 0 to 60 minutes which is usually the most your food will need to cook.
radar
| Temperature Range | Label | | ----------------- | ------------ | | 125°C | Defrost Clean| | 150°C | | | 175°C | | | 200°C | | | 225°C | | | 250°C | | | Off | Temp |Temperature Control
Timer
Choose the appropriate racks7 trays and accessories and place them into the glass bowl. You can cook from frozen or use the defrost function. Fill the bowl and racks with the cooking ingredients. Cover the bowl with the lid and connect the mains to a power outlet. Set the temperature control and timer as desired. You will find suggestions for cooking temperatures and times in the cooking guide table.
Note5
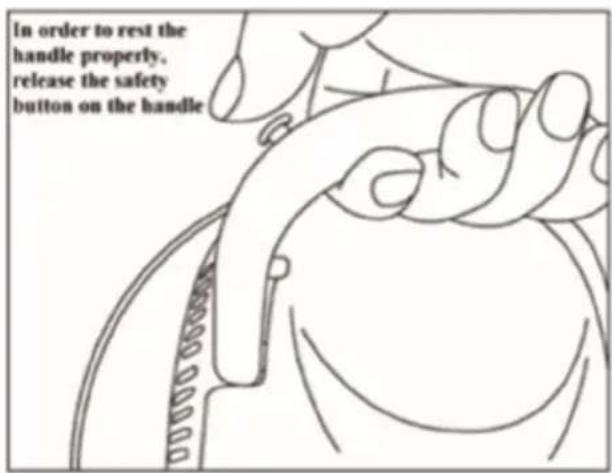
The3appliance3features3a3 safety3switch.3If3the3handle3 does3not3rest3properly73the3 electric3circuit3will3be3 interrupted.3
3
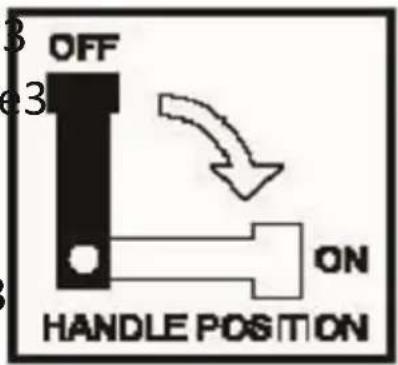
In3order3to3operate3the3appliance73 the3handle3must3be3lowered3to3the3 ON3position3to3deactivate3safety3 switch73lifting3the3handle3to3OFF3 position3will3activate3safety3switch3 2as3shown3in3illustration5.3
Note53The3thermostat3keeps3the3desired3temperature3until3 the3pre-set3time3has3elapsed.3The3control3lamp3with3its3 halogen3bulb3indicates3the3heating3process.3
3
If3it3becomes3necessary3to3open3the3bowl3during3cooking73 for3example3to3turn3the3food3over73it3is3imperative3to3 observe3the3following3instructions:3
3
- Turn3the3appliance3off3by3lifting3the3handle3to3the3upright3position.3
- Disconnect3the3plug3from3the3mains.3The3clock3time3 continues3automatically.3
- Lift3the3lid3by3the3handle3only.3
Warning5 3
3
When3opening3the3lid3of3the3convection3oven73be3careful3withescaping3steam3as3it3could3cause3burns3if3not3careful.3
To3continue3cooking73close3the3bowl3and3connect3the3plug3 to3the3mains.3The3operation3continues3as3soon3as3the3 handle3rests3properly3on3the3appliance.3Please3note3that3 the3timer3had3been3running3and3this3could3affect3your3 cooking3time.3
Note5 After3the3pre•set3time3has3elapsed73a3beeping3signal3will3sound3indicating3the3end3of3the3cooking3process.3The3fan3and3the3halogen3lamp3will3automatically3turn3off.3
3
Ending the cooking process
If3you3want3to3finish3the3cooking3process73set3the3temperatur control3and3the3clock3timer3to3OFF3and3disconnect3the3plug3 from3the3mains.3The3control3lamps3will3turn3off.3
Cooking guide
Instructions for roasting
- Place the roast on the lower grill rack. Add some water7 but only covering the bottom of the glass bowl.
- Turn the roast 1 or 2 times during cooking7 basting it with the gravy.
Instructions for grilling
- Use the grill racks as dual stands in order to place the ingredients at different levels.
- Turn thick meat pieces after half of the cooking time has elapsed.
- Can also use the steamer / air fryer accessory sited on racks.
Instructions for steaming
Fill the bottom of the bowl with some water and tasty herbs and spices for steaming vegetables or fish. Use the steamer / air fryer accessory.
Instructions for baking
- You may place any heat resistant baking pan onto the lower grill rack. Because of the air circulation the diameter should be of maximum 26 cm or 40 cm if extender ring is used.
- If you want to bake a very juicy cake without a crust7 attach aluminium foil over the baking pan. Remove the foil shortly
before the cake is done, so the top of the cake may slightly dry up.
- Cakes and other cookies are baked a little bit faster than in other common ovens.
- Place frozen pizza directly on the upper grill rack or in the baking tray.
Instructions for toasting
- You may toast bread and snacks without preheating the oven.
- Place the bakery products on one of the grill racks.
- Slightly moisten bread rolls that are from the previous day. This way they will crisp up nicely.
- You may also warm up older snacks such as crackers, chips or cookies. Bake them at maximum heat for a few minutes only, so they will become crispy again.
Instructions for defrosting
- The convection oven provides for a more evenly defrosting process than a microwave.
- Set the temperature control to DEFROST. Check the food every 5 to 10 minutes.
- In order to cook frozen food, lower the specified temperature by 20°C. The cooking time in the convection oven is also 30 - 50 % shorter (e.g. 10 to 15 minutes instead of 20 minutes).
Instructions for reheating
Use lower temperatures when reheating in order not to burn your food. Check the food every 5 to 10 minutes.
Note: These time specifications are for reference only and may vary depending on the circumstances.
Cooking Hints5
Brush meat with oil before seasoning.
When using both grill racks7 change the food after half of the cooking time has elapsed if the upper food gets crispy faster.
RECEIPES
Hundreds of delicious halogen oven recipes can be found on
www.halogenovenrecipes.co.uk
Cooking Times Table
| Food Position in the bowl | Temperature in °C | Cookingtime in minutes |
| Poultry | |||
| Chicken (whole) Lower grill rack 200 | 35 – 40 | ||
| Chicken | Upper grill rack 200 15 – 20 | ||
| Parts | |||
| Turkey Lower grill rack 200 60 – 90 | |||
| Duck Lower grill rack 200 50 – 60 | |||
| Fish | |||
| Fish Upper grill rack 200 7 -10 | |||
| Sea shells, steamed Lower grill rack 160 | 3 – 5 |
| Meat/ sausages | |||
| Roast beef (1.5 kg), medium done | Lower grill rack 175 45 – 50 | ||
| Steaks, medium done | Lower grill rack 250 8 -10 | ||
| Sausages, roasted | Lower grill rack 200 | 10 | |
| Cakes | |||
| One layer | Lower grill rack 175 15 – | 20 | |
| Covered cake with filling | Lower grill rack 175 30 – | 35 | |
| Loaf Pan | Lower grill rack 175 35 – | 40 |
| Pastry | |||
| Pie without filling | Upper grill rack 200 10 – | 12 | |
| Pie with filling | Lower grill rack 175 25 – | 30 | |
| Muffins | Lower grill rack 175 15 – | 18 | |
| Meringue | Lower grill rack 175 | 5 – 8 | |
| Food Position in the bowl | Temperature in °C | Cooking time in minutes | |
| Yeast bread | |||
| Loaf Lower grill rack 175 15 – 20 | |||
| Bread rolls Lower grill rack 175 15 – 20 | |||
| Bread rolls, crisped up Lower grill rack | 100 5 -10 | ||
| Corn bread Lower grill rack 175 10 – 20 | |||
| Frozen pizza Upper grill rack 200 10 | |||
CLEANING & MAINTENANCE
Make sure the unit is unplugged before cleaning
Wait until it has cooled down before cleaning
Before first use and continuing after each use, wipe off unit with a damp cloth and dry thoroughly.
The glass bowl is dishwasher safe and can be immersed. Do not immerse the lid into water for cleaning.
Protect the halogen lamp from water.
Water must not enter the control unit.
Do not use wire brushes or other abrasive objects.
Cleaning the Lid
Use a wet cloth to remove splashes and food stains from the lid. Use a mild detergent in case of heavy staining.
Dry lid thoroughly. This item is not dishwasher safe.
Glass bowl, grill racks, tongs and expander ring
Clean these parts by hand in warm water with a mild detergent.
Rinse under clean water to remove soap residue; dry thoroughly.
Self-cleaning5 the bowl can be cleaned easily using the self-cleaning function. Fill the bowl with water and add the extender ring. Pour washing up liquid and set the thermostat to 100^ C and timer to 10-15 minutes. When bowl cooled down, empty the dirty water and wipe it off or let it dry.
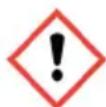
Warning5 Do not pour cold water into the glass bowl when the bowl is hot. Glass bowl must be cool before cleaning.
Troubleshooting
| Problem3 | Possible cause33Solution3 | |
| Appliance3does3not3function3 | Appliance3is3not3connected3to3the3mains333Appliance3is3defective3 | Check3the3position3of3the3lidCheck3another3wall3socket3Check3fuse3on3the3plug3Check3safety3catch33Please3contact3service3centre3 |
| A3whole3piece3of3food3is3cooked3unevenly3 | Air3circulation3is3not3even3 | Place3the3food3in3the3centre3of3the3bowl3on3a3low3rack33Do3not3stack3food3on3a3single3level3Use3the3racks3as3dual3stands3 |
| The3food3is3burnt3on3top3but3not3yet3cooked3 | The:food3is3too3close3to3the3halogen3bulb3 | Place3the3food3on3the3lower3grill3rack3or3temporarily3cover3the3food3with3aluminium3foil3 |
| ElectriQ UK SUPPORTwww.electriQ.co.uk/supportPlease, for your own convenience, make these simple checks before calling the service line.If the unit still fails to operatecall: 0871 620 1057 or complete the online form.Is the unit plugged into the mains? Is the fuse OK?Switch the unit off. Restart the unit.Office hours: 9AM - 5PM Monday to Fridaywww.electriQ.co.ukUnit J6Lowfields WayEllandWest YorkshireHX5 9DA |
- Thank3you3for3choosing3
- electri 3
- Contents
- SAFETY INSTRUCTIONS
- Important
- Unit Safety Protection and Performance Tips
- Features and Parts 3
- Operation
- Note5
- Warning5 3
- Ending the cooking process
- Cooking guide
- Instructions for roasting
- Instructions for grilling
- Instructions for steaming
- Instructions for baking
- Instructions for toasting
- Instructions for defrosting
- Instructions for reheating
- Cooking Hints5
- RECEIPES
- CLEANING & MAINTENANCE
- Cleaning the Lid
- Glass bowl, grill racks, tongs and expander ring
- Troubleshooting
Brand : ElectriQ
Model : HOV17
Category : Oven