T16004 - Multicooker Tower - Free user manual and instructions
Find the device manual for free T16004 Tower in PDF.


| Product Type | Multicooker |
| Brand | Tower |
| Model | T16004 |
| Capacity | 5 L |
| Power | 900 W |
| Dimensions (W x D x H) | 28 x 26 x 30 cm |
| Weight | 3.5 kg |
| Power Supply | 220-240 V, 50/60 Hz |
| Cooking Programs | Rice, slow cook, steam, sauté, pressure cook, warm |
| Control Type | Digital touch panel |
| Display | LED timer display |
| Inner Pot Material | Non-stick coated aluminum |
| Safety Features | Auto shut-off, overheat protection, pressure release valve |
| Accessories Included | Steamer basket, rice paddle, measuring cup, recipe book |
| Cleaning & Maintenance | Wipe exterior with damp cloth; inner pot dishwasher safe |
| Spare Parts Availability | Inner pot, sealing ring, steam vent kit available |
| Repairability | Modular design; user-replaceable parts |
| Warranty | 2 years limited |
| Certifications | CE, RoHS |
| Color | Stainless steel / Black |
Frequently Asked Questions - T16004 Tower
User questions about T16004 Tower
0 question about this device. Answer the ones you know or ask your own.
Ask a new question about this device
Download the instructions for your Multicooker in PDF format for free! Find your manual T16004 - Tower and take your electronic device back in hand. On this page are published all the documents necessary for the use of your device. T16004 by Tower.
USER MANUAL T16004 Tower
Safety and Instruction Manual PLEASE READ CAREFULLY
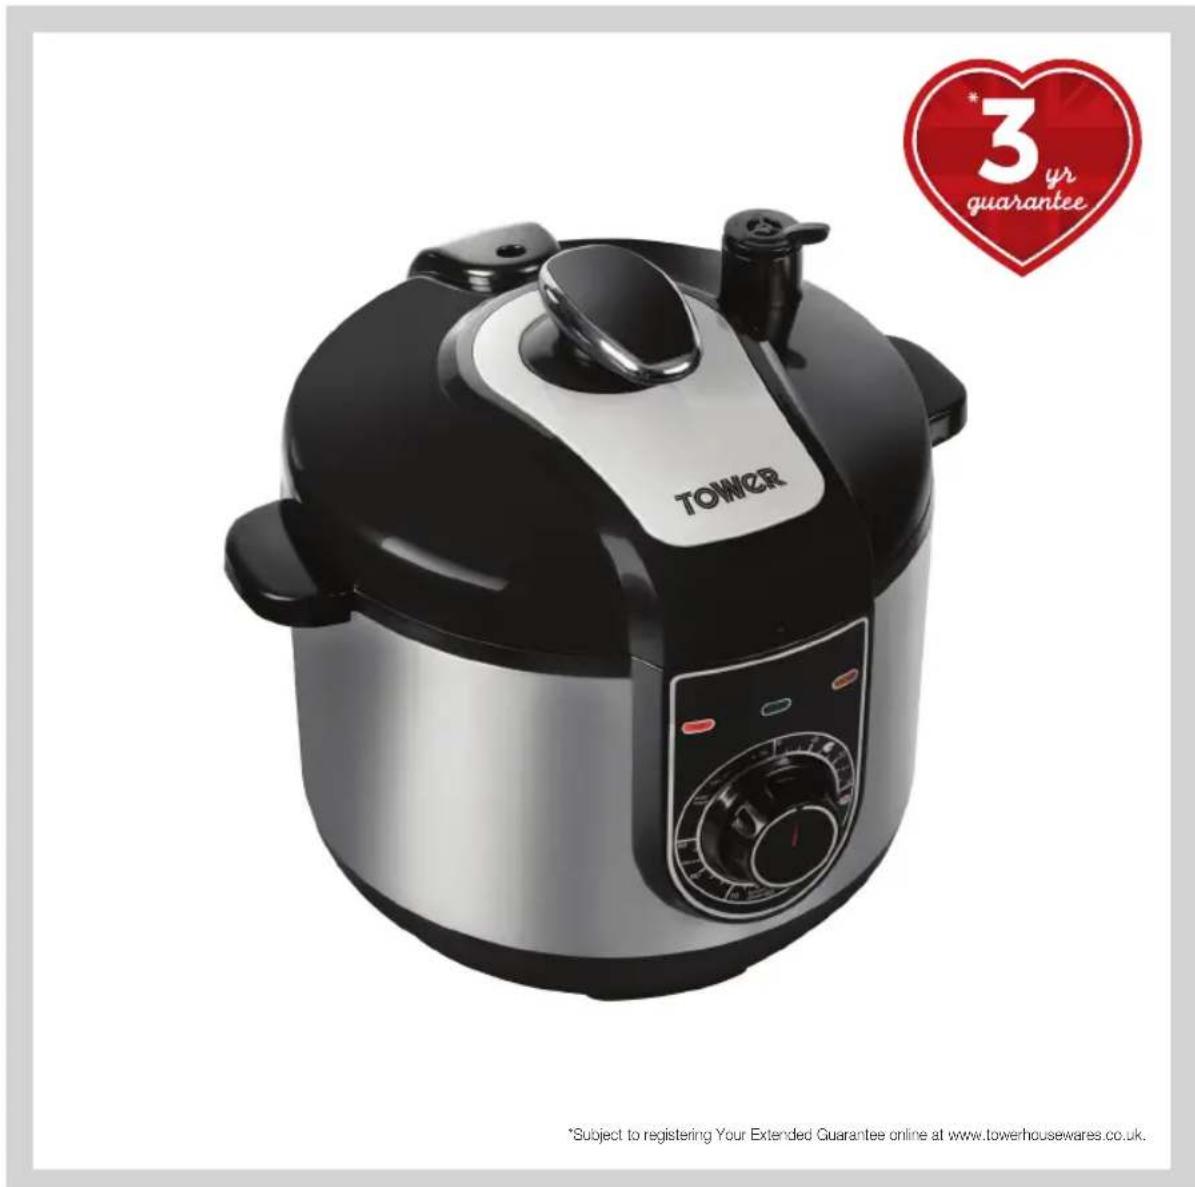
5 Litre
Electric Pressure Cooker
TOWER®
over 100 years of quality
1912 Midland Metal Spinners was founded by George Cadman, who was then 65 years old, as a metal holloware manufacturing company, in St. Mark's Street, Wolverhampton. They later moved into the Tower and Fort Works in Pelham Street, which ultimately gave rise to the famous Tower brand name.
1937 Tower exhibited some of their latest holloware designs at the British Industries Fair. As you can see from the original poster, their stand No. A410 must have been a great sight as it promoted their "Beautiful, inexpensive, untarnishable Plate, at prices all can afford to pay".
1961 Tower became one of the largest
natural_image
Three metallic kettle holders in different sizes (no text or symbols visible)Join the pressure cooker revolution
Tower pressure cookers cook foods in about a third of the time, preserve 95 per cent of the vitamins, use almost 90 per cent less fuel and lock in all the flavour. Use your Electric Pressure Cooker with its non-stick pot to brown, boil, steam, braise, stew and roast. Perfect for vegetables, meat, fruits, fish and grains.
Pressure cooking is the process of cooking food, using water or other cooking liquid, in a sealed vessel known as a pressure cooker. Pressure cookers help to seal all nutrients in the food and save energy by cooking up to 3 times faster than conventional cooking methods.
Pressure cookers heat food quickly because the internal steam pressure from the boiling liquid causes saturated steam (or "wet steam") to bombard and cook the food. They quickly simulate manufacturers of aluminium holloware, electric kettles, tea pots and other household articles with over 1,000 employees.
1974 Russell Hobbs took ownership of the expanding Tower brand.

Towerbrand
the effects of simmering, braising and other techniques. Two main things happen with high pressure steam - the boiling point of the water in the pot raises which in turn cooks food faster and the pressure raises, forcing liquid into the food. When liquid and moisture is forced into the food quickly, not only does it cook the food faster, it also helps improve the cooking of certain foods, such as making meat very tender.
In conventional cooking, water boils at 100^ at standard pressure and the water evaporates as steam. In a pressure cooker, the trapped steam causes the internal temperature and pressure to rise resulting in superheated water. After use, the pressure is slowly released so that the vessel can be safely opened.
CONTENTS:
Please read this Manual carefully BEFORE using the Electric Pressure Cooker for your own safety.
Thank you for purchasing this Tower Electric Pressure Cooker.
It has been designed to provide many years of trouble-free cooking. There are many benefits to using a Tower Electric Pressure cooker:
A wide range of food can be cooked in your pressure cooker, including vegetarian, vegan and a wide range of ethnic dishes.
- Foods retain more nutrients, vitamins and minerals and are more tasty.
- Saves energy as cooking is done in just one container on one heat source.
- Saves time when cooking – cooking can be up to 70% faster.
- Less washing up is required as only one cooking pot is used and the pressure cooker lid eliminates splashes and boil overs.
Contents:
- Specifications
Components and structure
Technical information
-
Important Safety Information
-
Using your Tower Appliance
& Recipes
-
Trouble Shooting & Faq's
-
Cleaning & Care
-
Recycling
-
Wiring Safety
-
Warranty Information
-
Your Receipt
See back page for Customer Service Information
1 SPECIFICATIONS:
Components
This box contains:
Pressure Cooker
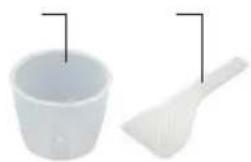
Measuring Cup
Removable Non Stick Cooking Pot
Water Catch Pot
Rice Spoon
Instruction Manual
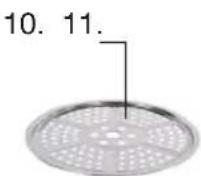
Steam Rack
natural_image
Close-up of a black object with a small metallic object, possibly a tool or component, shown in a circular frame (no text or symbols visible)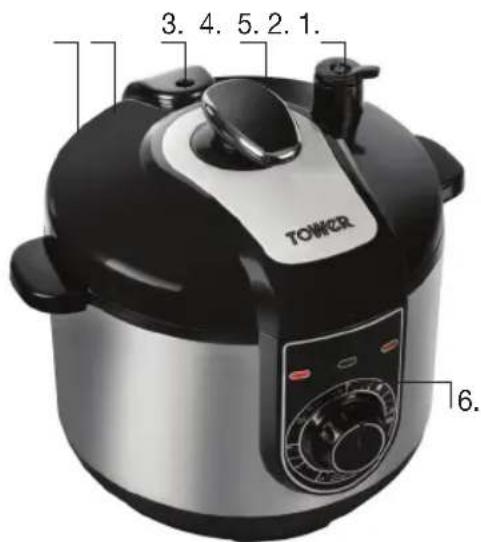
natural_image
Close-up of a black camera lens with control buttons and a central dial (no visible text or symbols)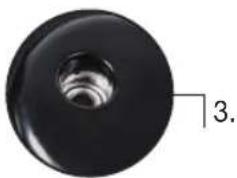
natural_image
Close-up of a black circular mechanical component with a threaded hole, labeled '3.' (no text or symbols on the object itself)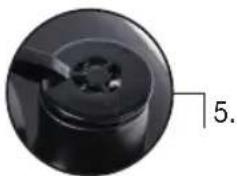
natural_image
Close-up of a mechanical component with a circular head and central hub, labeled with number 5 (no text or symbols on the object itself)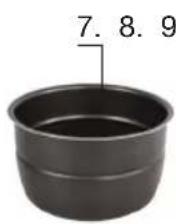
natural_image
Two white ceramic kitchen utensils: a cup and a brush, shown side by side (no text or symbols visible)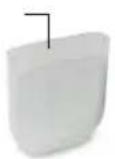
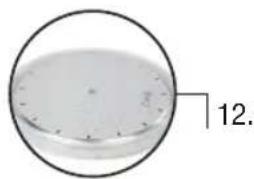
Structure of your pressure cooker:
-
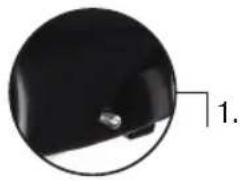
Safety Lock Override Pin
-
Steam Rack
-
Lid
-
Measuring cup
-
Float Valve Outlet
-
Rice spoon
-
Lid Handle
-
Water catch pot
-
Pressure Valve
-
Sealing Ring
-
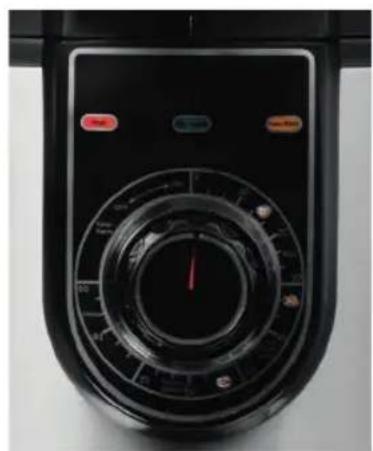
Control Panel
-
Inner Pot
Technical Data
Description: 5 Litre Electric Pressure Cooker
Model: T16004
Rated Voltage: 220V-240V \~ 50Hz
Power Consumption: 1000 Watts
Documentation
We declare that this product conforms to the following product legislation in accordance with the following directive(s):
2004/108/EC Electromagnetic Compatibility Directive.
2006/95/EC Low Voltage Directive.
2011/65/EU Restriction of Hazardous Substances Directive.
1935/2004/EC Materials & Articles in Contact With Food (LFGB section 30 & 31).
2009/125/EC Eco-Design of Energy Related Products
RKW Quality Assurance, United Kingdom.
Guarantee
Guarantee for spare parts
The removable non-stick cooking pot, steam rack and steam release valve are guaranteed for 1 year from date of purchase.
The main body and lid are guaranteed for the extended free warranty subject to registration.
If any defect arises due to faulty materials of workmanship, the faulty products must be returned to the place of purchase.
Refund or replacement is at the discretion of the retailer.
The gasket (lid sealing ring) should be checked regularly (at least every six months) for deterioration or hardening of the rubber, and should be replaced if necessary.
Should you encounter problems or require a replacement part, contact The Tower Customer Service Department on: +44 (0) 8333 220 6066.
Any necessary spare parts may be ordered from the Tower website.
Your warranty becomes void should you decide to use non Tower spare parts. Spare parts can be purchased from www.towerhousewares.co.uk
2 IMPORTANT SAFETY INFORMATION
Please read these notes carefully BEFORE using your Tower appliance
- This appliance cooks under pressure. Improper use may result in scalding injury. Make certain unit is properly closed before operating. See Operating Instructions before beginning.
- Do not open the pressure cooker until the unit has cooled and internal pressure has been released. Any pressure in the cooker can be hazardous.
- Do not attempt to use the safety lock override pin whilst the cooker is under pressure.
- Steam may also release from steam release hole located at the back of the lid.
- Always check the pressure release devices for clogging before use, rinse the steam valve under warm water to release any debris obstructing the vent. Always check inside the lid, underneath the steam vent for any unwanted food clogging.
-
Do not touch hot surfaces. Use handles and pot holders
-
Do not place the pressure cooker in a heated oven.
- Extreme caution must be used when moving a pressure cooker containing hot liquids.
- Do not use this pressure cooker for pressure frying with oil.
- Never fill the unit over 4/5 full when cooking; however, when cooking foods that expand such as dried fruits, or vegetables, the unit must never be over 2/5 full. 2/5 full means the food, as well as all other ingredients and liquids combined.
- Do not cook foods such as apple sauce, beans, cranberries, pearl barley, oatmeal or other cereals, rice, split peas, noodles, macaroni, rhubarb, or spaghetti.
- Check that the voltage of the main circuit corresponds with the rating of the appliance before operating.
- If the supply cord or appliance is damaged, stop using the appliance immediately and seek advice from the manufacturer, its service agent or a similarly qualified person.
- Do not let the cord hang over the edge of a table or counter or let it come into contact with any hot surfaces.
- Do not carry the appliance by the power cord.
- Do not use any extension cord with this appliance.
- Do not pull the plug out by the cord as this may damage the plug and/or the cable.
- Switch off at the wall socket then remove the plug from the socket when not in use or before cleaning.
- Switch off and unplug before fitting or removing tools/attachments, after use and before cleaning.
- Close supervision is necessary when any appliance is used by or near children.
• Children should not play with the appliance.
- This appliance can be used by children aged from 8 years and above and persons with reduced physical, sensory or mental capabilities or lack of experience and knowledge if they have been given supervision or instruction concerning use of the appliance in a safe way and understand the hazards involved.
• Cleaning and user maintenance should not be undertaken by children without supervision.
• Take care when any appliance is used near pets.
- Do not use this product for anything other than its intended use.
- This appliance is for household use only.
- Do not use the appliance outdoors.
- In the unlikely event the appliance develops a fault, stop using it immediately and seek advice from the service department:
+44 (0) 333 220 6066
3 USING YOUR APPLIANCE
Before first use:
- Before using the unit for the first time, carefully clean the unit and all the items that will come into contact with food.
- Do not use any abrasive detergents, brushes with metal or nylon bristles or sharp objects such as knives or spatulas for cleaning the appliance and accessories, use a sponge or cloth dampened in warm water to avoid any damage.
- Remove the lid by twisting the handle anticlockwise.
Using your Pressure Cooker:
- Place your Pressure Cooker on a stable, heat resistant surface.
- Connect power lead to the base of the Pressure Cooker and plug in at the wall.
- Attach the transparent water catch pot to the back of the unit. This will catch any excess water from the rim during cooking.
- Take the cook pot and fit it into the base of the Pressure Cooker.
- Place your ingredients in the cook pot, taking care not to exceed the quantities marked inside the cook pot.
- To fit the lid, first check that the gasket ring is in place. Place the lid on the unit and turn it clockwise to close. Ensure that the safety release pin (on rear of lid) and the condensation pot are aligned on the back of the Pressure Cooker.
- Select the required cooking function on the control panel by turning the dial.
- To release the built up steam turn the steam release valve clockwise or anti clockwise until all steam has released. Once the steam release valve has been turned, the safety valve pin at the rear of the lid will then drop down, allowing the Pressure Cooker to be opened.
Note: the safety valve pin MUST be kept clean and free from debris and food residue/grease.
- You can now turn the lid anticlockwise to open.
Using your Pressure Cooker:
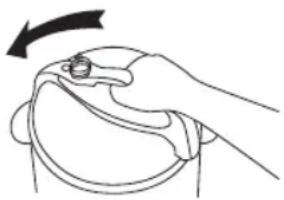
To fit the lid, place on to base unit and twist the handle to fit into in place. Ensure that the safety release pin (on the rear of the lid) and the condensation pot are aligned on the back of the Pressure Cooker base.
To remove the lid once cooking has finished, turn the steam release valve to release pressure. Once the pressure has dropped, the safety valve located on the rear of the lid will release. Turn the handle anti-clockwise to remove the lid.
natural_image
Line drawing of a hand holding a stethoscope with an arrow indicating rotation (no text or symbols)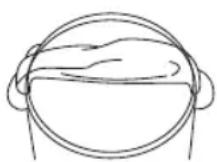
Keep Warm:
After the cooking process has finished the cooker will automatically go into the Keep Warm setting. Turn the dial to the OFF position to cancel.
Whilst on the Keep Warm setting the cooker will stay between 65-70°C, if the temperature rises above 70°C, the cooker will stop heating until the temperature falls within the normal range again. If the temperature falls below 65°C it will start to heat back up to 70°C.
Adding ingredients during cooking:
- To add ingredients to the pressure cooker during cooking you must first de-pressurise the cooker by turning the steam release valve.
- Open the lid to the pressure cooker and add your extra ingredients.
- To replace the lid pull out the safety lock override pin to disable the pressure lock.
- Once the lid is securely in position the safety lock override pin will spring back into place.
- Select you cooking function once again and adjust to the remaining time.
- Turn the dial to the correct cooking time.
Cooking time guidelines.
| FOOD/FILL LEVEL: | 1/5 2/5 | 3/5 4/5 | ||
| Rice | 15 minutes | 20 minutes | 25 minutes | 30 minutes |
| Chicken | 20 minutes | 25 minutes | 30 minutes | 35 minutes |
| Porridge/ Soup | 20 minutes | 28 minutes | 35 minutes | 40 minutes |
| Casserole | 30 minutes | 35 minutes | 40 minutes | 45 minutes |
| Beef | 35 minutes | 40 minutes | 45 minutes | 50 minutes |
Cooking Rice
- Measure out your required amount of rice using the measuring cups provided, then wash your rice under cold water.
- Place washed rice into the cooking pot and place the required amount of water into the cooking pot, following the measuring guide inside the cooking pot.
- Place the lid on the unit and turn it clockwise to close. Ensure your steam release valve is in the closed position, with the circle facing the arrow.
- Turn your dial to the correct setting depending on how much rice you have used.
- The pressure cooker will now start to warm up to the correct temperature before commencing to the cooking time.
- When the pressure cooker has finished cooking a beep will be heard and it will automatically go into keep warm mode.
- To release the built up steam turn the steam release valve clockwise or anti clockwise until all steam has released.
- Once the steam release valve has been turned, the safety valve pin at the rear of the lid will then drop down, allowing the pressure cooker to be opened.
- Note: the safety valve pin MUST be kept clean and free from debris and food residue/grease.
- Turn the handle anti-clockwise to remove the lid.
Making Porridge
- According to your recipe, add the oats and water to the cooking pot.
- Place the lid on to the cooking pot and turn it clockwise to close. Ensure your steam release valve is in the closed position, with the circle facing the arrow.
- Select the Porridge function on the dial by turning the timer.
- The cooking function will start once the Pressure Cooker has reached the correct temperature.
- Once cooking is complete, the pressure cooker will beep and the keep warm function will start.
- Turn the steam valve to release steam. Once the Pressure Cooker has depressurised, you can open the lid.
- You can now turn the lid anticlockwise to open. The porridge is now ready to serve.
Pressure Cooking Meat
- Add your joint of meat to the Pressure Cooker add stock to at least 1 depth full and add any other ingredients if required.
- Close the lid and steam valve.
- Turn the dial to the Meat function – it takes approximately 45 minutes for a medium joint. Amend the cooking time as required.
- Once the Pressure Cooker has pressurised, the cooking function will commence.
- When the cooking time is complete you will hear a beep and the keep warm cycle will start.
- Turn the steam valve to release steam. Once the Pressure Cooker has depressurised, you can open the lid, remove the meat and serve.
Note: It is recommended to brown your meat before cooking.
Making Stew
- Add your ingredients and stock to the cooking pot.
- If using meat, brown before adding to the cook pot.
- Close the lid and steam valve.
- Turn the dial to the Meat function and cook for approx. 45 minutes.
- After the Pressure Cooker has reached the correct temperature, the cooking process will start.
- When complete you will hear a beep and the keep warm function will automatically commence.
- Turn the steam valve to release steam. Once the Pressure Cooker has depressurised, you can open the lid.
- Your stew is now ready to serve.
Cooking Pulses
- Rinse pulses/beans in water.
- Follow the instructions on your packet of pulses for the pulse to water ratio required.
- Close the lid and steam valve.
- Turn the dial to reach the Tendon/Beans function, and adjust the time as required.
- After the Pressure Cooker has reached the correct temperature, the cooking process will start.
- When complete you will hear a beep and the keep warm function will automatically commence.
- Turn the steam valve to release steam.
- Once the Pressure Cooker has depressurised, can open the lid and remove your pulses - drain, rinse and then use.
Note: Once complete the pulses/beans will have softened and should be firm to the bite.
Cooking Chicken
- Place your chicken into the Pressure Cooker and add your chicken stock.
- Close the lid and steam valve.
- Turn the dial to the Chicken function and adjust the time as required.
- Once the Pressure Cooker has reached the correct temperature the steaming process will commence.
- When the cooking time is complete you will hear a beep and the keep warm cycle will start.
- Turn the steam valve to release steam. Once the Pressure Cooker has depressurised, you can open the lid, remove the meat and serve.
- Your chicken is now ready to serve.
Steaming
Using the included steam rack allows you to use your Pressure Cooker for steaming.
- Add water to the cooking pot, ensuring it is above the minimum water fill level. For steaming the water level must not be above the steam rack.
- Place the steam rack onto the ridge inside the cooking pot carefully; making sure it is fit securely.
- Place your ingredients on to the steam rack and season to your taste.
- Now close the lid and steam valve.
- Then turn the dial to the required setting. For example a half full pot of potatoes, carrots and beans will take approximately 20 minutes to steam. Adjust the cooking time as required.
-
Once the Pressure Cooker has reached the correct temperature the steaming process will commence.
-
When the cooking time is complete you will hear a beep and the keep warm cycle will start.
- Turn the steam valve to release steam. Once the Pressure Cooker has depressurised, you can open the lid.
- Your food is now ready to serve.
Temperatures and Pressure
| Function | Temperature °C | Pressure/ KPa |
| Rice 160 50-70 | ||
| Chicken 160 50-70 | ||
| Pulses 160 50-70 | ||
| Porridge 160 50-70 | ||
| Meat 160 50-70 | ||
| Steam 160 50-70 | ||
| Stew 160 50-70 |
Recipes for your Pressure Cooker
If you want to get in and out of the kitchen fast and serve your family wholesome, nutritious, home cooked meals, then the Tower electric pressure cooker is just the appliance for you and your family. No more junk food, no expensive fast food or pre-packaged “dinners” with their high fat, salt, chemicals and other unwanted additives. Pressure cooking uses superheated steam under pressure to force the flavour into foods, so steaming will always be better than the destructive effects of boiling which is constantly washing the flavour out..
With an incredibly wide array of functions, you can cook nutritious meals in record time and preserve vitamins and essential nutrients because foods cook quickly in an almost airless environment with very little liquid.
And with a large 5 litre capacity, whatever you make you have enough room to feed the whole family whilst saving up to 70% on energy.
We have included these three basic recipes to help you get started, so don't be afraid to dive in and experiment.
All recipes are for guideline purposes only and the photography shown is for illustration purposes only.
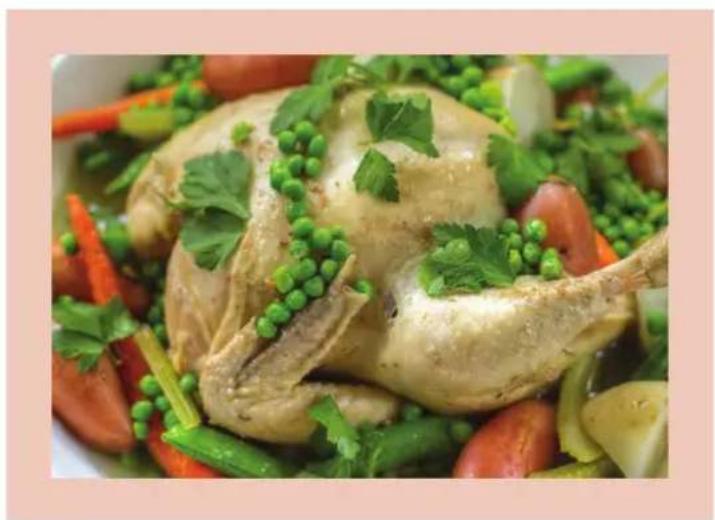
Whole chicken & Vegetables
What you need
1.5kg Whole Small Chicken 225ml Chicken Broth 2 Bags of Frozen Vegetable Medley Mix (Any will do, pre-seasoned or flavoured works great)
How you do it
- Pour the chicken broth into the main cooking pot of the pressure cooker.
- Season the chicken with salt and pepper and place into the pot as well.
- Take both bags of the frozen vegetable mix and pour into the pot.
- Follow the instructions for cooking chicken.
- Prepare rice, mashed potatoes, spaghetti or other pasta to serve with the chicken.

natural_image
Close-up of a cooked chicken dish garnished with parsley, peas, and vegetables (no text or symbols visible)Pork Pot Roast
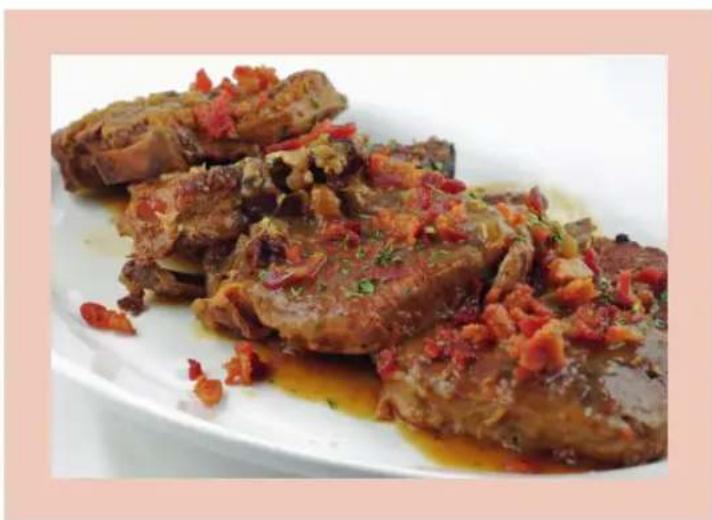
What you need
350 ml Chicken/veg stock
500g Pork Chops
2 medium onions sliced
2 large potatoes diced
2 large carrots diced
How you do it
- Brown chops on both sides before adding to the pressure cooker.
- Add a little oil to the cook pot and add carrots, potatoes, stock and the chops.
- Set the dial to the meat function.
- Place lid on top and close, also close the steam vent, once pressure cooker has reached temperature, cooking will commence.
- Once complete the pressure cooker will beep.
- Release steam pressure by turning steam valve, taking care of hot steam. Once complete turn the lid to open.
- Remove produce and serve.

natural_image
Plate of braised meat with red chili garnish, served on a white dish (no text or symbols visible)Winter Warmer Beef Stew
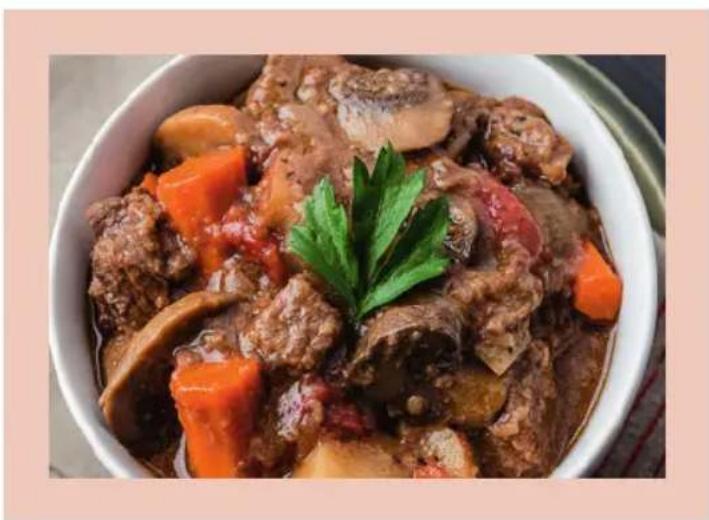
What you need
60g plain flour
1 tsp salt
1/2 tsp black pepper
1.3kg beef stew cubes
2 tbsp vegetable oil
1 can peeled chopped tomatoes
410ml beef stock
170ml red wine
2 packets onion soup mix
1 tsp dried basil
8 small potatoes
1 bag (450g) carrots, peeled and cut into 2 inch pieces
230g sliced mushrooms
1 large onion, cut into eighths
How you do it
- In a large bowl, combine flour, salt and pepper; add beef.
- Toss to coat.
- Heat the oil in a large frying pan over medium-high heat.
- Add half of the beef. Cook until browned on all sides. Repeat with remaining beef.
- Place browned beef in the cooking pot.
- Stir in tomatoes, beef stock, wine, onion soup mix and basil until well blended.
- Add potatoes, carrots, onion and mushrooms.
- Choose the meat function and cook for approximately 45 minutes.
- Cover and cook until the cycle is complete.
- Remember that you can adjust the cooking time to your requirement.

natural_image
Close-up of a bowl of stewed meat with carrots and mushrooms, garnished with parsley (no text or symbols visible)Tips:
- Try placing your veg on the steam rack with the minimum amount of water required. Save the remaining liquid after cooking for stock.
- If your vegetables are still steaming after being removed from your pressure cooker, they're still cooking! If your recipe calls for vegetables that are al dente, try running cold water over them in the sink to stop the cooking process.
- Cut ingredients into uniform sized pieces for evenly cooked food.
| Metric Imperial US cups | |
| 250ml 8 floz 1 cup | |
| 180ml 6 fl oz 3/4 cup | |
| 150ml 5 floz 2/3 cup | |
| 120ml 4 floz 1/2 cup | |
| 75ml 2 1/2 floz 1/3 cup | |
| 60ml 2 floz 1/4 cup | |
| 30ml 1 floz 1/8 cup | |
| 15ml 1/2 floz 1 tablespoon |
- Use fresh herbs when cooking meat. Pressure cooking tends to infuse the flavour of all the ingredients you cook together. Put fresh herbs in the pressure cooker whole, including the stems.
- When you cook with dried beans, lentils, rice or other foods that expand and absorb liquids, don't fill the pressure cooker more than half full.
| Imperial Metric | |
| 1/2 oz 15g | |
| 1 oz | 30g |
| 2 oz | 60g |
| 3 oz | 90g |
| 4 oz | 110g |
| 5 oz | 140g |
| 6 oz | 170g |
| 7 oz | 200g |
| 8 oz | 225g |
| 9 oz | 255g |
| 10 oz | 280g |
| 11 oz | 310g |
| 12 oz | 340g |
| 13 oz | 370g |
| 14 oz | 400g |
| 15 oz | 425g |
| 1 lb | 450g |
Check this chart for basic imperial to metric conversions of weights.
Food Allergies Important Note:
Some of these recipes may contain nuts and/or other allergens. Please be careful when making any of our sample recipes that you are NOT allergic to any of the ingredients. For more information on allergies, please visit the Food Standards Agency's website at: www.food.gov.uk
4 TROUBLE SHOOTING & FAQ'S
| Question Answer | |
| Is the steam release valve supposed to be loose? | Yes. If it wasn't loose it would not lift and drop during operation. |
| Are there recipes for this other than ones in the manuals? | Yes, any recipe intended for a pressure cooker will cook in the product. |
| Why is the lid stuck? The lid can become stuck if it is not sitting correctly before locking. Before closing the lid, ensure it is flat prior to twisting into closed position. | |
| How do you know that the cooker has stopped? | The product will beep 3 times. |
| How do I set the cooker to build pressure? | Fill the product with food & liquid to be cooked, Press start on a desired setting and the cooker will pressurise.Note: yogurt and cake settings will not pressurise. |
| Can I cook rice in the pressure cooker? | It is not recommended to cook white rice in the pressure cooker, due to the starch in the rice foaming up under pressure. However due to the lower starch content, brown rice may be cooked in the pressure cooker. |
| How long does the keep warm setting last? | The keep warm setting will stay on until it is manually switched off. |
5 CLEANING & CARE
- Remove plug from the mains socket, and allow the appliance to cool down before cleaning.
- Do not immerse the base unit of the appliance in water and make sure no water enters the appliance.
- Clean the base unit by wiping it with a damp cloth. A little detergent can be added if the appliance is heavily soiled.
- Do not use scouring pads, steel wool or any form of strong solvents or abrasive cleaning agents to clean the appliance, as they may damage the outside surfaces of the appliance.
- Clean all accessories in warm soapy water, do not use any scouring pads, steel wool or any strong solvents or abrasive cleaning agents when cleaning accessories.
- After every use please remove, empty, clean and replace the water catch pot.
IMPORTANT!
Allow to dry fully after cleaning before using again.
Do not use the appliance if damp. Ensure the appliance is completely clean and dry before storing.
Storage
To store your appliance:
Unplug power cord from the power outlet and clean as above.
Allow the appliance to dry fully.
Store on a flat, dry level surface out of reach of children.
6 RECYCLING
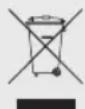
DISPOSAL OF THE UNIT
Appliances bearing the symbol shown here may not be disposed of in domestic rubbish. You are required to dispose of old electrical and electronic appliances like this separately.
Please visit www.recycle-more.co.uk or www.recyclenow.co.uk for access to information about the recycling of electrical items.
Please visit www.weeeireland.ie for access to information about the recycling of electrical items purchased in Ireland.
The WEEE directive, introduced in August 2006, states that all electrical items must be recycled, rather than taken to landfill.
Please arrange to take this appliance to your local Civic Amenity site for recycling, once it has reached the end of its life.
7 WIRING SAFETY FOR UK USE ONLY
IMPORTANT
As the colours in the mains lead of this appliance may not correspond with the coloured markings identifying the terminals in your plug, please proceed as follows:
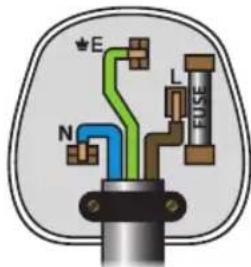
The wires in the mains lead are coloured in accordance with the following code:
Blue neutral [N] Brown live [L] Green/Yellow [EARTH]
Plug Fitting Details (Where Applicable).
The wire coloured blue is the neutral and must be connected to the terminal marked [N] or coloured black.
The wire coloured brown is the live wire and must be connected to the terminal marked [L] or coloured red.
The wire coloured green/yellow must be connected to the terminal marked with the letter [E] or marked ⚠.
On no account must either the brown or the blue wire be connected to the [EARTH] terminal ⚠.
Always ensure that the cord grip is fastened correctly.
The plug must be fitted with a fuse of the same rating already fitted and conforming to BS 1362 and be ASTA approved.
If in doubt consult a qualified electrician who will be pleased to do this for you.
Non-Rewireable Mains Plug
If your appliance is supplied with a non-rewireable plug fitted to the mains lead and should the fuse need replacing, you must use an ASTA approved one (conforming to BS 1362 of the same rating).
If in doubt, consult a qualified electrician who will be pleased to do this for you.
If you need to remove the plug - disconnect it from the mains - and then cut it off the mains lead and immediately dispose of its safely. Never attempt to reuse the plug or insert it into a socket outlet as there is a danger of an electric shock.
WARNING:
This Appliance MUST be Earthed
8 WARRANTY

We hope that you will enjoy your Tower Electric Pressure Cooker for many years.
As a thank you for purchasing one of our fantastic products, we are giving you 3 years peace of mind.
To receive your 3 year guarantee, simply register your appliance online by visiting
www.towerhousewares.co.uk
natural_image
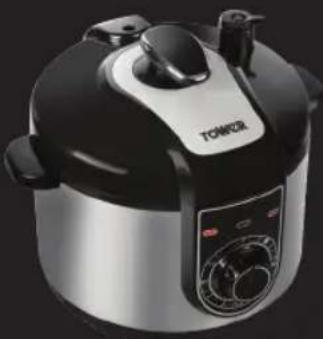
Exterior view of a modern rice cooker with black and silver casing (no visible text or symbols)This product is guaranteed for 12 months from the date of original purchase.
If any defect arises due to faulty materials of workmanship, the faulty products must be returned to the place of purchase.
Refund or replacement is at the discretion of the retailer.
The Following Conditions Apply:
- The product must be returned to the retailer with proof of purchase.
- The product must be installed and used in accordance with the instructions contained in this instruction guide.
- It must be used only for domestic purposes.
- It does not cover wear and tear, damage, misuse or consumable parts.
- Tower has limited liability for incidental or consequential loss or damage.
This guarantee is valid in the UK and Eire Only.
The standard one year guarantee is only extended to the maximum available for each particular product upon registration of the product within 28 days of purchase. If you do not register the product with us within the 28 day period, your product is guaranteed for 1 year only.
To validate your extended warranty, please visit www.towerhousewares.co.uk and register with us online. Alternatively, call our customer registration line on +44 (0) 333 220 6066.
Please note that length of extended warranty offered is dependent on product type and that each qualifying product needs to be registered individually in order to extend its warranty past the standard 1 year.
Extended warranty is only valid with proof of purchase.
9 YOUR RECEIPT
Affix your store receipt to this page for safe keeping.
NOTES
NOTES

TOWER®
thank you!
We hope you enjoy your appliance for many years. As a thank you for purchasing one of our fantastic products, we are giving you an extra 2 years peace of mind.
*To receive your extra 2 years guarantee, register your appliance online by visiting:
www.towerhousewares.co.uk
Should you have a problem with your appliance, or need any spare parts, please call our Service Department on: +44 (0) 333 220 6066
Your warranty becomes void should you decide to use non Tower spare parts. Spare parts can be purchased from www.towerhousewares.co.uk

great british design, innovation and excellence since 1912
- Litre
- Electric Pressure Cooker
- TOWER®
- Join the pressure cooker revolution
- CONTENTS:
- SPECIFICATIONS:
- Components
- Structure of your pressure cooker:
- Technical Data
- Documentation
- Guarantee
- IMPORTANT SAFETY INFORMATION
- Please read these notes carefully BEFORE using your Tower appliance
- USING YOUR APPLIANCE
- Before first use:
- Using your Pressure Cooker:
- Keep Warm:
- Adding ingredients during cooking:
- Cooking Rice
- Making Porridge
- Pressure Cooking Meat
- Making Stew
- Cooking Pulses
- Cooking Chicken
- Steaming
- Recipes for your Pressure Cooker
- Whole chicken & Vegetables
- What you need
- How you do it
- Pork Pot Roast
- Winter Warmer Beef Stew
- Tips:
- Food Allergies Important Note:
- CLEANING & CARE
- IMPORTANT!
- Storage
- RECYCLING
- DISPOSAL OF THE UNIT
- WIRING SAFETY FOR UK USE ONLY
- IMPORTANT
- Plug Fitting Details (Where Applicable).
- Non-Rewireable Mains Plug
- WARRANTY
- YOUR RECEIPT
- NOTES
- thank you!
Brand : Tower
Model : T16004
Category : Multicooker