
H1826MNB5WWK - Freezer HOOVER - Free user manual and instructions
Find the device manual for free H1826MNB5WWK HOOVER in PDF.


| Product Type | Upright Freezer |
| Brand | Hoover |
| Model | H1826MNB5WWK |
| Height (mm) | 1800 |
| Width (mm) | 595 |
| Depth (mm) | 650 |
| Net Weight (kg) | 68 |
| Energy Class | F |
| Annual Energy Consumption (kWh) | 280 |
| Freezer Net Capacity (liters) | 250 |
| Freezing Capacity (kg/24h) | 20 |
| Climate Class | SN-N-ST-T |
| Noise Level (dB) | 41 |
| Temperature Control | Mechanical thermostat |
| Fast Freeze Function | Yes |
| Defrost System | Manual defrost |
| Interior Light | LED |
| Shelves/Drawers | 6 frost-free shelves, 3 drawers |
| Door Hinges | Reversible |
| Child Lock | No |
| Power Supply (V/Hz) | 220-240 / 50 |
| Detachable Parts Available | Yes, shelves and drawers |
Frequently Asked Questions - H1826MNB5WWK HOOVER
User questions about H1826MNB5WWK HOOVER
0 question about this device. Answer the ones you know or ask your own.
Ask a new question about this device
Download the instructions for your Freezer in PDF format for free! Find your manual H1826MNB5WWK - HOOVER and take your electronic device back in hand. On this page are published all the documents necessary for the use of your device. H1826MNB5WWK by HOOVER.
USER MANUAL H1826MNB5WWK HOOVER
USER MANUAL
COMBI
SUMMARY
SAFETY INFORMATION
COMBI REFRIGERATOR HOOVER
Climate Class
TRANSPORTATION INSTRUCTIONS
INSTALLATION INSTRUCTIONS
STARTING TO USE
COMBI OPERATION
VERTICAL DISPLAY
TOP FEAUTRED VERTICAL DISPLAY
INTERNAL USER INTERFACE
TECHNICAL FEATURES
HUMIDITY EQUALISER
ANTIBACTERIAL SYSTEM (if present)
WATER DISPENSER
Tips for keeping food perfect in the Fridge
Where to store your foods in the fridge
Storing Frozen Food
ENERGY SAVING
TAKE CARE
Defrosng
Cleaning and Care
CHANGING THE INTERNAL LIGHT
REVERSING THE DOOR SWING
TROUBLE SHOOTING
Thank you for purchasing this product.
Before using your refrigerator, please carefully read this instrucon manual in order to maximize its performance. Store all documentaon for subsequent use or for other owners. This product is intended solely for household use or similar applicaons such as:
- the kitchen area for personnel in shops, oces and other working environments
- on farms, by clientele of hotels, motels and other environments of a residential type
-at-bed and breakfasts (B & B) - for catering services and similar applicaons not for retail sale.
This appliance must be used only for purposes of storage of food, any other use is considered dangerous and the manufacturer will not be responsible for any omissions. Also, it is recommended that you take note of the warranty conditions. Please, to obtain the best possible performance and trouble free operaon from your appliance it is very important to carefully read these instrucons. Failure to observe these instrucons may invalidate your right to free service during the guarantee period.
SAFETY INFORMATION
This guide contains many important safety informaon.
Please, we suggest you keep these instrucons in a safe place for easy reference and a good experience with the appliance.
The refrigerator contains a refrigerant gas (R600a: isobutane) and insulang gas (cyclopentane), with high compatibility with the environment, that are, however, inammable.

Cauon: risk of re
If the refrigerant circuit should be damaged:
- Avoid opening ames and sources of ignition.
Thoroughly venlate the room in which the appliance is situated
WARNING!
- Care must be taken while cleaning/carrying the appliance to avoid touching the condenser metal wires at the back of the appliance, as you might injure your ngers and hands or damage your product.
- This appliance is not designed for stacking with any other appliance. Do not aempt to sit or stand on top of your appliance as it is not designed for such use. You could injure yourself or damage the appliance.
- Make sure that mains cable is not caught under the appliance during and aer carrying/moving the appliance, to avoid the mains cable becoming cut or damaged.
- When poisoning your appliance take care not to damage your ooring, pipes, wall coverings etc. Do not move the appliance by pulling by the lid or handle. Do not allow children to play with the appliance or tamper with the controls. Our company declines to accept any liability should the instrucons not be followed.
- Do not install the appliance in humid, oily or dusty places, nor expose it to direct sunlight and to water.
- Do not install the appliance near heaters or inammable materials.
- If there is a power failure do not open the lid.
Frozen food should not be aected if the failure lasts for less than 20 hours. If the failure is longer, then the food should be checked and eaten immediately or cooked and then refrozen.
- If you nd that the lid of the chest freezer is dicult to open just aer you have closed it, don't worry. This is due to the pressure dierence which will equalize and allow the lid to be opened normally aer a few minutes.
- Do not connect the appliance to the electricity supply until all packing and transit protectors have been removed.
- Leave to stand for at least 4 hours before switching on to allow compressor oil to sele if transported horizontally.
- This freezer must only be used for its intended purpose (i.e. storing and freezing of edible foodstu).
- Do not store medicine or research materials in the Wine Coolers. When the material that requires a strict control of storage temperatures is to be stored, it is possible that it will deteriorate or an uncontrolled beacon may occur that can cause risks.
- Before performing any operaon, unplug the power cord from the power socket.
- On delivery, check to make sure that the product is not damaged and that all the parts and accessories are in perfect condition.
- If in the refrigeraon system a leak is noted, do not touch the wall outlet and do not use open ames. Open the window and let air into the room. Then call a service center to ask for repair.
- Do not use extension cords or adapters.
- Do not excessively pull or fold the power cord or touch the plug with wet hands.
- Do not damage the plug and/or the power cord; this could cause electrical shocks or res.
- If the supply cord is damaged, it must be replaced by the manufacturer, its service agent or similarly qualified person in order to avoid a hazard.
- Do not place or store inammable and highly volale materials such as ether, petrol, LPG, propane gas, aerosol spray cans, adhesives, pure alcohol, etc. These materials may cause an explosion.
- Do not use or store inammable sprays, such as spray paint, near the Wine Coolers. It could cause an explosion or re.
- Do not place objects and/or containers lled with water on the top of the appliance.
- We do not recommend the use of extension leads and mul-way adapters.
- Do not dispose of the appliance on a re. Take care not to damage, the cooling circuit/pipes of the appliance in transportaon and in use. In case of damage do not expose the appliance to re, potenal ignition source and immediately
venlate the room where the appliance is situated.
- The refrigeration system posioned behind and inside the Wine Coolers contains refrigerant. Therefore, avoid damaging the tubes.
- Do not use electrical appliances inside the food storage compartments of the appliance, unless they are of the type recommended by the manufacturer.
- Do not damage the refrigerant circuit.
- Do not use mechanical devices or other means to accelerate the defrosng process, other than those recommended by the manufacturer.
- Do not use electrical appliances inside the food storage compartments, unless they are of the type recommended by the manufacturer.
- Do not touch internal cooling elements, especially with wet hands, to avoid cracks or injuries.
- Maintain the venlaon openings in the appliance enclosure or in the built-in structure, free of obstrucon.
- Do not use pointed or sharp-edged objects such as knives or forks to remove the frost.
- Never use hairdryers, electrical heaters or other such electrical appliances for defrosng.
- Do not scrape with a knife or sharp object to remove frost or ice that occurs. With these, the refrigerant circuit can be damaged, the spill from which can cause a re or damage your eyes.
- Do not use mechanical devices or other equipment to hasten the defrosng process.
- Absolutely avoid the use of open ame or electrical equipment, such as heaters, steam cleaners, candles, oil lamps and the like in order to speed up the defrosng phase.
- Never use water wash the compressor posion, wipe it with a dry cloth thoroughly aer cleaning to prevent rust.
- It is recommended to keep the plug clean, any excessive dust residues on the plug can be the cause re.
- The product is designed and built for domestic household use only.
- The guarantee will be void if the product is installed or used in commercial or non-residential domesc household premises.
- The product must be correctly installed, located and operated in accordance with the instrucons contained in the User Instrucons Booklet provided.
- The guarantee is applicable only to new products and is not transferable if the product is resold.
- Our company disclaims any liability for incidental or consequential damages.
- The guarantee does not in any way diminish your statutory or legal rights.
- Do not perform repairs on this Wine Coolers. All
intervenons must be performed solely by qualified personnel.
- If you are discarding an old product with a lock or latch ed to the door, ensure that it is le in a safe condion to prevent the entrapment of children.
- This appliance can be used by children aged from 8 years and above and by persons with reduced physical, sensory or mental capabilities or with a lack of experience and knowledge; provided that they have been given adequate supervision or instrucon concerning how to use the appliance in a safe way and understand the hazards involved.
- Children should not play with the appliance. Cleaning and user maintenance should not be made by children without supervision.
- Locks: If your Fridge/Freezer is ed with a lock, to prevent children being entrapped keep the key out of reach and not in the vicinity of the appliance. If disposing of an old Fridge/Freezer break o any old locks or latches as a safeguard.
COMBI REFRIGERATOR HOOVER

The pictures are for illustrave purposes only.
Climate Class
The appliance is designed to operate at the limited range of ambient temperature, depending on climate zones. Do not use the appliance at the temperature out of the limit. Climate class of your appliance is indicated on the label with technical descripon inside the fridge compartment.
| Climate Class | Amb. T. (°C) | Amb. T. (°F) |
| SN | From 10 to 32 | From 50 to 90 |
| N | From 16 to 32 | From 61 to 90 |
| ST | From 16 to 38 | From 61 to 100 |
| T | From 16 to 43 | From 61 to 110 |
TRANSPORTATION INSTRUCTIONS
The appliance should be transported only in a vercal upright posion. The packing as supplied must be intact during transportaon. If during the course of transport the product has been transported horizontally, it must only be laid on its le hand side (when facing the door front) and it must not be operated for at least 4 hours to allow the system to sele aer the appliance is brought back to upright posion.
-
Failure to comply with the above instrucons could result in damage occurring to the appliance. The manufacturer will not be held responsible if these instrucons are disregarded.
-
The appliance must be protected against rain, moisture and other atmospheric influences.
INSTALLATION INSTRUCTIONS
- If possible avoid placing the appliance near cookers, radiators or in direct sunlight as this will cause the compressor to run for long periods. If installed next to a source of heat or refrigerator, maintain the following minimum side clearances:
| From Cookers | 4" (100 mm) |
| From Radiators | 12" (300 mm) |
| From Fridges | 4" (100 mm) |
-
Make sure that sucient room, with an average temperature of between 16^ C and 32^ C, is provided around the appliance to ensure free air circulaon. Ideally, a space of no less than 9cm on the back and 2cm on the sides.
-
The appliance should be located on a smooth surface.
-
It is forbidden to use the refrigerator outdoors.
-
Protecon from moisture. Do not locate the freezer in moist space to avoid the metal parts rusty. And do not spray water to the freezer, otherwise it will weaken the insulaon and causes current leakage.
-
Refer to "Cleaning and Care" secon to prepare your appliance for use.
-
If the freezer is installed in unheated areas, garages etc., in cold weather condensaon may form on the outer surfaces. This is quite normal and is not a fault. Remove the condensaon by wiping with a dry cloth.
-
Never place Refrigerator in a wall recessed or into ed cabinets or furniture when it is working, the grille at the back may become hot and the sides warm. Do not drape the Refrigerator with any covering.
STARTING TO USE
Before you staring to use the freezer, please check that:
- The interior is dry and air can circulate freely at the rear.
- Clean the interior as recommended under "TAKE CARE" secon (electric parts of the refrigerator can only be wiped by dry cloth).
- Do not switch on unl 4 hours aer moving the fridge/freezer. The coolant uid needs me to sele. If the appliance is switched o at any me, wait 30 minutes before switching back on to allow the coolant uid to sele.
- Before connecng the Refrigerator to the mains supply posion. The thermostat control dias is located inside the Fridge compartment.
- Turn the thermostat knob to the "3" posion and turn on the electricity. The compressor and the light inside the refrigerator will begin to work.
- Before storing foods in your refrigerator, turn the refrigerator on and wait for 24 hours, to make sure it is working properly and to allow the Fridge/Freezer to fail to the correct temperature.
- Open the door 30 minutes later, if the temperature in the refrigerator decreased obviously, it shows that the refrigerator system works well. When the refrigerator
operates for a period of me, the temperature controller will automatically set the temperature within limits it opens.
COMBI OPERATION
Appliance connected to power at the rst me: When the appliance is connected to power at the rst me, the display will be lit for 2 seconds before going normal and the appliance runs with intelligence funcon.
Display Control: When the refrigerator door is closed and there is no buon operaon in 3 minutes, the display light goes o.
When the display light is o, open the refrigerator door or click any buon to light it up.
VERTICAL DISPLAY (if present)

TEMPERATURE SETTING: Click the "Fridge" or "Freezer" buon and when it ickers in the symbol, temperatures can be set. Each me when the buon is clicked, the temperature changes accordingly. Temperatures cannot be set under funcons of fast cooling, fast freezing, Smart ECO and vacaon. Under temperature seng, if there is no buon operaon in 5 seconds, the buon stops ickering and the set temperature comes into eect.
SMART ECO: Acvate the Smart Eco buon to set the temperatures of the fridge in max. energy eciency condions (+4°C for fridge temperature, -18°C for freezer temperature).
To enter Smart Eco: Click "opon" unl it ickers and then click "OK" to enter this funcon.
To deacvate Smart Eco: Click "opon" unl it goes to Smart ECO, click "OK" to quit this funcon and the light goes o.
FAST COOLING: Acvate Fast Cooling mode to start an additional pulse for a fast freezing of the fridge compartment. The funcon is acvated and conrmed by the switching on of the dedicated LED icon.
To enter Fast Cooling: Click "opon" until it ickers in "Fast Cooling" and then click "OK" to enter this funcon.
To deacvate Fast Cooling: Click “opon” until it goes to “fast cooling” and then click “OK” to deacvate this funcon.
FAST FREEZING: Acvate Fast Freezing to rapidly freeze big quanes of food keeping intact
nutritional food properes. When the light in Fast Freezing goes o and the freezer temperature goes back to the value before fast freezing. When Fast Freezing me is up (26 hours), it deacvates automacally. When it goes to Vacaon, Fast Freezing stops.
To enter Fast Freezing: Click “opon” unl it ickers in “Fast Freezing” and then click “OK” to enter this funcon.
To deacvate Fast Freezing: Click "opon" until it goes to "fast freezing" and then click "OK" to quit this funcon.
VACATION: In case of long stops, the Vacaon funcon can be used. This funcon deacvates the fridge compartment, while leaving the freezer on. Ensure that there is no food inside the fridge compartment before using this funcon. The funcon is acvated and conrmed by the switching on of the dedicated LED icon. The light in Vacaon goes o and the refrigerator temperature goes back to the value before Vacaon.
Vacaoon quits under funcons of Smart ECO and Fast Cooling.
To enter Vacaon: Click "opon" unl it ickers in "Fast Freezing" and then click "OK" to enter this funcon.
To deacvate Vacaon: Click "opon" until it goes to "Vacaon" and then click "OK" to quit this funcon.
POWER OFF MEMORY: Refrigerator can automatically keep all the seng in case of power o. When the unit is plugged in again, the refrigerator will run with the seng before power o.
POWER-ON DELAY: To prevent harm to the refrigerator in case of sudden power cut and power on, the unit does not start immediately if the power o me is less than 5 minutes.
FREEZER OVER-TEMPERATURE ALARM (only in case of power on): When the freezer temperature is higher than 10^ C at the rst me connected to power, the symbol light of the freezer chamber goes on and the number representing temperature ickers.
Press any buon or wait for 5 seconds, ickering stops and it goes back to the temperature that was set.
REFRIGERATOR DOOR OPENING ALARM: When the refrigerator is open over 3 minutes, the buzzer will buzz. Close the door or press any buon to stop the alarm, but for the laer, the alarm will go again aer 3 minutes.
SENSOR FAULT ALARM: When it shows "E0", "E1", "E2" or other abnormal symbols, it means sensor faults and the refrigerator needs repair.
TOP FEAUTRED VERTICAL DISPLAY (if present)

SETTING Buon: Press "SETTING" to change the temperature.
When buon is pressed for the rst me: You can change refrigerator temperature with ▲ PLUS Buon and ▼ MINUS Buon.
When buon is pressed for the second time: You can change refrigerator temperature with ▲ PLUS Buon and ▼ MINUS Buon.
ON/OFF Buon: To turn on Refrigerator Press ON/OFF buon for 3 seconds. To turn off Refrigerator: Press ON/O buon for 3 seconds.
Stand-by Mode: To save energy is possible to acvate Stanby Mode. The refrigerator will work in normal state and all leds will turn OFF
To enter Stan-by Mode: Press ON/OFF buon for 1 second.
To deacvate Stan-by Mode: Press ON/OFF buon for 1 second. Fridge back to normal operaon.
ECO MODE Buon: Press Eco Mode buon to set temperatures of the fridge in max. energy eciency condions (+5°C for fridge temperature, -18°C for freezer temperature). If you want to exit the ECO mode funcon, you need to press the Eco Mode buon again and the refrigerator temperature turns back to normal operaon.
HOLIDAY Buon: In case of long stops, the Holiday funcon can be used. This funcon deacvates the fridge compartment, while leaving the freezer on. Ensure that there is no food inside the fridge compartment before using this funcon. The funcon is acvated and conrmed by the switching on of the dedicated LED icon. If you want to exit the Holiday funcon, you will need to press the "Holiday" buon again, the light in Holiday goes o and the refrigerator temperature goes back to the value before Holiday.
SUPER COOLING Buon: Press Super Cooling buon to start an additional pulse for a fast freezing of the fridge compartment. The funcon is acvated and conrmed by the switching on of the dedicated LED icon.
If you want to exit the Super Cooling funcon, you need to press the Super Cooling buon again and the refrigerator temperature turns back to normal operaon.
SUPER FREEZING Buon: Press Super Freezing buon to rapidly freeze big quantities of food keeping intact nutritional food properes. If you want to exit the Super Freezing funcon, you need to press the Super Freezing buon again and the freezer temperature turns back to normal operaon.
WI-FI Buon: This appliance is equipped with OneFi+ technology that allows you to control it remotely via App. Press OneFi+ buon to acvate Wi-Fi funcon.
Machine Enrollment (on App): Download the Hoover Wizard App on your device. The Hoover Wizard App is available for devices running both Android and iOS, both for tablets and for smartphones. Get all the details of the One Fi+ funcons by browsing the App in DEMO mode. Open the App, create the user prole and enroll the appliance following the instrucons on the device display or the "Quick Guide" aached on the machine. This operaon is necessary just for the rst installaon. To nalize the enrollment following the instrucon on the smartphone's screen
Refrigerator usage from remote by App: When the enrollment is completed, there will be Wi-Fi LED switched on. From now on it will be possible to manage the product by using the buons on the display or using the App: both of them will be aligned according to the last command given.
LOCK Button: Press Lock buon to block display user interface (Lock icon enlights, "LO" appears on display and, aer 2 seconds, the refrigerator and freezer temperature shows recovery). If you want to exit Lock funcon, press the "Lock" buon again for 3 seconds, and the refrigerator will exit the Lock funcon.
INTERNAL USER INTERFACE (if present)

SET Buon: Press SET buon for seng the temperature until you reach the level you want where level 1 is the warmest and level 4 is the coldest. Under normal operang conditions, we recommend using an intermediate seng (level 2).
Once the seng takes eect, it immediately enters the corresponding stall for operaon control, and the stall indicator lights up 3s3min and then goes out. Factory default temperature is set to 2. Long press "SET" key to exceed 3s and enter the hardware self-check program. The hardware self-check operaon is eecve within 10min, and the long buon operaon aer 10min is invalid.
WI-FI Buon: This appliance is equipped with OneFi+ technology that allows you to control it remotely via App. Press OneFi+ buon to acvate Wi-Fi funcon.
Machine Enrollment (on App): Download the Hoover Wizard App on your device. The Hoover Wizard App is available for devices running both Android and iOS, both for tablets and for smartphones. Get all the details of the One Fi+ funcons by browsing the App in DEMO mode.
Open the App, create the user prole and enroll the appliance following the instrucons on the device display or the "Quick Guide" aached on the machine. This operaon is necessary just for the rst installaon. To nalize the enrollment following the instrucon on the smartphone's screen.
Refrigerator usage from remote by App: When the enrollment is completed, there will be Wi-Fi LED switched on. From now on it will be possible to manage the product by using the buons on the display or using the App: both of them will be aligned according to the last command given.
FAST COOL Button: when "FAST COOL" buon is pressed, rapid cooling funcon is acvated, according to the 21°C to refrigeraon control gear. Maximum running me is 3h, aer this me temperature will be set to 1.
If the "SET" buon is pressed in the process of speed cooling, the instant cooling funcon is immediately withdrawn and the default is entered into the next gear.
TECHNICAL FEATURES
HUMIDITY EQUALISER (if present)
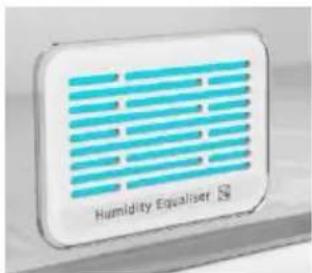
The exclusive Hoover Humidity Equaliser uses this humidity naturally generated by fruits and vegetables to keep always a level between 85% and 95%.
ANTIBACTERIAL SYSTEM (if present)
LED UVA Lights acvate a Titanium Filter producing a “photocatalysis” reacon which will destroy bacteria within the refrigerator air. This reacon works when the refrigerator door is closed to avoid puried air leakage.
In Total No Frost products, it is inserted in sky box and it works every me the compressor works. Filter is permanent and therefore does not need changing.
The antibacterial system has to be turned o during the energy consumpon test.

WATER DISPENSER (if present)
The water dispenser allows you to get chilled water without opening the fridge compartment door.

natural_image
Illustration of a blue refrigerator with a door and a small orange button (no text or symbols)Before rst use
Before using the water dispenser for the rst me, remove and clean the water tank located inside the fridge compartment.
- Li the water tank out of the fridge compartment.
- Open the water tank cover and then clean the water tank and cover in warm soapy water. Rinse thoroughly.
- Aer cleaning, each the cover to the water tank and then replace the water tank back on the fridge door.
- Clean the dispenser pad outside the fridge door.
Filling the water tank with water
- Open the small cover.
- Fill the water tank with drinkable water up to the Max line.
- Close the small cover.
Dispensing
To dispense water, push the dispenser pad gently, using
a glass or container. To stop the ow of water, pull your glass away from the dispenser pad.

Tips for keeping food perfect in the Fridge
Take extra care with meat and sh: cooked meats should always be stored on a shelf above raw meats to avoid bacterial transfer. Keep raw meats on a plate which is large enough to collect juices and cover it with cling lm or foil.
Leave space around food: this allows cold air to circulate around the Fridge, ensuring all parts of the Fridge are kept cool.
Wrap up food!: to prevent transfer of avors and drying out, food should be separately packed or covered. Fruit and vegetables need not be wrapped.
Pre-cooked food should be cooled properly: allow pre-cooked food to cool down before placing in the Fridge. This will help to stop the internal temperature of the Fridge from rising.
Shut the door!: to prevent cold air escaping, try to limit the number of mes you open the door. When retuning from shopping, sort foods to be kept in your Fridge before opening the door. Only open the door to put food in or take it out.
Where to store your foods in the fridge
Cool area: this is where to store foods which will keep longer if they are kept cool. Milk, eggs, yogurt, fruit juices, hard cheeses eg. Cheddar. Opened jars and boles of salad dressings, sauces and jams. Fats, eg. Buer, margarine, low-fat speads, cooking fats and lard.
Coldest area (0°C to 5°C): this is where foods which must be cold to keep them safe should be kept:
- Raw and uncooked foods should always be wrapped.
- Pre-cooked chilled foods, eg. Ready meals, meat pies, so cheeses.
-Pre-cooked meats eg. Ham, - Prepared salads(including pre-packed mixed green salads, rice, potato salad etc).
·Desserts, eg. Fromage frais, home-prepared food and leovers or cream cakes.

The pictures are for illustrave purposes only.
Crisper: this is the most humid part of the Fridge. Vegetables, fruit, fresh salad items eg. Unwashed whole leuce, whole tomatoes, radishes etc can be stored here.
WE RECOMMEND THAT ALL PRODUCE KEPT IN THE SALAD BIN IS WRAPPED.
NOTE: Always wrap and store raw meat, poultry and fish on the lowest shelf at the bottom of the fridge. This will stop them dripping onto, or touching other foods. Do not store inflammable gasses or liquids in the fridge.
Electrical operation after 3h on the freezer, the temperature in the cabinet above -12°C, the alarm light is lit, and buzzer sounds.
Storing Frozen Food
Prepackaged commercially frozen food should be stored in accordance with the frozen food manufacturer's instructions for a M B E R freezer compartment.
To ensure that the high quality achieved by the frozen food manufacturer and the food retailer is maintained the following should be remembered:
- Put packets in the freezer as quickly as possible after purchase.
- Do not exceed "Use-By", "Best Before" dates on the packaging.
| DO | DON'T |
| Defrost food from the freezer thoroughly in a fridge or in a microwave oven following defrosting and cooking instructions. | Use pointed sharp-edged objects such as knives, forks to remove the ice. |
| Defrost frozen meat completely before cooking. | Put hot food in the freezer. Let it cool down first. |
| Store commercially frozen food in accordance with the instructions given on the packets that you buy. | Put liquid-filled bottles or sealed cans containing carbonated liquids into the freezer as they may burst. |
| Check contents of the refrigerator at regular intervals. | Remove items from the freezer with wet hands. |
ENERGY SAVING
For beer energy saving we suggest:
- Installing the appliance away from heat sources and not exposed to direct sunlight and in a well-venlated room.
- Avoid putting hot food into the refrigerator to avoid increasing the internal temperature and therefore causing connuous functionalizing of the compressor.
- Do not excessively stu foods so as to ensure proper air circulation.
• Defrost the appliance in case there is ice to facilitate the transfer of cold. - In case of absence of electrical energy, it is advisable to keep the refrigerator door closed.
- Open or keep the doors of the appliance open as lile as possible.
- Avoid adjusting the seng to temperatures too cold.
- Remove dust present on the rear of the appliance.
TAKE CARE
Defrosting
This appliance has automac defrosng system, no need to defrost by hand.
Cleaning and Care
Aer defrosng you should clean the Fridge/Freezer internally with a weak soluon of bicarbonate of soda. Then rinse with warm water using a damp sponge or cloth and wipe dry. Wash the baskets in warm soapy water and ensure they are completely dry before replacing in the Fridge/Freezer. Condensaon will form on the back wall of the Fridge; however it will normally run down the back wall and into the drain hole behind the salad bin.
natural_image
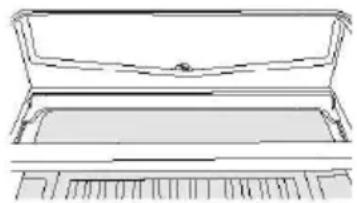
Line drawing of a closed mechanical component or housing (no text or symbols)The drain hole will have a “cleaning spike” inserted into it. This ensures that small pieces of food can not enter the drain. Aer you have cleaned the inside of your Fridge and removed any food residues from around the whole, use the “cleaning spike” to make sure that there are no blockages. Use standard furniture polish to clean the Fridge/Freezer exterior. Make sure that the doors are closed to prevent polish geng on the magnec door seal or inside.
The grille of the condenser at the back of the Fridge/Freezer and the adjacent components can be vacuumed using a so brush eachment.
Do not use harsh cleaners, scouring pads or solvents to clean any part of the Fridge/Freezer.
CHANGING THE INTERNAL LIGHT
- Before carrying out the LED replacement always disconnect the mains supply.
- Hold and li up the LED light cover.
- Remove the old LED by unscrewing it in an an-clockwise direcon.
- Replace with a new LED light by screwing it in a clockwise direcon marking sure that it is secure in the light holder.
- Ret the light cover and re-connect your Fridge to the mains supply and switch on.
REVERSING THE DOOR SWING Dissemble the Refrigerator Door
- a. Use a tool to remove the screw o the hinge cover, and then remove the laer. Insert the communicaon line to the hole on the cabinet top. b. Use a tool to remove the 4 screws o the upper hinge cover and then remove the laer. Pry up the door bush and small end cap cover on the door.

natural_image
3D mechanical assembly diagram showing a component with mounting holes and internal components (no text or symbols visible)
natural_image
3D mechanical assembly diagram showing a bracket with mounting holes and a lever mechanism (no text or symbols)
natural_image
Close-up of a mechanical device with a rectangular component and circular ports (no visible text or symbols)c. Insert the door bush and door communicaon line into the hole on the door and then put on the small end cap cover.
d. Use a tool to remove the 2 screws as shows in the below gure to remove the hole cover on the cabinet top and get the cabinet communicaon line out of the hole. Pry up the small end cap cover on the door and get out the door bush and door communicaon line.

natural_image
Diagram of a computer monitor with ports and connectors (no text or symbols visible)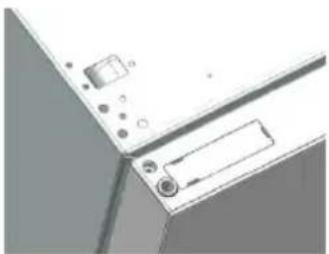
natural_image
Close-up of a computer monitor with buttons and a paper tab (no visible text or symbols)e. Insert the door bush into the round hole on the door and then put on the small end cap cover.
f. Move the refrigerator door upward over 500mm to remove the door.

natural_image
3D rendering of an open refrigerator with shelves and doors (no text or symbols visible)- a. Use a tool to remove the 3 screws o the middle hinge cover and then remove the middle hinge. b. move the freezer door upward over 500mm to remove the door.

natural_image
3D technical illustration of a mechanical assembly with bolts and a bracket (no text or symbols)
natural_image
3D rendering of a refrigerator with open door and side shelves (no text or symbols visible)
c. Remove the adjustable front feet under the lower hinge; use a tool to remove the 4 screws from the lower hinge and then disassemble the lower hinge. Door disassembly is nished.
The pictures are for illustrave purposes only.
Assemble door, lower hinge accessories to the corresponding positions
- a. Use a tool to get the door bush out as shown in the below gure and assemble it to the corresponding posion of the other side.

flowchart
graph TD
    A["Path a"] --> B["Path b"]
    B --> C["End"]
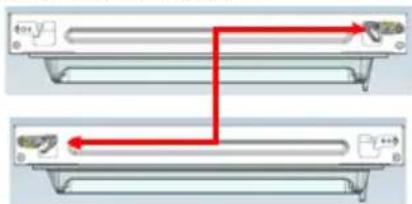
b. Use a tool to remove the screws o the stopper ass as shown in the below gure and then assemble them to the other side of the door.
natural_image
Diagram showing two identical mechanical components with red arrows indicating direction, no text or symbols present.c. Use a tool to remove the axle and two stoppers on the lower hinge and then assemble them to the posion as shown in the below gure.

natural_image
Two views of a mechanical component with colored circular features, one showing a red arrow indicating transformation (no text or symbols)This situaon apply to open door in right side This situaon apply to le side
The pictures are for illustrave purposes only.
Assemble the refrigerator door and freezer door to the opposite side
- a. Remove the adjustable front foot as shown below by hand and then assemble the lower hinge to the other side of the cabinet and x the screws by using a tool.

natural_image
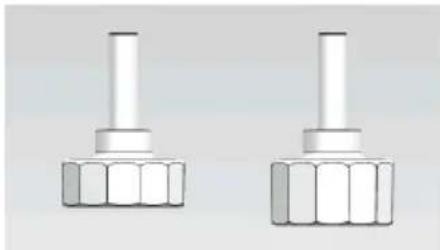
3D mechanical assembly diagram showing a bracket with mounting flanges and a red arrow indicating a specific component (no text or symbols present)b. Assemble the shorter adjustable front foot to the lower hinge side and adjust the height of the foot to make the refrigerator stay in level.
natural_image
Two identical white mechanical components with hexagonal bases, no text or symbols visible.- Put on the freezer door and turn the middle hinge by 180^ C and then assemble it to the other side of the cabinet; use a tool to screw up the 3 screws to x the middle hinge.

natural_image
Technical diagram showing a mechanical component with a red arrow indicating direction (no text or symbols present)- Put on the refrigerator door and assemble the upper hinge to the other side of the cabinet; use a tool to screw up the 4 screws to x the upper hinge.
Aer that, connect the door communicaon line and the cabinet communicaon line and then put on the upper hinge cover and x it using a screw.
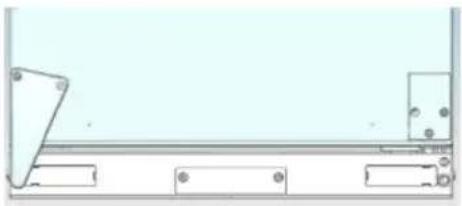
- Assemble the hole cover to the other side of the cabinet and use a tool to screw up the hole cover.
natural_image
Pure technical line drawing of a mechanical assembly without any text, numbers, or symbolsDoor disassembly is nished here.
gure of door opening from the right
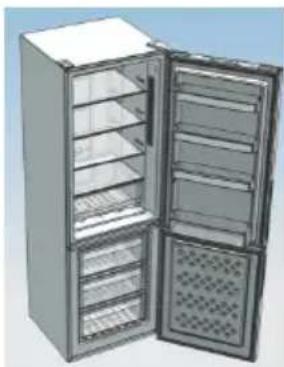
natural_image
3D rendering of an open stainless steel refrigerator with multiple doors and ventilation grilles (no text or symbols visible)
natural_image
3D rendering of a stainless steel refrigerator with open doors and side shelves (no text or symbols visible)gure of door opening from the le

Double check that the door is aligned correctly and all the seals are closed on all sides. If necessary, re-adjust the levelling feet.
NOTE: If you want to have the door swing reversed, we recommend that your contact a qualified technician. You should only try to reverse the door yourself if you believe that you are qualified to do so. All parts removed must be saved to do the reinstallaon of the door. You should rest the fridge freezer on something solid so that it will not slip during the door change process. Do not lay the fridge freezer at as this may damage the coolant system. Ensure the fridge freezer is unplugged and empty. We recommend that 2 people handle the fridge freezer during assembly.
The pictures are for illustrave purposes only.
TROUBLE SHOOTING
- If the appliance does not operate when switched on, check.
- Power cut: If the internal temperature of the Fridge/Freezer compartment is -18°C or less when the power returns, your food is safe. The food in your Fridge/Freezer will remain frozen for approx 16 hours with the door closed. Do not open the Fridge/Freezer door more than necessary.
- The product is designed and built for domesc household use only.
- The plug is inserted properly in the socket and that the power supply is on. (To check the power supply to the socket, plug in another appliance).
- The fuse has blown/circuit breaker has tripped/main distribution switch has been turned off.
- The temperature control has been set correctly.
- If the refrigerator is exceptionally cold, you may have accidentally adjusted the thermostat control dial to a higher posion.
- If the refrigerator is exceptionally warm, the compressor may not be working. Turn the thermostat control dial to the maximum seng and wait a few minutes. If there is no humming noise, it is not working. Contact the local store where your purchase was made.
- If condensaon appears outside of the Refrigerator, this may be due to a change in the room temperature. Wipe o any residue of moisture. If the problem connues contact the local store where your purchase was made.
- If the provided plug has been replaced, make sure the new plug is properly connected. If the appliance is sll not operang aer the above checks, please contact Customer Service.
SCRAPPING OLD APPLIANCES

This appliance is marked according to the European direcve 2012/19/EU on Waste Electrical and Electronic Equipment (WEEE).
WEEE contains both pollung substances (which can cause negative consequences for the environment) and basic components (which can be re-used). It is important to have WEEE subjected to specific treatments, in order to remove and dispose properly all pollutants, and recover and recycle all materials.
Individuals can play an important role in ensuring that WEEE does not become an environmental issue; it is essenal to follow some basic rules:
WEEE should not be treated as household waste.
WEEE should be handed over to the relevant collecon points managed by the municipality or by registered companies. In many countries, for large WEEE, home collecon could be present.
In many countries, when you buy a new appliance, the old one may be returned to the retailer who has to collect it free of charge on a one-to-one basis, as long as the equipment is of equivalent type and has the same funcons as the supplied equipment.
Conformity
By placing the C€ mark on this product, we are conming compliance to all relevant European safety, health and environmental requirements which are applicable in legislaon for this product.
CANDY HOOVER GROUP S.R.L.
Via Privata Eden Fumagalli
20861 Brugherio Milan Italy
- SUMMARY
- SAFETY INFORMATION
- WARNING!
- Climate Class
- TRANSPORTATION INSTRUCTIONS
- INSTALLATION INSTRUCTIONS
- STARTING TO USE
- COMBI OPERATION
- VERTICAL DISPLAY (if present)
- TOP FEAUTRED VERTICAL DISPLAY (if present)
- INTERNAL USER INTERFACE (if present)
- TECHNICAL FEATURES
- HUMIDITY EQUALISER (if present)
- ANTIBACTERIAL SYSTEM (if present)
- WATER DISPENSER (if present)
- Before rst use
- Filling the water tank with water
- Dispensing
- Tips for keeping food perfect in the Fridge
- Where to store your foods in the fridge
- Storing Frozen Food
- ENERGY SAVING
- TAKE CARE
- Defrosting
- Cleaning and Care
- CHANGING THE INTERNAL LIGHT
- REVERSING THE DOOR SWING Dissemble the Refrigerator Door
- Assemble door, lower hinge accessories to the corresponding positions
- Assemble the refrigerator door and freezer door to the opposite side
- TROUBLE SHOOTING
- SCRAPPING OLD APPLIANCES
- Conformity
Brand : HOOVER
Model : H1826MNB5WWK
Category : Freezer