
CS650 - Pregnant PSB - Free user manual and instructions
Find the device manual for free CS650 PSB in PDF.


| Product Type | Center Channel Speaker |
| Brand | PSB |
| Model | CS650 |
| Configuration | 2-Way |
| Woofer Size | 6.5 inches |
| Tweeter Size | 1 inch |
| Frequency Response | 55 Hz - 21 kHz |
| Sensitivity | 89 dB (2.83V @ 1m) |
| Impedance | 8 Ohms |
| Recommended Amplifier Power | 20 - 150 Watts |
| Dimensions (W x H x D) | 20.5 x 7.5 x 9.75 inches |
| Weight | 12.5 lbs |
| Finish | Black Ash Vinyl |
| Mounting | Shelf or stand |
| Warranty | 5 years limited |
| Part Number | CS650-B |
Frequently Asked Questions - CS650 PSB
User questions about CS650 PSB
0 question about this device. Answer the ones you know or ask your own.
Ask a new question about this device
Download the instructions for your Pregnant in PDF format for free! Find your manual CS650 - PSB and take your electronic device back in hand. On this page are published all the documents necessary for the use of your device. CS650 by PSB.
USER MANUAL CS650 PSB
theCustomSoundseries
Owner's Guide
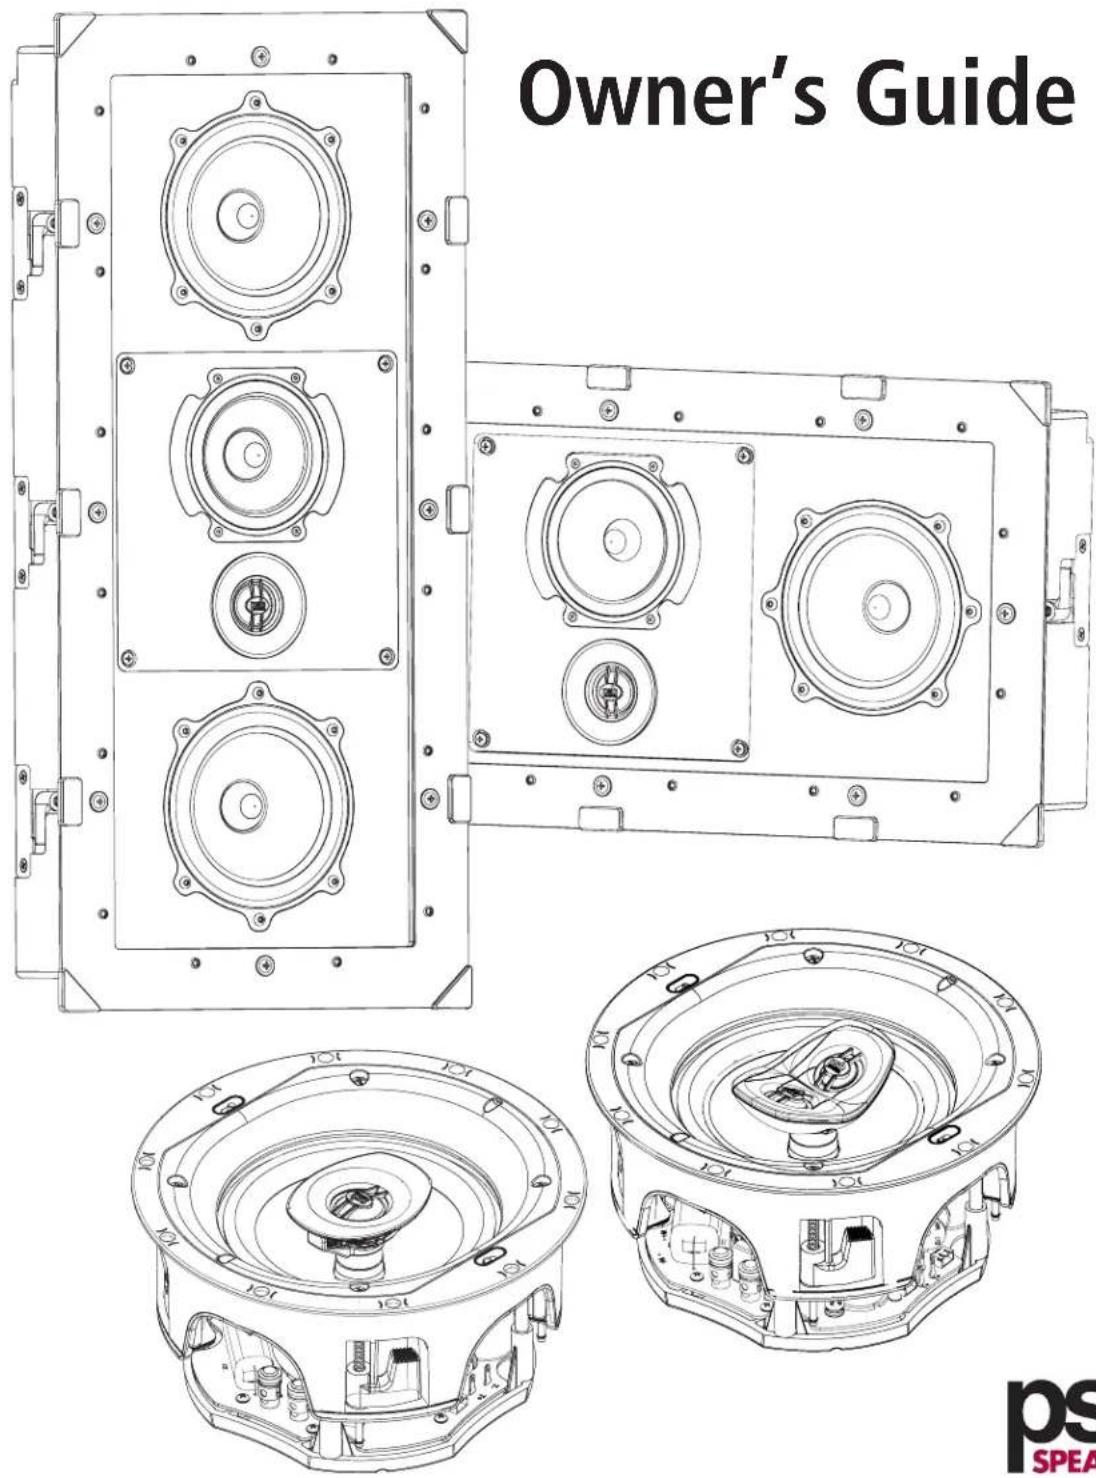
Thank you for purchasing PSB Speakers CustomSound In-Wall/In-Ceiling Speaker. These are high performance architectural speakers, providing superior stereo and home theatre sound for commercial and residential applications. Their slim and discrete profile virtually disappears in the room due to their small dimensions, low profile perforated grille and 'frameless' design. They are easy to install and conceal in all types of rooms.
Designed inside the anechoic chamber at Canada's National Research Council, this CustomSound In-Wall/In-Ceiling Speaker is engineered using PSB's unparalleled driver technology, from their award-winning series of In-Room loudspeakers. The new PSB CustomSound models employ clay-filled polypropylene woofer cones, titanium ferro-fluid cooled tweeter domes and carefully designed phase plugs to turn ordinary rooms and commercial spaces into live performances. Please read this booklet to help assure that you are getting the most out of your PSB product and your music.
CS600 Series
There are three models in this series featuring frameless magnetic grilles with invisible scrims. They are for In-Ceiling applications due to the depth of the speaker. The provided round and square grilles (CS600 series only) simplify and reduce your inventory requirements.
Each model features an improved simple, fool proof mounting system using heavy duty doglegs. Cutting templates are included. Pre-construction brackets and Back Boxes are also available.
CS610 – 2-Way In-Ceiling Speaker
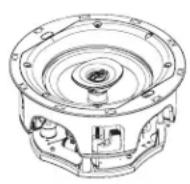
- Concentrically mounted driver features a Wave Guide and ball-joint pivot mount assembly so the tweeter can be aimed toward the listening position for enhanced musical imaging.
- Tweeter level adjustment to 'dial in' the upper frequency response of the speaker and its acoustic environment to achieve the most musical balance for every room.
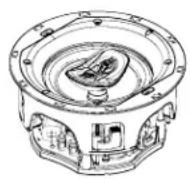
CS630 – Stereo/Surround In-Ceiling Speaker
- Features a dual voice coil equipped version of the CS610 woofer and a pair of aluminium dome tweeters.
- Offers acoustic adjustments for the mid/woofer and tweeter levels.
- Provides stereo sound in small spaces like bathrooms and hallways and can be used as surround effects speakers in home theatres.
- The tweeter array can be rotated after installation to get the best high frequency coverage.
- Two discrete channels, it can be wired as bipole, dipole, or as surround plus surround rears in a 7.1 theatre.
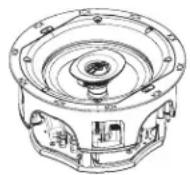
CS650 – Premium 2-Way In-Ceiling Speaker
- Employs a premium woofer for robust bass output and extension.
- Upgraded 1" titanium tweeter with Wave Guide and indexed adjustment for precise adjustment of the tweeters acoustic axis.
- Also featured are acoustic adjustments for the mid/woofer and tweeter level.
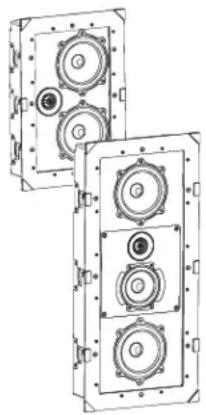
Enclosed Models - In-Wall (W) and In-Ceiling (C) applications.
natural_image
Technical line drawing of two identical mechanical or electrical enclosure units with multiple circular components and mounting holes (no text or symbols)W-LCR – In Wall Speaker (Enclosed)
- 2-way design employing two 5 14 -inch (135mm) woofers along with a 1-inch (25mm) titanium dome tweeter.
- Perfect speaker for most installations, both as a 2-channel zone speaker and as part or all of a surround sound system.
W-LCR2 - In-Wall Speaker (Enclosed)
- A 3-way loudspeaker design employing two of the 5 1/4-inch (135mm) woofers with a 4-inch (100mm) midrange speaker and a 1-inch (25mm) titanium dome tweeter.
- The midrange and tweeter are on a rotatable sub-assembly for uniform dispersion whether the speaker is oriented vertically or horizontally.
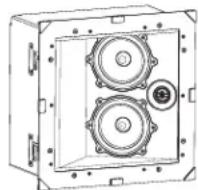
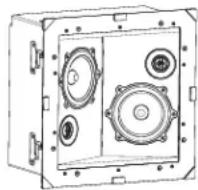
C-LCR - In-Ceiling Speaker (Enclosed)
- 2-way design employing two 5 14 -inch (135mm) woofers with a 1-inch (25mm) titanium dome tweeter.
- The drivers are on an angled baffle, in a deeper box for better dispersion recessed into the ceiling.
C-SUR – In-Ceiling Speaker (Enclosed)
- Employs two 5 14 -inch (135mm) woofers and two 1-inch (25mm) tweeters in a 5.1/7.1 dual mode configuration.
• Each woofer/tweeter pair has its own crossover and input. - A single CustomSound C-SUR can be used for both the surround and surround back channels providing an ideal solution for a 7.1 theatre in smaller rooms.
ADDITIONAL FEATURES...
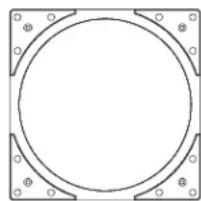
Square Grille Option
This adaptor is used to change from round to square grilles and should be installed on the speaker before installation.
Dog Legs
The provided Dog Legs are used to lock the speaker into the ceiling or wall.
Backcan
Backcans are sold separately for the following open back models only:
• BCN 600 for CS610/CS650 speakers
• BCN 630 for CS630 speaker
The Backcan attaches to the back of the speaker and provides:
- Speaker isolation for better sound quality.
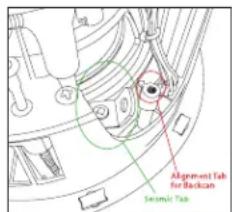
- Seismic tabs that secure the speaker to prevent damage or injury, should it dislodge from the ceiling or wall (included on the CS610, CS630 and CS650).
o This tab is provided on the back of each Backcan for connection to an independent secondary support point.
Some construction codes require using this secondary support point, which requires connecting a support line to a separate secure support point. Consult construction codes in your region.
NOTE: The CS600 Series provides seismic tabs directly on the speaker if the Backcan isn't used.
WARNING: Ceiling speakers can generate substantial vibration. It is HIGHLY RECOMMENDED to use the seismic tab as a secondary support point in case the ceiling tile or structure breaks.
natural_image
Pure geometric diagram of a circle inscribed in a square frame with corner markers (no text or symbols)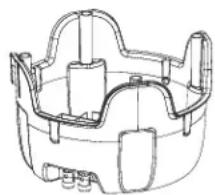
natural_image
Technical line drawing of a mechanical housing or enclosure component (no text or symbols)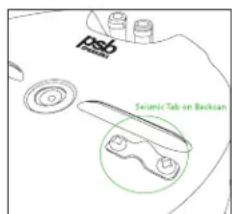
UNPACKING...
The packing materials are designed to protect the speaker from damage during transport. If visible or concealed damage occurs during handling, please notify your authorized PSB dealer, or the shipping company that delivered your loudspeaker. We highly recommend retaining all packaging, as it may be needed to transport the speakers in the future.
Required Tools
The following tools will be needed for typical installations:
- Tape measure
- Pencil, level
- Utility knife
• Wallboard saw (and extra blades) - Screwdriver
- Drill, drill bits
- Fish tape or probe wire
- Flashlight
- Speaker wire of the appropriate length and gauge
In addition to the supplies and material listed above, paint and extra fine sandpaper may be necessary if you wish to change the colour of the grille from the standard white finish.
Speaker Wire
If speaker wire is not yet installed, follow these guidelines for the correct speaker wire. If wires are installed, check to ensure each cable and length of run meets the following standards:
| Gauge Maximum Length | |
| 16 AWG (1.3mm ^2 ) 30 ft | (9 m) |
| 14 AWG (2.1mm ^2 ) 50 ft | (15 m) |
| 12 AWG (3.3mm ^2 ) 90 ft | (27 m) |
NOTE: Leave at least 14" (36cm) of extra wire length at the speaker location to ease the installation.
Painting
WARNING: Construction dust or paint on the speaker drivers can negatively affect their performance and if significant, will void their warranty.
The grille is constructed of painted steel. It can be painted following standard painting practices and techniques. Prior to painting, remove the scrim covering from the grille to avoid damaging the material. Apply as many coats of paint as needed (thinned slightly) to produce an even surface and avoid blocking grille perforations. Please note that spraying will yield best results.
Let a painted grille dry thoroughly in a well-ventilated area before carefully reapplying the grille scrim with reusable adhesive and installing it on the speaker.
POSITIONING...
Layout
CustomSound In-Wall/In-Ceiling speakers are designed to be mounted in walls or ceilings. In part, due to their wide dispersion characteristics and other aspects of their superb sonic performance, the mounting position in a room is very flexible. Based on different requirements and the variety of room shapes and sizes, we highly recommend consulting your local PSB authorized dealer, or contacting a local CEDIA certified custom install specialist nearest you.
Speaker Locations
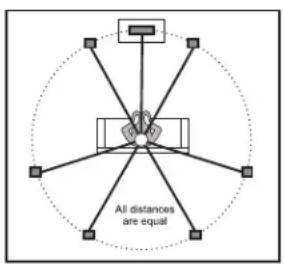
Before installation, it is strongly suggested to consider and plan the probable location of listeners in relation to speaker locations. Ideally, listeners should have a clear line-of-sight.
Please read and understand all safety and preparation information on these pages to ensure installation is done accordingly.
Preparing Ceiling and Wall
If you are unsure about completing this process, we highly suggest consulting your local PSB authorized dealer, or contacting a local CEDIA certified custom install specialist nearest you.
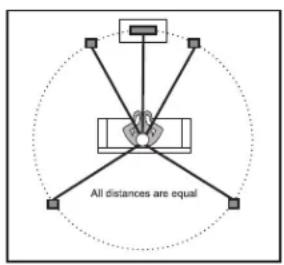
5.1 surround speaker placement
flowchart
graph TD
    A["Central Node"] --> B["Upper Control Unit"]
    A --> C["Left Control Unit"]
    A --> D["Right Control Unit"]
    A --> E["Left Control Unit"]
    style A fill:#f9f,stroke:#333
    style B fill:#ccf,stroke:#333
    style C fill:#cfc,stroke:#333
    style D fill:#fcc,stroke:#333
    style E fill:#cff,stroke:#333
    note1["All distances are equal"]
7.1 surround speaker placement
WARNING: Ensure each spot chosen is safe for cutting. Do not cut through mounting surfaces that could have potential hazards such as electrical wiring, conduits, plumbing or asbestos insulation concealed behind them.
If there is some type of moveable insulation in the ceiling, please proceed after reviewing these tips:
- Wear hand, mouth, nose and eye protection before handling insulation containing fibreglass.
- Beware of hidden nails when reaching into the ceiling to remove insulation.
- Cut or push the insulation away before inserting the speaker.
- Be sure to keep a 4-6 in. (10-15 cm) area around the speaker hole free from any types of insulation to maximize acoustic performance.
- Loose blown in insulation should not be used in the location of the speaker as it can cause damage to the woofer if the Backcan (sold separately) is not used.
INSTALLING...
NOTE: Please use eye protection and observe all safety precautions before using appropriate installation tools.
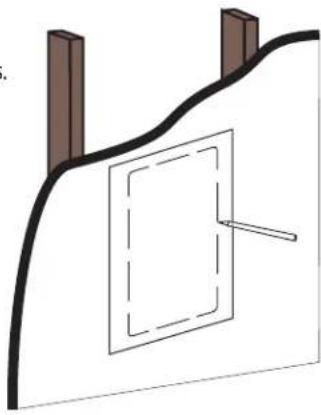
Using the Cut Out Template
NOTE: Locate the wall studs prior to installation as they could interfere with the placement of the speakers.
- Centre the template in the location where the centre of the speaker grille will be located.
- Position the template in place on the mounting surface (e.g., use painter's tape).
- Trace along the cutting line of the template with a pencil.
New Construction
- For open back model speakers (CS610, CS630, CS650) use the stud plate and/or metal wings to lock the speakers in place.
- For enclosed model speakers (W-LCR, W-LCR2, C-LCR, C-SUR) use the appropriate in-wall/in-ceiling installation bracket, locate the locking tabs and connect both halves of the bracket together until secure.
- Take the four metal stud wings and lock them in place in the proper direction of the mounting studs (W-LCR, W-LCR2, C-LCR, C-SUR).
- Place the assembled bracket in the desired location of the speaker, with the outlined edge facing outwards from the wall. Use the included double sided tape (only included with the CS600 models) when lining up all bracket locations before screwing into place.
- Use the appropriate hardware to secure each metal stud wing to the applicable mounting studs.
- Before installing wall or ceiling panelling such as drywall, map each bracket location for easier installation of the speaker once wall or ceiling panelling has been installed.
- For further install instructions, please follow the instructions listed in the "Existing Construction" section and all "New Construction" instructions listed within the section.
natural_image
Simple line drawing of a wall with a curved black line and a dashed square, no text or symbols present.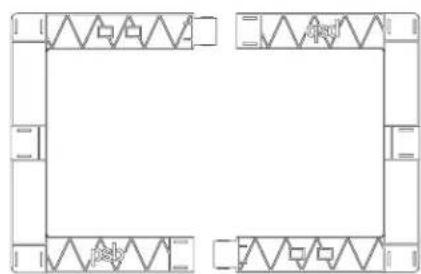
natural_image
Pure architectural floor plan lines without any text, numbers, or symbols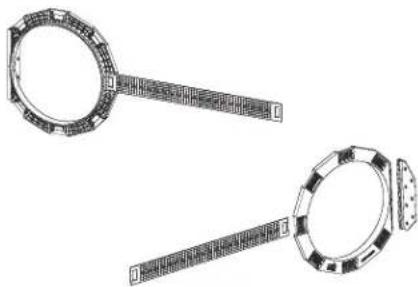
natural_image
Technical line drawing of two mechanical components with no visible text or symbols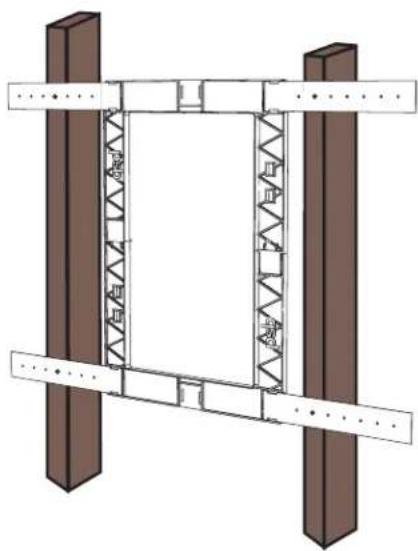
natural_image
Architectural diagram of a structural frame with vertical supports and internal trusswork (no text or symbols)Existing Construction
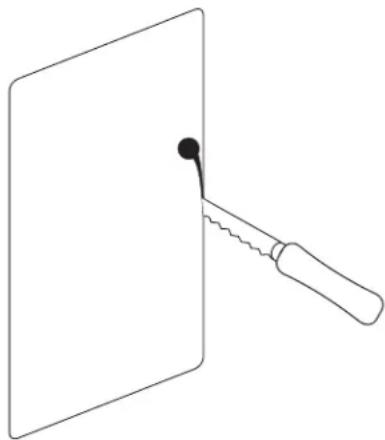
- Drill a hole large enough so that the blade of your cutting tool can be inserted.
- Drill a hole inside the area drawn with the template.
- Choose a spot near the centre or close to the outside edge of the drawn area, based on the location, that will be easier to begin cutting with a cutting tool.
NOTE: Be sure to cut carefully to make the opening as symmetrical as possible. The speaker will overlap some of the cutting edge, masking any minor cutting issues.
- Hold the cutting blade perpendicular to the mounting surface. Try to keep the blade as straight as possible while the opening is cut, to ensure the blade follows the outline.
- For ceiling installations, insert the tip of the saw or cutting tool into the pilot hole and cut seventy-five percent around the cutting line.
- Place one hand under the surface cut out to support it and continue to complete cutting the opening.
- Remove the cut-out section.
- Make sure all material and debris are cleaned from the hole. This material can interfere with a proper seal between the speaker and the mounting surface.
Preparing Speaker Cable Wires
A speaker cable consists of two insulated wires. The insulation around one wire is marked (stripped, collared, or ribbed) to identify it as positive, while the other wire is negative.
Using the appropriate tools install the speaker cable in the desired locations for the installation. When the speaker cable is within reach of the speaker opening:
- Push all insulation and debris from the inside of the speaker opening and ensure blown insulation is at least 4 to 6 in. (10 to 15 cm) from the surrounding of the opening.
- Locate and pull at least 14 in. (36 cm) of speaker cable out from the speaker opening.
- Make sure to allow enough cable to connect the wires to the speaker from a comfortable position.
- Strip approximately 1/2 in. (13 mm) of insulation from both wires.
- Twist the bare end of each wire so loose strands will not touch across terminals.
Connecting the Speakers
When connecting speaker wire, be sure to connect each wire to the proper speaker and amplifier/receiver terminal for correct polarity, positive to positive (+) and negative to negative (-). Ensure both channels move forward and backward together (in-phase).
Bare Wire Connection
Push the top of the binding post down to line up the two holes. Insert wire through hole, and release binding post.
NOTE: This connection will accept up to 8-gauge wire.
natural_image
Simple line drawing of a tool interacting with a rectangular panel (no text or symbols)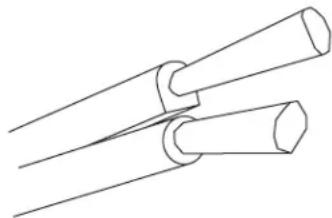
natural_image
Pure technical line drawing of two intersecting cylindrical components (no text or symbols)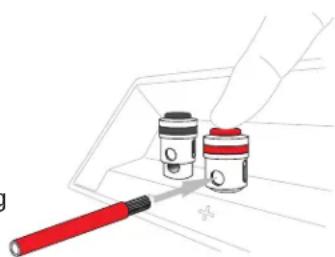
natural_image
Illustration of a hand holding two cylindrical containers with red and black components, next to a red-handled tool (no text or symbols)Observe Proper Connection Polarity
- Slide the bare end of the positive lead into the correct, spring-loaded terminal post colour-coded red or marked (+).
- Slide the bare end of the negative lead into the correct, spring-loaded terminal post colour-coded black or marked (-).
-
The wire through each terminal post should be slightly pushed over to avoid contact with wire strands from other terminal posts, or speaker circuitry.
-
Ensure all wiring is properly secured before proceeding with installation.
For more information on installing speaker cable, consult a local CEDIA certified custom installation specialist or professional electrician.
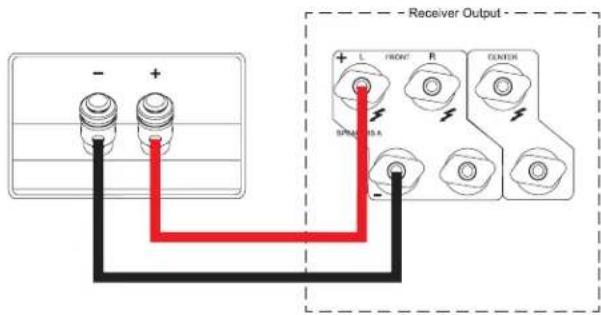
Observe Proper Connection Polarity
Installing the Backcans (Optional)
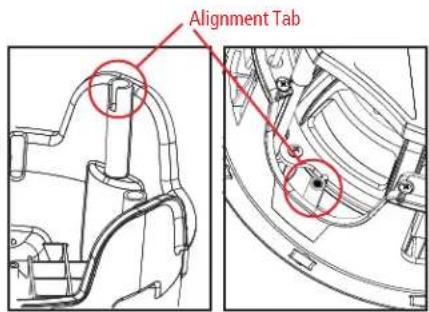
- Connect the speaker terminals (with the speaker wire) to the speaker input before installing the Backcan on the speaker. Ensure proper connection polarity is followed -- see "Observe Proper Connection Polarity" diagram for reference.
- Once the speaker wires are connected, place the Backcan on the rear of the speaker. Do not press on the speaker driver cones as the speaker is guided into the opening.
- One of the four mounting bosses has an alignment tab to ensure it is installed the same way all the time.
- Install 4 screws (provided) to firmly lock on and seal the Backcan.
Inserting the Speaker
- Using two hands and holding the edge of the speaker, guide the speaker into the opening and ensure the speaker cable is not being pinched.
- Make sure not to press on the speaker driver cones as the speaker is guided into the opening, and be careful not to damage or remove any of the gasket material on the edge of the speaker if present.
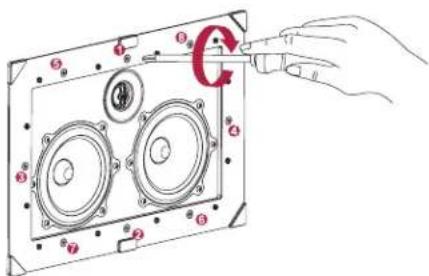
- With the speaker in place, tighten one of the dogleg screws until the frame of the speaker is pressed firmly against the mounting surface. Avoid tightening the screws with too much pressure as it can cause damage to the mounting surface.
- Locate the opposing dogleg screw and repeat the process, as these two tightened dogleg screws will hold the speaker in place temporarily.
- Repeat the same process with the other doglegs to firmly secure the speaker in place.
Installing and Removing Grilles
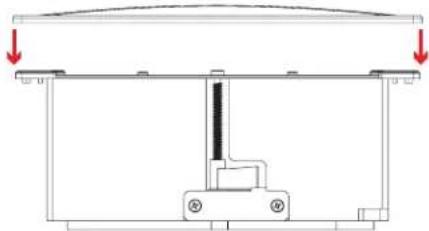
The CustomSound In-Wall and In-Ceiling models use high-strength magnets for easy installation of the grilles to the speaker. The speaker is equipped with several magnetic strips along the edge of the speaker.
- Centre the grille over the speaker until it is firmly locked in place.
- If the grille will not lock into place, check to ensure the grille is properly centred on the frame and all magnets are clear of debris.
natural_image
Pure mechanical assembly diagram showing a frame with supports and a central vertical component, no text or symbols present.LISTENING...
Testing Speakers
With the speakers installed, ensure the speakers are functioning properly before finalizing the installation.
- Before turning on the receiver/amplifier, make sure there is no unused speaker cable connected to either component. Attached cable that is free at one end can cause a short and damage your equipment.
- Turn on the receiver/amplifier and play material that you are familiar with to try and recognize differences or irregularities in the sound of the speaker.
- Ensure reproduced sounds are clear and free of distortion.
Please refer to your receiver or amplifier manufacturer's manual for more information on surround modes, room EQ, and other speaker calibration settings.
PROTECTING YOUR INVESTEMENT
For long lasting enjoyment of your PSB speakers, you should respect their limits and avoid excessive volume levels for music or movie playback. Excessive volume levels can damage all types of speakers.
If your speakers are pushed to excessive volume levels, they could be driven into "clipping", which could result in severe and permanent damage. When listening to your speakers at loud levels, check for any signs of harsh, distorted midrange and diminishing resolution. If detected, turn the volume down immediately.
CARING AND CLEANING...
It is essential to maintain and clean your speakers periodically. However, excessive cleaning may cause damage and jeopardize the longevity of the product. When not in use, avoid storing the speakers in extreme hot or cold temperatures and humidity and avoid exposing them to liquids.
Grille Care
After removing the grille, vacuum the front of the speaker on a low setting. Lightly wipe the surface and perforated holes with a damp cloth to remove residue or dust from the grille. If deeper cleaning is required, use a non-hazardous cleaning product and wipe the surface. Allow the grille to dry thoroughly before carefully reattaching it to the speaker.
Driver Care
During light cleaning, avoid touching speaker cones as this could cause permanent damage. If deeper cleaning is required, we suggest using a lint brush to clean the speaker cones and rubber surrounds. Never touch the metal tweeter domes.
TROUBLESHOOTING...
Issue: Audible Distortion
- If a speaker begins to sound distorted or fatigued, follow the speaker wire from the speaker in question to the receiver/amplifier to ensure wires are in good condition, are firmly connected and are not touching across terminals.
II. Check connections from the source of music to the receiver/amplifier.
III. At the speaker, release the spring-loaded terminal posts and remove the affected speaker to reveal the cable. Make sure the wires are in good condition, are firmly connected and are not touching across terminals.
Issue: Low or No Volume
- If there is low or no volume output, check that the receiver/amplifier is powered on and all receiver/amplifier settings are correct.
II. If the receiver/amplifier is indeed powered on, check and ensure that the cable connections to the receiver/amplifier are in good condition, are firmly connected and are not touching across terminals.
III. If other stereo speakers are connected to a second set of audio outputs on the amplifier/receiver, make sure to select the proper A or B speaker setting to match A or B outputs connected to the speakers.
If service is required, please visit your local authorized PSB service centre, or our PSB Speakers website and open a support ticket in the PSB Lounge (http://www.psbspeakers.com/lounge).
If you have moved since your purchase, the nearest authorized PSB dealer will be able to assist you. If the problem is not resolved, please contact us directly and provide the model name, serial number, date of purchase, dealer name, and a full detailed description of the issue.
ENVIRONMENTAL PROTECTION
At the end of its useful life, this product must not be disposed of with regular household waste. It must be returned to a collection point for recycling of electrical and electronic equipment. The symbol on the product, owner's guide and packaging, points this out.


The materials can be reused in accordance with their markings. Through re-use, recycling of raw materials, or other forms of recycling of old products, you are making an important contribution to the protection of our environment.
Your local administrative office can advise you of the responsible waste disposal point.
We appreciate your purchase of our product and thank you for taking the time to read this owner's guide. We hope you enjoy the exceptional satisfaction that PSB Speakers offer and wish you many years of enjoyable listening.
Real Sound for Real People.
All specifications are subject to change without notice. PSB, PSB Speakers and CustomSound are trademarks of, or used under license by, PSB Speakers, a division of Lenbrook Industries Limited. © 2018 18-016 PSB All other trademarks used herein are trademarks of their respective owners. All rights reserved.
- theCustomSoundseries
- Owner's Guide
- CS600 Series
- CS610 – 2-Way In-Ceiling Speaker
- CS630 – Stereo/Surround In-Ceiling Speaker
- CS650 – Premium 2-Way In-Ceiling Speaker
- Enclosed Models - In-Wall (W) and In-Ceiling (C) applications.
- W-LCR – In Wall Speaker (Enclosed)
- W-LCR2 - In-Wall Speaker (Enclosed)
- C-LCR - In-Ceiling Speaker (Enclosed)
- C-SUR – In-Ceiling Speaker (Enclosed)
- ADDITIONAL FEATURES...
- Square Grille Option
- Dog Legs
- Backcan
- UNPACKING...
- Required Tools
- Speaker Wire
- Painting
- POSITIONING...
- Layout
- Speaker Locations
- Preparing Ceiling and Wall
- INSTALLING...
- Using the Cut Out Template
- New Construction
- Existing Construction
- Preparing Speaker Cable Wires
- Connecting the Speakers
- Bare Wire Connection
- Observe Proper Connection Polarity
- Installing the Backcans (Optional)
- Inserting the Speaker
- Installing and Removing Grilles
- LISTENING...
- Testing Speakers
- PROTECTING YOUR INVESTEMENT
- CARING AND CLEANING...
- Grille Care
- Driver Care
- TROUBLESHOOTING...
- Issue: Audible Distortion
- Issue: Low or No Volume
- ENVIRONMENTAL PROTECTION
Brand : PSB
Model : CS650
Category : Pregnant