31577 - Blender Lakeland - Free user manual and instructions
Find the device manual for free 31577 Lakeland in PDF.


| Type de produit | Blender |
| Marque | Lakeland |
| Modele | 31577 |
| Puissance | 800 watts |
| Capacite du bol | 1.5 litres |
| Materiau du bol | Verre resistant a la chaleur |
| Materiau des lames | Acier inoxydable |
| Nombre de vitesses | 2 vitesses plus impulsion |
| Dimensions (L x P x H) | 20 cm x 18 cm x 40 cm |
| Poids | 2.5 kg |
| Alimentation | 220-240V, 50/60Hz |
| Cordon d'alimentation | 1.2 metres |
| Fonctions principales | Mixer, emietter, pulveriser, emulsionner |
| Nettoyage | Bol et couvercle lavables au lave-vaisselle |
| Securite | Base antiderapante |
| Pieces detachees | Bol, couvercle, lames, joint disponibles |
| Garantie | 2 ans |
Frequently Asked Questions - 31577 Lakeland
User questions about 31577 Lakeland
0 question about this device. Answer the ones you know or ask your own.
Ask a new question about this device
Download the instructions for your Blender in PDF format for free! Find your manual 31577 - Lakeland and take your electronic device back in hand. On this page are published all the documents necessary for the use of your device. 31577 by Lakeland.
USER MANUAL 31577 Lakeland
natural_image
Exterior view of a modern kitchen blender with clear glass and black casing (no text or symbols visible)Model: 31577
LAKELAND TOUCHSCREEN SOUP MAKER
Thank you for choosing the Lakeland Touchscreen Soup Maker.
Please take a little time to read this booklet before getting started and keep it in a safe place for future reference.
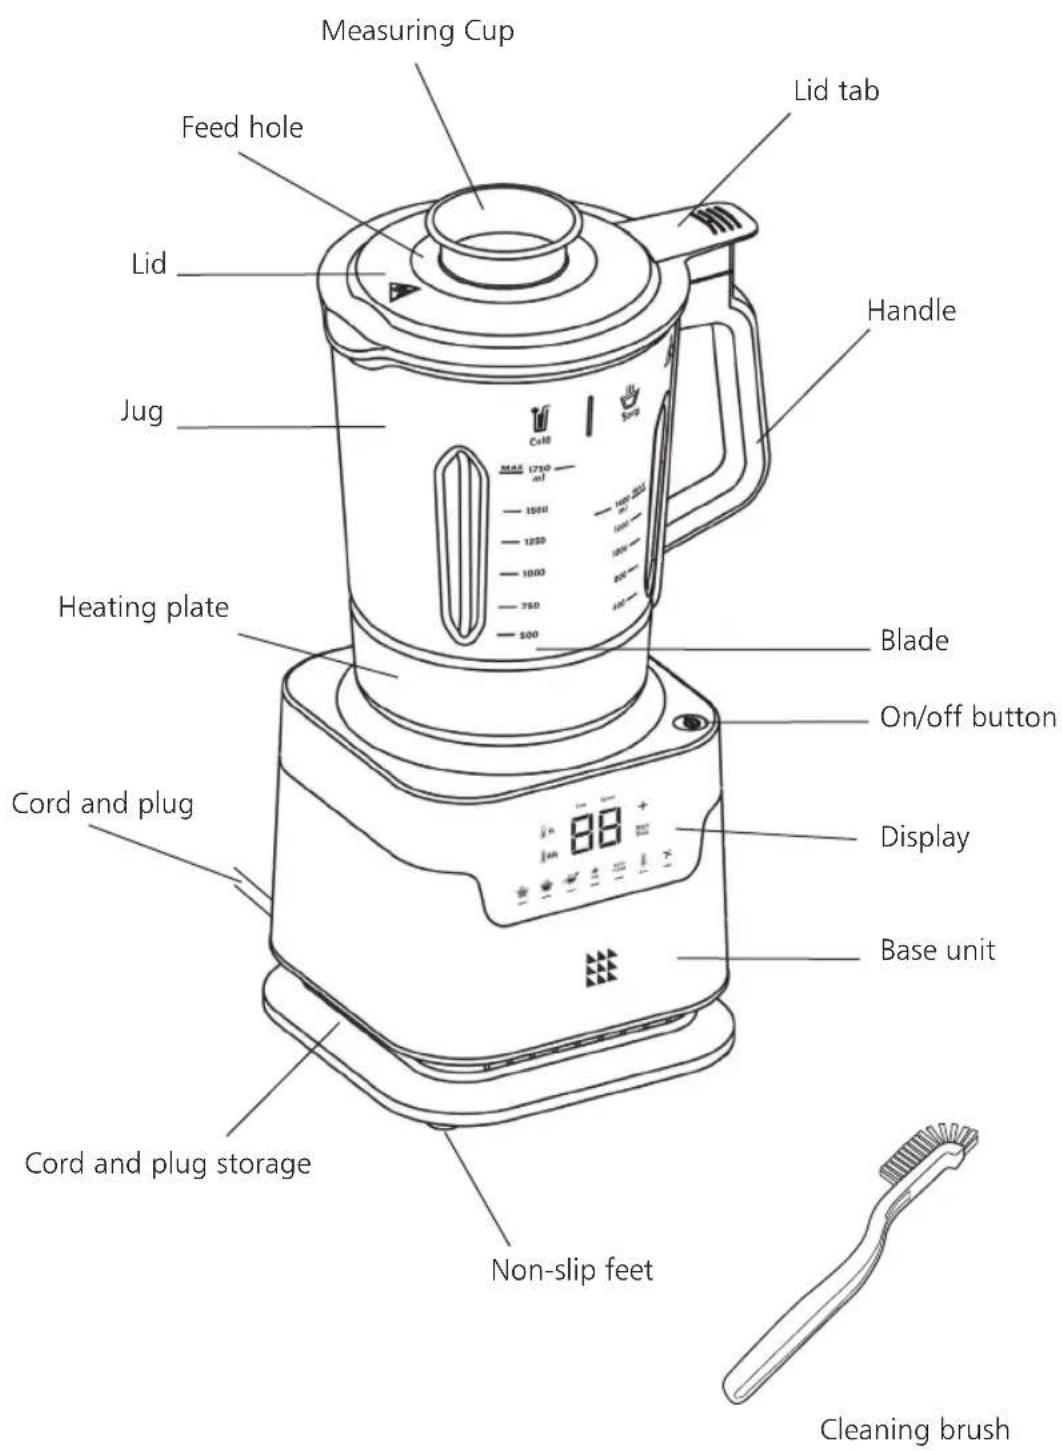
This Touchscreen Soup Maker chops, blends, cooks, simmers and stirs your soup from start to finished perfection, all in one jug. It has four automatic settings that allow you to choose from a smooth, creamy soup right through to a chunky hearty broth. It also cooks and blends up sauce and crushes ice.
You can manually set the Soup Maker so you can still cook your favourite recipes, it will blend your ingredients in short, gentle bursts. It is quick and easy to clean, with an auto-clean setting, non-stick heating plate, and cleaning brush to reach underneath the blade.
Here at Lakeland, our award-winning family-owned business still offers the same excellent quality, value for money and exceptional customer service as when we founded the company back in the 1960s.
Our products are hand-picked and thoroughly tested so you can be sure that everything you purchase will be a pleasure to use for many years to come.
CONTENTS
Product features 4
Display....5
Safety cautions 6-7
Before using the Touchscreen Soup Maker for the first time 8-9
Using the auto clean setting 8
Instructions for use 10-17
Using the automatic settings 10
Using the manual setting 14
Blending....17
Recipes 18-24
Frequently asked questions 25
Care and cleaning 26
Electrical connections 27
Recycling your electricals 27
PRODUCT FEATURES
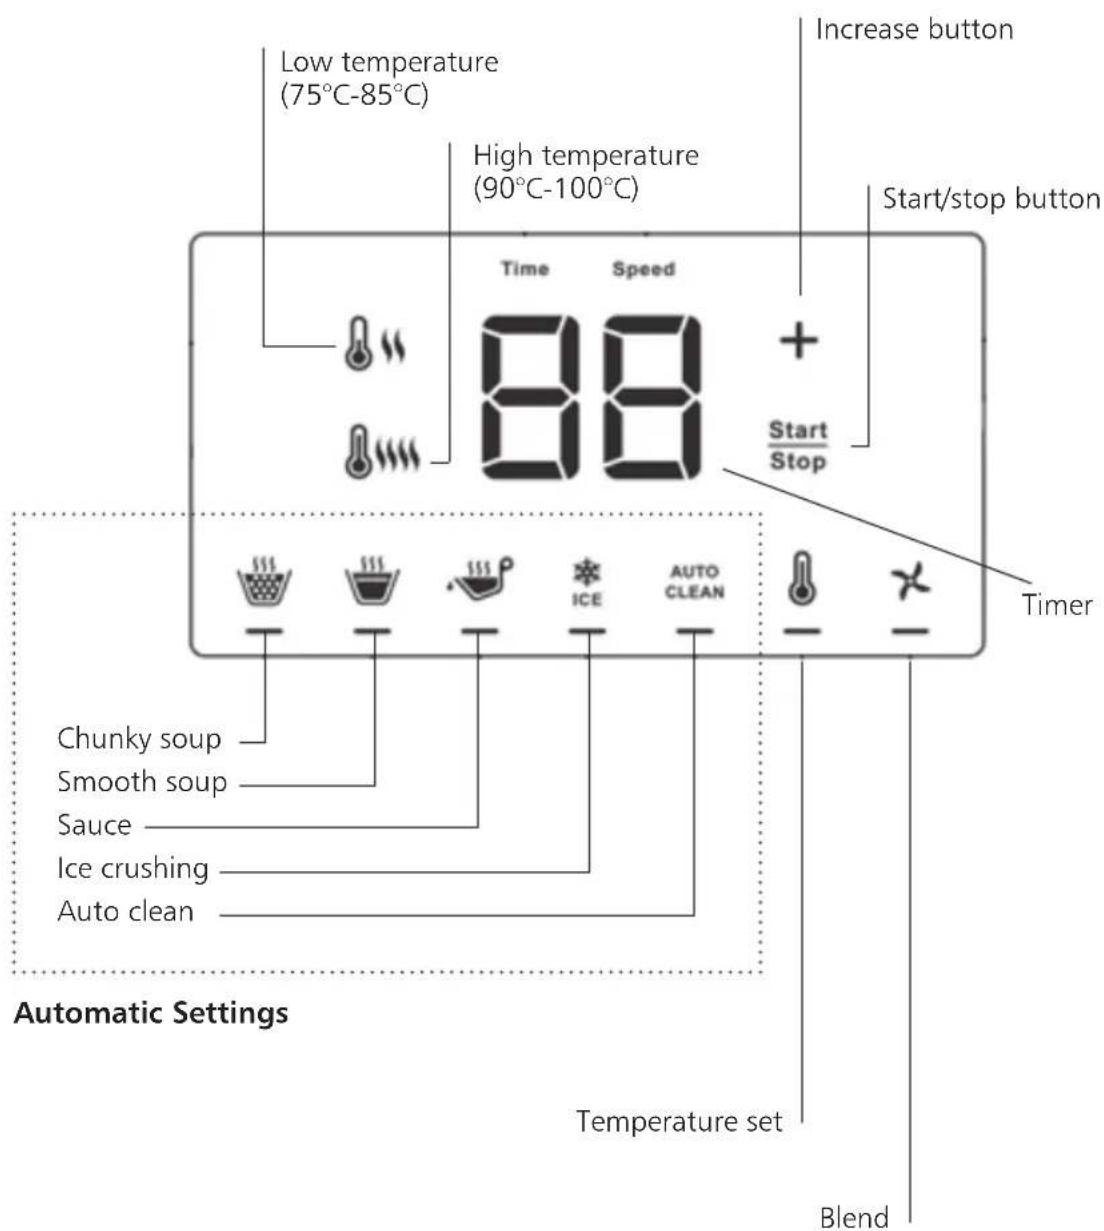
DISPLAY
SAFETY CAUTIONS
Carefully read all the instructions before using the appliance and keep in a safe place for future reference. Always follow these safety cautions when using the appliance to avoid personal injury or damage to the appliance. This appliance should be used only as described in this instruction book.
- This appliance can be used by children aged from 8 years and above and persons with reduced physical, sensory or mental capabilities or lack of experience and knowledge if they have been given supervision or instruction concerning use of the appliance in a safe way and understand the hazards involved. Children shall not play with the appliance. Cleaning and user maintenance shall not be done by children unless they are older than 8 and supervised.
• Make sure your electricity supply matches the voltage shown on the appliance.
- Ensure all packaging materials and any promotional labels or stickers are removed from the appliance before the first use.
- Always inspect the appliance before use for noticeable signs of damage. Do not use if damaged or has been dropped. In the event of damage, or if the appliance develops a fault contact the Lakeland customer care team on 015394 88100.
- Do not use this appliance if the lead is damaged. If the lead is damaged it must be replaced with a special lead. Contact the Lakeland customer care team on 015394 88100.
• Always use the appliance on a dry, level, heat resistant surface.
- Unplug from the mains when not in use and before cleaning. To disconnect, turn the socket to "off" and remove the plug from the mains socket.
- Do not use any accessories or attachments with this appliance other than those recommended by Lakeland.
- To protect against fire, electric shock or personal injury, do not immerse cord, plug or lid in water or other liquids.
- Do not leave the lead hanging over the edge of a kitchen table or worktop. Avoid contact between the lead and hot surfaces.
- For indoor use only.
• For domestic use only.
- This appliance should be used for preparation of food and drinks as described within the instructions for use that accompany it.
- Always ensure that your hands are dry before removing the plug from the mains socket. Never pull the plug out of the mains socket by its lead.
• To avoid injury or possible fire, do not cover the appliance when in use.
- Do not connect this appliance to an external timer or remote control system.
- An extension cable may be used with care. The electrical rating of the cable should be at least as great as the appliance. Do not allow the cable to hang over the edge of the worktop or touch any hot surfaces.
- This appliance complies with the basic requirements of Directives 2014/30/EU (Electromagnetic Compatibility) and 2014/35/EU (Low Voltage Directive).
- WARNING: A cut off plug inserted into a 13 amp socket is a serious safety (shock) hazard. Ensure the cut off plug is disposed of safely.
• CAUTION: The plastic bags used to wrap this appliance or the packaging may be dangerous. To avoid risk of suffocation, keep these bags out of reach of babies and children. These bags are not toys.
- Be careful when adding ingredients through the feed hole. Do not insert utensils through the feed hole. Do not add cold liquids, hot steam will escape and can burn.
- CAUTION: The blade is very sharp, do not touch. Care must be taken when emptying the jug and during cleaning.
- Keep the appliance, plug and lead away from hot ovens, electric and gas burners, flames and hot surfaces.
- The Touchscreen Soup Maker should only be used at least 10cm away from walls and other surfaces, to allow sufficient airflow.
- DO NOT operate the Touchscreen Soup Maker empty, and never fill the jug beyond the 'MAX' marks on the side of the jug.
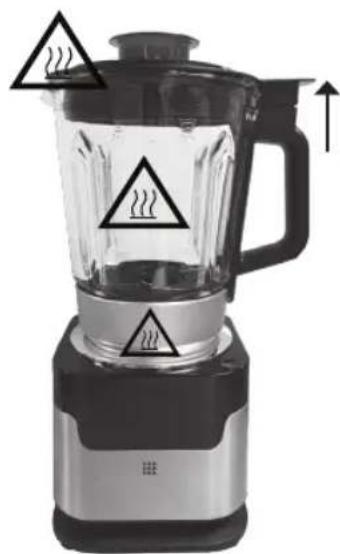
WARNING – HOT SURFACES
- The jug, heating plate and base unit, and surfaces marked with this symbol will get very hot during use.
• DO NOT TOUCH as possible injury could occur.
Wear oven gloves when removing the jug from the base unit. Allow the appliance to cool completely before touching these surfaces, handling, moving or storing this appliance.
- Be careful when removing the lid and the measuring cup.
- Remove the lid slowly by pushing up the lid tab, with the opening facing away from you. Be careful as hot steam will escape and can burn.
natural_image
Illustration of a blender with warning symbols indicating heat dissipation (no text or labels present)BEFORE USING THE TOUCHSCREEN SOUP MAKER FOR THE FIRST TIME
- WARNING: Do not insert the plug into an electrical outlet, or turn on the Soup Maker before you have fully assembled it.
- Unpack the Soup Maker, remove all the packaging materials.
- Before first use, wipe the base unit and outside of the jug with a clean damp cloth.
USING THE AUTO CLEAN SETTING
The jug is one complete unit which includes the blades, heating plate, jug and handle. Do not attempt to remove the jug from the heating plate. The jug cannot be immersed in water. Use the AUTO CLEAN setting to clean inside the jug and underneath the blades.
- Place the base unit on a flat, dry heat resistant surface near a socket.
- Fill the jug with 1000ml of water and 3 or 4 drops of washing-up liquid.
natural_image
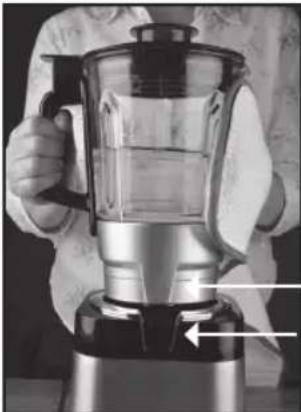
Black-and-white photo of a hand holding a plastic blender with a handle, showing liquid and a white arrow pointing to the side (no text or symbols visible)- NOTE: When the jug is full of liquid, it becomes very heavy. Lift the jug onto the base unit with both hands, the notch on the back of the jug fits into the groove on the base unit.
Notch Groove
- Add the lid and firmly click the measuring cup into place. The Soup Maker will not work unless the lid is in place, this is a safety feature.
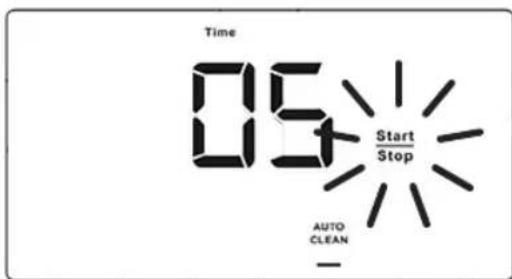
- Plug in and switch the appliance on at the socket. The ON/OFF button will illuminate. Press the ON/OFF button to switch on and illuminate the display. Press the AUTO CLEAN button - a line will appear underneath, and the START/STOP button will flash.
- The timer will show 5 minutes, this is the length of the cycle.
-
Press the START/STOP button to start cleaning the jug. The Soup Maker will bleep 3 times each time the blades blend throughout the cycle.
-
The appliance will start to stir, then it will heat the water for 2 minutes, then stir the water again until the end of the auto clean cycle.
- The timer will count down. The Soup Maker will bleep when the cycle has finished and the timer will show "00".

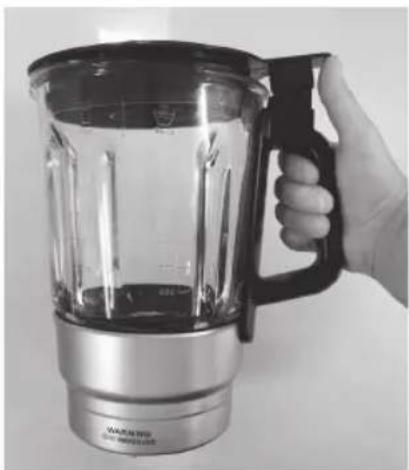
• Take the jug off the base unit and place it on a flat surface.
natural_image
Hand holding a clear blender with handle and control panel (no visible text or symbols)- Remove the lid by pushing the lid tab upwards. Remove the lid slowly with the underside of the lid pointing away from you and let the steam escape gradually.
- Wash the lid and measuring cup in warm soapy water, rinse and dry thoroughly.
- Empty the soapy water out of the jug, rinse with clean water to remove any soap and dry thoroughly.
• Make sure that all parts are clean and dry before assembling the product. - With both hands, lift the jug back onto the base unit.
- Firmly push the lid and measuring cup onto the jug.
• The Soup Maker is now ready to use.
INSTRUCTIONS FOR USE
Note: The buttons on the Soup Maker are touch sensitive and easily pressed. Keep ☒ngers away from the buttons during cooking, to avoid pressing them by accident.
USING THE AUTOMATIC SETTINGS
CHUNKY SOUP, SMOOTH SOUP AND SAUCE SETTINGS
- Plug in and switch on the Soup Maker at the socket.
• The ON/OFF ⏻ button will illuminate.
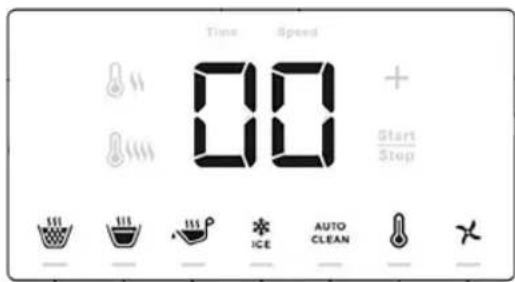
- Press the ON/OFF ⏻ button to switch on and illuminate the display.
- Put the chopped vegetables, ingredients and liquid for your recipe into the jug. It is best to cut food into small, even pieces before placing in the Soup Maker.
- These settings heat the ingredients, DO NOT ☒ll the jug beyond the 'MAX' mark 1,400ml (for soup), and make sure there is a minimum of 600ml inside the jug.
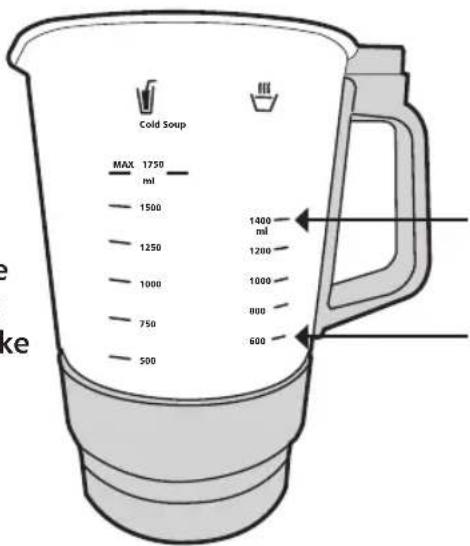
'MAX' mark soup
'MIN' mark soup
- Add the lid and measuring cup. The Soup Maker will not work unless the lid is in place, this is a safety feature.
Here is a guide to the length and blending speed for each setting:
| Program Cooking Time Keep Warm | (75°C) | Blending | |
Chunky Soup  (up to 100°C) (up to 100°C) | 30 minutes 20 minutes Medium Speed | ||
Smooth Soup  (up to 100°C) (up to 100°C) | 30 minutes 20 minutes High Speed | ||
Sauce  (85°C - 100°C) (85°C - 100°C) | 20 minutes - Low Speed | ||
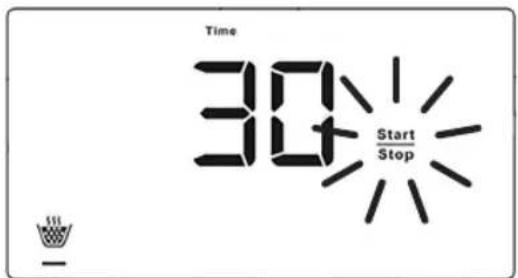
- Select the automatic setting you require for your recipe, a line will appear underneath, and the START/STOP button will flash.
- The timer will show 30 minutes for chunky and smooth soup, and 20 minutes for sauce.

- Start the cooking cycle by pressing the START/STOP button.
- The button will stop flashing and change from white to yellow. The timer will start counting down to show how much time is left in the cooking cycle.
- When you switch on the Soup Maker for the first time there may be a slight burning smell, this is normal for a new appliance and will stop after a few uses.
- The Soup Maker will start heating for few minutes, then blend the ingredients depending on the cycle. Each time the blade blends, the Soup Maker will bleep 3 times.
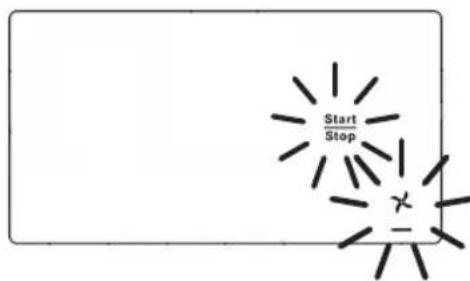
During the cooking cycle:
- You can check the consistency of your soup through the jug. If you require a smoother consistency, you can stir the blade at any time by pressing and holding the BLEND button.
- You can pause the cycle by pressing the START/ STOP button and add more ingredients through the feed hole with the measuring cup. The START/ STOP button will flash white when the appliance is paused. Press again to continue. Do not remove the measuring cup or add ingredients when the appliance is blending.
- You may need to scrape any food from the sides of the jug with a plastic or silicone spatula during the cooking cycle. Pause the appliance to do this.
- During the last minute of the cooking cycle, depending on your setting, the Soup Maker may start to stir the ingredients more frequently. During the smooth soup cycle, you will notice the blade stirring more frequently throughout the cycle, even in 'keep warm'.

- When the cycle has finished, there will be five bleeps and the timer will display "77-77-30-00".
- The Soup Maker will then switch to keep warm mode for 20 minutes, so your soup is ready to serve at the table, the display will show "77+77+30+00". It will not keep warm on the Sauce setting.
- After 20 minutes of keeping warm, the appliance will bleep several times then go into standby mode, and will display "00". If no buttons are pressed within 10 minutes, the appliance will switch off automatically.
- Press the ON/OFF ⏻ button to turn off the appliance.
- Switch off and unplug at the socket.
natural_image
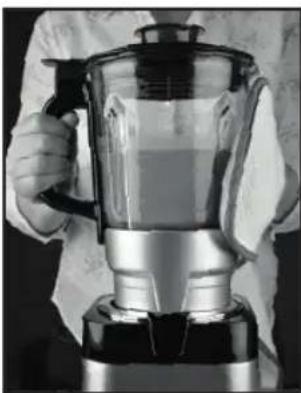
Black-and-white photo of a modern kitchen blender with a handle and lid, no visible text or symbolsWhen the jug is full it is very heavy. When your soup is ready, use both hands to lift and wear oven gloves as the jug will be hot. Pour hot liquid out carefully.
ICE CRUSHING SETTING
The ice crushing setting blends at high speed without heating, to create nutritious smoothies and milkshakes.
- Put the ingredients and ice for your recipe into the jug.
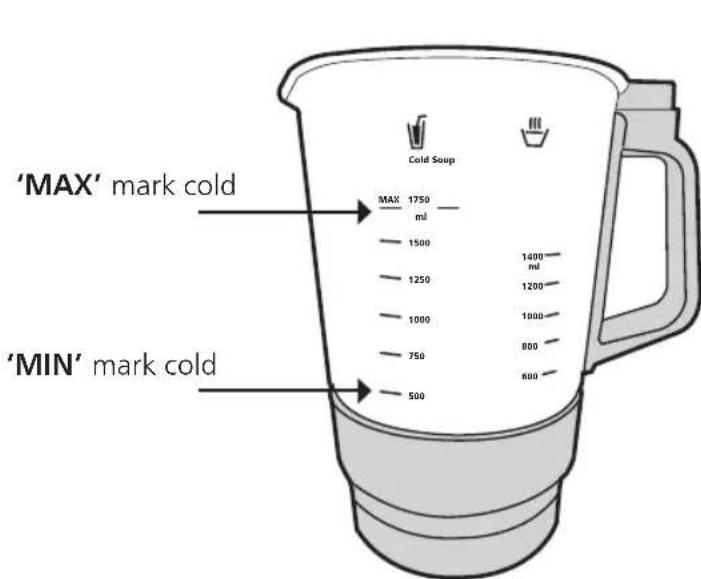
- For cold recipes do not ☒ll the jug beyond the 'MAX' mark, 1,750ml on the jug, and always ☒ll with a minimum of 500ml. If you are only crushing ice in the jug, do not ☒ll beyond the 750ml mark. Allow ice to thaw for ten minutes at room temperature ☒rst.
- Add the lid and measuring cup. The Soup Maker will not work unless the lid is in place, this is a safety feature.
- Press the ON/OFF ⏻ button to start the appliance.
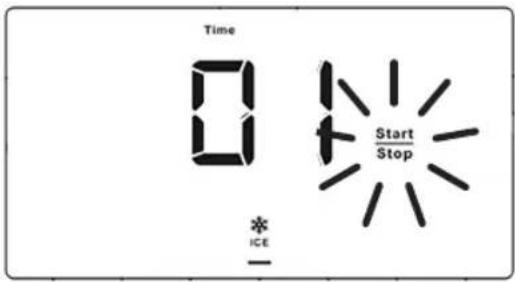
- Press the ICE CRUSHING button, a line will appear underneath, and the START/STOP button will flash. The timer will show 1 minute.
- Press the START/STOP button to start the cycle. The button will stop flashing and change from white to yellow.
• The blade will stir at high speed for one minute.
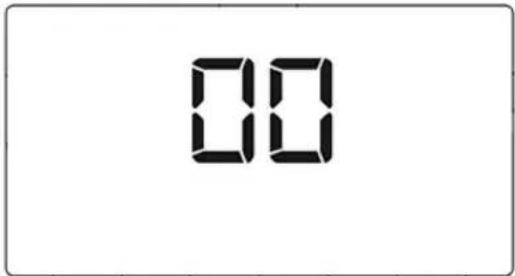
- When the cycle has finished, it will bleep five times and the timer will display "00".
- Remove the ice cubes immediately to prevent the crushed ice freezing together into one frozen mass.
Bought ice cubes may get stuck and need more stirring. Pulse by pressing and holding the BLEND button, and then scrape and pulse again.
- Press the ON/OFF ⏻ button to turn off the appliance.
- Switch off and unplug at the socket.
USING THE MANUAL SETTING
You can use the Touchscreen Soup Maker on the manual setting so you can experiment with cooking favourite recipes.
- Plug in and switch on the Soup Maker at the socket.
• The ON/OFF ⏻ button will illuminate.
- Press the ON/OFF ⏻ button to switch on and illuminate the display.
- Put the ingredients for your recipe into the jug. It is best to cut food into small, even pieces before placing in the Soup Maker.
- For hot recipes do not ☒II the jug beyond the 'MAX' mark, 1,400ml and ☒II with a minimum of 600ml. For cold recipes do not ☒II beyond the 'MAX' mark, 1,750ml and ☒II with a minimum of 500ml.
- Add the lid and measuring cup. The Soup Maker will not work unless the lid is in place, this is a safety feature.
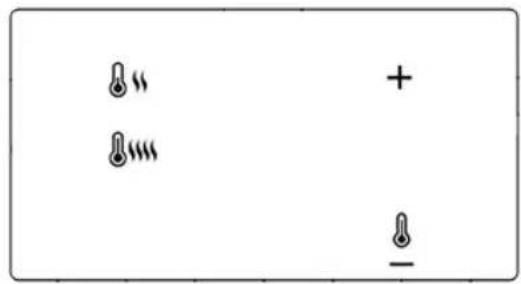
- Press the TEMPERATURE SET button, this will illuminate new icons on the display.
natural_image
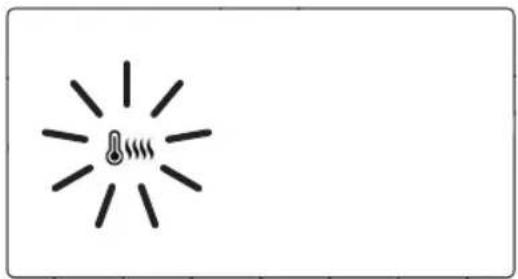
Simple line drawing of a light bulb with radiating lines and a warning symbol (no text or labels)- The display will show the high temperature icon which cooks at 90°C - 100°C.
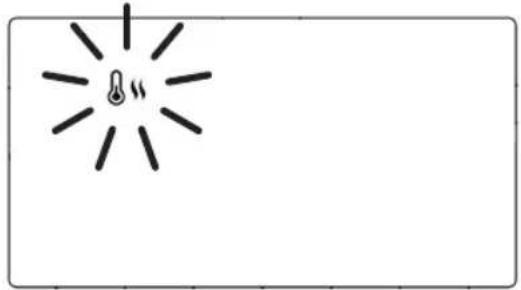
natural_image
Simple line drawing of a light bulb with radiating lines, no text or symbols present- Press the temperature set icon again, to illuminate the low temperature icon and cook at a lower temperature of 75^ C - 85^ C.

- The display will show a default cooking time of 30 minutes.
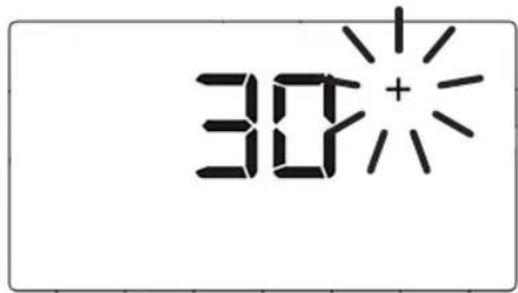
- Press the INCREASE button to adjust the cooking time for your recipe. You can set the time between 1 to 60 minutes. Press and hold the button to move quickly through the minutes.
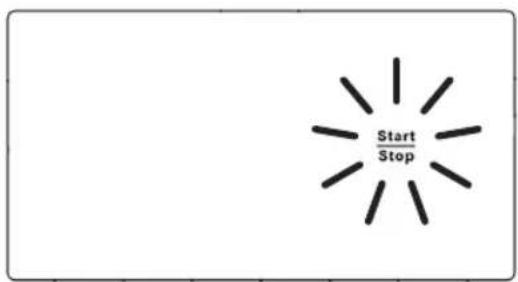
- Press the START/STOP button to start the cooking cycle. The button will stop flashing and change from white to yellow. The timer will start counting down to show how much time is left in the cooking cycle.
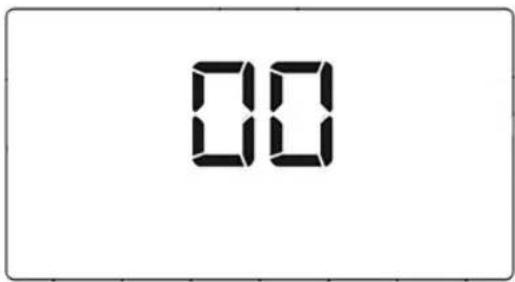
- When the cycle has finished, it will bleep five times and the timer will display " 77+77+30+00.
- The Soup Maker will then switch to keep warm mode for 20 minutes, so your soup is ready to serve at the table.
- After 20 minutes, the appliance will bleep 5 times then go into standby mode, and will display "00". If no buttons are pressed within 10 minutes, the appliance will switch off automatically.
- Press the ON/OFF ⏻ button to turn off the appliance.
- Switch off and unplug at the socket.
BLENDING
You can use the Soup Maker as a blender without heating, to create baby food, purées, cold dips and sauces.
There are three blender speed settings, LOW (01), MEDIUM (02) and HIGH (03).
- Plug in and switch on the Soup Maker at the socket.
• The ON/OFF ⏻ button will illuminate.
- Press the ON/OFF button to switch on and illuminate the display.
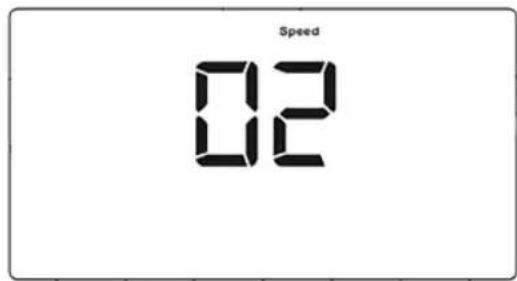
- Press the BLEND button on the display. The SPEED icon will illuminate, and the display will default to the medium speed (02). Press the INCREASE button to change the blending speed, between LOW (01), MEDIUM (02) and HIGH (03).
- Put the ingredients for your recipe into the jug.
- Do not ☒ll the jug beyond the 'MAX' mark, 1,750ml for cold recipes, and ensure there is a minimum of 500ml of ingredients inside the jug.
- Add the lid and measuring cup. The Soup Maker will not work unless the lid is in place, this is a safety feature.

natural_image
Simple line drawing of a blank rectangular frame with a central explosion-like symbol (no text or labels)- Press and hold the BLEND button, monitor your ingredients through the jug and release the button to stop.
• Stir and blend your food until you have reached the consistency you require.
- The blending setting will stop automatically after 35 seconds, this is a safety feature to stop the motor overheating.
- Press the ON/OFF ⏻ button to turn off the appliance.
- Switch off and unplug at the socket.
RECIPES
Please note that all spoon measurements are standard metric, so 1 tsp is 5ml and 1 tbsp is 15ml. We recommend using a set of measuring spoons for accurate results.
CHUNKY SOUPS
CHICKEN AND SWEETCORN SOUP - Serves 4
| Ingredients Quantity |
| Chicken stock 800ml |
| Chicken breast 150g, cut into thin strips |
| Sweetcorn kernels, frozen 300g |
| Spring onions 3, chopped |
| Salt and ground white pepper To taste |
WHAT YOU DO
Put all the ingredients into the jug.
Cook using the 'Chunky Soup' setting, see 'Instructions for Use'.
When the cooking cycle has finished, taste, season and serve.
LEEK AND POTATO SOUP - Serves 4
| Ingredients Quantity |
| Small leeks 2, trimmed, chopped and thoroughly washed |
| New potatoes, skins on 350g, cleaned and chopped into small cubes |
| Chicken or vegetable stock 700ml |
| Salt and ground black pepper To taste |
WHAT YOU DO
Put all the ingredients into the jug.
Cook using the 'Chunky Soup' setting, see 'Instructions for Use'.
When the cooking cycle has finished, taste, season and serve.
CHORIZO AND CHICKPEA SOUP - Serves 4
| Ingredients Quantity |
| Vegetable oil 1 tbsp |
| Chorizo 250g, chopped |
| Chilli flakes 1 tsp |
| Canned, chopped tomatoes 400g |
| Canned, chickpeas 400g |
| Chicken, ham or vegetable stock 500ml |
| Salt and freshly ground pepper To taste |
| Parsley Few sprigs of, chopped |
WHAT YOU DO
Put the ingredients into the jug, except the parsley.
Cook using the 'Chunky Soup' setting, see 'Instructions for Use'.
When the cooking cycle has finished, taste, season, add a few sprigs of chopped parsley to serve.
SMOOTH SOUPS
TOMATO SOUP - Serves 4
| Ingredients Quantity | |
| Ripe tomatoes 700g | |
| Olive oil 4 tbsp | |
| Pinch of sugar | |
| Medium onion 1, peeled and cut into 5-6 pieces | |
| Garlic cloves 2, peeled | |
| Chicken or vegetable stock 500ml | |
| Salt and ground black pepper To taste | |
| Crème fraiche (optional) 2 tbsp |
WHAT YOU DO
Put the ingredients into the jug, except the crème fraiche.
Cook using the 'Smooth Soup' setting, see 'Instructions for Use'.
When the cooking cycle has finished, taste, season, add crème fraîche to serve.
GREEN PEA SOUP - Serves 4
| Ingredients Quantity |
| Spring onions 3, roots removed and cut into 2-3 pieces |
| Butter 50g |
| Frozen peas 350g |
| Chicken or vegetable stock 700ml |
| Salt and ground black pepper To taste |
| Mint leaves (optional) 6-8 |
WHAT YOU DO
Put the ingredients into the jug, except the mint leaves.
Cook using the 'Smooth Soup' setting, see 'Instructions for Use'.
When the cooking cycle has finished, taste, season, add mint leaves to serve.
BUTTERNUT SQUASH SOUP - Serves 4
| Ingredients Quantity | |
| Butternut squash, medium 1 (about 600g) peeled, deseeded and cut into large chunks | |
| Olive oil 1 tbsp | |
| Onion 1, peeled and cut into 6 pieces | |
| Garlic cloves 3, peeled | |
| Ground coriander 12 tsp | |
| Turmeric 14 tsp | |
| Chicken or vegetable stock | 600ml |
| Salt | To taste |
| Coriander leaves | A few sprigs, to garnish |
WHAT YOU DO
Put the ingredients into the jug, except the coriander leaves.
Cook using the 'Smooth Soup' setting, see 'Instructions for Use'.
When the cooking cycle has finished, taste, season, garnish with coriander leaves to serve.
SAUCES
BÉCHAMEL SAUCE - Makes approximately 600ml
| Ingredients Quantity |
| Plain flour 50g, seived |
| Salted butter 50g |
| Milk 500ml |
| Salt, fresh ground black pepper andfreshly grated nutmeg To taste |
WHAT YOU DO
Put all the ingredients in the jug.
Cook using the 'Sauce' setting, see 'Instructions for Use'.
When the cooking cycle has finished, taste, season and serve.
MUSHROOM SAUCE - Makes approximately 600ml
| Ingredients Quantity |
| Chestnut or button mushrooms 150g, cleaned and halved |
| Large onion 1, peeled and quartered |
| Clove garlic 1, peeled |
| Vegetable oil 3 tbsp |
| Double cream 284ml |
| Salt and pepper To taste |
WHAT YOU DO
Put all the ingredients in the jug.
Cook using the 'Sauce' setting, see 'Instructions for Use'.
When the cooking cycle has finished, taste, season and serve.
BLUE SAUCE - Makes approximately 600ml
| Ingredients Quantity |
| Small onion 1/2, peeled and halved |
| Salted Butter 50g |
| Blue cheese, eg Stilton,Roquefort etc. 150g, roughly chopped |
| Mascarpone cheese 150g |
| Whipping cream 142ml |
| Freshly ground black pepper To taste |
WHAT YOU DO
Put all the ingredients in the jug.
Cook using the 'Sauce' setting, see 'Instructions for Use'.
When the cooking cycle has finished, taste, season and serve.
MUSHROOMS WITH GARLIC AND PARSLEY - Serves 2
| Ingredients Quantity |
| Olive oil 75ml |
| Garlic clove 1/2, peeled |
| Button mushrooms 175g, cleaned and halved |
| Fresh parsley Small bunch, stalks removed |
| Salt and freshly ground pepper To taste |
WHAT YOU DO
Put all the ingredients in the jug, except the parsley.
Cook using the 'Sauce' setting, see 'Instructions for Use'.
When the cooking cycle has finished, taste, season, add parsley to serve.
TOMATO SAUCE Makes 1 bowl to serve as a dip or accompaniment
| Ingredients Quantity |
| Onion 1 medium, peeled and quartered |
| Cloves garlic 2, peeled |
| Dried thyme 1/4 tsp |
| Olive oil 100ml |
| Sugar 2 tsp |
| Salt and pepper |
| Water 218ml |
| Ripe tomatoes 600g |
| Basil leaves 2 |
WHAT YOU DO
Put all the ingredients in the jug.
Cook using the 'Sauce' setting, see 'Instructions for Use'.
When the cooking cycle has finished, taste, season and serve.
WHITE WINE SAUCE Makes approximately 600ml
TIP: For a more luxurious sauce, replace some of the milk with double cream.
| Ingredients Quantity |
| Plain flour 100g |
| Milk 300ml |
| Butter 30g |
| White wine 200ml |
| Salt 1/4 tsp |
| Ground white pepper To taste |
WHAT YOU DO
Put all the ingredients in the jug.
Cook using the 'Sauce' setting, see 'Instructions for Use'.
When the cooking cycle has finished, taste, season and serve.
DRINKS
FRESH LEMONADE - Makes about 6 glasses
TIP: You can use lemonade or sparkling or soda water instead of tap water to create a fizzy drink.
| Ingredients Quantity |
| Unwaxed lemons, rind on 4, cut into 8 pieces each |
| Caster sugar 100g |
| Water 300ml |
WHAT YOU DO
Put the lemons, sugar and water into the jug.
Blend using the 'Ice Crushing' setting, see 'Instructions for Use'.
When the cycle has finished, pour the mixture through a sieve to the remove the pulp.
Pour the lemonade into a large jug and add another 750ml of water.
Add ice and few sprigs of mint to serve.
STRAWBERRY AND WATERMELON SMOOTHIE - Serves 4
TIP: If watermelon is not in season, use another type of melon or soft fruit instead.
| Ingredients Quantity |
| Strawberries 400g stalks removed, rinsed |
| Watermelon 600g skin and seeds removed |
| Water 200ml |
| Ice cubes 3-4 |
| Fresh mint leaves 5-6, to garnish |
WHAT YOU DO
Put the strawberries, watermelon, water and ice cubes into the jug.
Blend using the 'Ice Crushing' setting, see 'Instructions for Use'.
When the cycle has finished, pour into four glasses and add mint leaves to serve.
FREQUENTLY ASKED QUESTIONS
Question: Why is the Soup Maker not working?
Answer: Check that the Soup Maker is plugged in and switched on at the socket.
Then check that the jug is sitting correctly on the base unit, the notch on the jug need to sit securely into the groove.
The lid must be fitted correctly and firmly pushed down onto the jug. This is a safety feature and the Soup Maker will not work unless the lid is in place.
Question: Why is the Soup Maker is not responding when I press the buttons on the display?
Answer: Dirt and grease may have built up on the control panel. Switch off and unplug the Soup Maker at the socket. Wipe the control panel with a damp cloth and dry thoroughly.
Question: Why have the ingredients inside my Soup Maker not blended very well?
Answer: Check that the ingredients have not exceeded the 'MAX' marks for hot and cold ingredients on the jug. It may be overfilled, remove some of the ingredients. There may not be enough water or cooking liquid inside the jug to help blend the ingredients.
Press and hold the Blend button to blend and stir the ingredients for longer.
Question: Why is my soup burnt?
Answer: You may have selected the wrong program by accident. There may not be enough liquid in the jug, so your ingredients have come into direct contact with the hotplate and burnt, add more liquid.
CARE AND CLEANING
- Unplug the Touchscreen Soup Maker and let it cool completely before cleaning.
- Clean thoroughly before using for the first time and after every use.
- Check the parts for wear or damage after every few uses.
- Do not use abrasive cleaners, or steel wool.
- Always use plastic, wooden or silicone spatulas, as metal utensils will damage non-stick coatings.
- Never immerse the base unit, jug, cord or plug in water or any other liquid.
- To clean the outer surfaces of the base unit and jug, wipe with a clean damp cloth and dry thoroughly before storing.
- After you have made soup, use the cleaning brush to remove any residue stuck inside the jug and around the blades. Do not reach into the jug and touch the blades with your hands.
• No parts are dishwasher safe
- To clean inside the jug and blade, use the auto clean setting. See the instructions in 'Before using the touchscreen Soup Maker for the ☒rst time'.
- Wash the lid and measuring cup in warm soapy water, rinse and dry thoroughly.
- There is cord storage around the base of the Soup Maker.
- Store the Touchscreen Soup Maker with the power cable loosely coiled. Never wrap it tightly around the product.
ELECTRICAL CONNECTIONS
THIS APPLIANCE MUST BE EARTHED
The appliance is fitted with a fused three-pin plug to BS1363 which is suitable for use in all homes fitted with sockets to current specifications.
CHANGING THE 10 AMP FUSE
Use a 10 amp BS1362 fuse. Only BSI or ASTA approved fuses should be used. If you are unsure which plug or fuse to use, always refer to a qualified electrician.
Note: After replacing or changing a fuse on a moulded plug which has a fuse cover, the cover must be refitted to the plug; the appliance must not be used without a fuse cover. If lost, replacement fuse covers can be obtained from an electrical shop. This appliance complies with the following EU Directives: 2014/35/EU (Low Voltage Directive) and 2014/30/EU (EMC Directive).
RECYCLING YOUR ELECTRICALS
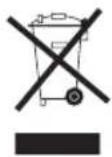
Along with many other high street retailers, Lakeland has joined a scheme whereby customers can take their unwanted electricals to recycling points set up around the country.
Visit www.recycle-more.co.uk to find your nearest recycling point.
Lakeland
Alexandra Buildings, Windermere, Cumbria, UK LA23 1BQ
Tel: +44(0)15394 88100 www.lakeland.co.uk
- LAKELAND TOUCHSCREEN SOUP MAKER
- CONTENTS
- PRODUCT FEATURES
- DISPLAY
- SAFETY CAUTIONS
- WARNING – HOT SURFACES
- BEFORE USING THE TOUCHSCREEN SOUP MAKER FOR THE FIRST TIME
- USING THE AUTO CLEAN SETTING
- INSTRUCTIONS FOR USE
- USING THE AUTOMATIC SETTINGS
- During the cooking cycle:
- ICE CRUSHING SETTING
- USING THE MANUAL SETTING
- BLENDING
- RECIPES
- CHUNKY SOUPS
- WHAT YOU DO
- SMOOTH SOUPS
- SAUCES
- WHITE WINE SAUCE Makes approximately 600ml
- DRINKS
- FRESH LEMONADE - Makes about 6 glasses
- STRAWBERRY AND WATERMELON SMOOTHIE - Serves 4
- FREQUENTLY ASKED QUESTIONS
- CARE AND CLEANING
- ELECTRICAL CONNECTIONS
- THIS APPLIANCE MUST BE EARTHED
- CHANGING THE 10 AMP FUSE
- RECYCLING YOUR ELECTRICALS
- Lakeland
Brand : Lakeland
Model : 31577
Category : Blender