61776 - Chopper Lakeland - Free user manual and instructions
Find the device manual for free 61776 Lakeland in PDF.


| Product Type | Electric Meat Grinder / Mincer |
| Brand | Lakeland |
| Model | 61776 |
| Power | 800 W |
| Voltage | 220-240 V, 50/60 Hz |
| Capacity | 1.5 kg per minute |
| Dimensions | 30 x 20 x 25 cm |
| Weight | 3.2 kg |
| Material | Stainless steel blade and grinding plate, ABS plastic housing |
| Functions | Mincing meat, grinding vegetables, making sausages |
| Speed Settings | 2 speeds + reverse |
| Reversible Function | Yes, to clear blockages |
| Dishwasher Safe Parts | Blade, grinding plate, pusher, and trays |
| Safety Features | Overload protection, non-slip feet, safety lock on hopper |
| Accessories Included | 3 grinding plates (fine, medium, coarse), sausage attachment, kibbeh attachment |
| Cord Storage | Built-in cord wrap at base |
| Cleaning & Maintenance | Wipe motor housing with damp cloth; wash removable parts with warm soapy water or dishwasher |
| Spare Parts Availability | Replacement blades, plates, and attachments available from Lakeland website |
| Warranty | 2 years limited |
| Certifications | CE, RoHS |
Frequently Asked Questions - 61776 Lakeland
User questions about 61776 Lakeland
0 question about this device. Answer the ones you know or ask your own.
Ask a new question about this device
Download the instructions for your Chopper in PDF format for free! Find your manual 61776 - Lakeland and take your electronic device back in hand. On this page are published all the documents necessary for the use of your device. 61776 by Lakeland.
USER MANUAL 61776 Lakeland
natural_image
Black LAKELAND stainless steel kitchen tool with handle and control panel (no visible text or symbols on device body)Model: 61776
LAKELAND MEAT MINCER
Thank you for choosing the Lakeland Meat Mincer.
Please take a little time to read this booklet before getting started and keep it in a safe place for future reference.
This Meat Mincer lets you turn those Sunday roast leftovers into mince for shepherd's pie, or make your own sausages for the barbeque. This easy to use Meat Mincer lets you do all this with minimum effort. Simply load your meat of choice into the wide chute, turn on the mincer and use the included pusher to help it into the blades.
Here at Lakeland, our award-winning family-owned business still offers the same excellent quality, value for money and exceptional customer service as when we founded the company back in the 1960s.
Our products are hand-picked and thoroughly tested so you can be sure that everything you purchase will be a pleasure to use for many years to come.
CONTENTS
Product features....4-5
Safety cautions....6-7
Using your Meat Mincer and using for the first time....8-11
Instructions for use 12
Hints and tips....12
Recipes 13-15
Frequently asked questions....16
Care and cleaning 16
Electrical connections....17
Recycling your electricals 17
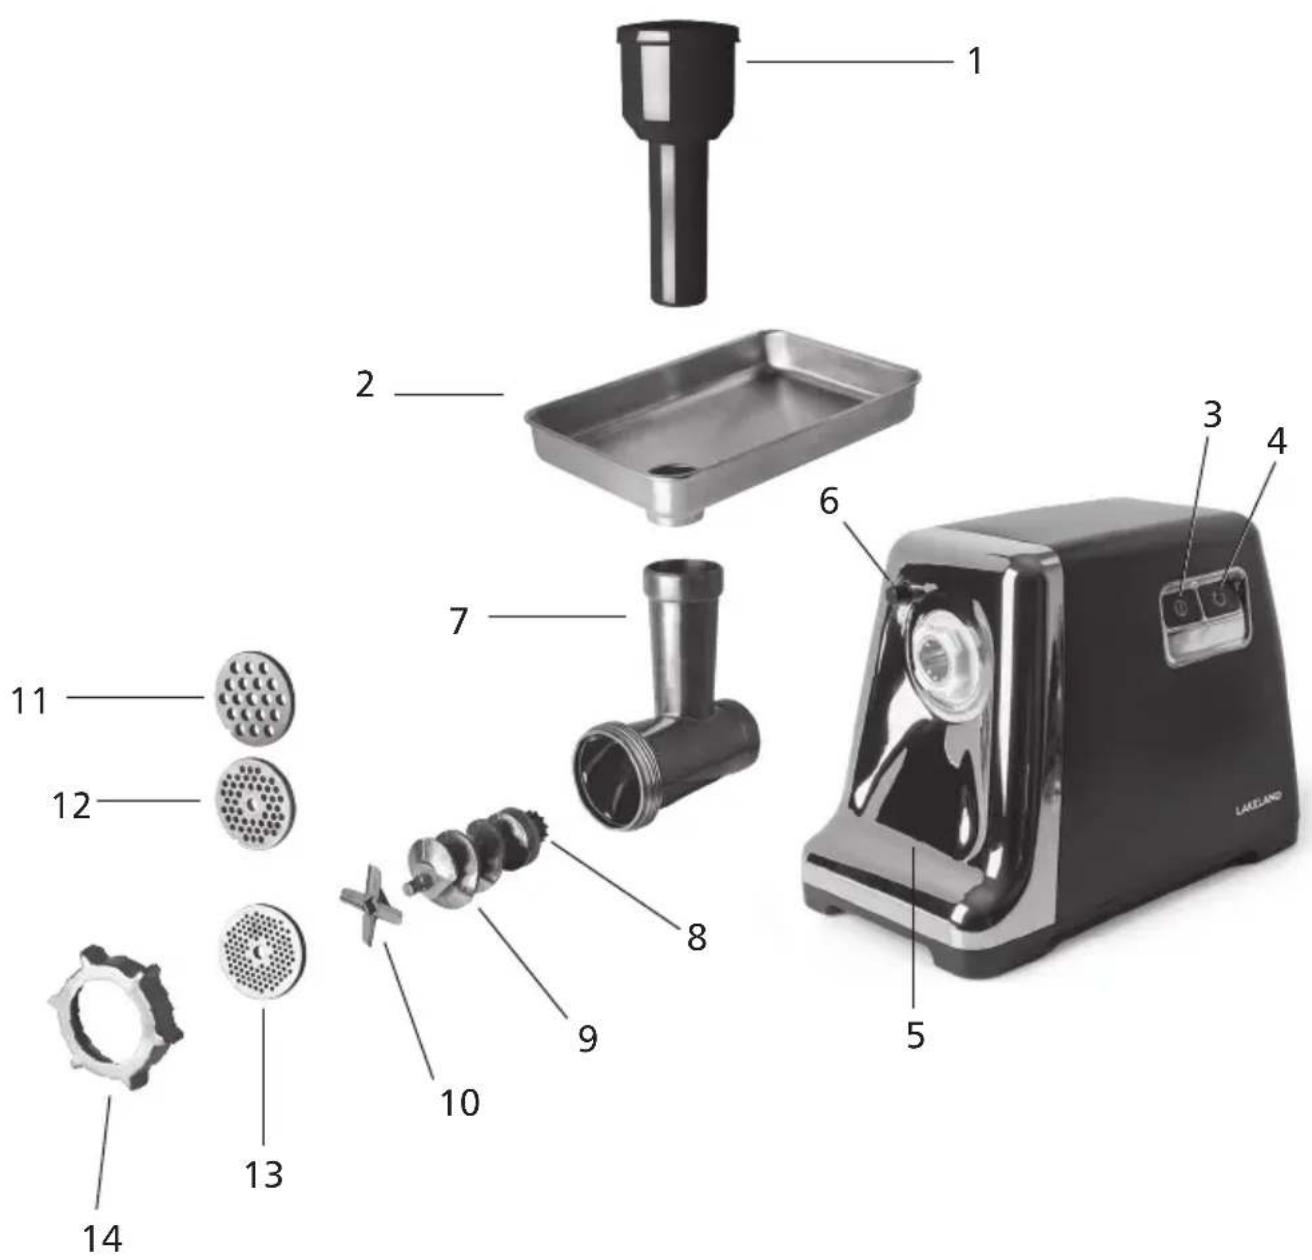
PRODUCT FEATURES
- Pusher
- Coupling
- Food tray
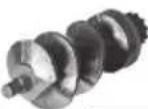
- Feed screw
- On/off button
- Stainless steel cutting blade
- Reverse button
- Coarse mincer disc
- Base unit
- Medium mincer disc
- Safety lock button
- Fine mincer disc
- Mincing chamber
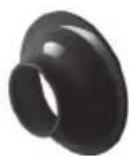
- Ring collar
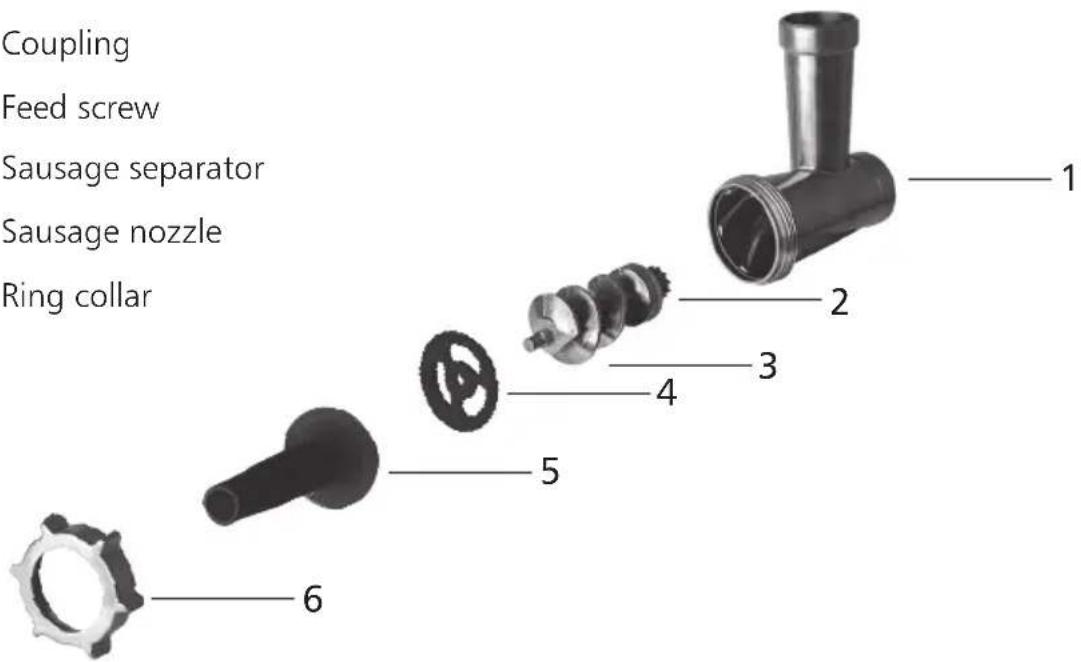
SAUSAGE MAKER ATTACHMENTS
- Mincing chamber
- Coupling
- Feed screw
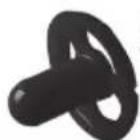
- Sausage separator
- Sausage nozzle
- Ring collar
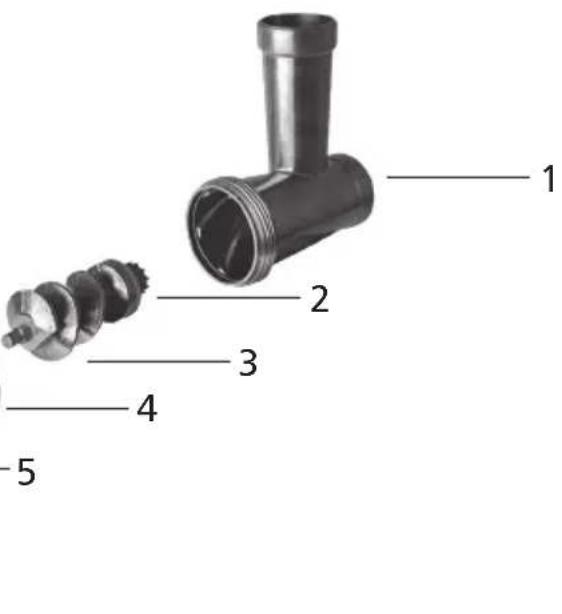
KEBAB MAKER ATTACHMENTS
- Mincing chamber
- Coupling
- Feed screw
- Kebab separator
- Kebab nozzle
- Ring collar
ncing chamber - Coupling
- Feed screw
- Kebab separator
- Kebab nozzle
- Ring collar
1
2
4
[Non-Text]
6
PLEASE NOTE: The sausage maker and kebab maker use the same mincing chamber, coupling/feed screw and ring collar as the mincer.
SAFETY CAUTIONS
Carefully read all the instructions before using the appliance and keep in a safe place for future reference. Always follow these safety cautions when using the appliance to avoid personal injury or damage to the appliance. This appliance should be used only as described in this instruction book.
- This appliance can be used by children aged from 8 years and above and persons with reduced physical, sensory or mental capabilities or lack of experience and knowledge if they have been given supervision or instruction concerning use of the appliance in a safe way and understand the hazards involved. Children shall not play with the appliance. Cleaning and user maintenance shall not be done by children unless they are older than 8 and supervised.
- Make sure your electricity supply matches the voltage shown on the appliance.
- Ensure all packaging materials and any promotional labels or stickers are removed from the appliance before the first use.
- Always inspect the appliance before use for noticeable signs of damage. Do not use if damaged or has been dropped. In the event of damage, or if the appliance develops a fault contact the Lakeland customer care team on 015394 88100.
- Do not use this appliance if the lead is damaged. If the lead is damaged it must be replaced with a special lead. Contact the Lakeland customer care team on 015394 88100.
• Always use the appliance on a dry, level, heat resistant surface. - Unplug from the mains when not in use and before cleaning. To disconnect, turn the socket to "off" and remove the plug from the mains socket.
- Do not use any accessories or attachments with this appliance other than those recommended by Lakeland.
- To protect against fire, electric shock or personal injury, do not immerse cord, plug or lid in water or other liquids.
- Do not leave the lead hanging over the edge of a kitchen table or worktop. Avoid contact between the lead and hot surfaces.
- For indoor use only.
- For domestic use only.
-
This appliance should be used for preparation of food as described within the instructions for use that accompany it.
-
Always ensure that your hands are dry before removing the plug from the mains socket. Never pull the plug out of the mains socket by its lead.
- To avoid injury or possible fire, do not cover the appliance when in use.
- Do not connect this appliance to an external timer or remote control system.
- An extension cable may be used with care. The electrical rating of the cable should be at least as great as the appliance. Do not allow the cable to hang over the edge of the worktop or touch any hot surfaces.
- This appliance complies with the basic requirements of Directives 2014/30/EU (Electromagnetic Compatibility) and 2014/35/EU (Low Voltage Directive).
- WARNING: A cut off plug inserted into a 13 amp socket is a serious safety (shock) hazard. Ensure the cut off plug is disposed of safely.
• CAUTION: The plastic bags used to wrap this appliance or the packaging may be dangerous. To avoid risk of suffocation, keep these bags out of reach of babies and children. These bags are not toys. - Always remove bones etc. from meat before mincing. Cut large pieces of meat into smaller chunks, and also try to remove large sections of fat from the meat before mincing.
- Meat should be thawed before mincing.
- The cutting blade is very sharp; please handle with care when assembling and cleaning.
- Keep hands, hair, clothing and utensils away from moving parts. Never insert spoons, knives or other tools into the attachments. Always use the food pusher provided.
- Always switch off the appliance and unplug from the socket before adding or removing attachments, after use and before cleaning.
- Do not operate with wet hands and never allow the plug or cord to get wet.
USING YOUR MEAT MINCER FOR THE FIRST TIME
- Unpack the Meat Mincer and remove all the packaging materials.
- Before first use, wipe the base unit with a clean damp cloth.
- Wash the attachments in warm soapy water, rinse and dry thoroughly. Wipe the mincer discs with a light coating of vegetable oil to prevent rust developing. Place in a sealed plastic bag or airtight box until needed then rinse before use.
- Make sure that all parts are clean and dry before assembling the product.
- Do not place any parts of the mincer in your dishwasher.
WARNING: Do not insert the plug into an electrical outlet, or turn on the appliance before you have fully assembled it.
ASSEMBLING THE MEAT MINCER
natural_image
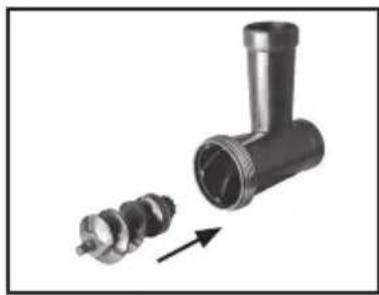
Mechanical component diagram showing a T-shaped pipe fitting with two separate cylindrical parts, one with an arrow indicating direction (no text or symbols present)• Make sure the Meat Mincer is unplugged.
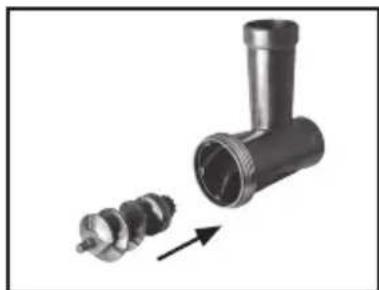
- Fit the feed screw inside the mincing chamber - the white plastic coupling goes in first.
natural_image
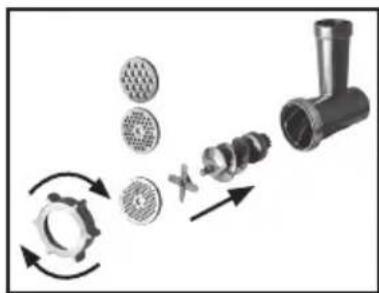
Diagram showing mechanical components including a pipe fitting, gear assembly, and valve mechanism (no text or labels)- Carefully slot the cutting blade onto the screw with the sharp edges facing out - please handle with care.
- Fit one of the mincer discs (fine, medium or coarse). The notch in the disc fits the pin on the edge of the mincer chamber.
- Screw on the ring collar, turning clockwise.
natural_image
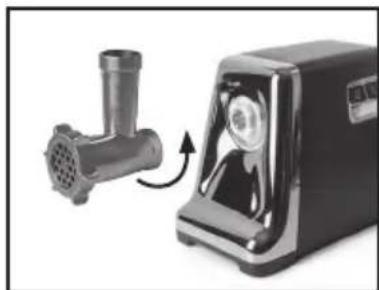
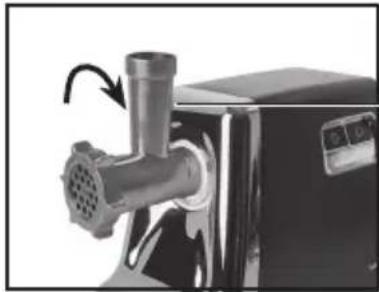
Close-up of a kitchen electric oven next to a mounted meat drain (no text or symbols visible)- Slot the assembled mincing chamber onto the base unit. Twist it anti-clockwise and you will hear the safety lock click into place.
natural_image
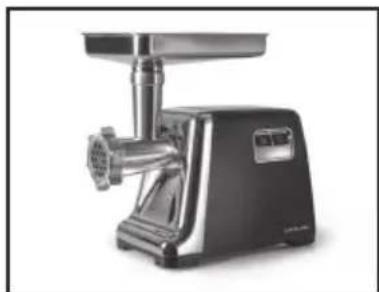
Close-up of a stainless steel meat maker (no visible text or labels)- Fit the food tray onto the mincing chamber and place a dish beneath the mincer to catch the food.
- Your Meat Mincer is now ready to use.
TAKING THE MEAT MINCER APART
- Make sure the Meat Mincer is switched off and unplugged.
- Lift off the food tray. Press the safety lock button and turn the mincing chamber clockwise to remove it.
natural_image
Close-up of a black stainless steel kitchen tool with a piping and valve (no visible text or symbols)Safety lock button
- Unscrew the ring collar and carefully remove the mincer disc, cutting blade and feed screw.
- To clean, see the 'Care and Cleaning' instructions.
USING THE SAUSAGE MAKER ATTACHMENT
natural_image
Mechanical component diagram showing a T-shaped pipe fitting with two separate cylindrical parts, one with an arrow indicating direction (no text or symbols present)• Make sure the Meat Mincer is unplugged.
- Fit the feed screw inside the mincing chamber - the white plastic coupling goes in first.
natural_image
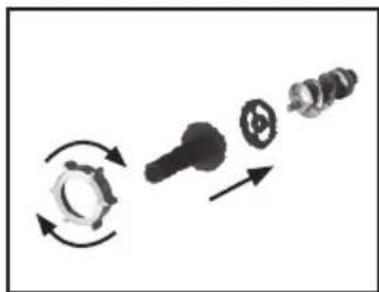
Diagram showing a mechanical assembly with rotating components and a central component (no text or symbols)- Place the white plastic sausage separator onto the screw.
- Hold the sausage nozzle onto the mincing chamber, then screw on the ring collar, turning clockwise.
natural_image
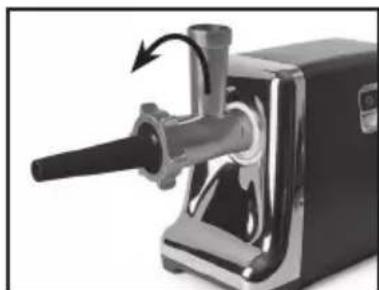
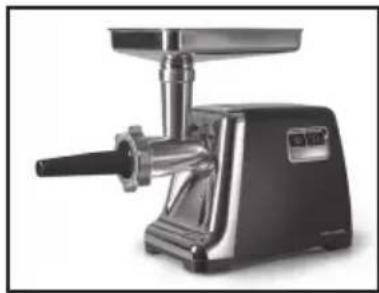
Close-up of a mechanical tool with a rotating shaft and handle, no visible text or symbols- Slot the assembled mincing chamber onto the base unit. Twist it anti-clockwise and you will hear the safety lock click into place.
natural_image
Close-up of a black and silver kitchen grater with handle and lever (no visible text or symbols)• Fit the food tray onto the mincing chamber.
- If you are using sausage skins, soak in warm water for around 10 minutes.
- Pull the sausage skin onto the end of the nozzle. Plug in the machine and press the On/off button.
- Using the food pusher, gently guide the sausage filling into the mincing chamber. As the sausage skin fills, gently ease it off the nozzle and twist into sausages.
TAKING THE SAUSAGE MAKER ATTACHMENT APART
- Make sure the machine is switched off and unplugged.
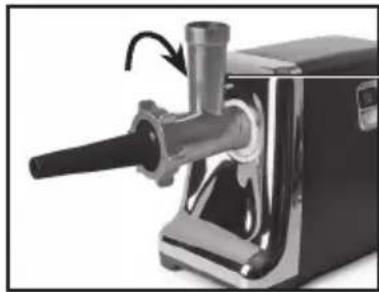
- Lift off the food tray. Press the safety lock button and turn the mincing chamber clockwise to remove it.
natural_image
Close-up of a black and silver manual bread maker with a handle and spout (no visible text or symbols)Safety lock button
- Unscrew the ring collar and remove the sausage nozzle, sausage separator and feed screw.
- To clean, see the 'Care and Cleaning' instructions.
USING THE KEBAB MAKER ATTACHMENT
natural_image
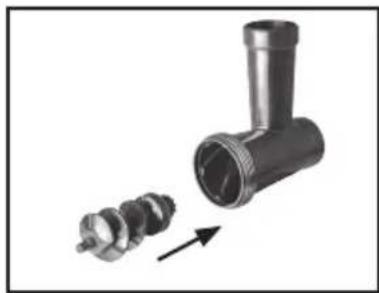
Mechanical component diagram showing a T-shaped pipe fitting with multiple cylindrical parts and an arrow indicating direction (no text or symbols)• Make sure the Meat Mincer is unplugged.
- Fit the feed screw inside the mincing chamber - the white plastic coupling goes in first.
natural_image
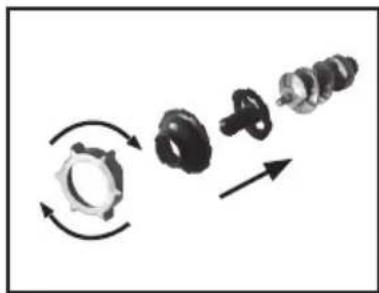
Diagram showing a mechanical assembly with rotating components and directional arrows (no text or symbols)- Place the white plastic kebab separator onto the screw.
- Hold the kebab nozzle onto the mincing chamber, then screw on the ring collar, turning clockwise.
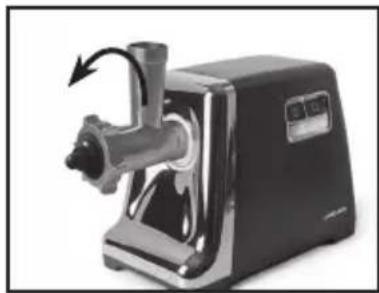
natural_image
Black and white photo of a kitchen electric shaver with a rotating handle (no visible text or symbols)- Slot the assembled mincing chamber onto the base unit. Twist it anti-clockwise and you will hear the safety lock click into place.
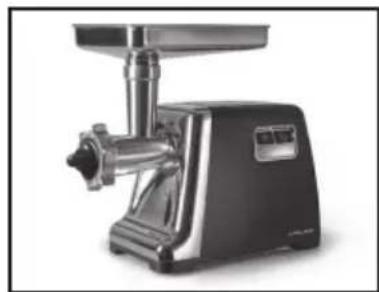
natural_image
Close-up of a stainless steel meat maker with handle and control panel (no visible text or symbols)• Fit the food tray onto the mincing chamber.
- Plug in the machine and press the On/off button.
- Using the food pusher, gently guide the kebab mixture into the mincing chamber. Gently ease it off the nozzle in 7cm lengths.
TAKING THE KEBAB MAKER ATTACHMENT APART
- Make sure the machine is switched off and unplugged.
- Lift off the food tray. Press the safety lock button and turn the mincing chamber clockwise to remove it.
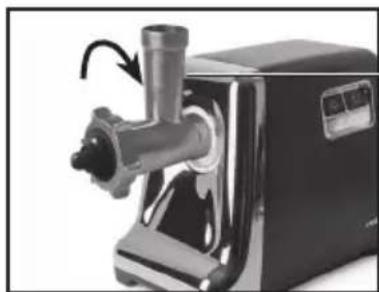
natural_image
Close-up of a black and silver kitchen grater with a piping bag and handle (no visible text or symbols)Safety lock button
- Unscrew the ring collar and remove the kebab nozzle, kebab separator and feed screw.
• To clean, see the 'Care and Cleaning' instructions.
INSTRUCTIONS FOR USE
PLEASE NOTE: Always remove bones etc. from meat before mincing. Cut large pieces of meat into smaller chunks, and also try to remove large sections of fat from the meat before mincing.
- Plug in the appliance and switch on at the socket. Turn the appliance on by pressing the On/off button.
- Using the food pusher, gently guide small pieces of meat into the mincing chamber. Add small quantities at a time to avoid overloading the motor.
- If the meat mincer is struggling or becomes stuck, press the reverse button to allow the mixture to move backwards along the mincing chamber so that the blockage is removed.
- When you have finished mincing, switch off and unplug.
- To clean, see the 'Care and Cleaning' instructions.
PLEASE NOTE: The sausage filling should not be too 'wet', otherwise liquid may leak into the machine.
HINTS AND TIPS
- After 3 minutes' use, let the machine rest for 30 minutes to allow the motor to cool down.
- Please avoid forcing ingredients down the chute with the food pusher as this may damage the machine. Also ensure that all bones and any large fatty areas on the meat are removed before mincing.
- Please assemble the mincing chamber carefully. If the pieces are not properly fitted, the meat will not mince well and the cutting blades and mincer discs may become blunt.
RECIPES
Please note that all spoon measurements are standard metric, so 1 tsp is 5ml and 1 tbsp is 15ml. We recommend using a set of measuring spoons for accurate results.
MINCED PORK BURGERS – Makes 8
| Ingredients Quantity | |
| Stale bread 60g | |
| Onion 50g, sliced | |
| Pork meat 500g | |
| Fresh or dried breadcrumbs 40g | |
| Butter | 20g |
| Egg 1, beaten | |
| Oil | |
| Salt and pepper | |
WHAT YOU DO
Soak the stale bread in water, then drain.
Fry the sliced onion in oil and butter until golden.
Cut the pork into pieces for mincing. Put the bread, fried onion and pork through the mincer twice, using the fine mincer disc.
Place the pork mixture into a bowl. Add the beaten egg, season and combine all the ingredients.
Divide the mixture into 8 oval-shaped burgers, around 1.5cm thick. Coat in breadcrumbs and fry in hot oil on both sides until golden and completely cooked through. Serve in soft white rolls with apple sauce.
HOME-MADE PORK SAUSAGES
The quantity of sausages made depends on the size and type you choose to make, whether individual link sausages or a Cumberland-style swirl, coiled from a length of sausage.
| Ingredients | Quantity |
| Sausage skins | |
| Lean pork | 1.2kg |
| Belly pork | 600g |
| Iced water | 360ml |
| Salt | 4 tsp |
| Black pepper | 1 tsp |
| Paprika | 1 tsp |
| Cumin | 1 tsp |
| Celery salt | 12 tsp |
| Dried mixed herbs or sage/thyme | 1 tbsp |
| Ground ginger | 2 tsp |
| Nutmeg | 1 tsp, freshly grated |
| Dried, finely chopped breadcrumbs | 170g |
WHAT YOU DO
Set the sausage skins to soak in warm water for around 10 minutes.
Measure out all the seasonings and shake together in a screw-top jar.
Cut all the meat into pieces for mincing and place in a large bowl.
Sprinkle the meat with the seasoning mix, then mix well until the meat pieces are evenly coated.
Put the pork mixture through the mincer once, using the fine mincer disc. Return the mixture to the bowl and check the seasoning is evenly distributed.
Add some of the iced water to the mixture and mix well. Gradually add the remaining water.
Add the breadcrumbs and mix well. By now the mixture should be firming up.
Put the mixture through the mincer again, this time using the coarse mincer disc. The mixture is now ready to fill the sausage skins, following the instructions for 'Using the Sausage Maker'.
To cook the sausages, heat a small amount of oil in a frying pan over a low to medium heat and fry gently, turning occasionally until completely cooked through. These meaty, herby sausages are delicious served with mashed potatoes and a rich onion gravy
STUFFED KEBABS – Makes 8-12 approx.
| Ingredients | Quantity |
| Outer Casing | |
| Lamb 500g, cut into strips | |
| Bulgur wheat 500g, washed and drained | |
| Onion small | |
| Filling | |
| Lamb 400g, cut into strips | |
| Onions, medium 2 finely chopped | |
| Allspice 1-2tsp | |
| Plain flour 1 tsp | |
| Salt and pepper | |
WHAT YOU DO
To Make The Outer Casing:
Pass alternate batches of lamb and bulgur wheat through the mincer fitted with the medium disc. Add the onion before all the lamb and wheat are minced.
Mix the minced lamb, onion and wheat together then pass back through the mincer a second time.
Change to the fine disc and mince the mixture for a third time, alternatively continue mincing using the medium disc.
The mixture is now ready to extrude through the kebab maker attachment.
To Make The Filling:
Mince the lamb using the fine disc.
Fry the onion in the oil until golden brown, add the lamb and allow to brown and cook through. Add the remaining ingredients and cook for 1-2 minutes.
Drain off any excess fat if necessary and allow to cool.
Extrude the casing mixture through the kebab maker and cut into approximately 7cm lengths.
Pinch one end of the tube together and then using a piping bag, carefully fill with the stuffing mixture through the open end leaving a small gap which can be pinched together to seal the kebab.
Deep fry the kebab in batches in hot oil 190^ C/375°F for approximately 6 minutes or until golden brown and the filling piping hot.
FREQUENTLY ASKED QUESTIONS
Question: The machine is assembled but when you press the control button it does not start.
Answer: All the parts are not correctly aligned and in place. Unplug the appliance, take the Meat Mincer apart and reassemble, following the instructions in 'Assembling the Meat Mincer'.
CARE AND CLEANING
• Always ensure the Meat Mincer is switched off and unplugged from the socket before cleaning.
- Clean thoroughly before using for the first time and after every use.
- Check the parts for wear or damage after every few uses.
- Do not use abrasive cleaners, or steel wool.
- Never immerse the base unit, cord and plug in water or any other liquid.
- Wipe the base unit with a soft, damp cloth. Do not immerse in water.
- Wash the plastic parts in warm, soapy water.
- Wash the metal parts in hot, soapy water with a washing-up brush. Handle the cutting blade with great care. Carefully dry all parts.
- Wipe the cutting blade and mincer discs with a light coating of vegetable oil to prevent rust developing. Place them in a sealed plastic bag or airtight box until needed, and then rinse before next use.
- Do not place any of the parts in your dishwasher.
- Avoid abrasive cleaners and metal scourers as they may damage the machine.
- Store the Meat Mincer with the power cable lossely coiled. Never wrap it tightly around the appliance.
ELECTRICAL CONNECTIONS
The appliance is fitted with a fused three-pin plug to BS1363 which is suitable for use in all homes fitted with sockets to current specifications.
CHANGING THE 5 AMP FUSE
Use a 5 amp BS1362 fuse. Only BSI or ASTA approved fuses should be used. If you are unsure which plug or fuse to use, always refer to a qualified electrician.
Note: after replacing or changing a fuse on a moulded plug which has a fuse cover, the cover must be refitted to the plug; the appliance must not be used without a fuse cover. If lost, replacement fuse covers can be obtained from an electrical shop. This appliance complies with the following EU Directives: 2014/35/EU (Low Voltage Directive) and 2014/30/EU (EMC Directive).
RECYCLING YOUR ELECTRICALS
Along with many other high street retailers, Lakeland has joined a scheme whereby customers can take their unwanted electrical products to recycling points set up around the country.
Visit www.recycle-more.co.uk to find your nearest recycling point.
- LAKELAND MEAT MINCER
- CONTENTS
- PRODUCT FEATURES
- SAUSAGE MAKER ATTACHMENTS
- KEBAB MAKER ATTACHMENTS
- SAFETY CAUTIONS
- USING YOUR MEAT MINCER FOR THE FIRST TIME
- ASSEMBLING THE MEAT MINCER
- TAKING THE MEAT MINCER APART
- USING THE SAUSAGE MAKER ATTACHMENT
- TAKING THE SAUSAGE MAKER ATTACHMENT APART
- Safety lock button
- USING THE KEBAB MAKER ATTACHMENT
- TAKING THE KEBAB MAKER ATTACHMENT APART
- INSTRUCTIONS FOR USE
- HINTS AND TIPS
- RECIPES
- WHAT YOU DO
- HOME-MADE PORK SAUSAGES
- To Make The Outer Casing:
- To Make The Filling:
- FREQUENTLY ASKED QUESTIONS
- CARE AND CLEANING
- ELECTRICAL CONNECTIONS
- CHANGING THE 5 AMP FUSE
- RECYCLING YOUR ELECTRICALS
Brand : Lakeland
Model : 61776
Category : Chopper