PKNESPRESO60 - Coffee maker Nutrichef - Free user manual and instructions
Find the device manual for free PKNESPRESO60 Nutrichef in PDF.


| Product Type | Automatic Capsule Espresso Maker |
| Brand | Nutrichef |
| Model | PKNESPRESO60 |
| Dimensions (L x W x H) | 14.2 x 4.6 x 9.8 inches |
| Weight | Approx. 6.5 lbs |
| Power Supply | 110V AC, 60Hz |
| Power Rating | 1260 Watts |
| Pump Pressure | 19 Bar |
| Water Tank Capacity | 27 oz (0.8 L) |
| Capsule Pod Capacity | 10 used capsules |
| Coffee Spout Height | 4.3 inches |
| Brew Sizes | Short (25ml), Normal (40ml), Lungo (110ml), programmable up to 150ml |
| Heating Time | Approx. 15 seconds to 40 seconds (initial warm-up) |
| Standby Time | 15 minutes before auto energy saving mode |
| Construction Material | Engineered ABS |
| Power Cord Length | 3.2 ft |
| Compatible Capsules | Nespresso coffee capsule pods |
| Special Features | LED indicator lights, removable drip tray, used capsule container, programmable volumes, energy saving mode, quick heat ability |
| Cleaning and Maintenance | Hand wash plastic parts; descaler required after 300-400 cups; do not immerse in water |
| Safety Features | Automatic shut-off, anti-scald design, grounded plug |
Frequently Asked Questions - PKNESPRESO60 Nutrichef
User questions about PKNESPRESO60 Nutrichef
0 question about this device. Answer the ones you know or ask your own.
Ask a new question about this device
Download the instructions for your Coffee maker in PDF format for free! Find your manual PKNESPRESO60 - Nutrichef and take your electronic device back in hand. On this page are published all the documents necessary for the use of your device. PKNESPRESO60 by Nutrichef.
USER MANUAL PKNESPRESO60 Nutrichef
natural_image
Exterior view of a modern stainless steel milk tea maker with black and silver casing (no visible text or symbols)

natural_image
Collection of grayscale geometric shapes including triangles, stars, and floral patterns (no text or symbols)Automatic Capsule Espresso Maker (Works with Nespresso Coffee Capsule Pods)
PLEASE READ THIS INSTRUCTION MANUAL
AND SAFETY INSTRUCTIONS BEFORE OPERATING THE APPLIANCE!
Content
Safety precautions
Notes on this operating manual
Unpacking
Starting up
• Before using for the first time
- Capsule type can be used
• Overview of machine parts and controls
• Filling/refilling the water tank
- Flushing out the machine/internal piping
Brewing coffee
• Refill hydraulic circuit when water tank is out of water during brewing
• Programming coffee volume.
Energy saving mode
Cleaning
• Emptying the Capsule container/drip tray
- Clean the coffee machine
Decalcification
Factory reset
Steaming out/storage/transportation
Troubleshooting
Technical data
Safety Precautions
Please take time to read these safety precautions carefully before connecting your machine to the power supply. It is essential to follow them and the operating instructions.
- First read this entire operating manual.
- Danger of electric shock! Never immerse the machine in water or any other liquid.
- Connect only to a properly grounded power point.
• To make sure that the machine is switched off, remove the plug from the power point.
• Always pull out the power plug before:
* Relocating the machine.
* Cleaning or maintenance.
* Long periods of disuse.
- Never clamp or run the power cable over sharp corners or edges.
- Danger of electric shock! Damaged power cables may only be replaced at the customer service centre.
- Danger of electric shock! Never touch the power plug/socket/cable or the machine with damp or wet hands. Never unplug by pulling out the power cable; always remove the plug.
- If you need an extension cable, make sure it is suitable for your machine (3-pole grounded,
1.5 mm2 conductor cross-section), and lay the cable to avoid tripping.
- Danger of scalding! Never move the machine during operation!
- Never operate the machine without water
• Always make sure there is water in water tank not less than minimum level.
- Danger of burning! Never touch very hot parts of the machine (e.g. brew unit during operations).
- Danger of scalding! Do not touch the steam or water jets.
- Danger of scalding! Do not move the operating lever when the machine is still under pressure making Coffee.
- Do not use the machine in case of:
*Faulty operation
*Damaged power cable.
*After falling or other damage.
*In such cases immediately have the machine checked and repaired if necessary at the customer service centre.
• The machine location must meet the following requirements:
* Choose a dry, stable and level support surface not immediately underneath the power point. at least 60 cm away from the washbasin and taps.
*Never place on flammable/ fusible surfaces or equipment.
* Never place the machine or power cable on or nearer than
50 cm to hot surfaces or open flames.
* Never cover the machine during operation.
- Keep children away from the machine during operation.
- Only use the machine in dry rooms.
- Danger of tripping! Do not let the power cable hang down.
• This machine is only intended for household use.
- Pull out the power plug and allow the machine to cool down completely before cleaning and or Maintenance.
• To prevent damage, never use replacement parts or accessories not recommended by the manufacturer
• This appliance is not intended for use by young children or inform persons unless they have been
adequately supervised by a responsible person to ensure that they can use the appliance safely, Young children should be supervised to ensure that they don't play with the appliance.
- If the supply cord is damaged, it must be replaced by the manufacturer, its service agent or similarly qualified persons in order to avoid hazard.
This appliance is intended to be used in household and similar applications such as:
*Staff kitchen areas in shops, offices and other working environments;
*Farm houses;
*By clients in hotels, motels and other residential type environments;
*Bed and breakfast type environments.
Notes
This operating manual cannot cover all possible circumstances. For further information or in case of problems not adequately covered in this operating manual, please contact the service and sales centre.
Please keep this operating manual safe and pass it on to the next user.
Unpacking
-
Remove your espresso Capsule coffee machine from its packaging.
• After unpacking, please check that the following parts are included: -
Water tank
-
Coffee machine
-
Manual
Note:
- Check that your home power supply voltage is the same as marked on the machine rating plate
- Destroy all the plastic bags to prevent danger to children!
Tip: Keep the packaging for transporting the machine (e.g. for removals, servicing, etc.)
Note:
You may find little water remaining in the machine.
In order to ensure that this machine works perfectly, it was tested with water before leaving the factory.
• DANGER OF FROST
Starting up
Before using for the first time
Caution: Improper handling of electrical equipment is dangerous and can be lethal. Please pay attention to the safety precautions in this manual, in particular the following:
• Danger of scalding: beware of hot water!
- Do not operate the machine with an empty water tank or water is less than MINIMUM level.
- Do not open the handle when the machine is brewing.
• Always pull out the power plug before cleaning the machine.
• Only use the machine in a dry room.
• Thoroughly rinse out the water tank with fresh water before using for the first time. Clean the Capsule coffee machine using a damp cloth only.
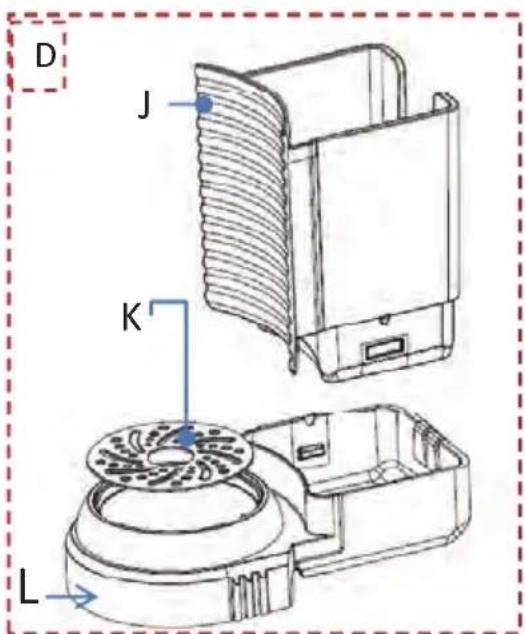
Machine Parts and Controls Overview
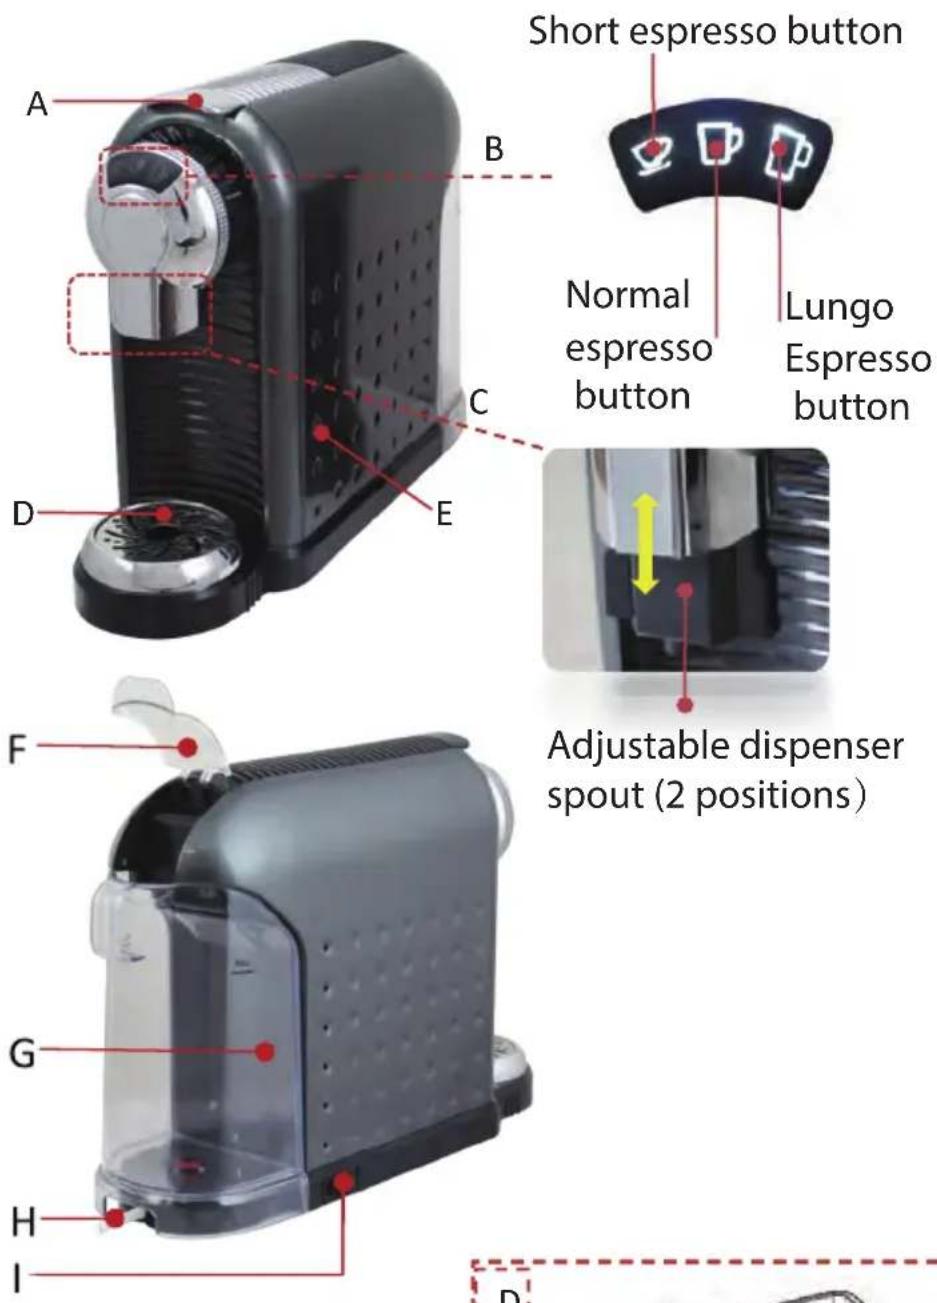
No. name
A handle
B buttons
C Dispenser
D Drip tray set
E wall
F Water tank
G water tank (removable)
H Power cord
I Main switch
J Used capsule container
K Drip tray cover
L drip tray (removable)
Definition of Lighting
| name status function action | |||
| indicator |  | First use. Refer to “flash out the machine and internal circuit” | |
 | Light steady/Water tank is empty. | Fill up water tank, open handle, then press any button to fill the internal circuit. | |
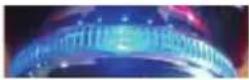 | Light steady | Stand-by | |
| Button light | 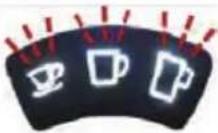 | Blinking when warming up. | Wait for ready. |
 | light steady | ready | |
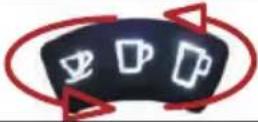 | Each button blinks circularly. | In energy saving mode. | |
| Light in used capsule container | 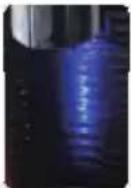 | light steady when handle is open. | Check if the used capsule container is full or not. |
Fill / Refill Water Tank
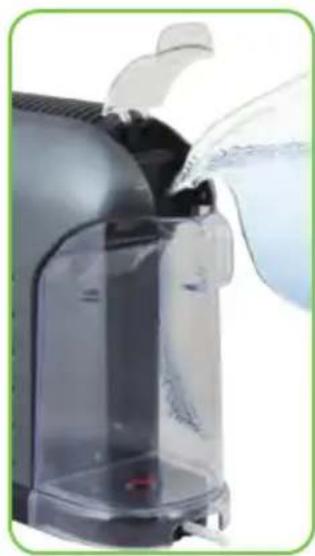
natural_image
Close-up of a dark, transparent kitchen blender with water being poured into it (no visible text or symbols)There are two ways to fill the water tank:
Directly into the machine, by using for example a jug, or by removing the water tank.
Filling without removing the tank
- Raise the water tank lid
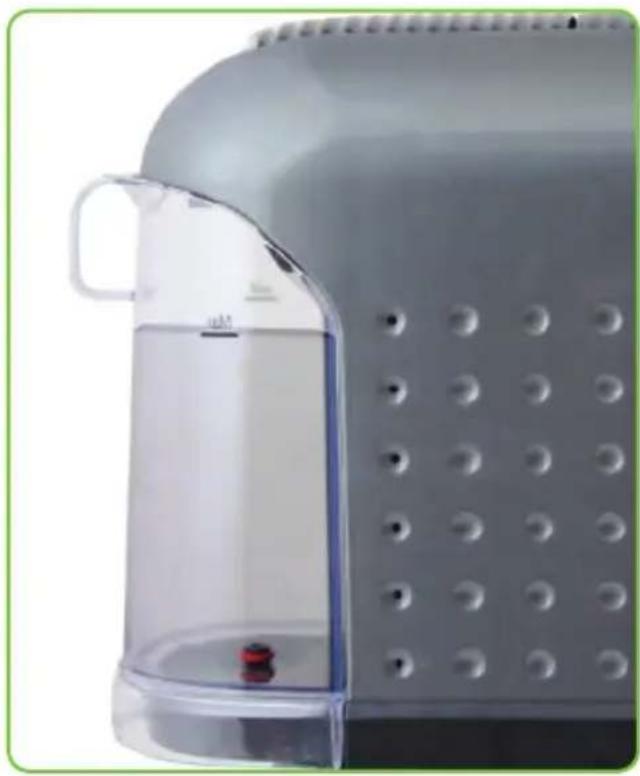
- Fill the tank up to the "MAX" mark with cold fresh water (the maximum capacity is 0.8 litre), or at least the "Min" mark.
- low down the lid
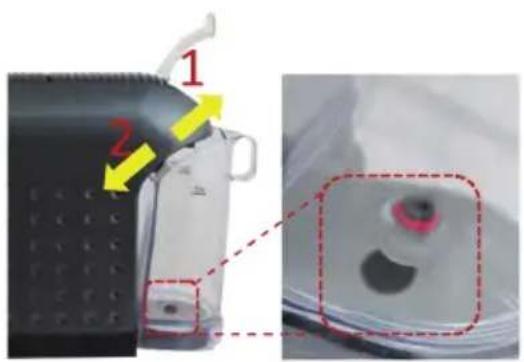
Filling by removing the water tank
- Hold the water grip at tilting angle as shown in direction 1 to remove the water tank from the machine.
- Fill the tank up to the "MAX" mark with cold fresh water (the maximum capacity is 0.8 litre). or at least the "Min" mark.
- Slide the water tank slowly on water tank base. When the water tank outlet is inserted in the inlet receptacle, push firmly on the water grip as shown in direction 2 to lock the water tank.
Flushing out the machine and internal piping/first use
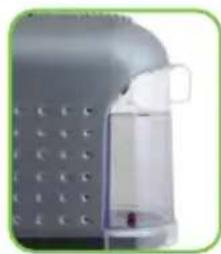
natural_image
Close-up of a gray industrial device with a transparent internal component, no visible text or symbolsBefore using for the first time or after long pauses
(e.g. holidays) the machine must be flushed out.
This short procedure can flush out and cleans the internal piping thoroughly.
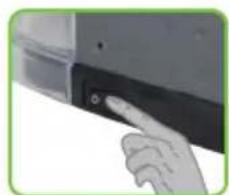
natural_image
Hand pressing a button on a device panel (no visible text or symbols)- Fill water tank to maximum level.
- Plug in the appliance and turn it on.
natural_image
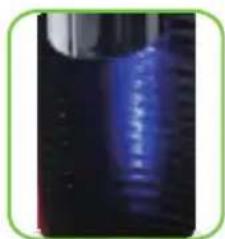
Close-up of a glowing blue vertical object against a dark background, no visible text or symbolsThe lights on the control buttons are blinking, blue lights in used-capsule container is lighted in blue which goes off after 1 minute
natural_image
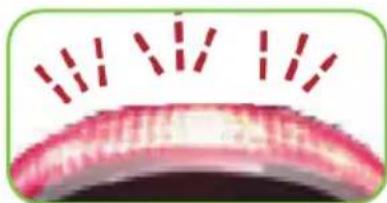
Close-up of a pink textured surface with three small red dashed lines above it, resembling a stylized food item or decorative element (no text or symbols)Tips: You can check easier if the used container is full or not when the blue light is ON. The indicator will blink in red for first use, meaning the internal circuit is empty. Please fill up water tank and open the handle.
Press any button to start pump, once water is detected entering the internal circuit, the red indicators becomes blue. The machine starts to heat up automatically when detected water in circuit with 3 buttons blinking.
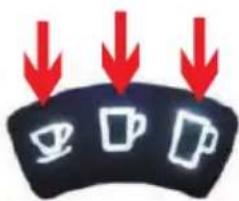
The lights on buttons become steady when the machine is heated up, heating up time is 40 seconds approximately
natural_image
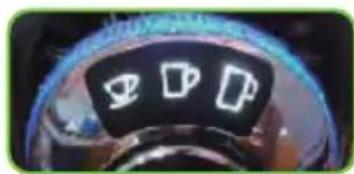
Close-up of a car dashboard with three white icons on a black tray (no text or symbols visible)Press the lungo coffee button, before pressing the button, make sure that:
• The handle is closed without capsule inside.
• The water tank is full.
• The water tank is firmly in place, otherwise water may leak.
- The drip tray with the used capsule container is completely inserted (never operate the machine without drip tray set (part D shown in “Overview of machine parts and controls”), or hot water will run out when opening handle.).
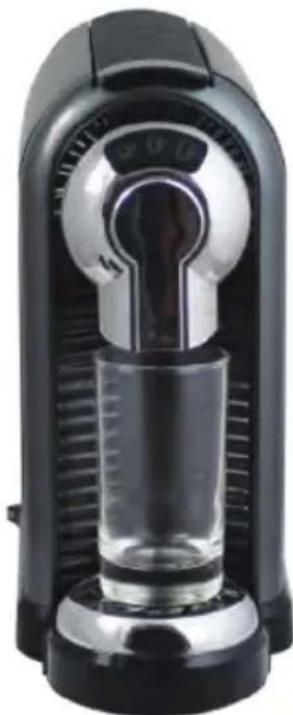
- A large bowl (250ml size or above) is placed under the dispenser.
- Press the middle button to start flush out.
- Open the handle when the flush out process stopped automatically.
• Empty the cup.
- Flush out cycle is finished
natural_image
Black industrial blender with clear glass and control knob (no visible text or symbols)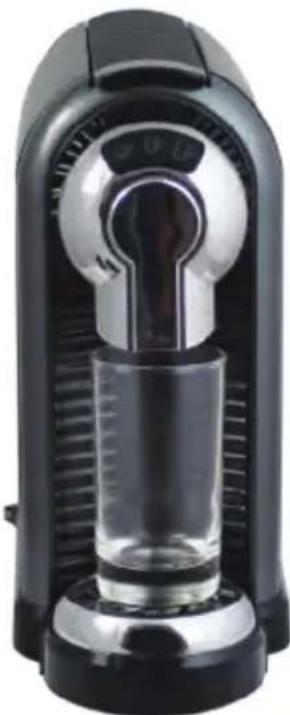
natural_image
Black industrial blender with glass internal structure and control knob (no visible text or symbols)Brewing Coffee
natural_image
Close-up of a black handheld device with labeled parts (1, 2, 3) and directional arrows indicating motion or movement (no readable text or symbols)*Make sure the water tank is in place before brewing. Because there is hot cleaning water come out during heating up.
CAUTION HOT WATER RISK OF SCALDING
- Place an empty cup under the dispenser.
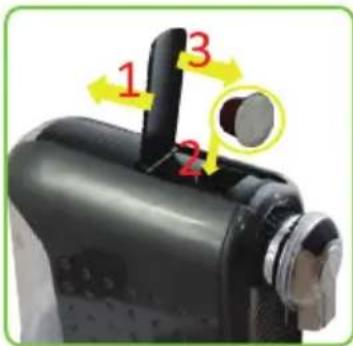
For small cups, low down the dispensing spout. -
Move the handle back completely
-
Insert capsule to fall straight into the compartment correctly.
- Close the handle firmly to load the capsule.
- Press the desired coffee button only once
- The selected button will blink and the machine is brewing coffee, dispensing will stop automatically when reaching the default brewing volume (30ml for short espresso, 60ml for normal espresso, 110ml for lungo espresso), default setting can be programmed, please refer to "how to program volume".
- Raise the handle to eject the used capsule into the container.
- Close the handle.
Tips:
- If the machine is cold (for example, using the machine in the morning or idle time longer than 1 hour), it is suggested to brew water first in order to remove the residual taste of the last cup.
- When brewing is finished, a small amount of water will be discharged to the water tank, it is clean water and still drinkable.
Refill internal circuit when water tank is out of water during brewing.
- It is strongly suggested to be sure there is enough water in the tank before making coffee, minimum level at least.
In case water is running out during coffee brewing, you can stop it by pressing the selected button which is blinking.
Open the handle to eject the used capsule.
CAUTION: Beware of hot steam: danger of scalding! Fill up water tank and press one of the buttons to start pumping water, once the circuit is refilled, the indicator light turns from red to blue.
Programming the coffee volume.
Be sure there is enough water in the tank before programming coffee volume. Make sure the water tank is in place before brewing. Because there is hot cleaning water come out during heating up.
CAUTION HOT WATER RISK OF SCALDING
- Place an empty cup under the dispenser. For small cups, low down the dispensing spout.
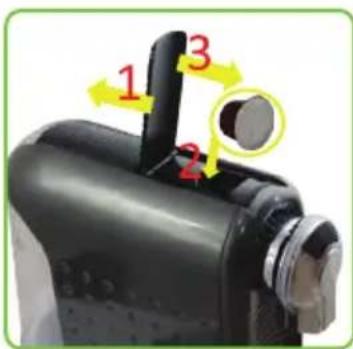
- Raise the handle back completely
- Insert capsule into the compartment gently.
- Close the handle firmly to load the capsule.
- Press the desired button and keep it pressed down, once the desired volume has been reached, release the button, now the button is reprogrammed.
- After the programming, the size will be recorded in memory for next use, by clicking the button normally (ie, press once.)
Do the same for other buttons if required.
Volume range: 25ml \~150ml based on Nespresso "Ristretto" capsule & "lungo" capsule), default size is 25ml (short espresso), 40ml (normal espresso), and 110ml (Lungo espresso).
Tips: when programming process is finished, leave the machine for 30 seconds for cool down prior to open handle. The blinking frequency is 1 second 1 blink, hence, you can counter the blinking to know the brewing time.

Energy saving mode.
The machine enters energy saving model automatically once the machine is idle for 15 minutes. The 3 buttons will flash cyclically in energy saving mode. To access quiet energy saving mode, please press any button, appliance will start warming up with lights blinking, when the buttons are lit steadily, the machine is ready to brew coffee.
Cleaning
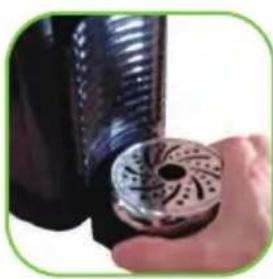
Emptying the capsule container and drip tray. The capsule container holds around 10 used capsules. We recommend emptying the used capsule container and the drip tray every day, you can see if the used capsule container is full or not while the blue light is on in the used capsule container.
natural_image
Close-up of a hand holding a decorative circular object with patterned patterns (no visible text or symbols)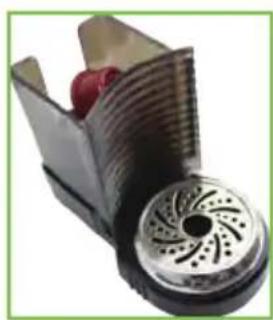
natural_image
Close-up of a mechanical device with a metallic circular component and a red spherical object inside, no visible text or symbols.- Raise the handle to ensure there is no capsule inside the brewing compartment.
- Raise the dispensing spout up if it is in low position.
- Hold the drip tray firmly and pull it out by lifting gently.
- Dispose of used capsules and drip tray.
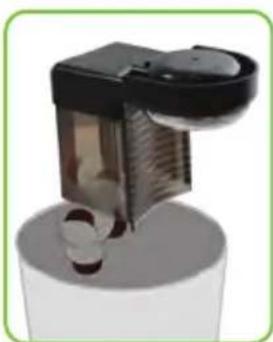
- The used capsule container can be detached, if necessary, from the lower drip tray (snaplock).
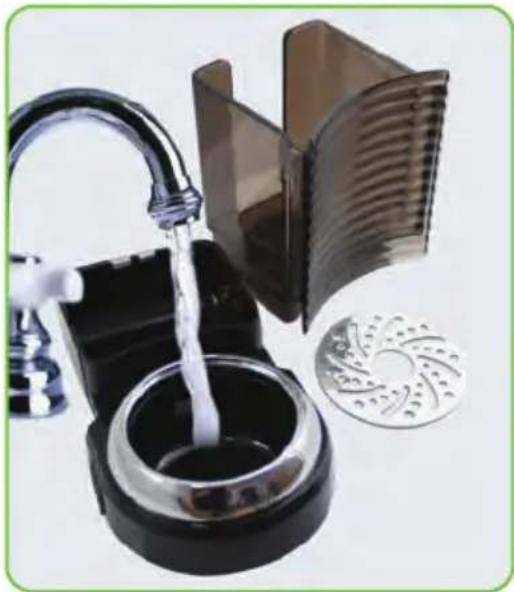
- Resin out the drip tray set with fresh water.
- Remove the water from the appliance, resin out the water tank with fresh water.
- After emptying/cleaning, reassemble the parts in reverse order and insert them back to machine in place.
Important:
The plastic parts of the machine are not dishwasher safe
natural_image
Close-up of a black and white mechanical device with a cylindrical base and a small container (no visible text or symbols)Coffee Machine
• Always pull out the power plug before cleaning the machine
- Never immerse the machine in water or clean it under running water
- Clean the machine with a dry cloth
- Never use abrasive cleaning agents or materials (use e.g. dry rags or kitchen paper)
natural_image
Product photo of a black and silver coffee maker with a water tap, alongside a metallic circular object (no text or symbols visible)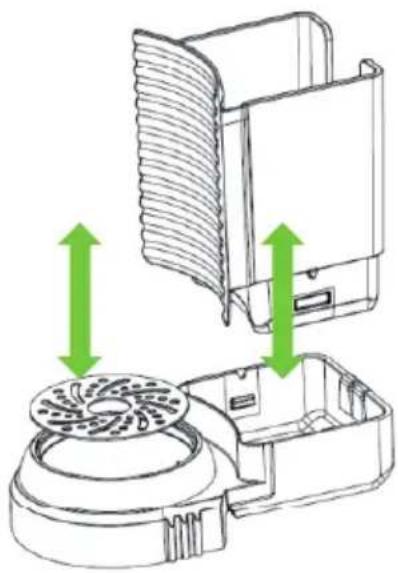
natural_image
Diagram of a device with a circular base and internal components, showing green directional arrows indicating movement or flow (no text or symbols present)Decalcification
Decalcification / Maintenance
Drinking water varies according to region. The lime particles in hard drinking water are deposited as residues in the machine and can block the piping and cause damage. To prevent this, be sure to decalcify the machine at the very least after making 300 to 400 cups of coffee or in any case if the output falls significantly or after one or two months. Decalcification must be done correctly to prevent damage.
So it is essential to follow these instructions.
Important:
- Never clean the machine with vinegar.
This causes damage and makes your coffee taste bad.
- Damage caused by incorrect decalcification or failure to decalcify is not covered by the guarantee.
- Caution: HOT WATER!
-
Recommendations: Purchase commercially available decalcifier (decalcifying liquid), diluted according to the manufacturer's instructions; pour the mixture in the water tank.
-
Make sure there is without Capsule inside the machine.
-
Place a large bowl under the dispensing head to collect the decalcification diluted and lime residues.
-
Fill the water tank with water to maximum level mixed with decalcifying solution, make sure the solution is dissolved completely.
-
Press the small button to run decalcifying water as you brew coffee normally, repeat for several times to run out the entire tank water.
-
Repeat the process to run another tanks of water mixed with decalcifying solution.
-
Repeat the process to Flush out the intern circuit with a tank of fresh water (without the decalcifying solution) to clean the internal circuit completely.
Factory Reset
In case you want to have the default setting of the machine, please follow below instruction
natural_image
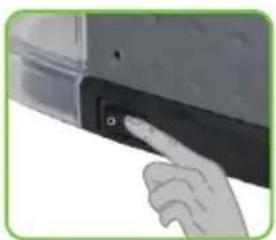
Hand pressing a button on a mechanical component (no text or symbols visible)a. Turn off the machine.
b. Press the lungo button and keep the button pressed, then switch ON the machine simultaneously, release the button after 3 seconds or when you see the buttons flash. if the machine is warming up after reset, the machine will flash more than twice).
c. After above operation, the machine is reset to factory default setting- the following parameters are reset:
- Coffee brewing volume
- After the reset, machine can start to work when the lights are steady.
Tips:
Make the reset when machine is warmed up so that you can see flash signal easier.
Steaming out / Storage / Transport Steaming Out
natural_image
Close-up of a modern spray gun with a transparent container and perforated panel (no visible text or symbols)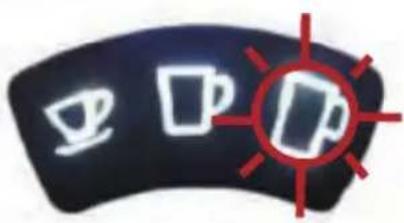
natural_image
Simple icon of coffee cups with a red crosshair overlay (no text or symbols)- Prior to long periods of disuse or for storage or transport at temperatures below 41^ F , it is essential to steam out the machine.
This removes water from the system to prevent internal frost damage.
- Turn ON the machine
• Empty the water tank and place it in its position. - Put an empty cup under the coffee dispensing spout.
- Press "lungo" button to start brewing.
• Steaming out now commences.
After the pump stops automatically, the steaming out process is completed.
• turn OFF the machine and unplug.
CAUTION:
• CAUTION HOT WATER RISK OF SCALDING
TROUBLESHOOTING
| PROBLEM | CAUSE | SOLUTION |
| No coffee is brewed. | The water tank is empty. | Fill water in the water tank. |
| The coffee is not hot enough. | -The Cold cups / mugs.- Scale build-up in machine.- Cold machine. | Preheat cup / mug.- Descale.- For cold machine, brewing a cup of water to warm up the circuit. |
| Capsule can’t drop down | -The used capsule container is full.-The capsule is deformed after brewing. | Empty the used capsule container.- Push it down with finger, or close the handle and open it once again. |
| steam when handle opened. | - Opened the handle too quick when brewing finished. | - Leave a few seconds to let the residual pressure to escape. |
| Water on table | -Water tank is leaking.-Drip tray is full of water.-When brewing finished, opened the brewing chamber without drip tray set in place.-Water tank is out of its place when heating up. | -Check if the valve on water tank is stuck.- Empty the drip tray.- Make sure the drip tray set is in place.- Make sure the water tank is in place. |
| Capsule dropped down directly to used capsule container. | -Capsule deformed | -Try it again with slight different angle.-Use a new Capsule |
| Occasional drops drip out of the dispensing head | -the heater is keeping warm. | -Occasional drops are normal, it is not a defect |
| Handle can not close | -Capsule is not placed well in brewing chamber. | 1)Change the Capsules.2)Push the Capsule a little deeper to align with the Capsule chamber. |
PKNESPRESO60
Espresso Machine
Automatic Capsule Espresso Maker
(Works with Nespresso Coffee Capsule Pods)
Features:
• Countertop Espresso Maker
• Brew Size Selectable: Short, Normal or Lungo Espresso Cups
• Compatible with Nespresso Coffee Capsule Pods
• Simple Electric Plug-in Design
• Quick Heat Ability, Warms in Seconds
• Sleek, Modern Kitchen Style
• Integrated (10) Capsule Pod Storage Tray
• LED Indicator Lights
• Stain-Resistant & Easy-to-Clean
• Integrated Refillable Water Tank
• Energy Efficient Auto Power-Off Feature
• Removable Parts for Hassle-Free Clean-Up
• Safe for Placement on Any Kitchen Table or Countertop!
What's in the Box:
- Espresso Maker
- Drip Tray
- Espresso Maker - Drip Tray
Technical Specs:
• Power Rating: 1260 Watt
• Capsule Pod Holder Capacity: 10 Capsule Pods
• Brew Sizes: Short 25ml, Normal 40ml, Lungo 110ml
• Coffee Spout Height: 4.3" -inches
• Water Tank Capacity: 27 oz.
• Heating Time: Up to 15 Seconds
- Pump Pressure: 19Bar
• Stand by Time: 15 Minutes
• Construction Material: Engineered ABS
• Power Cord Length: 3.2' ft.
- Power: 110V
• Dimensions (L x W x H): 14.2" x 4.6" x 9.8" -inches
nutrichef
- PLEASE READ THIS INSTRUCTION MANUAL
- AND SAFETY INSTRUCTIONS BEFORE OPERATING THE APPLIANCE!
- Content
- Starting up
- Brewing coffee
- Energy saving mode
- Cleaning
- Decalcification
- Safety Precautions
- This appliance is intended to be used in household and similar applications such as:
- Notes
- Please keep this operating manual safe and pass it on to the next user.
- Unpacking
- Note:
- Before using for the first time
- Machine Parts and Controls Overview
- No. name
- Definition of Lighting
- Fill / Refill Water Tank
- There are two ways to fill the water tank:
- Filling without removing the tank
- Filling by removing the water tank
- Flushing out the machine and internal piping/first use
- CAUTION HOT WATER RISK OF SCALDING
- Tips:
- Refill internal circuit when water tank is out of water during brewing.
- Programming the coffee volume.
- Do the same for other buttons if required.
- Energy saving mode.
- Important:
- Coffee Machine
- Decalcification / Maintenance
- Factory Reset
- In case you want to have the default setting of the machine, please follow below instruction
- Steaming out / Storage / Transport Steaming Out
- CAUTION:
- PKNESPRESO60
- Espresso Machine
- Automatic Capsule Espresso Maker
- (Works with Nespresso Coffee Capsule Pods)
- Features:
- What's in the Box:
- Technical Specs:
- nutrichef
Brand : Nutrichef
Model : PKNESPRESO60
Category : Coffee maker