
Klock Werks RVICXCT10 - Hi-Fi System KICKER - Free user manual and instructions
Find the device manual for free Klock Werks RVICXCT10 KICKER in PDF.


| Product Type | Motorcycle Audio System |
| Brand | KICKER |
| Model | Klock Werks RVICXCT10 |
| Speaker Size | 10 inches (subwoofer) |
| Peak Power Handling | 400 watts |
| RMS Power Handling | 200 watts |
| Frequency Response | 25 Hz - 500 Hz |
| Impedance | 4 ohms |
| Amplifier Included | Yes, built-in |
| Bluetooth Connectivity | Yes, version 5.0 |
| AUX Input | 3.5mm stereo jack |
| USB Charging Port | Yes, 5V/2.1A |
| Water Resistance Rating | IPX6 (splash resistant) |
| Dimensions (Diameter x Depth) | 10.75 x 5.5 inches |
| Weight | 15.2 lbs |
| Mounting Type | Flush mount in fairing |
| Grille Material | Powder-coated steel |
| Compatible with | Harley Davidson touring models |
| Cleaning Instructions | Wipe with damp cloth; avoid harsh chemicals |
| Safety Tips | Disconnect battery before installation |
| Spare Parts Available | Grille, mounting hardware, wiring harness |
Frequently Asked Questions - Klock Werks RVICXCT10 KICKER
User questions about Klock Werks RVICXCT10 KICKER
0 question about this device. Answer the ones you know or ask your own.
Ask a new question about this device
Download the instructions for your Hi-Fi System in PDF format for free! Find your manual Klock Werks RVICXCT10 - KICKER and take your electronic device back in hand. On this page are published all the documents necessary for the use of your device. Klock Werks RVICXCT10 by KICKER.
USER MANUAL Klock Werks RVICXCT10 KICKER
Victory Cross Country Rear amp/speaker installation
*Please reference model appropriate manual for procedures and torque specifications
-
Protect painted surfaces with a soft cloth
-
Remove inner chin fairing and disconnect battery
Harness installation
- Follow proper procedure to remove:
a. Seat
b. Fuel tank
c. Side covers
d. Lower backrest pad
e. Rear speakers
f. Rear speaker housings
-
Disconnect the 2-pin power harness under the left side cover (Red and Black wires)
-
From the inside-left of the trunk, thread the left side speaker wires, blue trigger wire and power leads through the existing holes behind the left side speaker PIC
-
Route the power leads along the existing trunk harness and under the left side cover
-
Route the blue trigger wire under the lower backrest area and connect it to the blue/pink wire with the barrel connector PIC
-
Route the right speaker wires along the floor of the trunk and through a hole behind the right speaker PIC
Speaker installation
-
Install the rear speaker housings back onto the trunk ensuring correct wire routing to avoid pinching
-
Left side speaker
a. Install a piece of heat shrink over the male ends of the amp harness and connect them to the stock speaker terminals. Activate heat shrink over connections to reduce the risk of a short
b. Connect the female ends from the amplifier harness to the new speaker from the kit
c. Carefully fit speaker into the housing and reinstall original hardware
- Repeat for right side speaker
Amp installation
-
Install amplifier onto bracket using supplied hardware PIC
-
Remove the black 8mm fastener in the front left of the trunk floor, place the amp and bracket assembly over that hole and loosely reinstall the black 8mm fastener PIC
- Connect the harness to the amplifier
- Tuck any excess wire length into the speaker pods
- Remove the black 8mm fastener from the front right of the trunk floor and install supplied P-clamp to retain the right side of the harness PIC
- Positioning the amp bracket over the holes for the lower backrest, reinstall the backrest using the original hardware
- Torque all three amp bracket fasteners
- Reconnect the 2-pin power harness and the battery to check system operation
Note: At this time, it is highly recommended to follow the guidelines in your Kicker PX 100.2 owner's manual to set up the amplifier. Klock Werks recommends that the dip switches be set up as follows:
- Auto turn-on - 12V
- Input level - HI
- HI-PASS-OFF
-
Input Gain control – Follow the instructions in your Kicker PX 100.2 owner's manual Pg. 4
-
Disconnect the battery and carefully reassemble motorcycle
-
Reconnect the battery, assemble the chin fairing and enjoy your Kicker audio system!

FOR USE WITH VICTORY CROSS COUNTRY TRUNK
natural_image
Close-up of a black plastic fan or impeller component with visible blades and central hub (no text or symbols)
INCLUDED IN THIS FIT KIT:
→ Step-by-step Installation Guide
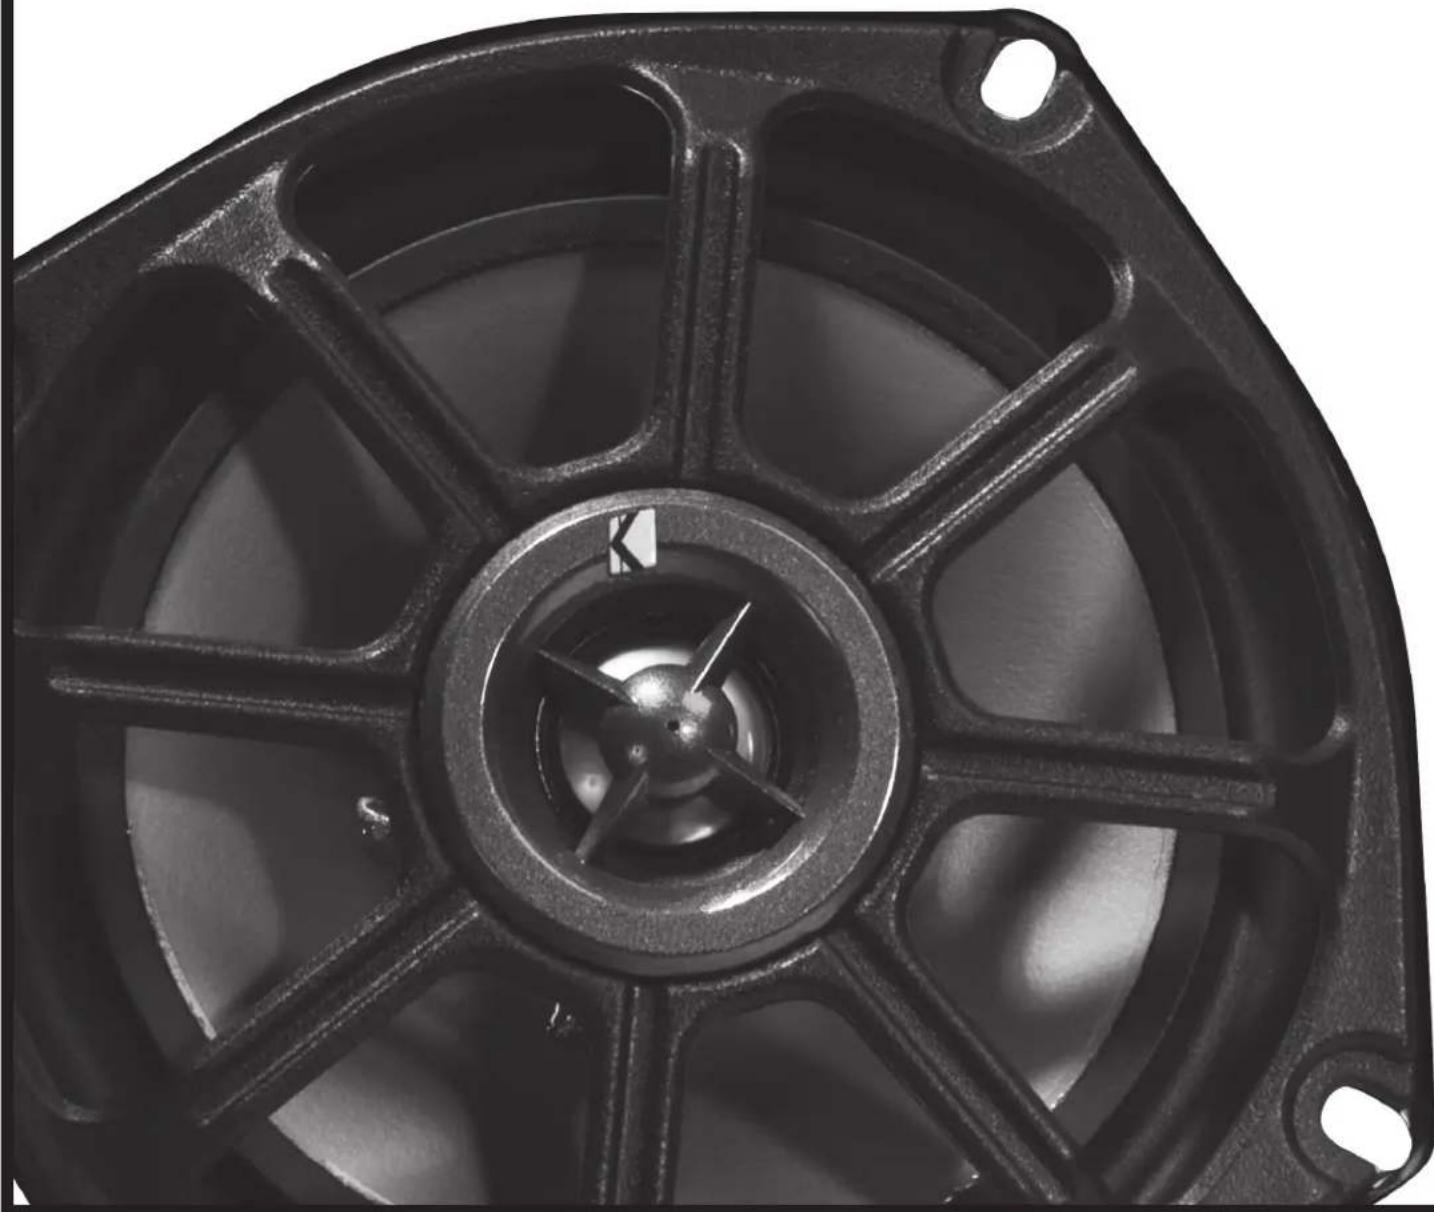
→ 5 1/4" Kicker Speakers Pair
→ Kicker Amp 100W/50W
→ Stainless Steel Mounting Bracket
→ Custom Wiring Harness
→ Black Heat Shrink
→ Black Cable Tie
→ All Necessary Hardware
- 8 - 32 x 1/2" Button Head Bolts
- 8 - 32 Nylock Nuts
KLOCK WERKS | VICTORY CROSS COUNTRY KICKER INSTALLATION 2
GETTING STARTED
*Please reference model appropriate service manual for procedures and torque specifications.
- Protect painted surfaces with a soft cloth.
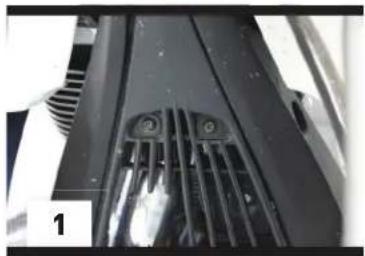
- Remove upper and lower fasteners for inner chin fairing and disconnect battery (Pic 1 and 2)
natural_image
Close-up of a mechanical component with internal slots and a label '1' (no readable text or symbols)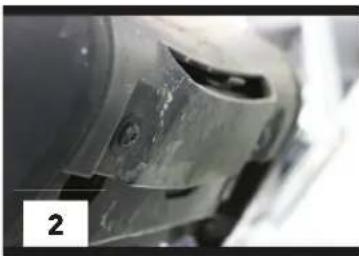
natural_image
Close-up of a mechanical component with visible wear and mounting holes (no text or symbols)HARNESS INSTALLATION
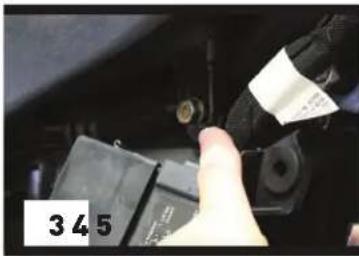
- Follow proper procedure to remove side covers and seat (Pic 3)
- Remove passenger backrest pad (Pic 4)
- Remove speakers grilles
- Remove speakers (Pic 5)
- Remove speaker housings (Pic 6 & 7)
- Unplug the 2-pin power connector on the new harness and set the piece with the fuse aside at this time.
- From the inside-left of the trunk, thread the left side speaker wires, blue trigger wire and power leads through the existing holes behind the left side speaker (Pic 8)
- Route the power leads along the existing trunk harness and under the left side cover (Pic 9)
- Route the blue trigger wire under the lower backrest area and connect it to the blue/pink wire with the barrel connector. Activate the provided heat shrink over the connection to reduce the risk of a short. (Pic 10)
- Route the right speaker wires along the floor of the trunk and through a hole behind the right speaker (Pic 11)
natural_image
Close-up of a hand holding a black cable with a white label, next to a battery component labeled '345' (no readable text or symbols on the diagram itself)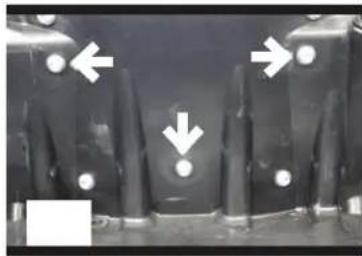
natural_image
Close-up of black mechanical components with white arrows pointing to features (no text or symbols visible)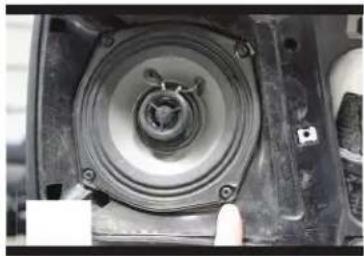
natural_image
Close-up of a mechanical component with a central circular component and a finger pointing to it (no visible text or symbols)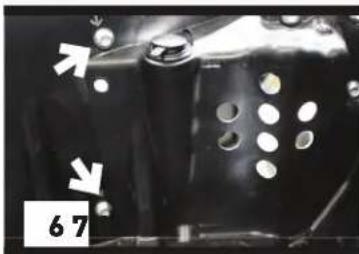
natural_image
Close-up of a mechanical component with circular holes and two white arrows pointing to features, labeled '67' (no readable text or symbols beyond label)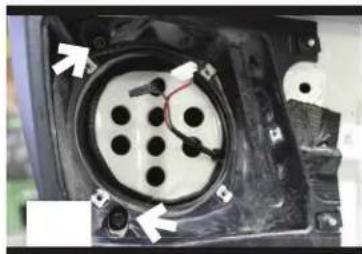
natural_image
Close-up of a mechanical component with circular holes and wiring, no visible text or symbols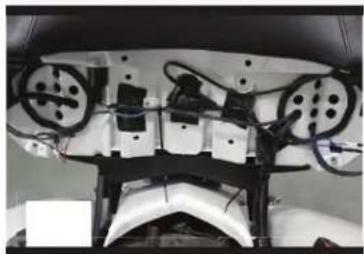
natural_image
Interior view of a vehicle's cockpit with visible wiring and components (no text or symbols)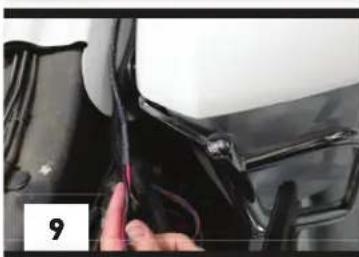
natural_image
Close-up of a hand holding a black cable with wires, next to a car hood (no visible text or symbols)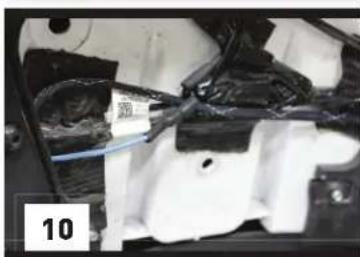
natural_image
Close-up of a car's engine compartment with visible wiring and components (no text or symbols)KLOCK WERKS | VICTORY CROSS COUNTRY KICKER INSTALLATION 3
SPEAKER INSTALLATION
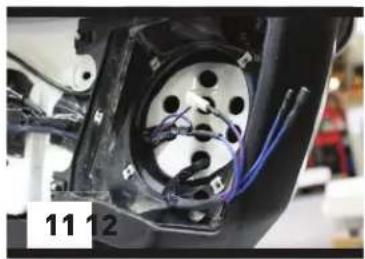
- Install the rear speaker housings back onto the trunk ensuring correct wire routing to avoid pinching (Pic 11)
- Left side speaker (Pic 12)
a. Connect the male ends from the new harness to the female ends of the stock harness
b. Connect the female ends from the amplifier harness to the new speaker from the kit
c. Carefully fit speaker into the housing and reinstall original hardware
-
Repeat for right side speaker
-
Reinstall speaker grilles
natural_image
Close-up of a mechanical component with blue wires and circular holes, no visible text or symbols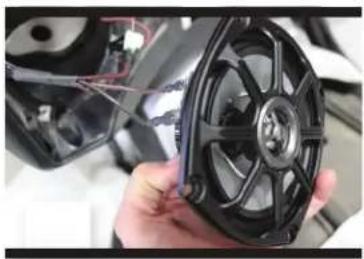
natural_image
Close-up of a hand holding a black automotive fan component, no visible text or symbolsAMP INSTALLATION
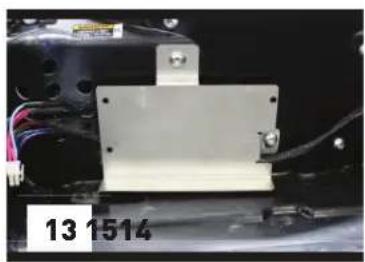
- Remove the black 8mm fastener in the front left of the trunk floor, place the amp bracket over that hole and loosely reinstall the black 8mm fastener (Pic 13)
- Positioning the amp bracket over the holes for the lower backrest, reinstall the backrest using the original hardware and torque fasteners (Pic 14)
- Install amp onto amp bracket with supplied hardware (needle nose pliers may be helpful here to hold hardware behind the amp bracket)
- Remove the black 8mm fastener from the front right of the trunk floor and install supplied P-clamp to retain the right side of the harness (Pic 15)
natural_image
Close-up of a white plastic electrical component with wires and connectors, labeled '13 1514' (no other text or symbols visible)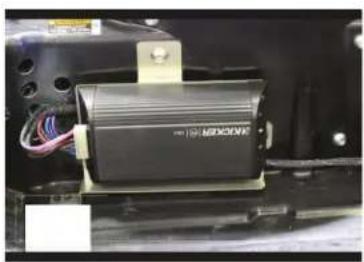
natural_image
Close-up of a black electronic component with visible wiring and a label, mounted on a dark mechanical base (no readable text or symbols)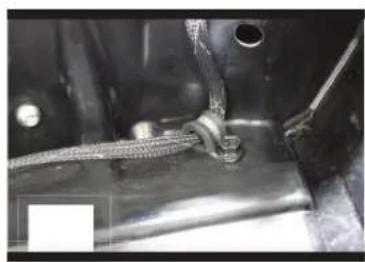
natural_image
Close-up of a mechanical assembly with hoses and a pipe fitting (no visible text or symbols)KLOCK WERKS | VICTORY CROSS COUNTRY KICKER INSTALLATION 4
POWER LEAD CONNECTION:
- Using the fused section of harness that was set aside earlier, take the 2-pin connector end and from the front of the motorcycle route the connector over the fuel tank mount.
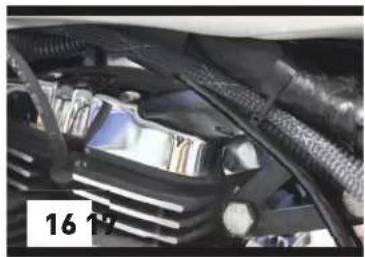
- Run the harness along the existing wiring under the tank and mate the power connector under the side cover area. (Pic 16)
- Using provided zip ties, attach harness to the wiring under the tank. Then follow the harness down the left frame tube and route the fuse and leads into the battery box area. (Pic 17)
- Attach the leads to their respective battery terminals.
Note: At this time, it is highly recommended to follow the guidelines in your Kicker PX 100.2 owner's manual to set up the amplifier. Klock Werks recommends that the dip switches be set up as follows: AUTO TURN-ON - 12V
INPUT LEVEL - HI
HI-PASS - OFF
INPUT GAIN CONTROL - Follow the instructions in your Kicker PX 100.2 owner's manual Pg. 4
-
Disconnect negative battery terminal and carefully reassemble motorcycle
-
Reconnect negative battery terminal, reassemble chin fairing and enjoy your Kicker audio system!
natural_image
Close-up of a car engine bay with hoses and ventilation ducts (no visible text or symbols)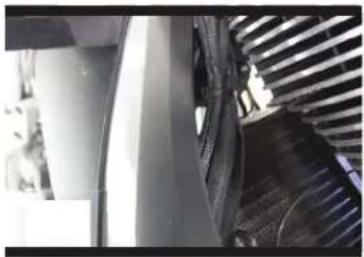
natural_image
Close-up of a mechanical component with metallic blades and a textured surface (no visible text or symbols)IMPORTANT
Thank you for purchasing a Klock Werks® Fit Kit equipped with industry leading KICKER® speakers and amplifier. There are two models of amplifier that may be used in this kit: PX100.2 or PXA200.2.
Set the switches to the following configuration for the PX100.2
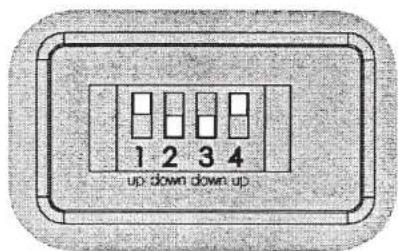
IMPORTANT: Turn the gain all the way down, then increase to 20%, about 1/4 turn from 0. Product ships with gain at maximum setting.
Set the switches to the following configuration for the PXA200.2
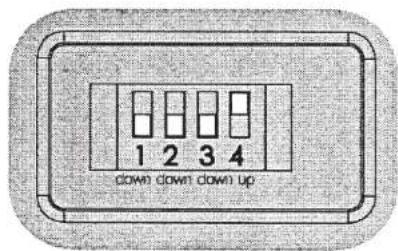
Your gain rotary should look like this.
Be careful not to set it to 80% instead!

All other installation procedures, including wiring and mounting, are the same for either amplifier. Enjoy your Performance PowerSports equipment as engineered by Klock Werks and KICKER!
KKICKER®
PXA
Amplifiers
PXA STEREO AMPLIFIER
PXA200.2
Owner's Manual | English
| @ 14.4V, 4Ω stereo, ≤ 1% THD+N | 25 x 2 |
| @ 14.4V, 2Ω stereo, < 1% THD+N | 50 x 2 |
| @ 14.4V, 1Ω stereo, ≤ 1% THD+N | 100 x 2 |
Length [in, cm] 7, 17.8
Height [in, cm] 1-5/8, 4
Width [in, cm] 3-7/16, 8.7
Frequency Response [Hz] 10 - 20k
Signal-to-Noise Ratio [dB] 95
Input Sensitivity Low Level: 125mV-5V
High Level: 250mV-10V
Electronic Crossover Selectable HI or OFF; 60Hz, 80Hz or 120Hz; 12dB/octave slope
Pro Tip: To get the best performance from your new KICKER Amplifier and extend the warranty by 1 year, use genuine KICKER accessories and wiring.
INSTALLATION
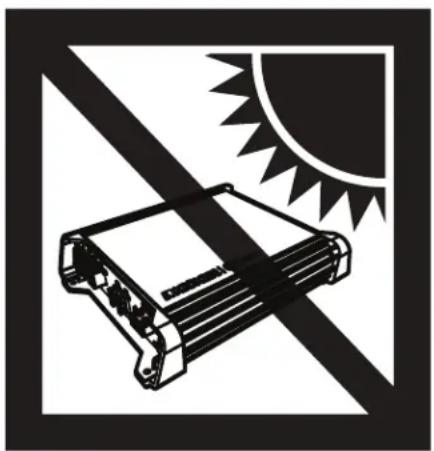
Mounting: Choose a structurally sound location to mount your KICKER amplifier. Make sure there are no items behind the area where the screws will be driven. Choose a location that allows at least 4" (10cm) of open ventilation for the amplifier. Drill four holes using a 7/64" (3mm) bit and use the supplied #8 screws to mount the amplifier.
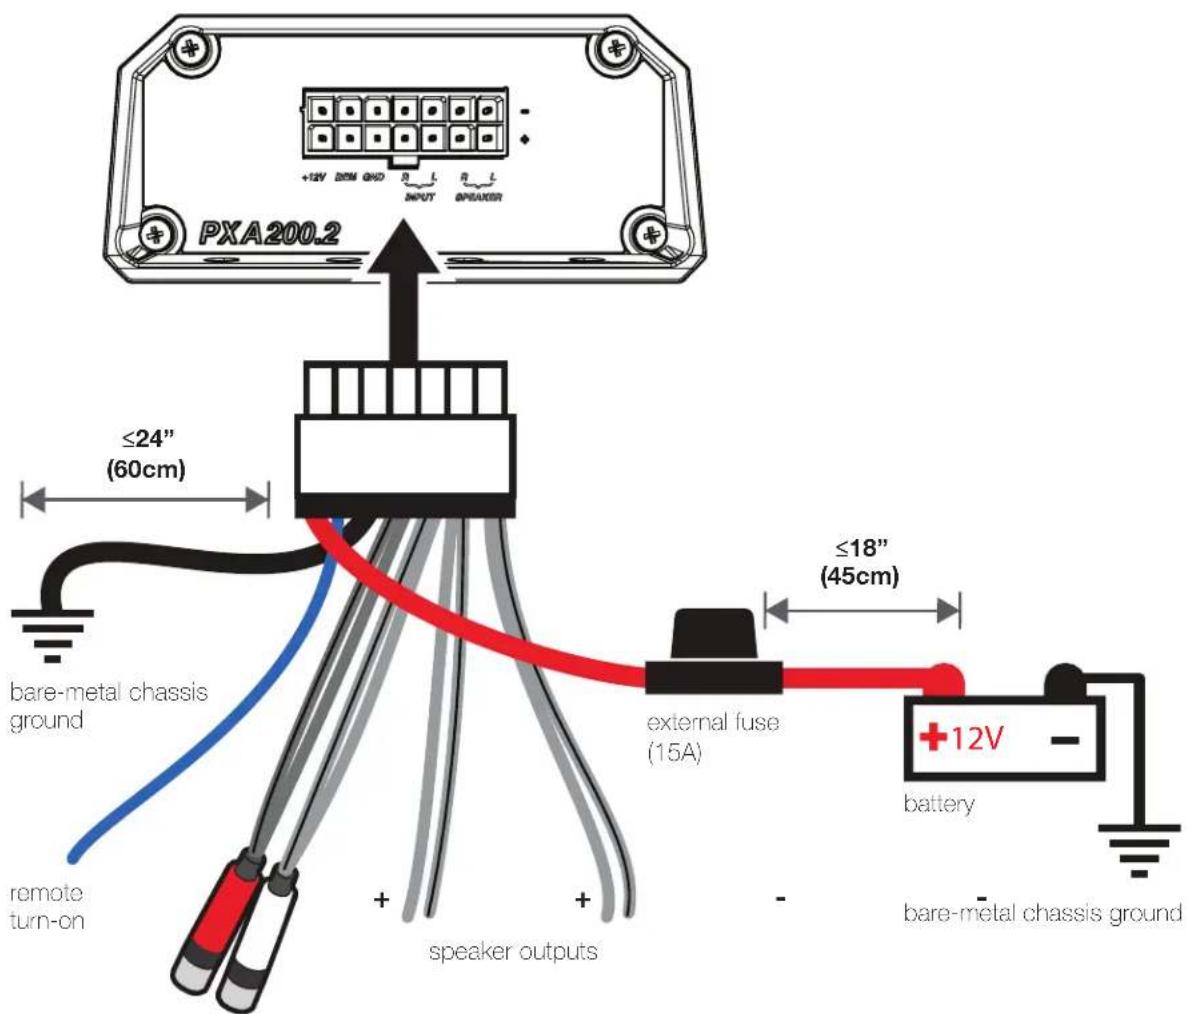
Wiring: Disconnect the vehicle's battery to avoid an electrical short. Then, connect the PXA harness to the amplifier. A good ground connections is important. If this amplifier is mounted in the front fairing of a motorcycle, it will be best to extend the ground wire all the way to the battery.
The PXA amplifiers have the capability to receive almost any level of input signal. If a Hi-Level signal is coming from the speaker leads of the source unit, simply cut off the RCA jacks and connect it directly to the exposed wires. Set the Input Level switch to Hi. Set the Auto Turn-On to DC. If speaker leads are not available from your source unit, use an RCA stereo cable to connect directly to the RCA connectors of the PXA amplifier. Set the Input Level switch to Lo. Set the Auto Turn-On switch to +12V, and use the blue remote trigger wire to turn the amplifier on.
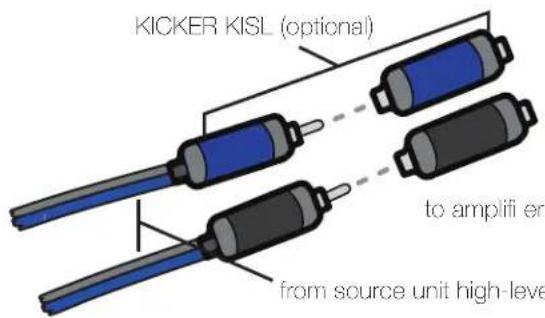
Model External Fuse
PXA200.2 1 x 15 Ampere
from source unit high-level speaker outputs
Cut the looped red power cable located on the PXA harness and install a 15A fuse. Fuse installation should be within 18" (45cm) of the battery and in-line with the harness' power cable, which is connected to your amplifier. If you ever need to remove the amplifier from the vehicle after it has been installed, the ground wire should be the last wire disconnected from the amplifier--just the opposite as when you installed it.
RCA inputs (remove to use hi-level input)
OPERATION
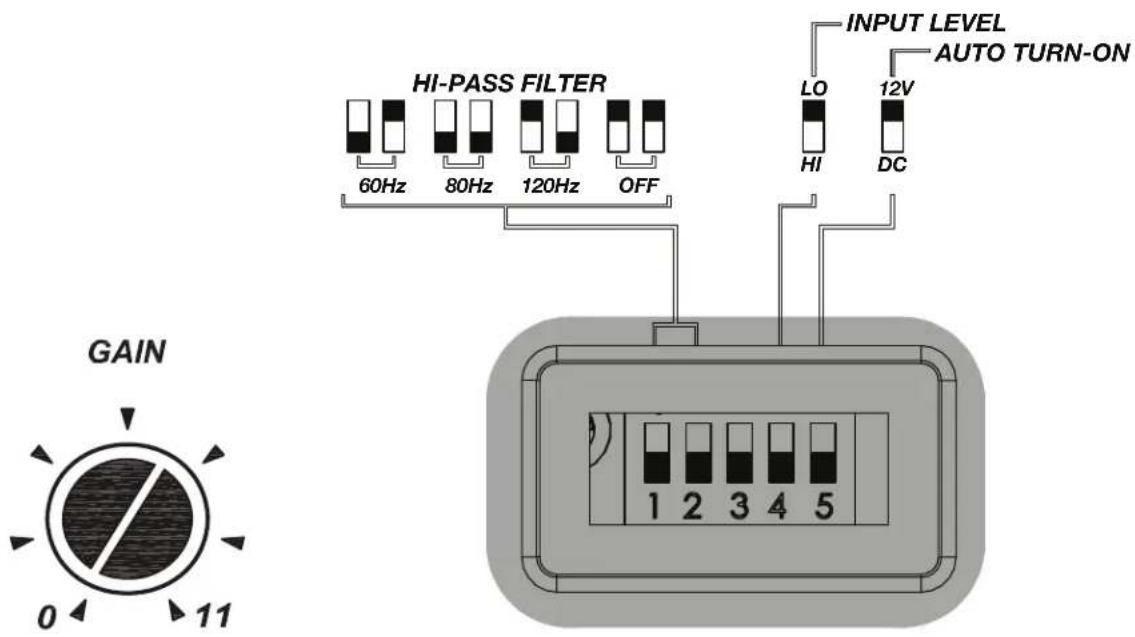
Automatic Turn-On Selection: The PXA series offers two automatic turn-on modes that can be selected on the end panel; +12V or DC Offset. Using the DC Offset mode causes the REM terminal wire to have +12V out for turning on additional amplifiers.
- Remote Turn-On: Set the switch to +12V to use the remote turn-on lead from the PXA harness. Run 18 gauge wire from the Remote Turn-On Lead on your source unit to the REM wire on the PXA harness. (Best for Lo-Level input)
- DC Offset Turn-On: The DC Offset mode detects a 6V DC offset from the HI-Level speaker outputs when the source unit has been turned on. (Best for Hi-Level input)
Input Level: The RCA inputs on KICKER PXA amplifiers are capable of receiving either Hi or Low-level signals from your source unit. When using a Hi-Level signal, simply set the Input Level switch on the amplifier to Hi.
HI-PASS Switches: Use the HI-PASS switches behind the protective rubber covering of the amplifier to set the internal crossover. Choose a cutoff of 60Hz, 80Hz, 120Hz, or OFF depending on the configuration of switches 1 and 2. Never change the switches with the audio system on!
Input Gain Control: The input gain control is not a volume control. It matches the output of the source unit to the input level of the amplifier. Turn the source unit up to about 3/4 volume (if the source unit goes to 30, turn it to 25). Next, slowly turn (clockwise) the gain on the amplifier up until you can hear audible distortion, then turn it down a little.
TROUBLESHOOTING
If your amplifi er does not appear to be working, check the obvious things first such as blown fuses, poor or incorrect wiring connections, incorrect setting of crossover switch and gain controls, etc. There is a Power Protection LED on the side power panel of your Kicker PXA series amplifi er. Depending on the state of the amplifi er and the vehicle's charging system, the LED will glow either Red or Blue. When the blue LED is lit this indicates the amplifi er is turned on and no trouble exists.
Blue LED off, no output? With a Volt Ohm Meter (VOM) check the following: ① +12 volt power terminal (should read +12V to +16V) ② Remote turn-on terminal (should read +12V to +16V) ③ Check for reversed power and ground connections ④ Ground terminal, for proper conductivity. ⑤ For Hi-Level input, check input wires for +6V.
Blue LED on, no output? Check the following: ① RCA connections ② Test speaker outputs with a "known" good speaker. ③ Substitute source unit with a "known" good source unit. ④ Check for a signal in the RCA cable feeding the amplifier with the VOM meter set to measure "AC" voltage.
Protection LED flashing with loud music? The red LED indicates low battery voltage. Check all the connections in your vehicle's charging system. It may be necessary to replace or charge your vehicle's battery or replace your vehicle's alternator.
Protection LED on, no output? ① Amplifi er is very hot = thermal protection is engaged. Test for proper impedance at the speaker terminals with a VOM meter (see the diagrams in this manual for minimum recommended impedance and multiple speaker wiring suggestions). Also check for adequate airflow around the amplifier. ② Amplifi er shuts down only while vehicle is running = voltage protection circuitry is engaged. Voltage to the amplifier is not within the 10–16 volt operating range. Have the vehicle's charging and electrical system inspected. ③ Amplifi er will only play at low volume levels = short circuit protection is engaged. Check for speaker wires shorted to each other or to the vehicle chassis. Check for damaged speakers or speaker(s) operating below the minimum recommended impedance.
No or low output? ① Check the balance control on source unit ② Check the RCA (or speaker input) and speaker output connections.
Alternator noise-whining sound with engine's RPM? ① Check for damaged RCA (or speaker input) cable ② Check the routing of RCA (or speaker input) cable ③ Check the source unit for proper grounding ④ Check the gain settings and turn them down if they are set too high.
Reduced bass response? Reverse a speaker connection from positive to negative on the stereo/subwoofer channel(s); if the bass improves, the speaker was out of phase.
Ground Noise? KICKER amplifiers are engineered to be fully compatible with all manufacturers' head units. Some head units may require additional grounding to prevent noise from entering the audio signal. If you are experiencing this problem with your head unit, in most cases running a ground wire from the RCA outputs on the head unit to the chassis will remedy this issue.
CAUTION: When jump starting the vehicle, be sure that connections made with jumper cables are correct. Improper connections can result in blown amplifi er fuses as well as the failure of other critical systems in the vehicle.
If you have more questions about the installation or operation of your new KICKER product, see the Authorized KICKER Dealer where you made your purchase. For more advice on installation, click on the SUPPORT tab on the KICKER homepage, www.kicker.com. Choose the TECHNICAL SUPPORT tab, choose the subject you are interested in, and then download or view the corresponding information. Please E-mail support@kicker.com or call Technical Services (405) 624-8583 for unanswered or specific questions.
natural_image
Black and white illustration of a device with diagonal lines and sun symbol (no text or symbols)ELECTRONICS LIMITED WARRANTY
When purchased from an Authorized KICKER Dealer, KICKER warrants this product to be free from defects in material and workmanship under normal use for a period of TWO (2) YEARS from date of original purchase. If this product is identified as "Refurbished" or "B Goods", the warranty is limited to a period of THREE (3) MONTHS from date of original purchase. In all cases you must have the original receipt. Should service be necessary under this warranty for any reason due to manufacturing defect or malfunction during the warranty period, KICKER will repair or replace (at its discretion) the defective merchandise with equivalent merchandise. Warranty replacements may have cosmetic scratches and blemishes. Discontinued products may be replaced with more current equivalent products. This warranty is valid only for the original purchaser and is not extended to owners of the product subsequent to the original purchaser. Any applicable implied warranties are limited in duration to a period of the express warranty as provided herein beginning with the date of the original purchase at retail, and no warranties, whether express or implied, shall apply to this product thereafter. Some states do not allow limitations on implied warranties; therefore, these exclusions may not apply to you. This warranty gives you specific legal rights; however you may have other rights that vary from state to state.
WHAT TO DO IF YOU NEED WARRANTY OR SERVICE:
Defective merchandise should be returned to your local Authorized Stillwater Designs (KICKER) Dealer for warranty service. Assistance in locating an Authorized Dealer can be found at www.kicker.com or by contacting Stillwater Designs directly. You can confirm that a dealer is authorized by asking to see a current authorized dealer window decal.
If it becomes necessary for you to return defective merchandise directly to Stillwater Designs (KICKER), call the KICKER Customer Service Department at (405) 624-8510 for a Return Merchandise Authorization (RMA) number. Package only the defective items in a package that will prevent shipping damage, and return to:
Stillwater Designs, 3100 North Husband St, Stillwater, OK 74075
The RMA number must be clearly marked on the outside of the package. Please return only defective components. The return of functioning items increases your return freight charges. Non-defective items will be returned freightcollect to you. For example, if a subwoofer is defective, only return the defective subwoofer, not the entire enclosure. Include a copy of the original receipt with the purchase date clearly visible, and a "proof-of-purchase" statement listing the Customer's name, Dealer's name and invoice number, and product purchased. Warranty expiration on items without proof-of-purchase will be determined from the type of sale and manufacturing date code. Freight must be prepaid; items sent freight-collect, or COD, will be refused.
WHAT IS NOT COVERED?
This warranty is valid only if the product is used for the purpose for which it was designed. It does not cover:
o Damage due to improper installation
o Subsequent damage to other components
o Damage caused by exposure to moisture, excessive heat, chemical cleaners, and/or UV radiation
o Damage through negligence, misuse, accident or abuse. Repeated returns for the same damage may be considered abuse
o Any cost or expense related to the removal or reinstallation of product
o Speakers damaged due to amplifier clipping or distortion
o Items previously repaired or modified by any unauthorized repair facility
o Return shipping on non-defective items
o Products with tampered or missing barcode labels
o Products with tampered or missing serial numbers
o Products returned without a Return Merchandise Authorization (RMA) number
o Products purchased from an UNAUTHORIZED dealer
o Freight Damage
o The cost of shipping product to KICKER
o Service performed by anyone other than KICKER
stillwaterdesigns
HOW LONG WILL IT TAKE?
KICKER strives to maintain a goal of one week turnaround for all electronics (amplifiers, crossovers, equalizers, etc.) returns. Delays may be incurred if lack of replacement inventory or parts is encountered. Failure to follow these steps may void your warranty. Any questions can be directed to the KICKER Customer Service Department at (405) 624-8510. Contact your International KICKER dealer or distributor concerning specific procedures for your country's warranty policies.
Note: All specifications and performance figures are subject to change. Please visit www.kicker.com for the most current information.
INTERNATIONAL WARRANTY
Contact your International KICKER dealer or distributor concerning specific procedures for your country's warranty policies.
WARNING: KICKER products are capable of producing sound levels that can permanently damage your hearing! Turning up a system to a level that has audible distortion is more damaging to your ears than listening to an undistorted system at the same volume level. The threshold of pain is always an indicator that the sound level is too loud and may permanently damage your hearing. Please use common sense when controlling volume.
Our goods come with guarantees that cannot be excluded under the Australian Consumer Law. You are entitled to a replacement or refund for a major failure and for compensation for any other reasonably foreseeable loss or damage. You are also entitled to have the goods repaired or replaced if the goods fail to be of acceptable quality and the failure does not amount to a major failure.
| Woofer Size | 5-1/4" [133mm] |
| Tweeter Size | 3/4" [20mm] |
| Frequency Response | 60Hz-20kHz |
| Max Amplifier Power | 100W PEAK | 50W RMS |
| Sensitivity [1W/1m] | 88.3dB |
| Nominal Impedance | 2Ω |
| Weight | 12.6oz [358g] |
| Mounting Hole Diameter | 4-7/8" [124mm] |
| Mounting Depth | 2-3/16" [56mm] |
![[9/16"] 14mm [2 3/16"] 56mm [4 7/8"] 124mm](/content/2026/05/967780/images/6b3f9b057fc7ee37ae05efe49fb7d43d35a61f5d693793c137495d273950f264.jpg)
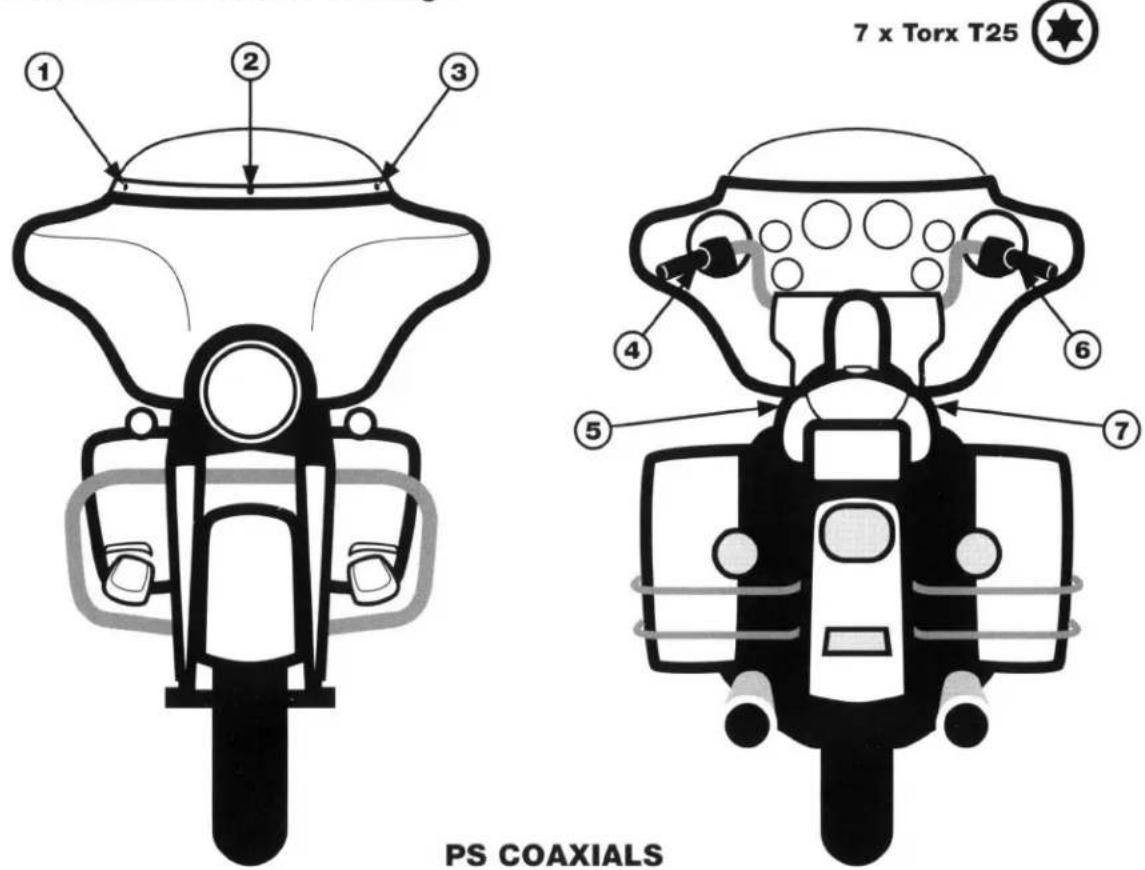
The PS5250 Coaxial Speakers are KICKER's upgrade for Harley-Davidson® premium audio systems (2006 and later) and similar touring bikes. Please refer to your bike's factory service manual for disassembly/installation information. Typically, you should retain all factory screws, hardware, and grilles when upgrading your bike to a KICKER system. The following diagrams show how to install the PS5250 speakers in a Harley-Davidson bike with "batwing" style fairing (2006 and later). Note: The PS5250 is a 2-ohm speaker. Do not install in systems that are not 2-ohm stable!
- Remove front side of fairing.

2. Remove factory speakers.
Remove the factory speaker connectors.
Retain the 3 factory screws.
Remove the factory speakers from the factory angle mount (be careful not to damage the angle mount).
![[ viewed from front of bike ] factory speaker location factory speaker connectors](/content/2026/05/967780/images/7fe28efb68b9958c41d8f034b92dc2025cadd5944e53073fccf44ce7358772d2.jpg)
3. Prepare PS5250 for installation.
Install the KICKER badges onto the grilles; bend the rear posts to secure them in place.
For Harley "batwing" installations, replace the factory grilles with KICKER grilles.
For all other Harley applications, use the factory grilles only.
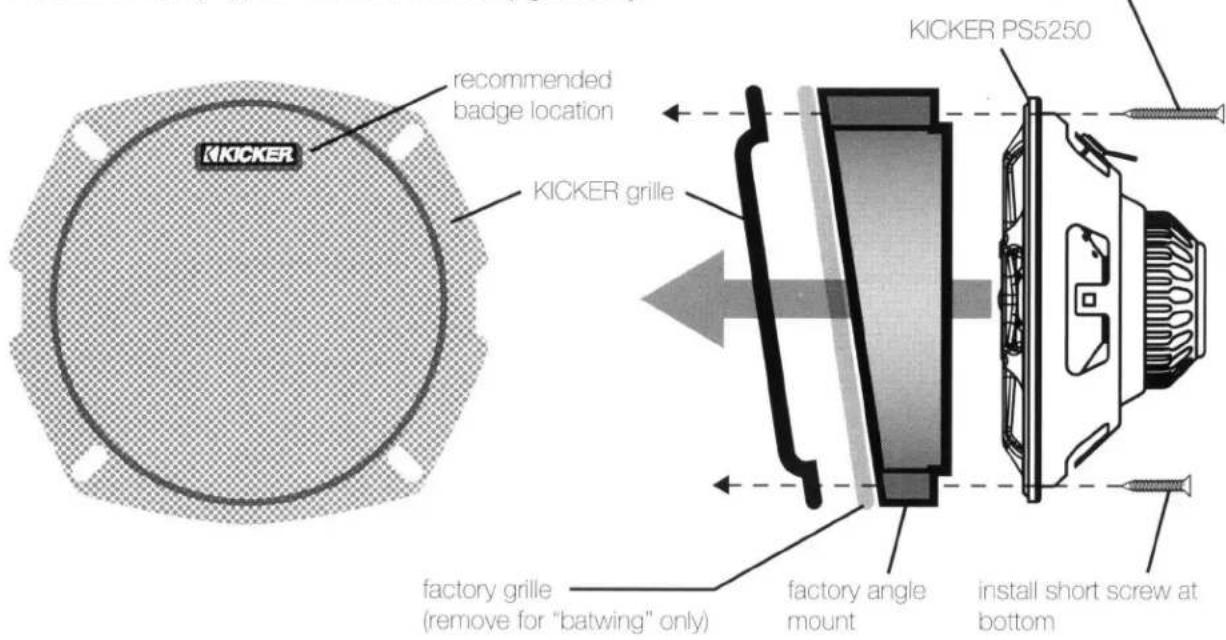
4. Install PS5250 in factory location.
Use the 3 factory screws.
Connect the factory speaker connectors to the PS5250 terminals.
Re-install your bike's front fairing in the reverse order you disassembled it.
ACOUSTICS LIMITED WARRANTY
KICKER warrants this product to be free from defects in material and workmanship under normal use for a period of THREE (3) MONTHS from date of original purchase with receipt. When purchased from an Authorized KICKER Dealer it is warranted for ONE (1) YEAR from date of original purchase with receipt. In all cases you must have the original receipt. Should service be necessary under this warranty for any reason due to manufacturing defect or malfunction during the warranty period, KICKER will repair or replace (at its discretion) the defective merchandise with equivalent merchandise at no charge. Warranty replacements may have cosmetic scratches and blemishes. Discontinued products may be replaced with more current equivalent products. This warranty is valid only for the original purchaser and is not extended to owners of the product subsequent to the original purchaser. Any applicable implied warranties are limited in duration to a period of the express warranty as provided herein beginning with the date of the original purchase at retail, and no warranties, whether express or implied, shall apply to this product thereafter. Some states do not allow limitations on implied warranties; therefore these exclusions may not apply to you. This warranty gives you specific legal rights; however you may have other rights that vary from state to state.
WHAT TO DO IF YOU NEED WARRANTY OR SERVICE:
Defective merchandise should be returned to your local Authorized Stillwater Designs (KICKER) Dealer for warranty service. Assistance in locating an Authorized Dealer can be found at www.kicker.com or by contacting Stillwater Designs directly. You can confirm that a dealer is authorized by asking to see a current authorized dealer window decal.
If it becomes necessary for you to return defective merchandise directly to Stillwater Designs (KICKER), call the KICKER Customer Service Department at (405) 624-8510 for a Return Merchandise Authorization (RMA) number. Package only the defective items in a package that will prevent shipping damage, and return to:
Stillwater Designs, 3100 North Husband St, Stillwater, OK 74075
The RMA number must be clearly marked on the outside of the package. Please return only defective components. The return of functioning items increases your return freight charges. Non-defective items will be returned freightcollect to you. For example, if a subwoofer is defective, only return the defective subwoofer, not the entire enclosure. Include a copy of the original receipt with the purchase date clearly visible, and a "proof-of-purchase" statement listing the Customer's name, Dealer's name and invoice number, and product purchased. Warranty expiration on items without proof-of-purchase will be determined from the type of sale and manufacturing date code. Freight must be prepaid; items sent freight-collect, or COD, will be refused.
WHAT IS NOT COVERED?
This warranty is valid only if the product is used for the purpose for which it was designed. It does not cover:
o Damage due to improper installation
o Subsequent damage to other components
o Damage caused by exposure to moisture, excessive heat, chemical cleaners, and/or UV radiation
o Damage through negligence, misuse, accident or abuse. Repeated returns for the same damage may be considered abuse
o Any cost or expense related to the removal or reinstallation of product
o Speakers damaged due to amplifier clipping or distortion
o Items previously repaired or modified by any unauthorized repair facility
o Return shipping on non-defective items
o Products with tampered or missing barcode labels
o Products returned without a Return Merchandise Authorization (RMA) number
o Freight Damage
o The cost of shipping product to KICKER
o Service performed by anyone other than KICKER
stillwaterdesigns

HOW LONG WILL IT TAKE?
KICKER strives to maintain a goal of 48-hour service for all acoustics (subwoofers, midrange drivers, tweeters, crossovers, etc) returns. Delays may be incurred if lack of replacement inventory or parts is encountered. Failure to follow these steps may void your warranty. Any questions can be directed to the KICKER Customer Service Department at (405) 624-8510. Contact your International KICKER dealer or distributor concerning specific procedures for your country's warranty policies.
Note: All specifications and performance figures are subject to change. Please visit www.kicker.com for the most current information.
P.O. Box 459 • Stillwater, Oklahoma 74076 • USA • (405) 624-8510
10PS5250-C-20091208
INTERNATIONAL WARRANTY
Contact your International KICKER dealer or distributor concerning specific procedures for your country's warranty policies.
WARNING: KICKER products are capable of producing sound levels that can permanently damage your hearing! Turning up a system to a level that has audible distortion is more damaging to your ears than listening to an undistorted system at the same volume level. The threshold of pain is always an indicator that the sound level is too loud and may permanently damage your hearing. Please use common sense when controlling volume.
Harley-Davidson is a registered trademark of Harley-Davidson, Inc.
Audio System Upgrade
Please retain this card and your receipt with vehicle Contains valuable information should you need service
RVICXCT10
When purchased from an Authorized KICKER Dealer, KICKER warrants this product to be free from defects in material and workmanship under normal use for a period of THREE (3) YEARS from date of original purchase for automotive products and TWO (2) YEARS from date of original purchase for motorcycle products. If this product is identified as "Refurbished" or "B Goods", the warranty is limited to a period of THREE (3) MONTHS from date of original purchase. In all cases you must have the original receipt. Should service be necessary under this warranty for any reason due to manufacturing defect or malfunction during the warranty period, KICKER will repair or replace (at its discretion) the defective merchandise with equivalent merchandise. Warranty replacements may have cosmetic scratches and blemishes. Discontinued products may be replaced with more current equivalent products. This warranty is valid only for the original purchaser and is not extended to owners of the product subsequent to the original purchaser. Any applicable implied warranties are limited in duration to a period of the express warranty as provided herein beginning with the date of the original purchase at retail, and no warranties, whether express or implied, shall apply to this product thereafter. Some states do not allow limitations on implied warranties; therefore, these exclusions may not apply to you. This warranty gives you specific legal rights; however you may have other rights that vary from state to state.
WHAT TO DO IF YOU NEED WARRANTY OR SERVICE:
Defective merchandise should be returned to your local Authorized Stillwater Designs (KICKER) Dealer for warranty service. Assistance in locating an Authorized Dealer can be found at www.kicker.com or by contacting Stillwater Designs directly. If it becomes necessary for you to return defective merchandise directly to Stillwater Designs (KICKER), call the KICKER Customer Service Department at (405) 624-8510 for a Return Merchandise Authorization (RMA) number. Package only the defective items in a package that will prevent shipping damage, and return to:
Stillwater Designs, 3100 North Husband St, Stillwater, OK 74075
The RMA number must be clearly marked on the outside of the package. Please return only defective components. The return of functioning items increases your return freight charges. Non-defective items will be returned freight collect to you. Include a copy of the original receipt with the purchase date clearly visible, and a "proof-of-purchase" statement listing the Customer's name, Dealer's name and invoice number, and product purchased. Warranty expiration on items without proof-of-purchase will be determined from the type of sale and manufacturing date code. Freight must be prepaid; items sent freight-collect, or COD, will be refused.
WHAT IS NOT COVERED?
- This warranty is valid only if the product is used for the purpose for which it was designed. It does not cover:
• Damage due to improper installation - Subsequent damage to other components
• Damage caused by exposure to moisture, excessive heat, chemical cleaners, and/or UV radiation
• Damage through negligence, misuse, accident or abuse. Repeated returns for the same damage may be considered abuse - Any cost or expense related to the removal or reinstallation of product
- Speakers damaged due to amplifier clipping or distortion
- Items previously repaired or modified by any unauthorized repair facility
- Return shipping on non-defective items
- Products with tampered or missing barcode labels
- Products returned without a Return Merchandise Authorization (RMA) number
- Freight Damage
• The cost of shipping product to KICKER
• Service performed by anyone other than KICKER
SD stillwaterdesigns
HOW LONG WILL IT TAKE?
KICKER strives to maintain a goal of 1 week service for all acoustics (subwoofers, midrange drivers, tweeters, crossovers, etc) returns. Delays may be incurred if lack of replacement inventory or parts is encountered. Failure to follow these steps may void your warranty. Any questions can be directed to the KICKER Customer Service Department at (405) 624-8510. Contact your International KICKER dealer or distributor concerning specific procedures for your country's warranty policies. Note: All specifications and performance figures are subject to change. Please visit www.kicker.com for the most current information.
P.O. Box 459 • Stillwater, Oklahoma 74076 • USA • (405) 624–8510
- Victory Cross Country Rear amp/speaker installation
- INCLUDED IN THIS FIT KIT:
- KLOCK WERKS | VICTORY CROSS COUNTRY KICKER INSTALLATION 2
- GETTING STARTED
- HARNESS INSTALLATION
- KLOCK WERKS | VICTORY CROSS COUNTRY KICKER INSTALLATION 3
- SPEAKER INSTALLATION
- AMP INSTALLATION
- KLOCK WERKS | VICTORY CROSS COUNTRY KICKER INSTALLATION 4
- POWER LEAD CONNECTION:
- IMPORTANT
- KKICKER®
- PXA
- Amplifiers
- INSTALLATION
- Model External Fuse
- OPERATION
- TROUBLESHOOTING
- ELECTRONICS LIMITED WARRANTY
- WHAT TO DO IF YOU NEED WARRANTY OR SERVICE:
- Stillwater Designs, 3100 North Husband St, Stillwater, OK 74075
- WHAT IS NOT COVERED?
- stillwaterdesigns
- HOW LONG WILL IT TAKE?
- INTERNATIONAL WARRANTY
- Remove factory speakers.
- Prepare PS5250 for installation.
- Install PS5250 in factory location.
- ACOUSTICS LIMITED WARRANTY
- Audio System Upgrade
- SD stillwaterdesigns
Brand : KICKER
Model : Klock Werks RVICXCT10
Category : Hi-Fi System