
SL-VP50 - CD Player TECHNICS - Free user manual and instructions
Find the device manual for free SL-VP50 TECHNICS in PDF.


| Product Type | CD Player |
| Brand | Technics |
| Model | SL-VP50 |
| Disc Compatibility | CD, CD-R, CD-RW |
| Audio Output | Stereo analog, Optical digital |
| Headphone Output | 3.5mm stereo jack |
| Power Source | AC adapter (DC 9V) or 6 x AA batteries |
| Battery Life | Approx. 10 hours continuous play |
| Dimensions (W x H x D) | Approx. 130 x 30 x 140 mm |
| Weight | Approx. 280 g (without batteries) |
| Playback Modes | Normal, Program, Shuffle, Repeat One/All |
| Anti-Skip Protection | 40-second ESP (Electronic Skip Protection) |
| Display | LCD with track number, elapsed time, and mode indicators |
| Controls | Play/Pause, Stop, Skip/Search, Volume dial, Hold switch |
| Maintenance | Clean lens with a blower or soft brush; wipe exterior with dry cloth |
| Safety | Do not disassemble; keep away from moisture; use only specified power supply |
| Repairability | Laser pickup and belt replacement possible by authorized service |
| Accessories | AC adapter, carrying case (optional), remote control (optional) |
Frequently Asked Questions - SL-VP50 TECHNICS
User questions about SL-VP50 TECHNICS
0 question about this device. Answer the ones you know or ask your own.
Ask a new question about this device
Download the instructions for your CD Player in PDF format for free! Find your manual SL-VP50 - TECHNICS and take your electronic device back in hand. On this page are published all the documents necessary for the use of your device. SL-VP50 by TECHNICS.
USER MANUAL SL-VP50 TECHNICS
Portable Video CD Player
SL-VP50
Operating Instructions
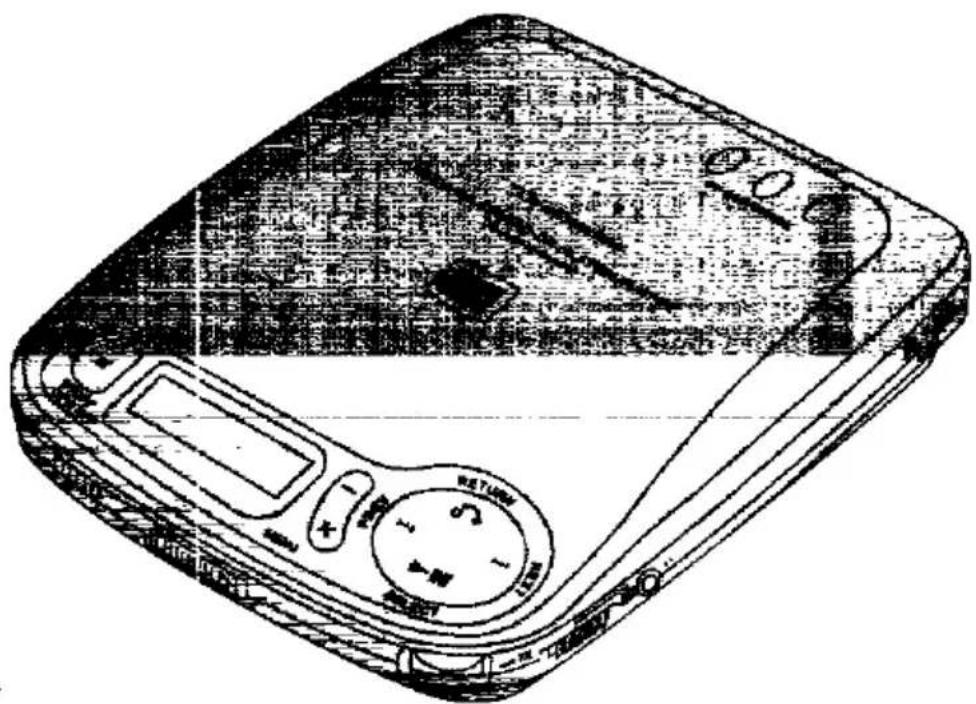
natural_image
Line drawing of a portable electronic device with control panel and buttons (no text or symbols)

Note:
The "EB" indication shown on the packing case indicates United Kingdom.
Before connecting, operating or adjusting this product, please read these instructions completely.
HB|EG|GC
RQT2876-B
Dear Customer
Thank you for purchasing this product. For optimum performance and safety, please read these operating instructions carefully.
Table of Contents
Before Operation
Caution for AC mains lead ..... 4
Supplied Accessories ..... 5
Remote Control Preparations .... 5
Location of Controls ..... 6
Power Source 7
Before Operating the Unit .....10
Basic Operation
Playing Video CDs (with the playback control feature) .....11
Playing Audio CDs and Video CDs (not equipped with the playback control feature) ....13
Applied Operation
Various Play Using the Remote Control Unit ....15
Audio channel selection .....20
For Your Reference
Using the Unit with Optional Accessories .....21
Concerning Compact Discs ....22
Cautions 23
Troubleshooting Guide .....24
Specifications 25
Maintenance 25
Concerning the TV display ....26
Description of Terms .... Back cover
Features
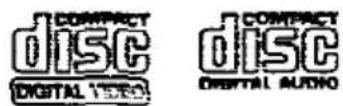
This unit is the portable video CD play which is the playback control method. The following CDs shown below can played on this unit.
Video CD:
(Motion picture + audio)
Only compact discs having this mark can be used.

Version 2.0
The disc with the playback control feature. In addition to the motion picture play-menu playback and high-resolution image playback are possible.
Version 1.1
The disc not equipped with the play: control feature
Only the motion picture playback is possible.
Audio CD:
Only compact discs having this mark can be used.

Only the audio playback is possible
CLASS 1 LASER PRODUCT
LUOKAN 1 LASERLAITE KLASS 1 LASER APPAR.
natural_image
Simple line drawing of a container with an arrow indicating downward motion (no text or symbols)(Back of product)
(Komponentens bagside)
(Produktets beisikte)
DANGER-Invisible radiation when open and interlock defects AVOID DIRECT EXPOSURE TO BEAM.
(Bottom of the product)
Marking sign is located on bottom of the unit
IRSK
DVARSEL!
ETTE PRODUKTET ANVENDER EN ASER.
TJENING AV KONTROLLER, JUSTE- INGER ELLER ANDRE INNGREP ENN E SOM ER BESKREVENT I DENNE UKSANVISNING, KAN FÖRE TIL LIG BESTRÅLING.
EKSLER MÅ IKKE ÁPNES, OG FORSOK DEU Å REPARERE APPARATET PÅ ENHÅND. ALT SERVICE OG REPA- ASJONSARBEID MÅ UTFÖRES AV VALIFISEHT PERSONELL.
NSK
:EMÄRK!
DETTE APPARAT ANVENDES EN ASER.
LUG AF BETJENINGSKNAPPER ELLER EGULERINGER ELLER FREMGANGS- DER UDOVER DE I DENNE BETJE- INGSVEJLEDNING ANGIVNE, KAN UDORE FAHE FOR BESTRÅLING.
EN IKKE KABINETTET OG FORSOG IKE AT UDFORE REPARATIONER ELV. REPARATIONER MÅ KUN FORE- AGES AF KVALIFICEREDE TEKNIKERE.
10MI
AROITUS!
AITTEEN KÄYTTÄMINEN MUULLA KOIN ÄSSÄ KÄYTTÖOHJEESSA MAINITULLA ÄVALLA SAATTAA ALTISTAA KÄYT- ÄIJÄN TURVALLISUUSLUOKAN 1 YLIT- ÄVALLE NÄKYMÄTTÖMÄLLE LASER- TEILYLLE.
WARNING:
TO REDUCE THE RISK OF FIRE OR ELECTRIC SHOCK, DO NOT EXPOSE THIS APPLIANCE TO RAIN OR MOISURE.
CAUTION!
THIS PRODUCT UTILIZES A LASER.
USE OF CONTROLS OR ADJUSTMENTS OR PERFORMANCE OF PROCEDURES OTHER THAN THOSE SPECIFIED HEREIN MAY RESULT IN HAZARDOUS RADIATION EXPOSURE.
DO NOT OPEN COVERS AND DO NOT REPAIR YOURSELF, REFER SERVICING TO QUALIFIED PERSONNEL.
ADVARSEL:
FOR AT REDUCERE RISIKOEN FOR BRAND OG ELEKTRISKE ST∅D MÅ DETTE APPARAT IKKE UDSÄETTES FOR REGN ELLER FUGT.
VAROITUS:
TULIPALO- JA SÄHKÖISKUVAARAN VÄLİTTÄMISEKSI ÄLÄ SAATA TÄTÄ LAITETTA ALTTIIKSI SATEELLE TAI KOSTEUDELLE.
ADVARSEL: USYNLIG LASERSTRÅLING VED ÅBNING, NÅR SIKKERHEDSAF- BRYDERE ER UDE AF FUNKTION. UNDGÅ UDSÄTTEELSE FOR STRÅLING.
(Pásat under apparatus)
Caution for AC mains lead
(For United Kingdom)
("EB" area code model only)
For your safety, please read the following text carefully.
This appliance is supplied with a moulded three pin mains plug for your safety and convenience.
A 3-ampere fuse is fitted in this plug.
Should the fuse need to be replaced please ensure that the replacement fuse has a rating of 3-ampere and that it is approved by ASTA or BSI to BS1362.
Check for the ASTA mark or the BSI mark on the body of the fuse.
If the plug contains a removable fuse cover you must ensure that it is refitted when the fuse is replaced.
If you lose the fuse cover the plug must not be used until a replacement cover is obtained.
A replacement fuse cover can be purchased from your local dealer.
CAUTION!
IF THE FITTED MOULDED PLUG IS UNSUITABLE FOR THE SOCKET OUTLET IN YOUR HOME THEN THE FUSE SHOULD BE REMOVED AND THE PLUG CUT OFF AND DISPOSED OF SAFELY.
THERE IS A DANGER OF SEVERE ELECTRICAL SHOCK IF THE CUT OFF PLUG IS INSERTED INTO ANY 13-AMPERE SOCKET.
If a new plug is to be fitted please observe the wiring code as shown below.
If in any doubt please consult a qualified electrician.
IMPORTANT
The wires in this mains lead are coloured in accordance with the following code:
Blue: Neutral
Brown: Live
As the colours of the wires in the male lead of this appliance may not correspond with the coloured markings identifying terminals in your plug, proceed as folio. The wire which is coloured BLUE must connected to the terminal in the plug wi is marked with the letter N or colour BLACK.
The wire which is coloured BROWN must be connected to the terminal in the p' which is marked with the letter L or roured RED.
Under no circumstances should either these wires be connected to the earth terminal of the three pin plug, marked at the letter E or the Earth Symbol.
Before use
Remove the connector cover as follows

How to replace the fuse
- Remove the fuse cover with a sun driver.
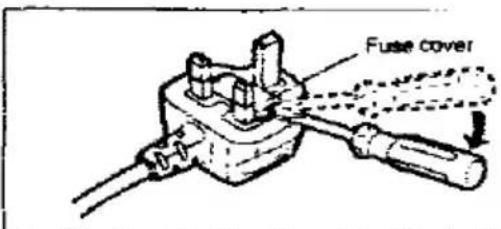
- Replace the fuse and attach the cover.

implied
nessones

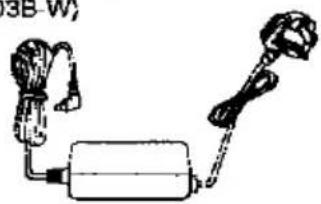
Check the packing carton for these accessories.
.3 adaptor
1 pc.
- configuration of the AC adaptor differs defining on the area.
For United Kingdom |
KFEA903B-W;
natural_image
Simple line drawing of a mechanical device with hoses and a cylindrical body (no text or symbols)For Continental Europe
RFEA903E-W)

natural_image
Simple line drawing of a cylindrical device connected to a cable (no text or symbols)itemote control transmitte:
-AK-SL408WH) 1 pc.

Series (for remote control)
-103, UM4) 2 pcs.

connection cable
RJL3X001X15) 1 pc
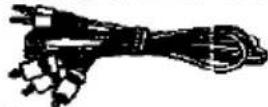
1 pin adaptor
For Continental Europe end.
United Kingdom
:FA015(-1) 1 pc.

[Unreadable due to severe distortion and noise]
Remote Control
Preparations
Battery installation
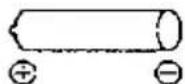
Insert two "R03" size (UM-4, included) as shown below. Insert batteries in the correct polarities (⊕, ⊖).

natural_image
Technical line drawing of a remote control device with labeled components (no text or symbols)■ Battery removal
Press and push up batteries in the direction of the arrow to remove them.
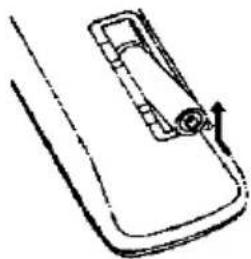
natural_image
Simple line drawing of a mechanical component with an arrow indicating direction (no text or symbols)■ Remote control transmitter's operation range and precautions
Remote control signal sensor
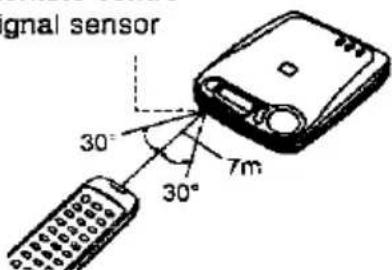
- Do not place obstacles between the remote control signal sensor and remote control transmitter.
- Take care to keep the remote control signal sensor and end of the remote control unit free from dust.
- Do not leave it where it will be exposed to direct sunlight.
Location of Controls
Main unit A
① Stop/operation off button
② Display
③ Remote control signal sensor
④ Open switch
⑤ Menu, +, - button
⑥ Headphones volume control
⑦ Multi operation button
(NEXT, PREV, SELECT, RETURN)
⑧ Hold switch
⑨ Headphones Jack (Ω)
⑩ Video format selector (NTSC, PAL, PAL AUTO)
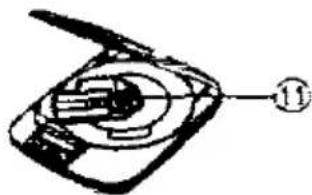
⑪ Push button
■ Rear panel of the unit
⑫ Video output terminal (VIDEO OUT)
⑬ Audio output terminal (AUDIO OUT)
⑭ DC in jack (DC IN 9 V ⊕ ⊖ ⊕)
Remote control unit
⑮ Menu on/off button
⑯ Scene button
⑰ A-B repeat button
⑱ VCD index button
⑲ Numeric button
20 II▶ (Frame skip) button
② Stop button
② II Pause button
⑳ Program button
24 Recall button
25 Audio channel select button
26 Clear button
⑳ Repeat button
⑳ Return button
29 Previous, next button
30 ▶ Select button
A

natural_image
Technical line drawing of a mechanical device with no visible text or symbolsB

C

to the specifications (page 25) for the duration of the play time provided: when rechargeable dry cell batteries are used.
Adaptor A
connect the AC adaptor.
only the AC adaptor provided with this unit.
[Unreadable]
The configuration of the AD adaptor differs deciding on the area.
the unit is in the standby condition when the adaptor is connected. The primary circuit is says "live" as long as the AC adaptor is connected to an electrical outlet.
or United Kingdom only:)
Indicator on the AC adaptor lights when the adaptor is connected.
AUTION
to not use the AC adaptor provided with this unit for other products.
areas except Continental Europe and United
CAUTION
the AC voltage is different according to the ____ Be sure to set the proper voltage in your ____ before use.
,for details, please refer to the attached sheet.)
.y cell batteries (not included)
- all six "R6/LR6" (UM-3) alkaline series as shown in the figure.
... sure that the AC adaptor is disconnected ... the AC power outlet and the unit.
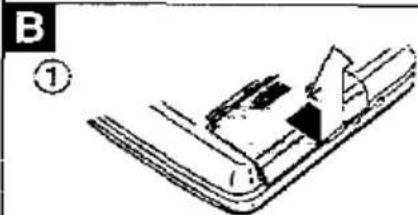
Slide the battery cover to open.
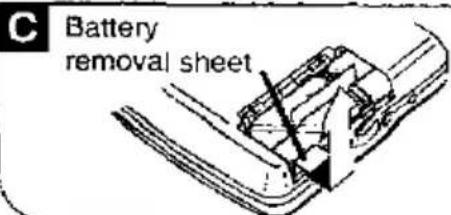
Put the battery removal sheet under the batteries, and then install batteries 1 and 2.
Put the insulator sheet: on top of the batteries and install battery 3.
Install battery 4 to make the insulator sheet come between batteries 3 and 4.
Now install batteries 15 and 6.
Battery removal
iii the battery removal sheet and remove the matches with your finger.
... to the cautions on page 23.

natural_image
Technical line drawing of a mechanical component with a triangular cutout and a black arrow indicating direction (no text or symbols)


Power Source
Rechargeable batteries (not included)
Make sure that the batteries have been charged before use.
■ Recharging batteries
1 Install six rechargeable batteries.
Only the SH-CDB8D batteries can be recharged.
Refer to the "Dry cell batteries" concerning the installation and removal of the batteries.
2 Connect the AC adaptor.
Note
The configuration of the AC adaptor differs depending on the area.
It takes about 4 hours to fully recharge them.
The recharging indicator ● flashes when you start recharging and the light off when recharging has completed.
3 After completing recharging of the batteries, disconnect the AC adaptor from the DC in jack and the AC power outlet.
●Recharging is possible only when the unit is switched to the standby mode.
The batteries can be used for about 10 months (300 times) if they are re-charged every day. After that, their operating time will be shortened, and you will have to replace them.
Obtain new rechargeable batteries (SH-CDB8D) designed exclusively for the unit.
- While recharging, the AC adaptor and rechargeable batteries may get warm. This is normal.
1

flowchart
graph TD
    A["Device with battery removed"] --> B["Battery removal sheet"]
    B --> C["Insulator sheet"]
    C --> D["Final panel with numbered components"]
2
DC IN Jack
(DC IN 9 V ←)

Battery Indicator
us starts flashing when the batteries yo run down. After a short while the wei automatically shuts off. ne amount of time the unit will continue play after the indicator has started flash- differs slightly, depending on the type batteries used.)
type of battery
Hechargeable natteries
Dry cell natteries
Action
Recharge the batteries again.
Replace with new batteries.
ne battery indicator may not flash if re-argeable batteries, other than those designated by Panasonic, are used.)
17 73:18
Battery indicator
Before Operating the Unit
1 When you install a video CD Connect the unit to the TV.
Use the connection cable (included) and the 21 pin adaptor (included only for Continental Europe and United Kingdom). Set: the NTSC, PAL. PAL AUTO selector according to the television set.
NTSC: When connecting the NTSC system TV
PAL: When connecting the PAL system TV
PAL AUTO: When connecting the TV which has PAL 60 system. (This is the system which enable to enjoy NTSC software.) For details, refer to the operating instructions of the TV.
If your television set has 21 pin plug terminal:
-
Connect the connection cable to the 21 pin adaptor.
-
Connect the 21 p-n adaptor to the TV set.
2 Release the hold mode.
■ Accidental Operation Prevention Function ▲
This function prevents the unit from operating even if its function buttons are pressed accidentally. (However, the disc lid can be opened or closed.) Use the function to prevent the following situations:
Example 1: While the unit is not in use, the power is inadvertently tuned on and the batteries run down.
Example 2: Play is interrupted while the unit is in use.
To use the accidental operation prevention function
Set HOLD to the HOLD position. It is possible to operate the unit from the remote control in the "hold" mode (except for turning on or off the unit).
Before operation, release the unit from the hold state.
"ho!d" indicator
If the unit is in the hold mode, the "ho / d" indicator appears when any of the unit's function buttons is pressed.
When the unit is turned off
The "ho/d" indicator appears only when ▶! button is pressed.


svina Video CDs
[empty control feature]
cenu Playback
description of terms on the back playback method described below is only for CDs equipped with the playback control ire. Menu playback is automatically played on a video CD is playback control supported. the video CD is not playback control supported, to the regular playback mode described on 13.
Switch on the TV and select the VIDEO input mode.
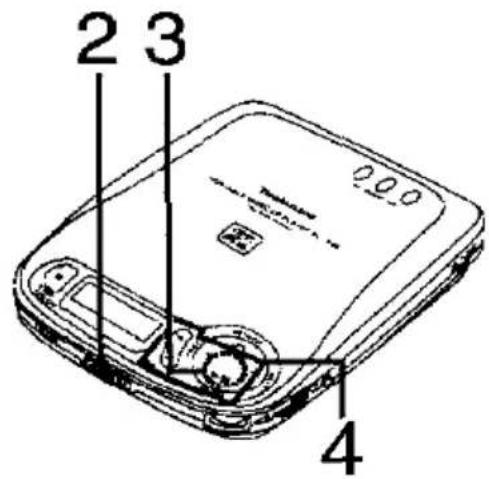
Slide OPEN to open the lid, and insert the video CD.
Press the area near the center hole of the disc until it clicks into position. Close the lid.
Press ▶11.
The menu screen appears on the TV. (with some discs, it may not appear immediately.) The menu screen that appears differs depending on the disc.
① Press MENU (+ or -) to select the menu.
② Press SELECT ▶II to start playback.
MENU +: When selecting the bigger number
MENU -: When selecting the smaller number
The display shows the menu number, and then playback will start.
The unit also identifies and plays the high-resolution still image automatically.
Adjust the TV volume level.
VOLUME control on this unit is exclusively for the headphones.
The menu configuration differs depending on the disc. Select the menu by following the instructions accompanying the disc or the screen display.
For your reference:
Concerning the display that appears on the TV screen, refer to pages 26-27.
Menu numbers can also be selected using the numeric buttons on the remote control unit.
2


natural_image
Line drawing of a CD or DVD disc with a spool and lid (no text or symbols)3

Playing Video CDs
(with the playback control feature)
| Menu operation | |
| To return to the previous menu | RETURN |
| To advance to the continuation of the menu | ▶▶ NEXT |
| To return to the previous screen | PREV |
| Playback operation | |
| To temporarily stop disc playPress during play.To resume play, press the button once again. | ▶II |
| To stop playPress during play. | ■ |
| To turn off the unitPress in the stop condition. | ■ |
| To skip forward or backward (skip)(Regular playback mode only)Press during play | PREV ▶◀:Skip backward▶▶ NEXTSkip forward |
| To search forward or backwardPress and hold during play. | PREV ▶◀:Search backward▶▶ NEXTSearch forward |
Note
- The pictures moving on the menu screen will not pause even when ▶ is pressed during playback.
- You cannot search forward or backward with a "slide show" disc.
■ To switch to the menu play/regular play mode
(Available only from the remote control) Press MENU OFF/ON.
Refer to page 13 for regular playback
When the power is switched to on, the menu playback will be automatically selected.

icgular Playback
description of terms of the back
ie playback method described below will ayback the disc in sequence from the liming. Regular playback can also eyback video CDs equipped with the ayback control feature. However, it is im- ssible to playback some moving or still tures. In this case, use the menu play-
For playing a video CD only:
Switch on the TV and select the VIDEO input mode.
Slide OPEN to open the lid, and Insert the CD.
Close the lid.
Press ▶II.
Play starts from the first track.
Play stops when all the tracks have been played.
For playing a video CD only:
Adjust the TV volume level to set sound level.
VOLUME control on this unit is exclusively for the headphones.
; listen through the headphones
(included) A
before connecting the headphones, reduce the volume level.
Playing Audio CDs and Video CDs
(not equipped with the playback control feature)
Removing the disc A
After the disc has stopped rotating, press PUSH and release the disc.
Note
Do not open the lid during play.
Automatic Shut-Off:
This functions, in order to prevent rechargeable and other batteries from becoming discharged. If you leave the unit in the stop mode for about 10 minutes, it will automatically shut off.
■ "no d15E" display
This appears for about 30 seconds when a disc has not been inserted or when a disc has not been inserted properly and then
▶ is pressed.
This display also appears when a disc or the lens are stained.
■ "B0E" display
This appears for about 10 minutes after the lid is opened. (It does not appear when the unit is turned off.)
■ The backlight of the display
When using the AC adaptor, the backlight of the display turns on.
Note
When you listen to an audio CD, disconnect the yellow video pin plug from the VIDEO OUT terminal to prevent from battery consumption.
A

natural_image
Diagram of a mechanical device with a circular component and a separate view showing a gear-like component (no text or symbols)-ious Play Using the Remote Control
[1]
only for video CDs)
o find the particular scene so want to watch A
To find the scene using a video index number
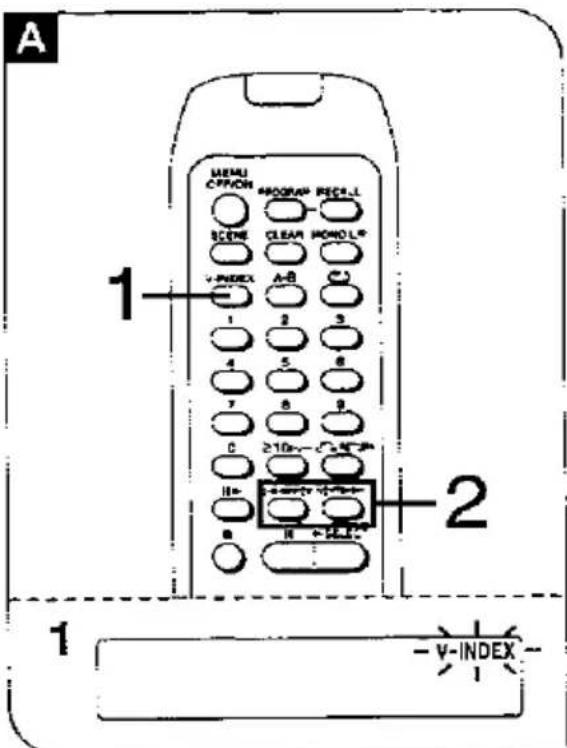
(See description of terms on the back cover) A particular scene in a track you want to watch can be located by selecting a video index number. This can be done only with the video index recorded.
Press V-INDEX in the play mode.
Press |◀◀ PREV or NEXT ▶▶▶ to select the video index number corresponding to the scene.
Play now starts at the video index selected.
o cancel this function:
loss V-INDEX again.
To find the scene using the numeric buttons B
Press V-INDEX.
^5 Press the numeric button to select the index number corresponding to the scene.
Press ▶ SELECT.
Play now starts at the video index selected.
o select a two-digit video index umber:
'tress the numeric button corresponding to be desired index number.
xample:
5: 1→5
4: 2→4
Then you make an error, press CLEAR to angel.
-
The video index search function is available with a track in play only
it may not possible to make a video index search with the motion picture.

Various Play Using the Remote Control Unit
(Only for video CDs)
■ To find the scene using a scene number ▲
(See description of terms on the back cover)
A particular scene in a track you want to watch can be located by selecting the scene number. Refer to the instructions accompanying the disc for details on the scene numbers.
Scene playback is possible only with video CDs equipped with the playback control feature (Menu playback mode).
1 Press SCENE.
2 Press the numeric button to select the scene number corresponding to the scene you desired to watch.
3 Press ▶ SELECT.
To cancel this function:
Press SCENE again.
To select a two-digit scene number:
Press the numeric button corresponding to the desired scene number.
Example:
15: 1→5
208: 2→0→8
Frame skip
Press ▶ during play.
Each time it is pressed, the video frame will go forward.
Continually pressing the button. the unit performs a still playback.
To cancel the frame skip mode.
Press 11.


- video CDs and audio CDs)
aying Tracks repeatedly repeat Function)
reparation: Press MENU OFF/ON on - remote control and set the unit to be similar playback mode)
To repeat only one track A once In the play or stop me
In time you press the button, the dis- y will change as follows:
1 →ALL →light off (OFF)
To repeat all tracks on the disc
twice in the play or stop mis.
“ your reference:
the program play mode, only all the guaranteed tracks will be repeated.
cancel repeat function:
and the " indicator goes
To repeat a particular section ⓒ (A–B repeat)
Press A-B during play at the point where repeat play is to be started (point A).
Press A-B at the point where repeat play is to be ended (point B).
Cancel the A-B repeat was A-B again.
…
. 8 repeat is not possible during pro-
ram play.
- 3 repeat between a track and another track is not possible.
Then using a video CD, A-B repeat of thin 2 seconds is not possible.

Various Play Using the Remote Control Unit
(For video CDs and audio CDs)
Playing Tracks in a Particular Sequence (Program Play)
With program play, you can program up to 24 tracks on the disc in any order you choose.
Before operation:
- Press MENU OFF/ON to set the unit to the regular playback mode.
- Set the unit to the stop mode.
1 Press PROGRAM.
2 Press the numeric buttons corresponding to the track number in sequence.
To select a two-digit track number:
First press ≥10/-/… and then press the numeric button corresponding to the desired track number.
Example:
15: ≥10/-/→1→5
20: ≥10/-/→2→0
3 Press ▶ SELECT.
When all the programmed tracks have been played, the unit will automatically stop.
To cancel program play:
Press PROGRAM again.
Concerning the "F" Indication:
It shows no further tracks can be programmed.

1
$$ 0 - - 0 0 $$
2
Track number Programmed

To confirm the programmed contents
ESS RECALL.
ie display shows the programmed track inbers in the sequence you have en- ui...
To cancel the programmed track
CLEAR (during play, press twice).
e track you programmed last will be kelled.
To cancel all the programmed tracks
The image contains no legible text or symbols.
"your reference:
ing the program play, the selections by in the same order as you pro- amined them.
PREV or NEXT ▶▶ to skip her programmed tracks.
faring play from a desired ack (Direct access play)
fire operation:
less MENU OFF/ON to set the unit to the jolar playback mode.
access play can be operated either stop mode or play mode.
see the numeric buttons corresponding to the track number.
the tracks are played in the original task order starting with the one selected to ending with the final track, and then by stops automatically
select a two-digit track number: si press ≥10/-/--, and then press the nu- tic button corresponding to the desired ≥k number.
nple:
210÷·s15
1: 210/-→2→0

Audio channel selection
When you use a multi audio CDs, you can hear only the vocal track or accompaniment by selecting the audio channel.
Press MONO L/R.
Pressing this button once displays the present audio condition. If you press the button continuously, the audio mode will change as follows.
•LR: Accompaniment+ vocal A
You can hear an accompaniment (main audio) from the left channel, and vocal track (sub audio) from the right channel.
•L : Accompaniment only ☐
You can hear an accompaniment (main audio) only.
•R : Vocal track only ©
You can hear a vocal track (sub audio) only.
(With some discs, accompaniment may be heard)
Note
If you open or close the lid, the audio channel selection retains in the memory. However, the LR mode resumes once the power is turned off and on again.

A
L R
B
L
C
R
Ising the Unit with Optional Accessories
sing the unit with an audio
-
- just the volume 'eve' on the amplifier. to not connect the cable to the PHONO uks on the amplifier.
Then you do not connect the provided allow pin plug connection cable to the IDEO OUT terminal, you can only listen the audio portion of the video CD.
Obtain the optional connecting cable if the amplifier comes with mini-phone.
Then you connect to the speaker system which has a built-in amplifier, make the connection to the headphones jack (3).
"Then you connect the microphone to audio system, you can enjoy KARAOKE" (singing with an accompaniment) by selecting the audio channel using the remote control unit. (See page 51.)
[Unreadable]
to cannot use this uni: with a car audio sire.
AUDIO OUT

Concerning Compact Discs
Only compact discs bearing this mark can be used with this unit. A
■ How to remove a disc from its case B
■ How to store the disc in its case
■ How to hold a disc
■ If the surface is dirty
Wipe it with a damp cloth and then wipe dry.
Wipe from the center toward the outer circumstances.
■ If moisture has formed on a disc
When moisture has formed because the disc was brought suddenly into a warm room from a cold environment, wipe it off using a soft dry cloth.
■ When storing discs
Avoid locations which are
●Exposed to direct sunlight
- Susceptible to high levels of humidity or dust.
- Directly exposed to heat from a heating appliance.
- On top of a ca: dashboard or near the rear window.
■ Handling precautions
- On the label side (the side with writing) Do not write anything using a pencil, ball-point pen, etc. Do not stick paper or labels.
- On the disc (shiny) side Handle this side carefully to keep it free from fingerprints or scratches. Do not use record cleaners, solvents, etc.
A
B

natural_image
Diagram showing a mechanical device before and after assembly, with no visible text or symbolsC

D

E

autions
chargeable batteries
only the SH-CDB8D batteries can be re- charged.
the power delivered by the batteries lasts for very short time after recharging, it means that batteries' service life is over. Do not use in any more. Please replace the batteries.
It charging already charged batteries will then their service life.
When recharging batteries for the first time or then they have not been used for a long period - time, the play time may be shorter than small. In a case like this, repeatedly recharge and discharge the batteries. This will restore them to their regular state.
to not allow any metal objects to touch the terminals of rechargeable batteries since this -any cause short-circuiting which is dangerous.
y cell batteries/rechargeable series
prevent damage to the batteries and electro- leakage, heed the following points.
Sign the ⊕ and ⊖ polarities properly when isorting the batteries into the unit.
to not mix different types or makes of batteries - and new batteries.
remove the batteries if you do not plan to use the unit for extended period of time.
do not throw batteries into a fire, and do not short-circuit, disassemble or subject them to the heat.
do not attempt to recharge dry cell batteries. in not peel off the plastic covering on the chargeable batteries. Short-circuiting may which is dangerous.
then inserting the batteries into the unit, be due to set the insulator sheet properly. (see yes 7-8.)
lying dry cell batteries/ chargeable batteries around
an putting dry cell or rechargeable batteries in pocket or bag, ensure that no other metal ob- such as a necklace are placed in the pocket bag with them. Contact with metal may cause in-circuiting which, in turn, may cause a fire. absolutely sure to carry the rechargeable bat- in the battery carrying case.
When driving a car
In the interest of traffic safety, do not either operate the unit or watch the video CD while driving.
Precautions for Listening with the Headphones
- Do no! play your headset at a high volume. Hearing experts advise against continuous extended play.
- If you experience a ringing in your ears, reduce volume or discontinue use.
- Do not use while operating a motorized vehicle. It may create a traffic hazard and is illegal in many areas.
- You should use extreme caution or temporarily discontinue use in potentially hazardous situations.
- Even if your headset is an open-air type designed to let you hear outside sounds, don't turn up the volume so high that you can't hear what's around you.
When purchasing rechargeable batteries
As a safety precaution, the portable video CD players made by our company have a construction designed to make it impossible to recharge ordinary batteries.
To use rechargeable batteries, be absolutely sure to purchase the rechargeable Ni-Cd batteries designed especially for this unit.
Special rechargeable NI-Cd batteries
SH-CDB8D (set of 2×3)
For details, consult with your dealer.
Special recharge- able batteries
Ordinary dry cell batteries/rechargeable batteries

For United Kingdom and Continental Europe
Notice about the rechargeable battery
The battery is designated recyclable.
Please follow your local recycling regulations.
Troubleshooting Guide
Before requesting service for this unit, check the chart below for a possible cause of the problem you. experiencing. Some simple checks or a minor adjustment on your part may eliminate the problem restore proper operation.
If you are in doubt about some of the check points, or if the remedies indicated in the chart do not set the problem, refer to the directory of Authorized Service Centers (enclosed with this unit) to local convenient service center, or consult your dealer for instructions.
| Problem | Check point | Remedy |
| The disc lid does not close. | Is the disc secured property? | Secure the disc property |
| No play even when disc is inserted. | Is unit in HOLD mode? | Release HOLD mode |
| Is disc secured? | Secure disc until it clicks into position. | |
| Any condensation inside unit? | Leave stand for about an hour and then operate | |
| Disc cannot be removed. | Is disc secured? | Press PUSH to release disc. |
| No picture on the TV screen while playing a video CD. | Is the connection cable connected? | Connect the connection cable property |
| Is the TV input switched to the "VIDEO" mode? | Switch the TV input mode switch to "VIDEO". | |
| The unit cannot be operated with the remote control. | Are the batteries installed in the reverse polarity? | Re-insert the batteries observing the correct polarities. |
| Are the batteries worn out? | Replace the batteries with new batteries. |
pecifications
info
= channels: 2 (left and right, stereo)
=quency
response: 20-20,000 Hz (+0.5 dB, -1.5 dB)
upit voltage: 0.65 V (50 kΩ)
more than 94 dB filter: 8 fs
== and flutter: Below measurable limit
. converter: MASH 4 DAC, 1 bit
iphone
...igui level: max. 9 mW+9 mW/16Ω (variable)
[104]
- input format: NTSD/PAL
·s input voltage: 1.0 Vpp (75Ω)
:Kup
iii source: Sem conductor laser
-length: 780 nm
icial
supply: DC ∈ V
consumption:
ising AC adaptor;
7.3 W
ising batteries;
2.4 W
aintenance
Intaining the lens
in the lid and clean the lens as shown the figure.
- a cotton swab to gently wipe off any prints.
immended product:
is cleaner kit
F1038C)
blower for nera lens


Play time:
(When used in hold mode, at 25°C temperature and on flat and stable surface)
| Rechargeable batteries | About 2 hours |
| Panasonic alkaline dry cell batteries | About 5 hours |
The play time may be less depending on the operating conditions.
Recharging time: About 4 hours
Dimensions
(W×H×D): 135×43.0×160 mm
Weight: 580 g (with batteries)
460 g
(without batteries)
Optional temperature range:
0°C-40°C
For United Kingdom only
This apparatus was produced to BS 800.
Note:
Specifications are subject to change without notice.
Weight and dimensions are approximate.
These specifications were measured using the AC adaptor.
MASH is a trademark of NTT.
Maintaining the unit
Wipe the unit with a soft cloth. Remove stubborn dirt using a cloth which has been dipped in water or soapy water and wrung out, and then wipe dry.
- If you intend to use a chemical cleaning cloth, read its directions first.
- Do not use alcohol or paint thinners.
Concerning the TV display
(On screen display)
You can confirm the unit's operating condition on the TV screen. The display will disapp after a few seconds. □: Reference page
- When starting play
11-13

natural_image
Empty rounded rectangle with a black arrow pointing right (no text or symbols)- When selecting a track for program
play 18

- When returning to the previous menu (RETURN)
12

natural_image
Simple line drawing of a computer mouse with a curved handle (no text or symbols)- When advancing to the continuation of the menu (NEXT)
12

natural_image
Blank rectangular frame with a small directional arrow icon in the top-right corner (no text or symbols)- When returning to the previous screen
12
natural_image
Blank rectangular frame with a small icon in the top-right corner (no text or symbols)- When making a menu play
12

- When making a regular play
12

- When stopping the play temporarily
12

natural_image
Blank rectangular frame with a small black square at the top center (no text or symbols)- When stopping the play
12

natural_image
Empty rectangular frame with a small black square in the top-right corner (no text or symbols)- When skipping forward to the tr: "3" (track skip)
12

then skipping backward to the track (track skip)
[2]

then repeating only one track the track repeat)
i7|

then repeat all tracks (all repeat)
71
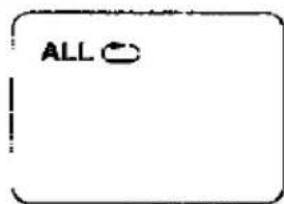
nen
repeating the programmed
?

Jen canceling the repeat function
r]

then repeating a particular section . B repeat)
7]

- When canceling the A-B repeat function
17
(Light off)
- When changing the audio channel to select "accompaniment+vocal track" channel
20
L R
- When changing the audio channel to select "accompaniment" channel only
20
MONO L
- When changing the audio channel to select "vocal" channel only
20
MONO R
When you making a frame skip, video index search, or scean playback, the operating conditions is also displayed on the TV screen.
Besides, the display is varied depending on discs.
Description of Terms
(Read this section together with the instructions accompanying the disc.)
Playback control:
This refers to the control signals which have already been recorded on a disc. These signals enable moving picture and still picture playback by selecting menus. There are two types of video CDs, those which support playback control and those which do not. The type is indicated in the disc's instructions and on the CD case.
Menu ( playback control) playback:
This method plays back the moving pictures or high-definition still pictures on a video CD by selecting a menu.
Regular playback:
This method plays back a disc in sequence from the beginning without using menus.
4-87
Track (number):
Video and audio programs are divided into units called tracks. The numbers cated to the tracks are called track ni bers.
Video index (number):
A track is subdivided into smaller u called indexes. The numbers allocated the video indexes are called index n ibers.
Scene:
Scenes refer to an individual menu, using picture, still picture, etc. which are corded only on video CDs equipped with the playback control feature. The numt allocated to the scenes are called sec numbers.
If the TV screen is in the following condition

natural_image
Illustration of a person sitting at a desk with a clock and window in the background (no text or symbols)● Picture is smaller than screen.
● Picture appears too wide.
● Picture movements are not smooth,
It is possible that software recorded using the NTSC system is being viewed on a PAL type TV.
Set the video format selector on the unit's rear panel to "PAL AUTO".
Note
- Depending on the TV set used, the picture may shrink vertically and black bars may appear both at the top and bottom of the screen.
This is not an indication of a malfunction. - If the picture remains unchanged even when the switch has been set to the "PAL AUTO" position, set it to the normal viewing position.
- When the picture on the TV is displayed in monochrome or sc with AUTO mode, switch the video format selector to PAL mode on this unit
Matsushita Electric Industrial Co., Ltd.
Central P.O. Box 288. Osaka 530-91. Japan
- Portable Video CD Player
- SL-VP50
- Operating Instructions
- Note:
- Dear Customer
- Table of Contents
- Before Operation
- Basic Operation
- Applied Operation
- For Your Reference
- Features
- Video CD:
- Version 2.0
- Version 1.1
- Audio CD:
- CLASS 1 LASER PRODUCT
- LUOKAN 1 LASERLAITE KLASS 1 LASER APPAR.
- DVARSEL!
- :EMÄRK!
- AROITUS!
- WARNING:
- CAUTION!
- ADVARSEL:
- VAROITUS:
- Caution for AC mains lead
- (For United Kingdom)
- ("EB" area code model only)
- IMPORTANT
- Before use
- How to replace the fuse
- implied
- nessones
- [Unreadable due to severe distortion and noise]
- Remote Control
- Preparations
- Battery installation
- ■ Battery removal
- ■ Remote control transmitter's operation range and precautions
- Location of Controls
- Main unit A
- Remote control unit
- Adaptor A
- connect the AC adaptor.
- [Unreadable]
- or United Kingdom only:)
- AUTION
- CAUTION
- .y cell batteries (not included)
- - all six "R6/LR6" (UM-3) alkaline series as shown in the figure.
- Battery removal
- Power Source
- Rechargeable batteries (not included)
- ■ Recharging batteries
- Note
- Battery Indicator
- type of battery
- Action
- Before Operating the Unit
- When you install a video CD Connect the unit to the TV.
- Release the hold mode.
- ■ Accidental Operation Prevention Function ▲
- svina Video CDs
- [empty control feature]
- cenu Playback
- Press ▶11.
- Adjust the TV volume level.
- For your reference:
- Playing Video CDs
- ■ To switch to the menu play/regular play mode
- icgular Playback
- Press ▶II.
- ; listen through the headphones
- Playing Audio CDs and Video CDs
- Removing the disc A
- Automatic Shut-Off:
- ■ "no d15E" display
- ▶ is pressed.
- ■ "B0E" display
- ■ The backlight of the display
- -ious Play Using the Remote Control
- o find the particular scene so want to watch A
- Various Play Using the Remote Control Unit
- ■ To find the scene using a scene number ▲
- To select a two-digit scene number:
- Frame skip
- aying Tracks repeatedly repeat Function)
- Playing Tracks in a Particular Sequence (Program Play)
- Before operation:
- To select a two-digit track number:
- Example:
- Press ▶ SELECT.
- To cancel program play:
- Concerning the "F" Indication:
- To confirm the programmed contents
- To cancel the programmed track
- To cancel all the programmed tracks
- faring play from a desired ack (Direct access play)
- see the numeric buttons corresponding to the track number.
- Audio channel selection
- Press MONO L/R.
- •LR: Accompaniment+ vocal A
- •L : Accompaniment only ☐
- •R : Vocal track only ©
- A
- B
- C
- Ising the Unit with Optional Accessories
- sing the unit with an audio
- -
- Concerning Compact Discs
- autions
- chargeable batteries
- y cell batteries/rechargeable series
- lying dry cell batteries/ chargeable batteries around
- When driving a car
- Precautions for Listening with the Headphones
- When purchasing rechargeable batteries
- For United Kingdom and Continental Europe
- Troubleshooting Guide
- pecifications
- aintenance
- Maintaining the unit
- Concerning the TV display
- Description of Terms
- Playback control:
- Menu ( playback control) playback:
- Regular playback:
- Track (number):
- Video index (number):
- Scene:
- If the TV screen is in the following condition
Brand : TECHNICS
Model : SL-VP50
Category : CD Player