
SB606 - Loudspeaker Campomatic - Free user manual and instructions
Find the device manual for free SB606 Campomatic in PDF.


| Product Type | Portable Bluetooth Speaker |
| Model | SB606 |
| Brand | Campomatic |
| Dimensions (W x H x D) | 200 x 100 x 100 mm |
| Weight | 0.85 kg |
| Power Source | Built-in rechargeable battery (3.7V, 1500 mAh) |
| Input Power | 5V DC via USB Type-C |
| Battery Life | Up to 10 hours at 50% volume |
| Charging Time | Approximately 2.5 hours |
| Wireless Connectivity | Bluetooth 5.0 |
| Wired Connectivity | 3.5 mm AUX input |
| Frequency Response | 100 Hz – 20 kHz |
| Output Power | 10 W RMS |
| Driver Size | 52 mm full-range |
| Controls | Power, Volume, Play/Pause, Bluetooth pairing, AUX |
| Microphone | Built-in for hands-free calls |
| Water Resistance | IPX5 (splash proof) |
| Material | Plastic with fabric mesh |
| Included Accessories | USB charging cable, AUX cable, user manual |
| Compatibility | Smartphones, tablets, laptops, MP3 players |
| Maintenance | Wipe with a soft dry cloth. Do not use harsh chemicals. |
| Safety | Keep away from heat sources and water. Do not disassemble. |
| Spare Parts | Available from Campomatic service centers |
| Repairability | Battery and speaker driver replaceable by qualified technician |
Frequently Asked Questions - SB606 Campomatic
User questions about SB606 Campomatic
0 question about this device. Answer the ones you know or ask your own.
Ask a new question about this device
Download the instructions for your Loudspeaker in PDF format for free! Find your manual SB606 - Campomatic and take your electronic device back in hand. On this page are published all the documents necessary for the use of your device. SB606 by Campomatic.
USER MANUAL SB606 Campomatic
natural_image
Black rectangular electronic device with textured body and label (no visible text or symbols)Made in China

This equipment has been designed and manufactured to meet international safety standards but, like any electrical equipment, care must be taken if you are to obtain the best results and safety is to be assured.
\*\*\*\*\*\*\*\*\*\*\*\*\*\*\*\*\*\*\*\*\*\*\*\*\*\*\*\*\*\*\*\*\*\*\*\*\*\*\*\*\*\*\*\*\*\*\*\*\*\*\*\*\*\*\*\*\*\*\*\*\*\*\*\*\*\*\*\*\*\*\*\*\*\*\*\*\*\*\*\*\*\*\*\*\*\*\*\*
DO read the operating instructions before you attempt to use the equipment.
DO ensure that all electrical connections (including the mains plug, extension leads and interconnections between the pieces of equipment) are properly made and in accordance with the manufacturer's instructions. Switch off and withdraw the mains plug before making or changing connections.
DO consult your dealer if you are ever in doubt about the installation, operation or safety of your equipment.
DO be careful with glass panels or doors on the equipment.
DO route the mains lead so that it is not likely to be walked on, crushed, chafed, or subject to excessive wear and tear or heat.
\*\*\*\*\*\*\*\*\*\*\*\*\*\*\*\*\*\*\*\*\*\*\*\*\*\*\*\*\*\*\*\*\*\*\*\*\*\*\*\*\*\*\*\*\*\*\*\*\*\*\*\*\*\*\*\*\*\*\*\*\*\*\*\*\*\*\*\*\*\*\*\*\*\*\*\*\*\*\*\*\*\*\*\*\*\*\*\*\*\*
DON'T remove any fixed cover as this may expose dangerous voltages.
DON'T obstruct the ventilation openings of the equipment with items such as newspaper,
tablecloths, curtains, etc. Overheating will cause damage and shorten the life of the equipment.
DON'T allow electrical equipment to be exposed to dripping or splashing, or objects filled with liquids, such as vases.
DON'T place hot object or naked fame sources such as lighted candles or night-lights on, or close to equipment. High temperatures can melt plastic and lead to fires.
DON'T use makeshift stands and NEVER fix legs with wood screws-to ensure complete safety always fit the manufacturer's approved stand or legs with the fixings provided according to the instructions.
DON'T use equipment such as personal stereos or radios so that you are distracted from the requirements of traffic safety.
DON'T listen to headphones at high volume, as such use can permanently damage your hearing.
DON'T leave equipment switched on when it is unattended unless it is specifically stated that it is designed for unattended operation or has a stand-by mode. Switch off by unplugging the equipment and make sure that your family know how to do this. Special arrangements may need to be made for infirm or handi-capped people.
DON'T continue to operate the equipment if you are in any doubt about it working normally, or if it is damaged in any way-switch off, withdraw the mains plug and consult your dealer.
ABOVE ALL,
- NEVER let anyone especially children push anything into holes, slots or any other opening in the equipment - this could result in a fatal electrical shock;
- NEVER guess or take chances with electrical equipment of any kind. It is better to be safe than sorry!
\*\*\*\*\*\*\*\*\*\*\*\*\*\*\*\*\*\*\*\*\*\*\*\*\*\*\*\*\*\*\*\*\*\*\*\*\*\*\*\*\*\*\*\*\*\*\*\*\*\*\*\*\*\*\*\*\*\*\*\*\*\*\*\*\*\*\*\*\*\*\*\*\*\*\*\*\*\*\*\*\*\*\*\*\*\*\*\*
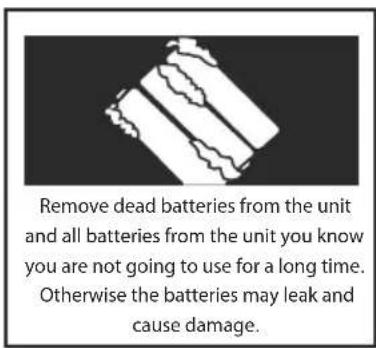
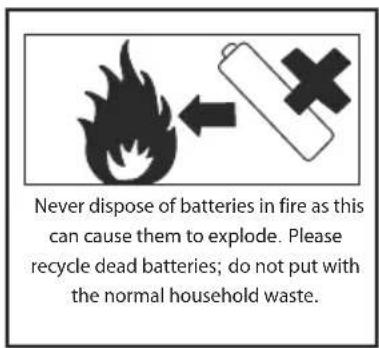
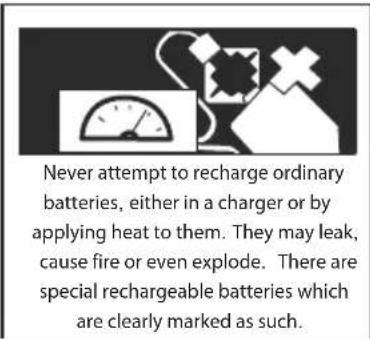
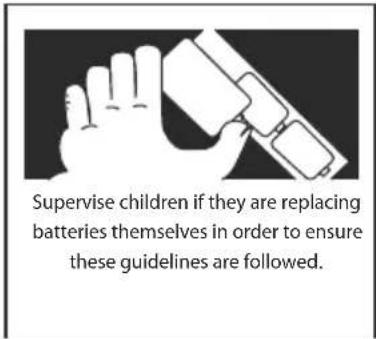
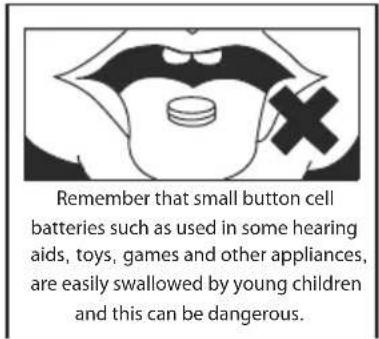
Used correctly, domestic batteries are a safe and dependable source of portable power. Problems can occur if they are misused or abused - resulting in leakage or, extreme cases, fire or explosion. Here are some simple guidelines to safe battery use designed to eliminate any such problems.
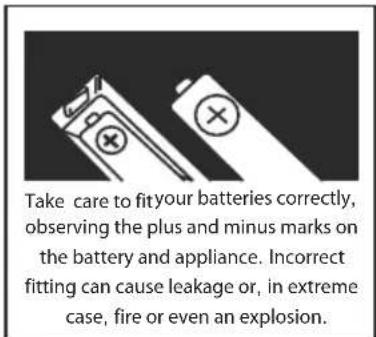
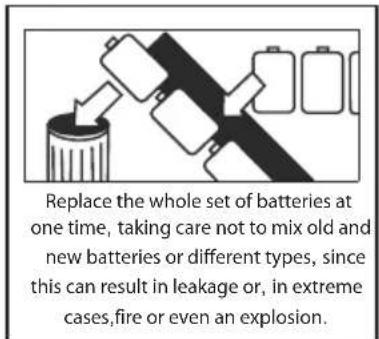
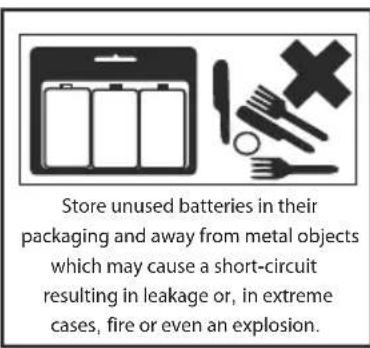
- Read all the instructions carefully before using the unit and keep them for future reference.
- Retain the manual. If you pass the unit onto a third party make sure to include this manual.
Check that the voltage marked on the rating label matches your mains voltage.
Damage
- Please inspect the unit for damage after unpacking.
- Do not continue to operate the unit if you are in any doubt about it working normally, or if it is damaged
- in any way - switch off, withdraw the mains plug and consult your dealer.
Location of Unit
- The unit must be placed on a flat stable surface and should not be subjected to vibrations.
- Do not place the unit on sloped or unstable surfaces as the unit may fall off or tip over.
- The mains socket must be located near the unit and should be easily accessible.
Temperature
- Avoid extreme degrees of temperature, either hot or cold. Place the unit well away from heat sources
• such as radiators or gas/electric fires. - Avoid exposure to direct sunlight and other sources of heat.
Naked Flames
- Never place any type of candle or naked flame on the top of or near the unit.
Moisture
- To reduce the risk of fire, electric shock or product damage, do not expose this unit to rain, moisture, dripping or splashing. No objects filled with liquids, such as vases, should be placed on the unit.
- If you spill any liquid into the unit, it can cause serious damages. Switch it off at the mains immediately. Withdraw the mains plug and consult your dealer.
Ventilation
- To prevent the risk of electric shock or fire hazard due to overheating, ensure that curtains and other materials do not obstruct the ventilation vents.
- Do not install or place this unit in a bookcase, built-in cabinet or in another confined space. Ensure the unit is well ventilated.
Safety
- Always disconnect the unit from the mains supply before connecting/disconnecting other devices or moving the unit.
- Unplug the unit from the mains socket before a lightning storm.
Mains Cable
- Make sure the unit or the unit stand is not resting on top of the mains cable, as the weight of the unit may damage the cable and create a safety hazard.
Interference
- Do not place the unit on or near appliances which may cause electromagnetic interference. If you do, it may adversely affect the operating performance of the unit, and cause a distorted picture or sound.
Batteries

WARNING
Do not ingest the battery, Chemical Burn Hazard•
- (The remote control supplied with) This product contains a coin/button cell battery. If the coin/button cell battery is swallowed, it can cause severe internal burns in just 2 hours and can lead to death.
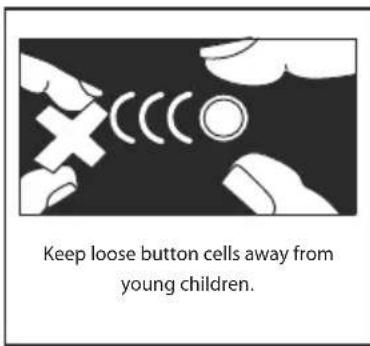
- Keep new and used batteries away from children.
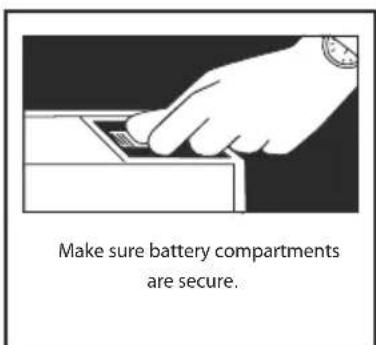
- If the battery compartment does not close securely, stop using the product and keep it away from children.
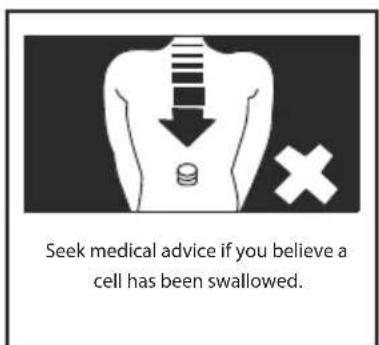
- If you think batteries might have been swallowed or placed inside any part of the body, seek immediate medical attention.
Supervision
- Children should be supervised to ensure that they do not play with the unit and the remote control.
- Never let anyone especially children push anything into the holes, slots or any other openings in the case - this could result in a fatal electric shock.



The lightning flash with arrowhead symbol, within an equilateral triangle, is intended to alert the user to the presence of uninsulated “dangerous voltage” within the unit’s enclosure that may be sufficient magnitude to constitute a risk of electric shock.

The exclamation point within an equilateral triangle is intended to alert the user to the presence of important operating and maintenance (servicing) instructions in the manual accompanying the unit.
Service
- To reduce the risk of electric shock, do not remove screws. The unit does not contain any user-serviceable parts. Please leave all maintenance work to qualified personnel.
- Do not open any fixed covers as this may expose dangerous voltages.
Maintenance
- Ensure the unit is fully unplugged from the power supply before cleaning.
- Do not use any type of abrasive pad or abrasive cleaning solutions as these may damage the unit's surface.
- Do not use liquids to clean the unit.
Important safety instructions
- The apparatus shall not be exposed to dripping or splashing and that no objects filled with liquids, as vases shall be placed on apparatus.
- Main plug is used as the disconnect device and it shall remain readily operable. To be completely disconnected the power input, the mains plug of the apparatus shall be disconnected from the mains completely.
- The mains plug of apparatus should not be obstructed or should be easily accessed during intended use.
- No naked flame sources such as lighted candles should be placed on the apparatus;
- Minimum distances 2cm around the apparatus for sufficient ventilations;
- The ventilation should not be impeded by covering the ventilation openings with items, such as newspaper, table-cloths, curtains, etc;
- The use of apparatus in moderate climates;
- The marking plate is located at the back (or bottom) of the apparatus;
- CAUTION: Danger or explosion if battery is incorrectly replaced. Replace only with the same or equivalent type.
- Battery shall not be exposed to excessive heat such as sunshine, fire or the like.
- Attention should be drawn to the environmental aspects of battery disposal;
- Excessive sound pressure from earphones and headphones can cause hearing loss.
- ESD remark: In case of malfunction due to electrostatic discharge, just reset the product to resume normal operation by user.
Some Dos and Don'ts On The Safe Use Of Equipment....1
Battery Safety Guidelines....2
Safety Warnings....3
Product Overview....6
Top view....6
Front view....6
Back view....6
Remote Control....7
Remote Control Battery Replacement 8
Battery Installation....8
Remote Control Operation Range....8
Wall Mounting....9
Connections....10
Connect Power....10
Digital inputs connection....11
Analogue inputs connection....12
GeneraOperation....13
Standby/ON....13
Select the Play Mode.... 13
Adjust the Volume.... 13
Select the Sound Effect.... 13
AUX/AUDIO IN/COAXIAL/OPTICAL OPERATION....13
Operation....14
Bluetooth Operation....14
USB Charging....14
Trouble shooting....15
Specifications....16
Standard Accessories....16
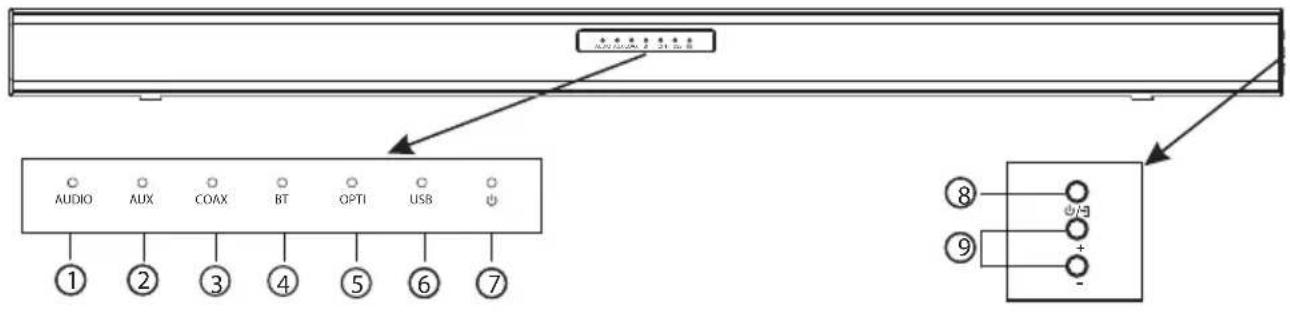
Front view
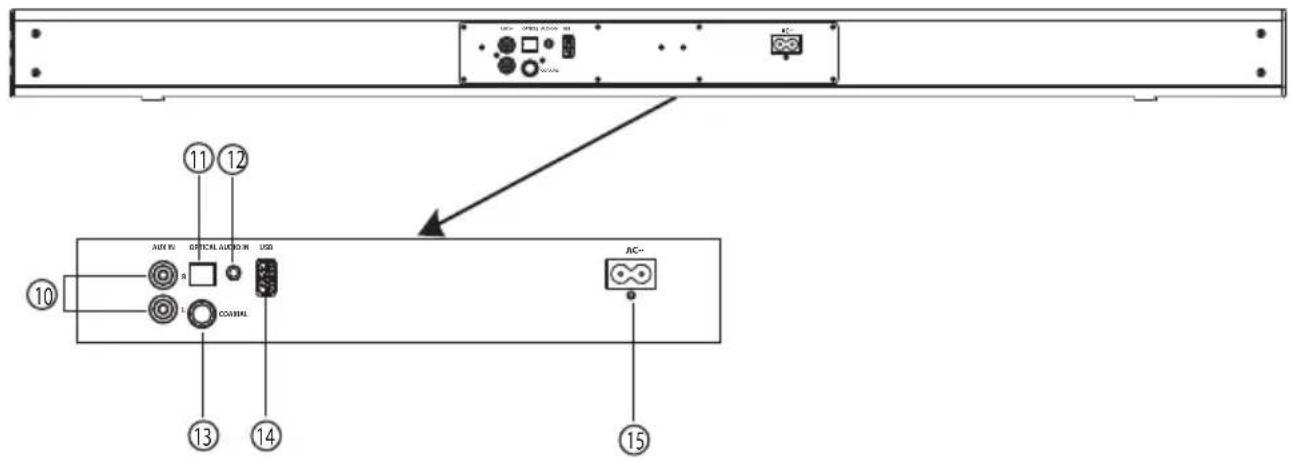
Back view
- AUDIO indicator
- AUX indicator
- COAXIAL indicator
- BT indicator
- OPTICAL indicator
- USB indicator
- Power indicator(Standby & On)
-
⏻/→
-
Press and hold for power on/off.
-
Press to change source.
-
VOL+/VOL-
- Increase/decrease the volume level.
- AUX IN (L/R) socket
- OPTICAL socket
- AUDIO IN socket
- COAXIAL socket
- USB socket
a USB stoCagendevice.
- Recharge for mobile device.
- AC Power socket (AC \~)
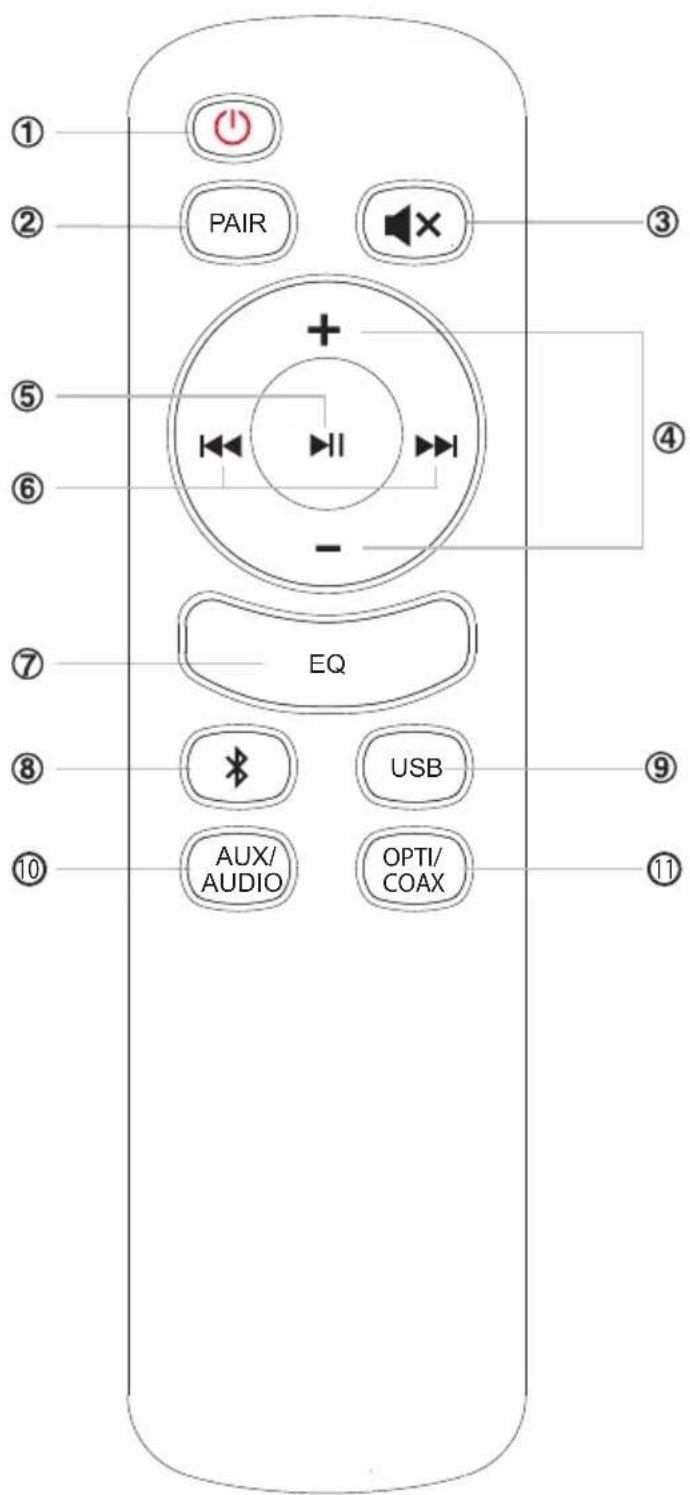
1. ⏻
- Switch the unit between ON and STANDBY modes.
2. PAIR
- Press and hold the button to activate the pairing function in Bluetooth and/or disconnect the existing paired Bluetooth device.
3.
- Mute or resume the sound.
- VOL+/VOL-
- Increase/decrease the volume level.
5.
- Play/pause in Bluetooth and USB.
6. /
• To select previous/next track in Bluetooth and USB.
7. EQ
- Select a preset sound effect. Default EQ is MUSIC, press to switch to NEWS, NORMAL and MUSIC as recycle.
8.
- Press repeatedly to switch audio source to Bluetooth.
9. USB
- Press repeatedly to switch audio source to USB.
10. AUDIO/AUX
- Press repeatedly to switch audio source to AUDIO and AUX(L/R).
11. OPTI/COAX
- Press repeatedly to switch audio source to OPTICAL and COAXIAL.
- Replace the remote control battery when it no longer operates the unit, or the range is reduced considerably.
- Use only CR2025 3V lithium battery.
- Bear in mind that lighting & other room, conditions, in addition to battery age, can affect the operating range of an infrared remote control.
- Battery disposal:
Batteries and rechargeable batteries are prohibited to dispose into household waste.
Battery Installation
- Remove the battery compartment cover. 2. Insert the battery following the correct polarity.
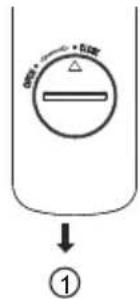
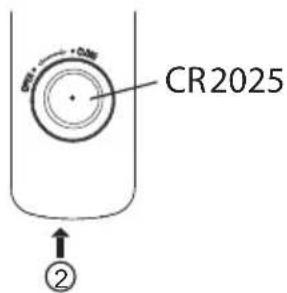
Remote Control Operation Range
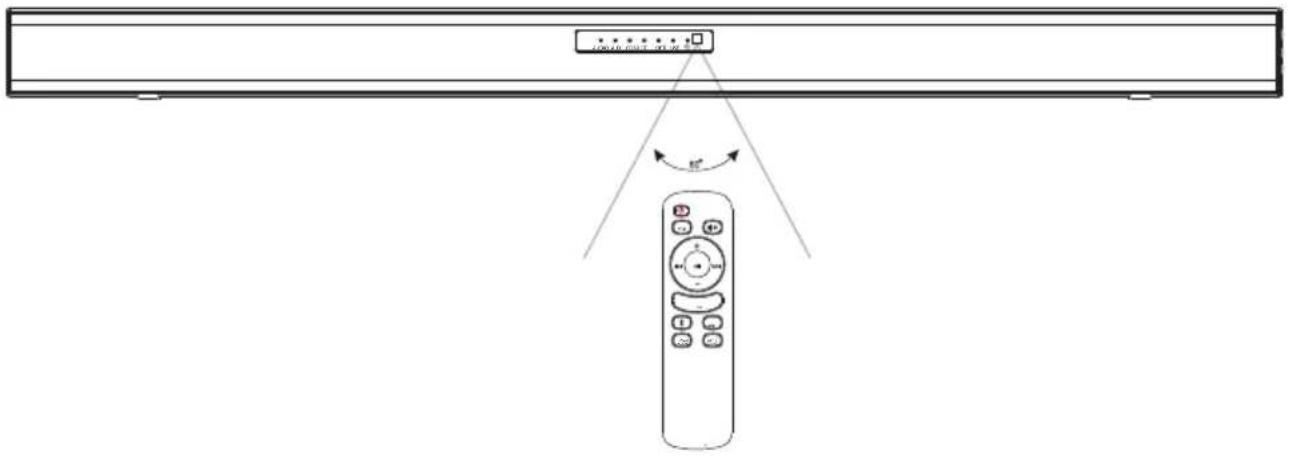
- The remote control sensor on the front unit is sensitive to the remote control's commands up to a maximum of 5 metres away and within a maximum of a 60^ arc.
- Please note that the operating distance may vary depending on the brightness of the room.
Note
Assembly is required. Installation must be carried out by qualified personnel only. Incorrect assembly can result in severe personal injury and property damage (if you intend to install this product yourself, you must check for installations such as electrical wiring and plumbing that may be buried inside the wall). The supplied wall brackets are only for use on vertical walls constructed from solid brick, solid concrete, solid wood, and solid wooden battens. It is the installer's responsibility to verify that the wall will safely support the total load of the Soundbar and wall brackets. Additional tools (not included) are required for the installation. Do not overtighten screws. Keep this instruction manual for future reference.
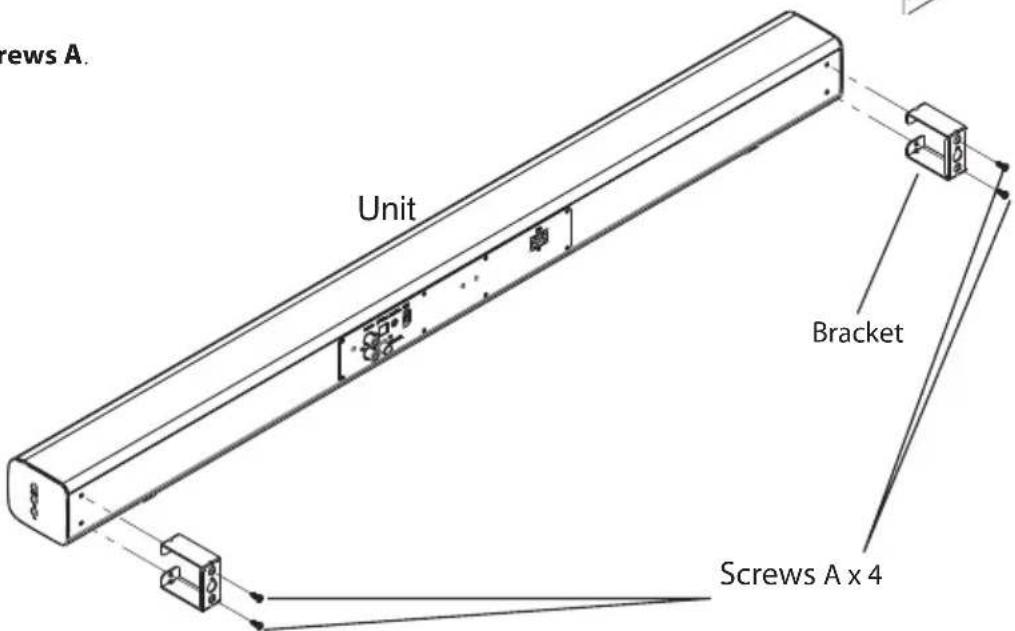
1.Parts
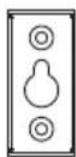
Bracket x 2
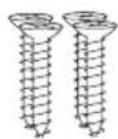
Screws A x 4
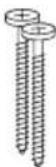
Screws B x 2
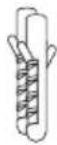
Dowels B x 2
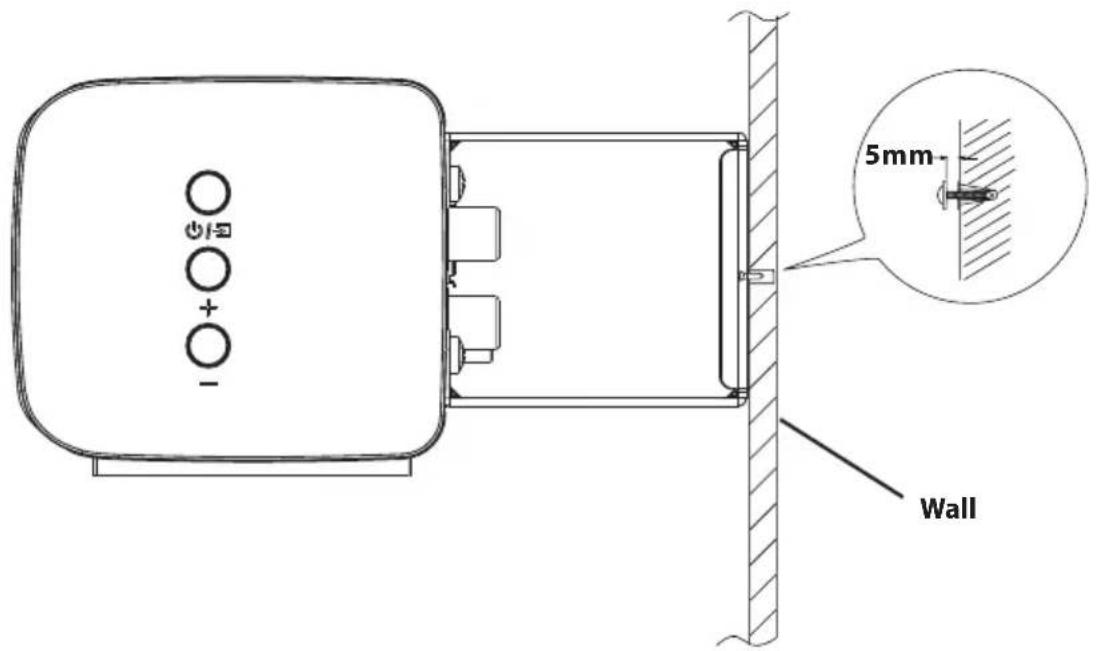
2. Drill holes, install dowels B x 2, screws B x 2.
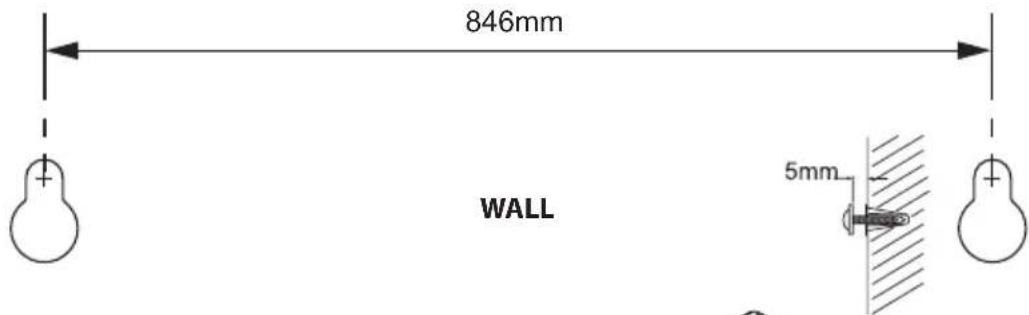
3. Install screws A.
4. Hang the unit.
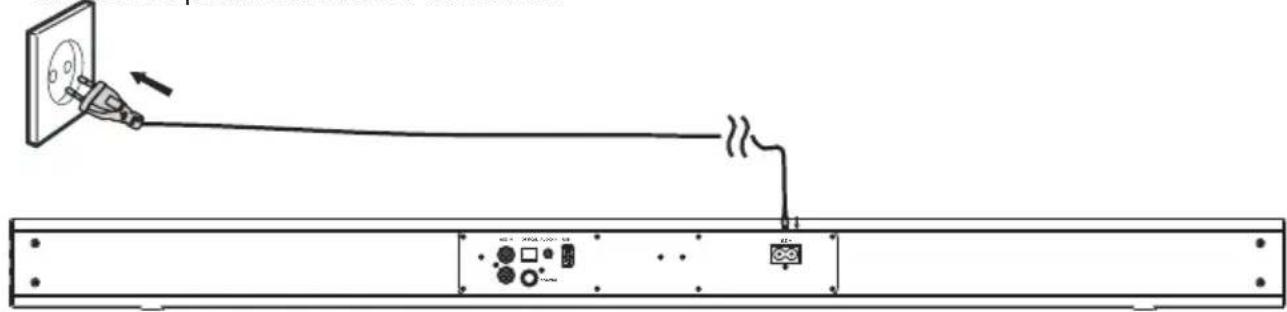
Connect Power
Caution:
- Risk of product damage! Ensure that the power supply voltage corresponds to the voltage printed on the rating label on the back or on the underside of the unit.
- Before connecting the power cable, ensure that you have completed all the other connections.
- Be sure to unplug the power cable from the outlet when the system is not in use for an extended period of time.
- Connect the power cable to the wall socket.
Digital inputs connection
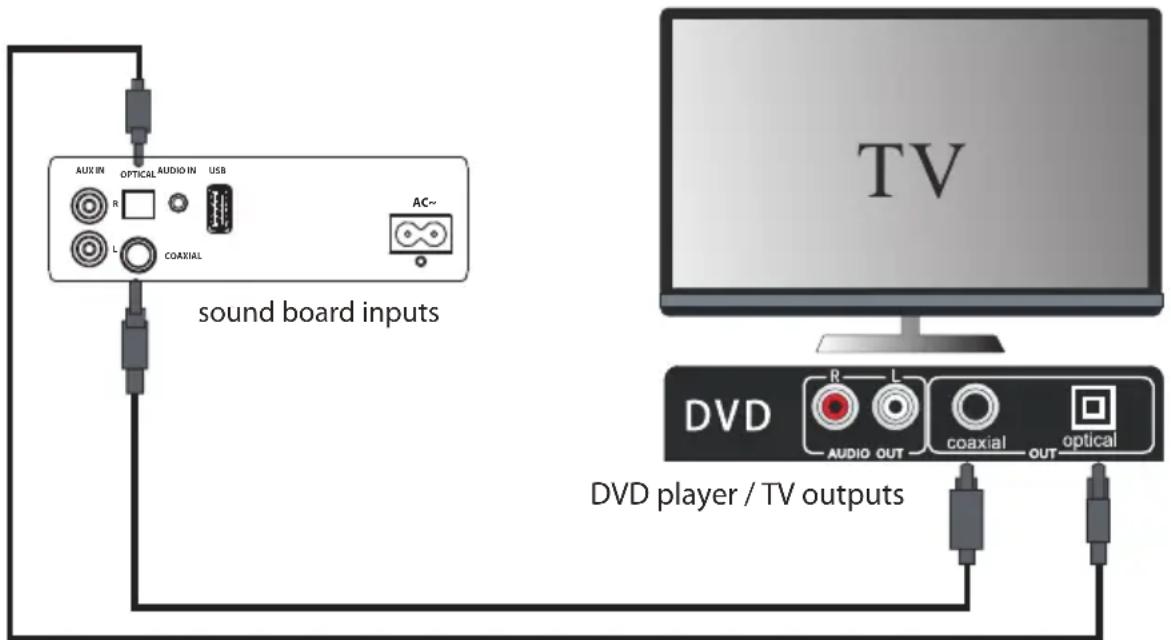
Connecting DVD player/TV outputs to digital inputs from the sound board.
- Remove the protective cap of the OPTICAL socket. Use the optical cable (Not supplied) to connect the OPTICAL output socket from the DVD player/TV with the input socket from the sound board.
- Use the COAXIAL cable (Not supplied) to connect the COAXIAL output socket from the DVD player/TV with the input socket from the sound board.
Tip
If there is no sound coming out of the sound board and the indicator lights up make sure that the audio setting of your source player(e.g.DVD player, game player, TV) is set to PCM with COAXIAL input.
If there is no sound output and the OPTICAL indicator lights up, ensure that the audio setting of the input source(e.g.TV,game console, DVD player, TV) is set to PCM with OPTICAL input.
Analogue inputs connection
Connecting DVD player/TV outputs to analogue inputs from the sound board.
- Use a RCA audio cable to connect the DVD player/TV outputs with the AUX(L/R) input socket from the sound board.
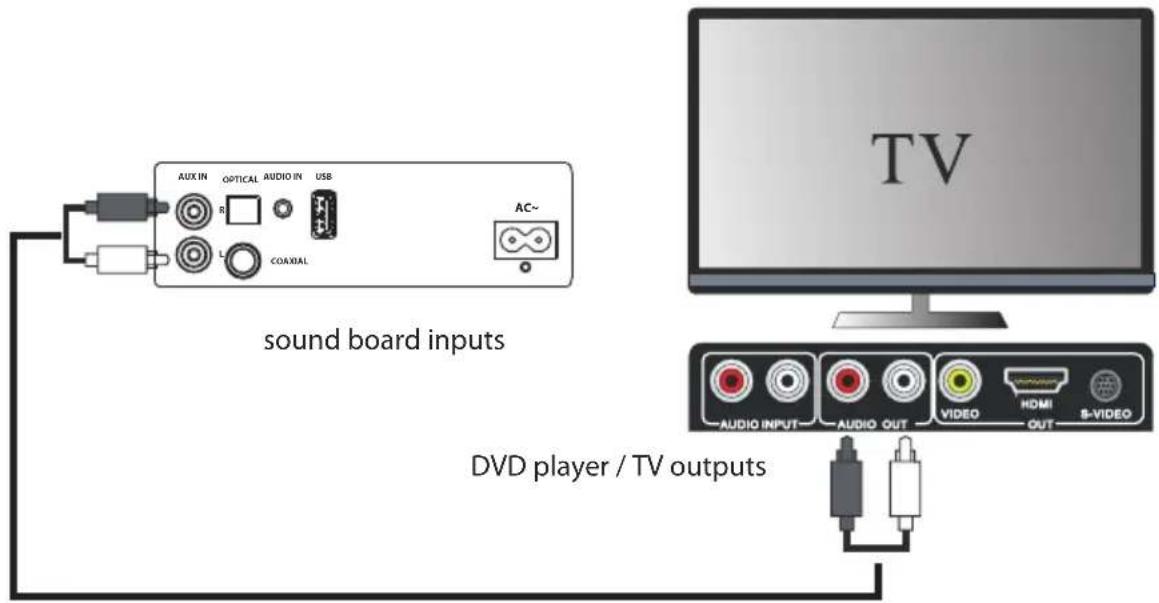
Connecting DVD player/TV outputs to analogue inputs from the sound board.
- Use a 3.5mm line-in cable (Not supplied) to connect the DVD player/TV outputs with the AUDIO input socket from the sound board.
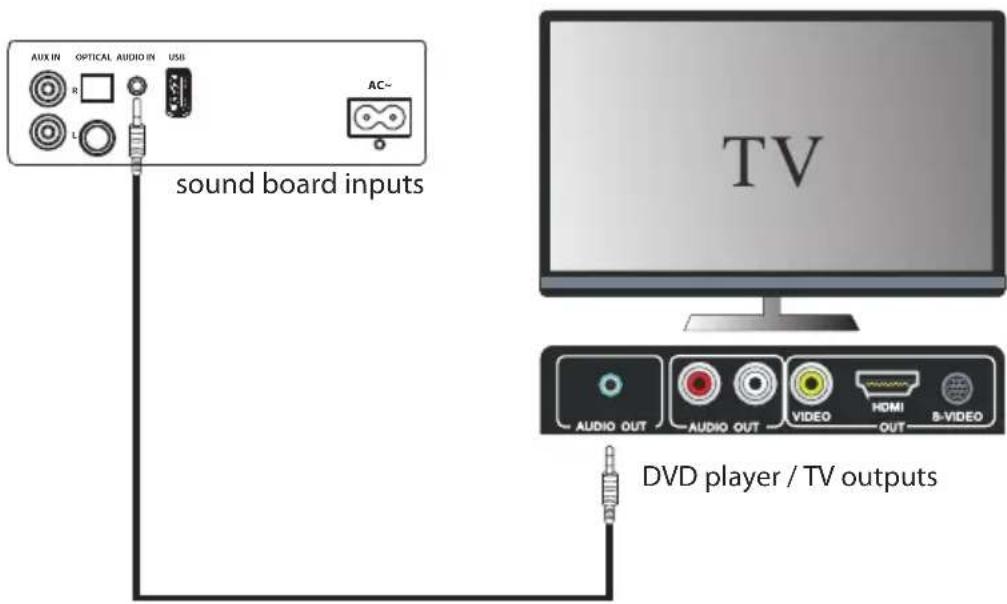
Standby/ON
When you connect the unit for the first time to the mains socket, the unit is activated to ON mode automatically.
- Press the ⏻ button on the remote control or press and hold the ⏻/→ on the unit to switch the main unit to STANDBY mode, the POWER indicator will light to red.
- Press the ⏻ button on the remote control again to switch the or press and hold the on the unit unit back to ON mode, and the POWER indicator will light to Green.
- Disconnect the mains plug from the main socket if you want to switch OFF the unit completely.
Select the Play Mode
Press repeatedly the ⏻/∃ button on the unit to switch between Bluetooth, USB, OPTICAL, OPTICAL, AUDIO and AUX(L/R). Alternatively press the ✗, USB, OPTI, COAX, AUDIO and AUX button on the remote control to select the desired source.
Adjust the Volume
- Press the VOL +/- buttons to adjust the volume.
- If you want to turn off the sound, press the ◀× button on the remote control. Press the ◀× button again or press the VOL+/- button to resume normal listening.
Noted please, if you adjusted volume above 26, then power off and power on again, volume will restored to factory setting automatically.
Select the Sound Effect
The default Sound Effect is MUSIC. While playing, press EQ button on the remote control to switch to NEWS, NORMAL and MUSIC as recycle.
- Press repeatedly the ⏻/∃ button on the unit or press alternatively the AUX, AUDIO, COAX and OPTI button on the remote control to select the desired source.
- Operate your audio device directly for playback features.
- Press the VOL +/- button to adjust the volume to your desired level.
Bluetooth Operation
You can listen to tracks from a media device if it is connected to the unit via BT.
Pair Bluetooth -enabled Devices
You need to pair your BT device with this unit before you connect them for the first time.
Note:
- The operational range between this unit and a Bluetooth device is approximately 10 meters (without any object between the Bluetooth device and the unit).
- Before you connect a Bluetooth device to this unit, ensure that you know the device's capabilities.
- Any obstacle between this unit and the device can reduce the operational range. Bluetooth
-
If the signal strength is weak, your device may disconnect, but it will re-enter Bluetooth automatically into pairing mode.
-
During ON mode, press the ✗ button on the remote control to select the Bluetooth mode.
If the unit is not paired to any Bluetooth device, the system enters automatically into pairing mode;
or you need to press and hold the PAIR button to start pairing. - Activate the Bluetooth function on your device and select the search mode.
" will appear on your BT device." Campomatic SB606
- Select "Campomatic SB606" in the pairing list.
Tips:
- If there is already an existing connection, press the PAIR button on the remote control to re-activate the pairing mode. The existing connection will be interrupted.
- The unit will also be disconnected when your device is moved beyond the operational range.
- If you want to reconnect your device to this unit, place it within the operational range.
- If the device is moved beyond the operational range, when it is brought back, please check if the device is still connected to the unit.
- If the connection is lost, follow the above instructions to pair your device again to this unit.
USB Charging
You can plug an USB cable in USB socket to charge the mobile device. Output voltage and current is 5V/500mA.
Important note:
This device is equipped with an energy saving mode: if no signal is given during 19 minutes the device will switch automatically into standby mode in order to save energy (ERP 2 standard). Please note that low volume setting in the audio source may be recognized as “no audio signal”: this will affect the capability of signal detection from the device and can also originate an automatic switch into standby mode. If this happens please reactivate the audio signal transmission or increase the volume setting on the audio source player (MP3 player, etc.), in order to resume playback. Please contact the local service center if the problem remains.
Troubleshooting
To keep the warranty valid, never try to repair the system by yourself. If you encounter problems when using this unit, check the following points before requesting service.
No power
- Ensure that the mains cable is connected securely.
- Make sure that the unit is switched on.
The remote control does not function
- Use the remote control near to the unit.
- Point the remote control at the remote control sensor on the unit.
- Replace the batteries in the remote control with new ones.
- Remove any obstacles between the remote control and the unit.
Loud hum or noise is heard
- The plugs and sockets are dirty. Wipe them with a cloth slightly moistened with an appropriate non-abrasive cleaning solution.
The unit does not respond when pressing any buttons
- The unit may freeze up during use. Switch off and then switch on the unit again at the mains socket to reset it.
No Sound or subwoofer poor sound
- Make sure that the unit is not muted. Press × or VOL + to resume normal listening.
- Ensure that the audio setting of the input source (e.g. TV, game console, DVD player, etc.) is mode while using Optical connection.set to PCM
I can't find the Bluetooth name of this unit on my Bluetooth device for Bluetooth pairing
- Ensure that the unit is switched on.
- Ensure that the Bluetooth function is activated on your Bluetooth device.
- The unit has a Bluetooth function that can receive a signal within 10 metres. Keep a distance within 10 meters both devices.
The unit switches off automatically during playing
- Please increase the volume level on your input source player like DVD player/T V ect.
Power supply: AC100-240V\~50/60Hz
Power consumption: xxW
Power consumption(standby mode): < 0.5W
Total harmonic distortion: < 1%(1kHz, 1W)
Audio input sensitivity: 500mV
Frequency response: 40Hz - 20kHz
Speaker impedance: 4Ohm x 2
Dimensions: 880 x 60.5 x 68.5mm
Bluetooth
Bluetooth version: V2.1
Work range: approx.10metres
Transmission frequency: 2.402\~2.480GHz
Protocols: A2DP/AVRCP
Standard Accessories
| Remote Control | x 1pc |
| Instruction Manual | x 1pc |
| RCA cable (White & Red) | x 1pc |
| Power cord | x 1pc |
| Bracket | x 2pcs |
| Screws A | x 4pcs |
| Screws B | x 2pcs |
| Dowels B | x 2pcs |
- \*\*\*\*\*\*\*\*\*\*\*\*\*\*\*\*\*\*\*\*\*\*\*\*\*\*\*\*\*\*\*\*\*\*\*\*\*\*\*\*\*\*\*\*\*\*\*\*\*\*\*\*\*\*\*\*\*\*\*\*\*\*\*\*\*\*\*\*\*\*\*\*\*\*\*\*\*\*\*\*\*\*\*\*\*\*\*\*
- \*\*\*\*\*\*\*\*\*\*\*\*\*\*\*\*\*\*\*\*\*\*\*\*\*\*\*\*\*\*\*\*\*\*\*\*\*\*\*\*\*\*\*\*\*\*\*\*\*\*\*\*\*\*\*\*\*\*\*\*\*\*\*\*\*\*\*\*\*\*\*\*\*\*\*\*\*\*\*\*\*\*\*\*\*\*\*\*\*\*
- ABOVE ALL,
- Damage
- Location of Unit
- Temperature
- Naked Flames
- Moisture
- Ventilation
- Safety
- Mains Cable
- Interference
- Batteries
- WARNING
- Supervision
- Service
- Maintenance
- Important safety instructions
- ⏻
- PAIR
- 3.
- 5.
- /
- EQ
- 8.
- USB
- AUDIO/AUX
- OPTI/COAX
- Note
- 1.Parts
- Drill holes, install dowels B x 2, screws B x 2.
- Install screws A.
- Hang the unit.
- Connect Power
- Caution:
- Digital inputs connection
- Tip
- Analogue inputs connection
- Standby/ON
- Select the Play Mode
- Adjust the Volume
- Select the Sound Effect
- Bluetooth Operation
- Pair Bluetooth -enabled Devices
- Note:
- Tips:
- USB Charging
- Important note:
- Troubleshooting
- No power
- The remote control does not function
- Loud hum or noise is heard
- The unit does not respond when pressing any buttons
- No Sound or subwoofer poor sound
- I can't find the Bluetooth name of this unit on my Bluetooth device for Bluetooth pairing
- The unit switches off automatically during playing
- Bluetooth
Brand : Campomatic
Model : SB606
Category : Loudspeaker