
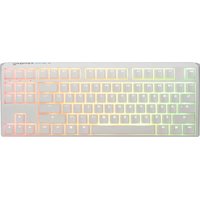
2017 YOTR - Keyboard Ducky - Free user manual and instructions
Find the device manual for free 2017 YOTR Ducky in PDF.


| Product Type | Mechanical Keyboard |
| Brand | Ducky |
| Model | 2017 YOTR (Year of the Rooster) |
| Layout | Full-size (104 keys) |
| Dimensions (approx.) | 440 x 140 x 40 mm |
| Weight (approx.) | 1.2 kg |
| Connection | USB Type-A |
| Cable Length | 1.8 m |
| Switch Type | Cherry MX (color varies by edition) |
| Backlighting | RGB per-key lighting |
| Keycap Material | Double-shot PBT |
| N-Key Rollover | Full NKRO over USB |
| Programmable Macros | Yes (via DIP switches or software) |
| Polling Rate | 1000 Hz |
| Onboard Memory | Yes (for lighting profiles) |
| Compatibility | Windows, macOS, Linux |
| Cleaning | Use compressed air and damp cloth; avoid solvents |
| Safety | Keep away from liquids; unplug during cleaning |
| Spare Parts | Replacement keycaps and switches available |
| Repairability | Switches are solderable; disassembly requires screwdriver |
| Warranty | 2 years limited |
Frequently Asked Questions - 2017 YOTR Ducky
User questions about 2017 YOTR Ducky
0 question about this device. Answer the ones you know or ask your own.
Ask a new question about this device
Download the instructions for your Keyboard in PDF format for free! Find your manual 2017 YOTR - Ducky and take your electronic device back in hand. On this page are published all the documents necessary for the use of your device. 2017 YOTR by Ducky.
USER MANUAL 2017 YOTR Ducky
Year of the Rooster Edition
Year of the Rooster Edition
• Model: DKYOTR2017
• Type: Mechanical Keyboard
Switch:
Cherry MX RGB Switches
- Interface: USB 2.0
• Simultaneous key output: USB N-Key Rollover (NKRO)
• LED: RGB Color LED
• Keycap material: PBT or ABS
• Legend printing: Double-Shot or Laser engraving
• Dimensions: 440 x 135 x 40 mm
• Weight: 1.1kg
• Origin of Production: Taiwan
For keyboard's specs and details, please contact our local distributors.


USB Repeat Acceleration
Note:
This feature allows users to adjust the repeat delay and repeat rate under USB. USB Repeat Acceleration may work differently in different applications. Please use a suitable setting accordingly. USB Repeat Acceleration can only be adjusted under "Function Mode."
| Fn + = | Esc | Function Mode On/Off | Must Hold for 3 sec |
| F1 | Repeat Delay 1x (Default) | Adjust USB Repeat Delay Time. | |
| F2 | Repeat Delay 2x | ||
| F3 | Repeat Delay 4x | ||
| F4 | Repeat Delay 8x | ||
| Alt+F1 | Repeat Rate 1x (Default) | Adjust USB Repeat Delay Time. | |
| Alt+F2 | Repeat Rate 2x | ||
| Alt+F3 | Repeat Rate 4x | ||
| Alt+F4 | Repeat Rate 8x |
- Note: USB Repeat Acceleration may work differently in different applications. Please use a suitable setting accordingly.
Single Color LED Lighting Modes
Note: Ducky Year Of The Rooster using a three-color RGB LED light, through Ducky Backlit technology that allows users to mix basis Red (R), Green (G), Blue (B) with a brightness of different colors, a combination of three colors that beyond performance. Here "Single Color LED Lighting Modes", represents a mix of single-color performance via RGB primary colors, dose not mean Only one type of color effect.
Fn + F9
First Mode: 100% Full Backlight mode
Second Mode: Breathing Mode
Third Mode: Wave Mode
Fourth Mode: Snake Marquee Mode
Fifth Mode: Reactive Mode
Sixth Mode: Ripple Mode
Seventh Mode: Aurora Mode
Eighth Mode: Backlighting Off
Single Color LED Lighting Modes
Note: Ducky Year Of The Rooster using a three-color RGB LED light, through Ducky Backlit technology that allows users to mix basis Red (R), Green (G), Blue (B) with a brightness of different colors, a combination of three colors that beyond performance. Here "Single Color LED Lighting Modes", represents a mix of single-color performance via RGB primary colors, dose not mean. Only one type of color effect.
Fn + F9
- The backlighting modes above can be adjusted using the following:
◆ Fn + F5 : Adjust Color (R) brightness. 10 levels.
♦ Fn + F6 : Adjust Color (G) brightness. 10 levels.
◆ Fn + F7 : Adjust Color (B) brightness. 10 levels. - Fn + F8 : Erase Red, Green and Blue color setting.
- Fn + Spacebar (Color Palette): Activate Color Palette to display 104 different colors, press to select the color you pick to complete setting.
- Fn + ← : Decrease speed.
- Fn + → : Increase speed
- Hold Fn + F9 for 3 seconds to turn off all backlighting (including CM1 and CM2)
RGB LED Blending Modes
Note: Ducky Year Of The Roosterusing a three-color RGB LED light, through Ducky Backlit technology that allows users to mix basis Red (R), Green (G), Blue (B) with a brightness of different colors, a combination of the three colors that beyond performance. Here “RGB LED Blending Modes” express via RGB LED provide three kinds of colors, a variety of automatic mixing color effect.
Fn + F10
First Mode: Color Cycling Mode
Second Mode: Wave Mode
Third Mode: Snake Marquee Mode
Fourth Mode: Rain Drop Mode
Fifth Mode: Reactive Mode Advanced
Sixth Mode: Ripple Mode
Seventh Mode: Aurora Mode
Eighth Mode: Backlighting Off
- All above modes can be user adjusted with the following key sequence.
◆ Fn + ← : Decrease speed.
◆ Fn + → : Increase speed.
- Hold Fn + F10 for 3 seconds to turn off all backlighting (including CM1 and CM2)
LED Zone Customization Mode
Note: Ducky Year Of The Rooster uses Ducky's patent backlighting memory technology. User customi- zable Backlight with 2 configurable profiles. In addition, the customized zones be set to Breathing Mode. The keyboard can be set to exactly how users want their backlight to behave.
| Fn + F11 | CM1 Cycle:First step: Turn on user customized zone and color.Second step: Breathing of user customized zone.Third Step: Turn off CM1 |
| Fn + F12 | CM2 Cycle:First step: Turn on user customized zone and color.Second step: Breathing of user customized zone.Third Step: Turn off CM2 |
| Fn + PrtSc | REC1 record CM1 setting |
| Fn + Pause | REC2 record CM2 setting |
| Caps Lock + F5 / F6 / F7 | Set up Red/ Green/ Blue LED Color |
| Caps Lock + F8 | Erase all LED light |
| Caps Lock + Scroll Lock | REC Over |
LED Zone Customization Mode
Note: Ducky Year Of The Rooster uses Ducky's patented backlighting memory technology. This mode provides 2 sets of memory, allowing you to customize individual key's backlighting. In addition, the customized zones be set to Breathing Mode. The keyboard can be set to exactly how users want their backlight to behave.
- Important:
- Adjust to the brightness first, then set the individual key to be set to that color.
- Recording steps
- Press Fn + PrtSc to record CM1, and Press Fn + Pause to record CM2.
- When start recording mode, Caps Lock will display the current LED brightness. The brightness can be adjusted by hitting Caps Lock + F5/F6/F7/F8. After setting the desired brightness, hit any key on the keyboard will set that key to the selected brightness.
- Repeating the above steps allow the user to set Ducky Year Of The Rooster with different colors to different keys. If the key have been set, press again to cancel the setting.
- To finish recording, press REC Over (Caps Lock + Scroll Lock) function to finish recording, the Brightness of the Caps Lock key is the value you set.
Note:
- Entering the recording mode will display the previously saved setting.
If no changes are made within 30 seconds in the recording mode, the recording session will terminated without saving.
CM1 and CM2 can be turned on along with other lighting modes. CM1 has the priority over CM2 when the zone overlaps.
DEMO Mode
This mode will not send any keycodes and will not function as a keyboard.
Please unplug and plug the keyboard to restart the keyboard in normal keyboard mode.
Hold Left Ctrl + Left Shift + Caps Lock then plug the keyboard into power source.
DEMO mode for the store window to showcase
Fn + Alt + Ctrl for 3 sec
Hold ON/OFF display Single LED, Cycling, Wave, Snake Marquee, Aurora and Ripple Mode.
Windows Lock Feature
- Fn + any Alt + any Windows key Hold for 3 seconds, the keyboards backlit will flash 3 times to indicate the keyboard that have been turn ON/OFF (default).
Keyboard power mode
USB 3.0 Power Mode(Default)
USB 2.0 Power Mode
Hold Right Alt + spacebar and plug-in USB port
Hold Left Alt + spacebar and plug-in USB port
Reset to Factory Defaults
| US ANSI & EU ISO Layout | Left + Windows key+ Right Windows key |
| JP JIS Layout | Fn + Left Windows key |
- Hold for 3 seconds. The keyboard's backlighting will flash 3 times to indicate the keyboard have been reset.
DIP Switch Functions
- For compatibility with KVM or operating systems that does not support N-Key Rollover (NKRO), it is recommended to switch to 6-Key Rollover (6KRO) mode.
- Keep the keyboard unplugged for 15 seconds after switching between NKRO and 6KRO mode before plugging the keyboard into the USB port.
- Ducky Year Of The Rooster cannot be upgraded under 6KRO. Please keep the keyboard in NORO mode (default) to upgrade the firmware.
DIP1\~DIP3 to decide Where FN locate
(Default is OFF、OFF、OFF):
▲ Show the original status when user PRESS it
▲ Add time interval manually
■ Implementation:
▲ When the key PRESS, start to run Macro
▲ PRESS to insert Macro repeatedly until PRESS again to stop
▲ Repeat to insert Macro while PRESS the key
▲ When the key PRESS, start to run Macro
▲ PRESS to insert Macro repeatedly until PRESS again to stop
▲ Repeat to insert Macro while PRESS the key
Unable to set Macro function:
• Fn
- Fn + ESC
- Fn + F1\~F12
- Fn + Print Screen
- Fn + Scroll Lock
- Fn + Pause
- Fn + 0\~9
- Fn + Ctrl
- Fn + Alt
- Fn + windows
- Fn + ↑ ↓ ← →
- Fn + Space
Ducky Macro hotkeys function
Switch profiles
| Fn + | 1 | = | Switch to profile 1 | Default Key function (Default) |
| 2 | Switch to profile 2 | Customize MacroKey Features | ||
| 3 | Switch to profile 3 | |||
| 4 | Switch to profile 4 | |||
| 5 | Switch to profile 5 | |||
| 6 | Switch to profile 6 |
- Lighting effects: After the configuration, the Caps Lock key will start flashing the value number that you configured.
- Only Profile 2\~6 can be set for Macro.
Reset Macro setting for single profile
| US ANSI & EU ISO Layout | HOLD Any Windows key + Spacebar for 3 second |
| JP JIS Layout | HOLD Left Windows key + Spacebar for 3 second |
Ducky Macro hotkeys function
Macro implementation option
| Fn + | Q | = | When the key PRESS, start to run Macro |
| W | PRESS to insert Macro repeatedly until PRESS again to stop | ||
| E | Repeat to insert Macro while PRESS the key |
Macro Record Option
| Fn + | 1 | = | 0.02s |
| 2 | 0.1s | ||
| 3 | 0.2s | ||
| 4 | 0.4s | ||
| 5 | 0.8s | ||
| 6 | 1s |
- Note: Default Macro function will be based on the user's typing speed and record it.
- Macro Open/ Shortcut keys recording: Hold Fn + Ctrl for 3 sec.
Multimedia function keys
In addition to replacing the character with the Macro output outside, Ducky offer more options for each button, including multimedia and mouse function keys that up to 24 different kinds of multimedia features.
Enter the button below to set key combination to activate the function.
| Fn + Windows key + Keys below | |||
| A | Mute | M | Search |
| B | Volume up | N | Previous page |
| C | Volume down | O | Next page |
| D | Play/ Pause | P | Mouse Left Click |
| E | Stop | Q | Mouse Right Click |
| F | Next playlist | R | Mouse Middle Click |
| G | Previous playlist | S | Mouse Cursor Up |
| H | Calculator | T | Mouse Cursor Down |
| I | My computer | U | Mouse Cursor Left |
| J | Browser | V | Mouse Cursor Right |
| K | W | Mouse Scroll Up | |
| L | Multimedia | X | Mouse Scroll Down |
• Note: This is Ducky Macro V2.0 new features.

- Note: Due to different languages would have slightly different configuration for layout, this is set to based on US ANSI layout for configure.
Windows common function keys
Hotkeys can be used in conjunction with comb -ination of windows keys to complete a task. This is a reference to the most used hotkeys only, please refer to Microsoft website for more detail.
| Windows common function keys | |||
| Ctrl + C | Copy select item | Windows + D | Desktop |
| Ctrl + X | Cut select item | Windows + M | Minimized all windows |
| Ctrl + V | Paste select item | Windows + L | Lock computer or change user |
| Ctrl + Z | Undo | Windows + R | Open [RUN] window |
| Ctrl + Y | Redo | Windows + F | Search files or folders |
| Ctrl + N | Open new file | Windows + ↑ | Maximized all windows |
| Ctrl + O | Open current file | Windows + ↓ | Minimized windows |
| Ctrl + S | Save file change | Windows + ← | Maximized window to the left side |
| Ctrl + P | Print file | Windows + → | Maximized window to the right side |
| Alt + F4 | Quit the software | Windows + Home | Minimized all windows other than the one used |
- http://windows.microsoft.com/en-us/windows/keyboard-shortcuts
Ducky Macro Implication Diagram

flowchart
graph TD
    A["Start Macro Setting"] --> B["Hold Fn + Ctrl for 3 sec"]
    B --> C["Keys with Macro configuration will light up and the caps lock key will flash slowly"]
    C --> D["Press and change the key that you wish to do Macro function"]
    D --> E{The key have not been set for Macro}
    E -->|Yes| F["Insert Macro function to key to change including Replace keycode, continuous Macro output, Multimedia function\n• Caps Lock flashing quickly\n• Only the key that is to be configured will light up"]
    E -->|No| G["Press Fn + q/ w/ e to Macro function, if no selections is to be made Press\nFn + q to go back to default\n• Caps Lock flashing quickly\n• Only the key that is to be configured will light up"]
    G --> H{Finish or Continue Macro Setting}
    H -->|Yes| I["Finish Macro Setting"]
    H -->|No| J["Fn+Alt"]
    I --> K["Finish Macro Setting"]
    J --> C
    K --> D
    L["Cancel the key for Macro Function"] --> C
Ducky Macro working example
[Example A]: Configure the key "Z" to "Q" output Steps: Hold Fn + Ctrl for 3 sec → Press Z → Press Q → Press Fn + Ctrl
[Example B]: Press Fn + A to insert 'Ducky' repeatedly until released the key to stop Steps: Hold Fn + Ctrl for 3 sec → Press Fn + A → Insert Ducky → Press Fn + E → Press Fn + Ctrl
[Example C]: Press F1 to show Desktop, under Windows system Steps: Hold Fn + Ctrl for 3 sec → Press F1 → Hold Windows key + D → Press Fn + Ctrl
[Example D]: Press F5 to mute the volume, under Windows system Steps: Hold Fn + Ctrl for 3 sec → Press F5 → Press Fn + Windows key + A → Press Fn + Ctrl
Note: Set the Profile from Profile 2\~6 before set Macro.
Special function : Mouse function

• ON/OFF : Fn + Number Lock
- Tips: Mouse function active while the "M" indicator light up on the right side.
NOTE

Ducky
Channel
WWW.DUCKYCHANNEL.COM.TW
NOTE
NOTE
- Year of the Rooster Edition
- USB Repeat Acceleration
- Single Color LED Lighting Modes
- RGB LED Blending Modes
- LED Zone Customization Mode
- Note:
- DEMO Mode
- DEMO mode for the store window to showcase
- Windows Lock Feature
- Keyboard power mode
- Reset to Factory Defaults
- DIP Switch Functions
- Unable to set Macro function:
- Ducky Macro hotkeys function
- Multimedia function keys
- Windows common function keys
- Ducky Macro Implication Diagram
- Ducky Macro working example
- Special function : Mouse function
- NOTE
Brand : Ducky
Model : 2017 YOTR
Category : Keyboard