
DDX35 - Car radio with screen KENWOOD - Free user manual and instructions
Find the device manual for free DDX35 KENWOOD in PDF.


| Product Type | Multimedia Receiver |
| Brand | Kenwood |
| Model | DDX35 |
| Display Size | 6.2 inches |
| Touchscreen | Yes |
| Built-in Bluetooth | Yes |
| DVD Playback | Yes |
| CD Playback | Yes |
| USB Input | Front USB port |
| AUX Input | Yes (front 3.5mm) |
| Rear View Camera Input | Yes |
| SiriusXM Ready | Yes (requires tuner) |
| Radio Band | AM/FM |
| Maximum Power Output | 50W x 4 |
| Preamp Outputs | 2 sets (front/rear) |
| Dimensions (W x H x D) | 178 x 100 x 160 mm |
| Weight | 2.0 kg |
| Operating Voltage | 14.4V DC (11-16V allowable) |
| Detachable Face | Yes |
Frequently Asked Questions - DDX35 KENWOOD
User questions about DDX35 KENWOOD
0 question about this device. Answer the ones you know or ask your own.
Ask a new question about this device
Download the instructions for your Car radio with screen in PDF format for free! Find your manual DDX35 - KENWOOD and take your electronic device back in hand. On this page are published all the documents necessary for the use of your device. DDX35 by KENWOOD.
USER MANUAL DDX35 KENWOOD
How to reset your unit 3
INTRODUCTIONS
Initial Settings ....5
Initial setup ....5
Updating the system 6
Setting the security function ....7
Component names and functions ....8
Setting the clock 10
Common operations ...... 11
Turning on the power 11
Turning off the power 11
Adjusting the panel angle 11
Adjusting the volume 11
Putting the unit in standby 12
Turning off the screen 12
Switching screens 13
AV SOURCE OPERATIONS
Selecting the playback source ..... 14
Displaying the source control screen .....14
Displaying all sources and items .....15
Customizing the
Disc operations 16
Playing a disc 16
Playable disc types....17
Playback operations ....18
USB operations 23
Playing a USB device 23
Listening to the iPod/iPhone device....25
iPod/iPhone playback operations from the unit 26
Selecting an audio/video file from the menu....27
Controlling playback from the iPod/iPhone 27
Using the smartphone — MirrorLink .... 28
Listening to the radio 30
Using other external components.... 35
AV-IN 35
Using the external navigation unit ....36
Sound adjustment 37
Using the sound equalization ....37
Adjusting the crossover frequency .....38
Changing the display design ...... 39
Setting for video playback ...... 41
Picture adjustment ....41
Changing the aspect ratio 42
Zooming picture 42
Using a rear view camera 43
Setting menu items 44
Memorizing/recalling the settings .....48
Locking the settings 48
Adjusting the touch position 48
BLUETOOTH OPERATIONS
(Only for DDX6023BT/DDX6053BT/
DDX4023BT/DDX4053BT/DDX42BT)
Information for using Bluetooth ^® devices....49
Bluetooth operations 49
Connecting Bluetooth devices 50
Setting up Bluetooth 52
Using the Bluetooth mobile phone .....53
Settings for Bluetooth mobile phone .....58
Using the Bluetooth audio player .....59
Operations from the remote controller....61
REFERENCE
Maintenance....65
More about this unit 66
Troubleshooting......68
Accessories/Installation Procedure 72
Connecting Wires to Terminals ..... 74
Connecting a USB device/iPod/ iPhone....75
Connecting Other Products ...... 76
Installing/Removing the Unit ...... 77
Specifications 79
KS-UBT1 (USB Bluetooth adapter) 82
⚠️ WARNINGS:
(To prevent accidents and damage)
- DO NOT install any unit or wire any cable in a location where;
- it may obstruct the steering wheel and gearshift lever operations.
- it may obstruct the operation of safety devices such as air bags.
- it may obstruct visibility.
• DO NOT operate the unit while driving. If you need to operate the unit while driving, be sure to look around carefully.
- The driver must not watch the monitor while driving.
⚠️ Cautions on the monitor:
- The monitor built in this unit has been produced with high precision, but it may have some ineffective dots. This is inevitable and is not considered defective.
- Do not expose the monitor to direct sunlight.
- Do not operate the touch panel using a ball-point pen or similar tool with the sharp tip.
Press the buttons on the touch panel with your finger directly (if you are wearing a glove, take it off).
- When the temperature is very cold or very hot...
- Chemical changes occur inside, causing malfunction.
- Pictures may not appear clearly or may move slowly. Pictures may not be synchronized with the sound or picture quality may decline in such environments.
For safety...
- Do not raise the volume level too much, as this will make driving dangerous by blocking outside sounds, and may cause hearing loss.
- Stop the car before performing any complicated operations.
Temperature inside the car...
If you have parked the car for a long time in hot or cold weather, wait until the temperature in the car becomes normal before operating the unit.
■ How to reset your unit
DDX6023BT/DDX6053BT
Reset button

DDX4023BT/DDX4053BT/DDX3023/DDX3053
Reset button

DDX42BT/DDX35
Reset button

If the unit fails to operate properly, press the Reset button. The unit returns to factory settings when the Reset button is pressed (except the registered Bluetooth devices).
How to read this manual:
• Illustrations of DDX6023BT are mainly used for explanation.
- This manual mainly explains operations using the buttons on the monitor panel and touch panel. For operations using the remote controller (RC-DV340: supplied only for DDX6023BT/DDX6053BT, page 60.
- < > indicates the variable screens/menus/operations/settings that appear on the touch panel.
- [] indicates the buttons on the touch panel.
- Indication language: English indications are used for the purpose of explanation. You can select the indication language from the
The displays and panels shown in this manual are examples used to provide clear explanations of the operations. For this reason, they may be different from the actual displays or panels.
Information on Disposal of Old Electrical and Electronic Equipment and Batteries (applicable for EU countries that have adopted separate waste collection systems)

Products and batteries with the symbol (crossed-out wheeled bin) cannot be disposed as household waste.
Old electrical and electronic equipment and batteries should be recycled at a facility capable of handling these items and their waste byproducts.
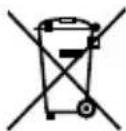
Contact your local authority for details in locating a recycle facility nearest to you.
Proper recycling and waste disposal will help conserve resources whilst preventing detrimental effects on our health and the environment.
Notice: The sign "Pb" below the symbol for batteries indicates that this battery contains lead.
The marking of products using lasers

The label is attached to the chassis/case and says that the component uses laser beams that have been classified as Class 1. It means that the unit is utilizing laser beams that are of a weaker class. There is no danger of hazardous radiation outside the unit.
CE
Declaration of Conformity with regard to the EMC Directive 2004/108/EC Manufacturer:
JVC KENWOOD Corporation
3-12 Moriya-cho, Kanagawa-ku, Yokohamashi, Kanagawa, 221-0022, Japan
EU Representative's:
Kenwood Electronics Europe BV Amsterdamseweg 37, 1422 AC UITHOORN, The Netherlands
ForTurkey
When you power on the unit for the first time or reset the unit, the initial setting screen appears.
- You can also change the settings on the
1 ForDDX6023BT/DDX6053BT:

For DDX4023BT/DDX4053BT/ DDX3023/DDX3053/DDX42BT/ DDX35:

| Language | Select the text language used for on-screen information. ( page 46)• Setto display the operation buttons and menu items in the selected language ([Local]: initially selected) or English ([English]). |
| Angle *2 | Adjust the panel angle. ( page 11) |
| AV Input Select an external component to play — [AV-IN2] or [iPod] ( page 46) | |
| NAV I/F Input *1 | Select navigation or Mirror Link to use. ( page 46) |
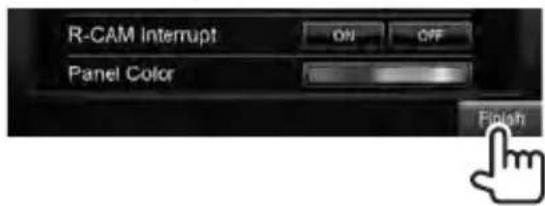
| R-CAM Interrupt | Select [ON] when connecting the rear view camera. ( page 46) |
| Panel Color | Select the color of the buttons on the monitor panel. ( page 39) |
2 Finish the procedure.
Updating the system
You can update the system by connecting a USB device containing the update file.
1 Create an update file, copy it to a USB device, and connect it to the unit.
To connect a USB device, page 75.
2 On :
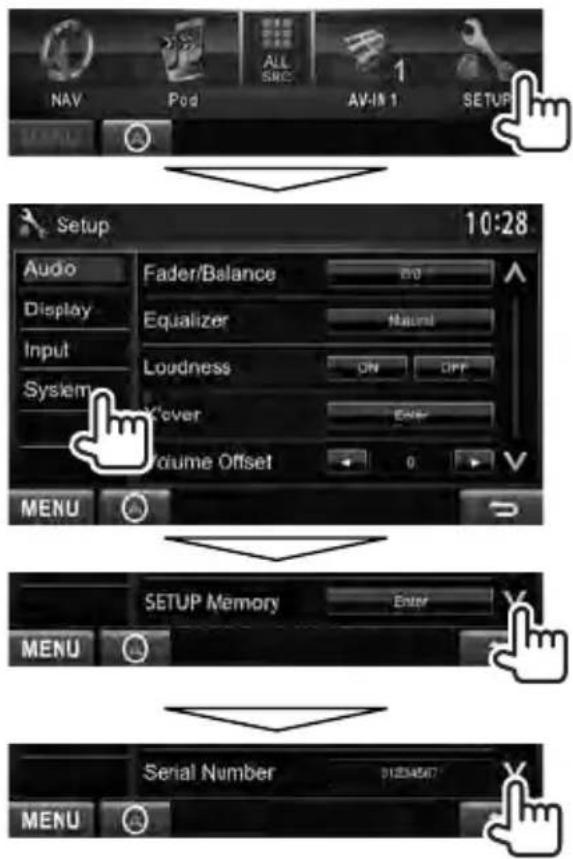
3

4

| Application Version | Updates the System application. |
| DVD Version | Updates the DVD System application. |
It may take a while.
If the update has been complete successfully, "Update Completed" appears. Reset the unit.
- If the update has failed, turn the power off and then on, and retry the update.
• Even if you have turned off the power during update, you can restart the update after the power is turned on. The update will be performed from the beginning.
Setting the security function
You can set a security code to protect your receiver system against theft.
■ Registering the security code
1 Display the security code setting screen.
On

- To clear the registered security code, perform step 1 and press [CLR] in
2 Enter a four-digit number (①), then confirm the entry (②).

3 Repeat step 2 to confirm your security code.
Now, your security code is registered.
- When the unit is being reset or disconnected from battery, you are required to enter the security code. Enter the correct security code, then press [Enter].
■ Activating the security function
You can activate security function to protect your receiver system against theft.
On

The security indicator on the monitor panel flashes when the vehicle ignition is off.
To cancel, select [OFF].
Component names and functions
DDX6023BT/DDX6053BT
Screen (Touch panel) Monitor panel
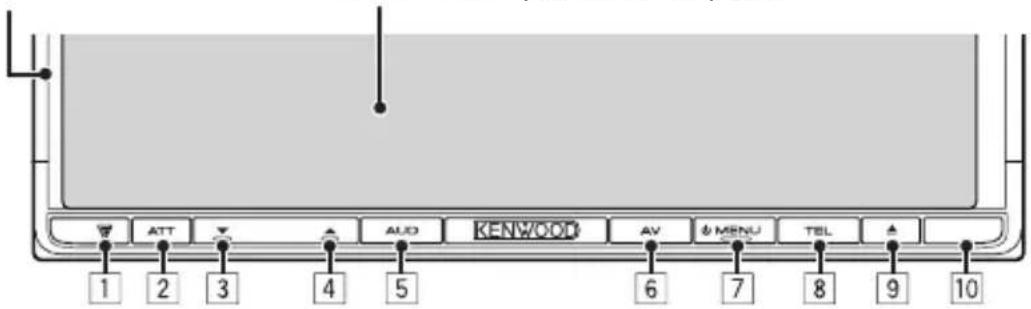
1 Reset button/Power indicator/Security indicator
- Resets the unit. ( page 3)
• Lights up while the unit is turned on. - Flashes when the security function is activated. ( page 7 )
2 ATT button (Press)
- Attenuates the sound.
V.OFF button (Hold) - Turns off/on the screen. ( page 12)
3 VOLUME ▼ (down) button (page 11)
• Decreases the volume.
4 VOLUME ▲ (up) button (page 11)
- Increases the volume.
5 AUD button (Press)
- Displays the
screen. ( page 37)
R-CAM button (Hold)
- Displays the picture from the rear view camera.
6 AV button (Press)
- Displays the current source screen. AV OUT button (Hold)
- Selects the AV source for external monitor or amplifier.
7 MENU button
• Turns off the power. (Hold)
• Turns on the power. (Press)
- Displays the
8 TEL button (Press)
- Displays the
screen. (page 54)
VOICE button (Hold) - Activates voice dialing. ( page 54)
9 ▲ (Eject) button
- Ejects the disc (Tilts the monitor panel fully).
- Opens/Closes the monitor panel.
10 Remote sensor
Caution on the volume setting:
Digital devices produce very little noise compared with other sources. Lower the volume before playing these digital sources to avoid damaging the speakers by sudden increase of the output level.
You can change the color of the buttons on the monitor panel. ( page 39)
DDX4023BT/DDX4053BT/
DDX3023/DDX3053

Screen (Touch panel) Monitor panel
1 Loading slot
2 ▲ (Eject) button
- Ejects the disc.
3 Reset button/Power indicator/Security indicator
- Resets the unit. ( page 3)
- Lights up while the unit is turned on.
- Flashes when the security function is activated. ( page 7)
4 Remote sensor
5 MENU button
• Turns off the power. (Hold)
• Turns on the power. (Press)
- Displays the
6 AV/AV OUT button
• Displays the current source screen. (Press)
- Selects the AV source for external monitor or amplifier. (Hold)
7 For DDX4023BT/DDX4053BT :
VOL/ATT/AUD knob (page 11)
• Attenuates the sound. (Press)
- Adjusts the audio volume. (Turn)
- Displays the
DDX42BT/DDX35

Screen (Touch panel) Monitor panel
- Attenuates the sound. (Press)
- Adjusts the audio volume. (Turn)
For DDX42BT/DDX35:
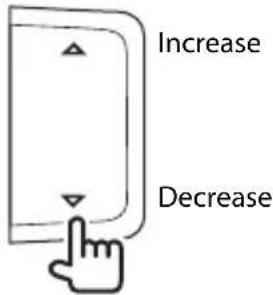
Volume △ (up)/ ▽ (down) buttons (page 11)
• Increases/decreases the volume. (Press)
8 For DDX4023BT/DDX4053BT/
DDX42BT:
TEL/VOICE button
- Displays the
screen. (Press) (page 54) - The function of the button when held varies depending on the
setting (page 47).
ForDDX3023/DDX3053/DDX35:
AUD/V.OFF button
- Displays the
screen. (Press) (E page 37) - The function of the button when held varies depending on the
setting (page47).
9 For DDX42BT/DDX35 only:
USB input terminal
10 For DDX42BT/DDX35 only:
iPod/AV-IN2 input terminal
Setting the clock
1 Display the screen.
On the source control screen:


2 Display the screen.

3 Display the screen.
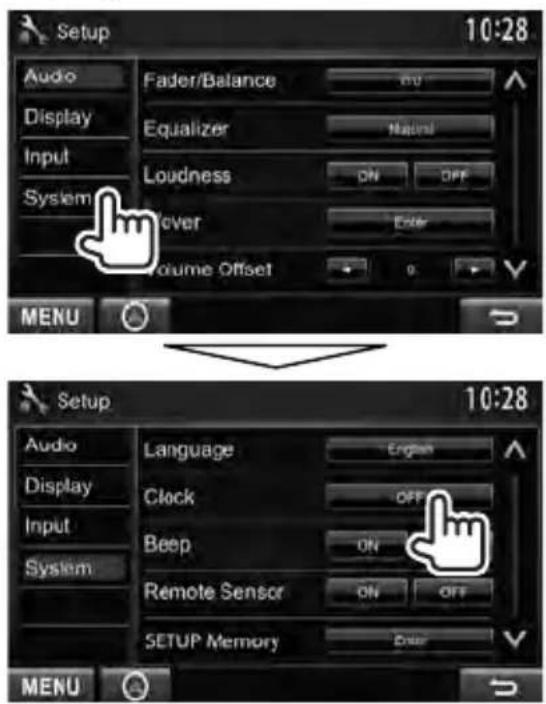
4 Set the clock time.

| NAV* | Synchronizes the clock time with the connected navigation unit. |
| Radio Data System | Synchronizes the clock time with FM Radio Data System . |
| OFF Sets the clock manually.(below) | |
When selecting
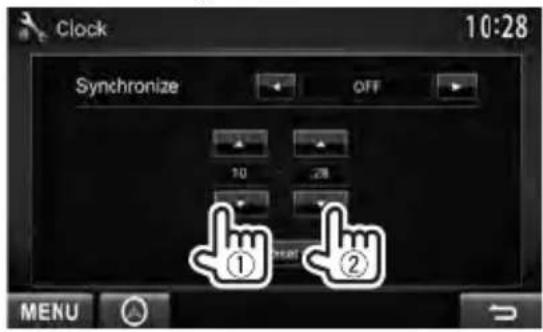
① Adjust the hour
② Adjust the minute
[Reset]: Sets the minute to "00."
Example:
$$ 3: 0 0 - 3: 2 9 \rightarrow 3: 0 0 $$
$$ 3: 3 0 - 3: 5 9 \rightarrow 4: 0 0 $$
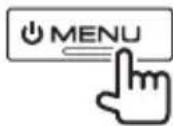
5 Finish the procedure.

* Appears only when the navigation unit is connected.
Common operations
Turning on the power
DDX6023BT/DDX6053BT
DDX4023BT/DDX4053BT/ DDX3023/DDX3053

DDX42BT/DDX35

Turning off the power
DDX6023BT/DDX6053BT

DDX4023BT/DDX4053BT/ DDX3023/DDX3053

DDX42BT/DDX35

Adjusting the panel angle
(Only for DDX6023BT/DDX6053BT)
You can change the panel angle.
1 Select an angle (0 - 6).

To set the current position as the power off position, select [Memory].
Adjusting the volume
To adjust the volume (00 to 35)
DDX6023BT/DDX6053BT

DDX4023BT/DDX4053BT/DDX3023/DDX3053

IncreaseDecrease
DDX42BT/DDX35
To attenuate the sound
Only for DDX6023BT/ DDX6053BT
Only for DDX4023BT/ DDX4053BT/DDX3023/ DDX3053


The ATT indicator lights up.
To cancel the attenuation, press the same button again.
Putting the unit in standby
1

2
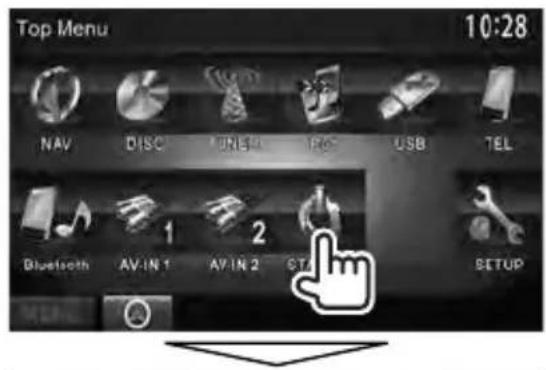
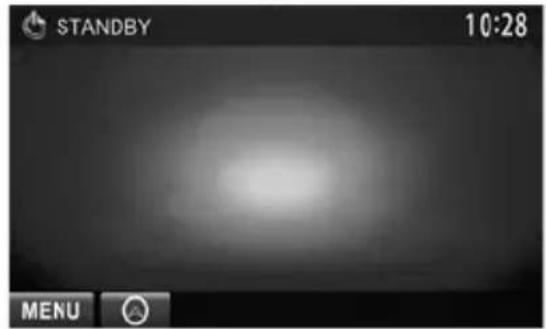
Turning off the screen
DDX6023BT/DDX6053BT

DDX4023BT/
DDX4053BT ^*1
DDX3023/DDX3053 ^4

DDX42BT*

DDX35 ^2

The screen is turned off.
To turn on the screen, press ⏻ MENU.
- You can also turn on the screen by touching the display.
* This operation works only when
* This operation works only when
Switchingscreens
Source control screen
- Pressing ⏻ MENU on the monitor panel also displays

Displays the navigation screen. * ( page 36)
*1 Appears only when a navigation unit is connected.
• Changes the AV source.
- Displays the

page 15
- You can arrange the items to display on the
Changes the detailed settings.

Changes the page
Press [ ] to return to the previous screen.
Touchscreenoperation
Displays the video control menu while playing a video.

flowchart
graph TD
    A["Start"] --> B["Go to the previous chapter/track.*2"]
    B --> C["Step 1: Hand icon pointing up to right"]
    C --> D["Step 2: Hand icon pointing down to left"]
    D --> E["Step 3: Hand icon pointing up to right"]
    E --> F["Step 4: Hand icon pointing down to left"]
    F --> G["End"]
Displays the source control screen while playing a video.
- The operation buttons disappear by touching the screen or when no operation is done for about 5 seconds.
*2 Not available for video from an external component and rear view camera.
AV SOURCE OPERATIONS
Selecting the playback source

• To display all sources and items, page 15.
- You can change the items (other than [SETUP]) to display on the
| NAV^*1 × 2 (page 36) | Displays the navigation screen when a navigation unit is connected. |
| MirrorLink^*2 × 3 (page 28) | Displays your smartphone screen on the touch panel. |
| DISC (page 16) | Plays a disc. |
| TUNER (page 30) | Switches to the radio broadcast. |
| iPod^*4 (page 25) | Plays an iPod/iPhone. |
| USB (page 23) | Plays files on a USB device. |
| TEL^*5 (page 54) | Displays the phone control screen. |
| Bluetooth^*5 (page 59) | Plays a Bluetooth audio player. |
| AV-IN 1/AV-IN 2^*4 (page 35) | Switches to an external component connected to AV-IN1 and iPod/AV-IN2 input terminals. |
*1 When no navigation unit is connected, "No Navigation" appears.
*2 Select an appropriate input setting on
Displaying the source control screen
On video playback screen

- The operation buttons disappear by touching the screen or when no operation is done for about 5 seconds.
Displaying all sources and items
On

DDX6023BT/DDX6053BT/ DDX4023BT/DDX4053BT/DDX42BT
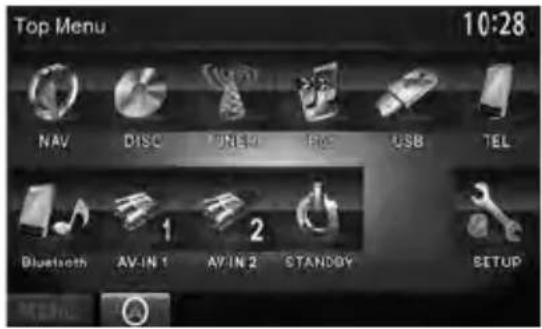
DDX3023/DDX3053/DDX35
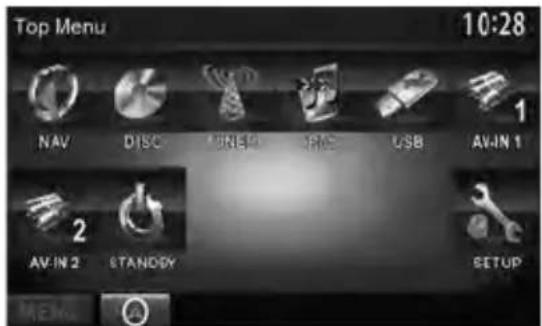
Customizing the screen
You can arrange the items to display on the
1 On

2

3 Select the position to place the icon (①), then select the item you want to display on the selected position (②).

4 Repeat step 3 to place icons for other items.
Discoperations
Playing a disc
- If a disc does not have a disc menu, all tracks on it will be played repeatedly until you change the source or eject the disc.

DDX4023BT/DDX4053BT/DDX3023/DDX3053/DDX42BT/DDX35

The source changes to "DISC" and playback starts.
- The IN indicator lights up while a disc is inserted.
- If Ⓧ" appears on the screen, the unit cannot accept the operation you have tried to do. - In some cases, without showing "∅," operations will not be accepted.
- When playing back a multi-channel encoded disc, the multi-channel signals are downmixed to stereo.

DDX4023BT/DDX4053BT/DDX3023/DDX3053

DDX42BT/DDX35

natural_image
Simple line drawing of a hand cursor clicking a button on a computer interface (no text or symbols)- You can eject a disc when playing another AV source.
- If the ejected disc is not removed within 15 seconds, the disc is automatically inserted again into the loading slot to protect it from dust.
When removing a disc, pull it horizontally.
Closing the monitor panel (Only for DDX6023BT/DDX6053BT)
After removing the disc, press ▲ (eject) button again. The monitor panel closes.
playable disc types
| Disc type Recording format, file type, etc. Playable | ||
| DVD DVD-Video* | 1Region Code:For DDX6023BT/DDX4023BT/DDX3023/DDX42BT: 2For DDX6053BT/DDX4053BT/DDX3053/DDX35: 5 | √OK |
| DVD-Audio/DVD-ROM | ✕NO | |
| DVD Recordable/Rewritable(DVD-R/-RW *2, +R/+RW *3)DVD Video: UDF bridgeDVD-VRDivX/MPEG1/MPEG2/JPEG/MP3/WMA/WAV/AAC: ISO 9660 level 1,level 2, Romeo, Joliet | DVD-Video | √OK |
| DVD-VR *4 | ||
| DivX/MPEG1/MPEG2 | ||
| JPEG | ||
| MP3/WMA/WAV/AAC | ||
| MPEG4/DVD+VR/DVD-RAM | ✕NO | |
| Dual Disc DVD side | √OK | |
| Non-DVD side | ✕NO | |
| CD/VCD DTS-CD/Audio CD/CD Text (CD-DA) | √OK | |
| VCD (Video CD) | ||
| SVCD (Super Video CD)/CD-ROM/CD-I (CD-I Ready) | ✕NO | |
| CD Recordable/Rewritable(CD-R/-RW)ISO 9660 level 1, level 2,Romeo, Joliet | CD-DA | √OK |
| VCD (Video CD) | ||
| DivX/MPEG1/MPEG2 | ||
| JPEG | ||
| MP3/WMA/WAV/AAC | ||
| MPEG4 | ✕NO | |
*1 If you insert a DVD Video disc of an incorrect Region Code, "Region code error" appears on the screen.
^*2 DVD-R recorded in multi-border format is also playable (except for dual layer discs). DVD-RW dual layer discs are not playable.
*3 It is possible to play back finalized +R/+RW (Video format only) discs. "DVD" is selected as its disc type when a +R/+RW disc is loaded. +RW double layer discs are not playable.
*4 This unit cannot play back contents protected with CPRM (Content Protection for Recordable Media).
Caution for DualDisc playback
The Non-DVD side of a "DualDisc" does not comply with the "Compact Disc Digital Audio" standard. Therefore, the use of Non-DVD side of a DualDisc on this product may not be recommended.
Playbackoperations
To display the source control screen, page 14.
ForDVD/DVD-VR/VCD/DivX/MPEG1/MPEG2/JPEG

| [○][×]*2 | Selects playback mode.( page 21) |
| [▶ □] Starts/pauses playback. | |
| [■]*3 | Stops playback. |
| [◀◀] [▶▶] • | Selects a chapter/track.(Press)• Reverse/forward search.* (Hold) |
| [◀◀] [▶▶] | Reverse/forward search during playback.*4Plays back in slow-motion during pause. |
| [MODE]*5 | Enters thesettings. (page 22) |
| [MENU] | Displays thescreen. |
- For DivX/MPEG1/MPEG2/JPEG, the following buttons also appear:

Selects a folder.

Displays the folder/track list. ( page 19)
For CD/MP3/WMA/WAV/AAC
While playing, the jacket picture is shown if the file has the tag data including the jacket picture.
• MP3/WMA/WAV/AAC: Folder no./Track no.
- CD: Track no.
![ag data including the jacket picture. Media type Playback status (►: play/II: pause) 10:28 MODE DISC F01 T01 00:10:25 Playing time KENWOOD Title Artist Album Track/file information • Pressing [<] scrolls the text if not all of the text is shown. MENU page 36 File type Playback mode](/content/2026/05/964491/images/1fb11cd7765b61720a961f7770137d876d7d416be7080003f0afb7dd6aee4a6c.jpg)
![[C] × [Q] *1 [▶ ▶] Starts/pauses playback. [+] 1 Selects playback mode. ( page 21) Displays the folder/track list. ( below)](/content/2026/05/964491/images/959d6c449154f966574b98d19900cb322491b9082379d1c7c32c2ab295a5de74.jpg)
| [◀◀] [▶▶] | Selects a track. |
| [◀◀] [▶▶] | Reverse/forward search.* 2 |
| [MODE]*1 | Enters the <DISC Mode> settings. (page 22) |
| [MENU] | Displays the <Top Menu> screen. |
*1 Does not appear for CD.
*2 Search speed varies depending on the type of disc or file.
Selecting folder/track on the list

Playing Recordable/Rewritable discs
- This unit can recognize a total of 5 000 files and 250 folders (a maximum of 999 files per folder).
- Use only "finalized" discs.
- This unit can play back multi-session discs; however, unclosed sessions will be skipped while playing.
- Some discs or files may not be played back due to their characteristics or recording conditions.
■ Video menu operations
You can display the video menu screen during video playback.
• Available items on the screen differ depending on the types of the loaded disc and playback files.
- The operation buttons disappear by touching the screen or when no operation is done for about 5 seconds.
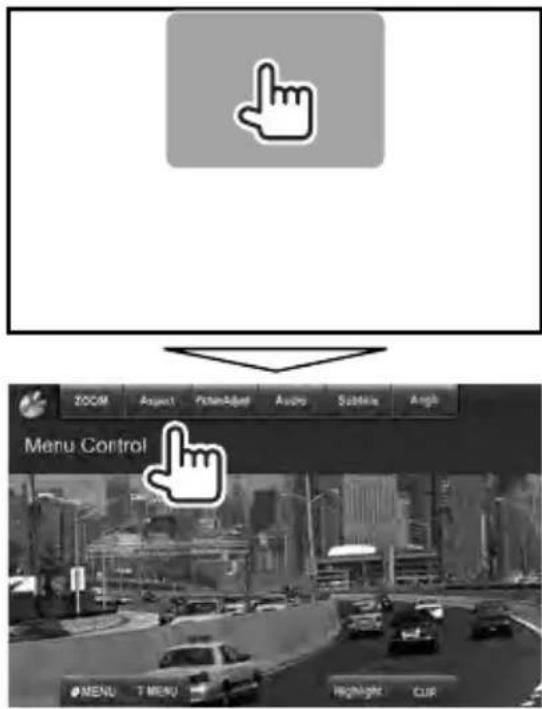
- The screen for MPEG1/MPEG2 differs from the above.

| ZOOM Displays the picture size selecting screen. ( page 42) | |
| Aspect | Selects the aspect ratio. ( page 42) |
| Picture Adjust | Displays the picture adjustment screen. ( page 41) |
| Audio Selects the audio type.For DVD-VR: Selects the audio channel (ST: stereo, L: left, R: right). | |
| Subtitle Selects the subtitle type. | |
| Angle Selects view angle. | |
| MENU Displays the disc menu (DVD)/playlist (DVD-VR). | |
| T MENU Displays the disc menu (DVD)/original program (DVD-VR). | |
| Highlight Switches to the direct disc menu mode. Press the target item to select.To restore the screen, press AV on the monitor panel. | |
| CUR Displays the menu/playlist/ original program item selecting screen.[▲] [▼] [◀] [▶]: Selects an item.- For DivX only [◀] [▶]: Skips back or forward by about 5 minutes.[ENTER]: Confirms the selection.[RETURN]: Returns to the previous screen. | |
Only for VCD
1

2
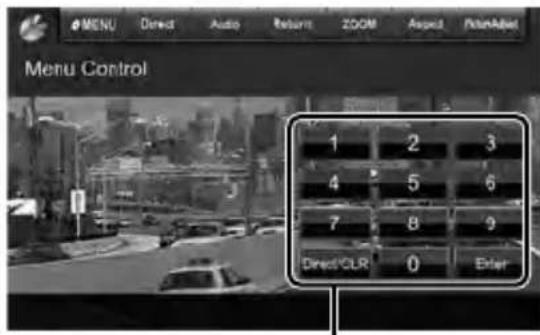
Direct selecting buttons (below)
| ZOOM | Displays the picture size selecting screen. ( page 42) |
| Aspect | Selects the aspect ratio. ( page 42) |
| Picture Adjust | Displays the picture adjustment screen. ( page 41) |
| MENU | Displays the disc menu. |
| Audio | Selects the audio channel (ST: stereo, L: left, R: right). |
| Direct | Displays/hides the direct selecting buttons. ( below) |
| Return | Displays the previous screen or the menu. |
• To select a track directly
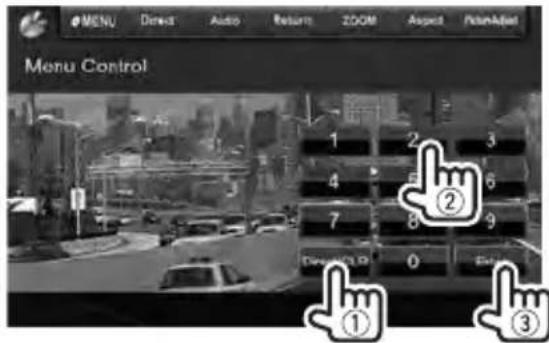
- When you enter a wrong number, press [Direct/CLR] to delete the last entry.
- To deactivate the PBC function, press [■] then the direct selecting buttons to select a track number.

Selecting playback mode
For DVD/DVD-VR
Selects Repeat playback mode

For VCD (without PBC)/CD/DivX/MPEG1/MPEG2/MP3/WMA/WAV/AAC
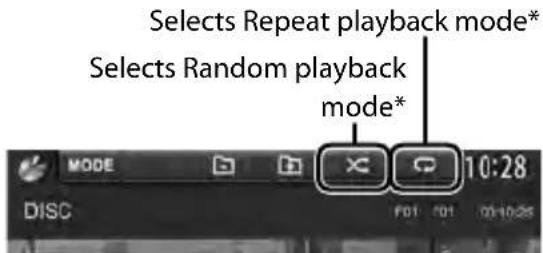
* You cannot activate the repeat mode and the random mode at the same time.
• Each time you press the button, the playback mode changes. (The corresponding indicator lights up.)
- Available items differ depending on the types of loaded disc and playback file.
| Indicator Playback mode | |
| C-REP Repeats current chapter. | |
| T-REP Repeats current title/program. | |
| REP Repeats current track. | |
| FO-REP Repeats all tracks of the current folder. | |
| RDM | Randomly plays all tracks. |
| FO-RDM | Randomly plays all tracks of current folder, then tracks of next folders. |
To cancel, press the button repeatedly until the indicator disappears.
settings

| Disc Setup items | Selectable setting/item | Initial: Underlined | |
| For DVD/DVD-VR | MenuLanguage | Select the initial disc menu language; Initial English ( page 67). | |
| SubtitleLanguage | Select the initial subtitle language or erase the subtitle (OFF); Initial English ( page 67). | ||
| AudioLanguage | Select the initial audio language; Initial English ( page 67). | ||
| Down Mix When | playing back a multi-channel disc, this setting affects the signals reproduced through the front and/or rear speakers.♦ Dolby : Select this to enjoy multi-channel surround Surround audio with Dolby Surround.♦ Stereo : Normally select this. | ||
| DynamicRange Control | You can change the dynamic range while playing Dolby Digital software.♦ Wide : Select this to enjoy a powerful sound at a low volume level with its full dynamic range.♦ Normal : Select this to reduce the dynamic range a little.♦ Dialog : Select this to reproduce the movie dialog more clearly. | ||
| For discsexcept VCD/CD | ScreenRatioSelect the monitor type to watch a wide screen picture on the external monitor.♦ 16:9  ♦ 4:3 LB (Letterbox) ♦ 4:3 PS (PanScan) ♦ 4:3 LB (Letterbox) ♦ 4:3 PS (PanScan)  | ||
| For discscantainingaudio/video/picture files | FileTypeSelect the playback file type when a disc contains different types of files.♦ Audio : Plays back audio files.♦ Still Image : Plays back JPEG files.♦ Video : Plays back DivX/MPEG1/MPEG2 files.♦ Audio&Video : Plays back audio files and DivX/MPEG1/MPEG2 files.· For playable file types, page 17.· If the disc contains no files of the selected type, the existing files are played in the following order: audio, video, then still image. | ||
Playing a USB device
- This unit can play JPEG/DivX /MPEG1/MPEG2/MP3/WMA/WAV/AAC files stored in a USB mass storage class device.
- This unit can recognize a total of 5 000 files and 250 folders (a maximum of 999 files per folder).
• Make sure all important data has been backed up to avoid losing the data.
■ Connecting a USB device
You can connect a USB mass storage class device such as a USB memory, Digital Audio Player etc. to the unit.
- You cannot connect a computer or portable HDD to the USB input terminal.
- To connect a USB device, page75.
When a USB device is connected...
The source changes to "USB" and playback starts.
- All tracks in the USB device will be played repeatedly until you change the source.
To disconnect the USB device safely
Press [▲], then disconnect the USB device after "No Device" appears.
Cautions:
- This unit may not play back files in a USB device properly when using a USB extension cable.
- USB devices equipped with special functions such as data security functions cannot be used with the unit.
- Do not use a USB device with 2 or more partitions.
- Depending on the shape of the USB devices and connection ports, some USB devices may not be attached properly or the connection might be loose.
- This unit may not recognize a memory card inserted into the USB card reader.
- When connecting with a USB cable, use the USB 2.0 cable.
- The maximum number of characters:
- Folder names : 50 characters
- File names : 50 characters
- Avoid using the USB device if it might effect driving safety.
- Do not pull out and connect the USB device repeatedly while "Reading..." is shown on the screen.
- Electrostatic shock at connecting a USB device may cause abnormal playback of the device. In this case, disconnect the USB device then reset this unit and the USB device.
- Operation and power supply may not work as intended for some USB devices.
-
Do not leave a USB device in the car, or expose to direct sunlight or high temperature to avoid deformation or damage to the device.
-
To display the source control screen, page 14.
• To change settings for video playback, page 20.
• DivX/MPEG1/MPEG2/MP3/WMA/WAV/AAC: Folder no./Track no.
- JPEG: Folder no./File no.
![Only for MP3/WMA/ WAV/AAC: While playing, the jacket picture is shown if the file has the tag data including the jacket picture. page 36 USB F01 T01 KENWOOD Title Artist Album Playback status (►: play / II: pause ) Playing time Track/file information (for MP3/WMA/WAV/ AAC) • Pressing [<] scrolls the text if not all of the text is shown. MENU RETP MUSIC Playback mode File type](/content/2026/05/964491/images/474055ff5a16afecbe2dbbf6b4d6ae9e1c66633142225824614ed557bc41113e.jpg)
| [∅] | Selects repeat playback mode. *1*2REP: Repeats the current track.FO-REP: Repeats all tracks in the current folder. |
| [×] | Selects random playback mode. *1*2RDM: Randomly plays all tracks.FO-RDM: Randomly plays all tracks in the folder. |
| [▲] Press this button before disconnecting. (page 23) | |
| [Q] | Displays the folder/track list. ( page 19) |
| [▶ II] | Starts/pauses playback. |
| [◀◀] [▶▶] | Selects a track. |
| [◀◀] [▶▶] | Reverse/forward search.*3 |
| [+][-] | Selects a folder. |
| [MODE] Enters the <USB Mode> settings. ( below) | |
| [MENU] | Displays the <Top Menu> screen. |
• Available items differ depending on the types of playback file.
*1 To cancel random or repeat mode, press the button repeatedly until the indicator disappears.
*2 You cannot activate the repeat mode and the random mode at the same time.
*3 Search speed varies depending on the type of disc or file.
settings
Setting
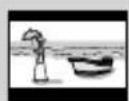
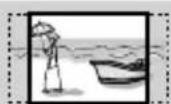
Select the monitor type to watch a wide screen picture on the external monitor.
16:94:3LB
(Letterbox)
4:3 PS
(PanScan)

Setting
Press [Next]. Switches between internal and external memory source of the connected device (such as mobile phone).
Setting
| Audio Plays back audio files. |
| Still Image Plays back JPEG files. |
| Video Plays back DivX/MPEG1/MPEG2 files. |
| Audio&Video Plays back audio files and DivX/MPEG1/MPEG2 files. |
- If the USB device contains no files of the selected type, the existing files are played in the following order: audio, video, then still image.
Listening to the iPod/iPhone device
■ Preparation
- Connect iPod/iPhone. ( page 75 )
- When connecting iPhone/iPod touch, turn off App beforehand; otherwise the playback may not be started after connection.
• Use the following cables:
- To watch the video and to listen to the music (analog): USB Audio and Video cable for iPod/iPhone—KCA-iP22F/KCA-iP202 (optional accessory)
- To listen to the music (digital): USB Audio cable for iPod/iPhone—KCA-iP102 (optional accessory)
- Select appropriate input settings on
- Do not use extension cables.
iPod/iPhone that can be connected to this unit:
Made for
- iPod with video
- iPod classic
- iPod nano (6th Generation)
- iPod nano (5th Generation)
- iPod nano (4th Generation)
- iPod nano (3rd Generation)
- iPod touch (4th Generation)
- iPod touch (3rd Generation)
- iPod touch (2nd Generation)
- iPod touch (1st Generation)
- iPhone 4S
- iPhone 4
- iPhone 3GS
- iPhone 3G
- iPhone
Settings for iPod playback
When the source is "iPod"...
1

2
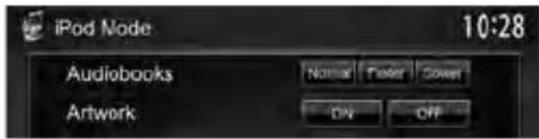
Audiobooks Selects the speed of audio books.
Artwork Shows/hides the iPod artwork.
Setting for iPod/iPhone playback
You can change the setting only when [STANDBY] is selected on
1 On

2


AV-IN2 Select this when connecting the iPod/iPhone using the USB Audio cable for iPod/ iPhone.
iPod Select this when connecting the iPod/iPhone using the USB Audio and Video cable for iPod/iPhone
iPod/iPhone playback operations from the unit
- To display the source control screen, page 14.
• To change settings for video playback, page 20.
Current track number/total track number
Playback status (▶: play/Ⅱ: pause)
While playing, Artwork (the picture displayed on the screen of iPod/iPhone) is shown if the song contains the Artwork.*1

Playing time
Song/video
information
- Pressing [<] scrolls the text if not all of the text is shown.
[MODE] Enter the
[▶II] Starts/pauses playback.
[☐] Selects Repeat playback mode.*2
- REP: Functions the same as "Repeat One."
[×] Selects Random playback mode.*2
- RDM: Functions the same as "Shuffle Songs."
• A-RDM: Functions the same as "Shuffle Albums."
| [Q] | Displays the audio/video file list. ( page 27) |
| [◀◀] [▶▶] | Selects an audio/video file.*3 |
| [◀◀] [▶▶] | Reverse/forward search. |
| [APP] Select to control playback from the iPod/iPhone—iPod/iPhone control mode.*4 ( page 27) | |
| [MENU] | Displays thescreen. |
*1 For changing the Artwork display setting, page 25.
*2 To cancel random or repeat mode, press the button repeatedly until the indicator disappears.
Not available in iPod control mode. ( page 27)
*3 Resume playback is unavailable for video files.
*4 When using iPod with video, you can control playback only from the unit.
- When you turn on this unit, the iPod/iPhone is charged through the unit.
-
The text information may not be displayed correctly.
-
For some iPod/iPhone models, the performance may be abnormal or unstable during operation. In this case, disconnect the iPod/iPhone device, then check its condition. If the performance is not improved or is slow, reset your iPod/iPhone.
- For the latest compatible list and software version of iPod/iPhone, see: www.kenwood.com/cs/ce/ipod
Selecting an audio/video file from the menu
1
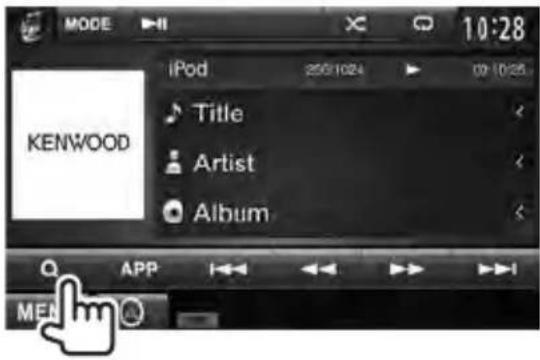
2 Select the menu (audio or video) (①), a category (②), then a desired item (③).
- Select the item in the selected layer until a desired file starts playing.
Audio menu:

Video menu:

• Available categories differ depending on the type of your iPod/iPhone.
Controlling playback from the iPod/iPhone
You can play back the audio/video files or use App by operating iPod/iPhone itself instead of the unit.

- When you are using Garmin StreetPilot® Onboard, the screen appears. For Garmin StreetPilot® Onboard for iPhone, visit the Garmin web site: www.garmin.com
Garmin App:

- The current position of your vehicle appears on the map. When the vehicle runs, the map scrolls. - The screens of the iPhone and unit are not the same.
• To return to the normal mode, press [APP].
Using the smartphone — MirrorLink
(Only for DDX6023BT/DDX6053BT/DDX4023BT/DDX4053BT/DDX3053/DDX42BT/DDX35)
You can connect the SMARTPHONE ADAPTER unit (KCA-ML100: optional accessory) to the NAV I/F input terminal, and a smartphone (not supplied) to the SMARTPHONE ADAPTER unit so that you can view the smartphone screen. ( page 76)
This product offers the "MirrorLink" function that virtually "mirrors" applications on your smartphone screen directly on the touch panel screen.
- Only MirrorLink-compatible smartphones are available. For compatible smartphones, visit the following website: http://kenwood.com/cs/ce/
- To use MirrorLink, the specialized application must be installed in the compatible smartphone.
- After connecting to a smartphone that is compatible with this unit, the application's home screen will appear on the touch panel screen.
- MirrorLink will be unavailable if you start another application on the smartphone while the specialized application is used. To use the specialized application in MirrorLink again, remove and insert the micro-USB cable connected to the smartphone.
Preparation: Select
■ Basic MirrorLink operations
1 Connect your smartphone to the SMARTPHONE ADAPTER unit (KCA-ML100).

natural_image
Line drawing of a smartphone with an attached cable showing signal connection (no text or symbols)2 On :

A combination of your smartphone screen and control buttons appears as follows:


Displays the home screen of your specialized application.

Displays the menu option of your specialized application.

Displays the information on the firmware (the version and GPS status). ( page 29)

Returns to the previous screen.
- An unavailable button is disabled.
You can operate the applications on the touch panel screen as well as on your smartphone screen.
■ Updating the firmware
Check the firmware version, and if necessary, update the firmware. (You do not need to connect your smartphone.)
- Do not turn off the power during update.
1 Visit the website (http://kenwood.com/cs/ce/), download the update data, and save it to the root folder of an SD or SDHC card.
2 Use a ball-point pen or the like to remove the SD cover. While the power is on, insert the SD or SDHC card containing the update data.

SMARTPHONE ADAPTER unit (KCA-ML100)
3 Press the reset button of the SMARTPHONE ADAPTER unit.
The update is completed successfully when the green LED lights up. (It takes approximately 30 seconds.) If the update fails, the red LED lights up.
4 Remove the SD or SDHC card.
5 Place the SD cover over the slot.
6 Press the reset button of the SMARTPHONE ADAPTER unit.
7 Display the firmware information screen to confirm that it has been updated successfully. ( page 28)

Listening to the radio
Press to switch the information between Radio Text, Radio Text Plus, and PTY code.
Band no./preset no./the station frequency currently tuned in
![MODE TI MONO TEXT 10:28 P1 P4 TUNER FM1 P1 87.9MHz P2 P5 PS Station Name < Title/Artist Title/Artist < P3 P6 Radio Text Radio Text < PTY AM FM SEEK MENU ST/MONO indicator AF page 36 ST/MONO indicator RF page 34 RDS indicator LO.S indicator (EON indicator) Seek mode indicator Text information - Pressing [<] scrolls the text if not all of the text is shown. Standby reception indicators (EON page 33) EON indicator: Lights up when a Radio Data System station is sending EON signals.](/content/2026/05/964491/images/2ecf96abe10794d25240fee7a888020d7960a0fd168c8ca31a32a0e41f3ec513.jpg)
- The ST indicator lights up when receiving an FM stereo broadcast with sufficient signal strength.
| [P1] - [P6] | • Selects a stored station. (Press) • Stores the current station. (Hold) |
| [MODE] | Enters thesettings. (page 31) |
| [TI] | Activates/deactivates TI standby reception mode. (page 33) |
| [MONO]* | Activates/deactivates monaural mode for better FM reception. (Stereo effect will be lost.) • The MONO indicator lights up while monaural mode is activated. |
| [TEXT] | Displays/hides the information of the current station (page 31). |
| [PTY]* | Enters the PTY search mode. ( page 32) |
| [AM] Selects AM band. | |
| [FM] Selects FM band. | →FM1→FM2→FM3 |
| [SEEK] Changes the seek mode. | • AUTO1: Auto Search• AUTO2: Tunes in stations in memory one after another.• MANU: Manual Search |
| [◀◀] [▶▶] | Searches for a station. • The search method differs according to the selected seek mode ( above) |
| [MENU] | Displays thescreen. |
* Appears only when FM is selected as the source.
Changing the display information

PS (station name) for FM Radio Data System when PS signal is coming in

Tuning in FM stations only with strong signals—LocalSeek
1

2

ON Select this to tune in only to stations with sufficient signal strength. The LO.S indicator lights up.
OFF Deactivate the function.
■ Storing stations in memory
You can preset six stations for each band.
Automaticpresetting—AME(Auto Memory)
1
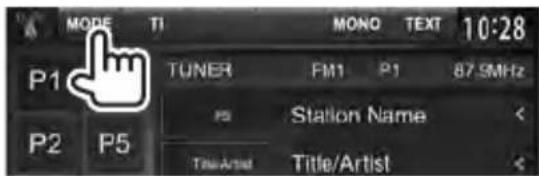
2

Local stations with the strongest signals are searched and stored automatically.
Manualpresetting
1 Tune in to a station you want to preset. ( page 30)
2 Select a preset number.
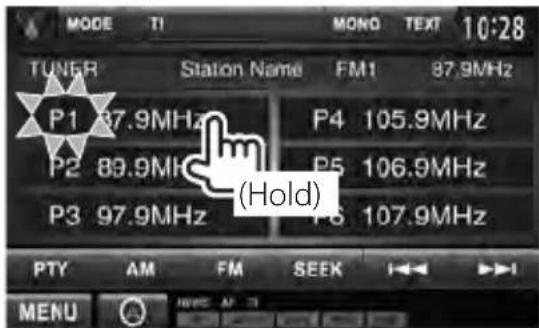
The station selected in step 1 is stored.
■ Selecting a preset station

The following features are available only for FM Radio Data System stations.
■ Searching for FM Radio Data System program—PTY Search
You can search for your favorite programs being broadcast by selecting the PTY code.
1

2 Select a PTY code.

Changes the page
PTY Search starts.
If there is a station broadcasting a program of the same PTY code as you have selected, that station is tuned in.
- Only English/Spanish/French/German/Dutch/Portuguese are available for the text language here. If another language has been selected in
■ Activating/deactivating TI/News Standby Reception
TIStandbyReception
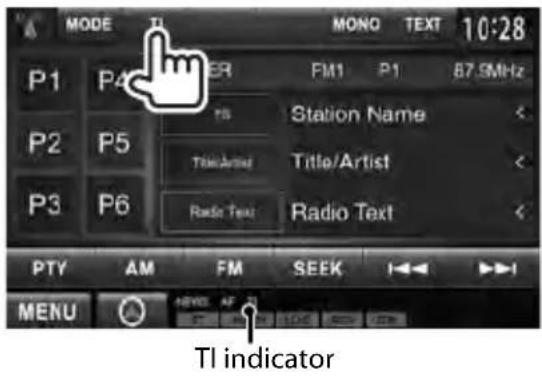
| TI indicator TI | Standby Reception |
| Lights in white | The unit will temporarily switch to Traffic Information (TI) if available. |
| Lights in orange | Not yet activated. Tune in to another station providing the Radio Data System signals. |
| Goes off Deactivated. | |
- The volume adjustment for Traffic Information is automatically memorized. The next time the unit switches to Traffic Information, the volume is set to the previous level.
News Standby Reception
1
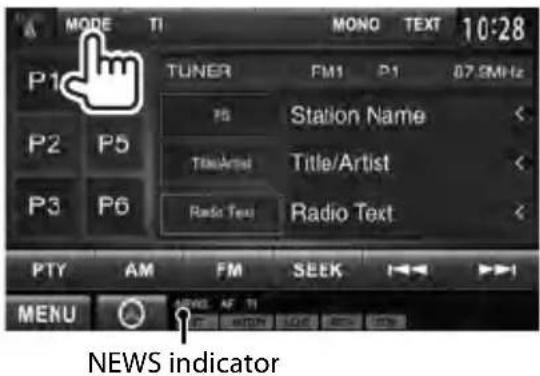
2

| 00min – 90min | Activates News Standby Reception (the NEWS indicator lights up).Select the period of time to disable interruption. |
| OFF Deactivates News Standby Reception. | |
- The volume adjustment while receiving News is automatically memorized. The next time the unit switches to News, the volume is set to the previous level.
■ Tracing the same program—Network-Tracking Reception
When driving in an area where FM reception is not sufficient enough, this unit automatically tunes in to another FM Radio Data System station of the same network, possibly broadcasting the same program with stronger signals.
When shipped from the factory, Network-Tracking Reception is activated.
To change the Network-Tracking Reception setting
1

2
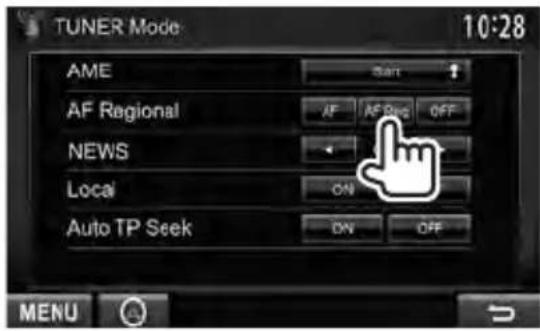
| AF Switches to another station. The program may differ from the one currently received (the AF indicator lights up). |
| AF Reg Switches to another station broadcasting the same program (the AF indicator lights up). |
| OFF Cancels. |
- The RDS indicator lights up when the Network-Tracking Reception is activated and an FM Radio Data System station is found.
■ Automatic TI station seek—Auto TP Seek
When traffic information station reception is poor, the unit automatically searches for another station that can be received better.
To activate Auto TP Seek
1

2

Todeactivate, select
Using other external components
AV-IN
To display the source control screen, page 14.
AV-IN name (below)

[MODE] Changes the AV-IN name.
- Press [◀] or [▶] to select an AV-IN name.
- This setting does not affect the source name "AV-IN 1"/"AV-IN 2" displayed on
.
[MENU]
Displays the
You can connect external components to the AV-IN1 and iPod/AV-IN2 input terminals.
Preparation:
If you want to use "AV-IN2", select [AV-IN2] for
- No preparation is required for "AV-IN1".
1 Connect external components to AV-IN1 and iPod/AV-IN2 input terminals.
To connect external components,
pages 75 and 76.
3 Turn on the connected component and start playing the source.
2 Select "AV-IN 1" or "AV-IN 2" as the source. ( page 14)
Using the external navigation unit
You can connect a navigation unit (KNA-G620T : optional accessory) to the navigation input terminal so that you can view the navigation screen. ( page 76)
The navigation guidance comes out of the front speakers even when you listen to an audio source.
Preparation: Select
■ To view the navigation
screen
On

α
On any screen:

The navigation screen is activated.
- While the navigation screen is displayed, the touch panel operations are available only for using navigation function.
- The aspect ratio of the navigation screen is fixed to
regardless of the setting ( page 42).
To cancel the navigation screen
DDX4023BT/
DDX6023BT/
DDX4053BT/
DDX6053BT
DDX3023/
DDX3053
DDX42BT/
DDX35

■ Settingsfornavigationunit
1 On

2
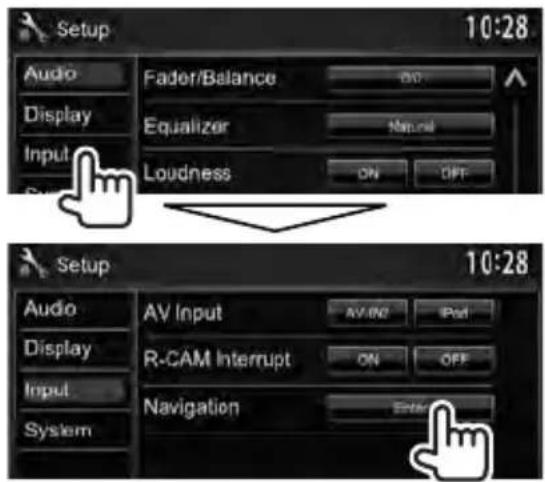
3
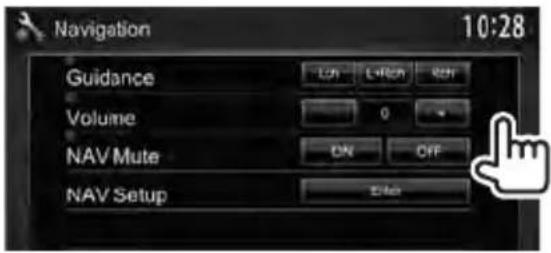
| Guidance Select front speakers used for the navigation guidance. |
| Volume Adjust the volume of the navigation guidance. (0 to 35) |
| NAV Mute Select [ON] to attenuate the sound coming out of speakers other than the front speakers during navigation guidance. |
| NAV Setup Press [Enter] to display the setup screen for the navigation unit.See the instruction manual supplied for the navigation unit. |
Sound adjustment
Using the sound equalization
- The adjustment is memorized for each source until you adjust the sound again. If the source is a disc, the adjustment is stored for each of the following categories.
- DVD/DVD-VR/VCD
- CD
- DivX/MPEG1/MPEG2/MP3/WMA/WAV/AAC
- You cannot adjust the sound when the unit is in standby.
■ Selecting a preset sound mode
1 On
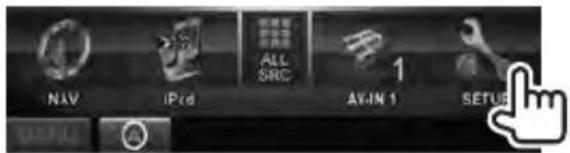
2

3 Select a sound mode.

Changes the page
■ Storing your own adjustment
Customizing preset sound mode
1 Select a sound mode. (☐)
"Selecting a preset sound mode")
2 Set

3 Adjust the level of each band (①), then select the subwoofer level* (②).
Selects the band
The adjustments are stored and
- You can also display the
* Adjustable only when the subwoofer is activated. ( page 44)
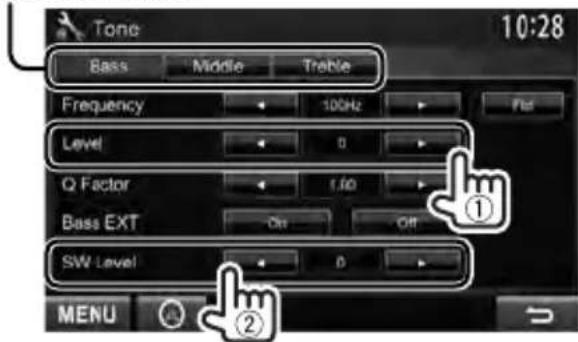
Adjusting the sound precisely
1 Perform steps 1 and 2 of "Selecting a preset sound mode," then...

2

3 Adjust the sound of each band.
Selects the band

Flat Changes level of Bass/Middle/Treble to 0.
Frequency Selects frequency.
Level Adjusts level.
Q Factor Adjusts the width of the frequency.
Bass EXT Activates/deactivates bass.
SW Level Adjusts subwoofer level.*
The adjustments are stored and
* Adjustable only when the subwoofer is activated. ( page 44)
Adjusting the crossover frequency
1 On

2

3 Select the item to adjust, then make adjustment.
Adjusts the crossover for front or rear speakers (high pass filter).

Adjusts the crossover for subwoofer (low pass filter).*1

Adjusts the subwoofer level.

Adjusts the cross over frequency.
Selects the phase for the subwoofer. *2
Adjustable only when the subwoofer is activated. ( page 44)
*2 Not selectable when
Changing the display design
You can change the background and panel color.
1 On :

2

3 Select an item to change ([Background] or [Panel Color]).
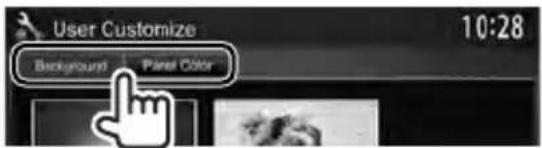
4 Select a background/panel color.
To select a background

For setting your favorite scene as the background, page 40
To select a panel color
Variable color illumination
- Illumination color changes gradually.

For making your own color adjustment, below
Making your own color adjustment
- You can make your own color adjustment only when
1

2

3
User color adjuster: You can make your own color adjustment stored in

Dimmer setting: You can make the color adjustment for each dimmer setting.
Using your favorite scene as the background
While playing a video or JPEG, you can capture an image and use the captured image as a background.
- You cannot capture copyrighted content and images from iPod/iPhone, or videos/JPEG from smartphone.
- When using a JPEG file as the background, make sure that the resolution is 800 x 600 pixels.
- The color of the captured image may look different from that of the actual scene.
1 Play a video or JPEG.
2 Display the
3
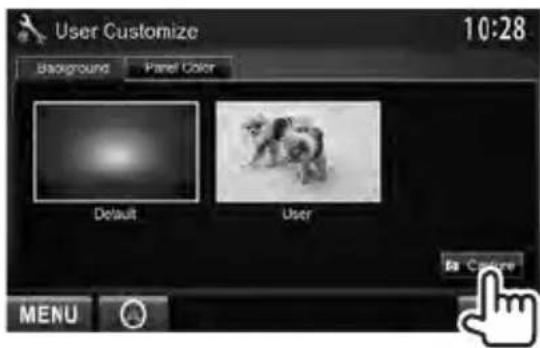
4 Adjust the image.

natural_image
Black-and-white photo of a small dog walking on a sandy beach, with a hand cursor icon overlay (no text or symbols on the dog or background)[▶Ⅱ]* Starts/Pauses playback. [Ⅰ▶]* Advances scenes frame-by-frame.
[⊕] Magnifies the scene. (
[▲] [▼] Moves the zooming frame. [◀] [▶]
- To cancel the capture screen, press [Cancel]. * Not displayed when playing an external component connected to AV-IN1 or iPod/AV-IN2 input terminal.
5 Capture the image displayed on the screen.

natural_image
Black-and-white photo of two small p�� dogs on a sandy beach, with no visible text or symbols.A confirmation message appears. Press [Yes] to store the newly captured image. (The existing image is replaced with the new one.)
- Press [No] to return to the previous screen.
Setting for video playback
You can change the setting for video playback.
Pictureadjustment
You can adjust the picture quality.
1 Display the adjustment menu.
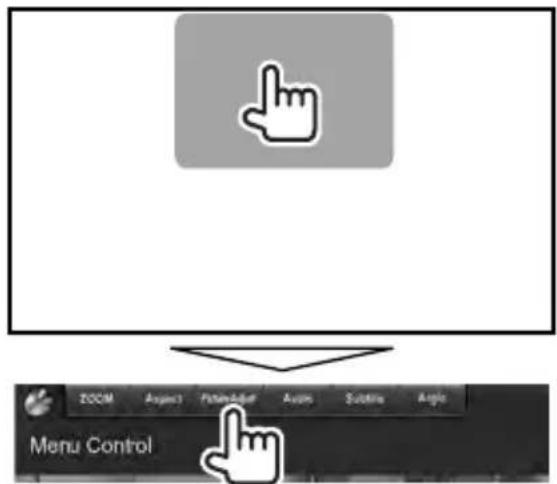
2 Select [DIM ON] (dimmer on) or [DIM OFF] (dimmer off).
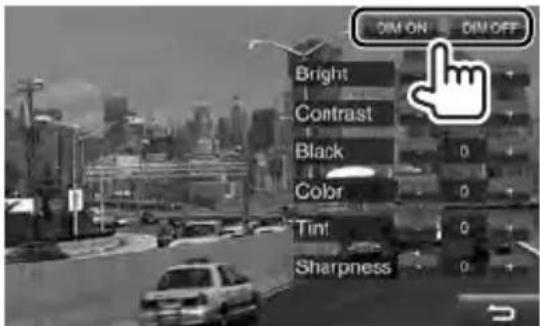
3 Adjust the picture (-15 to +15).
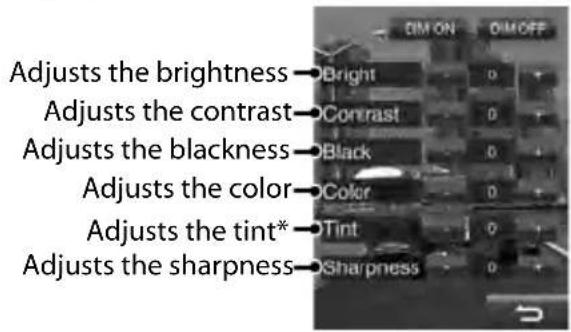
* Adjustable only when the incoming signal is NTSC.
Changing the aspect ratio
You can change the aspect ratio for video playback.
1

2

| 4:3 signal 1 | 6:9 signal | |
| FULL*:For 16:9originalpictures |  |  |
| JUST:For 4:3LBoriginalpictures |  | 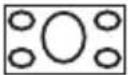 |
| Normal*:For 4:3 originalpictures | 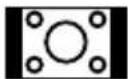 | 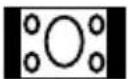 |
| Auto:· For “ | DISC”/“USB” only:The aspect ratio is automatically selected to match to the incoming signals. | |
* While DivX is played back with
Zoomingpicture
You can zoom the picture (
- When
1
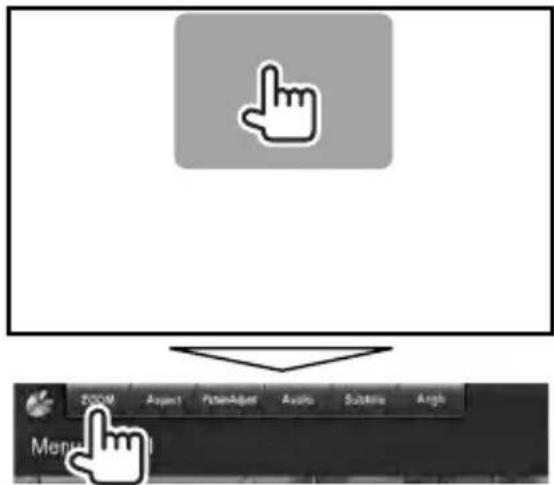
2
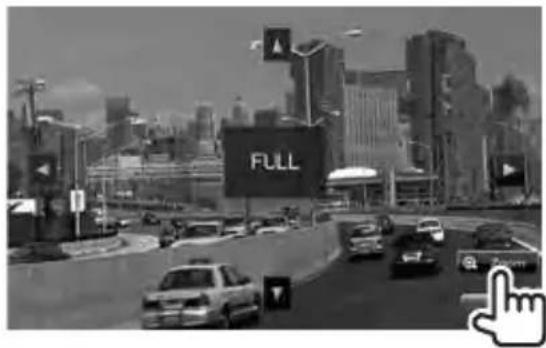
[▲] [▼] [◀] [▶]: Moves the zooming frame.
Using a rear view camera
- To use a rear view camera, the REVERSE lead connection is required. For connecting a rear view camera, page 76.
■ Activating the rear view camera
1 On

2


To deactivate, select [OFF].
■ Displaying the picture from the rear view camera
The rear view screen is displayed when you shift the gear to the reverse (R) position.
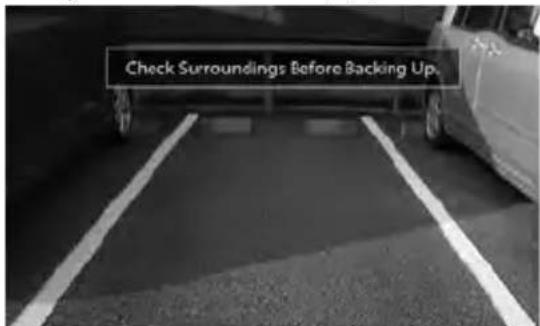
• To erase the caution message, touch the screen.
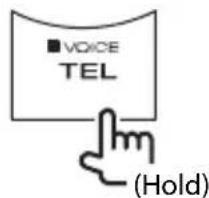
To display the picture from the rear view camera manually
DDX6023BT/DDX6053BT

DDX4023BT/ DDX4053BT*1

DDX3023/ DDX3053*2
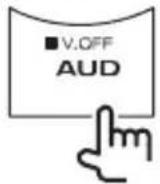
DDX42BT ^※ ■VOICE TEL (Hold)


When displaying the picture from the rear view camera manually, you can change the setting of the picture. ( pages 41 and 42 )
To erase the rear view screen, press and hold the same button again.
*1 This operation works only when
*2 This operation works only when
Setting menu items

- You cannot change
(page 12)
| Menu item Selectable setting | /item Initial: Underlined | |
| Audio | Fader/Balance | Fader: Adjust the front and rear speaker output balance.F6 to R6; Initial0When using a two-speaker system, set the fader to the center (0).Balance: Adjust the left and right speaker output balance.L6 to R6; Initial0Press [▲/▼/◄/►] or drag [⊕] to adjust.To clear the adjustment, press [Center]. |
| Equalizer | Change the sound mode or adjust and store the equalization for each source. ( page 37)Natural/Rock/Pops/Easy/Top40/Jazz/User | |
| Loudness You can activate/deactivate the loudness function.ON: Boost low and high frequencies to produce a well-balanced sound at a low volume level. The LOUD indicator lights up.OFF: Cancels. | ||
| X'over | Adjust the crossover frequency. ( page 38) | |
| Volume Offset | Adjust and store the auto-adjustment volume level for each source. (For discs, the adjustment is stored for each of the following categories: DVD/DVD-VR/VCD, CD, and DivX/MPEG1/MPEG2/MP3/WMA/WAV/AAC.) The volume level will automatically increase or decrease when you change the source.-15 to +6; Initial0 | |
| Subwoofer | ON: Activates the subwoofer.OFF: Cancels. | |
| Speaker Select | Select the size of the connected speaker.Standard/Narrow/Middle/Wide | |
| Menu item Selectable setting | g/item Initial: Underlined | |
| Display | Dimmer | ♦ Auto : Dims the screen and button illumination when you turn on the headlights.♦ ON : Activates dimmer.♦ OFF : Cancels.♦ NAV : Activates or deactivates dimmer according to the day/night display setting of the connected navigation unit. |
| UserCustomize | Change the display design (background and panel color). (page 39) | |
| OSD Clock | ♦ ON : Displays the clock while a video source is played back.♦ OFF : Cancels. | |
| Scroll | ♦ ON : Repeats scrolling.♦ Once : Scrolls the displayed information once.♦ OFF : Cancels.• Pressing [<] scrolls the text regardless of the setting. | |
| MenuCustomize | Change the items to display on thescreen. (page 15) | |
| Screen Adjust Adjust the | brightness and blackness of the screen.Select the dimmer mode (or) for adjustment, then change the following settings:♦ Bright : Adjusts brightness (-15 to +15; Initial 0 for/+15 for).♦ Black : Adjusts blackness (-15 to +15; Initial 0). | |
| Video Output * | Select the color system of the external monitor.♦ NTSC/PAL | |
| AngleOnly for DDX6023BT/DDX6053BT | Adjust the panel angle. (page 11) | |
* "Please power off" appears when the setting is changed. Turn off the power, then turn on to enable the change.
| Menu item Selectable setting/item Initial: Underlined | ||
| Input | AVInput | You can determine the use of the iPod/AV-IN2 input terminal.♦ AV-IN2 : Select to play an AV component connected to the iPod/AV-IN2 input terminal.♦ iPod : Select when connecting the iPod/iPhone using the USB Audio and Video cable for iPod/iPhone. (page 75) |
| R-CAMInterrupt | ♦ ON : Displays the picture from the rear view camera when you shift the gear to the reverse (R) position.♦ OFF : Select this when no camera is connected. | |
| NAV I/F Input *Only for DDX6023BT/DDX6053BT/DDX4023BT/DDX4053BT/DDX3053/DDX42BT/DDX35 | ♦ NAV : Enables to select “NAV” as the source.♦ MirrorLink : Enables to select “MirrorLink” as the source. | |
| NAV Mute* | Attenuate the sound coming out of speakers other than the front speakers during navigation guidance. | |
| Navigation*3 | Change the navigation settings. (page 36) | |
| System | Language*1 | Select the text language used for on-screen information.♦ English/Spanish/French/German/Italian/Dutch/Russian/Portuguese/Chinese-Simplified/Chinese-Traditional/Thai/Turkish/Arabic/Persian/Hebrew/Greek/Indonesia/Korean; Initial for DDX6023BT/DDX4023BT/DDX3023/DDX42BT: English, for DDX6053BT/DDX4053BT/DDX3053/DDX35: Russian• For external monitors, only English/Spanish/French/German/Italian/Dutch/Russian/Portuguese are available. If another language has been selected, the text language for external monitors will be set to English.♦ GUI : Select a language (or:the language selected above) used for displaying operation buttons and menu items. |
*1 "Please power off" appears when the setting is changed. Turn off the power, then turn on to enable the change.
*2 Appears when
| Menu item Selectable setting/item Initial: Underlined | ||
| System | Clock | Adjust the clock time. ( page 10) |
| Beep | ♦ ON : Activates the key-touch tone.♦ OFF : Cancels. | |
| Remote Sensor | ♦ ON : Activates the remote sensor.♦ OFF : Cancels. | |
| SETUP Memory You can memorize, recall, clear, or lock the settings you have made. ( page 48) | ||
| BluetoothSetup Only for DDX6023BT/DDX6053BT/DDX4023BT/DDX4053BT/DDX42BT | Configures settings for using a Bluetooth device, such as connection and other general operations. ( page 52) | |
| TEL Key Long Press Only for DDX4023BT/DDX4053BT/DDX42BT | Assigns the function of the TEL button when held.♦ V-OFF : Turns off the screen. ( page 12)♦ VOICE : Activates voice dialing. ( page 54)♦ R-CAM : Displays the picture from the rear view camera. ( page 43) | |
| AUD Key Long Press Only for DDX3023/DDX3053/DDX35 | Assigns the function of the AUD button when held.♦ V-OFF : Turns off the screen. ( page 12)♦ R-CAM : Displays the picture from the rear view camera. ( page 43) | |
| DivX(R) VOD This unit has its own Registration Code. Once you have played back a file with the Registration Code recorded, this unit's Registration Code is overwritten for copyright protection.·Press [Enter] to display the information.·To return to the previous screen, press [OK]. | ||
| Security Code | Register the security code for the unit. ( page 7) | |
| SI | Activate or deactivate the security function. ( page 7) | |
| Serial Number Displays the serial number. | ||
| Touch Panel Adjust | Adjust the touch position of the buttons on screen. ( page 48) | |
| System Information Displays the version information on the software. You can update the software. ( page 6) | ||
Memorizing/recallingthe settings
You can memorize the settings changed in the
- The memorized settings are kept even when the unit is reset.
1 On
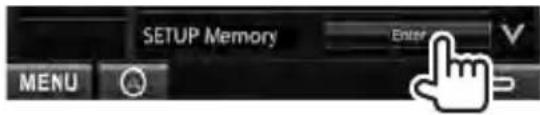
2

- To cancel, press [No].
3 Select an operation.

[Recall]: Recalls the memorized settings. [Memory]: Memorizes the current settings.
[Clear]: Clears the currently memorized settings.
- To cancel, press [Cancel].

Confirmation message appears. Press [Yes].
Locking the settings
You can lock the settings to prevent them from being changed.
- is shown beside the settings that can be locked.
1 On
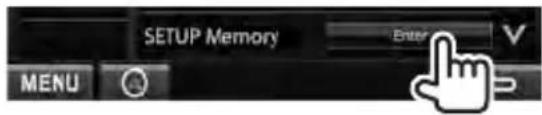
2

To unlock the setting, press [Unlock].
Adjusting the touch position
You can adjust the touch position on the touch panel if the position touched and the operation performed do not match.
1 On

2 Touch the center of the marks at the lower left and at the upper right as instructed.
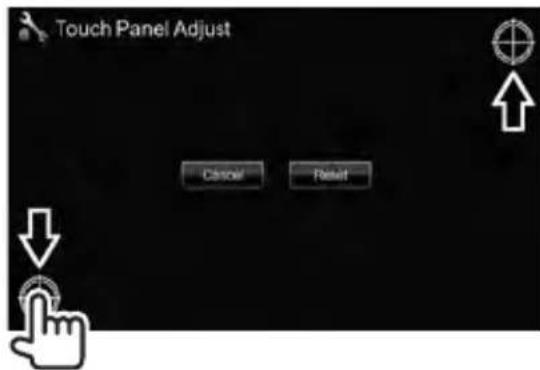
- To reset the touch position, press [Reset].
- To cancel the current operation, press [Cancel].
BLUETOOTH OPERATIONS
(Only for DDX6023BT/DDX6053BT/DDX4023BT/DDX4053BT/DDX42BT)
Information for using Bluetooth® devices
- While driving, do not perform complicated operations such as dialing the numbers, using phonebook, etc. When you perform these operations, stop your car in a safe place.
- Some Bluetooth devices may not be connected to this unit depending on the Bluetooth version of the device.
• This unit may not work for some Bluetooth devices. - Connecting condition may vary depending on circumstances around you.
- When the unit is turned off, the device is disconnected.
Bluetoothoperations

Bluetooth®
Bluetooth is a short-range wireless radio communication technology for the mobile device such as mobile phones, portable PCs, and other devices. The Bluetooth devices can be connected without cables and communicate with each other.
Preparation:
Bluetooth adapter KS-UBT1 has been attached. Connect the microphone (supplied) beforehand. (pages74and78)
DDX6023BT/DDX6053BT

DDX4023BT/DDX4053BT/DDX42BT

Bluetooth adapter (KS-UBT1)
Connecting Bluetooth devices
■ Registering a new Bluetooth device
When you connect a Bluetooth device to the unit for the first time, make pairing between the unit and the device for registration. Pairing allows Bluetooth devices to communicate each other.
- The pairing method differs depending on the Bluetooth version of the device.
- For the device with Bluetooth 2.1: You can pair the device and the unit using SSP (Secure Simple Pairing) which only requests confirmation.
- For the device with Bluetooth 2.0: You need to enter a PIN code both on the device and unit for pairing.
- Once the pairing is complete, it is registered in the unit even if you reset the unit. Up to 5 devices can be registered in total.
- Only one device for Bluetooth phone and one for Bluetooth audio can be connected at a time.
- To use the Bluetooth function, you need to turn on Bluetooth function of the device.
- To use the registered device, you need to connect the device to the unit. ( page 51)
Pairing a Bluetooth device using SSP (for Bluetooth 2.1)
When the Bluetooth device is compatible with Bluetooth 2.1, pairing request is sent from the available device. Confirm the request both on the device and the unit.
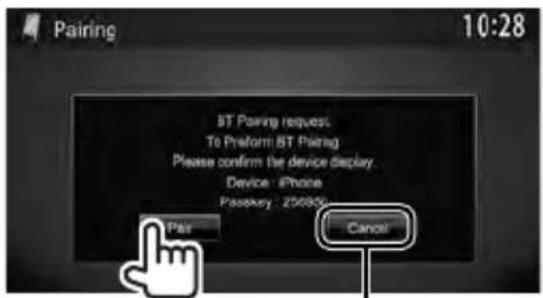
Rejects the request
Pairing a Bluetooth device using a PIN code (for Bluetooth2.0)
- The maximum digit of the PIN code that can be set is 16.
1 On

2 Display the screen.

3 Change the PIN code.
- If you skip changing the PIN code, go to step 4.


Deletes last entry
4 Operate the Bluetooth device to complete pairing.
When pairing is complete, the device is listed on
■ Connecting a registered Bluetooth device
1 Display the screen. (page 50)
2
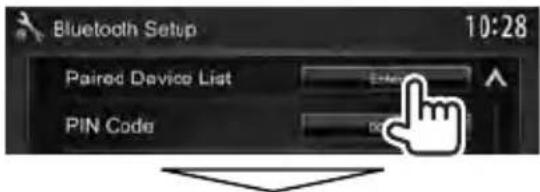
Select the device you want to connect (①), then select the usage of the device ([TEL (HFP)] for mobile phone and [Audio (A2DP)] for Bluetooth audio player)(②).

- Selectable items depend on the device you are operating.
- If you connect a device while another device is connected, the device previously connected is disconnected and the connection for the recently connected is established.
■ Deleting a registered Bluetooth device
1 Display the screen. ( page 50)
2

3 Select a device to delete (①), then delete the registration (②).

Confirmation message appears. Press [Yes].
Setting up Bluetooth
You can perform general operations such as connection and initialization through
■ Displaying the screen


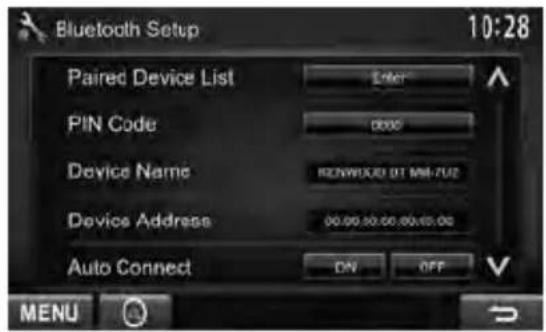
menu items
| Menu items Selectable setting/item Initial: Underlined | |
| Paired Device List | Press [Enter] to show the list of the registered devices. You can connect the device or delete the registration (page 51). |
| PIN Code Changes the PIN code of the unit.• Enter a new PIN code, then press [Enter]. | |
| Device Name Shows the device name to be shown on the Bluetooth device — “KENWOOD BT MM-7U2.” | |
| Device Address | Shows the device address of the unit. |
| Auto Connect | ♦ ON : The connection is automatically established with the last connected Bluetooth device when the unit is turned on.♦ OFF : Cancels. |
| Bluetooth HF/ Audio | Select the speakers used for Bluetooth (both phone and audio player).♦ Front Only : From front speakers only.♦ All : From all speakers. |
| Auto Pairing | ♦ ON : Establishes the pairing automatically with the connected iOS device (such as iPhone) even if the Bluetooth function is deactivated on the device. (Auto pairing may not work for some devices depending on the iOS version.)♦ OFF : Cancels. |
| Initialize | Hold [Enter] to initialize all settings you have made for using Bluetooth mobile phone and Bluetooth audio player. |
Using the Bluetooth mobile phone
■ Receiving a call
When a call comes in...
Call information
■ Adjusting the volume of microphone
While talking...
(if acquired)Rejects th
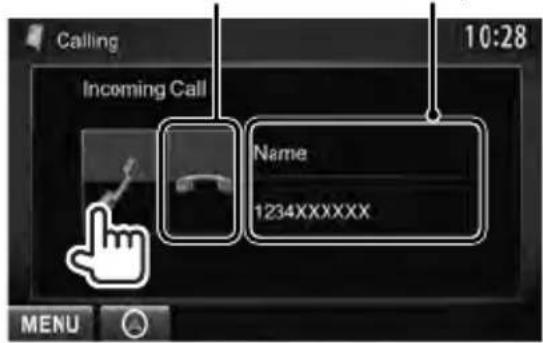
- Phone operation is not available while the picture from the rear view camera is displayed. ( page 43)
When is set to [On]
The unit answers the incoming call automatically. ( page 58)
■ Ending a call
While talking...
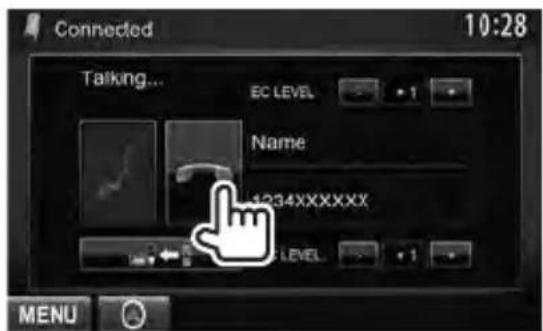

- This adjustment does not affect the volume level of the other sources.
- To adjust the volume of calls/earpiece, use VOLUME ▼ / for DDX6023BT/DDX6053BT), VOL/ATT/AUD knob (for DDX4023BT/DDX4053BT), or △/▽ (for DDX42BT) on the monitor panel.
■ Switching between handsfree mode and phone mode
While talking...

Each time you press the button, the talking method is switched ( ⇌ : handsfree mode / ⇌ : phone mode).
■ Notifying SMS reception
If the mobile phone is compatible with SMS (Short Message Service), the unit tells you a message has been received. ( page 58)
To read a received message, operate the mobile phone after stopping the car in a safe place.
- You cannot read, edit, or send a message through the unit.
■ Adjusting the echo cancel level
While talking...

■ Making a call
1 On

2 Select a method to make a call.
Phonebook/Call lists (page 55)
Direct number entry (the right column)

Voice dialing (the right column)
Direct number entry
Deletes last entry
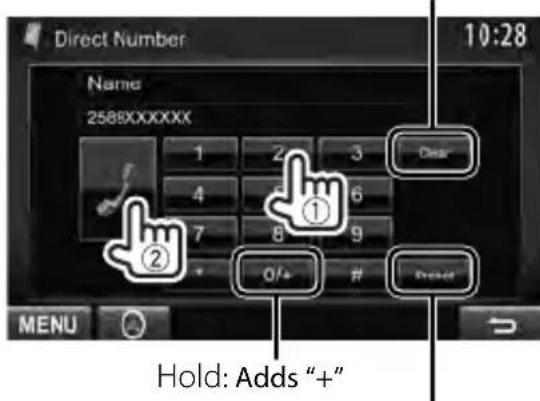
Presets the entered phone number on the preset list (page 56)
- You can enter up to 32 numbers.
Voicedialing
• Available only when the connected mobile phone has the voice recognition system.

Or
DDX6023BT/
DDX6053BT

DDX4023BT/
DDX4053BT* DDX42BT*

Speak the name you want to call.
To cancel, press [Cancel].
* This operation works only when <TEL Key Long
Press> is set to
Using the phonebook/call lists
1
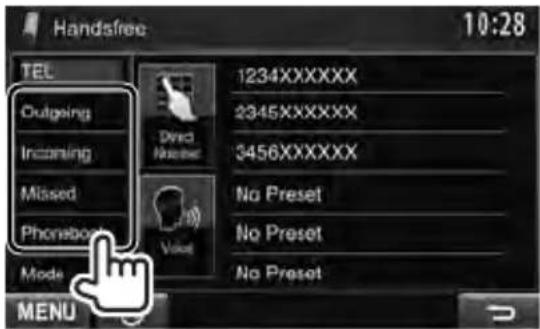
Outgoing From dialled call list.
Incoming From received call list.
Missed From missed call list.
Phonebook From phonebook.
- For copying the phonebook, page 56.

2
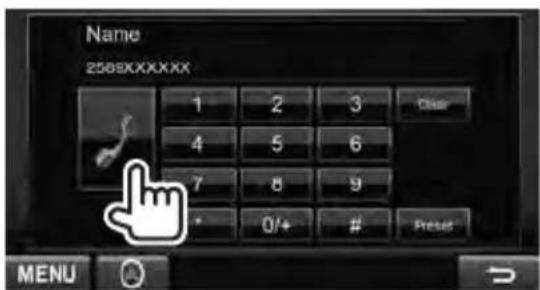
To use the A-Z search on the phonebook
When
1
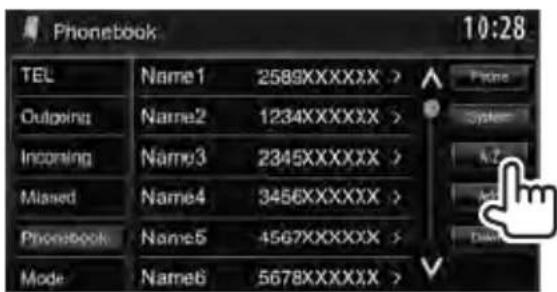
2 Select the initial.
- If the initial is not a letter or number, press [Others].

3 Select a phone number from the list.

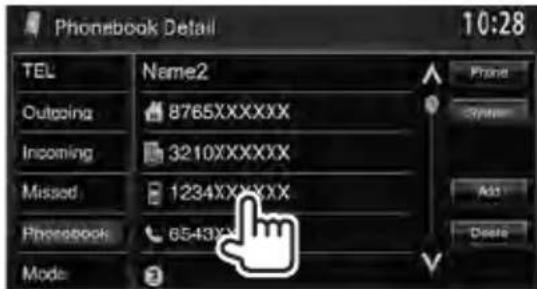
To display the details of an entry
When
1 Display the details of the desired entry.

2 Select a phone number to call.
■ Presetting the phone numbers
You can preset up to 6 phone numbers.
1 On
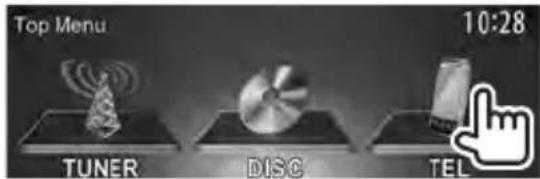
2 Select an item from phonebook/call lists.

3 Select a phone number.

4 Select a preset number to store into.

- You can also preset the phone number entered on
To delete the preset phone numbers, initialize the settings from
■ Copying the phonebook
You can copy the phonebook memory of a mobile phone into the unit (up to 400 entries).
1 On
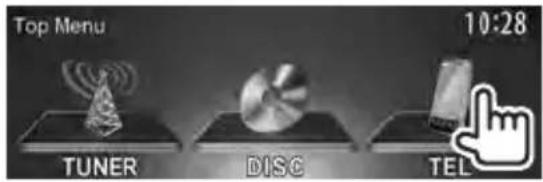


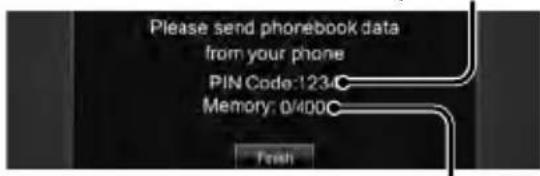
Numbers of the phonebook entries copied
4 Operate the target mobile phone.
• Refer to the instruction manual supplied with your mobile phone.
- To cancel the transfer, press [Finish].
5 Finish the procedure.

The phonebook memory is copied from the mobile phone.
■ Deleting the phone number entries in the unit
1 Display the phonebook/call list you want to delete. ( page 55)
2

- You cannot delete data when [Phone] is selected.
3 Select the item you want to delete.
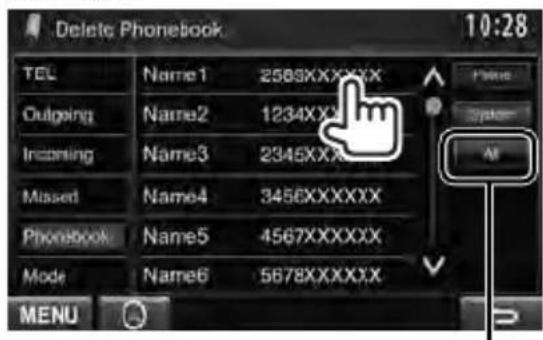
Deletes all the numbers/names in the selected item
A confirmation message appears. Press [Yes].
About mobile phones compatible with Phone Book Access Profile (PBAP)
If your mobile phone supports PBAP, you can display the phonebook and call lists on the touch panel screen when the mobile phone is connected.
• Phonebook: up to 5 000 entries
• Dialed calls, received calls, and missed calls: up to 50 entries each
To display the phonebook/call lists of the mobile phone or the unit
Connected mobile phone

Unit
Settings for Bluetooth mobile phone
1 On

2

3
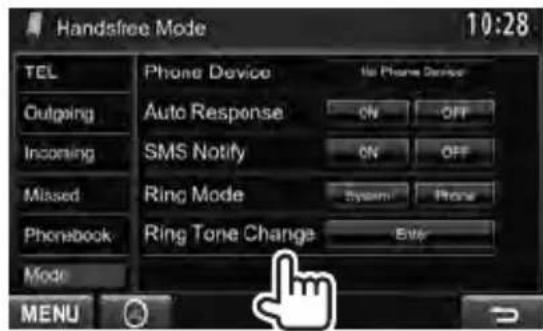
| Menu items Selectable setting/item Initial: Underlined | |
| Phone Device | Shows the connected phone device name. |
| Auto Response | ♦ ON : The unit answers the incoming calls automatically in 5 seconds.♦ OFF : The unit does not answer the calls automatically. Answer the calls manually. |
| SMSNotify | ♦ ON : The unit informs you of the arrival of a message by ringing and displaying “Receiving Message.”♦ OFF : The unit does not inform you of the arrival of a message. |
| Ring Mode | ♦ System : The ring tone set on the unit is used.♦ Phone : The ring tone set on the mobile phone is used. (This function may not work depending on the mobile phone.) |
| Ring Tone Change | Whenis set to, press [Enter], then select the ring tone for received calls and SMS from, , .♦ Call Tone : Selects the ring tone for phone calls.♦ Message : Selects the ring tone for SMS. Tone |
Using the Bluetooth audio player
• To register a new device, page 50.
- To connect/disconnect a device, page 51.
![Playback status* (▶: play/II: pause) 10:28 Bluetooth 00:10:28 Playing time * Title Artist Album Audio Device Tag data (current track title/ artist name/album title) * Pressing [<] scrolls the text if not all of the text is shown. MENU page 36](/content/2026/05/964491/images/04b268534ddfab2b079336342681c9f852bf0e7a53a004950e16cbdf5d30475b.jpg)
- The operation buttons, indications and information displayed on the screen differ depending on the connected device.
| [▶] Starts playback. | |
| [11] Pauses. | |
| [◀◀][▶▶▶] • Selects a track. (Press)• Reverse/forward search* (Hold) | |
| [MENU] | Displays thescreen. |
* Available only for the devices compatible with AVRCP 1.3.
DDX6023BT/DDX6053BT:
This unit can be operated using the Remote Controller (RC-DV340) supplied with this unit. DDX4023BT/DDX4053BT/DDX3023/DDX3053/DDX42BT/DDX35:
Optional Remote Controller KNA-RCDV331 is designed for controlling this unit. Refer to the instruction manual that comes with the remote controller.
CAUTION
- Put the Remote Controller in a place where it will not move during braking or other operations. A dangerous situation could result, if the Remote Controller falls down and gets wedged under the pedals while driving.
- Do not leave the battery near fire or under direct sunlight. A fire, explosion or excessive heat generation may result.
- Do not recharge, short, break up or heat the battery or place it in an open fire. Such actions may cause the battery to leak fluid. If spilled fluid comes in contact with your eyes or on clothing, immediately rinse with water and consult a physician.
- Place the battery out of reach of children. In the unlikely event that a child swallows the battery, immediately consult a physician.
Battery installation
Use two "AAA"/"R03"-size batteries.
Insert the batteries with the + and - poles aligned properly, following the illustration inside the case.

natural_image
Diagram of a mobile phone casing with battery pack and internal components (no text or symbols)- If the Remote Controller operates only over shorter distances or does not operate at all, it is possible that the batteries are depleted. In such instances, replace the both batteries with new ones.
Remote Controller mode switch
The functions operated from the remote controller differ depending on the position of the mode switch.

AUD mode: Switch to this mode when controlling a selected source or tuner source, etc.
DVD mode: Switch to this mode when playing DVDs or CDs etc. with the player integrated in this unit.
TV mode: Not used.
- The position of the remote control mode switch is indicated in the title of each mode, e.g., "(AUD mode)".
- When controlling a player that is not integrated in the unit, select "AUD" mode.
Operations from the remote controller
Common operations (AUD mode)
Source switching
Switches to the source to be played. Hangs up the incoming/current call.
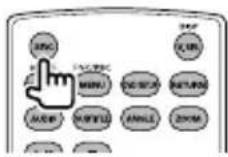
Volume control
Adjusts the volume.
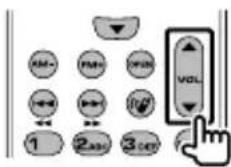
Volume attenuating
Press the key once to lower the volume. Press again to restore the previous volume.

NAV/V.SEL
Switches to the navigation screen.

Cursor key
Moves the cursor when displaying menu.

ENTER
Enters options.

Hands-free communication
When a call comes in, it answers the call.

Function
Switches the control screen.

MODE
Switches the aspect ratio.
Aspect ratio changes each time you press this key.

OPEN
(OnlyforDDX6023BT/DDX6053BT)
Adjusts the panel angle.
The panel angle changes each time you press this key.

DVD/VCD (DVD mode)
Track search and file search
Selects the track or file to be played.
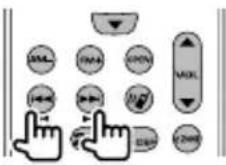
Play/Pause
Pauses the track.
Press again to resume playing.

Stop
Memorizes the last point where the disc stopped.

Direct search

Pressing this key switches the features that can be searched directly.
DVD-VIDEO
Chapter number
Title number
Cancel
DVD-VR
Chapter number
Program/Playlist
Cancel
VCD 1.X, VCD 2.X (PBC OFF)
Track number
Cancel
VCD 2.X (PBC ON)
Track number
Cancel
Once you have switched to the direct search feature, specify the search number from the numeric keypad, and then press [ENTER] key.
Numeric keypad
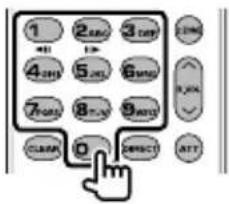
- Specify the number to search in direct search.
- Press 1 2ABC to fast forward/backward. Switches the fast forward/backward speed each time you press this key.
- Press 1 2 ABC to slow forward/backward during pause.
DVD Top Menu
Returns to the DVD top menu.
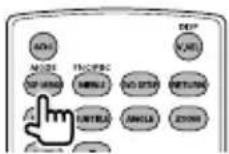
DVD Menu
Displays the DVD menu.

SUBTITLE
Switches the subtitle language.

ZOOM
Switches the zoom ratio each time you press this key.

Picture Angle
Switches the picture angle each time you press this key.

AUDIO
Switches the voice language each time you press this key.
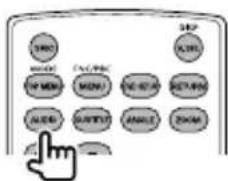
Music Disc/Audio file/Video file/Picture file (AUD mode)
Folder search
Selects the folder to be played.
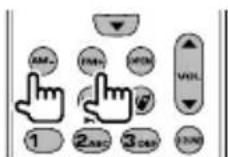
Track search and file search
Selects the track or file to be played.

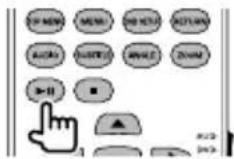
Play/Pause
Pauses the track.
Press again to resume playing.
Direct search

Pressing this key switches the features that can be searched directly.
Music Disc
Track number
Cancel
Audio files in DVD/CD disc
Folder number
File number
Cancel
Once you have switched to the direct search feature, specify the search number from the numeric keypad, and then press [ENTER] key.
Numeric keypad
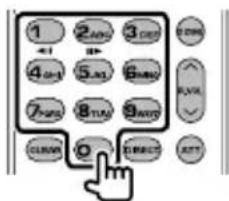
- Specify the number to search in direct search.
Radio (AUD mode)
Band switching
Switches to bands received by the unit.

Station selection
Switches to broadcast stations received by the unit.

Seek mode switching
Switches the Seek mode (AUTO1, AUTO2, MANU).
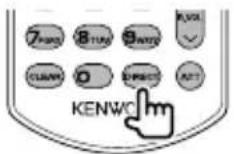
Direct tuning
After pressing this key, use the keypad to specify the broadcast station you wish to receive.
Example: 92.1MHz (FM)


Example: 810kHz (AM)


Numeric keypad
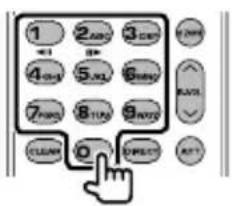
- To use preset tuning, press the number of a programmed broadcast station. (1 - 6MNO)
- Press the direct tuning key first, then specify the frequency of the station to receive.
iPod (AUD mode)
Music/Video search
Selects the music/video to be played.

Play/Pause
Pauses the music/video.
Press again to resume playing.

USB (AUD mode)
Folder search
Selects the folder to be played.

File search
Selects the file to be played.
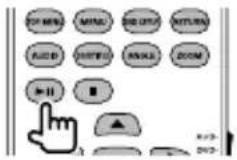
Play/Pause
Pauses the file.
Press again to resume playing.
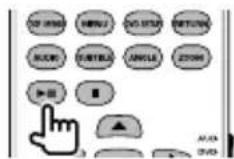
REFERENCE
Maintenance
■ Caution on cleaning the unit
Do not use any solvent (for example, thinner, benzine, etc.), detergent, or insecticide. This may damage the monitor or the unit.

natural_image
Illustration of a hand spraying water onto a microwave oven (no text or symbols)Recommended cleaning method:
Gently wipe the panel with a soft, dry cloth.
■ Moisture condensation
Moisture may condense on the lens inside the unit in the following cases:
• After starting the heater in the car.
- If it becomes very humid inside the car. Should this occur, the unit may malfunction. In this case, eject the disc and leave the unit turned on for a few hours until the moisture evaporates.
■ How to handle discs
When removing a disc
from its case, press
down the center holder of the case and lift the disc out, holding it by the edges.
Center holder

• Always hold the disc by the edges. Do not touch its recording surface.
When storing a disc in its case, gently insert the disc around the center holder (with the printed surface facing up).
• Make sure to store discs in their cases after use.
■ To keep discs clean
A dirty disc may not play correctly. If a disc does become dirty, wipe it with a soft cloth in a straight line from center to edge.

- Do not use any solvents (for example, conventional record cleaner, spray, thinner, benzine, etc.) to clean discs.
■ To play new discs
New discs may have some rough spots around the inner and outer edges. If such a disc is used, this unit may reject the disc.

To remove these rough spots, rub the edges with a pencil or ball-point pen, etc.
Do not use the following discs:
8 cm CD Warped disc


Sticker and sticker residue Stick-on label
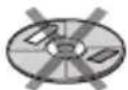

Unusual shape

C-thru Disc (semi-transparent disc)
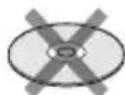
Transparent or semi-transparent parts on its recording area

■ File playback
Playing DivX files
- This unit can play back DivX files with the extension code <.divx> , <.div> , or <.avi> (regardless of the letter case—upper/lower).
- Audio stream should conform to MP3 or Dolby Digital.
- The file encoded in the interlaced scanning mode may not be played back correctly.
Playing MPEG1/MPEG2 files
- This unit can play back MPEG1/MPEG2 files with the extension code <.mpg> , <.mpeg> , or <.mod> .
- The stream format should conform to MPEG system/program stream. The file format should be MP@ML (Main Profile at Main Level)/SP@ML (Simple Profile at Main Level)/MP@LL (Main Profile at Low Level).
- Audio streams should conform to MPEG1 Audio Layer-2 or Dolby Digital.
Playing JPEG files
- This unit can play back JPEG files with the extension code <.jpg> or <.jpeg>.
- This unit can play back JPEG files that are at 32 x 32 to 8 192 x 7 680 resolution. It may take time to display the file depending on its resolution.
- This unit can play back baseline JPEG files. Progressive JPEG files or lossless JPEG files cannot be played.
We bear no responsibility for any loss of data in an iPod/iPhone and USB mass storage class device while using this unit.
Playing MP3/WMA/WAV/AAC files
- This unit can play back files with the extension code <.mp3> , <.wma> , <.wav> , or <.m4a> (regardless of the letter case—upper/lower). - This unit can play back the files meeting the conditions below:
- Bit rate: MP3: 8 kbps – 320 kbps WMA: 5 kbps – 320 kbps AAC: 16 kbps – 320 kbps
- Sampling frequency: 8 kHz – 48 kHz (for MP3/WMA) 44.1 kHz (for WAV) 32 kHz – 48 kHz (for AAC)
- This unit can show ID3 Tag Version 1.0/1.1/2.2/2.3/2.4 (for MP3).
- This unit can also show WAV/WMA/AAC Tag.
- This unit can play back files recorded in VBR (variable bit rate).
- Files recorded in VBR have a discrepancy in elapsed time indication.
- This unit cannot play back the following files:
- MP3 files encoded with MP3i and MP3 PRO format.
- MP3 files encoded with Layer 1/2.
- WMA files encoded with lossless, professional, and voice format.
- WMA files which are not based upon Windows Media® Audio.
- WMA/AAC files copy-protected with DRM.
- AAC files encoded by using any other application than iTunes.
- AAC files copy-protected with FairPlay (except those stored on an iPod).
- Files which have the data such as AIFF, ATRAC3, etc.
■ Sound signals emitted through the rear terminals
Through the analog terminals (Speaker out/Front Preout/Rear Preout)
2-channel signal is emitted. When playing multi-channel encoded disc, multi-channel signals are downmixed.
■ Language codes (for DVD/DivX language selection)
| Code | Language Code | Language Code Language | Code Language | ||||
| AA Afar | GL Galician MI | Maori SO Somali | |||||
| AB Abkhazian GN Guarani MK Macedonian SQ Albanian | |||||||
| AF Afrkaans GU Gujarati ML Malayalam SR Serbian | |||||||
| AM | Ameharic | HA | Hausa | MN | Mongolian | SS | Siswati |
| AR | Arabic | HI | Hindi | MO | Moldavian | ST | Sesotho |
| AS | Assamese | HR | Croatian | MR | Marathi | SU | Sundanese |
| AY | Aymara | HU | Hungarian | MS | Malay (MAY) | SW | Swahili |
| AZ | Azerbaijani | HY | Armenian | MT | Maltese | TA | Tamil |
| BA | Bashkir | IA | Interlingua | MY | Burmese | TE | Telugu |
| BE | Byelorussian | IE | Interlingue | NA | Nauru | TG | Tajik |
| BG | Bulgarian | IK | Inupiak | NE | Nepali | TH | Thai |
| BH | Bihari | IN | Indonesian | NO | Norwegian | TI | Tigrinya |
| BI | Bislama | IS | Icelandic | OC | Occitan | TK | Turkmen |
| BN | Bengali, Bangla | IW | Hebrew | OM | (Afan) Oromo | TL | Tagalog |
| BO | Tibetan | JA | Japanese | OR | Oriya | TN | Setswana |
| BR | Breton | JI | Yiddish | PA | Panjabi | TO | Tonga |
| CA | Catalan | JW | Javanese | PL | Polish | TR | Turkish |
| CO | Corsican | KA | Georgian | PS | Pashto, Pushto | TS | Tsonga |
| CS | Czech | KK | Kazakh | QU | Quechua | TT | Tatar |
| CY Welsh KL Greenlandic RM Rhaeto-Romance TW Twi | |||||||
| DZ | Bhutani | KM | Cambodian | RN | Kirundi | UK | Ukrainian |
| EL | Greek | KN | Kannada | RO | Rumanian | UR | Urdu |
| EO | Esperanto | KO | Korean (KOR) | RW | Kinyarwanda | UZ | Uzbek |
| ET | Estonian | KS | Kashmiri | SA | Sanskrit | VI | Vietnamese |
| EU | Basque | KU | Kurdish | SD | Sindhi | VO | Volapuk |
| FA | Persian | KY | Kirghiz | SG | Sangho | WO | Wolof |
| FI | Finnish | LA | Latin | SH | Serbo-Croatian | XH | Xhosa |
| FJ | Fiji | LN | Lingala | SI | Singhalese | YO | Yoruba |
| FO | Faroese | LO | Laothian | SK | Slovak | ZU | Zulu |
| FY | Frisian | LT | Lithuanian | SL | Slovenian | ||
| GA | Irish | LV | Latvian, Lettish | SM | Samoan | ||
| GD | Scots Gaelic MG | Malagasy SN Shona | |||||
Troubleshooting
What appears to be trouble is not always serious. Check the following points before calling a service center.
- For operations with the external components, refer also to the instructions supplied with the adapters used for the connections (as well as the instructions supplied with the external components).
■ If the following messages appear
General
| Message Remedy/Cause | |
| “No Signal” • Start the | playback on the external component connected to AV-IN1 or iPod/AV-IN2 input terminal.• Check the cords and connections.• Signal input is too weak. |
| • “Miswiring DC Offset Error”• “Warning DC Offset Error” | A speaker cord has shorted or it has come in to contact with the car chassis. Wire or insulate the speaker cord as appropriate, then reset the unit (pages 3 and 74). |
| “Parking off” | No playback picture is shown when the parking brake is not engaged. |
| “Authorization Error” | Check whether the connected iPod/iPhone is compatible with this unit. (page 25) |
| “USB Device Error” • | The USB power voltage is abnormal.• Turn off and turn on the unit.• Connect another USB device. |
| “Panel Mecha Error” | The panel does not work properly. Reset the unit. |
| “No Navigation” No | navigation unit is connected. |
Bluetooth (Only for DDX6023BT/DDX6053BT/DDX4023BT/DDX4053BT/DDX42BT)
| Message Remedy/Cause | |
| "No BT Dongle" The Bluetooth adapter (KS-UBT1) is removed. | |
| "Connection Error" | The device is registered but the connection has failed. Connect the registered device. (page 51) |
| "Please Wait..." | The unit is preparing to use the Bluetooth function. If the message does not disappear, turn off and turn on the unit, then connect the device again (or reset the unit). |
| "No Voice Device" | The connected mobile phone does not have the voice recognition system. |
| "No Data" | No phonebook data is contained in the connected Bluetooth phone. |
| "Initialize Error" | The unit has failed to initialize the Bluetooth module. Try the operation again. |
| "Dial Error" | Dialing has failed. Try the operation again. |
| "Hung Up Error" | The call has not ended yet. Park your car, and use the connected mobile phone to end the call. |
| "Pick Up Error" | The unit has failed to receive a call. |
■ If there seems to be a problem
| Symptom Remedy/Cause | ||
| General | No sound comes out of the speakers. | Adjust the volume to the optimum level.Check the cords and connections. |
| No picture is displayed on the screen. | Turn on the screen. (page 12) | |
| The unit does not work at all. | Reset the unit. (page 3) | |
| The remote controller* does not work. | Replace the battery. | |
| TUNER | AME automatic presetting does not work. | Store stations manually. (page 31) |
| Static noise while listening to the radio. | Connect the aerial firmly. | |
| Disc in general | Recordable/Rewritable discs cannot be played back.Tracks on the Recordable/Rewritable discs cannot be skipped. | Insert a finalized disc.Finalize the discs with the component which you used for recording. |
| Playback does not start. The format of files is not supported by the unit. | ||
| No picture appears on the external monitor. | Connect the video cord correctly.Select the correct input on the external monitor. | |
| DivX/MPEG1/MPEG2/JPEG/MP3/WMA/WAV/AAC | Disc cannot be played back. Record the tracks using a compliant application on the appropriate discs. (page 17)Add appropriate extension codes to the file names. | |
| Tracks are not played back as you have intended them to play. | Playback order may differ from the one played back using other players. | |
| AV-IN1/AV-IN2 | No picture appears on the screen. | Turn on the video component if it is not on.Connect the video component correctly.When AV-IN2' is selected as the source, setto [AV-IN]. |
* For DDX4023BT/DDX4053BT/DDX3023/DDX3053/DDX42BT/DDX35, purchase KNA-RCDV331 separately.
| Symptom Remedy/Cause | ||
| iPod/iPhone | No sound comes out of the speakers. | · Disconnect the iPod/iPhone, then connect it again.· Select another source and then reselect "iPod". |
| The iPod/iPhone does not turn on or does not work. | · Check the connecting cable and its connection.· Update the firmware version.· Charge the battery.· Check whether the iPod/iPhone control mode is correctly selected. ( page 27)· Reset the iPod/iPhone. | |
| Sound is distorted. Deactivate the | equalizer either on this unit or the iPod/iPhone. | |
| A lot of noise is generated. Turn off (unchecked) the "VoiceOver" feature of the iPod. For details, visit. | ||
| No operations are available when playing back a track containing Artwork. | Operate the unit after the Artwork is loaded. ( page 25) | |
| Sound does not synchronize with the video. | Select for ( page 46) | |
| · Videos cannot be played.· No sound of videos comes out. | · Connect USB Audio and Video cable KCA-iP202/ KCA-iP22F. Other cables cannot be used.· Select for ( page 46) | |
| USB | "Reading..." keeps flashing on the screen. | Turn off the power and on again. |
| While playing a track, sound is sometimes interrupted. | The tracks are not properly copied into the USB device. Copy tracks again, and try again. | |
| Bluetooth (only for DDX6023BT/DDX6053BT/DDX4023BT/DDX4053BT/DDX42BT) | Phone sound quality is poor. · Reduce the distance between the unit and the Bluetooth mobile phone.· Move the car to place where you can get a better signal reception. | |
| The sound is interrupted or skipped while using a Bluetooth audio player. | · Reduce the distance between the unit and the Bluetooth audio player.· Disconnect the device connected for Bluetooth phone.· Turn off, then turn on the unit.· (When the sound is not yet restored) connect the player again. | |
| The connected audio player cannot be controlled. | Check whether the connected audio player supports AVRCP (Audio Video Remote Control Profile). | |
| Bluetooth device does not detect the unit. | · Check whether the Bluetooth adapter (KS-UBT1) is inserted correctly.· Search from the Bluetooth device again. | |
| The unit does not make pairing with the Bluetooth device. | · For the device compatible with Bluetooth2.1: Register the device by using a PIN code. ( page 50)· For the device compatible with Bluetooth 2.0: Enter the same PIN code for both the unit and target device. If the PIN code of the device is not indicated on its instructions, try "0000" or "1234." | |
| Echo or noise occurs. Adjust the microphone unit position. | ||
| The unit does not respond when you try to copy the phonebook to the unit. | You may have tried to copy the same entries (as stored) to the unit. | |
Accessories/InstallationProcedure
Accessories
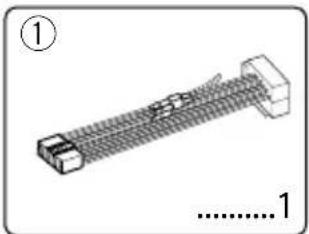
natural_image
Diagram of a mechanical assembly with labeled parts (1 and 1), no readable text or symbols present.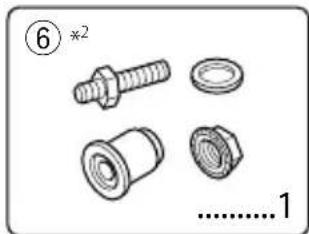
natural_image
Illustration of four mechanical components: a bolt, a nut, and a washer (no text or symbols)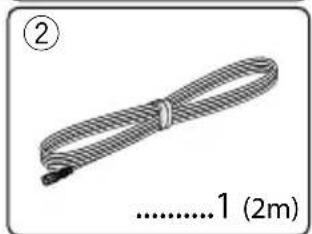
natural_image
Coiled cable or rope with measurement annotation (no text or symbols on the object itself)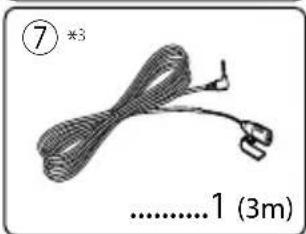
natural_image
Illustration of a coiled cable or rope with a small attached clip, labeled with number 7 and dimension 1 (3m) (no text or symbols on the diagram itself)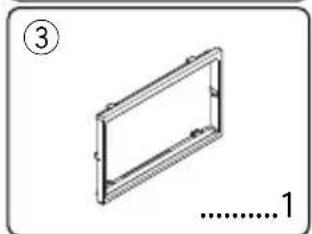
natural_image
Simple line drawing of a rectangular frame with no text or symbols*1 DDX4023BT/ DDX4053BT/ DDX3023/DDX3053/ DDX42BT/DDX35 only. *2 DDX6023BT/ DDX6053BT only.
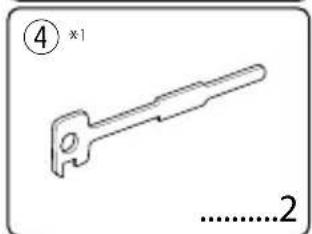
natural_image
Line drawing of a mechanical tool with a handle and key (no text or symbols)*DDX6023BT/ DDX6053BT/ DDX4023BT/ DDX4053BT/DDX42BT only.

natural_image
Simple line drawing of a mechanical part with no text or symbolsInstallation Procedure
1 To prevent a short circuit, remove the key from the ignition and disconnect the ⊖ battery.
2 Make the proper input and output wire connections for each unit.
3 Connect the speaker wires of the wiring harness.
4 Take Connector B on the wiring harness and connect it to the speaker connector in your vehicle.
5 Take Connector A on the wiring harness and connect it to the external power connector on your vehicle.
6 Connect the wiring harness connector to the unit.
7 Install the unit in your car.
8 Reconnect the battery.
9 Press the reset button.
10 Perform the Initial Setup.
WARNING
- If you connect the ignition wire (red) and the battery wire (yellow) to the car chassis (ground), you may cause a short circuit, that in turn may start a fire. Always connect those wires to the power source running through the fuse box.
- Do not cut out the fuse from the ignition wire (red) and the battery wire (yellow). The power supply must be connected to the wires via the fuse.
!
- Mounting and wiring this product requires skills and experience. For best safety, leave the mounting and wiring work to professionals.
- Make sure to ground the unit to a negative 12V DC power supply.
- Do not install the unit in a spot exposed to direct sunlight or excessive heat or humidity. Also avoid places with too much dust or the possibility of water splashing.
- Do not use your own screws. Use only the screws provided. If you use the wrong screws, you could damage the unit.
- If the power is not turned ON ("Miswiring DC Offset Error", "Warning DC Offset Error" is displayed), the speaker wire may have a short-circuit or touched the chassis of the vehicle and the protection function may have been activated. Therefore, the speaker wire should be checked.
- If your car's ignition does not have an ACC position, connect the ignition wires to a power source that can be turned on and off with the ignition key. If you connect the ignition wire to a power source with a constant voltage supply, such as with battery wires, the battery may be drained.
-
Only for DDX6023BT/DDX6053BT: If the console has a lid, make sure to install the unit so that the faceplate will not hit the lid when closing and opening.
-
If the fuse blows, first make sure the wires are not touching to cause a short circuit, then replace the old fuse with one with the same rating.
• Insulate unconnected wires with vinyl tape or other similar material. To prevent a short circuit, do not remove the caps on the ends of the unconnected wires or the terminals. - Connect the speaker wires correctly to the terminals to which they correspond. The unit may be damaged or fail to work if you share the wires or ground them to any metal part in the car.
- When only two speakers are being connected to the system, connect the connectors either to both the front output terminals or to both the rear output terminals (do not use one from each). For example, if you connect the connector of the left speaker to a front output terminal, do not connect the connector to a rear output terminal.
• After the unit is installed, check whether the brake lamps, blinkers, wipers, etc. on the car are working properly. - Mount the unit so that the mounting angle is 30^ or less.
- Do not press hard on the panel surface when installing the unit to the vehicle. Otherwise scars, damage, or failure may result.
- This unit has the cooling fan to decrease the internal temperature. Do not mount the unit in a place where the cooling fan of the unit is blocked. Blocking these openings will prevent the cooling of the internal temperature and result in malfunction.

Install this unit in the console of your vehicle.
Do not touch the metal part of this unit during and shortly after the use of the unit. Metal part such as the heat sink and enclosure become hot.
DDX6023BT/DDX6053BTonly
1 Before installation, remove the screws.

Do not use the removed screws for installation.
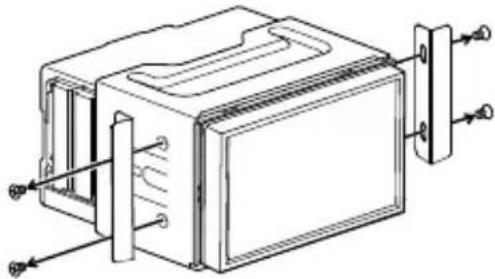
natural_image
Technical line drawing of a mechanical housing or enclosure with mounting brackets and internal components (no text or symbols)2 Detach the sleeve using the two extraction keys ⑤ then slide off the mounting sleeve.
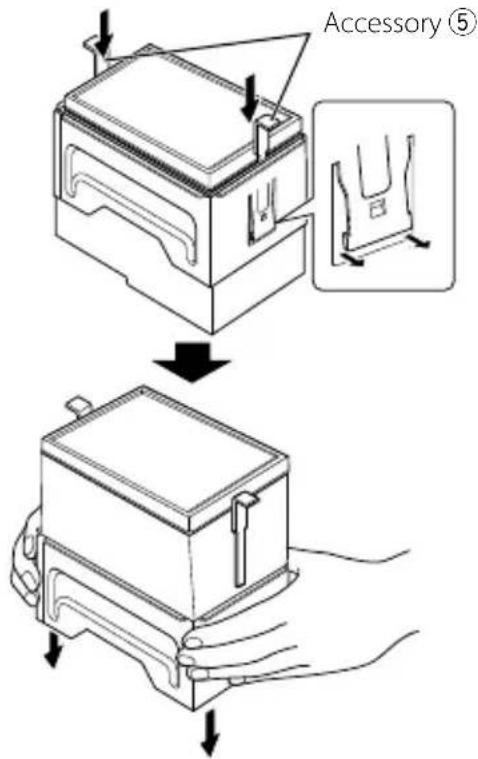
DDX4023BT/DDX4053BT/DDX42BTonly
• Install the Bluetooth adapter (KS-UBT1) besides the place enclosed by the metal.
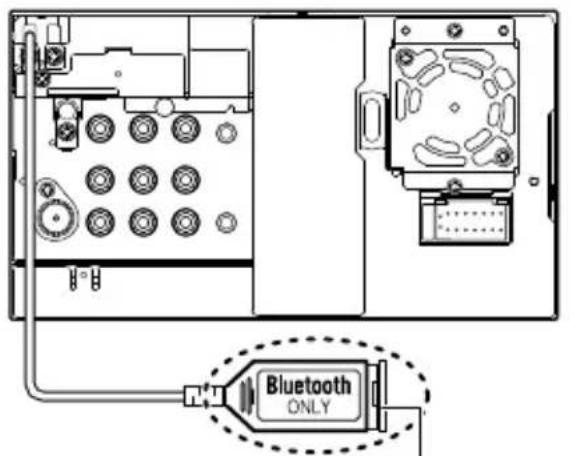
Bluetooth adapter (KS-UBT1)
ConnectingWirestoTerminals

flowchart
graph TD
    A["Bluetooth Microphone (Accessory ⑦) DDX6023BT/DDX6053BT/DDX4023BT/DDX4053BT/DDX42BT only"] --> B["Subwoofer"]
    B --> C["Subwoofer Preout (monaural)"]
    C --> D["Connect to vehicle's reverse lamp harness when using the optional rear view camera."]
    D --> E["Extension cable (Accessory ②)"]
    E --> F["PARK SW"]
    F --> G["(Parking sensor wire)"]
    G --> H["For best safety, be sure to connect the parking sensor."]
    H --> I["Connect to the vehicle's parking brake detection switch harness."]
    I --> J["Linking cable"]
    J --> K["Motor"]
    L["Antenna Cord"] --> M["FUSE (10A)"]
    N["FM/AM antenna input (JASO)"] --> O["Switch"]
    P["Accessory ①"] --> Q["Light blue/Yellow"]
    Q --> R["Remote CONT"]
    R --> S["STEERING WHEEL REMOTE INPUT"]
    T["Blue/White"] --> U["(Steering remote control wire)"]
    U --> V["P.CONT ANT CONT"]
    W["Brown"] --> X["(Power control/antenna control wire)"]
    X --> Y["MUTE"]
    Z["Yellow (Battery wire)"] --> AA["Red (Ignition wire)"]
    AB["Red (A7)"] --> AC["Yellow (Battery wire)"]
    AD["Yellow (A4)"] --> AE["Red (Ignition wire)"]
    AF["Connector A"] --> AG["Connector B"]
    AH["Connector B"] --> AI["Yellow (Battery wire)"]
    AJ["Red (A7)"] --> AK["Red (Ignition wire)"]
    AL["Yellow (A4)"] --> AM["Yellow (Battery wire)"]
    AN["Default wiring"] --> AO["Yellow (Battery wire)"]
| Pin Colour and functions | |
| A4 Yellow Battery | |
| A5 Blue/White Power Control | |
| A6 Orange/White Dimmer | |
| A7 Red Ignition (ACC) | |
| A8 Black Earth (Ground) Connection | |
| Pin Colour and functions | ||
| B1/B2 | Purple⊕ / Purple/Black⊖ | Rear Speaker (Right) |
| B3/B4 | Gray⊕ / Gray/Black⊖ | Front Speaker (Right) |
| B5/B6 | White⊕ / White/Black⊖ | Front Speaker (Left) |
| B7/B8 | Green⊕ / Green/Black⊖ | Rear Speaker (Left) |
Connecting a USB device/iPod/iPhone
For DDX6023BT/DDX6053BT

flowchart
graph TD
    A["iPod (commercially available)"] --> B["USB device (commercially available)"]
    B --> C["CA-U1EX* (Optional Accessory)"]
    C --> D["USB terminal"]
    D --> E["iPod/AV IN2"]
    E --> F["iPod/Audio Visual input 2 (iPod/AV-IN2) (iPod/AV Input 2 switchable)"]
    G["KCA-iP202 (Optional Accessory)"] --> H["(0.8 m)"]
    H --> I["(1.8 m)"]
    style A fill:#f9f,stroke:#333
    style B fill:#f9f,stroke:#333
    style C fill:#ccf,stroke:#333
    style D fill:#cfc,stroke:#333
    style E fill:#fcc,stroke:#333
    style F fill:#cff,stroke:#333
    style G fill:#ffc,stroke:#333
    style H fill:#cfc,stroke:#333
    note right of A: * Use CA-U1EX for extending the cable if necessary. (Max 500 mA, 5V)
For DDX4023BT/DDX4053BT

flowchart
graph TD
    A["iPod (commercially available)"] --> B["USB device (commercially available)"]
    B --> C["CA-U1EX* (Optional Accessory)"]
    C --> D["USB terminal"]
    D --> E["iPod/Audio Visual input 2 (iPod/AV-IN2) (iPod/AV Input 2 switchable)"]
    E --> F["iPod/AV IN2"]
    G["KCA-iP202 (Optional Accessory)"] --> H["(0.8 m)"]
    H --> I["(1.8 m)"]
    style A fill:#f9f,stroke:#333
    style B fill:#ccf,stroke:#333
    style C fill:#cfc,stroke:#333
    style D fill:#fcc,stroke:#333
    style E fill:#cff,stroke:#333
    style F fill:#ffc,stroke:#333
    style G fill:#fff,stroke:#333
    note right of A: * Use CA-U1EX for extending the cable if necessary. (Max 500 mA, 5V)
For DDX42BT/DDX35
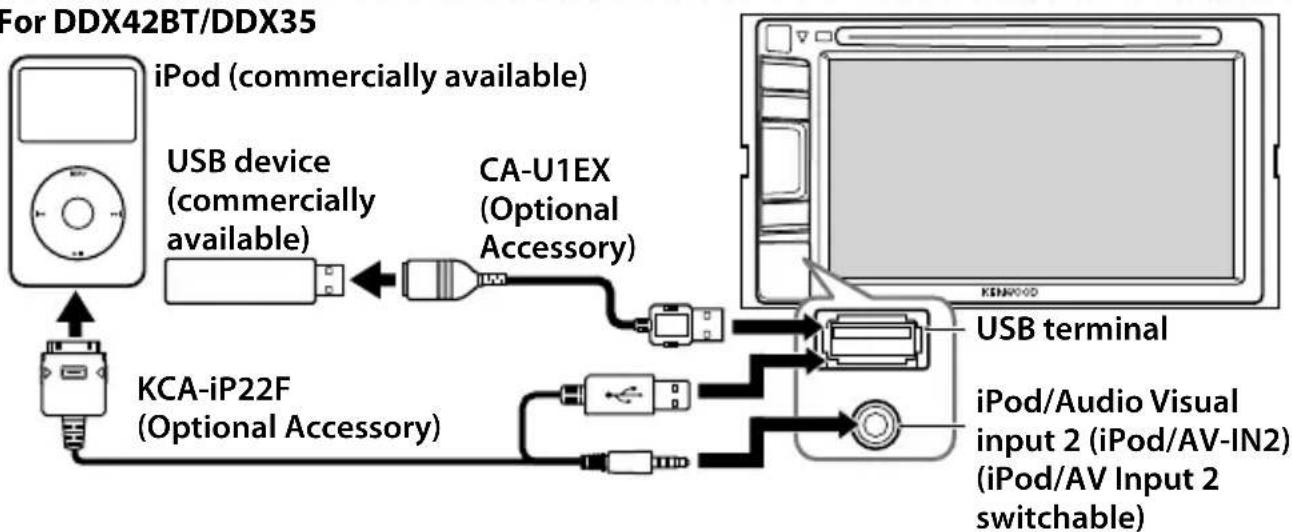
flowchart
graph TD
    A["iPod (commercially available)"] --> B["USB device (commercially available)"]
    B --> C["USB terminal"]
    D["KCA-iP22F (Optional Accessory)"] --> E["USB terminal"]
    E --> F["iPod/Audio Visual input 2 (iPod/AV-IN2) (iPod/AV Input 2 switchable)"]
    G["CA-U1EX (Optional Accessory)"] --> H["USB terminal"]
    H --> I["iPod/Audio Visual input 2 (iPod/AV-IN2) (iPod/AV Input 2 switchable)"]
Connecting Other Products
Navigation System (Optional Accessory)

flowchart
graph TD
    A["GPS antenna (CX-G100 : Optional Accessory)"] --> B["SMARTPHONEADAPTER (KCA-ML100 : Optional Accessory)"]
    B --> C["SMARTPHONE (commercially available)"]
    C --> D["Navi I/F Input"]
    D --> E["Rear View Camera Input"]
    E --> F["Visual input (Yellow)"]
    D --> G["Audio/Visual Output"]
    G --> H["Visual output (Yellow)"]
    G --> I["Audio output (3.5φ mini plug)"]
    G --> J["Resistance-free stereo type mini plug"]
    D --> K["Rear Preout"]
    K --> L["Audio left output (White)"]
    K --> M["Audio right output (Red)"]
    D --> N["Front Preout"]
    N --> O["Audio left output (White)"]
    N --> P["Audio right output (Red)"]
    D --> Q["Audio Visual input 1 (AV-IN1)"]
    Q --> R["Visual input (Yellow)"]
    Q --> S["Audio left input (White)"]
    Q --> T["Audio right input (Red)"]
    D --> U["Blue/White (Power control wire) To Main unit (page 74)"]
    D --> V["Light Green (Parking sensor wire)"]
    D --> W["Yellow (Battery wire)"]
    D --> X["FUSE (5A)"]
    D --> Y["Black (Ground wire) ⊖ (To car chassis)"]
    D --> Z["Battery"]
    style A fill:#f9f,stroke:#333
    style B fill:#ccf,stroke:#333
    style C fill:#cfc,stroke:#333
    style D fill:#fcc,stroke:#333
    style E fill:#ffc,stroke:#333
    style G fill:#ffc,stroke:#333
    style H fill:#ffc,stroke:#333
    style I fill:#ffc,stroke:#333
    style J fill:#ffc,stroke:#333
    style K fill:#ffc,stroke:#333
    style L fill:#ffc,stroke:#333
    style M fill:#ffc,stroke:#333
    style N fill:#ffc,stroke:#333
    style O fill:#ffc,stroke:#333
    style P fill:#ffc,stroke:#333
    style Q fill:#ffc,stroke:#333
    style R fill:#ffc,stroke:#333
    style S fill:#ffc,stroke:#333
    style T fill:#ffc,stroke:#333
    style U fill:#ffc,stroke:#333
    style V fill:#ffc,stroke:#333
    style W fill:#ffc,stroke:#333
    style X fill:#ffc,stroke:#333
    style Y fill:#ffc,stroke:#333
Installing the Trim Plate
1 Attach accessory ③ to the unit.
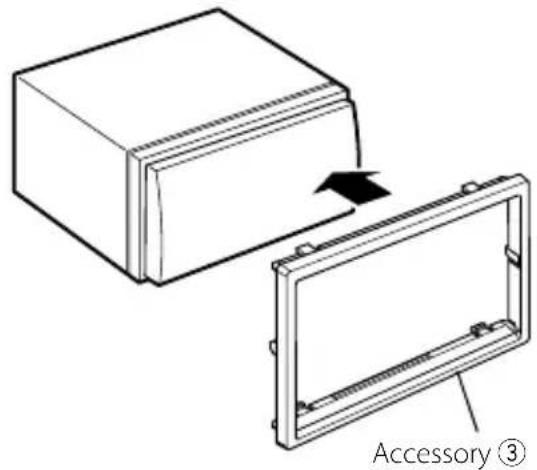
Installing the Unit
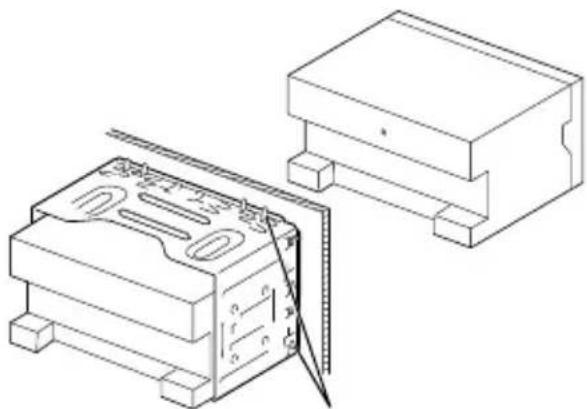
natural_image
Technical line drawing of a device housing with a separate component, showing internal components and mounting base (no text or symbols)Bend the tabs of the mounting sleeve with a screwdriver or similar utensil and attach it in place.
For more stable attachment the unit (DDX6053BT/DDX6023BT only)
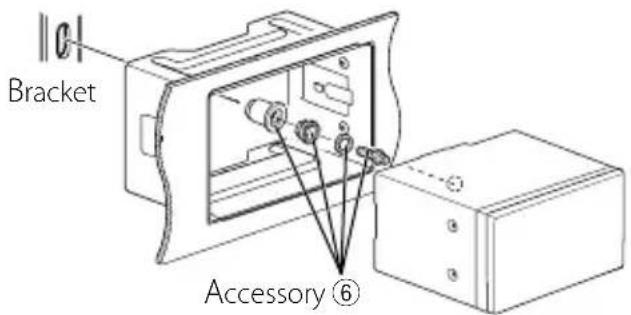
Removing the Trim Plate (DDX4023BT/DDX4053BT/DDX3023/DDX3053/DDX42BT/DDX35 only)
1 Engage the catch pins on the extraction key ④ and remove the two locks on the lower part. Lower the frame and pull it forward as shown in the figure.


- The frame can be removed from the top side in the same manner.
2 When the lower part is removed, remove the upper two locations.
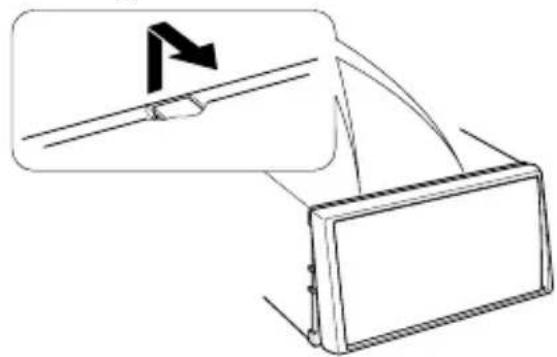
natural_image
Diagram showing a device with an arrow pointing to a bracket and a magnified view of the component (no text or symbols)
- Make sure that the unit is installed securely in place. If the unit is unstable, it may malfunction (eg, the sound may skip).
Removing the Unit (DDX4023BT/DDX4053BT/DDX3023/DDX3053/DDX42BT/DDX35 only)
- For removing DDX6023BT/DDX6053BT, page 73.
1 Remove the trim plate by referring to the removal procedure in the section "Removing the Trim Plate".
2 Insert the two extraction keys ④ deeply into the slots on each side, as shown.

3 Lower the extraction keyl toward the bottom, and pull out the unit halfway while pressing towards the inside.

natural_image
Illustration of hands using a tool to adjust or install a rectangular object, with arrows indicating motion (no text or symbols)
- Be careful to avoid injury from the catch pins on the removal tool.
4 Pull the unit all the way out with your hands, being careful not to drop it.
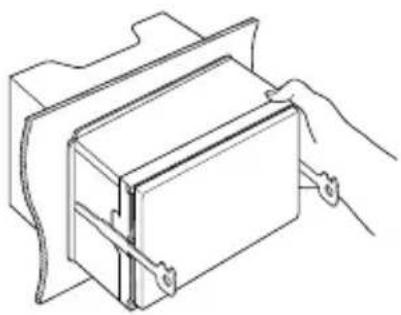
natural_image
Line drawing of a hand holding a rectangular device with mounting brackets (no text or symbols)Installing the Microphone Unit (DDX6023BT/ DDX6053BT/ DDX4023BT/ DDX4053BT/DDX42BT only)
1 Check the installation position of the microphone (accessory ⑦).
2 Remove oil and other dirt from the installation surface.
3 Install the microphone.
4 Wire the microphone cable up to the unit with it secured at several positions using tape or the like.

• Install the microphone as far as possible from the mobile phone.

Fix a cable with clamps (commercially available).
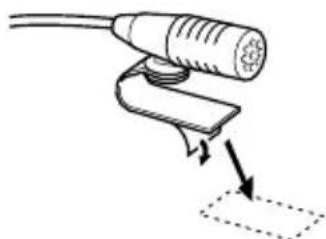
natural_image
Diagram of a handheld device with a cable and connector, showing directional arrows indicating movement or force (no text or symbols present)Peel the release coated paper of double-face adhesive tape to fix on the place shown above.
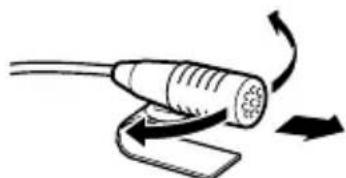
natural_image
Diagram of a cable being inserted into a connector with directional arrows indicating motion (no text or symbols)Adjust the direction of the microphone to the driver.
Monitor section
Picture Size
: 6.95 inches (diagonal) wide
156.6 mm (W) × 81.6 mm (H)
(DDX6023BT/DDX6053BT)
: 6.1 inches (diagonal) wide
136.2 mm (W) × 72 mm (H)
( DDX4023BT/DDX4053BT/DDX3023/
DDX3053/DDX42BT/DDX35)
Display System
: Transparent TN LCD panel
Drive System
: TFT active matrix system
Number of Pixels
: 1,152,000 (800H × 480V × RGB)
Effective Pixels
: 99.99%
Pixel Arrangement
: RGB striped arrangement
Back Lighting
: LED
DVD player section
D/A Converter
: 24 bit
Audio Decoder
: Linear PCM/Dolby Digital/dts/MP3/WMA/AAC/WAV
Video Decoder
: MPEG1/MPEG2/ DivX
Wow & Flutter
: Below Measurable Limit
Frequency Response
: Sampling frequency;
96 kHz: 20 Hz – 22,000 Hz
48 kHz: 20 Hz – 22,000 Hz
44.1 kHz: 20 Hz – 20,000 Hz
Total Harmonic Distortion
: 0.010% (1 kHz)
S/N Ratio (dB)
: 99 dB (DVD-Video 96 kHz)
Dynamic Range
: 98 dB (DVD-Video 96 kHz)
DiscFormat
: DVD-Video/DVD-VR/VIDEO-CD/CD-DA
Sampling frequency
: 44.1/48/96 kHz
Quantifying Bit Number
: 16/20/24 bit
USBinterfacesection
USB Standard
: USB 2.0 Full Speed
File System
: FAT 16/32
Maximum Power Supply Current
: DC 5 -1 A
D/A Converter
: 24 Bit
Video Decoder
: MPEG1/MPEG2/ DivX
Audio Decoder
: MP3/WMA/AAC/WAV (Linear PCM)
Bluetooth section
(DDX6023BT/DDX6053BT/
DDX4023BT/DDX4053BT/
DDX42BT)
Technology
: Bluetooth 2.1 + EDR
Frequency
: 2.402 GHz - 2.480 GHz
Output Power
: +4 dBm (MAX), 0 dBm (AVE), Power Class 2
Maximum Communication range
: Line of sight approx. 10m
Profile
: HFP (Hands Free Profile),
OPP (Object Push Profile),
PBAP (Phonebook Access Profile),
A2DP (Advanced Audio Distribution Profile),
AVRCP (Audio/Video Remote Control Profile),
GAP (Generic Access Profile),
SDP (Service Discovery Profile),
FM tuner section
Frequency Range (50 kHz)
:87.5MHz-108.0MHz
Usable Sensitivity (S/N: 26 dB)
: 0.7 μV/75 Ω
Quieting Sensitivity (S/N: 46 dB)
: 1.6 μV/75 Ω
Frequency Response (± 3.0 dB)
: 30 Hz - 15 kHz
S/N Ratio (dB)
: 65 dB (MONO)
Selectivity (± 400 kHz)
: ≥ 65 dB
Stereo Separation
: 35 dB (1 kHz)
LW tuner section
Frequency Range (9 kHz)
: 153 kHz - 279 kHz
Usable Sensitivity
: 45 μV
MW tuner section
Frequency Range (9 kHz)
: 531 kHz - 1611 kHz
Usable Sensitivity
: 25 μV
Videosection
Color System of External Video Input
: NTSC/PAL
External Video Input Level (RCA/mini jack)
: 1 Vp-p/75 Ω
External Audio Max Input Level (RCA/
mini jack)
: 2 V/25 kΩ
Video Output Level (RCA jack)
: 1 Vp-p/75 Ω
Audio Output Level (mini jack)
: 1.2 V/10 kΩ
Analog RGB input
: 0.7 Vp-p/75 Ω
Audio section
Maximum Power (Front & Rear)
: 50 W × 4
Full Bandwidth Power (Front & Rear)
(PWR DIN 45324, +B=14.4V)
:30W×4
Preout Level (V)
: 4 V/10 kΩ
Preout Impedance
: ≤ 600 Ω
Speaker Impedance
: 4 Ω - 8 Ω
Tone
Bass: 100 Hz ± 8 dB
Middle: 1 kHz ± 8 dB
Treble: 12.5 kHz ± 8 dB
General
Operating Voltage
: 14.4 V (10.5 V - 16 V allowable)
Maximum Current Consumption
: 10 A
Dimensions (W × H × D)
: 182×111×160 mm
(DDX6023BT/DDX6053BT)
182×112×163 mm
(DDX4023BT/DDX4053BT/DDX3023/
DDX3053/DDX42BT/DDX35)
Operational Temperature Range
: -10^ - +60^
Weight
: 2.5 kg
(DDX6023BT/DDX6053BT)
2.1 kg
(DDX4023BT/DDX4053BT)
2.0 kg
(DDX3023/DDX3053/DDX42BT/
DDX35)
- Although the effective pixels for the liquid crystal panel is given as 99.99% or more, 0.01% of pixels may not light or may light incorrectly.
- Specifications are subject to change without notice.
- "DVD Logo" is a trademark of DVD Format/Logo Licensing Corporation registered in the US, Japan and other countries.
- The "AAC" logo is a trademark of Dolby Laboratories.
- Microsoft and Windows Media are either registered trademarks or trademarks of Microsoft Corporation in the United States and/or other countries.
- Manufactured under license from Dolby Laboratories. Dolby and the double-D symbol are trademarks of Dolby Laboratories.
- Manufactured under license under U.S. Patent Nos: 5,956,674; 5,974,380; 6,487,535 & other U.S. and worldwide patents issued & pending. DTS, the Symbol, & DTS and the Symbol together are registered trademarks & DTS 2.0 Channel is a trademark of DTS, Inc. Product includes software. © DTS, Inc. All Rights Reserved.
- "Made for iPod," and "Made for iPhone" mean that an electronic accessory has been designed to connect specifically to iPod, or iPhone, respectively, and has been certified by the developer to meet Apple performance standards. Apple is not responsible for the operation of this device or its compliance with safety and regulatory standards. Please note that the use of this accessory with iPod or iPhone may affect wireless performance.
iPhone, iPod, iPod classic, iPod nano, and iPod touch are trademarks of Apple Inc., registered in the U.S. and other countries.
- iTunes is a trademark of Apple Inc.
- DivX ^ , DivX Certified ^ and associated logos are trademarks of Rovi Corporation or its subsidiaries and are used under license.
ABOUT DIVX VIDEO: DivX® is a digital video format created by DivX, LLC, a subsidiary of Rovi Corporation. This is an official DivX Certified® device that plays DivX video. Visit divx.com for more information and software tools to convert your files into DivX videos.
ABOUT DIVX VIDEO-ON-DEMAND: This DivX Certified® device must be registered in order to play purchased DivX Video-on-Demand (VOD) movies. To obtain your registration code, locate the DivX VOD section in your device setup menu. Go to vod.divx.com for more information on how to complete your registration.
- This item incorporates copy protection technology that is protected by U.S. patents and other intellectual property rights of Rovi Corporation. Reverse engineering and disassembly are prohibited.
- MirrorLink Certified™, the Design Only™ Certification Logo, MirrorLink™ and the MirrorLink™ Logo are certification marks and trademarks of the Car Connectivity Consortium LLC. Unauthorized use is strictly prohibited.
KS-UBT1 (USB Bluetooth adapter)
Instruction Manual
CAUTION
Changes or modifications not approved by us could void the user's authority to operate the equipment.
- This adapter has been designed exclusively for use with Kenwood car receivers. Do not use this adapter with any other car receiver.
- The Bluetooth® word mark and logos are registered trademarks owned by Bluetooth SIG, Inc. and any use of such marks by JVC KENWOOD Corporation is under license. Other trademarks and trade names are those of their respective owners.
Specifications
Bluetooth Version: Bluetooth Ver. 2.1 +EDR
Power Class: Class2 Radio
Service Area: 10 m (10.9 yd)
USB Standards: USB V1.1 (Full Speed)
Power Consumption: 54.3 mA/5 V (max.)
Dimensions (L × W × H):
15 mm × 19 mm × 5.6 mm
(5/8 "×3/4"×1/4")
Keep the Bluetooth adapter inserted when using the Bluetooth function.
When the adapter is removed, store it in a safe place.


Manufacturer: JVC KENWOOD Corporation
Model no.: KS-UBT1 Brand: JVC
Complies with IDA Standards DB102150
"This telecommunication equipment conforms to NTC technical requirement"
23260/SDPPI/2012 2354
TEC/WR/I/MOD-08/02/135.APR 08
URSEC 365/FR/2010
CNC 16-9371
COFETEL : RCPJVKS12-0646
CE
Declaration of Conformity with regard to the R&TTE Directive 1999/5/EC
Manufacturer:
JVC KENWOOD Corporation
3-12 Moriya-cho, Kanagawa-ku, Yokohama-shi, Kanagawa, 221-0022, Japan
EU Representative's:
Kenwood Electronics Europe BV
Amsterdamseweg 37, 1422 AC UITHOORN, The Netherlands
English
Hereby, JVC KENWOOD declares that this unit KS-UBT1 is in compliance with the essential requirements and other relevant provisions of Directive 1999/5/EC.
Français
- INTRODUCTIONS
- AV SOURCE OPERATIONS
- BLUETOOTH OPERATIONS
- REFERENCE
- ⚠️ WARNINGS:
- (To prevent accidents and damage)
- ⚠️ Cautions on the monitor:
- For safety...
- Temperature inside the car...
- ■ How to reset your unit
- DDX6023BT/DDX6053BT
- DDX4023BT/DDX4053BT/DDX3023/DDX3053
- DDX42BT/DDX35
- How to read this manual:
- Information on Disposal of Old Electrical and Electronic Equipment and Batteries (applicable for EU countries that have adopted separate waste collection systems)
- The marking of products using lasers
- CE
- Declaration of Conformity with regard to the EMC Directive 2004/108/EC Manufacturer:
- EU Representative's:
- ForDDX6023BT/DDX6053BT:
- For DDX4023BT/DDX4053BT/ DDX3023/DDX3053/DDX42BT/ DDX35:
- Finish the procedure.
- Updating the system
- Create an update file, copy it to a USB device, and connect it to the unit.
- On :
- Setting the security function
- ■ Registering the security code
- Display the security code setting screen.
- Enter a four-digit number (①), then confirm the entry (②).
- Repeat step 2 to confirm your security code.
- ■ Activating the security function
- Component names and functions
- Caution on the volume setting:
- For DDX42BT/DDX35:
- DDX42BT:
- ForDDX3023/DDX3053/DDX35:
- Setting the clock
- Display the screen.
- Display the screen.
- Display the screen.
- Set the clock time.
- Finish the procedure.
- Common operations
- Turning on the power
- Turning off the power
- Adjusting the panel angle
- Adjusting the volume
- Putting the unit in standby
- Turning off the screen
- To turn on the screen, press ⏻ MENU.
- Switchingscreens
- Source control screen
- Touchscreenoperation
- Selecting the playback source
- Displaying the source control screen
- Displaying all sources and items
- Customizing the screen
- Discoperations
- Playing a disc
- Closing the monitor panel (Only for DDX6023BT/DDX6053BT)
- Caution for DualDisc playback
- Playbackoperations
- For CD/MP3/WMA/WAV/AAC
- Selecting folder/track on the list
- Playing Recordable/Rewritable discs
- ■ Video menu operations
- Only for VCD
- Selecting playback mode
- settings
- Playing a USB device
- ■ Connecting a USB device
- When a USB device is connected...
- To disconnect the USB device safely
- Cautions:
- Setting
- Listening to the iPod/iPhone device
- ■ Preparation
- Settings for iPod playback
- Setting for iPod/iPhone playback
- iPod/iPhone playback operations from the unit
- Selecting an audio/video file from the menu
- Select the menu (audio or video) (①), a category (②), then a desired item (③).
- Controlling playback from the iPod/iPhone
- Using the smartphone — MirrorLink
- ■ Basic MirrorLink operations
- Connect your smartphone to the SMARTPHONE ADAPTER unit (KCA-ML100).
- ■ Updating the firmware
- Press the reset button of the SMARTPHONE ADAPTER unit.
- Listening to the radio
- Changing the display information
- Tuning in FM stations only with strong signals—LocalSeek
- ■ Storing stations in memory
- Automaticpresetting—AME(Auto Memory)
- Manualpresetting
- ■ Selecting a preset station
- ■ Searching for FM Radio Data System program—PTY Search
- 1
- Select a PTY code.
- ■ Activating/deactivating TI/News Standby Reception
- ■ Tracing the same program—Network-Tracking Reception
- To change the Network-Tracking Reception setting
- ■ Automatic TI station seek—Auto TP Seek
- To activate Auto TP Seek
- Using other external components
- AV-IN
- Preparation:
- Using the external navigation unit
- ■ To view the navigation
- screen
- To cancel the navigation screen
- ■ Settingsfornavigationunit
- Sound adjustment
- Using the sound equalization
- ■ Selecting a preset sound mode
- ■ Storing your own adjustment
- Customizing preset sound mode
- Adjusting the sound precisely
- Perform steps 1 and 2 of "Selecting a preset sound mode," then...
- Adjust the sound of each band.
- Adjusting the crossover frequency
- Select the item to adjust, then make adjustment.
- Changing the display design
- On :
- 2
- Select an item to change ([Background] or [Panel Color]).
- Select a background/panel color.
- To select a panel color
- Making your own color adjustment
- 3
- Using your favorite scene as the background
- Adjust the image.
- Capture the image displayed on the screen.
- Setting for video playback
- Pictureadjustment
- Display the adjustment menu.
- Select [DIM ON] (dimmer on) or [DIM OFF] (dimmer off).
- Adjust the picture (-15 to +15).
- Changing the aspect ratio
- Zoomingpicture
- Using a rear view camera
- ■ Activating the rear view camera
- ■ Displaying the picture from the rear view camera
- To display the picture from the rear view camera manually
- To erase the rear view screen, press and hold the same button again.
- Setting menu items
- Memorizing/recallingthe settings
- Locking the settings
- Adjusting the touch position
- Information for using Bluetooth® devices
- Bluetoothoperations
- Bluetooth®
- Connecting Bluetooth devices
- ■ Registering a new Bluetooth device
- Pairing a Bluetooth device using SSP (for Bluetooth 2.1)
- Pairing a Bluetooth device using a PIN code (for Bluetooth2.0)
- Change the PIN code.
- Operate the Bluetooth device to complete pairing.
- ■ Connecting a registered Bluetooth device
- Display the screen. (page 50)
- ■ Deleting a registered Bluetooth device
- Display the screen. ( page 50)
- Select a device to delete (①), then delete the registration (②).
- Setting up Bluetooth
- ■ Displaying the screen
- menu items
- Using the Bluetooth mobile phone
- ■ Receiving a call
- ■ Adjusting the volume of microphone
- When is set to [On]
- ■ Ending a call
- ■ Switching between handsfree mode and phone mode
- ■ Notifying SMS reception
- ■ Adjusting the echo cancel level
- ■ Making a call
- Select a method to make a call.
- Direct number entry
- Voicedialing
- To cancel, press [Cancel].
- Using the phonebook/call lists
- To use the A-Z search on the phonebook
- Select the initial.
- Select a phone number from the list.
- To display the details of an entry
- Display the details of the desired entry.
- Select a phone number to call.
- ■ Presetting the phone numbers
- ■ Copying the phonebook
- ■ Deleting the phone number entries in the unit
- Display the phonebook/call list you want to delete. ( page 55)
- Select the item you want to delete.
- About mobile phones compatible with Phone Book Access Profile (PBAP)
- To display the phonebook/call lists of the mobile phone or the unit
- Settings for Bluetooth mobile phone
- Using the Bluetooth audio player
- DDX6023BT/DDX6053BT:
- CAUTION
- Battery installation
- Remote Controller mode switch
- Operations from the remote controller
- Common operations (AUD mode)
- Source switching
- Volume control
- Volume attenuating
- NAV/V.SEL
- Cursor key
- ENTER
- Hands-free communication
- Function
- MODE
- OPEN
- DVD/VCD (DVD mode)
- Track search and file search
- Play/Pause
- Stop
- Direct search
- DVD-VIDEO
- DVD-VR
- VCD 1.X, VCD 2.X (PBC OFF)
- VCD 2.X (PBC ON)
- Numeric keypad
- DVD Top Menu
- DVD Menu
- SUBTITLE
- ZOOM
- Picture Angle
- AUDIO
- Music Disc/Audio file/Video file/Picture file (AUD mode)
- Folder search
- Music Disc
- Audio files in DVD/CD disc
- Radio (AUD mode)
- Band switching
- Station selection
- Seek mode switching
- Direct tuning
- iPod (AUD mode)
- Music/Video search
- USB (AUD mode)
- File search
- Maintenance
- ■ Caution on cleaning the unit
- Recommended cleaning method:
- ■ Moisture condensation
- ■ How to handle discs
- When removing a disc
- ■ To keep discs clean
- ■ To play new discs
- Do not use the following discs:
- ■ File playback
- Playing DivX files
- Playing MPEG1/MPEG2 files
- Playing JPEG files
- Playing MP3/WMA/WAV/AAC files
- ■ Sound signals emitted through the rear terminals
- Through the analog terminals (Speaker out/Front Preout/Rear Preout)
- Troubleshooting
- ■ If the following messages appear
- Accessories/InstallationProcedure
- Accessories
- Installation Procedure
- WARNING
- !
- DDX6023BT/DDX6053BTonly
- DDX4023BT/DDX4053BT/DDX42BTonly
- ConnectingWirestoTerminals
- Connecting a USB device/iPod/iPhone
- Connecting Other Products
- Installing the Trim Plate
- Installing the Unit
- Removing the Trim Plate (DDX4023BT/DDX4053BT/DDX3023/DDX3053/DDX42BT/DDX35 only)
- Removing the Unit (DDX4023BT/DDX4053BT/DDX3023/DDX3053/DDX42BT/DDX35 only)
- Installing the Microphone Unit (DDX6023BT/ DDX6053BT/ DDX4023BT/ DDX4053BT/DDX42BT only)
- Monitor section
- Picture Size
- Display System
- Drive System
- Number of Pixels
- Effective Pixels
- Pixel Arrangement
- Back Lighting
- DVD player section
- D/A Converter
- Audio Decoder
- Video Decoder
- Wow & Flutter
- Frequency Response
- Total Harmonic Distortion
- S/N Ratio (dB)
- Dynamic Range
- DiscFormat
- Sampling frequency
- Quantifying Bit Number
- USBinterfacesection
- USB Standard
- File System
- Maximum Power Supply Current
- Bluetooth section
- (DDX6023BT/DDX6053BT/
- DDX4023BT/DDX4053BT/
- DDX42BT)
- Technology
- Frequency
- Output Power
- Maximum Communication range
- Profile
- FM tuner section
- LW tuner section
- MW tuner section
- Videosection
- Audio section
- General
- KS-UBT1 (USB Bluetooth adapter)
- Instruction Manual
- Specifications
- Declaration of Conformity with regard to the R&TTE Directive 1999/5/EC
- Manufacturer:
- English
- Français
Brand : KENWOOD
Model : DDX35
Category : Car radio with screen