
W980i - Mobile Phone SONY ERICSSON - Free user manual and instructions
Find the device manual for free W980i SONY ERICSSON in PDF.


| Product Type | Mobile Phone |
| Brand | Sony Ericsson |
| Model | W980i |
| Form Factor | Clamshell |
| Dimensions | 92 x 46 x 17.5 mm |
| Weight | 100 g |
| Battery Type | Li-Ion, 950 mAh (BST-38) |
| Standby Time | Up to 360 hours |
| Talk Time | Up to 9 hours |
| Display | 2.2 inch TFT, 240x320 pixels, 256K colors |
| Camera | 3.2 MP, autofocus, LED flash |
| Music Player | Walkman player, MP3/AAC, FM radio with RDS |
| Memory | Internal 128 MB, Memory Stick Micro (M2) slot |
| Connectivity | Bluetooth 2.0, USB 2.0, 3.5mm headphone jack |
| Network | GSM 850/900/1800/1900, UMTS 2100 |
| Main Functions | Calling, messaging, music, camera, radio, organizer |
| Cleaning Instructions | Wipe with soft dry cloth, avoid liquids |
| Safety Information | Use original charger, avoid extreme temperatures |
| Spare Parts Availability | Battery, charger, headset, covers available online |
| Repairability | Moderate; professional service recommended for major repairs |
| General Information | Released 2008, music-focused phone with external playback controls |
Frequently Asked Questions - W980i SONY ERICSSON
User questions about W980i SONY ERICSSON
0 question about this device. Answer the ones you know or ask your own.
Ask a new question about this device
Download the instructions for your Mobile Phone in PDF format for free! Find your manual W980i - SONY ERICSSON and take your electronic device back in hand. On this page are published all the documents necessary for the use of your device. W980i by SONY ERICSSON.
USER MANUAL W980i SONY ERICSSON
Thank you for purchasing a Sony Ericsson W980 Walkman® phone. Enjoy hours of music – up to 8000* tracks – and a sound that is as true as possible to that of the original recording.
For additional phone content, go to www.sonyericsson.com/fun. Register now to get a suite of tools, free online storage, special offers, news and competitions at www.sonyericsson.com/myphone.
For product support, go to www.sonyericsson.com/support.
*Assumes eAAC+ encoded files
Accessories – More for your phone
Active Speaker MAS-100
Protective case with built-in speaker and FM radio antenna: Bring and share your music outdoors.

natural_image
Black electronic device with a circular button and a small green indicator light, set against a yellow background (no text or symbols visible)Bluetooth™ Car Speakerphone HCB-105
A portable handsfree solution for use in the car.
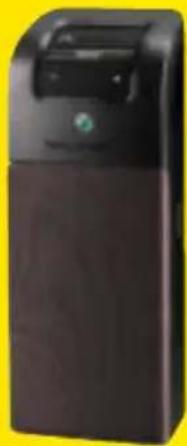
natural_image
Exterior view of a black and brown mobile phone with a small green logo on the top (no visible text or symbols)Music Desk Stand MDS-65
Designed for rich sound.

natural_image
Exterior view of a modern office building (no signage)These accessories can be purchased separately but may not be available in every market. To view the full range go to www.sonyericsson.com/accessories.
This is the Internet version of the User's guide. © Print only for private use.
Contents
Getting started 6
Assembly 6
Turning on the phone 7
Help 8
Charging the battery.... 8
Phone overview 9
When the phone is closed ..... 11
When the phone is open...... 12
Navigation.... 14
Memory.... 15
Phone language.... 15
Entering text 15
Walkman® 17
Stereo portable handsfree 17
Walkman® player 17
PlayNow™ 21
TrackID ^TM 21
Online music and video clips...... 21
Video player.... 22
Radio 22
MusicDJ™ 23
Record sound 23
Transferring and handling content 24
Handling content within the phone ....24
Sending content to another phone.....24
Transferring content to and
from a computer.... 24
Using the USB cable 25
Phone name.... 26
Using Bluetooth™ wireless
technology 27
Backing up and restoring 28
Calling 30
Making and receiving calls 30
Contacts 32
Call list 35
Speed dial.... 35
Voicemail 35
Voice control 35
More than one call 37
Restricted dialling 39
Call time and cost.... 40
Showing or hiding your
phone number 40
Imaging 40
Viewfinder and camera keys ...... 40
Using the camera 41
Getting more from the camera ..... 41
Viewing and tagging pictures ..... 42
PhotoDJ™ and VideoDJ™ 43
Blogging...... 44
Printing photos 45
Messaging 45
Text messages.... 45
Picture messages 46
Message options 47
Templates 47
Voice messages 48
Email 48
My friends 49
Area and cell information 51
Internet 52
Bookmarks 52
History pages.... 52
Getting more from the browser ..... 52
Internet security and certificates ... 53
Web feeds 53
Synchronizing 55
Synchronizing using
a computer 55
Synchronizing using
an Internet service 56
More features 58
Flight mode 58
Update service 58
Location services.... 59
Alarms 59
Calendar 60
Notes 61
Tasks 62
Profiles...... 62
Time and date 63
Theme 63
Main menu layout 63
Ringtones 63
Screen orientation 64
Games 64
Applications 64
Locks 65
Troubleshooting 67
Common questions 67
Error messages.... 69
Important information ..... 71
Guidelines for Safe and
Efficient Use 73
Limited Warranty 77
FCC Statement.... 79
Declaration of Conformity
for W980 80
Index 81
2 Contents
This is the Internet version of the User's guide. © Print only for private use.
Sony Ericsson W980 Walkman®
UMTS HSDPA 2100 GSM EDGE 850/900/1800/1900
This User guide is published by Sony Ericsson Mobile Communications AB or its local affiliated company, without any warranty. Improvements and changes to this User guide necessitated by typographical errors, inaccuracies of current information, or improvements to programs and/or equipment, may be made by Sony Ericsson Mobile Communications AB at any time and without notice. Such changes will, however, be incorporated into new editions of this User guide.
All rights reserved.
©Sony Ericsson Mobile Communications AB, 2008
Publication number: 1210-4395.1
Please note:
Some of the services in this User guide are not supported by all networks. This also applies to the GSM International Emergency Number 112.
Please contact your network operator or service provider if you are in doubt whether you can use a particular service or not.
Please read the Important information chapters before you use your mobile phone.
Your mobile phone has the capability to download, store and forward additional content, e.g. ringtones. The use of such content may be restricted or prohibited by rights of third parties, including but not limited to restriction under applicable copyright laws. You, and not Sony Ericsson, are entirely responsible for additional content that you download to or forward from your mobile phone. Prior to your use of any additional content, please verify that your intended use is properly licensed or is otherwise authorized. Sony Ericsson does not guarantee the accuracy, integrity or quality of any additional content or any other third party content.
Under no circumstances will Sony Ericsson be liable in any way for your improper use of additional content or other third party content.
Smart-Fit Rendering is a trademark or a registered trademark of ACCESS Co., Ltd.
Bluetooth is a trademark or a registered trademark of Bluetooth SIG Inc. and any use of such mark by Sony Ericsson is under license.
The Liquid Identity logo, SensMe, PlayNow, MusicDJ, PhotoDJ, TrackID and VideoDJ are trademarks or registered trademarks of Sony Ericsson Mobile Communications AB.
TrackID™ is powered by Gracenote Mobile MusicID™. Gracenote and Gracenote Mobile MusicID are trademarks or registered trademarks of Gracenote, Inc.
WALKMAN is a trademark or a registered trademark of Sony Corporation.
Lotus Notes is a trademark or a registered trademark of International Business Machines Corporation.
Sony is a trademark or registered trademark of Sony Corporation.
Google ^TM and Google Maps ^TM are trademarks or registered trademarks of Google, Inc.
SyncML is a trademark or registered trademark of Open Mobile Alliance LTD.
Ericsson is a trademark or registered trademark of Telefonaktiebolaget LM Ericsson.
Adobe Photoshop Album Starter Edition is a trademark or registered trademark of Adobe Systems Incorporated in the United States and/or other countries.
Microsoft, ActiveSync, Windows, Outlook, and Vista are registered trademarks or trademarks of Microsoft Corporation in the United States and/or other countries.
T9™ Text Input is a trademark or a registered trademark of Tegic Communications. T9™ Text Input is licensed under one or more of the following: U.S. Pat. Nos. 5,818,437, 5,953,541, 5,187,480, 5,945,928, and 6,011,554; Canadian Pat. No. 1,331,057, United Kingdom Pat. No. 2238414B; Hong Kong Standard Pat. No. HK0940329; Republic of Singapore Pat. No. 51383; Euro.Pat. No. 0 842 463(96927260.8) DE/DK, FI, FR, IT, NL, PT, ES, SE, GB; and additional patents are pending worldwide.
This product is protected by certain intellectual property rights of Microsoft. Use or distribution of such technology outside of this product is prohibited without a license from Microsoft.
Content owners use Windows Media digital rights management technology (WMDRM) to protect their intellectual property, including copyrights. This device uses WMDRM software to access WMDRM-protected content. If the WMDRM software fails to protect the content, content owners may ask Microsoft to revoke the software's ability to use WMDRM to play or copy protected content. Revocation does not affect unprotected content. When you download licenses for protected content, you agree that Microsoft may include a revocation list with the licenses. Content owners may require you to upgrade WMDRM to access their content. If you decline an upgrade, you will not be able to access content that requires the upgrade.
Java and all Java based trademarks and logos are trademarks or registered trademarks of Sun Microsystems, Inc. in the U.S. and other countries. End-user license agreement for Sun™ Java™ J2ME™.
This product is licensed under the MPEG-4 visual and AVC patent portfolio licenses for the personal and non-commercial use of a consumer for (i) encoding video in compliance with the MPEG-4 visual standard (“MPEG-4 video”) or the AVC
standard ("AVC video") and/or (ii) decoding MPEG-4 or AVC video that was encoded by a consumer engaged in a personal and non-commercial activity and/or was obtained from a video provider licensed by MPEG LA to provide MPEG-4 and/or AVC video. No license is granted or shall be implied for any other use. Additional information including that relating to promotional, internal and commercial uses and licensing may be obtained from MPEG LA, L.L.C. See http://www.mpegla.com. MPEG Layer-3 audio decoding technology licensed from Fraunhofer IIS and Thomson.
Restrictions: Software is confidential copyrighted information of Sun and title to all copies is retained by Sun and/or its licensors. Customer shall not modify, decompile, disassemble, decrypt, extract, or otherwise reverse engineer Software. Software may not be leased, assigned, or sublicensed, in whole or in part.
Export Regulations: This product, including any software or technical data contained in or accompanying the product, may be subject to U.S. export control laws, including the U.S. Export Administration Act and its associated regulations and the U.S. sanctions programs administered by the U.S. Treasury Department's Office of Foreign Assets Control, and may be additionally subject to export or import regulations in other countries. The user and any possessor of the product agrees to comply strictly with all such regulations and acknowledges that it is their responsibility to obtain any required licenses to export, re-export, or import this product. Without limitation this product, including any software contained therein, may not be downloaded, or otherwise exported or re-exported (i) into, or to a national or resident of, or an entity in, Cuba, Iraq, Iran, North Korea, Sudan, Syria (as such listing may be revised from time to time) or any country to which the U.S. has embargoed goods; or (ii) to any person or entity on the U.S. Treasury Department's list of Specially Designated Nationals or (iii) any person or entity on any other
export prohibition list that may be maintained from time to time by the United States Government, including but not limited to the U.S. Commerce Department's Denied Persons List or Entity List, or the U.S. State Department's Nonproliferation Sanctions List.
Restricted Rights: Use, duplication or disclosure by the United States government is subject to the restrictions as set forth in the Rights in Technical Data and Computer Software Clauses in DFARS 252.227-7013(c) (1) (ii) and FAR 52.227-19(c) (2) as applicable.
Other product and company names mentioned herein may be the trademarks of their respective owners.
Any rights not expressly granted herein are reserved. All illustrations are for illustration only and may not accurately depict the actual phone.
Instruction symbols
These symbols may appear in the User guide.

Note

Tip

Warning

A service or function is network-or subscription-dependent. Contact your network operator for details.
Use a selection or navigation key to scroll and select. See Navigation on page 14.
Getting started
Assembly
Before you start using your phone, you need to insert a SIM card and the battery.
To insert the SIM card

1 Remove the battery cover.
2 Slide the SIM card into its holder with the gold-coloured contacts facing down.
6 Getting started
This is the Internet version of the User's guide. © Print only for private use.
To insert the battery

1 Insert the battery with the label side up and the connectors facing each other.
2 Slide the battery cover into place.
Turning on the phone
To turn on the phone

natural_image
Close-up of a mobile phone keypad with buttons and an arrow pointing to the button (no readable text or symbols)1 Press and hold down Ⓙ
2 Enter your SIM card PIN, if requested and select OK.
3 Select a language.
4 Select Cont. to use the setup wizard while settings are downloaded.

If you want to correct a mistake when you enter your PIN, press .c

Before turning the phone off, you must return to standby.
SIM card
The SIM (Subscriber Identity Module) card, which you get from your network operator, contains information about
your subscription. Always turn off your phone and detach the charger before you insert or remove the SIM card.

You can save contacts on the SIM card before you remove it from your phone. See To copy names and numbers to the SIM card on page 33.
PIN
You may need a PIN (Personal Identification Number) to activate the services in your phone. Your PIN is supplied by your network operator. Each PIN digit appears as *, unless it starts with emergency number digits, for example, 112 or 911. You can see and call an emergency number without entering a PIN.

If you enter the wrong PIN three times in a row, the SIM card is blocked. See SIM card lock on page 65.
Standby
After you have turned on your phone and entered your PIN, the name of the network operator appears. This view is called standby. Your phone is now ready for use.
Help
In addition to this User guide, Getting started guides and more information are available at
www.sonyericsson.com/support.
Help and information are also available in your phone.
To view tips and tricks
1 From standby select Menu > Settings > the General tab > Setup wizard.
2 Select Tips and tricks.
To view information about functions
- Scroll to a function and select Info, if available. In some cases, Info appears under Options.
To view the phone demonstration
- From standby select Menu > Entertainment > Demo tour.
To view status information
• From standby press the volume key up.
Charging the battery
The phone battery is partly charged when you buy it.
To charge the battery

natural_image
Close-up of a black handheld device with a plug inserted, showing internal components and a small green indicator light (no text or symbols)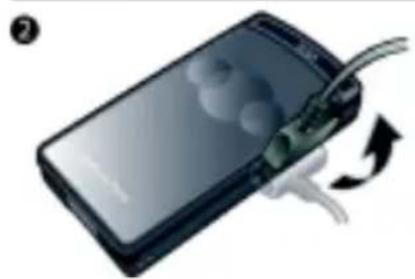
natural_image
Close-up of a black electronic device with a cable and scroll, showing a curved arrow indicating rotation or change (no text or symbols visible)1 Connect the charger to the phone. It takes approximately 2.5 hours to fully charge the battery. Press a key to view the screen.
2 Remove the charger by tilting the plug upwards.
You can use your phone while it is charging. You can charge the battery at any time and for more or less than 2.5 hours. You can interrupt the charging without damaging the battery.
Phone overview
1 Video call camera
2 Screen
3 Selection keys
4 Call key
5 Activity menu key
6 Walkman ® key
7 Connector for charger, handsfree and USB cable
8 Ear speaker
9 End key
10 C key (Clear)
11 On/off key
12 Navigation key

9Getti
13 Music sync light
14 External navigation key
15 External display
16 Indicator light
17 Camera lens
18 Volume keys
19 External applications key
20 Key lock

10 Getting started
This is the Internet version of the User's guide. © Print only for private use.
When the phone is closed
The following applications are available when the phone is closed:
- Walkman® player
- Standby
- Radio
To activate the external display
• If the phone is open, close it.
- If the phone is closed, press the volume key.
To lock or unlock the external display
- Slide the keylock switch.
To switch between the applications

natural_image
Illustration of a smartphone with cloud icons and an arrow pointing to it (no text or symbols)- Press

To use an application
- Press the external navigation key.
External navigation key response
You can set if the phone should sound or vibrate when you press the external navigation key.
To set the external navigation key response
1 From standby select Menu > Settings > the Sounds & alerts tab > Key response > Touch options.
2 Select an option.
When the phone is open
The menu is available from standby when the phone is open.
Menu overview

PlayNow™* Internet* Entertainment

Online services*
TrackID™
Location services
Games
VideoDJ™
PhotoDJ™
MusicDJ™
Remote control
Record sound
Demo tour

Camera Messaging Media

Write new
Inbox
Drafts
Outbox
Sent messages
Saved messages
My friends*
Call voicemail
Templates
Manage messages
Settings

Photo
Music
Video
Games
TV
Web feeds
Settings

Radio Contacts WALKMAN

Myself
New contact

12 Getting started
This is the Internet version of the User's guide. © Print only for private use.

Calls** Organizer

All Answered Dialled Missed


File manager**
Alarms
Applications
Video call
Calendar
Tasks
Notes
Synchronization
Timer
Stopwatch
Calculator
Code memo

Settings**

General
Profiles
Time & date
Language
Update service
Voice control
New events
Shortcuts
Flight mode
Security
Setup wizard
Accessibility*
Phone status
Master reset

Sounds & alerts
Ring volume
Ringtone
Silent mode
Increasing ring
Vibrating alert
Message alert
Key response

Display
Wallpaper
Main menu layout
Theme
Startup screen
Screen saver
Clock size
Brightness
Edit line names*

Calls
Speed dial
Smart search
Divert calls
Switch to line 2*
Manage calls
Time & cost*
Show/hide my no.
Handsfree
Open to answer

Connectivity
Bluetooth
USB
Phone name
Network sharing
Synchronization
Device management
Mobile networks
Data communication*
Internet settings
Streaming settings
Message settings*
SIP settings
Accessories
* Some menus are operator-, network- and subscription-dependent.
** You can use the navigation key to scroll between tabs in submenus. For more information, see Navigation on page 14.
Navigation
To navigate the phone menus

natural_image
Close-up of a car dashboard with four directional control buttons (no text or symbols visible)1 From standby select Menu.
2 Use the navigation key to move through the menus.
To select actions on the screen
- Press the left, centre or right selection key.
To view options for an item - Select Options to, for example, edit.
To end a function
- Press

To return to standby
- Press

To navigate your media
1 From standby select Menu > Media.
2 Scroll to a menu item and press the navigation key right.
3 To go back, press the navigation key left.
To delete items
- Press to delete items such as numbers, letters, pictures and sounds.
Tabs
Tabs may be available. For example, Settings have tabs.

natural_image
Toolbar with icons representing music, audio, video, and other media functions (no text or labels visible)To scroll between tabs
- Press the navigation key left or right.
Shortcuts
You can use keypad shortcuts to go directly to functions.
To use navigation key shortcuts
- From standby press, or to go directly to a function.
14 Getting started
This is the Internet version of the User's guide. © Print only for private use.
To edit a navigation key shortcut
1 From standby select Menu > Settings > the General tab > Shortcuts.
2 Scroll to an option and select Edit.
3 Scroll to a menu option and select Shortc.
Main menu shortcuts
Menu numbering starts from the top left icon and moves across and then down row by row.
To go directly to a main menu
• From standby select Menu and press

The Main menu layout must be set to
- Grid. See To change the main menu layout on page 63.
Activity menu
The activity menu gives you quick access to:
- New events – missed calls and new messages.
- Running apps – applications that are running in the background.
- My shortcuts – add your favourite functions to access them quickly.
- Internet – quick access to the Internet.
To open the activity menu
- Press
Memory
You can save content in the phone memory and on the SIM card. Images, text messages, picture messages and contacts are saved in the phone memory. You can choose to save text messages, picture messages and contacts on the SIM card. You can transfer content between the phone and a computer.
Phone language
You can select a language to use in your phone.
To change the phone language
1 From standby select Menu > Settings > the General tab > Language > Phone language.
2 Select an option.
Entering text
You can use multitap text input or T9 ^TM Text Input to enter text. The T9 Text Input method uses a built-in dictionary.
To change text input method
- When you enter text, press and hold down Ⓞa/A.
To shift between capitals and lower-case letters
- When you enter text, press *a/A
To enter numbers
- When you enter text, press and hold down 0+ 9- .
To enter full stops and commas
- When you enter text, press 1
To enter a symbol
1 When you enter text, select Options > Add symbol.
2 Scroll to a symbol and select Insert.
To enter text using T9 ^TM Text Input
1 From standby select, for example, Menu > Messaging > Write new > Text message.
2 If is not displayed, press and hold down to change to T9 Text Input.
3 Press each key only once, even if the letter you want is not the first letter on the key. For example, to write the word "Jane", press 5, 2 6 3. Write the whole word before looking at the suggestions.
4 Use or to view suggestions.
5 Press to accept a suggestion.
To enter text using multitap
1 From standby select, for example, Menu > Messaging > Write new > Text message.
2 If is displayed, press and hold down to change to multitap text input.
3 Press -2 repeatedly until the desired letter appears.
4 When a word is written, press to add a space.
To add words to the built-in dictionary
1 When you enter text using T9 Text Input, select Options > Spell word.
2 Write the word using multitap input and select Insert.
Walkman®
You can listen to music, audio books and podcasts. Use Sony Ericsson Media Manager to transfer content to and from your phone. See Transferring content to and from a computer on page 24 for more information.
Stereo portable handsfree
To use the handsfree
- Connect the portable handsfree. Music stops when you receive a call and resumes when the call has ended.
Walkman® player
You can use the Walkman® player both when the phone is open and closed.
To play music
1 When the phone is closed, press to go to the Walkman® player.
2 Press ▶ ■
3 Press ▲ to browse your music.
4 Scroll to a track and press ▶ ■
To stop playing music
- Press ▶
To fast forward and rewind
- Press and hold down ▶▶.
To move between tracks
- Press ▶▶▶ I or ◀.
To browse your music
- Press ▲
To minimize the player
- When the phone is open and you listen to music, select Options > Minimize.
To set light effects
1 From standby press and select Options > Settings > Light effects.
2 Select an option.
To return to the player
- Press w.
Shake control
To switch track

natural_image
Illustration of three hands holding a remote device, showing a curved arrow indicating rotation (no text or symbols present)- When the phone is closed and the music is playing, press and hold down ▶■ and move the phone to the right
17Walk
with a flick of your wrist to go to the next track. To go to the previous track, use the same action to the left.
To shuffle tracks

natural_image
Illustration of a hand holding a smartphone with arrows indicating rotation or interaction (no text or symbols)- When the phone is closed and the music is playing, press and hold down ▶■ and shake your phone.
To change the volume
natural_image
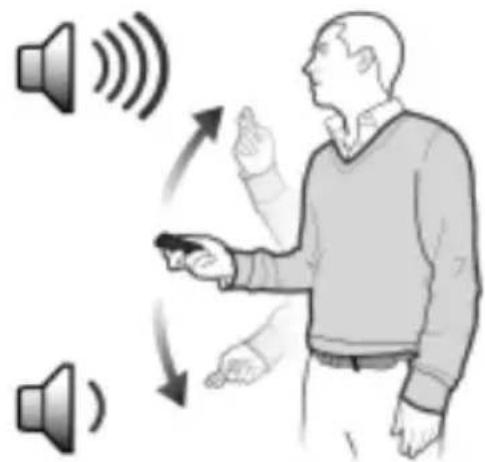
Illustration of a person interacting with sound equipment, showing speaker icons and directional arrows (no text or symbols)1 When the phone is closed and the music is playing, hold the phone out in front of you facing upwards.
2 Press and hold down ▶ and bend your arm upwards towards you to increase the volume. To decrease the volume, repeat the action in the opposite direction.
Clear stereo and clear bass
Clear stereo and clear bass are activated when you set the equalizer manually.
18 Walkman®
This is the Internet version of the User's guide. © Print only for private use.
To activate clear stereo and clear bass using presets
1 When the phone is open and you listen to music, select Options > Settings > Equalizer.
2 Select any of the presets, except Normal.
Playlists
You can create playlists to organize music files. Files can be added to more than one playlist.
Deleting a playlist, or a file from a playlist, does not delete the file from the memory, just the reference to the file.
To create a playlist
1 From standby select Menu > Media > Music > Playlists.
2 Scroll to New playlist and select Add.
3 Enter a name and select OK.
4 For each track you want to add, scroll to the track and select Mark.
5 Select Add to add the tracks to the playlist.
! It may take a few minutes for the phone to create the playlist.
To create a playlist by mood

natural_image
Microscopic view of a cell nucleus with scattered white particles and an orange-stained nucleus (no text or labels)! To create playlists by mood, your music tracks must be transferred to your phone using Sony Ericsson Media Manager. For information on how to analyze your music, see Media Manager Help.
1 From standby select Menu > Media > Music > SensMe™ > Open.
2 Press ⚠, ⏻, ⏱ to preview different tracks.
3 Select Add and press 🔒 or ⬇ to choose an area of tracks.
4 Select Create to play the playlist in the Walkman® player.
5 Select Options > Save playlist and enter a name and select OK.
! It may take a few minutes for the phone to create the playlist.
To add files to a playlist
1 From standby select Menu > Media > Music > Playlists.
2 Select a playlist.
3 Scroll to Add music and select Add.
4 For each track you want to add, scroll to the track and select Mark.
5 Select Add to add the tracks to the playlist.
To remove tracks from a playlist
1 From standby select Menu > Media > Music > Playlists.
2 Select a playlist.
3 Scroll to the track and press C
Audio books
You can listen to audio books that you have transferred to your phone from a computer using Sony Ericsson Media Manager.
It may take a few minutes before a transferred audio book appears in the list of available audio books.
To play audio books
1 When the phone is closed, press to go to the Walkman® player.
2 Press ▶ ■
3 Press ▲ and select Audio books.
4 Select an audio book.
5 Scroll to a chapter and press ▶■
! Audio books in other formats than M4B or audio books that do not have ID3v2 chapter tags can be found in the Tracks folder.
FM transmitter
You can play music or audio books saved in your phone through an external radio over the FM radio frequency band. The icon indicates transmission.
Do not use the FM transmitter in places where this is prohibited. The FM transmitter will not work in countries where it is not legal, when the phone is in flight mode or where there is no network coverage.
To transmit music to an FM radio
1 Place the phone up to 10 metres (33 feet) from the radio, with no solid objects in between. The maximum distance varies depending on the surrounding environment.
2 External FM radio: Tune in an unused frequency.
3 Phone: From standby select Menu > Media > Music.
4 Browse by category using the navigation key.
5 Scroll to a title and select Play.
6 Select Options > FM transmitter.
20 Walkman®
This is the Internet version of the User's guide. © Print only for private use.
7 Use or to select the same frequency as on the external radio.
8 Select Start.
9 Select Done to go back to the Walkman® player view.

Move the phone closer to the radio if transmission is not working. Sound quality may be improved by changing the frequency.
To stop transmitting music
1 In the Walkman® player view, select Options > FM transmitter.
2 Select Stop.

Transmission stops when you stop playing music and exit the Walkman® player.

PlayNow™
You can connect to PlayNow™ to download ringtones, games, music, themes and wallpapers. You can preview or listen to content before you purchase and download it to your phone.

This service is not available in all countries.
If you cannot use PlayNow™, see Troubleshooting on page 67.
To use PlayNow™
1 From standby select Menu > PlayNow™.
2 Scroll the PlayNow™ Web site and follow the instructions to preview and purchase content.
TrackID™
TrackID™ is a music recognition service. You can search for song titles, artists and album names.
! For cost information contact your service provider.
If you cannot use TrackID™, see Troubleshooting on page 67.
To search for song information
- When you hear a song through a loudspeaker, from standby select Menu > Entertainment > TrackID™ > Start.
- When the radio is playing select Options > TrackID™.
Online music and video clips
You can view video clips and listen to music by streaming them to your phone from the Internet. If you cannot use the Internet, see Troubleshooting on page 67.
To select a data account for streaming
1 From standby select Menu > Settings > the Connectivity tab > Streaming settings > Connect using:.
2 Select the data account to use.
3 Select Save.
To stream music and video clips
1 From standby select Menu > Internet.
2 Select Options > Go to > Bookmarks.
3 Select a link to stream from.
Video player
To play videos
1 From standby select Menu > Media > Video > Videos.
2 Scroll to a title and select Play.
To stop playing videos
- Press the centre selection key.
Radio
Do not use your phone as a radio in places where this is prohibited.
You can use the radio both when the phone is open and closed.
To listen to the radio
1 Connect the handsfree to the phone.
2 When the phone is closed, press to go to the radio view.
3 Press the external navigation key centre.
To automatically search for channels
- When the radio is playing, press and hold down ▲ or ▶ to search for the next or previous available channel.
To manually search for channels
- When the radio is playing, press ▶ or ◀.
To change the volume
- When the radio is playing, press the volume keys up or down.
To minimize the radio
- When the phone is open and you listen to the radio, select Options > Minimize.
To return to the radio
- From standby select Menu > Radio.
22 Walkman®
This is the Internet version of the User's guide. © Print only for private use.
Saving channels
You can save up to 20 preset channels.
To save channels
1 From standby select Menu > Radio.
2 When you have found a radio channel select Options > Save.
3 Scroll to a position and select Insert.
To select saved channels
1 From standby select Menu > Radio > Options > Channels.
2 Select a radio channel.
To switch between saved channels
- When the phone is closed and the radio is playing, press ▲ or ▶ to switch to the previous or next saved channel.
MusicDJ™
You can compose and edit your own melodies to use as ringtones. A melody consists of four types of tracks – Drums, Basses, Chords and Accents. A track contains a number of music blocks. The blocks consist of pre-arranged sounds with different characteristics. The blocks are grouped into Intro, Verse, Chorus and Break. You compose a melody by adding music blocks to the tracks.
To compose a melody
1 From standby select Menu > Entertainment > MusicDJ™.
2 Select to Insert, Copy or Paste blocks.
3 Use 🔍, 🔍, 🔍 or to scroll between the blocks.
4 Select Options > Save melody.
Record sound
You can record a voice memo or a call. Recorded sounds can also be set as ringtones.
In some countries or states it is required by law that you inform the other person before recording the call.
To record a sound
- From standby select Menu > Entertainment > Record sound > Record.
To record a call
1 During an ongoing call, select Options > Record.
2 Select Save to save the recording.
To listen to a recording
1 From standby select Menu > Organizer > File manager.
2 Scroll to Music and select Open.
3 Scroll to a recording and select Play.
Transferring and handling content
You can transfer and handle content such as pictures and music.

You are not allowed to exchange some copyright-protected material. 🔒 identifies a protected file.
Handling content within the phone
You can use File manager to handle content saved in the phone memory.
If the memory is full, delete some content to create space.
To select more than one item in a folder
1 From standby select Menu > Organizer > File manager.
2 Scroll to a folder and select Open.
3 Select Options > Mark > Mark several.
4 For each item you want to mark, scroll to the item and select Mark.
To view memory status
1 From standby select Menu > Organizer > File manager.
2 Select Options > Memory status.
To view information about content
1 From standby select Menu > Organizer > File manager.
2 Find an item and select Options > Information.
Sending content to another phone
You can send content, for example, in messages or using Bluetooth™ wireless technology.
To send items
1 Scroll to an item and select Options > Send.
2 Select a transfer method.
! Make sure the receiving device supports the transfer method you select.
Transferring content to and from a computer
You can use Sony Ericsson Media Manager to transfer content between your phone and a computer.
! Sony Ericsson Media Manager software is included on the CD that comes with your phone and available for download at www.sonyericsson.com/support.
24 Transferring and handling content
This is the Internet version of the User's guide. © Print only for private use.
When you move or copy content from a computer to your phone unrecognized files are saved in the Other folder in the file manager.
Required operating systems
You need one of these operating systems to use the software included on the CD:
- Microsoft® Windows Vista™ 32 bit and 64 bit versions of: Ultimate, Enterprise, Business, Home Premium, Home Basic)
- Microsoft® Windows XP (Pro or Home), Service Pack 2 or higher
To install Sony Ericsson Media Manager
1 Turn on your computer and insert the CD. The CD starts automatically and the installation window opens.
2 Select a language and click OK.
3 Click Install Sony Ericsson Media Manager and follow the instructions.
To transfer content using Sony Ericsson Media Manager
1 Connect the phone to a computer with a USB cable supported by your phone.
2 Computer: Start/Programs/Sony Ericsson/Media Manager.
3 Phone: Select Mass storage.
4 Computer: Wait until the phone appears in Sony Ericsson Media Manager.
5 Move files between your phone and the computer in Sony Ericsson Media Manager.
Do not remove the USB cable from your phone or computer during transfer, as this may corrupt the phone memory.
6 For safe disconnection of the USB cable, right-click the removable disk icon in Windows Explorer and select Eject.
For details on transferring music, refer to Media Manager Help. Click ① in the top right corner of the Sony Ericsson Media Manager window.
Using the USB cable
You can connect your phone to a computer with the USB cable to synchronize, transfer and back up phone content and use your phone as a modem. For more information, go to www.sonyericsson.com/support to read Getting started guides.

natural_image
Illustration of a handheld device connected to a CD and USB cable, with a computer monitor in the background (no text or symbols)Before you use the USB cable
• See Required operating systems on page 25.
! Only use a USB cable supported by your phone. Do not remove the USB cable from your phone or computer during transfer as this may corrupt the phone memory.
To disconnect the USB cable safely
1 Right-click the removable disk icon in Windows Explorer.
2 Select Eject.
3 Disconnect the USB cable when there is a message saying it is safe to do so in the phone.
Do not copy the files immediately if you formatted the phone drive on the PC. In that case, remove the USB cable and restart the phone first.
Drag and drop content
You can drag and drop content between your phone memory and a computer in Microsoft Windows Explorer.
To drag and drop content
1 Connect your phone to a computer using the USB cable.
2 Phone: Select Mass storage.
3 Computer: Wait until the phone memory appear as external disks in Windows Explorer.
4 Drag and drop selected files between the phone and the computer.
Phone name
You can enter a name for your phone that is shown to other devices when using, for example, Bluetooth™ wireless technology.
To enter a phone name
1 From standby select Menu > Settings > the Connectivity tab > Phone name.
2 Enter the phone name and select OK.
26 Transferring and handling content
This is the Internet version of the User's guide. © Print only for private use.
Using Bluetooth™ wireless technology
The Bluetooth function makes wireless connection to other Bluetooth devices possible. You can, for example:
- Connect to handsfree devices.
- Connect to several devices at the same time.
- Connect to computers and access the Internet.
- Exchange items.
- Play multiplayer games.

A range within 10 metres (33 feet), with no solid objects in between, is recommended for Bluetooth communication.
Before you use Bluetooth wireless technology
You must turn on the Bluetooth function to communicate with other devices. You may also have to pair your phone with other Bluetooth devices.
To turn the Bluetooth function on
- From standby select Menu > Settings > the Connectivity tab > Bluetooth > Turn on.
! Make sure that the device you want to pair your phone with has the Bluetooth function activated and Bluetooth visibility set to on.
To pair the phone with a device
1 From standby select Menu > Settings > the Connectivity tab > Bluetooth > My devices.
2 Scroll to New device and select Add to search for available devices.
3 Select a device.
4 Enter a passcode, if required.
To allow connection to the phone
1 From standby select Menu > Settings > the Connectivity tab > Bluetooth > My devices.
2 Select a device from the list.
3 Select Options > Allow connection.
4 Select Always ask or Always allow.
This is only possible with devices that require access to a secure service.
To pair the phone with a Bluetooth handsfree for the first time
1 From standby select Menu > Settings > the Connectivity tab > Bluetooth > Handsfree.
2 Scroll to a device and select Yes.
3 Enter a passcode, if required.
Power saving
You can save battery power with the Power save function. In Power save mode you can only connect with a single Bluetooth device. If you want to connect with more than one Bluetooth device at the same time you must turn this function off.
To turn powersave on
- From standby select Menu > Settings > the Connectivity tab > Bluetooth > Powersave > On.
Transferring sound to and from a Bluetooth handsfree
You can transfer the sound to and from a Bluetooth handsfree using a phone key or the handsfree key.
To transfer sound
1 From standby select Menu > Settings > the Connectivity tab > Bluetooth > Handsfree > Incoming call.
2 Select an option. In phone transfers sound to the phone. In handsfree transfers sound to the handsfree.
To transfer sound during a call
1 During a call, select Sound.
2 Select from the list.
Backing up and restoring
You can backup phone content to a computer using the Sony Ericsson PC Suite and the Sony Ericsson Media Manager. With Sony Ericsson PC Suite you can backup and restore contacts, calendar, tasks, notes and bookmarks. With Sony Ericsson Media Manager you can backup and restore content such as music, pictures and video clips.
Before backing up and restoring, you need to install the Sony Ericsson PC Suite and the Sony Ericsson Media Manager.
Always make a backup before having the
- phone upgraded, since upgrading can clear the user content.
To make a backup using the Sony Ericsson PC Suite
1 Computer: Start the Sony Ericsson PC Suite from Start/Programs/Sony Ericsson/PC Suite.
2 Follow the instructions in the Sony Ericsson PC Suite for how to connect.
3 Phone: Select Phone mode.
4 Computer: Go to the backup and restore section in the Sony Ericsson PC Suite and make a backup.
! The Sony Ericsson PC Suite will overwrite all the phone content during the restore process. You may damage your phone if you interrupt the process.
To restore phone content using the Sony Ericsson PC Suite
1 Computer: Start the Sony Ericsson PC Suite from Start/Programs/Sony Ericsson/PC Suite.
2 Follow the instructions in the Sony Ericsson PC Suite for how to connect.
3 Phone: Select Phone mode.
4 Computer: Go to the backup and restore section in the Sony Ericsson PC Suite and restore your phone.
To make a backup using the Sony Ericsson Media Manager
1 Connect your phone to the computer using a USB cable.
You can also connect your phone to a computer using Bluetooth.
2 Phone: Select Media transfer mode.
3 Computer: Start Sony Ericsson Media Manager from Start/Programs/Sony Ericsson/Media Manager.
4 Go to the backup section in the Sony Ericsson Media Manager.
5 Select the files you want to backup and make a back up.
The Sony Ericsson Media Manager will compare your phone content with your computer backup and then restore files missing in your phone. You may damage your phone if you interrupt the process.
To restore phone content using the Sony Ericsson Media Manager
1 Connect your phone to the computer.
2 Phone: Select Media transfer mode.
3 Computer: Start Sony Ericsson Media Manager from Start/Programs/Sony Ericsson/Media Manager.
4 Go to the backup section in the Sony Ericsson Media Manager.
5 Select the files you want to restore and restore them.
For more information on backing up and restoring in Sony Ericsson Media Manager see the Sony Ericsson Media Manager Getting started guide at www.sonyericsson.com/support.
Calling
Making and receiving calls
You need to turn on your phone and be within range of a network.
To make a call
1 From standby enter a phone number (with international country code and area code, if applicable).
2 Press
You can call numbers from your contacts and call list. See Contacts on page 32, and Call list on page 35. You can also use your voice to make calls. See Voice control on page 35.
To end a call
- Press
To make international calls
1 From standby press and hold down ①+ until a “+” sign appears.
2 Enter the country code, area code (without the first zero) and phone number.
3 Press
To re-dial a number
- When Retry? appears select Yes.
Do not hold your phone to your ear when waiting. When the call connects, your phone gives a loud signal.
To answer a call
- Press
To reject a call
- Press
To change the ear speaker volume during a call
- Press the volume key up or down.
To mute the microphone during a call
1 Press and hold down .c
2 Press and hold down again to resume.
To turn the loudspeaker on during a call
- Select Sound > Turn on speaker.
Do not hold your phone to your ear when using the loudspeaker. This could damage your hearing.
To view missed calls from standby
- Press to open the call list.
30 Calling
This is the Internet version of the User's guide. © Print only for private use.
Networks
Your phone switches automatically between GSM and 3G (UMTS) networks depending on availability. Some network operators allow you to switch networks manually.
To switch networks manually
1 From standby select Menu > Settings > the Connectivity tab > Mobile networks > GSM/3G networks.
2 Select an option.
Emergency calls
Your phone supports international emergency numbers, for example, 112 and 911. You can normally use these numbers to make emergency calls in any country, with or without the SIM card inserted, if you are in range of a 3G (UMTS) or GSM network.
In some countries, other emergency numbers may also be promoted. Your network operator may therefore have saved additional local emergency numbers on the SIM card.
To make an emergency call
- From standby enter 112 (the international emergency number) and press 📐.
To view your local emergency numbers
1 From standby select Menu > Contacts.
2 Scroll to New contact and select Options > Special numbers > Emergency nos.
Video call
You can see a person on the screen during calls. Both parties need a subscription that supports the 3G (UMTS) service, and you need to be within range of a 3G (UMTS) network. 3G (UMTS) service is available when 3G appears.
To make a video call
1 From standby enter a phone number (with international country code and area code if applicable).
2 Select Options > Make video call.
To use the zoom with an outgoing video call
- Press ⬆ or ▼ .
To view video call options
• During the call, select Options.
Contacts
You can save names, phone numbers and personal information in Contacts. Information can be saved in the phone memory or on the SIM card.

You can synchronize your contacts using the Sony Ericsson PC Suite.
Default contacts
You can choose which contact information is shown as default. If Phone contacts is selected as default, your contacts show all the information saved in Contacts. If you select SIM contacts as default, your contacts show names and numbers saved on the SIM card.
To select default contacts
1 From standby select Menu > Contacts.
2 Scroll to New contact and select Options > Advanced > Default contacts.
3 Select an option.
Phone contacts
Phone contacts can contain names, phone numbers and personal information. They are saved in the phone memory.
To add a phone contact
1 From standby select Menu > Contacts.
2 Scroll to New contact and select Add.
3 Enter the name and select OK.
4 Scroll to New number: and select Add.
5 Enter the number and select OK.
6 Select a number option.
7 Scroll between the tabs and add information to the fields.
8 Select Save.
Calling contacts
To call a phone contact
1 From standby select Menu > Contacts.
2 Scroll to a contact and press
To go directly to the contacts list
- From standby press and hold down 2 - .9
To call with Smart search
1 From standby press + to 9 enter a sequence of (at least two) digits. All entries which match the sequence of digits or corresponding letters are shown in a list.
2 Scroll to a contact or a phone number and press
To turn Smart search on or off
1 From standby select Menu > Settings > the Calls tab > Smart search.
2 Select an option.
32 Calling
This is the Internet version of the User's guide. © Print only for private use.
Editing contacts
To add information to a phone contact
1 From standby select Menu > Contacts.
2 Scroll to a contact and select Options > Edit contact.
3 Scroll between the tabs and select Add or Edit.
4 Select an option and an item to add or edit.
5 Select Save.

If your subscription supports Calling Line Identification (CLI) service, you can assign personal ringtones and pictures to contacts.
To copy names and numbers to phone contacts
1 From standby select Menu > Contacts.
2 Scroll to New contact and select Options > Advanced > Copy from SIM.
3 Select an option.
To copy names and numbers to the SIM card
1 From standby select Menu > Contacts.
2 Scroll to New contact and select Options > Advanced > Copy to SIM.
3 Select an option.
When you copy all contacts from your phone to the SIM card, all existing SIM card information is replaced.
To automatically save names and phone numbers on the SIM card
1 From standby select Menu > Contacts.
2 Scroll to New contact and select Options > Advanced > Auto save on SIM.
3 Select an option.
SIM contacts
SIM contacts can contain names and numbers only. They are saved on the SIM card.
To add a SIM contact
1 From standby select Menu > Contacts.
2 Scroll to New contact and select Add.
3 Enter the name and select OK.
4 Enter the number and select OK.
5 Select a number option and add more information, if available.
6 Select Save.
To call a SIM contact
1 From standby select Menu > Contacts.
2 Scroll to a contact and press
Deleting contacts
To delete all contacts
1 From standby select Menu > Contacts.
2 Scroll to New contact and select Options > Advanced > Delete all contacts.
3 Select an option.
Contact memory status
The number of contacts you can save in your phone or on the SIM card depends on available memory.
To view contact memory status
1 From standby select Menu > Contacts.
2 Scroll to New contact and select Options > Advanced > Memory status.
Myself
You can enter information about yourself and, for example, send your business card.
To enter Myself information
1 From standby select Menu > Contacts.
2 Scroll to Myself and select Open.
3 Scroll to an option and edit the information.
4 Select Save.
To add your own business card
1 From standby select Menu > Contacts.
2 Scroll to Myself and select Open.
3 Scroll to My contact info and select Add > Create new.
4 Scroll between the tabs and add information to the fields.
5 Enter the information and select Save.
Groups
You can create a group of phone numbers and email addresses from Phone contacts to send messages to. See Messaging on page 45. You can also use groups (with phone numbers) when you create accepted callers lists. See Accept calls on page 38.
To create a group of numbers and email addresses
1 From standby select Menu > Contacts.
2 Scroll to New contact and select Options > Groups.
3 Scroll to New group and select Add.
4 Enter a name for the group and select Continue.
5 Scroll to New and select Add.
6 For each contact phone number or email address you want to mark, scroll to it and select Mark.
7 Select Continue > Done.
Call list
You can view information about recent calls.
To call a number from the call list
1 From standby press and scroll to a tab.
2 Scroll to a name or a number and press 📞.
To add a call list number to contacts
1 From standby press 📄 scroll to a tab.
2 Scroll to the number and select Save.
3 Select New contact to create a new contact or select an existing contact to add the number to.
Speed dial
Speed dialling lets you select nine contacts that you can dial quickly. The contacts can be saved in positions 1-9.
To add contacts to speed dial numbers
1 From standby select Menu > Contacts.
2 Scroll to New contact and select Options > Speed dial.
3 Scroll to a position number and select Add.
4 Select a contact.
To speed dial
- From standby enter the position number and press

Voicemail
If your subscription includes an answering service, callers can leave a voicemail message when you cannot answer a call.
To enter your voicemail number
1 From standby select Menu > Messaging > Settings > Voicemail number.
2 Enter the number and select OK.
To call your voicemail service
- From standby press and hold down 1.
Voice control
By creating voice commands you can:
- Voice dial – call someone by saying their name
- Answer and reject calls when you use a handsfree
To record a voice command using voice dialling
1 From standby select Menu > Settings > the General tab > Voice dialling > Activate.
2 Select Yes > New voice command and select a contact. If the contact has more than one number, select the number to add the voice command to.
3 Record a voice command such as "John mobile".
4 Follow the instructions that appear. Wait for the tone and say the command to record. The voice command is played back to you.
5 If the recording sounds OK, select Yes. If not, select No and repeat steps 3 and 4.
! Voice commands are saved in the phone memory only. They cannot be used in another phone.
To voice dial
1 From standby press and hold down a volume key.
2 Wait for the tone and say a recorded name, for example “John mobile”. The phone plays the name back to you and connects the call.
Voice answering
When you use a handsfree, you can answer or reject incoming calls with your voice.
To activate voice answering and record voice answer commands
1 From standby select Menu > Settings > the General tab > Voice control > Voice answer > Activate.
2 Follow the instructions that appear and select Continue. Wait for the tone and say “Answer”, or say any other word of your choosing.
3 Select Yes to accept or No for a new recording.
4 Follow the instructions that appear and select Continue. Wait for the tone and say "Busy", or say any other word of your choosing.
5 Select Yes to accept or No for a new recording.
6 Follow the instructions that appear and select Continue.
7 Select the environments in which you want to activate voice answering.
To answer a call using voice commands
- Say "Answer."
To reject a call using voice commands
- Say "Busy."

Diverting calls
You can divert calls, for example, to an answering service.

When Restrict calls is used, some divert call options are not available. See Restricted dialling on page 39.
To divert calls
1 From standby select Menu > Settings > the Calls tab > Divert calls.
2 Select a call type and a divert option.
3 Select Activate.
4 Enter the number to divert calls to and select OK.

More than one call
You can handle more than one call at a time. For example, you can put an ongoing call on hold, while you make or answer a second call. You can also switch between the two calls. You cannot answer a third call without ending one of the first two calls. You can also join two calls.
Call waiting
You will hear a beep if you receive a second call while call waiting is active.
To activate call waiting
- From standby select Menu > Settings > the Calls tab > Manage calls > Call waiting > Activate.
To make a second call
1 During the call, press this puts the ongoing call on hold.
2 Select Options > Add call.
3 Enter the number to call and press
To answer a second call
- During the call, press this puts the ongoing call on hold.
To reject a second call
- During the call, press and continue with the ongoing call.
To end an ongoing call and answer a second call
- During the call, select Replace active call.
Handling two voice calls
You can have calls ongoing and on hold at the same time.
To switch between two calls
- During the call, press

To join two calls
- During the call, select Options > Join calls.

To connect two calls
- During the call, select Options > Transfer call. You are disconnected from both calls.
To end an ongoing call and return to the call on hold
- First press and then.

Conference calls
With a conference call, you can have a joint conversation with up to five people.
To add a new participant
1 During the call, press this puts the joined calls on hold.
2 Select Options > Add call.
3 Enter the number to call and press 📞.
4 Select Options > Join calls to add the new participant.
5 Repeat this task to add more participants.
To release a participant
1 Select Options > Release party.
2 Select the participant to release.
To have a private conversation
1 During the call, select Options > Talk to and select the participant to talk to.
2 To resume the conference call, select Options > Join calls.
My numbers
You can view, add and edit your own phone numbers.
To check your phone numbers
1 From standby select Menu > Contacts.
2 Scroll to New contact and select Options > Special numbers > My numbers.
3 Select an option.
Accept calls
You can choose to receive calls from certain phone numbers only.
To add numbers to the accepted callers list
1 From standby select Menu > Settings > the Calls tab > Manage calls > Accept calls > Only from list.
2 Scroll to New and select Add.
3 Select a contact or Groups.
See Groups on page 34.
To accept all calls
- From standby select Menu > Settings > the Calls tab > Manage calls > Accept calls > All callers.

Restricted dialling
You can restrict outgoing and incoming calls. A password from your service provider is required.
! If you divert incoming calls, you cannot use some restrict calls options.
Restrict calls options
Standard options are:
- All outgoing – all outgoing calls.
- Outgoing intl – all outgoing international calls.
- Outgoing intl roam. – all outgoing international calls except to your home country.
- All incoming – all incoming calls.
- Inc. when roaming – all incoming calls when you are abroad.
To restrict calls
1 From standby select Menu > Settings > the Calls tab > Manage calls > Restrict calls.
2 Select an option.
3 Select Activate.
4 Enter your password and select OK.

Fixed dialling
Fixed dialling allows calls to be made only to certain numbers saved on the SIM card. The fixed numbers are protected by your PIN2.
Partial numbers can be saved. For example, saving 0123456 allows calls to be made to all numbers starting with 0123456.
When fixed dialling is used, you cannot view or manage any phone numbers saved on the SIM card, but you can still call the international emergency number, 112.
To use fixed dialling
1 From standby select Menu > Contacts.
2 Scroll to New contact and select Options > Special numbers > Fixed dialling > Activate.
3 Enter your PIN2 and select OK.
4 Select OK again to confirm.
To save a fixed number
1 From standby select Menu > Contacts.
2 Scroll to New contact and select Options > Special numbers > Fixed dialling > Fixed numbers > New number.
3 Enter the information and select Save.

Call time and cost
During a call, the phone shows how long you have been talking. You can also check on the duration of your last call, your outgoing calls and the total time of all your calls.
To check the call time
- From standby select Menu > Settings > the Calls tab > Time & cost > Call timers.

Showing or hiding your phone number
You can decide to show or hide your phone number when you make a call.
To hide your phone number
1 From standby select Menu > Settings > the Calls tab > Show/hide my no.
2 Select Hide number.
Imaging
You can take pictures and record video clips to view, save or send. You find saved pictures and video clips in Media and in File manager.
Viewfinder and camera keys

1 Take pictures/Record video clips
2 Zoom in or out
Using the camera
To activate the camera
- From standby select Menu > Camera.
To take a picture
1 Activate the camera and press the navigation key left or right to scroll to 📄.
2 Press the centre selection key to take a picture.
3 The picture is automatically saved in the file manager.

Do not record with a strong light source in the background. Use a support or the self-timer to avoid a blurred picture.
To record a video clip
1 Activate the camera and press the navigation key left or right to scroll to 📄.
2 Press the centre selection key to start recording.
3 To stop recording, press the centre selection key. The video clip is automatically saved in the file manager.
To use zoom
- Press the navigation key up or down.
When taking a picture, zoom is available only in VGA mode.
To adjust brightness
- Press the volume keys up or down.
To view pictures and video clips
1 Activate the camera and select Options > View all pictures.
2 Scroll to the item.
3 To view a video clip, press the centre selection key.
Getting more from the camera
You can improve an underexposed picture with Photo fix.
Camera icons and settings
Icons on the screen inform what the current setting is. More camera settings are available in Options.
To change settings
- Activate the camera and select Options.
To view information about settings
- Scroll to a setting and select
Camera shortcuts
| Key Shortcut | |
| Zoom out | |
| Zoom in | |
| 1 | Camera: Shoot modeVideo: Video length |
| 3 | Self-timer |
| 2 | Night mode |
| 0+ | Camera key guide |
Viewing and tagging pictures
You can view and tag your pictures in Media.
To view pictures in a slide show
1 From standby select Menu > Media > Photo > Cam. Album.
2 Select a month.
3 Scroll to a picture and select View.
4 Select Options > Slide show.
5 Select a mood.
Viewing pictures on a map
When is shown on the screen, your geographical position is saved with the pictures you take. This is called geo tagging, and it shows the approximate location of where a picture was taken.
To view pictures on a map
1 From standby select Menu > Media > Photo > Cam. Album.
2 Select a month.
3 Scroll to a picture and select View.
4 Select Options > View on map.
To change the geo tagging setting
1 From standby select Menu > Camera > Options > Add position.
2 Select an option.
Photo tags
You can tag pictures to categorize them in Photo tags. For example, you can create a vacation tag and add it to all your vacation photos.
To tag pictures
1 From standby select Menu > Media > Photo > Cam. Album.
2 Select a month.
3 Scroll to a picture and select View.
4 Press and scroll to a tag.
5 Press the centre selection key.
6 For each picture you want to tag, scroll to the picture and press the centre selection key.
To create a new photo tag
1 From standby select Menu > Media > Photo > Cam. Album.
2 Select a month.
3 Scroll to a picture and select View.
4 Press ⚙️ and select Options > New tag.
5 Enter a name and select OK.
6 Select an icon.
7 Press the centre selection key to tag the picture.
Using pictures
You can add a picture to a contact, use it during phone startup, as a wallpaper in standby or as a screen saver.
To use pictures
1 From standby select Menu > Media > Photo > Cam. Album.
2 Select a month.
3 Scroll to a picture and select View.
4 Select Options > Use as.
5 Select an option.
To set a Java application as a wallpaper
1 From standby select Menu > Settings > the Display tab.
2 Select Wallpaper > Application.
3 Select a Java application.
You can only set the Java™ applications that have support for wallpaper.
Working With pictures
You can view, enhance and organize your pictures and video clips on your computer by installing the Adobe™ Photoshop™ Album Starter Edition. It is included on the CD that comes with your phone and available for download at www.sonyericsson.com/support.
Use Sony Ericsson Media Manager to transfer content to and from your phone. See Transferring content to and from a computer on page 24 for more information.
PhotoDJ™ and VideoDJ™
You can edit pictures and video clips.
To edit and save a picture
1 From standby select Menu > Media > Photo > Cam. Album.
2 Select a month.
3 Scroll to a picture and select View.
4 Select Options > Edit in PhotoDJ™.
5 Edit the picture.
6 Select Options > Save picture.
To edit and save a video clip
1 From standby select Menu > Organizer > File manager > Videos.
2 Scroll to a video clip and select Options > VideoDJ™.
3 Edit the video clip.
4 Select Options > Save.
To trim a video clip
1 From standby select Menu > Organizer > File manager > Videos.
2 Scroll to a video clip and select Options > VideoDJ™ > Edit > Trim.
3 Select Set to set the starting point and select Start.
4 Select Set to set the ending point and select End.
5 Select Trim > Options > Save.
Blogging
A blog is a personal Web page. If your subscription supports this service, you can send pictures or video clips to a blog.
If you cannot use picture or video blog, see Troubleshooting on page 67.
! Web services may require a separate license agreement between you and the service provider. Additional regulations and charges may apply. Contact your service provider.
To send camera pictures to a blog
1 From standby select Menu > Media > Photo > Cam. Album.
2 Select a month.
3 Scroll to a picture and select View.
4 Select Options > Send > To blog.
5 Enter a title and text and select OK.
6 Select Publish.
You can also send a photo to a blog just after you have taken it by selecting Send > To blog.
To send video clips to a blog
1 From standby select Menu > Media > Video.
2 Scroll to a video clip and select Options > Send > To blog.
3 Enter a title and text and select OK.
4 Select Publish.
You can also send a video clip to a blog just after you have recorded it by selecting Send > To blog.
To go to a blog address from contacts
1 From standby select Menu > Contacts.
2 Scroll to a contact and select a Web address.
3 Select Go to.
44 Imaging
This is the Internet version of the User's guide. © Print only for private use.
Printing photos
You can print camera pictures using the USB cable connected to a compatible printer.

You can also print using a Bluetooth compatible printer that supports the Object Push Profile.
To print camera pictures using the USB cable
1 Connect the USB cable to the phone.
2 Connect the USB cable to the printer.
3 Wait for feedback in the phone and select OK.
4 Enter printer settings (if required) and select Print.
5 From standby select Menu > Media > Photo > Cam. Album.
6 Select a month.
7 Scroll to a picture and select Options > Print.

You should disconnect and re-connect the USB cable if there is a printer error.
Messaging
Receiving and saving messages You are notified when you receive a message. Messages are automatically saved in the phone memory. When the phone memory is full, you can delete messages or save them on the SIM card.
To save a message on the SIM card
1 From standby select Menu > Messaging and select a folder.
2 Scroll to a message and select Options > Save message.
To view a message from the inbox
1 From standby select Menu > Messaging > Inbox.
2 Scroll to the message and select View.
Text messages
Text messages can contain simple pictures, sound effects, animations, and melodies.
To write and send a text message
1 From standby select Menu > Messaging > Write new > Text message.
2 Write the message and select Continue > Contacts look-up.
3 Select a recipient and select Send.
! If you send a text message to a group, you will be charged for each member. See Groups on page 34.
To copy and paste text in a text message
1 When you write the message, select Options > Copy & paste.
2 Select Copy all or Mark & copy. Scroll to and mark text in the message.
3 Select Options > Copy & paste > Paste.
To add an item to a text message
1 When you write the message, select Options > Add item.
2 Select an option and then an item.
To call a number in a text message
- When you view the message, scroll to the phone number and press 📞.
To turn long messages on
1 From standby select Menu > Messaging > Settings > Text message.
2 Select Max. msg length > Max. available.
Picture messages
Picture messages can contain text, pictures, slides, sound recordings, video clips, signatures and
attachments. You can send picture messages to a mobile phone or an email address.
If you cannot use picture messages, see Troubleshooting on page 67.
To create and send a picture message
1 From standby select Menu > Messaging > Write new > Picture msg.
2 Enter text. To add items to the message, press scroll and select an item.
3 Select Continue > Contacts look-up.
4 Select a recipient and select Send.
Receiving picture messages
You can select how to download your picture messages. Standard options when you download picture messages are:
• Always – automatic download.
- Ask in roaming – ask to download when not in home network.
- Not in roaming – do not download when not in home network.
- Always ask – ask to download.
- Off – new messages appear in the Inbox.
To set automatic download
1 From standby select Menu > Messaging > Settings > Picture message > Auto download.
2 Select an option.
Message options
You can set standard options for all messages or choose specific settings each time you send a message.
To set text message options
1 From standby select Menu > Messaging > Settings > Text message.
2 Scroll to an option and select Edit.
To set picture message options
1 From standby select Menu > Messaging > Settings > Picture message.
2 Scroll to an option and select Edit.
To set options for a specific message
1 When the message is ready and a recipient is selected, select Options > Advanced.
2 Scroll to an option and select Edit.
Templates
If you often use the same phrases and pictures in a message, you can save the message as a template.
To add a text message template
1 From standby select Menu > Messaging > Templates > New template > Text.
2 Insert text or select Options to add items. Select OK.
3 Enter a title and select OK.
To add a picture message template
1 From standby select Menu > Messaging > Templates > New template > Picture msg.
2 Enter text. To add items to the message, press scroll and select an item.
3 Select Save, enter a title and select OK.
To save a message as a template
1 From standby select Menu > Messaging > Inbox.
2 Scroll to the message and select View > Options > Save as template.

Voice messages
You can send and receive a sound recording as a voice message.

The sender and recipient must have a subscription supporting picture messaging.
To record and send a voice message
1 From standby select Menu > Messaging > Write new > Voice message.
2 Record the message and select Stop > Send > Contacts look-up.
3 Select a recipient and select Send.

You can use standard email functions and your computer email address in your phone.

You can synchronize your email using Microsoft® Exchange ActiveSync.
Before you use email
You can use the setup wizard to check if settings are available for your email account or you can enter them manually. You can also receive settings at www.sonyericsson.com/support.
To create an email account
1 From standby select Menu > Messaging > Email > Accounts.
2 Scroll to New account and select Add.

If you enter settings manually, you can contact your email provider for more information. An email provider could be the company that supplied your email address.
To write and send an email message
1 From standby select Menu > Messaging > Email > Write new.
2 Select Add > Enter email address.
Enter the email address and select OK.
3 To add more recipients, scroll to To: and select Edit.
4 Scroll to an option and select Add > Enter email address. Enter the email address and select OK. When you are ready, select Done.
5 Select Edit and enter a subject.
Select OK.
6 Select Edit and enter the text.
Select OK.
7 Select Add and choose a file to attach.
8 Select Continue > Send.
To receive and read an email message
1 From standby select Menu > Messaging > Email > Inbox > Options > Check new email.
2 Scroll to the message and select View.
To save an email message
1 From standby select Menu > Messaging > Email > Inbox.
2 Scroll to the message and select View > Options > Save message.
To reply to an email message
1 From standby select Menu > Messaging > Email > Inbox.
2 Scroll to the message and select Options > Reply.
3 Write the reply and select OK.
4 Select Continue > Send.
To view an attachment in an email message
- When you view the message, select Options > Attachments > Use > View.
To save an attachment in an email message
- When you view the message, select Options > Attachments > Use > Save.
Active email account
If you have several email accounts, you can change which one is active.
To change the active email account
1 From standby select Menu > Messaging > Email > Accounts.
2 Select an account.
Push email
You can receive notification in your phone from your email server that you have new email messages.
To turn on push email notification
- From standby select Menu > Messaging > Email > Settings > Push email.
My friends
You can connect and log in to the My friends server to communicate online with chat messages.
If you cannot use My friends, see Troubleshooting on page 67.
Before you use My friends
If no settings exist in your phone, you need to enter server settings. Your service provider can provide standard settings information such as:
- Username
- Password
- Server address
- Internet profile
To enter My friendsserver settings
1 From standby select Menu > Messaging > My friends > Configure.
2 Scroll to a setting and select Add.
To log in to the My friends server
- From standby select Menu > Messaging > My friends > Log in.
To log out of the My friends server
- Select Options > Log out.
To add a chat contact
1 From standby select Menu > Messaging > My friends > the Contacts tab.
2 Select Options > Add contact.
To send a chat message
1 From standby select Menu > Messaging > My friends > the Contacts tab.
2 Scroll to a contact and select Chat.
3 Write the message and select Send.
Status
You can show your status, for example, Happy or Busy, to your contacts only. You can also show your status to all users on the My friends server.
To show my status
1 From standby select Menu > Messaging > My friends > Options > Settings > Show my status.
2 Select an option.
To update your own status
1 From standby select Menu > Messaging > My friends > the My status tab.
2 Edit the information.
3 Select Options > Save.
Chat group
A chat group can be started by your service provider, by an individual My friends user or by yourself. You can save chat groups by saving a chat invitation or by searching for a specific chat group.
To create a chat group
1 From standby select Menu > Messaging > My friends > the Chat groups tab.
2 Select Options > Add chat group > New chat group.
3 Select who to invite from your contacts list and select Continue.
4 Enter a short invitation text and select Continue > Send.
To add a chat group
1 From standby select Menu > Messaging > My friends > the Chat groups tab > Options > Add chat group.
2 Select an option.
! Conversation history is saved between log out and when you log in again to let you return to chat messages from previous conversations.
To save a conversation
1 From standby select Menu > Messaging > My friends > the Conversations tab.
2 Enter a conversation.
3 Select Options > Advanced > Save conversation.
Area and cell information
Area and cell information are messages, for example, local traffic reports, that are sent by your service provider when you are within a certain network area when you choose to receive them.
To turn area information on
1 From standby select Menu > Messaging > Settings > Area info.
2 Scroll to Reception and select Edit > On.
Internet
If you cannot use the Internet, see Troubleshooting on page 67.
To start browsing
1 From standby select Menu > Internet.
2 Select Options > Go to.
3 Select an option.
To exit the browser
- When you browse the Internet, select Options > Exit browser.
Bookmarks
You can create and edit bookmarks as quick links to your favourite Web pages.
To create a bookmark
1 When you browse the Internet, select Options > Tools > Add bookmark.
2 Enter a title and an address.
Select Save.
To select a bookmark
1 From standby select Menu > Internet.
2 Select Options > Go to > Bookmarks.
3 Scroll to a bookmark and select Go to.
History pages
You can view Web pages you have browsed.
To view history pages
- From standby select Menu > Internet > Options > Go to > History.
Getting more from the browser
To use pan and zoom on a Web page
1 When you browse the Internet, press #一务.
2 Use the navigation key to move the frame.
3 Press Zoom.
4 To switch back to pan, press
To use pan and zoom, you need to turn off Smart-fit: Options > Advanced > Smart-Fit > Off.
To make a call when you browse
- Press

To save a picture from a Web page
1 When you browse the Internet, select Options > Tools > Save picture.
2 Select a picture.
To find text on a Web page
1 When you browse the Internet, select Options > Tools > Find on page.
2 Enter text and press Find.
52 Internet
This is the Internet version of the User's guide. © Print only for private use.
To send a link
1 When you browse the Internet, select Options > Tools > Send link.
2 Select a transfer method.
! Make sure the receiving device supports the transfer method you select.
Internet keypad shortcuts
You can use the keypad to go directly to an Internet browser function.
To select Internet keypad shortcuts
1 From standby select Menu > Internet.
2 Select Options > Advanced > Keypad mode > Shortcuts.
| Key Shortcut | |
 | Bookmarks |
 - Enter text to Enter address, Search Internet or search in Bookmarks - Enter text to Enter address, Search Internet or search in Bookmarks | |
 | Fullscreen or Landscape or Normal screen |
 | Zoom |
 | Pan & zoom (when Smart-Fit is off) |
Internet security and certificates
Your phone supports secure browsing. Certain Internet services, such as banking, require certificates in your phone. Your phone may already contain certificates when you buy it or you can download new certificates.
To view certificates in the phone
- From standby select Menu > Settings > the General tab > Security > Certificates.
Web feeds
You can subscribe to and download frequently updated content, such as news, podcasts or photos, using Web feeds.
To add new feeds for a Web page
1 When you browse a page on the Internet that has Web feeds, indicated by 📞 icon, select Options > Web feeds.
2 For each feed you want to add, scroll to the feed and select Mark.
3 Select Options > Continue.
To download content via feeds
1 From standby select Menu > Media > Web feeds.
2 Scroll to an updated feed and select View or ▶
3 Select a heading to expand.
4 Select an icon depending on content, to open a Web page, to download an audio podcast, to download a video podcast or to download a photo.

You can also subscribe to and download content to a computer via feeds using Sony Ericsson Media Manager. You can then transfer the content to your phone. See Transferring content to and from a computer on page 24.
Updating Web feeds
You can manually update your feeds, or schedule updates. When there are updates, appears on the screen.
To schedule Web feed updates
1 From standby select Menu > Media > Web feeds.
2 Scroll to a feed and select Options > Schedule update.
3 Select an option.

Frequent updates may be costly.
To update Web feeds manually
1 From standby select Menu > Media > Web feeds.
2 Scroll to a feed and select Options > Update.
3 Select an option.
Web feeds in standby
You can show news updates on the standby screen.
To show Web feeds in standby
1 From standby select Menu > Media > Web feeds.
2 Scroll to a feed and select Options > Settings > Standby ticker > Show in standby.
To access Web feeds from standby
1 From standby select Ticker.
2 To read more about a feed, press 🙏 or ⓣ to scroll to a headline and select Go to.
Podcasts
Podcasts are files, for example, radio programs or video content, that you can download and play. You subscribe to and download podcasts using Web feeds.
To access audio podcasts
- From standby select Menu > Media > Music > Podcasts.
To access video podcasts
- From standby select Menu > Media > Video > Podcasts.
Photo feeds
You can subscribe to Photo feeds and download photos. To start using Photo feeds, see Web feeds on page 53.
To access photo feeds
- From standby select Menu > Media > Photo > Photo feeds.
Synchronizing
You can synchronize in two different ways. You can synchronize your phone using a computer program or you can synchronize using an Internet service.

Use only one of the synchronization methods at a time with your phone.
For more information on synchronizing, go to www.sonyericsson.com/support to read Getting started guides.
Synchronizing using a computer
You can use the USB cable or Bluetooth wireless technology to synchronize phone contacts, appointments, bookmarks, tasks and notes with a computer program such as Microsoft Outlook.
Before synchronizing, you need to install the Sony Ericsson PC Suite.
! Sony Ericsson PC Suite software is included on the CD with your phone and available for download at www.sonyericsson.com/support.
See Required operating systems on 25.
To install the Sony Ericsson PC Suite
1 Turn on your computer and insert the CD. The CD starts automatically and the installation window opens.
2 Select a language and click OK.
3 Click Install Sony Ericsson PC suite and follow the instructions on the screen.
To synchronize using the Sony Ericsson PC Suite
1 Computer: Start PC Suite from Start/Programs/Sony Ericsson/PC Suite.
2 Follow the instructions in the Sony Ericsson PC Suite for how to connect.
3 Phone: Select Phone mode.
4 Computer: When you are notified that the Sony Ericsson PC Suite has found your phone, you can start synchronizing.
For usage details, see the Sony Ericsson PC Suite Help section once the software has been installed on your computer.
Synchronizing using an Internet service
You can synchronize with an Internet service using SyncML™ or a Microsoft® Exchange Server using Microsoft Exchange ActiveSync. If you cannot synchronize with an Internet service, see Troubleshooting on page 67.
SyncML
You can synchronize remote content and personal information using SyncML.
Before you synchronize using SyncML
You must enter settings for SyncML synchronization and register a synchronization account online with a service provider. You will need:
- Server address – server URL
- Database name – database to synchronize with
To enter settings for SyncML
1 From standby select Menu > Organizer > Synchronization.
2 Scroll to New account and select Add > SyncML.
3 Enter a name for the new account and select Cont.
4 Select Server address. Enter the required information and select OK.
5 Enter Username and Password, if required.
6 Scroll to the Applications tab and mark applications to synchronize.
7 Scroll to the App. settings tab and select an application.
8 Select Database name and enter the required information.
9 Scroll to the Advanced tab to enter additional settings for synchronizing and select Save.
To synchronize using SyncML
1 From standby select Menu > Organizer > Synchronization.
2 Scroll to an account and select Start.
Microsoft® Exchange ActiveSync
You can access and synchronize information such as email, contacts and calendar entries using Microsoft® Exchange Server with Microsoft® Exchange ActiveSync.

For more information on synchronization settings, contact your IT administrator.
Before you synchronize using Microsoft® Exchange ActiveSync You must enter settings for Microsoft Exchange ActiveSync to access a Microsoft Exchange Server. You will need:
- Server address – server URL
- Domain – server domain
- Username – account username
- Password – account password
Before you synchronize with Exchange
• ActiveSync, you must enter the correct time zone in your phone.
To enter settings for Microsoft® Exchange ActiveSync
1 From standby select Menu > Organizer > Synchronization.
2 Scroll to New account and select Add > Exchange ActiveSync.
3 Enter a name for the new account and select Cont.
4 Enter the required settings.
5 Scroll between the tabs to enter additional settings.
6 Select Save.
To synchronize using Microsoft® Exchange ActiveSync
1 From standby select Menu > Organizer > Synchronization.
2 Scroll to an account and select Start.
More features
Flight mode
In Flight mode the network and radio transceivers are turned off to prevent disturbance to sensitive equipment.
When the flight mode menu is activated you are asked to select a mode the next time you turn on your phone:
- Normal mode – full functionality
- Flight mode – limited functionality
To activate the flight mode menu
- From standby select Menu > Settings > the General tab > Flight mode > Show at startup.
To select flight mode
1 When the flight mode menu is activated, turn off your phone.
2 Turn on your phone and select Flight mode.

Update service
You can update your phone with the latest software. You do not lose personal or phone information.
There are two ways to update your phone:
• Over the air using your phone
- Using the provided USB cable and an Internet-connected computer
! Update service requires data access such as GPRS, 3G or HSDPA.
To change Internet settings
- From standby select Menu > Settings > the General tab > Update service > Settings > Internet settings.
To view the current software in the phone
1 From standby select Menu > Settings > the General tab > Update service.
2 Select Software version.
To use Update service using the phone
1 From standby select Menu > Settings > the General tab > Update service.
2 Select Search for update and follow the instructions that appear.
To use Update service using a USB cable
1 Go to www.sonyericsson.com/support or click the Sony Ericsson Update service in the Sony Ericsson PC Suite software if installed on your computer.
2 Select a region and country.
3 Follow the instructions on the screen.
See To install the Sony Ericsson PC Suite on page 56.
To set a reminder to use Update service
1 From standby select Menu > Settings > the General tab > Update service > Settings > Reminder.
2 Select an option.
Location services
You can get help to find your way and save your favourite locations. With information from mobile towers near you, you may be able to view your approximate location on a map.

You can get more exact information about your location with a GPS accessory supported by your phone.
! Some features of Location services use the Internet.
To use Google Maps™ for mobile
- From standby select Menu > Entertainment > Location services > Google Maps.
To view help about Google Maps
- When you use Google Maps, select Options > Help.
To view your approximate location
- When you use Google Maps, press Ⓞ +.
To view a saved location
1 From standby select Menu > Entertainment > Location services > My favourites.
2 Scroll to a location and select Go to.

When you use Google Maps you can press to access your favourites.
Alarms
You can set a sound or the radio as an alarm signal. The alarm sounds even if the phone is turned off. When the alarm sounds you can silence it or turn it off.
To set the alarm
1 From standby select Menu > Organizer > Alarms.
2 Scroll to an alarm and select Edit.
3 Scroll to Time: and select Edit.
4 Enter a time and select OK > Save.
To set the recurrent alarm
1 From standby select Menu > Organizer > Alarms.
2 Scroll to an alarm and select Edit.
3 Scroll to Recurrent: and select Edit.
4 Scroll to a day and select Mark.
5 To select another day, scroll to the day and select Mark.
6 Select Done > Save.
To set the alarm signal
1 From standby select Menu > Organizer > Alarms.
2 Scroll to an alarm and select Edit.
3 Scroll to the tab.
4 Scroll to Alarm signal: and select Edit.
5 Find and select an alarm signal.
Select Save.
To silence the alarm
- When the alarm sounds, press any key.
• To repeat the alarm, select Snooze.
To turn off the alarm
- When the alarm sounds, press any key and select TurnOff.
To cancel the alarm
1 From standby select Menu > Organizer > Alarms.
2 Scroll to an alarm and select TurnOff.
The alarm in silent mode
You can set the alarm not to sound when the phone is in silent mode.
To set an alarm to sound or not in silent mode
1 From standby select Menu > Organizer > Alarms.
2 Scroll to an alarm and select Edit.
3 Scroll to the tab.
4 Scroll to Silent mode: and select Edit.
5 Select an option.
To set the snooze duration
1 From standby select Menu > Organizer > Alarms.
2 Scroll to an alarm and select Edit.
3 Scroll to Snooze duration: and select Edit.
4 Select an option.
Calendar
The calendar can be synchronized with a computer calendar, with a calendar on the Web or with a Microsoft® Exchange Server (Microsoft® Outlook®).
For more information see Synchronizing on page 55.
Default view
You can choose whether month, week or day view will appear first when you open the calendar.
To set default view
1 From standby select Menu > Organizer > Calendar.
2 Select Options > Advanced > Default view.
3 Select an option.
Appointments
You can add new appointments or reuse existing appointments.
To add an appointment
1 From standby select Menu > Organizer > Calendar.
2 Select a date.
3 Scroll to New appointment and select Add.
4 Enter the information and confirm each entry.
5 Select Save.
To view an appointment
1 From standby select Menu > Organizer > Calendar.
2 Select a date.
3 Scroll to an appointment and select View.
To edit an appointment
1 From standby select Menu > Organizer > Calendar.
2 Select a date.
3 Scroll to an appointment and select View.
4 Select Options > Edit.
5 Edit the appointment and confirm each entry.
6 Select Save.
To view a calendar week
1 From standby select Menu > Organizer > Calendar.
2 Select Options > Change view to > Week.
To set when reminders should sound
1 From standby select Menu > Organizer > Calendar.
2 Select a date.
3 Select Options > Advanced > Reminders.
4 Select an option.
A reminders option set in calendar affects a reminders option set in tasks.
Notes
You can make notes and save them. You can also show a note in standby.
To add a note
1 From standby select Menu > Organizer > Notes.
2 Scroll to New note and select Add.
3 Write a note and select Save.
To show a note in standby
1 From standby select Menu > Organizer > Notes.
2 Scroll to a note and select Options > Show in standby.
To hide a note from standby
1 From standby select Menu > Organizer > Notes.
2 Scroll to the note shown in standby.
This will be marked with an icon.
Select Options > Hide in standby.
Tasks
You can add new tasks or reuse existing tasks.
To add a task
1 From standby select Menu > Organizer > Tasks.
2 Select New task and select Add.
3 Select an option.
4 Enter details and confirm each entry.
To view a task
1 From standby select Menu > Organizer > Tasks.
2 Scroll to a task and select View.
To set when reminders should sound
1 From standby select Menu > Organizer > Tasks.
2 Scroll to a task and select Options > Reminders.
3 Select an option.
A reminders option set in tasks affects a reminders option set in calendar.
Profiles
You can change settings such as the ring volume and vibrating alert to suit different locations. You can reset all profiles to the phone's original settings.
To select a profile
1 From standby select Menu > Settings > the General tab > Profiles.
2 Select a profile.
To view and edit a profile
1 From standby select Menu > Settings > the General tab > Profiles.
2 Scroll to a profile and select Options > View and edit.
You cannot rename the Normal profile.
62 More features
This is the Internet version of the User's guide. © Print only for private use.
Time and date
To set the time
1 From standby select Menu > Settings > the General tab > Time & date > Time.
2 Enter the time and select Save.
To set the date
1 From standby select Menu > Settings > the General tab > Time & date > Date.
2 Enter the date and select Save.
To set the time zone
1 From standby select Menu > Settings > the General tab > Time & date > My time zone.
2 Select the time zone you are in.

If you select a city, My time zone also updates the time when daylight saving time changes.
Theme
You can change the appearance of the screen through items such as colours and wallpaper. You can also create new themes and download them. For more information, go to www.sonyericsson.com/support.
To set a theme
1 From standby select Menu > Settings > the Display tab > Theme.
2 Scroll to a theme and select Set.
Main menu layout
You can change the layout of the icons in the main menu.
To change the main menu layout
1 From standby select Menu > Options > Main menu layout.
2 Select an option.
Ringtones
To set a ringtone
1 From standby select Menu > Settings > the Sounds & alerts tab > Ringtone.
2 Find and select a ringtone.
To set the ringtone volume
1 From standby select Menu > Settings > the Sounds & alerts tab > Ring volume.
2 Press or to change the volume.
3 Select Save.
To turn the ringtone off
- From standby press and hold down #一刃.
All signals except the alarm signal are affected.
To set the vibrating alert
1 From standby select Menu > Settings > the Sounds & alerts tab > Vibrating alert.
2 Select an option.
Screen orientation
You can change between landscape and portrait orientation, or select Auto rotate to have the orientation change when you rotate the phone.
To change screen orientation in Media
1 From standby select Menu > Media > Settings > Orientation.
2 Select an option.
Games
Your phone contains preloaded games. You can also download games. Help texts are available for most games.
To start a game
1 From standby select Menu > Media > Games.
2 Select a game.
To end a game
- Press

Applications
You can download and run Java applications. You can also view information or set different permissions.
Internet profiles for Java applications Some Java applications need to connect to the Internet to receive information. Most Java applications use the same Internet settings as your Web browser. If you cannot use Java applications, see Troubleshooting on page 67.
To select a Java application
1 From standby select Menu > Organizer > Applications.
2 Select an application.
64 More features
This is the Internet version of the User's guide. © Print only for private use.
To view information about a Java application
1 From standby select Menu > Organizer > Applications.
2 Scroll to an application and select Options > Information.
To set permissions for a Java application
1 From standby select Menu > Organizer > Applications.
2 Scroll to an application and select Options > Permissions.
3 Set permissions.
Java application screen size
Some Java applications are designed for a specific screen size. For more information, contact the application vendor.
To set the screen size for a Java application
1 From standby select Menu > Organizer > Applications.
2 Scroll to an application and select Options > Screen size.
3 Select an option.
Locks
SIM card lock
This lock only protects your subscription. Your phone will work with a new SIM card. If the lock is on, you have to enter a PIN (Personal Identity Number).
If you enter your PIN incorrectly three times in a row, the SIM card is blocked and you need to enter your PUK (Personal Unblocking Key). Your PIN and PUK are supplied by your network operator.
To unblock the SIM card
1 When PIN blocked appears, enter your PUK and select OK.
2 Enter a new four-to-eight-digit PIN and select OK.
3 Re-enter the new PIN and select OK.
To edit the PIN
1 From standby select Menu > Settings > the General tab > Security > Locks > SIM protection > Change PIN.
2 Enter your PIN and select OK.
3 Enter a new four-to-eight-digit PIN and select OK.
4 Re-enter the new PIN and select OK.
! If Codes do not match appears, you entered the new PIN incorrectly. If Wrong PIN appears, followed by Old PIN:, you entered your old PIN incorrectly.
To use the SIM card lock
1 From standby select Menu > Settings > the General tab > Security > Locks > SIM protection > Protection.
2 Select an option.
3 Enter your PIN and select OK.
Phone lock
You can stop unauthorized use of your phone. Change the phone lock code (0000) to any four-to-eight-digit personal code.
It is important that you remember your new code. If you forget it, you have to take your phone to your local Sony Ericsson retailer.
To use the phone lock
1 From standby select Menu > Settings > the General tab > Security > Locks > Phone protection > Protection.
2 Select an option.
3 Enter the phone lock code and select OK.
To unlock the phone
- Enter your code and select OK.
To change the phone lock code
1 From standby select Menu > Settings > the General tab > Security > Locks > Phone protection > Change code.
2 Enter the old code and select OK.
3 Enter the new code and select OK.
4 Repeat the code and select OK.
IMEI number
Keep a copy of your IMEI (International Mobile Equipment Identity) number in case your phone is stolen.
To view your IMEI number
- From standby press *_ /A # - 0 + 6, # - .
Troubleshooting
Some problems will require you to call your network operator.
For more support go to www.sonyericsson.com/support.
Common questions
I cannot synchronize with an Internet service, use the Internet, PlayNow™, TrackID™, My friends, Java, picture messaging, email, or blogging
Your subscription does not include data capability. Settings are missing or incorrect.
You can download settings using the setup wizard or by going to www.sonyericsson.com/support.
To download settings using the Setup wizard
1 From standby select Menu > Settings > the General tab > Setup wizard > Settings download.
2 Follow the instructions that appear.

Contact your network operator or service provider for more information.
I have problems with memory capacity or the phone is working slowly
Restart your phone every day to free memory or do a Master reset.
Master reset
If you select Reset settings, the changes that you have made to settings will be deleted.
If you select Reset all, your settings and content, such as contacts, messages, pictures, sounds and downloaded games, will be deleted. You may also lose content that was in the phone at purchase.
To reset the phone
1 From standby select Menu > Settings > the General tab > Master reset.
2 Select an option.
3 Follow the instructions that appear.
I cannot charge the phone or battery capacity is low
The charger is not properly connected or the battery connection is poor. Remove the battery and clean the connectors.
The battery is worn out and needs to be replaced. See Charging the battery on page 8.
No battery icon appears when I start charging the phone
It may take a few minutes before the battery icon appears on the screen.
Some menu options appear in grey A service is not activated. Contact your network operator.
I cannot use SMS/text messages on my phone
You must have a service centre number. The number is supplied by your service provider and is usually saved on the SIM card. If the number to your service centre is not saved on your SIM card, you must enter the number yourself.
To enter a service centre number
1 From standby select Menu > Messaging > Settings > Text message and scroll to Service centre. The number is shown if it is saved on the SIM card.
2 If there is no number shown, select Edit.
3 Scroll to New ServiceCentre and select Add.
4 Enter the number, including the international “+” sign and country code.
5 Select Save.
I cannot use picture messages on my phone
You must set an MMS profile and the address of your message server. If no MMS profile or message server exists, you can receive all the settings automatically from your network operator or at www.sonyericsson.com/support.
To select an MMS profile
1 From standby select Menu > Messaging > Settings > Picture message > MMS profile.
2 Select a profile.
To set the message server address
1 From standby select Menu > Messaging > Settings > Picture message.
2 Scroll to MMS profile and select Edit.
3 Select Options > Edit.
4 Scroll to Message server and select Edit.
5 Enter the address and select OK > Save.
The phone does not ring or rings too softly
Make sure that Silent mode has not been set to On. See To turn the ringtone off on page 64.
68 Troubleshooting
This is the Internet version of the User's guide. © Print only for private use.
Check the ringtone volume. See To set the ringtone volume on page 63.
Check the profile. See To select a profile on page 62.
Check the divert call options. See To divert calls on page 37.
The phone cannot be detected by other devices using Bluetooth wireless technology
You have not turned the Bluetooth function on. Make sure that the visibility is set to show phone. See To turn the Bluetooth function on on page 27.
I cannot synchronise or transfer content between my phone and my computer, when using the USB cable.
The cable or software that came with your phone has not been properly installed. Go to
www.sonyericsson.com/support to read Getting started guides which contain detailed installation instructions and troubleshooting guides.
I have forgotten my code memo passcode
If you forget your passcode, you must reset the code memo. This means that all entries in the code memo are
deleted. The next time you enter the code memo, you must proceed as if you are opening it for the first time.
To reset code memo
1 From standby select Menu > Organizer > Code memo.
2 Enter an incorrect password 3 times.
3 Reset code memo? appears.
4 Select Yes.
Where can I find the regulatory information such as my IMEI number if I cannot turn on my phone?

Error messages
Insert SIM
There is no SIM card in your phone or you may have inserted it incorrectly.
See To insert the SIM card on page 6.
The SIM card connectors need cleaning. If the card is damaged, contact your network operator.
Insert correct SIM card
Your phone is set to work only with certain SIM cards. Check if you are using the correct operator SIM card.
Wrong PIN/Wrong PIN2
You have entered your PIN or PIN2 incorrectly.
Enter the correct PIN or PIN2 and select Yes. See PIN on page 7.
PIN blocked/PIN2 blocked
You have entered your PIN or PIN2 code incorrectly three times in a row.
To unblock, see SIM card lock on page 65.
Codes do not match
Codes that you have entered do not match. When you want to change a security code, for example your PIN, you have to confirm the new code. See SIM card lock on page 65.
No netw. coverage
Your phone is in flight mode. See Flight mode on page 58.
Your phone is not receiving any network signal, or the received signal is too weak. Contact your network operator and make sure that the network has coverage where you are.
The SIM card is not working properly. Insert your SIM card in another phone. If this works, it is probably your phone that is causing the problem. Please contact the nearest Sony Ericsson service location.
Emerg. calls only
You are within range of a network, but you are not allowed to use it. However, in an emergency, some network operators allow you to call the international emergency number 112. See Emergency calls on page 31.
PUK blocked. Contact operator.
You entered your personal unblocking key code (PUK) incorrectly 10 times in a row.
Important information
Sony Ericsson Consumer Web site
On www.sonyericsson.com/support there is a support section where help and tips are only a few clicks away. Here you will find the latest computer software updates and tips on how to use your product more efficiently.
Service and support
You have access to a portfolio of exclusive service advantages such as:
- Global and local Web sites providing support
• A global network of Call Centers -
An extensive network of Sony Ericsson service partners
-
A warranty period. Learn more about the warranty conditions in the Important information.
On www.sonyericsson.com, you will find the latest support tools and information. For operator-specific services and features, please contact your network operator.
You can also contact our Call Centers. If your country/region is not represented in the list below, please contact your local dealer. (Calls are charged according to national rates, including local taxes, unless the phone number is a toll-free number.) If your product needs service, please contact the dealer from whom it was purchased, or one of our service partners. For warranty claims, save proof of purchase.
Support
Argentina 800-333-7427 questions.AR@support.sonyericsson.com Australia 1-300650-600 questions.AU@support.sonyericsson.com Belgique/België 02-7451611 questions.BE@support.sonyericsson.com Brasil 4001-04444 questions.BR@support.sonyericsson.com Canada 1-866-766-9374 questions.CA@support.sonyericsson.com Central Africa +27 112589023 questions.CF@support.sonyericsson.com Chile 123-0020-0656 questions.CL@support.sonyericsson.com
| Colombia 18009122135 | questions.CO@support.sonyericsson.com | |
| Česká republika | 844550 055 | questions.CZ@support.sonyericsson.com |
| Danmark | 33 31 28 28 | questions.DK@support.sonyericsson.com |
| Deutschland | 0180 534 2020 | questions.DE@support.sonyericsson.com |
| Ελλάδα | 801-11-810-810 | questions.GR@support.sonyericsson.com |
| 210-89 91 919 | ||
| España | 902 180 576 | questions.ES@support.sonyericsson.com |
| France | 0 825 383 383 | questions.FR@support.sonyericsson.com |
| Hong Kong/ 香港 | 8203 8863 | questions.HK@support.sonyericsson.com |
| Hrvatska | 062 000 000 | questions.HR@support.sonyericsson.com |
| India/ 39011111 | questions.IN@support.sonyericsson.com | |
| Indonesia | 021-2701388 | questions.ID@support.sonyericsson.com |
| Ireland | 1850 545 888 | questions.IE@support.sonyericsson.com |
Italia 06 48895206 questions.IT@support.sonyericsson.com
Lietuva 8 70055030 questions.LT@support.sonyericsson.com
Magyarország +36 1 880 4747 questions.HU@support.sonyericsson.com
Malaysia 1-800-889900 questions.MY@support.sonyericsson.com
México 01 800 000 4722 questions.MX@support.sonyericsson.com
Nederland 0900 899 8318 questions.NL@support.sonyericsson.com
New Zealand 0800-100150 questions.NZ@support.sonyericsson.com
Norge 815 00 840 questions.NO@support.sonyericsson.com
Österreich 0810 200245 questions.AT@support.sonyericsson.com
Pakistan 111 22 55 73 questions.PK@support.sonyericsson.com
(92-21) 111 22 55 73
Philippines/Pilipinas 02-6351860 questions.PH@support.sonyericsson.com
Polska 0 (prefiks) 22 6916200 questions.PL@support.sonyericsson.com
Portugal 808 204 466 questions.PT@support.sonyericsson.com
questions.RO@support.sonyericsson.com
Россия 8 (495) 787 0986 questions.RU@support.sonyericsson.com
Schweiz/Suisse/Svizzera 0848 824 040 questions.CH@support.sonyericsson.com
Singapore 67440733 questions.SG@support.sonyericsson.com
questions.SK@support.sonyericsson.com
South Africa 0861 6322222 questions.ZA@support.sonyericsson.com
Suomi 09-299 2000 questions.FI@support.sonyericsson.com
Sverige 013-24 45 00 questions.SE@support.sonyericsson.com
questions.TR@support.sonyericsson.com
Україна (+0380) 44 590 1515 questions.UA@support.sonyericsson.com
United Kingdom 08705 23 7237 questions.GB@support.sonyericsson.com
United States 1-866-7669347 questions.US@support.sonyericsson.com
Venezuela 0-800-100-2250 questions.VE@support.sonyericsson.com
Guidelines for Safe and Efficient Use
Please follow these guidelines. Failure to do so might entail a potential health risk or product malfunction. If in doubt as to its proper function, have the product checked by a certified service partner before charging or using it.

Recommendations for care and safe use of our products
- Handle with care and keep in a clean and dust-free place.
- Warning! May explode if disposed of in fire.
- Do not expose your product to liquid or moisture or excess humidity.
- Do not expose to extreme temperatures. Do not expose the battery to temperatures above +60^ (+140^) .
- Do not expose to flames or lit tobacco products.
- Do not drop, throw or try to bend your product.
- Do not paint or attempt to disassemble or modify your product. Only Sony Ericsson authorized personnel should perform service.
- Consult with authorized medical staff and the instructions of the medical device manufacturer before using your product near pacemakers or other medical devices or equipment.
- Discontinue use of electronic devices or disable the radio transmitting functionality of the device where required or requested to do so.
- Do not use where a potentially explosive atmosphere exists.
- Do not place your product or install wireless equipment in the area above an air bag in your car.



- Caution: Cracked or broken displays may create sharp edges or splinters that could be harmful upon contact.
- Do not use your Bluetooth Headset in positions where it is uncomfortable or will be subject to pressure.
Children
Warning! Keep out of the reach of children. Do not allow children to play with mobile phones or accessories. They could hurt themselves or others.

Products may contain small parts that could become detached and create a choking hazard.
Power supply (Charger)
Connect the charger to power sources as marked on the product. Do not use outdoors or in damp areas. Do not alter or subject the cord to damage or stress. Unplug the unit before cleaning it. Never alter the plug. If it does not fit into the outlet, have a proper outlet installed by an electrician. When power supply is connected there is a small drain of power. To avoid this small energy waste, disconnect the power supply when the product is fully charged. Use of charging devices that are not Sony Ericsson branded may impose increased safety risks.
Battery
New or idle batteries can have short-term reduced capacity. Fully charge the battery before initial use. Use for intended purpose only. Charge the battery in temperatures between +5°C (+41°F) and +45°C (+113°F). Do not put the battery into your mouth. Do not let the battery contacts touch another metal object. Turn off the product before removing the battery. Performance depends on temperatures, signal strength, usage patterns, features selected and voice or data transmissions. Only Sony Ericsson service partners should remove or replace built-in batteries. Use of batteries that are not Sony Ericsson branded may pose increased safety risks.
Personal medical devices
Mobile phones may affect implanted medical equipment. Reduce risk of interference by keeping a minimum distance of 15 cm (6 inches) between the phone and the device. Use the phone at your right ear. Do not carry the phone in your breast pocket. Turn off the phone if you suspect interference. For all medical devices, consult a physician and the manufacturer.
Driving
Some vehicle manufacturers forbid the use of phones in their vehicles unless a handsfree kit with an external antenna supports the installation. Check with your vehicle manufacturer's representative to be sure that your mobile phone or Bluetooth handsfree will not affect the electronic systems in your vehicle. Full attention should be given to driving at all times and local laws and regulations restricting the use of wireless devices while driving must be observed.
GPS/Location based functions
Some products provide GPS/Location based functions. Location determining functionality is provided “As is” and “With all faults”. Sony Ericsson does not make any representation or warranty as to the accuracy of such location information.
Use of location-based information by the device may not be uninterrupted or error free and may additionally be dependent on network service availability. Please note that functionality may be reduced or prevented in certain environments such as building interiors or areas adjacent to buildings. Caution: Do not use GPS functionality in a manner which causes distraction from driving.
Emergency calls
Calls cannot be guaranteed under all conditions. Never rely solely upon mobile phones for essential communications. Calls may not be possible in all areas, on all networks, or when certain network services and/or phone features are used.
Antenna
Use of antenna devices not marketed by Sony Ericsson could damage your phone, reduce performance, and produce SAR levels above the established limits. Do not cover the antenna with your hand as this affects call quality, power levels and can shorten talk and standby times.
Radio frequency (RF) exposure and Specific Absorption Rate (SAR)
When your phone or Bluetooth handsfree is turned on, it emits low levels of radio frequency energy. International safety guidelines have been developed through periodic and thorough evaluation of scientific studies. These guidelines establish permitted levels of radio wave exposure. The guidelines include a safety margin designed to assure the safety of all persons and to account for any variations in measurements.
Specific Absorption Rate (SAR) is used to measure radio frequency energy absorbed by the body when using a mobile phone. The SAR value is determined at the highest certified power level in laboratory conditions, but because the phone is designed to use the minimum power necessary to access the chosen network, the actual SAR level can be well below this value. There is no proof of difference in safety based on difference in SAR value.
Products with radio transmitters sold in the US must be certified by the Federal Communications Commission (FCC). When required, tests are performed when the phone is placed at the ear and when worn on the body. For body-worn operation, the phone has been tested when positioned
74 Important information
This is the Internet version of the User's guide. © Print only for private use.
a minimum of 15 mm from the body without any metal parts in the vicinity of the phone or when properly used with an appropriate Sony Ericsson accessory and worn on the body.
For more information about SAR and radio frequency exposure go to:
www.sonyericsson.com/health.
Malware
Malware (short for malicious software) is software that can harm your mobile phone or other computers. Malware or harmful applications can include viruses, worms, spyware, and other unwanted programs. While your device does employ security measures to resist such efforts, Sony Ericsson does not warrant or represent that your device will be impervious to introduction of malware. You can however reduce the risk of malware attacks by using care when downloading content or accepting applications, refraining from opening or responding to messages from unknown sources, using trustworthy services to access the Internet, and only downloading content to your mobile phone from known, reliable sources.
Accessories
Use only Sony Ericsson branded original accessories and certified service partners. Sony Ericsson does not test third-party accessories. Accessories may influence RF Exposure, radio performance, sound loudness, electric safety and other areas. Third-party accessories and parts may pose a risk to your health or safety or decrease performance.
Accessible Solutions/Special Needs
In the US, compatible Sony Ericsson phones may offer compatibility with TTY terminals (with use of necessary accessory). For more information call the Sony Ericsson Special Needs Center on 877 878 1996 (TTY) or 877 207 2056 (voice), or go to www.sonyericsson-snc.com.
Disposal of old electrical and electronic equipment
Electronic equipment and batteries should not be included as household waste but should be left at an appropriate collection point for recycling. This helps prevent potential negative consequences for the environment and human health. Check local regulations by contacting your local city office, your household waste disposal service, the shop where you purchased the product or calling a Sony Ericsson Call Center.
Disposing of the battery
Check local regulations or call a Sony Ericsson Call Center for information. Never use municipal waste.
Memory Card
If your product comes complete with a removable memory card, it is generally compatible with the handset purchased but may not be compatible with other devices or the capabilities of their memory cards. Check other devices for compatibility before purchase or use. If your product is equipped with a memory card reader, check memory card compatibility before purchase or use.
The memory card is formatted prior to shipping. To reformat the memory card, use a compatible device. Do not use the standard operating system format when formatting the memory card on a PC. For details, refer to the operating instructions of the device or contact customer support.
Warning!
If your device requires an adapter for insertion into the handset or another device, do not insert the card directly without the required adapter.
Precautions on Memory Card Use
- Do not expose the memory card to moisture.
- Do not touch terminal connections with your hand or any metal object.
- Do not strike, bend, or drop the memory card.
- Do not attempt to disassemble or modify the memory card.
- Do not use or store the memory card in humid or corrosive locations or in excessive heat such as a closed car in summer, in direct sunlight or near a heater, etc.
- Do not press or bend the end of the memory card adapter with excessive force.
- Do not let dirt, dust, or foreign objects get into the insert port of any memory card adapter.
- Check you have inserted the memory card correctly.
- Insert the memory card as far as it will go into any memory card adapter needed. The memory card may not operate properly unless fully inserted.
- We recommend that you make a backup copy of important data. We are not responsible for any loss or damage to content you store on the memory card.
- Recorded data may be damaged or lost when you remove the memory card or memory card adapter, or turn off the power while formatting, reading or writing data, or when you use the memory card in locations subject to static electricity or high electrical field emissions.
Protection of personal information
Erase personal data before disposing of the product. To delete data, perform a master reset. Deleting data from the phone memory does not ensure that it cannot be recovered. Sony Ericsson does not warrant against recovery of information and does not assume responsibility for disclosure of any information even after a master reset.
Loudness warning!
Avoid volume levels that may be harmful to your hearing.
End User License Agreement
Software delivered with this device and its media is owned by Sony Ericsson Mobile Communications AB, and/or its affiliated companies and its suppliers and licensors.
Sony Ericsson grants you a non-exclusive limited license to use the Software solely in conjunction with the Device on which it is installed or delivered. Ownership of the Software is not sold, transferred or otherwise conveyed.
Do not use any means to discover the source code or any component of the Software, reproduce and distribute the Software, or modify the Software. You are entitled to transfer rights and obligations to the Software to a third party, solely together with the Device with which you received the Software, provided the third party agrees in writing to be bound by the terms of this License.
This license exists throughout the useful life of this Device. It can be terminated by transferring your rights to the Device to a third party in writing.
Failure to comply with any of these terms and conditions will terminate the license immediately.
Sony Ericsson and its third party suppliers and licensors retain all rights, title and interest in and to the Software. Sony Ericsson, and, to the extent that the Software contains material or code of a third party, such third party, shall be entitled third party beneficiaries of these terms.
This license is governed by the laws of Sweden. When applicable, the foregoing applies to statutory consumer rights.
Limited Warranty
Sony Ericsson Mobile Communications AB, Nya Vattentornet, SE-221 88 Lund, Sweden, (Sony Ericsson) or its local affiliated company, provides this Limited Warranty for your mobile phone, original accessory delivered with your mobile phone, and/or your mobile computing product (hereinafter referred to as "Product").
Should your Product need warranty service, please return it to the dealer from whom it was purchased, or contact your local Sony Ericsson Call Center (national rates may apply) or visit www.sonyericsson.com to get further information.
Our Warranty
Subject to the conditions of this Limited Warranty, Sony Ericsson warrants this Product to be free from defects in design, material and workmanship at the time of its original purchase by a consumer. This Limited Warranty will last for a period of one (1) year as from the original date of purchase of the Product.
What we will do
If, during the warranty period, this Product fails to operate under normal use and service, due to defects in design, materials or workmanship, Sony Ericsson authorized distributors or service partners, in the country* where you purchased the Product, will, at their option, either repair or replace the Product in accordance with the terms and conditions stipulated herein.
Sony Ericsson and its service partners reserve the right to charge a handling fee if a returned Product is found not to be under warranty according to the conditions below.
Please note that some of your personal settings, downloads and other information may be lost when your Sony Ericsson Product is repaired or replaced. At present Sony Ericsson may be prevented by
applicable law, other regulation or technical restrictions from making a backup copy of certain downloads. Sony Ericsson does not take any responsibility for any lost information of any kind and will not reimburse you for any such loss. You should always make backup copies of all the information stored on your Sony Ericsson Product such as downloads, calendar and contacts before handing in your Sony Ericsson Product for repair or replacement.
Conditions
1 This Limited Warranty is valid only if the original proof of purchase for this Product issued by a Sony Ericsson authorized dealer specifying the date of purchase and serial number**, is presented with the Product to be repaired or replaced. Sony Ericsson reserves the right to refuse warranty service if this information has been removed or changed after the original purchase of the Product from the dealer.
2 If Sony Ericsson repairs or replaces the Product, the repair for the defect concerned, or the replaced Product shall be warranted for the remaining time of the original warranty period or for ninety (90) days from the date of repair, whichever is longer. Repair or replacement may involve the use of functionally equivalent reconditioned units. Replaced parts or components will become the property of Sony Ericsson.
3 This warranty does not cover any failure of the Product due to normal tear and wear, or due to misuse, including but not limited to use in other than the normal and customary manner, in accordance with the Sony Ericsson instructions for use and maintenance of the Product. Nor does this warranty cover any failure of the Product due to accident, software or hardware modification or adjustment, acts of God or damage resulting from liquid.
A rechargeable battery can be charged and discharged more than a hundred times. However, it will eventually wear out – this is not a defect and corresponds to normal wear and tear. When the talk-time or standby time is noticeably shorter, it is time to replace your battery. Sony Ericsson recommends that you use only batteries and chargers approved by Sony Ericsson.
Minor variations in display brightness and colour may occur between the phones. There may be tiny bright or dark dots on the display. These are called defective pixels and occur when individual dots have malfunctioned and can not be adjusted. Two defective pixels are deemed acceptable.
Minor variations in camera image appearance may occur between phones. This is nothing uncommon and is not regarded as a defective camera module.
4 Since the cellular system on which the Product is to operate is provided by a carrier independent from Sony Ericsson, Sony Ericsson will not be responsible for the operation, availability, coverage, services or range of that system.
5 This warranty does not cover Product failures caused by installations, modifications, or repair or opening of the Product performed by a non-Sony Ericsson authorised person.
6 The warranty does not cover Product failures which have been caused by use of accessories or other peripheral devices which are not Sony Ericsson branded original accessories intended for use with the Product.
7 Tampering with any of the seals on the Product will void the warranty.
8 THERE ARE NO EXPRESS WARRANTIES,
WHETHER WRITTEN OR ORAL, OTHER THAN
THIS PRINTED LIMITED WARRANTY. ALL IMPLIED
WARRANTIES, INCLUDING WITHOUT LIMITATION
THE IMPLIED WARRANTIES OF
MERCHANTABILITY OR FITNESS FOR A
PARTICULAR PURPOSE, ARE LIMITED TO THE
DURATION OF THIS LIMITED WARRANTY. IN NO
EVENT SHALL SONY ERICSSON OR ITS
LICENSORS BE LIABLE FOR INCIDENTAL OR CONSEQUENTIAL DAMAGES OF ANY NATURE WHATSOEVER, INCLUDING BUT NOT LIMITED TO LOST PROFITS OR COMMERCIAL LOSS; TO THE FULL EXTENT THOSE DAMAGES CAN BE DISCLAIMED BY LAW.
Some countries/states do not allow the exclusion or limitation of incidental or consequential damages, or limitation of the duration of implied warranties, so the preceding limitations or exclusions may not apply to you.
The warranty provided does not affect the consumer's statutory rights under applicable legislation in force, nor the consumer's rights against the dealer arising from their sales / purchase contract.
\*Geographical scope of the warranty
If you have purchased your Product in a country member of the European Economic Area (EEA) or in Switzerland or the Republic of Turkey, and such Product was intended for sale in the EEA or in Switzerland or in Turkey, you can have your Product serviced in any EEA country or in Switzerland or in Turkey, under the warranty conditions prevailing in the country in which you require servicing, provided that an identical Product is sold in such country by an authorised Sony Ericsson distributor. To find out if your Product is sold in the country you are in, please call the local Sony Ericsson Call Center. Please observe that certain services may not be possible elsewhere than in the country of original purchase, for example due to the fact that your Product may have an interior or exterior which is different from equivalent models sold in other countries. Please note in addition that it may sometimes not be possible to repair SIM-locked Products.
** In some countries/regions additional information (such as a valid warranty card) may be requested.
78 Important information
This is the Internet version of the User's guide. © Print only for private use.
FCC Statement
This device complies with Part 15 of the FCC rules. Operation is subject to the following two conditions:

(1) This device may not cause harmful interference, and (2)
This device must accept any interference received, including interference that may cause undesired operation.
Any change or modification not expressly approved by Sony Ericsson may void the user's authority to operate the equipment.
This equipment has been tested and found to comply with the limits for a Class B digital device, pursuant to Part 15 of the FCC Rules. These limits are designed to provide reasonable protection against harmful interference in a residential installation. This equipment generates, uses and can radiate radio frequency energy and, if not installed and used in accordance with the instructions, may cause harmful interference to radio communications. However, there is no guarantee that interference will not occur in a particular installation.
If this equipment does cause harmful interference to radio or television reception, which can be determined by turning the equipment off and on, the user is encouraged to try to correct the interference by one or more of the following measures:
-- Reorient or relocate the receiving antenna.
-- Increase the separation between the equipment and receiver.
-- Connect the equipment into an outlet on a circuit different from that to which the receiver is connected.
-- Consult the dealer or an experienced radio/TV technician for help.
Industry Canada Statement
This device complies with RSS-210 of Industry Canada.
Operation is subject to the following two conditions: (1) this device may not cause interference, and (2) this device must accept any interference, including interference that may cause undesired operation of the device.
This Class B digital apparatus complies with Canadian ICES-003.
Declaration of Conformity for W980
We, Sony Ericsson Mobile Communications AB of Nya Vattentornet
SE-221 88 Lund, Sweden
declare under our sole responsibility that our product
Sony Ericsson type AAD-3052091-BV
and in combination with our accessories, to which this declaration relates is in conformity with the appropriate standards EN 301 511:V9.0.2,
EN 301 908-1:V2.2.1, EN 301 908-2:V2.2.1,
EN 300 328:V1.7.1, EN 301 357-1:V1.3.1, EN 301
357-2:V1.3.1, EN 301 489-7:V1.3.1, EN 301
489-17:V1.2.1, EN 301 489-24:V1.3.1, EN 301
489-9:V1.3.1, EN 60 950-1:2006 following the provisions of, Radio Equipment and
Telecommunication Terminal Equipment directive 1999/5/EC.
Lund, April 2008
CE0682

Shoji Nemoto,
Head of Product Business Group GSM/UMTS
We fulfil the requirements of the R&TTE Directive (1999/5/EC).
Index
A
activity menu 15
alarms 59
answering service 35
applications 64
appointments 61
assembly 6
audio book 20
auto rotate 64
B
backing up and restoring 28
battery
charging 8
inserting 6
blog
camera 44
video 44
Bluetooth™ wireless technology ..... 27
bookmarks
creating 52
select 52
business cards 34
C
calendar 60-61
call divert 37
call list 35
call numbers in message 46
call time 40
caller-specific ringtones 33
calls
accepting 38
answering and rejecting 30
emergency 31
handling two calls 37
international 30
making and receiving 30
putting on hold 37
recording 23
video 31
camera 40
activating 41
blog 44
printing 45
settings 41
shortcuts 42
using 41
camera keys 40
clear bass 18
clear stereo 18
code memo 69
conference calls 38
contacts 32
adding phone contacts 32
default contacts 32
groups 34
synchronising 55
D
date 63
declaration of conformity 80
downloading music 21
E
email 48
emergency numbers 31
entering text 15
F
file manager 24
fixed dialling 39
flight mode 58
FM transmitter 20
G
games 64
Google Maps ^TM 59
groups 34
H
handsfree 17,27,35
help 8
hiding number 40
history, Web pages ....52
|
imaging
camera 40
video recorder 40
IMEI number 66
Internet
bookmarks ....52
security and certificates ....53
K
keys 9
L
language 15
location data 42
location services 59
lock
phone 66
SIM card 65
M
master reset 67
Media Manager 24, 25
media transfer 25, 26
memory status 24,34
menu overview 12
82 Index
This is the Internet version of the User's guide. © Print only for private use.
messages
area and cell information 51
email 48
picture 46
text 45
voice 48
messaging 45
microphone 30
MMS See picture messages
MusicDJ™ 23
My friends 49
my numbers 38
N
navigating menus 14
notes 61
O
online music, listening 21
online video clips, viewing 21
P
pan and zoom, Web pages 52
PC Suite 55
phone mode 56
phone name 26
phone, turning on 7
photo feeds 55
photo tags 42
PhotoDJ™ 43
picture messages 46
pictures 42
PIN code, changing 65
playlists 19
PlayNow™ 21
podcasts 54
power saving 28
profiles 62
PUK 65
push email 49
R
radio 22
restricted dialling 39
ringtones 63
S
safety guidelines 73
screen orientation 64
search, on Web pages 52
selection keys 14
SensMe ^TM 19
settings, Internet settings 67
shortcuts 14
SIM card
copying to/from 33
inserting 6
locking 65
unblocking 65
smart search 32
SMS See text messages
SOS See emergency numbers
sound recorder 23
speed dialling 35
standby 7
synchronizing 55
T
T9™ Text Input 16
tasks 62
templates 47
text messages 45
theme 63
time 63
time zone 63
TrackID ^TM 21
transferring
camera pictures 24
music 24
sound 28
turning on/off
Bluetooth ^TM function 27
phone lock 66
SIM lock protection 66
U
Update service 58
USB cable 25
V
video
blog 44
editing 43
video player 22
video recorder 40
VideoDJ™ 43
voice answering 36
voice commands ....35
voice control 35
voice messages 48
voicemail 35
volume
ear speaker 30
ringtone 63
W
Walkman® player 17
warranty 77
Web feeds ....53
Web pages, history ....52
Z
zoom 41

- Accessories – More for your phone
- Contents
- Getting started 6
- Walkman® 17
- Transferring and handling content 24
- Calling 30
- Imaging 40
- Messaging 45
- Internet 52
- Synchronizing 55
- More features 58
- Troubleshooting 67
- Important information ..... 71
- Index 81
- Contents
- Sony Ericsson W980 Walkman®
- Instruction symbols
- Getting started
- Assembly
- Getting started
- Turning on the phone
- SIM card
- PIN
- Standby
- Help
- To view tips and tricks
- Charging the battery
- Phone overview
- Getting started
- When the phone is closed
- When the phone is open
- Getting started
- Navigation
- To navigate your media
- To delete items
- Tabs
- To scroll between tabs
- Shortcuts
- To use navigation key shortcuts
- Getting started
- To edit a navigation key shortcut
- Main menu shortcuts
- To go directly to a main menu
- Activity menu
- To open the activity menu
- Memory
- Phone language
- To change the phone language
- Entering text
- To change text input method
- To shift between capitals and lower-case letters
- To enter numbers
- To enter full stops and commas
- To enter a symbol
- To enter text using T9 TM Text Input
- To enter text using multitap
- To add words to the built-in dictionary
- Walkman®
- Stereo portable handsfree
- To use the handsfree
- Walkman® player
- To play music
- To stop playing music
- To fast forward and rewind
- To move between tracks
- To browse your music
- To minimize the player
- To set light effects
- To return to the player
- Shake control
- To switch track
- Clear stereo and clear bass
- Walkman®
- To activate clear stereo and clear bass using presets
- Playlists
- To create a playlist
- To create a playlist by mood
- To add files to a playlist
- To remove tracks from a playlist
- Audio books
- To play audio books
- FM transmitter
- To transmit music to an FM radio
- Walkman®
- To stop transmitting music
- PlayNow™
- To use PlayNow™
- TrackID™
- To search for song information
- Online music and video clips
- To select a data account for streaming
- To stream music and video clips
- Video player
- To play videos
- To stop playing videos
- Radio
- To listen to the radio
- To automatically search for channels
- To manually search for channels
- To change the volume
- To minimize the radio
- To return to the radio
- Walkman®
- Saving channels
- To save channels
- To select saved channels
- To switch between saved channels
- MusicDJ™
- To compose a melody
- Record sound
- To record a sound
- To record a call
- To listen to a recording
- Transferring and handling content
- Handling content within the phone
- To select more than one item in a folder
- To view memory status
- To view information about content
- Sending content to another phone
- To send items
- Transferring content to and from a computer
- Transferring and handling content
- Required operating systems
- To install Sony Ericsson Media Manager
- To transfer content using Sony Ericsson Media Manager
- Using the USB cable
- Before you use the USB cable
- To disconnect the USB cable safely
- Drag and drop content
- To drag and drop content
- Phone name
- To enter a phone name
- Transferring and handling content
- Using Bluetooth™ wireless technology
- Before you use Bluetooth wireless technology
- To turn the Bluetooth function on
- To pair the phone with a device
- To allow connection to the phone
- To pair the phone with a Bluetooth handsfree for the first time
- Power saving
- To turn powersave on
- Transferring sound to and from a Bluetooth handsfree
- To transfer sound
- To transfer sound during a call
- Backing up and restoring
- To make a backup using the Sony Ericsson PC Suite
- To restore phone content using the Sony Ericsson PC Suite
- To make a backup using the Sony Ericsson Media Manager
- To restore phone content using the Sony Ericsson Media Manager
- Calling
- Making and receiving calls
- To make a call
- To end a call
- To make international calls
- To re-dial a number
- To answer a call
- To reject a call
- Calling
- Networks
- To switch networks manually
- Emergency calls
- To make an emergency call
- To view your local emergency numbers
- Video call
- To make a video call
- To use the zoom with an outgoing video call
- To view video call options
- Contacts
- Default contacts
- To select default contacts
- Phone contacts
- To add a phone contact
- Calling contacts
- To call a phone contact
- To go directly to the contacts list
- To call with Smart search
- To turn Smart search on or off
- Calling
- Editing contacts
- To add information to a phone contact
- To copy names and numbers to phone contacts
- To copy names and numbers to the SIM card
- To automatically save names and phone numbers on the SIM card
- SIM contacts
- To add a SIM contact
- To call a SIM contact
- Deleting contacts
- To delete all contacts
- Contact memory status
- To view contact memory status
- Myself
- To enter Myself information
- To add your own business card
- Groups
- To create a group of numbers and email addresses
- Call list
- To call a number from the call list
- To add a call list number to contacts
- Speed dial
- To add contacts to speed dial numbers
- To speed dial
- Voicemail
- To enter your voicemail number
- To call your voicemail service
- Voice control
- To record a voice command using voice dialling
- To voice dial
- Voice answering
- To activate voice answering and record voice answer commands
- To answer a call using voice commands
- To reject a call using voice commands
- Diverting calls
- To divert calls
- More than one call
- Call waiting
- To activate call waiting
- To make a second call
- To answer a second call
- To reject a second call
- To end an ongoing call and answer a second call
- Handling two voice calls
- To switch between two calls
- To join two calls
- To connect two calls
- To end an ongoing call and return to the call on hold
- Conference calls
- To add a new participant
- To release a participant
- To have a private conversation
- My numbers
- To check your phone numbers
- Accept calls
- To add numbers to the accepted callers list
- To accept all calls
- Restricted dialling
- Restrict calls options
- To restrict calls
- Fixed dialling
- To use fixed dialling
- To save a fixed number
- Call time and cost
- To check the call time
- Showing or hiding your phone number
- To hide your phone number
- Imaging
- Viewfinder and camera keys
- Using the camera
- To activate the camera
- To take a picture
- To record a video clip
- To use zoom
- To adjust brightness
- To view pictures and video clips
- Getting more from the camera
- Camera icons and settings
- To change settings
- To view information about settings
- Camera shortcuts
- Viewing and tagging pictures
- To view pictures in a slide show
- Viewing pictures on a map
- To view pictures on a map
- To change the geo tagging setting
- Photo tags
- To tag pictures
- To create a new photo tag
- Using pictures
- To use pictures
- To set a Java application as a wallpaper
- Working With pictures
- PhotoDJ™ and VideoDJ™
- To edit and save a picture
- To edit and save a video clip
- To trim a video clip
- Blogging
- To send camera pictures to a blog
- To send video clips to a blog
- To go to a blog address from contacts
- Imaging
- Printing photos
- To print camera pictures using the USB cable
- Messaging
- To save a message on the SIM card
- To view a message from the inbox
- Text messages
- To write and send a text message
- To copy and paste text in a text message
- To add an item to a text message
- To call a number in a text message
- To turn long messages on
- Picture messages
- To create and send a picture message
- Receiving picture messages
- To set automatic download
- Message options
- To set text message options
- To set picture message options
- To set options for a specific message
- Templates
- To add a text message template
- To add a picture message template
- To save a message as a template
- Voice messages
- To record and send a voice message
- Before you use email
- To create an email account
- To write and send an email message
- To receive and read an email message
- To save an email message
- To reply to an email message
- To view an attachment in an email message
- To save an attachment in an email message
- Active email account
- To change the active email account
- Push email
- To turn on push email notification
- My friends
- Before you use My friends
- To enter My friendsserver settings
- To log in to the My friends server
- To log out of the My friends server
- To add a chat contact
- To send a chat message
- Status
- To show my status
- To update your own status
- Chat group
- To create a chat group
- To add a chat group
- To save a conversation
- Area and cell information
- To turn area information on
- Internet
- To start browsing
- To exit the browser
- Bookmarks
- To create a bookmark
- To select a bookmark
- History pages
- To view history pages
- Getting more from the browser
- Internet
- To send a link
- Internet keypad shortcuts
- To select Internet keypad shortcuts
- Internet security and certificates
- To view certificates in the phone
- Web feeds
- To add new feeds for a Web page
- To download content via feeds
- Updating Web feeds
- To schedule Web feed updates
- To update Web feeds manually
- Web feeds in standby
- To show Web feeds in standby
- To access Web feeds from standby
- Podcasts
- To access audio podcasts
- To access video podcasts
- Photo feeds
- To access photo feeds
- Synchronizing
- Synchronizing using a computer
- To install the Sony Ericsson PC Suite
- To synchronize using the Sony Ericsson PC Suite
- Synchronizing using an Internet service
- SyncML
- Before you synchronize using SyncML
- To enter settings for SyncML
- To synchronize using SyncML
- Microsoft® Exchange ActiveSync
- To enter settings for Microsoft® Exchange ActiveSync
- To synchronize using Microsoft® Exchange ActiveSync
- More features
- Flight mode
- To activate the flight mode menu
- To select flight mode
- Update service
- To change Internet settings
- To view the current software in the phone
- To use Update service using the phone
- To use Update service using a USB cable
- To set a reminder to use Update service
- Location services
- To use Google Maps™ for mobile
- To view help about Google Maps
- To view your approximate location
- To view a saved location
- Alarms
- To set the alarm
- To set the recurrent alarm
- To set the alarm signal
- To silence the alarm
- To turn off the alarm
- To cancel the alarm
- The alarm in silent mode
- To set an alarm to sound or not in silent mode
- To set the snooze duration
- Calendar
- Default view
- To set default view
- Appointments
- To add an appointment
- To view an appointment
- To edit an appointment
- To view a calendar week
- To set when reminders should sound
- Notes
- To add a note
- To show a note in standby
- To hide a note from standby
- Tasks
- To add a task
- To view a task
- Profiles
- To select a profile
- To view and edit a profile
- More features
- Time and date
- To set the time
- To set the date
- To set the time zone
- Theme
- To set a theme
- Main menu layout
- To change the main menu layout
- Ringtones
- To set a ringtone
- To set the ringtone volume
- To turn the ringtone off
- To set the vibrating alert
- Screen orientation
- To change screen orientation in Media
- Games
- To start a game
- To end a game
- Applications
- To select a Java application
- More features
- To view information about a Java application
- To set permissions for a Java application
- Java application screen size
- To set the screen size for a Java application
- Locks
- SIM card lock
- To unblock the SIM card
- To edit the PIN
- To use the SIM card lock
- Phone lock
- To use the phone lock
- To unlock the phone
- To change the phone lock code
- IMEI number
- To view your IMEI number
- Troubleshooting
- Common questions
- Master reset
- To reset the phone
- No battery icon appears when I start charging the phone
- Some menu options appear in grey A service is not activated. Contact your network operator.
- I cannot use SMS/text messages on my phone
- To enter a service centre number
- I cannot use picture messages on my phone
- To select an MMS profile
- To set the message server address
- The phone does not ring or rings too softly
- Troubleshooting
- To reset code memo
- Error messages
- Insert correct SIM card
- Wrong PIN/Wrong PIN2
- PIN blocked/PIN2 blocked
- Codes do not match
- No netw. coverage
- Emerg. calls only
- PUK blocked. Contact operator.
- Important information
- Sony Ericsson Consumer Web site
- Service and support
- Support
- Guidelines for Safe and Efficient Use
- Recommendations for care and safe use of our products
- Children
- Power supply (Charger)
- Battery
- Personal medical devices
- Driving
- GPS/Location based functions
- Antenna
- Radio frequency (RF) exposure and Specific Absorption Rate (SAR)
- Important information
- Malware
- Accessories
- Accessible Solutions/Special Needs
- Disposal of old electrical and electronic equipment
- Disposing of the battery
- Memory Card
- Warning!
- Precautions on Memory Card Use
- Protection of personal information
- Loudness warning!
- End User License Agreement
- Limited Warranty
- Our Warranty
- What we will do
- Conditions
- \*Geographical scope of the warranty
- Important information
- FCC Statement
- Industry Canada Statement
- Declaration of Conformity for W980
- Index
- A
- B
- C
- D
- E
- F
- G
- H
- |
- K
- L
- M
- Index
- messages
- N
- O
- P
- R
- S
- T
- U
- V
- W
- Z
Brand : SONY ERICSSON
Model : W980i
Category : Mobile Phone