
GIS78XC - Flashlight GORENJE - Free user manual and instructions
Find the device manual for free GIS78XC GORENJE in PDF.


| Product Type | Built-in Induction Hob |
| Brand | Gorenje |
| Model | GIS78XC |
| Dimensions (approx.) | 780 mm width (standard) |
| Number of Cooking Zones | 4 (induction) |
| Control Type | Touch slider + IQcook sensor |
| IQcook Functions | Boiling (Large water), Slow Cooking, Steam Cooking, Defrosting, Keep Warm, Frying, Braising/Searing |
| Boil Control | Yes, brings water to boil and maintains it |
| Energy Saving | Up to 40% energy savings |
| Safety Features | Child lock, STOP/GO, SmartSense boil-over protection |
| Timer | Minute minder and countdown timer |
| Power Levels per Zone | 9 levels (induction) |
| IQ Sensor Battery | Type DL2450 (replaceable) |
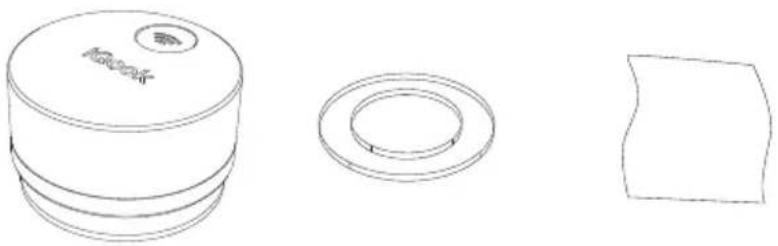
| Accessories Included | IQ sensor, mounting ring, alcohol wipes |
| Installation Requirement | Magnetic metal ring on lid for IQ sensor |
| Cleaning | Sensor: soft damp cloth; Hob: glass ceramic cleaner |
| Warranty | Standard 2 years (check local) |
| Service Availability | Gorenje service centers and authorized workshops |
Frequently Asked Questions - GIS78XC GORENJE
User questions about GIS78XC GORENJE
0 question about this device. Answer the ones you know or ask your own.
Ask a new question about this device
Download the instructions for your Flashlight in PDF format for free! Find your manual GIS78XC - GORENJE and take your electronic device back in hand. On this page are published all the documents necessary for the use of your device. GIS78XC by GORENJE.
USER MANUAL GIS78XC GORENJE
Instructions for Use
GIT68B
GIT78B
GIS68XC
GIS78XC
IQook

natural_image
Row of eight simple line icons representing cooking or heating concepts (no text or symbols)- automatic control of hob operation
- boil control
- saves up to 40% of energy
- actively retains nutrients, vitamins, and proteins in the food
TABLE OF
IMPORTANT NOTES AND PRECAUTIONS ....5
CONTROL UNIT 6
PREPARING THE LID FOR THE IQ FUNCTIONS ....8
Accessories supplied with the appliance ....8
Installing the IQ sensor onto the lid 8
OPERATION OF THE IQ FUNCTIONS ....10
Use of functions and the appliance....10
Cooking modes....13
COOKING WITH A LARGE AMOUNT OF WATER 13
SLOW COOKING....15
STEAM COOKING....17
DEFROSTING FROZEN FOOD 18
KEEPING THE FOOD WARM....18
Selecting the cooking power level....21
FRYING....21
BRAISING/SEARING....23
Switching off the functions and the appliance 24
SETTING THE CLOCK 25
Using the minute minder....25
Using the countdown timer 25
TROUBLESHOOTING 26
Replacing the battery 27
Ordering additional equipment....27
Images used:

Important information

Tip
- The IQcook system can only be active on one cooking zone at a time. When the settings procedure is over, the IQcook system can be selected for another cooking zone.
- When using the IQcook system, the power boost function (P) cannot be used on the adjacent cooking zone (above, under).
- Before the start of operation with any IQ function, the system must check all parameters; therefore, the start of cooking is slightly delayed. During this time, do not remove the pot from the cooking zone.
- Do not use of the STOP/GO function when using the IQcook system as this will interrupt the IQcook system. (If the STOP/GO function is used nevertheless, then reactivate the IQ system.)
- Reactivate the IQ system when the cooking zone is cooled (»H« is lit up on the display unit). This will lead to optimum operating results.
- If you intend to use the IQ sensor on the lid, then a magnetic metal ring must be attached to the upper side of the lid, on which the IQ sensor is installed before use. The glue will fully set in 24 hours. In the meantime, do not use this lid and do not wash it (see section »Preparing the lid«).
- Make sure the surfaces of the lid and the ring onto which the IQ sensor is to be installed are always clean.
Place the IQ sensor on the ring so that it snaps into place. - During the cooking process, do not lift the lid (only with functions that require the IQ sensor). If this is necessary (e.g. to stir the food), only remove the lid briefy – for no more than approx. 10 seconds.
- Do not place the lid with the IQ sensor on another pot or pan during the cooking process. Use the same pot or pan until the end of the cooking process.
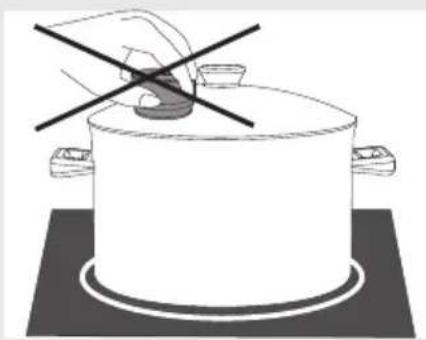
- Do not use the IQ sensor as a lid handle and do not remove it from the lid during cooking.
- Warning! The handle of the lid can heat up during operation; thus, use a cloth or a kitchen mitten to touch it.
- The IQ sensor is water resistant. To allow a long useful life and sleek appearance of the sensor, remove it from the lid after cooking and store it in a safe place so that it is not damaged.
- Clean the IQ sensor using with a soft slightly damp cloth. Keep the front side always clean.
- A battery is installed in the IQ sensor (instructions for battery replacement are provided herein).
CONTROL UNIT
IQcook system can be used on any cooking zone by touching the IQ key.
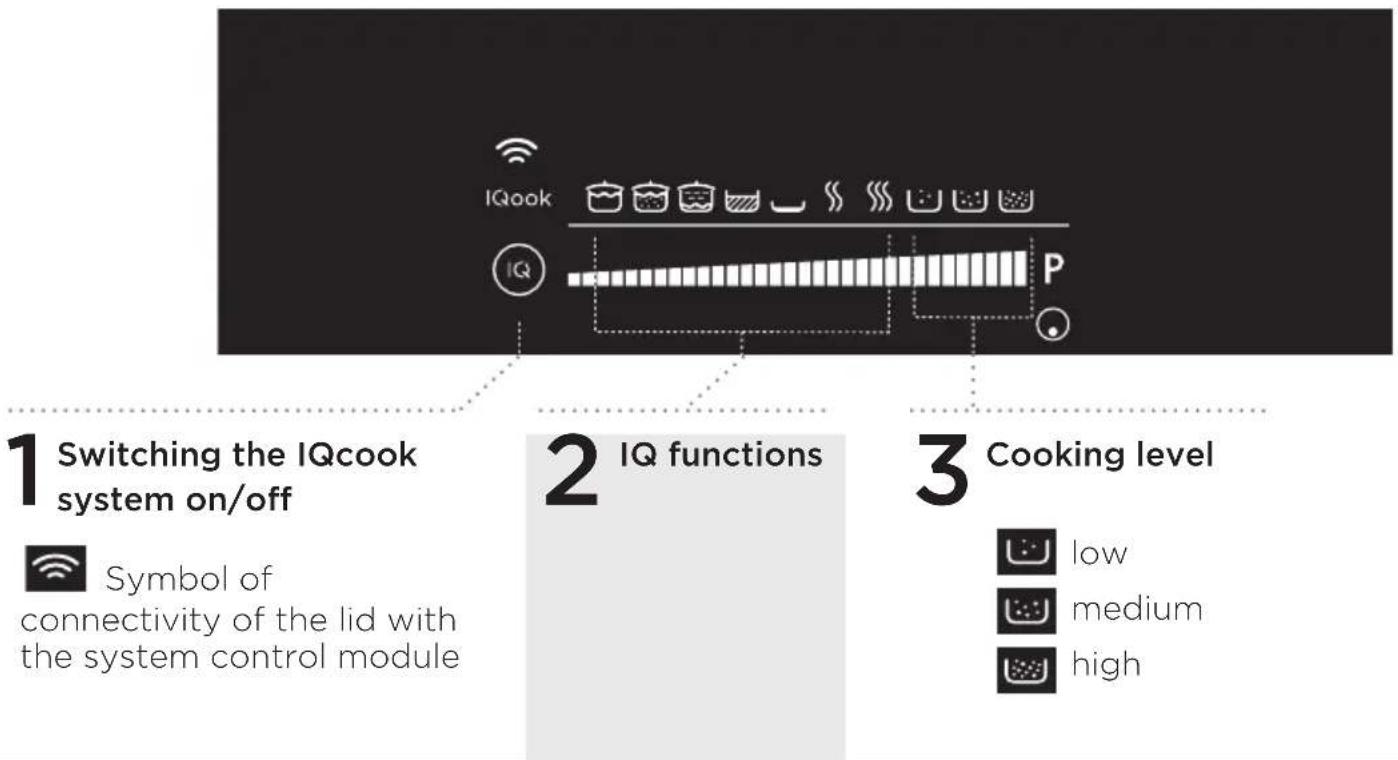
flowchart
graph TD
    A["1 Switching the IQcook system on/off"] --> B["2 IQ functions"]
    B --> C["3 Cooking level"]
    style A fill:#f9f,stroke:#333
    style B fill:#ccf,stroke:#333
    style C fill:#cfc,stroke:#333
| symbol | Description | Use of the lid | |
 | COOKING WITH A LARGE AMOUNT OF WATER - method 1 | The function allows bringing the water rapidly to the boil and maintaining the boiling temperature. It is appropriate for dishes such as soups, vegetables, etc.. |  |
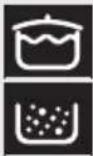 | COOKING WITH A LARGE AMOUNT OF WATER - method 2 | The function allows rapid heating of water to the boiling point with the lid in place. The lid should then be removed and the process continues at high cooking power. Suitable for pasta (spaghetti), frozen vegetables, gnocchi, dumplings etc. |  |
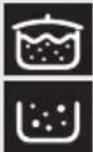 | SLOW COOKING - method 1 | This function is used for dishes that take longer to cook, with slow heating and maintaining the boil. It is appropriate for dishes that require a long cooking time (goulash, rice, stews). |  |
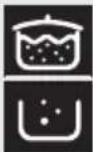 | SLOW COOKING - method 2 | This function is suitable for cooking milk, rice souffl é, and pudding. |  |
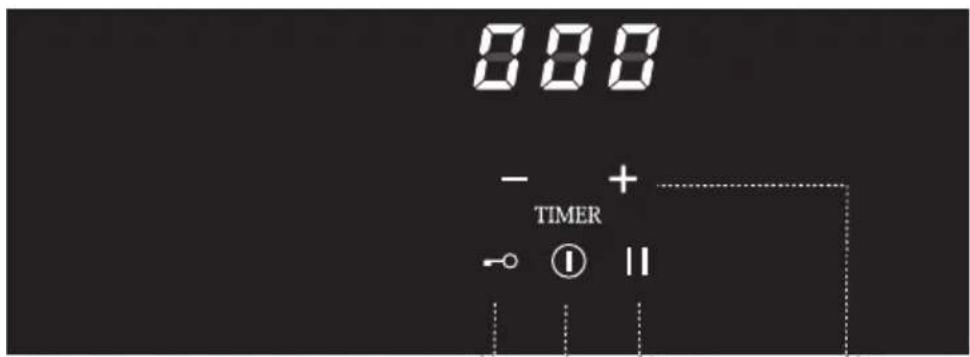
(For detailed description of the functions 4, 5, 6, 7, see instructions Built-in Induction Glass Ceramic Hob).
4 Lock - Child lock When active, all keys, except for 😊 and on/off keys➊, are inactive.
5 Switching the hob on/off When the hob is switched on, there will be a short beep and »0« will be displayed.
6 STOP/GO (stop/go) The function stops the operation of the cooking hob for ten minutes. The symbol II appears.
7 Setting the clock (+/-) Minute minder Countdown timer
 | STEAM COOKING | The function controls the steam and even cooking.For healthy cooking without overcooking.The vegetables will retain its natural colour, nutrients, and vitamins.The lid must be in place throughout the cooking process. |  |
 | FRYING | Appropriate for dishes that require a large amount of oil (0.5 to 1.0 litres): doughnuts (Berliners), French fries, deep frozen food etc. | - |
 | BRAISING/SEARING | Appropriate for cooking meat at various levels of cooking power. The meat will cook evenly and remain juicy. | - |
 | DEFROSTING FROZEN FOOD | Defrosting food and melting chocolate. |  |
 | KEEPING THE FOOD WARM | Keeps the food warm at a temperature of around 70°C. |  |
PREPARING THE LID FOR THE IQ FUNCTIONS
with the appliance
(number depends on the model) Accessories supplied
natural_image
Three technical line drawings: a cylindrical component with a circular feature, a concentric ring, and a separate square (no text or symbols)Sensor IQ Ring Tissue/wipe
Installing the IQ sensor onto the lid
Before using the appliance for the first time:
natural_image
Line drawing of a hand holding a square object over a circular surface with a small cylindrical object above (no text or symbols)2 min
natural_image
Simple curved line drawing with a small irregular shape inside, no text or symbols present.OK

natural_image
Simple curved line drawing with no text or symbols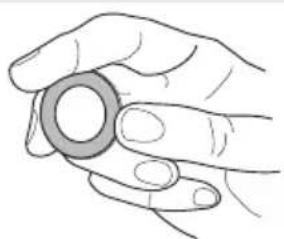
natural_image
Line drawing of a hand holding a circular object (no text or symbols)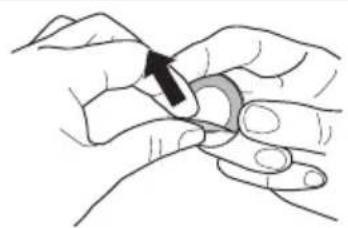
natural_image
Illustration of hands performing a finger manipulation or massage technique (no text or symbols present)-
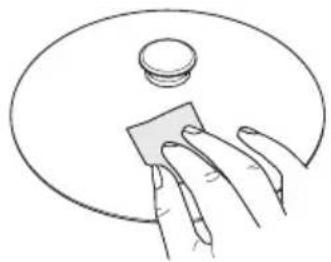
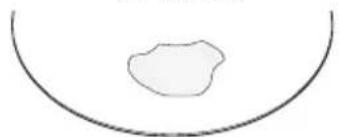
Clean the surface of the lid where you wish to attach the IQ sensor, using the alcohol wipes supplied. Use a new wipe, or tissue, for each lid.
-
Hold the ring using the tips of your fingers and remove the self-adhesive sticker (do not touch the sticker surface, in order to keep it clean.
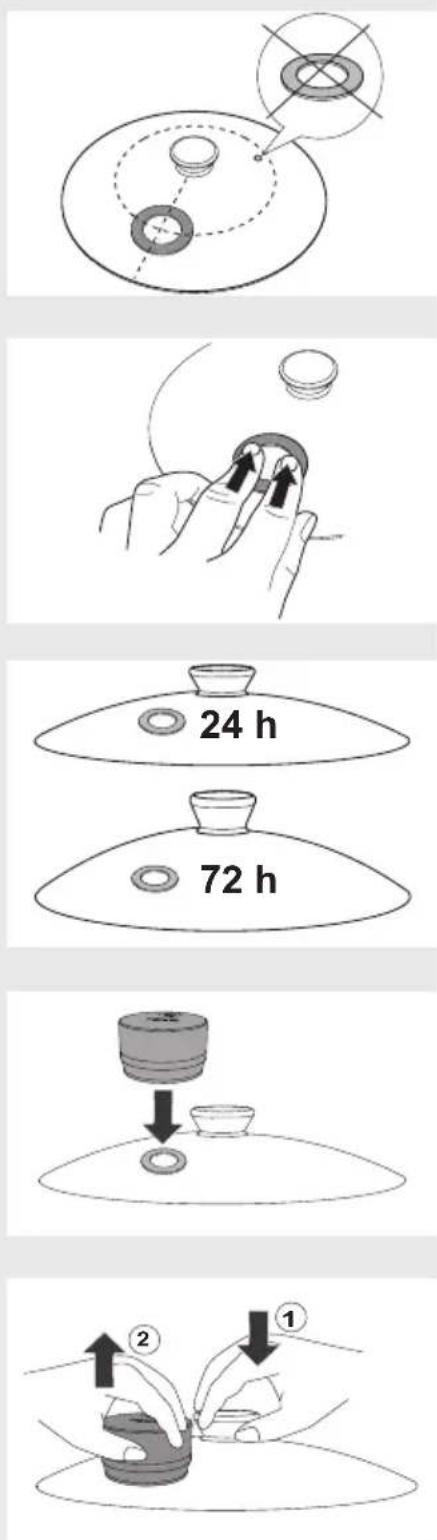
- Attach the ring to the part of the lid that you have previously cleaned. Then, press on it using your fingers to make sure it sticks evenly to the lid.

Do not attach the ring over or around the lid release valve (depending on the lid model).
If the ring is placed too close to the edge, the lid will be less stable and may turn upside down once the sensor is in place.

The glue will fully set in 24 hours or in 72 hours (depending on the lid). In the meantime, do not use this lid, do not wash it and do not attach the IQ sensor to it.
- Place the IQ sensor on the ring by slowly bringing it towards the ring until it snaps into place.
Removing the sensor
After use, remove the IQ sensor and store it.

Use the lid with the pan or pot. If you use the same lid on several pieces of cookware, make sure the lid fits on each of them.
Do not use the IQ sensor as a lid handle.
Do not wash the IQ sensor in a dishwasher.
OPERATION OF THE IQ FUNCTIONS
Use of functions and the appliance

The IQcook system automatically controls the cooking progress; however, it does not automatically switch off the functions after the end of cooking. This has to be done manually or by means of a TIMER - a countdown timer or a minute minder.
The IQcook system can be simultaneously activated on one cooking zone only. When the settings procedure is over, the IQcook system can be selected for another cooking zone.
IQook symbols on inactive cooking ones are dimly lit the entire time. If you press the (symbol) 🔒 key on one cooking zone, the IQook symbol will go out on other inactive cooking zones. When the settings procedure is completed, all IQook symbols will be dimly lit again.
A - USE OF FUNCTIONS


With these functions, use the lid with the IQ sensor.
Do not place the lid with the IQ sensor on another pot or pan during the cooking process. Use the same pot or pan until the end of the cooking process.
Before switching on the hob, the cooking zone and the bottom of the pot or pan must be clean and dry.
Preparation procedure:
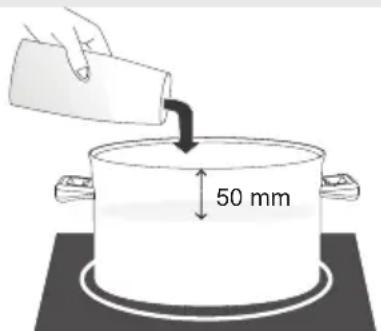
- Fill the pot or pan with water and food and place it on the cooking zone.

When cooking with water, make sure the water level is no less than 50 mm bellow the upper edge of the pan.
natural_image
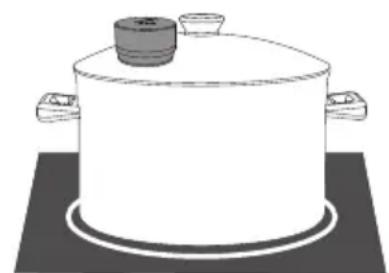
Simple line drawing of a cooking pot on a stove (no text or symbols)- Cover the dish with a lid to which the IQ sensor is attached.
natural_image
Simple line drawing of a cooking pot with a crossed lid and two handles, placed on a mat (no text or symbols)Touch the on/off key A short beep will be emitted.

- Touch the on/off ① key. A short beep will be emitted.

- Activate the IQcook system by touching the IQ key of the selected cooking zone. IQcook will be displayed and all available cooking programs will light up slightly.
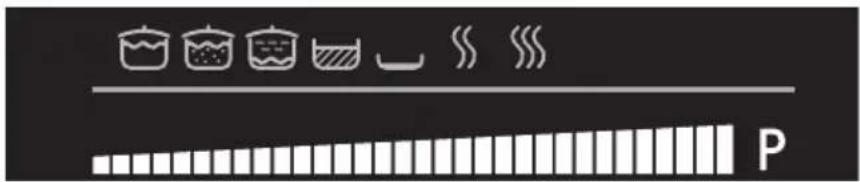
- Touch the slider under the selected symbol with your finger, or slide your finger across the slider to select the desired cooking function. After you remove your finger from the slider, only the selected function will remain fully lit while other will only be dimly lit. If the settings are not changed within five seconds, the dimly lit functions will go off.
With the functions "Cooking with a large amount of water" (and "Slow cooking" ( ). additional symbols will light up after 5 seconds, allowing you to select two modes of operation (see section »Operating modes«).
* Timer function can be set before the start of operation (see section »Timer settings«).
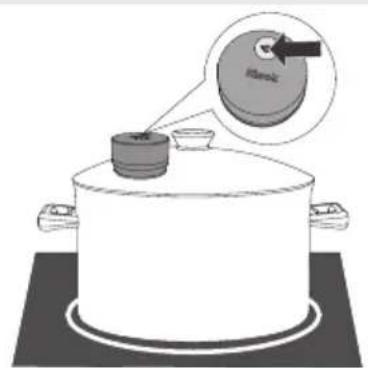
- In order for the connection between the IQ sensor and the control module to work, press the key on the IQ sensor (attached to the lid). The same symbol on the control module will indicate this 🔊.
natural_image
Illustration of a cooking pot with a lid and lid removed, showing a magnified view of the lid (no text or symbols present)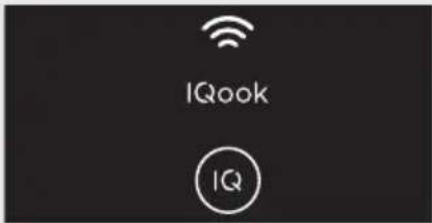
- After several seconds, the symbol will be fully lit and a beep will be heard. The connection is now established and the cooking process will begin.
COOKING WITH A LARGE AMOUNT OF WATER


Some types of food may foam during cooking. Lift the lid and stir the contents. Use a lid with a release valve!

When cooking with a large amount of water (when the symbol (☐) lights up), it is possible that the liquid is not visibly boiling yet. Leave the lid on the pot (in mode 1) until the system heats the water to a gentle boil. Intensity of maintaining the boil may also depend on the type of pan and lid.


Method 1
The function allows rapid heating of water to the boiling point and maintaining the boil. Suitable for food that is placed in the water at the beginning of the cooking process.
Food: SOUPS, PASTA, POTATOES etc.
Note: Before cooking, wash the vegetables, especially potatoes, thoroughly in water. This will prevent foaming during the cooking process.


Method 2
With this function, water will be brought quickly to the boil with the lid in place; then, remove the lid and boiling will be maintained.
Food: PASTA (SPAGHETTI), FROZEN FOOD (GNOCCHI, DUMPLINGS, VEGETABLES) etc.
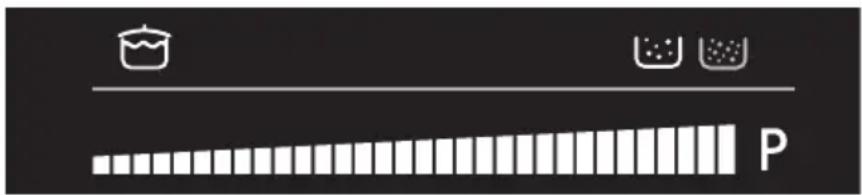
When cooking with a large amount of water, select the symbol. After 5 seconds, the symbol will light up, and the symbol will be dimly lit.
A) Symbol (L) is fully lit and it is not necessary to select it (the dimly lit symbol will go out after five seconds and method 1 will be selected).
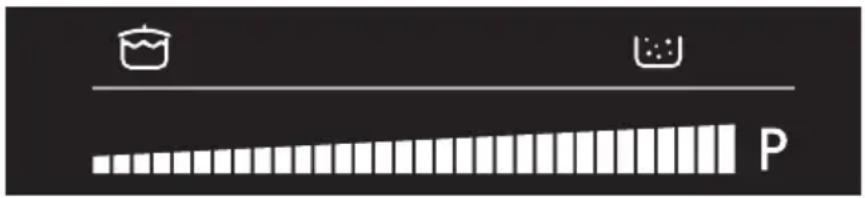
When the water is brought to the boil (with the lid in place), the symbol ■ will be lit and a beep will be heard.
B) If you select the dimly lit symbol (☐), which will then be fully lit, then method 2 will be selected.
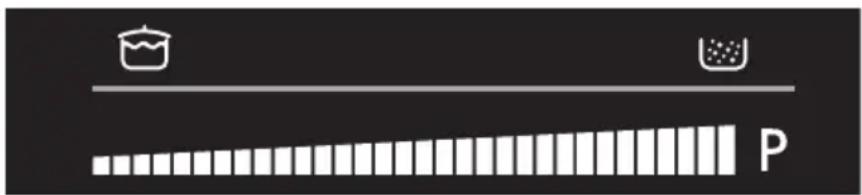
When the water is brought to the boil (with the lid in place), the symbol 📄 will be lit and a beep will be heard. Then, symbol 📅, will appear which will remain lit for as long as you do not remove the lid.
Put the food into the pot or pan and press any fi eld on the slider. Put the food into the pot or pan and press any fi eld on the slider. The symbol 📞 will disappear after a few seconds.
Do not replace the lid.


Some types of food may foam during cooking. Lift the lid and stir the contents. Use a lid with a release valve!


Method 1
This function is used for dishes that take longer to cook - with slow heating and maintaining the boil.
Food: GOULASH, STEWS, SAUCES, RICE etc.
Note:
Rice - wash in water before cooking. Please note that cooking one part of rice takes two to three parts of water.


Method 2
This function is suitable for cooking dishes by slow heating - milk, rice pudding, pudding.
Food: MILK, RICE SOUFFLÉ, PUDDING etc.
Note:
Rice - wash in water before cooking. Please note that cooking one part of rice takes two to three parts of water. Stir the rice occasionally during the entire cooking process (even when the symbol is still lit).
Pudding - When the milk has heated up (with the lid on) and the (☐) symbol lights up, add the pudding powder to the milk and stir for approx. 3 minutes.
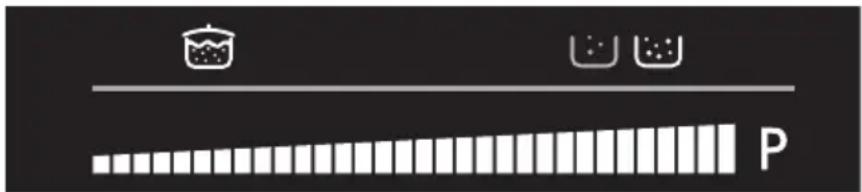
Select the 📋 symbol with the Slow cooking function. After 5 seconds, the 📋 symbol will light up, and the 📋 symbol will be dimly lit.
A) Symbol (i) will be fully lit and it is not necessary to select it (the dimly lit symbol will go out after five seconds and method 1 will be selected).
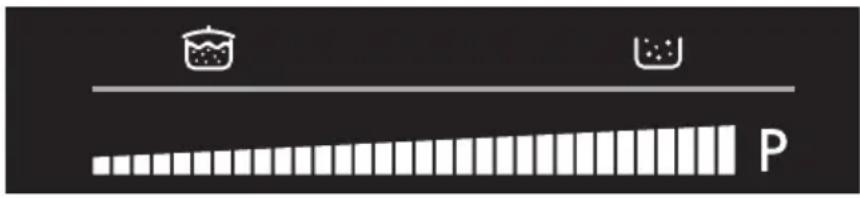
When the water is brought to the boil (with the lid in place), the symbol ■ will be lit and a beep will be heard.
Note: Do not lift the lid during the cooking process. If necessary, only lift the lid briefly to stir the food.
B) If you select the dimly lit symbol (U), which will then be fully lit, then method 2 will be selected.
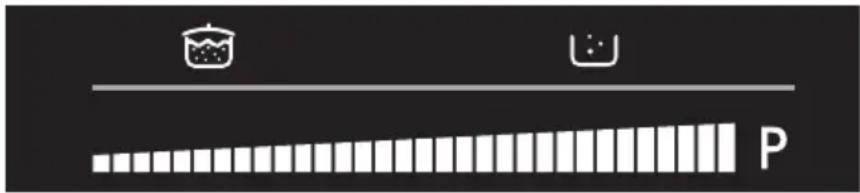
When the water is brought to the boil (with the lid in place), the symbol 📄 will be lit and a beep will be heard.
Note: The system will automatically perceive when the lid is removed. Communication will be interrupted after a while, but you may continue to stir the food.

For optimum cooking results, we recommend using a lid without a steam release valve.
(cooking time depends on the quality, amount, and type of food, as well as cookware, lid, and taste.)

First fill the pot with water and then add the food (this applies to all food).
| FOOD AMOUNT OF | FOOD (kg) | AMOUNT OF WATER (dl) | COOKING TIME (min) | Note |
| apples 0,5 0,2 7-12 | ||||
| pears 0,4 0,2 7-12 | ||||
| peaches 0,4 0,2 7-12 | ||||
| plums 0,4 0,2 7-12 | ||||
| fruit mixture 0,5 0,2 7-12 | ||||
| potatoes 0,5 0,6 23-30 diced and washed | in water | |||
| broccoli 0,3 0,2 | 14-18 | |||
| cauliflower | 0,5 | 0,4 | 17-25 | |
| carrots | 0,5 | 0,2-0,4 | 17-25 | |
| vegetable mixture 0,3 | 0,2-0,4 | 17-20 | ||
| peas (frozen) | 0,3 0,2 | 25-30 | ||
| zucchini 0,4 0,2 | 10-13 | |||
| egg-plants (aubergines) | 0,3 | 0,4 | 10-13 | |
| chickpeas | 0,25 | 1 | 25-30 | It should be soaked for approx. 6 hours before cooking |
| lentil | 0,3 | 1 | 20-25 | It should be soaked for approx. 12 hours before cooking |
| cabbage (fresh) | 0,3 0,4 20-25 | |||
| sauerkraut | 0,5 0,4 | 20-30 | ||
| hot dogs 0,5 | 1 | 8-10 | ||
| maize kernels | 0,5 0,5 | 13-17 | ||
| kale | 0,5 0,4 20-25 | |||
| string beans (frozen) | 0,5 0,6 30-35 | |||
| clam | 0,3 0,4 | 13-17 | ||
| shrimps (frozen tails) | 0,4 | - | 13-17 | |
| Chicken breast, pieces | 0,3 0,4 | 23-27 | ||
| Cured cooked sausage | 0,5 | 1 20-25 | ||
| beef | 0,3 | 1 | 50-60 | |
DEFROSTING FROZEN FOOD

This function is suitable for defrosting all types of frozen food, as well as for melting chocolate.
KEEPING THE FOOD WARM

This function is suitable for keeping food of any type warm. It is also suitable for preparing mulled wine.
Example:
When cooking goulash with the Slow Cooking function (method 1), switch to this system after the cooking is done to keep the food warm.
THE FOLLOWING SYMBOLS WILL APPEAR ON THE DISPLAY DURING OPERATION:

The water is not boiling yet.

The water is boiling.
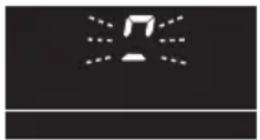
With the IQcook functions that require the use of the lid, the system will automatically perceive if you remove the lid. The symbol () will start flashing on the display and the hob will beep.
Replace the lid onto the pot or pan and press any fi eld on the slider.
- If you do not do this and the water is not boiling yet (the symbol (☐) is lit up), the system will continue to operate; however, optimum cooking results cannot be guaranteed in this case.
- If the water is already boiling (symbol ☐ is on), then the system will continue to operate. Communication of the sensor with the cooking hob will be disconnected and the
symbol will be switched off (in this case, we cannot guarantee optimum cooking results).

With the function »Cooking with a large amount of water - Method 2«, symbol () will appear on the display (as soon as the water starts to boil) and it will remain lit until you remove the lid.

SAFETY FEATURE - SmartSense
This function controls the system so that the food in the pot or pan does not boil over if there is a shortage of liquid.
It is active in IQ functions for which the lid is required.
Symbol will appear on the display and the hob will beep.
The system will cut the power supply. The symbols will disappear and the cooking zone will be switched off.

With these functions, use the lid with an IQcook sensor and do not remove it from the lid during cooking.
Never place a lid with an IQ sensor on the glass ceramic hob.
The hob must always fit the pot or pan. Never place the lid askew to only partly cover the pan.
The selected function cannot be changed to another function during operation. The cooking zone must first be switched off.
Do not lift the lid during the cooking process. If this is necessary (e.g. to stir the food), only remove the lid briefly - for no more than approx. 10 seconds. This will allow attaining optimum cooking results as well as saving some energy.
B - USE OF FUNCTIONS


With these functions, do not use the lid with the IQ sensor.
Do not remove the pot or pan from the cooking zone during cooking because this may prolong the process (except for the function Braising/searing - or when making pancakes).
Selecting the cooking power level
With the functions Frying and Braising/searing, three power levels are available: low, medium, and high. To select a power level, touch the slider or slide your finger along the slider.
Medium is the preset level-.
FRYING


Frying power level may only be set at the beginning of operation; after 5 seconds, the dimly lit power levels will disappear.
Before the start of operation, choose the level at which you wish to fry:

Low: 150 - 170°C (suitable for fresh food, doughnuts, liners, pretzels etc.)

Medium: 175 - 190°C (suitable for fresh food, French fries etc.)

High: 195 - 210°C (suitable for deep frozen food etc.)

Frying function is suitable for dishes that require a large amount of oil, from 0.5 to 1.0 litres.
When the appropriate oil temperature is reached, symbol will appear on the display, the hob will beep, and the food can be placed in the pan.
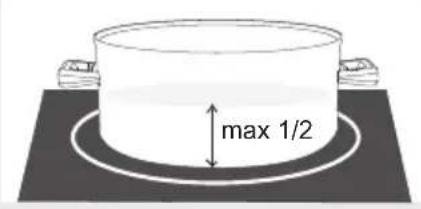

The amount of oil should not reach higher than one half of the pan side wall as some types of food will make the oil foam.
Always place the pan with cool oil on the cooking zone. If the IQ system is deactivated during cooking when the oil has already heated up, and then reactivate the system and change the settings, then the operation can be extended.
BRAISING/SEARING

natural_image
Simple white curved line on dark background, no text or symbols present
Power level can be changed during operation as well.
Cooking levels:

Low: 150 - 170°C

Medium: 175 - 190°C

High: 195 - 210°C
Food: COOKING ALL TYPES OF MEAT, FISH, PANCAKES, EGGS, VEGETABLES etc.
Note:
Pancakes - Distribute the oil evenly across the surface of the pan and place the pan on the cooking zone. Activate the IQ system. When the symbol (☐) appears on the display unit, add the batter. With every subsequent pancake, first place the empty pan with oil onto the cooking zone for approx. 30 seconds and then add the following batch of batter.
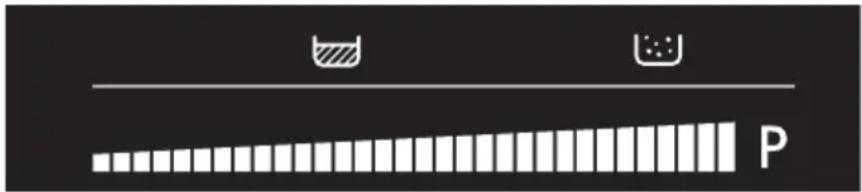
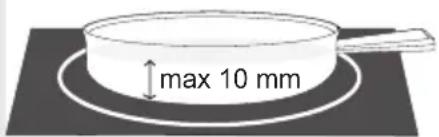
The braising/searing function is suitable for dishes that only require a small amount of oil, up to a level of 10 mm. When the appropriate oil temperature is reached, symbol ■, will appear on the display, the hob will beep, and the food can be placed in the pan.
THE FOLLOWING SYMBOLS WILL APPEAR ON THE DISPLAY DURING OPERATION:

Oil has not heated up yet.

Oil has heated up.
Switching off the functions and the appliance


For each cooking zone, cooking time can be set using the MINUTE MINDER or COUNTDOWN TIMER.
- After the cooking process, switch off the cooking zone by pressing the IQ key ^10 . The hob will beep, and zero (O) will appear on the display.
- To switch off all cooking zones simultaneously, touch the on/off key. A short beep will be heard. The cooking hob is now switched off.
Using the minute minder
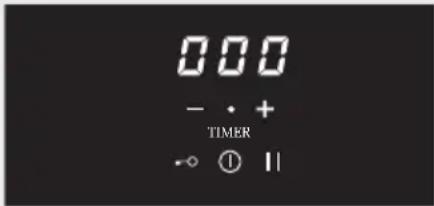
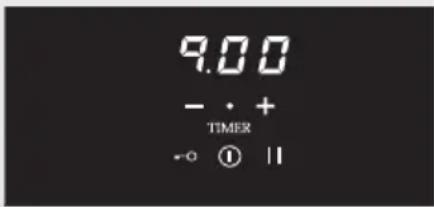
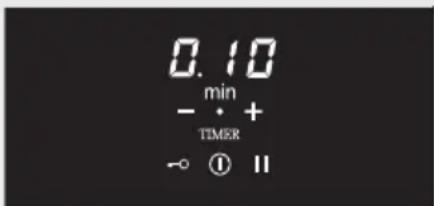
Not connected to the cooking zone.
- Touch (+/-). The dot will light up.
- Use (+) and (−) to set the clock. First, set the minutes; then, the clock will automatically move on to allow setting the hour, and the symbol (min) will light up.
- After a few seconds, the minute minder will start counting. The dot (between the +/- keys) will start to flash.
- To switch off the minute minder, press the (+/-) keys until the dot is fully lit, then press the (-) key until the time is set to 00.
- Switch off the alarm ».« at the end by pressing the (+) or (-) key.

The minute minder will remain active after the hob is switched off with the ① key.
Using the countdown timer

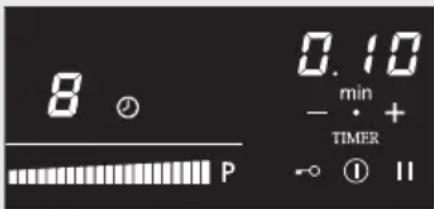
Setting for several cooking zones simultaneously. The timer can be switched on if at least on.
- Touch (+/-) for the first active cooking zone. Symbol will appear. Every time you touch the (+/-) keys, the cooking time will be set for the next cooking zone as indicated by the symbol on the display.
- Use (+) and (−) to set the clock. First, set the minutes; then, the clock will automatically move on to allow setting the hour, and the symbol (min) will light up.
- After a few seconds, the countdown timer will start counting down. The dot ».« will flash and the active cooking zone symbol ⏻ is lit up.
- Switch off the alarm at the end by pressing the (+) or (-) key. The display will indicate the time for the timer closest to zero.

The countdown timer is connected to the active cooking zone. When the cooking time expires, the cooking zone will be switched off.
| Problem Possible causes Solution | ||
 | Boil Sense function is activated. | |
 | Boil Sense function is activated. | |
 | (fl ashing) | The lid was removed. |
 | (fl ashing) | Battery low, or interrupted communication with the cooking hob. |
| F1 | Dirty or damaged bottom side of the IQ sensor. | |
| F2 | Error in communication between the IQ sensor and the hob. | |
| F3 | IQ sensor battery low. Replace the battery. | |
| F4 | Cooking zone is too hot. | |
Replacing the battery
natural_image
Diagram of a cylindrical object with labeled points A and B, showing internal curved structure (no text or symbols beyond labels)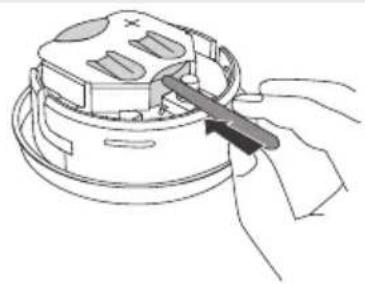
natural_image
Line drawing of a hand using a tool to adjust or install a mechanical component (no text or symbols visible)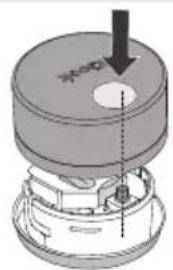
natural_image
Mechanical component diagram showing piston and housing assembly (no text or symbols)Ordering additional equipment
-
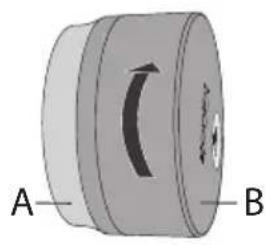
Hold the bottom of the sensor (A). Then firmly hold the IQ sensor lid (B) and turn it in the direction of the arrow by 10 degrees.
-
Remove the battery by pushing it through the opening with a thin (plastic or wooden) object.
-
Place the new battery (DL2450) back into the opening.

The "plus" sign on the battery must be on the upper side.
- Correctly replace the IQ sensor cover to the sensor housing and rotate it in the opposite direction by approx. 10 degrees.
Additional equipment and accessories can be purchased at the Gorenje service unit or at an authorized service center.
www.gorenje.si
Accessories may be purchased individually or in bundles - code:
Sensor: 393759
Ring: 393758
386679
- IQook
- TABLE OF
- IMPORTANT NOTES AND PRECAUTIONS ....5
- CONTROL UNIT 6
- PREPARING THE LID FOR THE IQ FUNCTIONS ....8
- OPERATION OF THE IQ FUNCTIONS ....10
- Cooking modes....13
- SETTING THE CLOCK 25
- TROUBLESHOOTING 26
- CONTROL UNIT
- PREPARING THE LID FOR THE IQ FUNCTIONS
- Removing the sensor
- OPERATION OF THE IQ FUNCTIONS
- Use of functions and the appliance
- A - USE OF FUNCTIONS
- Preparation procedure:
- Method 1
- Method 2
- Note:
- DEFROSTING FROZEN FOOD
- KEEPING THE FOOD WARM
- Example:
- THE FOLLOWING SYMBOLS WILL APPEAR ON THE DISPLAY DURING OPERATION:
- SAFETY FEATURE - SmartSense
- B - USE OF FUNCTIONS
- Using the minute minder
- Not connected to the cooking zone.
- Using the countdown timer
- Replacing the battery
- Ordering additional equipment
Brand : GORENJE
Model : GIS78XC
Category : Flashlight