KABPMWRWHTA - Blood pressure monitor Kogan - Free user manual and instructions
Find the device manual for free KABPMWRWHTA Kogan in PDF.


| Product Type | Automatic Blood Pressure Monitor |
| Brand | Kogan |
| Model | KABPMWRWHTA |
| Measurement Method | Oscillometric |
| Display Type | LCD Digital Display |
| Measurement Range | Systolic: 60-260 mmHg, Diastolic: 30-200 mmHg, Pulse: 40-200 beats/min |
| Accuracy | ±3 mmHg for blood pressure, ±5% for pulse |
| Cuff Type | Wrist cuff (13-20 cm circumference) |
| Memory | 2 x 90 readings for 2 users |
| Power Source | 2 x AAA batteries (included) |
| Battery Life | Approximately 300 measurements |
| Auto Shut-off | After 1 minute of inactivity |
| Indicators | Irregular heartbeat detection, WHO classification indicator |
| Dimensions | Approx. 78 x 68 x 28 mm |
| Weight | Approx. 140 g (without batteries) |
| Operating Temperature | 10°C to 40°C |
| Storage Temperature | -20°C to 50°C |
| Humidity | < 85% RH |
| Certifications | ISO 13485, CE |
| Warranty | 1 year limited |
Frequently Asked Questions - KABPMWRWHTA Kogan
User questions about KABPMWRWHTA Kogan
0 question about this device. Answer the ones you know or ask your own.
Ask a new question about this device
Download the instructions for your Blood pressure monitor in PDF format for free! Find your manual KABPMWRWHTA - Kogan and take your electronic device back in hand. On this page are published all the documents necessary for the use of your device. KABPMWRWHTA by Kogan.
USER MANUAL KABPMWRWHTA Kogan
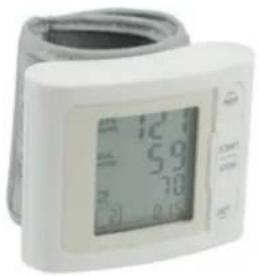
Digital Wrist Blood Pressure Monitor
KABPMWRWHTA
USER MANUAL
INTRODUCTION 2
• General Description
• Indications for Use
• Measurement Principle
• Safety Information
- LCD Display Signal
• Monitor Components
BEFORE YOU START 6
• The Choice of Power Supply
• Installing and Replacing the Batteries
- Setting Date, Time and Measurement Unit
MEASUREMENT 9
- Positioning the Cuff
• Start Measurement
DATA MANAGEMENT 11
• Recalling the Records
- Deleting the Records
INFORMATION FOR USER 13
- Tips for Measurement
- Maintenance
ABOUT BLOOD PRESSURE 15
• What are systolic pressure and diastolic pressure?
• What is the standard blood pressure classification?
• Why does my blood pressure fluctuate throughout the day?
• Why the blood pressure I get from the hospital is different from home?
- If the result is the same if measuring on the right wrist?
TROUBLESHOOTING 17
SPECIFICATIONS 18
CONTACT INFORMATION....19
COMPLIED EUROPEAN STANDARD LISTS.... 19
EMC GUIDANCE 20
♥ General Description
Thank you for selecting KOGAN wrist blood pressure Monitor (TMB-1014-A). The monitor features blood pressure measurement, pulse rate measurement and the result storage. The design provides you with two years of reliable service.
Reading taken by the TMB-1014-A are equivalent to those obtained by a trained observer using the cuff and stethoscope auscultation method.
This manual contains important safety and care information, and provides step by step instructions for using the product.
Read the manual thoroughly before using the product.
FEATURES:
• Systolic Blood Pressure
- Pulse Rate
• Diastolic Blood Pressure
• Memory: Up to 60 pieces of records
♥ Indications for use
The KOGAN Blood Pressure Monitor is digital monitors intended for use in measuring blood pressure and heartbeat rate with wrist circumference ranging from 13.5 cm to 19.5 cm (about 5-7.7 inches).
It is intended for adult indoor use only.
♥ Measurement Principle
This product uses the Oscillometric Measuring Method to detect blood pressure. Before every measurement, the unit establishes a "zero point" equivalent to the atmospheric pressure. Then it starts inflating the cuff. Meanwhile, the unit detects pressure oscillation generated by beat-to-beat pulsatile, which is used to deter-mine the systolic pressure and diastolic pressure as well as pulse rate. The device also compares the longest and the shortest intervals of detected pulse wave to with the average value, and then calculates the standard deviation. The monitor will light up a warning symbol when the calculated standard deviation is larger than or equal to 15.
♥ Safety information
The below signs might be in the user manual, labeling or other components. They are the requirement of standard and using.
 | Symbol for "THE OPERATION GUIDE MUST BE READ" |  | Symbol for "MANUFACTURE DATE" |
| [8cc5] | Symbol for "MANUFACTURER" |  | Symbol for "ENVIRONMENT PROTECTION - Wast electrical products should not be disposed of with household waste. Please recycle where facilities exist. Check with your local authority or retailer for recycling advice" |
| [zx24] | Symbol for "SERIAL NUMBER" | ||
 | Symbol for "TYPE BF APPLIED PARTS" | --- | Symbol for "DIRECT CURRENT" |

CAUTION
Please do read this user manual carefully and thoroughly before use.
This device is intended for adult use only.
This device is intended for non-invasive measuring and monitoring of asterial blood pressure. It is not intended for use on extremities other than the wrist or for functions other than obtaining a blood pressure measurement.
Do not confuse self-monitoring with self-diagnosis. This unit allows you to monitor your blood pressure. Please start or end medical treatment basing solely on physician's treatment advice.
If you are taking medication, consult your physician to determine the most appropriate time for your measurement. Never change a prescribed medication without your physician's consent.
This unit is not suitable for continuous monitoring during medical emergencies or operations.
If the pressure of the cuff exceeds 40 kPa (300 mmHg), the unit will automatically deflate. Should the cuff not deflate when its pressure exceeds 40 kPa (300 mmHg), detach the cuff from the wrist and press the START/STOP button to stop inflation.
Do not use the monitor under the conditions of strong electromagnetic field (e.g. medical RF equipment) that radiates interference signal or electrical fast transient / burst signal.
The maximum temperature that the applied part can be achieved is 42.5 while the environmental temperature is 40.
The device is not AP/APG equipment. It is not suitable for use in the presence of a flammable anesthetic mixture with air (or oxygen, nitrous oxide).
Please keep the unit out of reach of infants or children, since inhalation or swallowing of small parts is dangerous or even fatal.
Please use ACCESSORIES and detachable parts specified / authorised by MANUFACTURER. Otherwise, it may cause damage to the unit or danger to the user / patient.
The materials of the cuff have been tested and found to comply with requirements of ISO 10993-5:2009 and ISO 10993-10:2010. It won't cause any potential allergic reaction or contact injury.
Manufacturer will make the circuit diagrams, component list, etc. available on request.
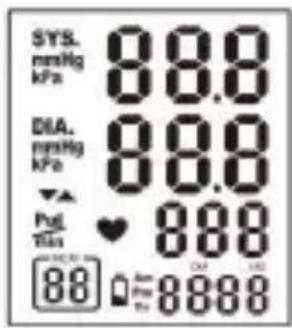
♥ LCD Display Signal
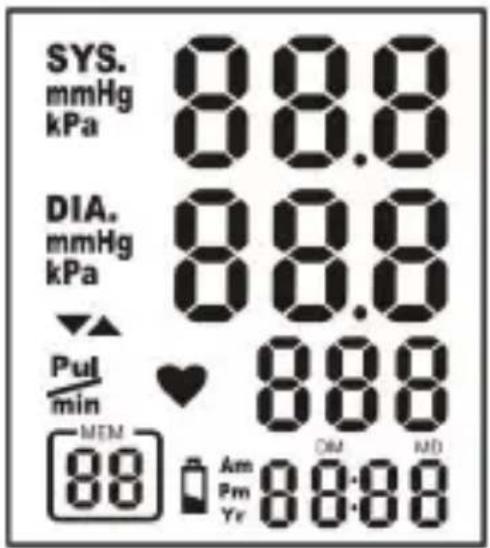
| SYMBOL | DESCRIPTION | EXPLANATION |
| SYS | SystolicBlood Pressure | High blood pressure |
| DIA | DiastolicBlood Pressure | Low blood pressure |
| _min | Pulse | beat/minute |
| 0+Lo | Low Battery | Low battery and please replace the batteries. |
| mmHg | Unit | Measurement unit of blood pressure |
| kPa | Unit | Measurement unit of blood pressure |
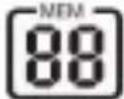 | Memory | When this symbol lights up, the measuring result displayed is retrieved from memory. |
| ▲ | Inflating | Charge the air into the cuff. |
| ▼ | Deflating | Exhaust the air in the cuff. |
 | Time | Hour:Minute (Day:Month / Year) |
 | Heartbeat | Heartbeat detection during the measurement |
♥ Monitor Components
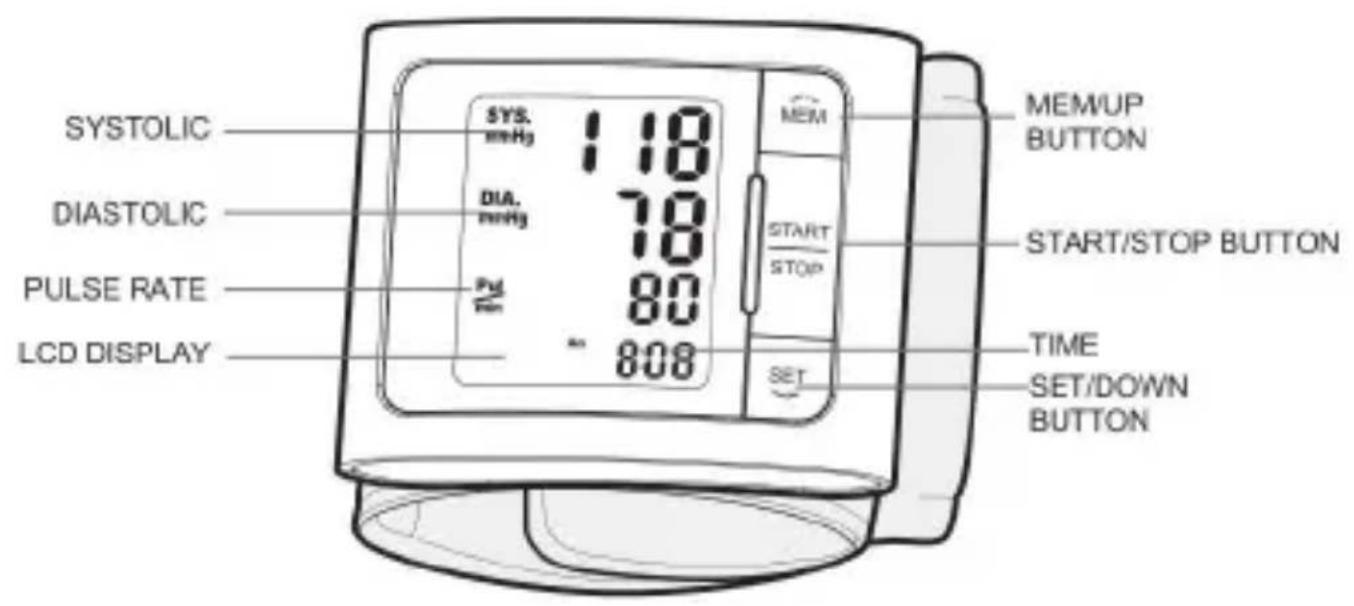
Component List:
- PCBA;
- Air Pipe;
- Pump;
- Valve;
- Cuff.
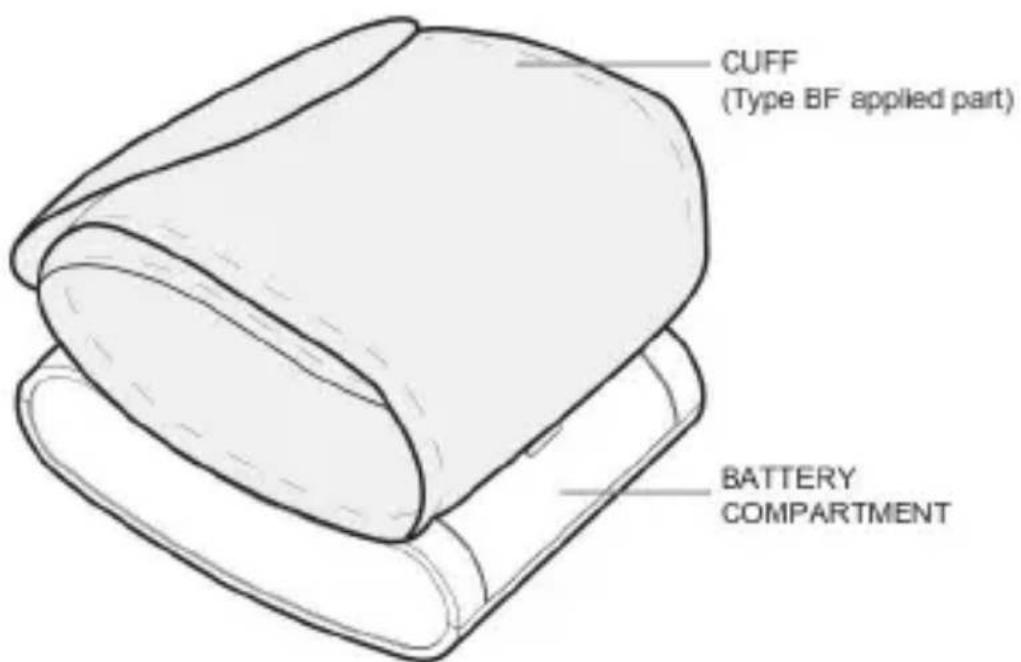
♥ List
-
Wrist Blood Pressure Monitor (TMB-1014-A)
-
Two AAA-size batteries
- User Manual
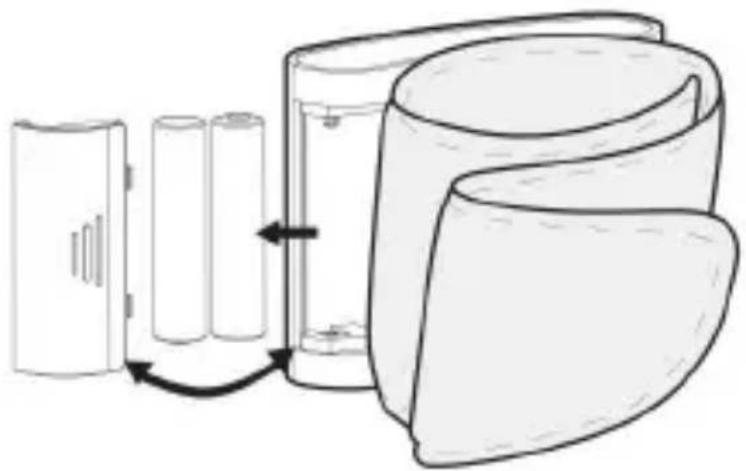
♥ Installing and Replacing the Batteries
- Open the battery door.
- Insert the batteries according to the polarity indications.
(Always select the authorized / specified battery: Two AAA-size batteries).
- Close the battery door.
natural_image
Diagram showing battery cell arrangement with arrows indicating flow from left to right (no text or symbols)Replace the batteries under following circumstances:
• +Lo displays on the LCD
• The LCD display dims
- When powering on the monitor, the LCD doesn't light up.

CAUTION
- Remove batteries if the device is not likely to be used for some time.
- Worm batteries are harmful to the environment. Do not dispose with daily garbage.
- Remove the old batteries from the device following your local recycling guidelines.
- Do not dispose of batteries in fire. Batteries may explode or leak.
Setting Date, Time and Measurement Unit
Please proceed to time setting before your initial use so as to ensure each piece of record are labled with a time stamp. (Year Range: 2010-2050)
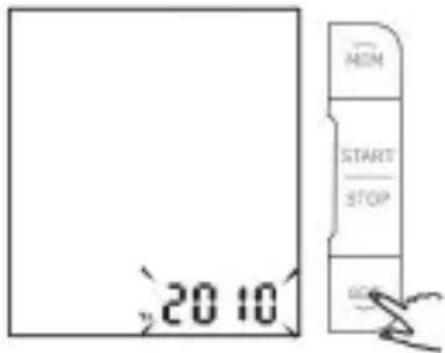
- When the monitor is OFF, press the "SET" button to enter the time mode, then press and hold "SET" button for 3 seconds to enter the [YEAR] setting.
Note: If you don't want to do the settings, you can press START/STOP button to turn off the monitor.
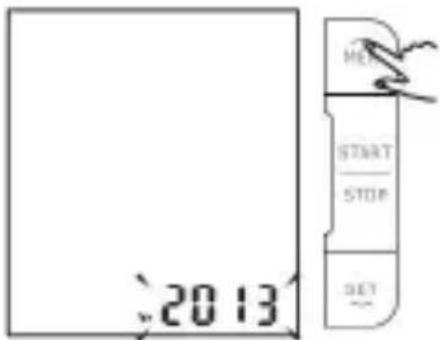
- Press "MEM" button to change the numeral. Each press will increase the numeral by one in a cycling manner.
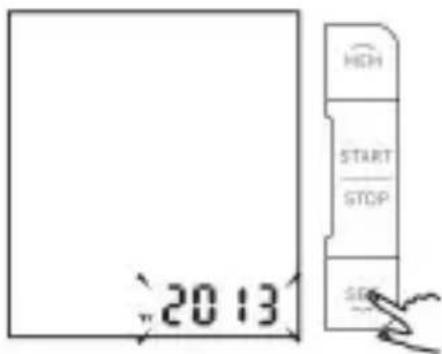
- Press "SET" button to confirm the [YEAR]. Then the monitor diverts to the [MONTH] and [DAY] setting automatically.
BEFORE YOU START
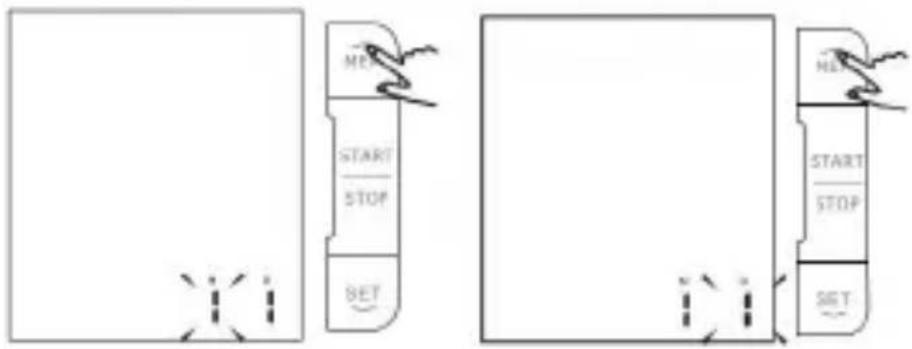
- Repeat step 2 and 3 to confirm [MONTH] and [DAY].
flowchart
graph TD
    A["Start"] --> B["SET"]
    B --> C["START STOP"]
    C --> D["MET"]
    D --> E["Set"]
    style A fill:#fff,stroke:#000
    style B fill:#fff,stroke:#000
    style C fill:#fff,stroke:#000
    style D fill:#fff,stroke:#000
    style E fill:#fff,stroke:#000
- Then the monitor diverts to time setting. Select the time format. Repeat step 2 and 3 to confirm the time format, [HOUR] and [MINUTE].
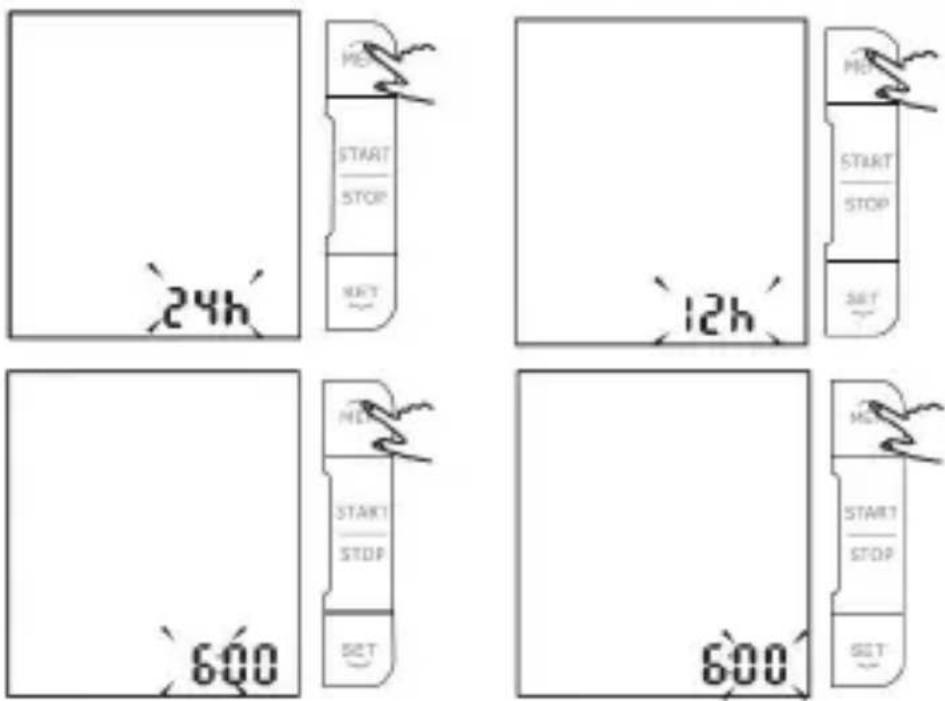
- Repeat step 2 and 3 to confirm the measurement unit.
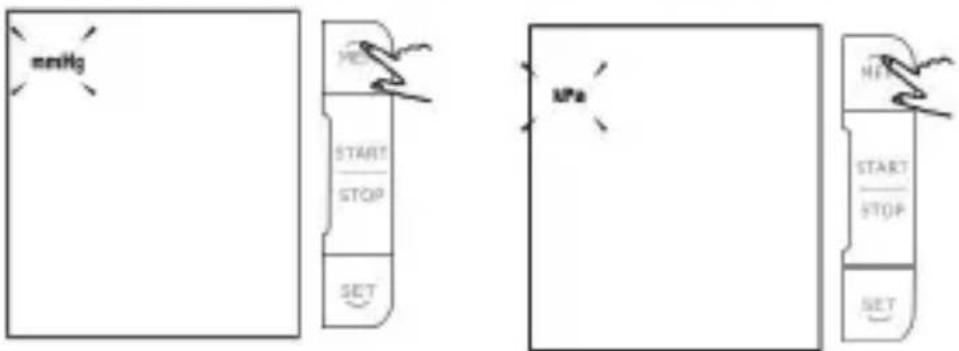
flowchart
graph TD
    A["mesing"] --> B["ME"]
    B --> C["START/STOP"]
    C --> D["SET"]
    E["MPa"] --> F["ME"]
    F --> G["START/STOP"]
    G --> H["SET"]
- After confirming the measurement unit, the LCD will display all the settings you have done one by one and the monitor will shut off automatically.
♥ Positioning the Cuff
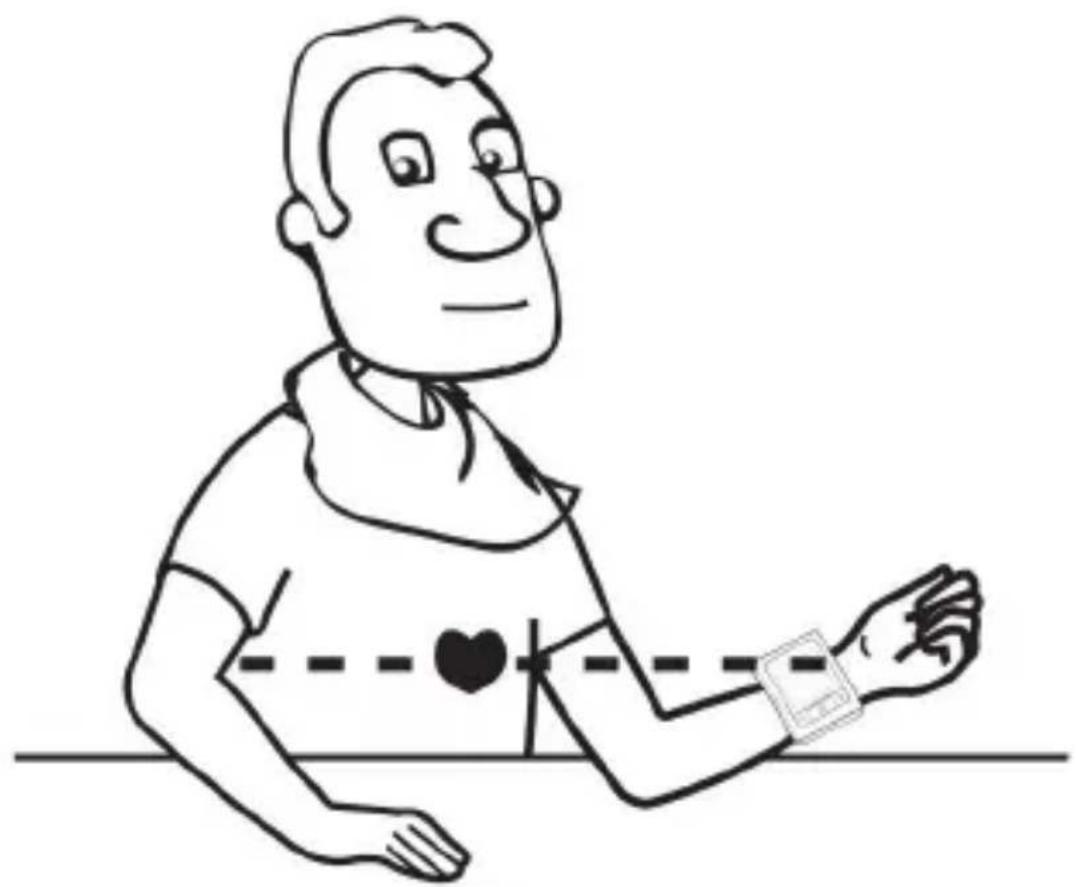
- Remove all accessories (watch, bracelet, etc) from your left wrist. If your physician has diagnosed you with poor circulation in your left wrist, use your right wrist.
- Roll or push up your sleeve to expose the skin.
- Apply the cuff to your left wrist with your palm facing up.
- Position the edge of the cuff about 1-1.5cm.
-
Fasten the wrist cuff around your wrist, leaving no extra room between the cuff and your skin. If the cuff is too loose, the measurement will not be accurate.
-
Resting for 5 minutes before measuring.
- Wait at least 3 minutes between measurements. This allows your blood circulation to recover.
- For a meaningful comparison, try to measure under similar conditions. For example, take daily measurements at approximately the same time, on the same wrist, or as directed by a physician.
natural_image
Cartoon illustration of a person wearing a wristwatch with a heart symbol on the arm (no text or symbols present)♥ Start Measurement
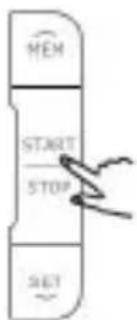
- After correctly positioning the cuff, press START button to turn on the monitor, and it will complete the measurement process automatically.
The LCD will display all the icons.
Adjust to zero.
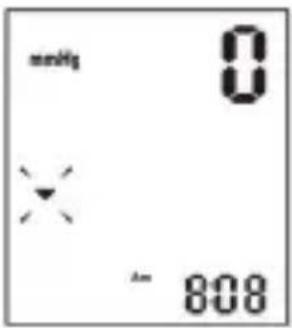
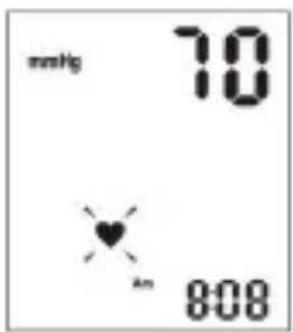
Inflating and measuring.
Display and save the measuring result.
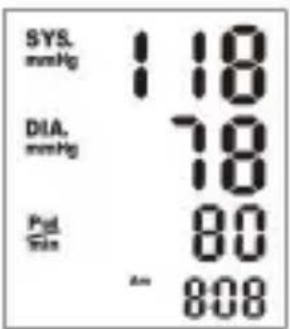
- Press STOP button to turn off the monitor. Otherwise, the monitor will shut off within 1 minute.
flowchart
graph TD
    A["MEM"] --> B["START"]
    B --> C["STOP"]
    C --> D["SET"]
♥ Recalling the Records
- When the monitor is off, press "MEM" button to access the memory. The monitor will display the latest measurement record first.
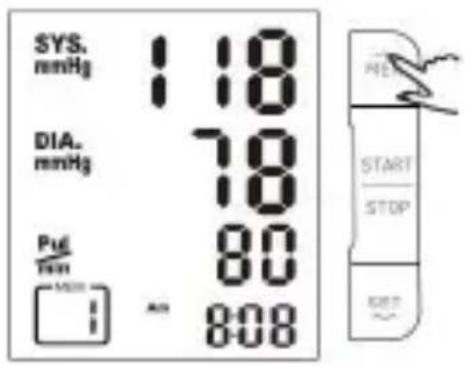
- Press "MEM/UP" button or "SET/DOWN" button to rotate the history records. "MEM/UP" to go forward; "SET/DOWN" to go backward.
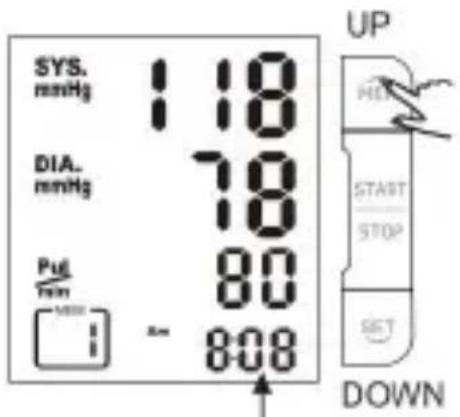
The exact time and date of the measurement will display alternatively.
M S The corresponding date is January 5th.
Am 8:08 The corresponding time is 8:08 a.m.

CAUTION
The most recent record (1) is shown first. Each new measurement is assigned to the first (1) record. All other records are pushed back one digit (e.g., 2 becomes 3, and so on), and the last record (60) is dropped from the list.
♥ Deleting the Records
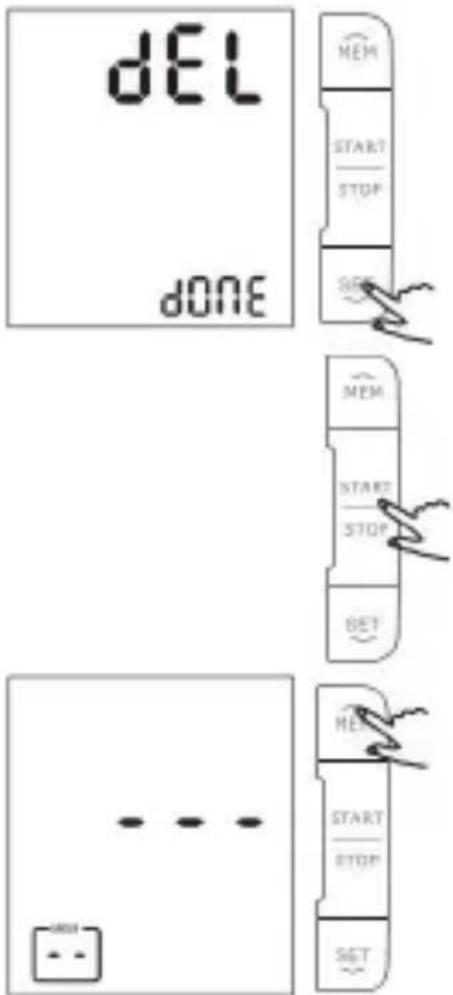
When you did not obtain the accurate measurement, you can clear all the measuring results by following below steps.
- When the monitor is off, press the "MEM" button to access the memory. Then press and hold both the "MEM" button for 3 seconds, the LCD will display "dEL ALL".
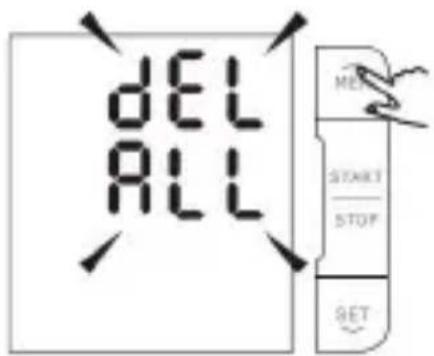
- If you would like to clear the memory, press the "SET" button. The monitor will display "dEL dOnE" in response, and then turn off automatically.
-
If you wish to give up clearing, press "START/STOP" to turn off the monitor.
-
When there is no memory in the monitor, if you press the "MEM" button to look up the history, the LCD will display as pictured to the right.
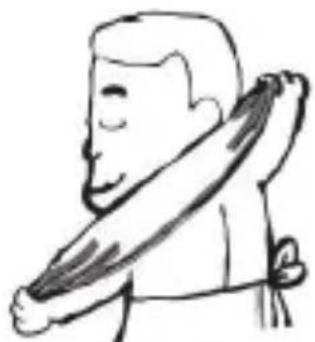
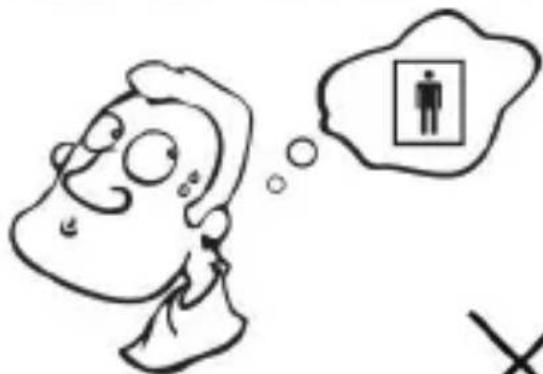
♥ Tips for Measurement
It can cause inaccuracy if the measurement is taken in the following circumstances.

natural_image
Cartoon drawing of a person eating with a bowl and spoon (no text or symbols)Within 1 hour after dinner or drinking

natural_image
Cartoon illustration of a person sitting at a table with a steaming cup and coffee cup (no text or symbols)Immediate measurement after tea, coffee, smoking

natural_image
Simple line drawing of a person holding an object, no text or symbols presentWithin 20 minutes after taking a bath

natural_image
Cartoon illustration of a man in a suit holding a phone to his ear, with no visible text or symbols
When talking or moving your fingers

natural_image
Simple line drawing of a person with expressive eyes and a bow, surrounded by decorative swirls (no text or symbols)In a very cold environment
natural_image
Cartoon illustration of a person with thought bubble showing a person inside a box (no text or symbols)When you want to discharge urine
♥ Maintenance
To obtain the best performance, please follow below instructions.
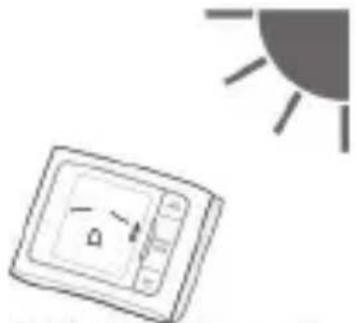
natural_image
Simple line drawing of a sun and a wall-mounted device (no text or symbols)Put in a dry place and avoid the sunshine
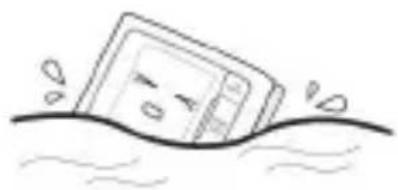
natural_image
Simple line drawing of a sad book partially submerged in water, with no text or symbols present.Avoid immersing it in the water. Clean it with a dry cloth in case.
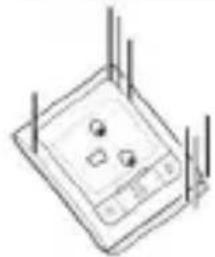
natural_image
Isometric line drawing of a rectangular electronic device with three ports and vertical lines (no text or symbols)Avoid shaking and collision.
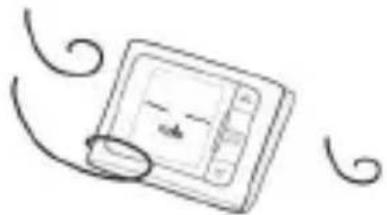
natural_image
Simple line drawing of a notebook with scroll decorations (no text or symbols)Avoid dusty environment and unstable temperature surrounding
natural_image
Simple line drawing of a hand holding a small object with a smiling face and a curved handle (no text or symbols)Use the slightly damp cloth to remove the dirt.
natural_image
Simple line drawing of a sad, anthropomorphic object with a tail and curved lines (no text or symbols)Avoid washing the cuff

CAUTION
The device doesn't need to be calibrated in two years of reliable service.
Please dispose of ACCESSORIES, detachable parts, and the ME EQUIPMENT according to the local guidelines.
When the device was used to measure patients who have common arrhythmias such as atrial or ventricular premature beats or atrial fibrillation, the best result may occur deviation. Please consult your physician about the result.
The device is contraindicated for any female subject who may be suspected of, or is pregnant. Besides provided inaccurate readings, the affects of this device on the fetus are unknown.
After the cuff inflated long time, the patient's arm and fingers will is insufficient, anaesthesia, destending pain and ecchymosis.
Please use the device under the environment which was provided in the user manual. Otherwise, the performance and lifetime of the device will be impacted and reduced.
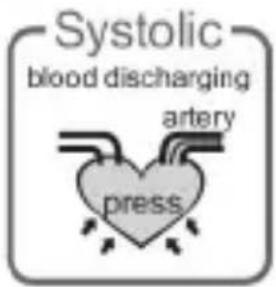
♥ What are systolic pressure and diastolic pressure?
When ventricles contract and pump blood out of the heart, the blood pressure reaches its maximum value in the cycle, which is called systolic pressure. When the ventricles relax, the blood pressure reaches its minimum value in the cycle, which is called diastolic pressure.

♥ What is the standard blood pressure classification?
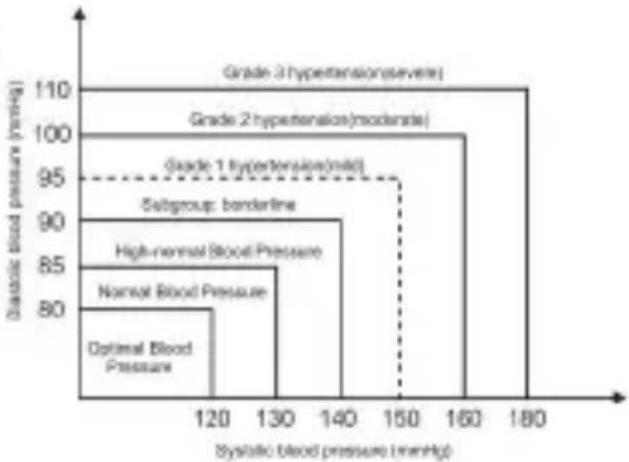
The blood pressure classification published by World Health Organization (WHO) and International Society of Hypertension (ISH) in 1999 is as follows:
bar
| Category | Systolic blood pressure (mmHg) | Statinic blood pressure (mmHg) | |---|---|---| | Optimal Blood Pressure | 120 | 80 | | Normal Blood Pressure | 130 | 85 | | High-normal Blood Pressure | 140 | 90 | | Subgroup: borderline | 150 | 95 | | Grade 1 Hypertension(mild) | 160 | 95 | | Grade 2 hypertension(moderate) | 170 | 100 | | Grade 3 hypertension(severe) | 180 | 110 |
CAUTION
Only a physician can tell your normal BP range. Please contact a physician if your measuring result falls out of the range. Kindly note that only a physician could tell whether your blood pressure value has reached a dangerous point.
| Blood Pressure (mm Hg)\Level | Optimal | Normal | High-normal | Mild | Moderate | Severe |
| SYS | <120 | 120-129 | 130-139 | 140-159 | 160-179 | ≥180 |
| DIA | <80 | 80-84 | 85-89 | 90-99 | 100-109 | ≥110 |
♥ Why does my blood pressure fluctuate throughout the day?
- Individual blood pressure varies every in one day, it also affected by the way you tie your cuff and the your measurement position, so please take the measurement at the same condition.
- The varies of the pressure is greater if the person take medicine.
- Waiting at least 3 minutes for another measurement.
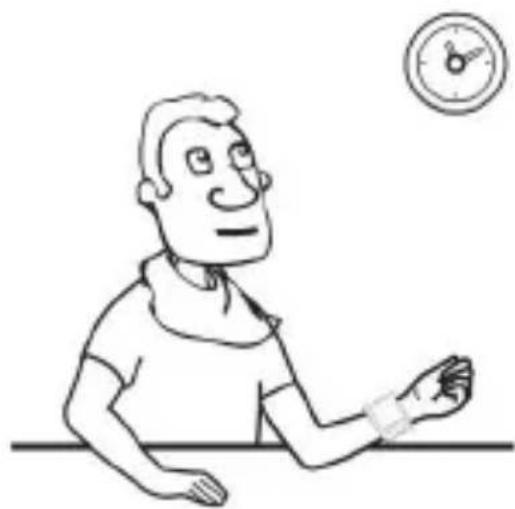
natural_image
Cartoon illustration of a person sitting at a desk with a clock above their head (no text or symbols)♥ Why the blood pressure I get from the hospital is different from home?
The blood pressure is different even during 24 hour because of the weather, emotion, exercise etc, specially the "white coat" in hospital which makes the results are higher than the ones at home.
The attention need to pay when you measure your blood pressure at home:
If the cuff is tied properly.
If the cuff is too tight or too loose.
If the cuff is tied on the wrist.
If you feel anxious pressured.
You had better take deep breath 2-3 times before beginning.
Advice: adjust yourself for 4-5 minutes until you calm down.
♥ If the result is the same if measuring on the right wrist?
It is ok for both wrists, but there will be some different results for different person, so suggest you measure the same wrist every time.

natural_image
Simple line drawing of a person sitting at a desk (no text or symbols)This section includes a list of error messages and frequently asked questions for problems you may encounter with your blood pressure monitor. If the products not operating as you think it should, check here before arranging for servicing.
| PROBLEM | SYMPTOM | CHECK THIS | REMEDY |
| No power | Display will not light up. | Batteries are exhausted. | Replace with new batteries |
| Batteries are inserted incorrectly. | Insert the batteries correctly | ||
| Low batteries | Display is dim or display the battery icon and 'Lo' | Batteries are low. | Replace with new batteries |
| Error massage | E 1 shows | The cuff is not secure. | Refasten the cuff and then measure again. |
| E 2 shows | The cuff is very tight | Readjust the cuff, not too loose or too tight and then measure again. | |
| E 3 shows | The pressure of the cuff is excess. | Relax for a moment and then measure again. | |
| E 10 or E 11 shows | The monitor detected motion, talking or the pulse is too poor while measuring. | Relax for a moment and then measure again. | |
| E 20 shows | The measurement process does not detect the pulse signal. | Loosen the clothing on the wrist and then measure again. | |
| E 21 shows | The treatment of the measurement failed. | Relax for a moment and then measure again. | |
| EExx, shows on the display. | A calibration error occurred. | Retake the measurement. If the problem persists, contact the retailer or our customer service department for further assistance. Refer to the warranty for contact information and return instructions. |
| Power supply | 3V 2*AAA batteries |
| Display mode | Digital LCD V.A. = 36mm x 41mm |
| Measurement mode | Oscillographic testing mode |
| Measurement range | Rated cuff pressure:0kpa - 40kpa (0mmHg~300mmHg)Measurement pressure: 5.3kPa-30.7kPa(40mmHg-230mmHg)pulse value: (40-199) beat/minute |
| Accuracy | Pressure:5°C-40°C within±0.4kpa(3mmHg)pulse value:±5% |
| Normal working condition | Temperature:5°C to 40°C Relative humidity ≤85%Atmospheric pressure: 86kPa to 106kPa |
| Storage & transportation condition | Temperature:-20°C to 60°C RH: 10% to 93%Atmospheric pressure: 50kPa to 106kPa |
| Measurement perimeter of the wrist | About 13.5cm-19.5cm |
| Weight | Approx.100g(Excluding the dry cells) |
| External dimensions | Approx.80×65×22mm |
| Attachment | 2*AAA batteries,user manual |
| Mode of operation | Continuous operation |
| Degree of protection | Type BF applied part |
| IP Classification | IP22 |
| Software version | V01 |
| Device classification | Internally Powered ME Equipment |
WARNING: No modification of this equipment is allowed.
♥ Complied European Standards List
| Risk Management | EN/ISO 14971:2007 |
| Labeling | EN 980:2008 |
| User Manual | EN 1041:2008 |
| Generl Requirements for Safety | EN 60601-1:2006/AC:2010EN 62304:2006/AC:2008EN 60601-1-6:2010EN 60601-1-11:2010 |
| Non-invasive Sphygmomanometers General Requirements | EN 1060-1:1995+A2:2009EN 1060-3:1997+A2:2009EN 1060-4:2004 |
| Electromagnetic Compatibility | EN 60601-1-2:2007 |
♥ EMC Guidance
Table 1 – Guidance and MANUFACTURER'S declaration – ELECTROMAGNETIC EMISSIONS – for all ME EQUIPMENT and ME SYSTEMS
| Guidance and manufacturer's declaration – electromagnetic emissions | ||
| The device is intended for use in the electromagnetic environment specified below.The customer or the user of the device should assure that it is used in such an environment. | ||
| Emissions test | Compliance | Electromagnetic environment – guidance |
| RF emissionsCISPR 11 | Group 1 | The device uses RF energy only for its internal function. Therefore, its RF emissions are very low and are not likely to cause any interference in nearby electronic equipment. |
| RF emissionsCISPR 11 | Class B | |
| Harmonic emissionsIEC 61000-3-2 | Not applicable | |
| Voltage fluctuations/flicker emissionsIEC 61000-3-3 | Not applicable | |
Table 2 – Guidance and MANUFACTURER'S declaration – electromagnetic IMMUNITY – for all ME EQUIPMENT and ME SYSTEMS
| Guidance and manufacturer's declaration - electromagnetic immunity | |||
| The device is intended for use in the electromagnetic environment specified below. The customer or the user of the device should assure that it is used in such an environment. | |||
| IMMUNITY test | IEC 60601test level | Compliance level | Electromagnetic environment - guidance |
| Electrostatic discharge (ESD)IEC 61000-4-2 | ±6 kV contact±8 kV air | ±6 kV contact±8 kV air | Floors should be wood, concrete or ceramic tile. If floors are covered with synthetic material, the relative humidity should be at least 30%. |
| Electrical fast transient/burstIEC 61000-4-4 | ±2 kV for power supply lines±1 kV for input/output lines | Not applicable | Mains power quality should be that of a typical commercial or hospital environment. |
| SurgeIEC 61000-4-5 | ±1 kV line(s) to line(s)±2 kV line(s) to earth | Not applicable | Mains power quality should be that of a typical commercial or hospital environment. |
| Voltage dips, short interruptions and voltage variations on power supply input linesIEC 61000-4-11 | <5 % UT(>95 % dip in UT)for 0.5 cycle40 % UT(60 % dip in UT)for 5 cycles70 % UT(30 % dip in UT)for 25 cycles<5 % UT(>95 % dip in UT)for 5 s | Not applicable | Mains power quality should be that of a typical commercial or hospital environment. If the user of the device requires continued operation during power mains interruptions, it is recommended that the device be powered from an uninterruptible power supply or a battery. |
| Power frequency (50/60 Hz)magnetic fieldIEC 61000-4-8 | 3 A/m | 3 A/m | Power frequency magnetic fields should be at levels characteristic of a typical location in a typical commercial or hospital environment. |
| NOTE UT is the a.c. mains voltage prior to application of the test level. | |||
Table 4 – Guidance and MANUFACTURER'S declaration – electromagnetic IMMUNITY – for ME EQUIPMENT and ME SYSTEMS that are not LIFE-SUPPORTING
| Guidance and manufacturer's declaration - electromagnetic immunity | |||
| The device is intended for use in the electromagnetic environment specified below. The customer or the user of the device should assure that it is used in such an environment. | |||
| IMNUNITY test | IEC 60601 TEST LEVEL | Compliance level | Electromagnetic environment - guidance |
| Conducted RFIEC 61000-4-6Radiated RFEIC 61000-4-3 | 3 Vrms150 kHz to 80 MHz3 V/m80 MHz to 2.5 GHz | Not applicable3 V/m | Portable and mobile RF communications equipment should be used no closer to any part of the device, including cables, than the recommended separation distance calculated from the equation applicable to the frequency of the transmitter.Recommended separation distanced = [3.5/V1]√Pd = 1.167√P 80 MHz to 800 MHzd = 2.333√P 800 MHz to 2.5 GHzwhere P is the maximum output power rating of the transmitter in watts (W) according to the transmitter manufacturer and d is the recommended separation distance in metres (m).Field strengths from fixed RF transmitters, as determined by an electromagnetic site survey,a should be less than the compliance level in each frequency range.bInterference may occur in the vicinity of equipment marked with the following symbol: |
| NOTE 1 At 80 MHz and 800 MHz, the higher frequency range applies.NOTE 2 These guidelines may not apply in all situations. Electromagnetic propagation is affected by absorption and reflection from structures, objects and people. | |||
| a Field strengths from fixed transmitters, such as base stations for radio (cellular/cordless) telephones and land mobile radios, amateur radio, AM and FM radio broadcast and TV broadcast cannot be predicted theoretically with accuracy. To assess the electromagnetic environment due to fixed RF transmitters, an electromagnetic site survey should be considered. If the measured field strength in the location in which the device is used exceeds the applicable RF compliance level above, the device should be observed to verify normal operation. If abnormal performance is observed, additional measures may be necessary, such as re-orienting or relocating the device.b Over the frequency range 150 kHz to 80 MHz, field strengths should be less than [V1] V/m. | |||
Table 6 – Recommended separation distances between portable and mobile RF communications equipment and the ME EQUIPMENT or ME SYSTEM – for ME EQUIPMENT and ME SYSTEMS that are not LIFE-SUPPORTING
| Recommended separation distances between portable and mobile RF communications equipment and the device | |||
| The device is intended for use in an electromagnetic environment in which radiated RF disturbances are controlled. The customer or the user of the device can help prevent electromagnetic interference by maintaining a minimum distance between portable and mobile RF communications equipment (transmitters) and the device as recommended below, according to the maximum output power of the communications equipment. | |||
| Rated maximum output power of transmitterW | Separation distance according to frequency of transmitterm | ||
| 150 kHz to 80 MHz d = [ 3.5V_1 ] | 80 MHz to 800 MHz d = 1.167 | 800 MHz to 2.5 GHz d = 2.333 | |
| 0.01 | Not applicable | 0.117 | 0.233 |
| 0.1 | Not applicable | 0.369 | 0.738 |
| 1 | Not applicable | 1.167 | 2.333 |
| 10 | Not applicable | 3.690 | 7.378 |
| 100 | Not applicable | 11.67 | 23.33 |
| For transmitters rated at a maximum output power not listed above, the recommended separation distance d in metres (m) can be estimated using the equation applicable to the frequency of the transmitter, where P is the maximum output power rating of the transmitter in watts (W) according to the transmitter manufacturer.NOTE 1 At 80 MHz and 800 MHz, the separation distance for the higher frequency range applies.NOTE 2 These guidelines may not apply in all situations. Electromagnetic propagation is affected by absorption and reflection from structures, objects and people. | |||
- Digital Wrist Blood Pressure Monitor
- KABPMWRWHTA
- INTRODUCTION 2
- BEFORE YOU START 6
- MEASUREMENT 9
- DATA MANAGEMENT 11
- INFORMATION FOR USER 13
- ABOUT BLOOD PRESSURE 15
- TROUBLESHOOTING 17
- SPECIFICATIONS 18
- CONTACT INFORMATION....19
- COMPLIED EUROPEAN STANDARD LISTS.... 19
- EMC GUIDANCE 20
- ♥ General Description
- FEATURES:
- ♥ Indications for use
- ♥ Measurement Principle
- ♥ Safety information
- CAUTION
- ♥ LCD Display Signal
- ♥ List
- ♥ Installing and Replacing the Batteries
- Setting Date, Time and Measurement Unit
- BEFORE YOU START
- ♥ Positioning the Cuff
- ♥ Start Measurement
- ♥ Recalling the Records
- ♥ Deleting the Records
- ♥ Tips for Measurement
- ♥ Maintenance
- ♥ What are systolic pressure and diastolic pressure?
- ♥ What is the standard blood pressure classification?
- ♥ Why does my blood pressure fluctuate throughout the day?
- ♥ Why the blood pressure I get from the hospital is different from home?
- ♥ If the result is the same if measuring on the right wrist?
- ♥ EMC Guidance
Brand : Kogan
Model : KABPMWRWHTA
Category : Blood pressure monitor