
BES50B - Cooker BUSH - Free user manual and instructions
Find the device manual for free BES50B BUSH in PDF.


| Product Type | Electric Cooker |
| Brand | Bush |
| Model | BES50B |
| Dimensions (H x W x D) | 900 x 500 x 600 mm |
| Net Weight | 34.59 kg |
| Power Supply | 220-240 V ~ 50 Hz |
| Maximum Power | 7000 W |
| Oven Volume | 54 Liters |
| Energy Rating | A |
| Number of Hotplates | 4 |
| Hotplate Control | 6-position rotary knobs (1-6) |
| Oven Functions | Conventional oven and grill |
| Oven Temperature Range | 50-250 °C |
| Safety Features | Anti-tilt chains, safety thermostat, child safety warnings |
| Cleaning | Removable inner door glass for easy cleaning; avoid abrasive cleaners |
| Accessories Included | 2 wire shelves, grill pan with handle |
| Installation Requirement | Must be installed by a qualified installer; requires dedicated circuit and double pole isolator switch |
| Warranty | 12 months from date of purchase |
| Colour | Black |
Frequently Asked Questions - BES50B BUSH
User questions about BES50B BUSH
0 question about this device. Answer the ones you know or ask your own.
Ask a new question about this device
Download the instructions for your Cooker in PDF format for free! Find your manual BES50B - BUSH and take your electronic device back in hand. On this page are published all the documents necessary for the use of your device. BES50B by BUSH.
USER MANUAL BES50B BUSH
Installation & User Instructions - Please keep for future reference
Cat no
Model
2557166
BUSH BES50W WHITE
2285452
BUSH BES50B BLACK

natural_image
White electric stove with four top burners and open door, no visible text or symbolsCooker serial number
place sticker here
Important – Please read these instructions fully before installing or using
These instructions contain important information which will help you get the best from your appliance and ensure safe and correct installation, use and maintenance. If you need help or have damaged or missing parts, call Argos Product Support 01759 487838
Contents
Safety Information 2
Parts 3
Installation 4-5
Positioning 4
Fixing to the wall 4
Electrical connection 5
User Instructions 6-8
Using the hotplates 6
Cookware selection 6
Using the oven 7
Using the grill 8
Care and Maintenance 9
Cleaning 9
Removing the inner door glass 9
Troubleshooting 10
Technical Specifications 11
Disposal information 11
A Guide to Wall Mounting & Fixings 12
Guarantee Back
natural_image
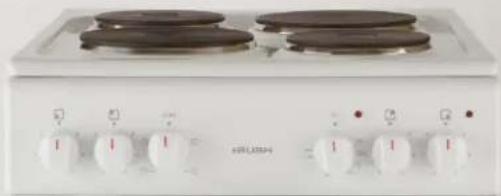
Front view of a white electric stove with four burners and control knobs (no visible text or symbols)
natural_image
Interior view of a rectangular storage unit with horizontal shelves and a curved top panel (no visible text or symbols)Important – Please read these instructions fully before installation
IMPORTANT: This product MUST be installed by a qualified installer in accordance with local regulations.
IMPORTANT: This appliance has been designed for non-professional, domestic use only.
IMPORTANT: Carefully unpack and examine the appliance for any damage. If you think there is a defect, do not use the appliance and contact Argos Product Support on 01759 487838.
IMPORTANT: The cooker is supplied setup according to the conditions shown on the rating label which is attached to the rear of the appliance.
IMPORTANT: Keep the electrical cable (not supplied) of your cooker away from the hot areas; do not let it touch the appliance. Keep the cable away from sharp edges and heated surfaces.
IMPORTANT: In the event that the cable connecting your cooker becomes damaged, it must be replaced by a suitably qualified person.
This cable must not be replaced by an unauthorised person.
IMPORTANT: When using the grill the grill door must be kept closed to prevent damage to the cooker knobs and to prevent the burn hazard that very hot knobs would present.
IMPORTANT: Children and persons with reduced physical, sensory or mental capabilities or lack of experience and knowledge should not be allowed to use the cooker unless supervised and warned of the hazards involved
WARNING: The appliance and its accessible parts become hot during use. Care should be taken to avoid touching hot parts.
WARNING: Cooking on a hob with fat or oil can be dangerous and should not be left unattended.
WARNING: NEVER try to extinguish a cooking fire with water. Instead switch off the appliance and cover flame e.g. with a lid or a fire blanket.
WARNING: Danger of fire: do not store items on the cooking surfaces or in the oven.
CAUTION: Cookers may topple forward if a child climbs onto the cooker door. Children should be supervised in the kitchen at all times and this cooker must be secured to the wall using the fixing points provided to prevent accidents.
CAUTION: Do not allow children in the kitchen when cooking or while cooker parts may still be hot. Many parts of the cooker will become hot and present a considerable hazard to children.
CAUTION: When the oven is hot never touch the oven glass by hand or with tools.
CAUTION: Before starting to use your appliance, ensure curtains, paper or flammable items are kept away from your appliance. Do not keep flammable materials inside of or around your cooker.
CAUTION: Take care when closing the oven door that there is nothing obstructing it from closing as this may break the glass door.
Please familiarise yourself with the parts and accessories listed below

1 - Control panel
2 - Oven and Grill
3 - Oven door
4 - Hotplate left rear
5 - Hotplate right rear
6 - Hotplate left front
7 - Hotplate right front
8 - Hob heat indicator
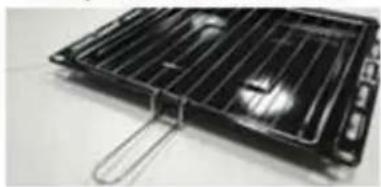
9 - Grill pan with removable handle
10 - Panel
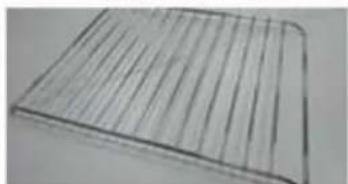
11 - Wire shelves X 2
Accessories
Grill pan and handle set
natural_image
Close-up of a black rectangular grating or filter with a metal clip attached (no text or symbols visible)2 wire shelves
natural_image
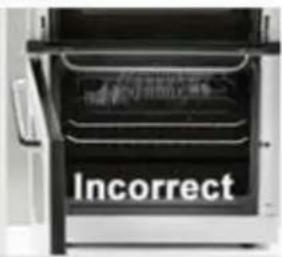
Close-up of a transparent plastic grid with parallel grooves (no text or symbols visible)Shelf orientation

Positioning and fixing to the wall
Positioning
- Make sure that there are no combustible or flammable materials, such as curtains, in the vicinity of the installation.
- Furniture and cabinets surrounding the cooker must be of material resistant to temperatures greater than 50°C.
- Surrounding furniture, cabinets and extractor fans should be positioned in accordance with the diagram shown in Figure 1.
- There must be at least 2cm of free space between the back wall and the rear of the appliance to allow for ventilation and air circulation.
- If fitted, the extractor fan must be at least 65cm above the hotplates. If no fan is fitted the minimum distance between the hotplates and any cabinet or other structure must be 75cm.
Fixing to the wall
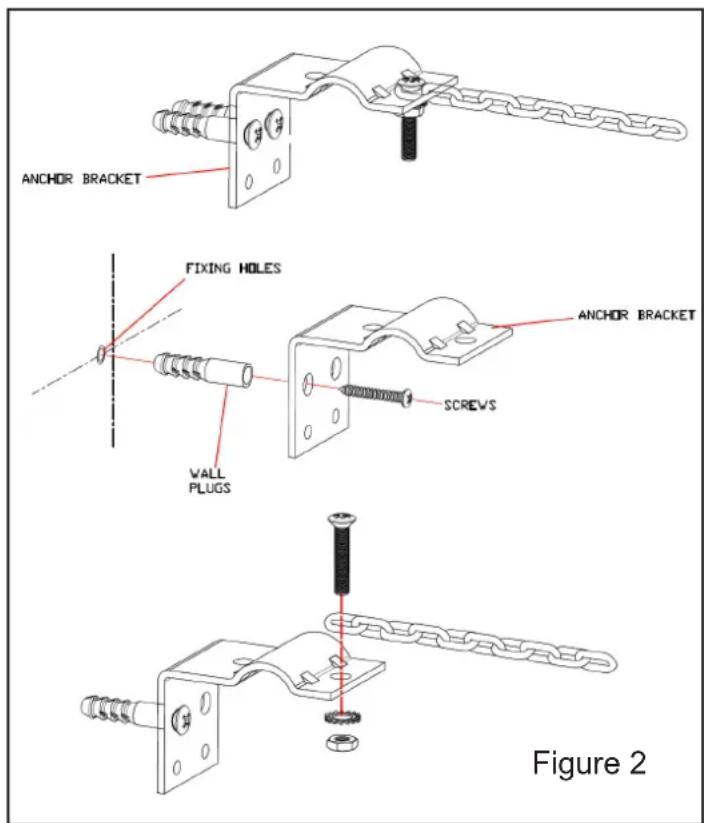
Before using the appliance fix it securely to the wall using the chains on the back of the cooker. This will prevent the cooker from toppling forward if excess weight is placed on the oven door. Since the chains must be attached to wall fixings suitable for your wall type, the wall fixings are not supplied with the cooker (Figure 2).
Please refer to the 'Guide to Wall Mounting and Fixings' on page 12.
Levelling
Level the cooker before using it. To do this, use the adjustable feet to achieve the correct level and height

Electrical connection

IMPORTANT: Electrical connections must be carried out by a suitably qualified person and in accordance with all relevant local building and installation regulations.
- See the rating label at the rear of the product for the appliance's rated load.
-
The cooker must be connected to a dedicated circuit suitably rated for the load of the appliance (see rating label at rear of appliance) as shown in the wiring diagrams below. It must be connected via a suitably rated cable to a double pole isolator cooker switch also suitably rated for the appliance.
-
Electrical cable should not touch the hot parts of the appliance.
The electrical cable should not be routed through any area that may be affected by heat from the oven, especially the area directly behind the oven.

Using the Hob
Each hotplate is regulated by a selector knob (Fig. 3).
The control allows for the efficient transfer of heat to the cooking pan.
The knob can be turned in both directions, to numbers 1 to 6
These numbers correspond to the power setting of the ceramic hob where 6 is the highest setting and 1 is the lowest.
Turn the hob control knob to off (●) when finished.
We recommend you turn off the hotplate 5 to 10 minutes before the dish is ready. This allows the heat accumulated in the hotplate to be used economically. The hotplate remains hot for a while after use.
SAFETY ADVICE IN THE CASE OF A COOKING PAN FIRE
In the event of a cooking pan fire:
- Turn off the cooker at the wall switch.
- Cover the pan with a fire blanket or damp cloth. This will smother the flames and extinguish the fire.
- Leave the pan to cool for at least an hour before attempting to move it. Injuries are often caused by picking up a hot pan and rushing outside with it.
NEVER USE A FIRE EXTINGUISHER TO PUT OUT A PAN FIRE
as the force of the extinguisher could tip the pan over.
Never use water to extinguish oil or fat pan fires.

Figure 3
COOKWARE SELECTION
- Any cookware should have a thick, flat and dry base of the same diameter or slightly bigger than the hotplate. If the cookware diameter is smaller than the hotplate, heat will be wasted.
- Cookware with uneven bases is very inefficient, making the cooking time longer and wasting electricity.
- Cookware made of flameproof glass, suitable for hotplate cooking, should match the hotplate size. Pans projecting beyond the hotplate may be broken due to temperature stresses. The heated pan must never be filled up with cold water or placed on cold metal or stone surfaces.
• Always use the pan with its lid on. This prevents the accumulation of vapour in the kitchen.

natural_image
Four black-and-white illustrations of cooking pots with crossed handles, arranged horizontally (no text or symbols)Only use flat bottomed pans
IMPORTANT!
- Never turn the hotplate on before placing a pan on it, except when first used.
- If the hotplate is not to be used for a long time, apply a little grease to the surface.
- Do not allow spills to be burned onto the hotplate as baked stains are harder to remove
Using the OVEN
Using the Main Oven
Turn the oven selector knob to the required function then turn the temperature knob clockwise and align the marker on the control knob with the required temperature (°C)
The indicator light on the control panel will go out and the thermostat will turn the element off when the selected temperature has been reached inside the oven. This will come back on once the thermostat falls below the set value.
Always turn the control knob to off (●) when cooking has finished.
Please note: The appliance incorporates a safety thermostat which cuts the electric supply to the oven if the temperature becomes excessive.
When using your oven for the first time your cooker may give off an unusual odour from the heating elements. This is normal for new cookers. To eliminate this odour run the oven at 250 degrees for 40-60 mins with the oven empty.

Using the GRILL
Using the grill
Turn the oven selector knob to grill. Turn the temperature knob clockwise and align the marker on the control knob with the required temperature ( ^ C)
The indicator light on the control panel will go out when the selected temperature has been reached inside the grill. This will come back on once the thermostat falls below the set value.
Always turn the control knob to off (●) when cooking has finished.
The grill door must be closed while grilling
Always use the handle when handling the grill pan

Cleaning and Maintenance
Argos
Product Support 01759 487838
Cleaning
WARNING! Isolate the power supply to the cooker and make sure that the oven is cool.
Do not clean using caustic creams, abrasive cleaning powders, thick wire wool or hard tools. Enamelled parts of the oven can be damaged if excess cleaning liquids are not immediately removed.
After cleaning the interior parts of the oven with a soapy cloth, rinse it and then dry thoroughly with a soft cloth.
Clean the glass surfaces with special glass cleaning agents.
Never use flammable agents like acid, thinner or petrol when cleaning your oven.
Do not clean your oven with a steam cleaner.
Do not wash any part of your oven in a dishwasher.
Removal of inner glass door for cleaning
Remove the inner glass by sliding the glass out towards you.
Care and use of the hotplates
For best results use pans with thick flat bases and match cooking pans to hotplates of equal size.
Always place the pan on the hotplate before switching on the hotplate.
Always disconnect the power and check that the hotplates are cool before cleaning.
Do not use harsh or abrasive cleaning agents or abrasive cleaning products such as wire wool to clean the hotplates. Use only cleaning products designed to be used on hotplates.
If your cooker does not appear to function correctly
- If no functions appear to work, check the cooker isolation switch has not been turned off also check the fuse in the switch and the circuit breaker in you consumer unit
-
After replacing the fuse or resetting the circuit breaker turn on individual parts of your cooker one at a time to check function
-
DO NOT attempt to repair this cooker yourself. Call Argos Product Support or consult a qualified electrician
| Problem Possible Cause Solution | ||
| Only parts of the cooker work it may be that the hobs, the ovens or the grill, do not work | Links may be missing in the rear connector box | Refer to the Quick Start Guide to check the correct placement of the linksThis must be done by a qualified competent person |
| Nothing works (completely dead) | Power is turned off at the isolation switch or the consumer unitPoor electrical connection | Ensure isolation switch is on Check consumer unit has not tripped outHave the connections checked by a qualified electrician |
| Oven not heating up Oven temperature | erature not set correctlyDoor is not properly closed | Ensure that the correct temperature has been selected and the door is properly closed |
| Models BUSH BES50BLACK or WHITE | |
| Power supply 220-240V~50 Hz | |
| Maximum power | 7000 W |
| Size (H x W x D) 900 x 500 x 600 | |
| Net Weight | 34.59 Kg |
| Oven volume 54 Lt. | |
| Energy rating A | |
We apologise for any inconvenience caused by minor inconsistencies within these instructions that may occur due to product improvements and development
All images and drawing are for illustration purposes only.
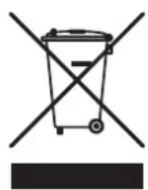
This appliance/fitting is marked according to the European directive 2002/96/EC on Waste Electrical and Electronic Equipment (WEEE). By ensuring this product is disposed of correctly, you will help prevent potential negative consequences for the environment and human health, which could otherwise be caused by inappropriate waste handling of this product.
The symbol on the product, or on the documents accompanying the product, the crossed out wheelie bin symbol, indicates that this appliance/fitting may not be treated as household waste. Instead it shall be handed over to the applicable collection point for the recycling of electrical and electronic equipment. Disposal must be carried out in accordance with local environmental regulations for waste disposal. For more detailed information about treatment, recovery and recycling of this product, please contact your local authority, your household waste disposal service or the retailer where you purchased the product.
Important note:
If plastic wall plugs are supplied with your product:

- these are only suitable for use in masonry walls.
If you are in any doubt about the correct wall plugs for your wall, seek professional advice.
Failure of the product due to using incorrect fixings is the responsibility of the installer.

Important: When drilling into walls always check that there are no hidden wires or pipes etc.
Make sure that the screws and wall plugs being used are suitable for supporting your unit. Consult a qualified tradesperson if you are unsure.
Hints:
1: General rule: Always use a larger screw and wall plug if you are not sure.
2: Ensure you use the recommended drill bit to match the wall plug and hole size.
3: Ensure you drill the hole horizontally, do not force the drill or enlarge the hole.
4: Take extra care when drilling high walls, ceilings and ceramic tiles. Ensure wall plugs are inserted beyond the thickness of the ceramic tiles to avoid the tiles splitting or cracking.
5: Ensure wall plugs are well fitted and are a tight fit in the drilled hole.
Types of walls
You can use one of the following types of wall plug if your walls are made of brick, breeze block, concrete, stone or wood.
No.1 "General Purpose" wall plug

natural_image
Diagram showing a screw being inserted into a die, with no text or symbols present.Generally aerated blocks should not be used to support heavy loads, use a specialist fitting in this case. For light loads, general purpose wall plugs can be used.
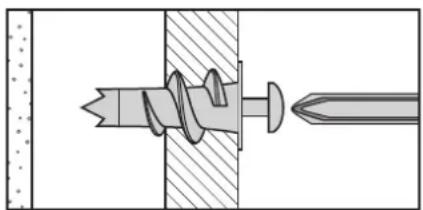
No.2 "Plasterboard" wall plug
natural_image
Technical diagram of a screw fastener assembly with a pin inserted into a housing (no text or labels)For use when attaching light loads on to plasterboard partitions.
No.3 "Cavity Fixing" wall plug

natural_image
Technical diagram of a screw fastener assembly with a pin inserted, showing internal threading and fastener tip (no text or labels)For use with plasterboard partitions or hollow wooden doors.
No.4 "Cavity Fixing-Heavy Duty" wall plug

natural_image
Technical diagram of a mechanical fastener assembly with threaded fastener and clamped spring (no text or labels)For use when fitting or supporting heavy loads such as shelving, wall cabinets and coat racks.
No.5 "Hammer Fixing" wall plug

natural_image
Diagram showing a mechanical assembly with a tool inserted into a housing, no text or symbols presentFor use with walls stuck with plasterboard. The hammer fixing allows it to be fixed to the wall rather than the plasterboard. Always check the fixing is secure to the retaining wall.
No.6 "Shield Anchor" wall plug Heavy loads

natural_image
Diagram of a mechanical assembly with a tool inserted into a housing, showing internal components and a hand holding a curved tool (no text or symbols present)For use with heavier loads such as TV & HiFi speakers and satellite dishes etc.

Care & Maintenance
Safety: Always check the fitting and location to ensure your safety in and around the home.
Fitting: From time to time check the fitting to ensure the wall plugs or screws do not become loose.

Product Guarantee
This product is guaranteed against manufacturing defects for a period of

Year
This product is guaranteed for 12 months from the date of original purchase.
Any defect that arises during this period due to faulty materials or workmanship will either be repaired free of charge or replaced.
The guarantee is subject to the following provisions:
- The guarantee does not cover accidental damage, misuse, cabinet parts, knobs or consumable items.
- The product must be correctly installed and operated in accordance with the instructions contained in this manual.
- It must be used solely for domestic purpose.
- The guarantee will be rendered invalid if the product is re-sold or has been damaged by inexpert repair.
- Specifications are subject to change without notice.
- The manufacturer disclaims any liability for the incidental or consequential damages.
- The guarantee is in addition to, and does not diminish your statutory or legal rights.
- In the event of a problem with the product with in the guarantee period call :- Argos Product Support 01759 487838.
Guarantor: Argos Ltd
489 - 499 Avebury Boulevard
Central Milton Keynes
MK9 2NW
- Important – Please read these instructions fully before installing or using
- Contents
- Safety Information 2
- Parts 3
- Installation 4-5
- User Instructions 6-8
- Care and Maintenance 9
- Troubleshooting 10
- Technical Specifications 11
- A Guide to Wall Mounting & Fixings 12
- Guarantee Back
- Important – Please read these instructions fully before installation
- This cable must not be replaced by an unauthorised person.
- Please familiarise yourself with the parts and accessories listed below
- Accessories
- Positioning and fixing to the wall
- Positioning
- Fixing to the wall
- Levelling
- Electrical connection
- Using the Hob
- SAFETY ADVICE IN THE CASE OF A COOKING PAN FIRE
- In the event of a cooking pan fire:
- NEVER USE A FIRE EXTINGUISHER TO PUT OUT A PAN FIRE
- COOKWARE SELECTION
- IMPORTANT!
- Using the OVEN
- Using the Main Oven
- Using the GRILL
- Cleaning and Maintenance
- Cleaning
- Removal of inner glass door for cleaning
- Care and use of the hotplates
- If your cooker does not appear to function correctly
- Important note:
- Hints:
- Types of walls
- Product Guarantee
Brand : BUSH
Model : BES50B
Category : Cooker