
CI392 - Washing machine CDA - Free user manual and instructions
Find the device manual for free CI392 CDA in PDF.


| Product Type | Freestanding washing machine |
| Brand | CDA |
| Model | CI392 |
| Capacity | 7 kg |
| Spin Speed | 1400 rpm |
| Energy Rating | Energy efficiency class A+++ |
| Width | 60 cm |
| Height | 85 cm |
| Depth | 60 cm |
| Weight | 70 kg |
| Power Supply | 220-240 V ~ 50 Hz, 10 A |
| Water Connection | Cold water inlet, ¾" thread |
| Programs | Cotton, Synthetics, Delicates, Quick 15', Eco 40-60, Wool, Rinse & Spin, Drain |
| Temperature Range | Cold – 90°C |
| Display | LED digital display with time remaining |
| Delay Start | Up to 24 hours |
| Safety Features | Child lock, overfill protection, unbalanced load detection, anti-leak system |
| Maintenance | Clean detergent drawer, drain pump filter regularly; descale monthly |
| Spare Parts Availability | CDA official website or authorized service centers |
| Repairability Index | 8.2/10 (parts accessible, common components) |
| Noise Level | Wash: 52 dB, Spin: 76 dB |
| Annual Water Consumption | 9900 L/year |
| Annual Energy Consumption | 180 kWh/year |
Frequently Asked Questions - CI392 CDA
User questions about CI392 CDA
0 question about this device. Answer the ones you know or ask your own.
Ask a new question about this device
Download the instructions for your Washing machine in PDF format for free! Find your manual CI392 - CDA and take your electronic device back in hand. On this page are published all the documents necessary for the use of your device. CI392 by CDA.
USER MANUAL CI392 CDA
natural_image
Line drawing of a front-loading washing machine with a circular vent and control panel (no text or symbols)WashingMachine
CE
THIS APPLIANCE COMPLIES WITH EUROPEAN DIRECTIVES
- EMC 89/336/EEC
- LOW VOLTAGE 73/23/EEC
- EEC-LABELLING 93/68/EEC
natural_image
Technical line drawing of a mechanical device with housing and mounting base (no text or symbols)
natural_image
Illustration of hands connecting a cable to a roof structure (no text or symbols)
natural_image
Line drawing of a hand holding a tool or object, with no visible text or symbols
natural_image
Line drawing of a hand adjusting a cable on a car wheel (no text or symbols)INSTRUCTIONS FOR THE INSTALLATION
ATTENTION: The washing machine must be trucked from the left hand side only (see packing label). Remove the thermoretractable film.
1 - Open the porthole door and take out the plastic bag containing the accessories. Lay down the machine on the left side leaning it on the corner, remove the packing base, and take out the two tub inside supports made by foamed part.
2 - Install the nuts on the levelling feet (you will find them in the plastic bag); screw the 4 feet on the machine, screwing the 2 reaer feet and the front right one completely by means of the provided special key. Put the machine back to the standing position.
3 - Unscrew the 3 screws of the back packing rods by means of the key (without removing them completely).
4 - Remove the rods (3) and close the holes by means of the closing plugs that you will find in the plastic accessories bag.
In case of future transportation of the washing machine it is advisable to keep the rods.
CLEANING AND MAINTENANCE
This washing machine does not require any particular maintenance. At the end of each wash it is recommended to leave the door open so that air will circulate and dry the interior of the machine. The external part of the machine should never be cleaned with abrasive detergents since this would ruin the enamel coating as well as the synthetic parts.

natural_image
Diagram showing a hand pulling a rope with directional arrows indicating motion (no text or symbols)Removing and cleaning filter
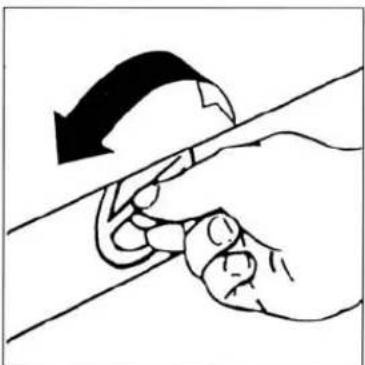
Remove the plastic base guard at the bottom of the machine by pressing and pulling upwards on the two tabs.
Place a rag under the washing machine to absorb any residual water. The filter is located under the base. Turn the filter handle counterclockwise and pull out the filter. Clean it under running water. Reinsert the filter and turn the handle clockwise until it is completely locked. WARNING: Water may leak from the filter if it is not properly tightened. Remember to clean the filter frequently to avoid excessive clogging.
The models without base are provided with a self-cleaning drain pump.
natural_image
Illustration of a hand holding a curved object over a straight line, with an arrow indicating rotation (no text or symbols)BEFORE CALLING THE TECNICHAL SERVICE CENTER:
-Check if plug is inserted
-Check that power is available in the apartment
-Check that the door is properly closed
-Check that the water tap is open
-Check that the water supply hose and water drain hose
- Are not blocked
- Check that the pump filter is clean

natural_image
Line drawing of a hand using a pulley to adjust a wooden block (no text or symbols)NOTE: If you have to call the service center, specify the model of your washing machine and if necessary the serial number which is indicated on the rating plate on the rear side of the machine.
Technical features
| dry clothes washing capacity | 5 kg (11 lb) |
| height | 850 mm (33 in) |
| width | 595 mm (23.5 in) |
| depth (piping included) | 530 mm (20.9 in) |
| total net weight | 62 kg (136 lb) approx |
| motor | 350-500 watt |
| water draining pump | 25 watt |
| water heating element | 2500 watt |
| supply voltage | 240 V - 50 Hz |
| power rating | 2850 watt approx |
| safety fuse | 13 A |
| water pressure | min 0,1 Mpa (1 bar)max 1 Mpa (10 bar) |

Positioning
After your washing machine has been placed in the desired location, level it by means of the front left foot, them the counternut must be blocked by means of the special key purposely provided. Warning: if the machine is not perfectly leveled, it will be unstable, noisy and may lead to malfunctions and broken parts. Do not place the machine on mats or carpets.

natural_image
Illustration of two hands holding a pipe, one with a handle and the other with a handle (no text or symbols)Water connection
Loading: Connect the water supply hose to a cold water tap with a 3/4" (gas type) fitting, insert the rubber washer supplied with the machine and fully tighten the ring nut. If the water tap is new or has not been used for a long time it is recommended to let the water run for a while before completing the connection. Connect the other end of the water supply hose to the machine and again insert the rubber washer between the hose and the solenoid valve fitting.
Drain: Insert the drain hose into a drain pipe (with a minimum internal diameter of 4 cm.) or hook it on a sink or bathtub, without crimping or creating any sharp curves. The hose should be positioned at a height ranging from a minimum of 70 cm. to a maximum of 100 cm. as shown in the figure.

Electrical Connection
Make sure that the electrical system can support the maximum current as indicated on the rating plate located on the rear side of the machine. The washing machine should be connected to an electrical outlet with ground, as prescribed by law. If the supply cord is damaged, it should be replaced by a special cable available at the manufacturers or at the technical service. Therefore, the company will not be responsible for any damage to persons or things due to non-compliance with these instructions.
Controls

1) Timer knob
a) choosing the programme
b) automatic indicating of the programme progress.
To obtain the required programme turn the timer knob clockwise, until the indicator coincides with the chosen programme.
2) Thermostat knob
For water temperature selection up to 95°C. Turn the knob until the indicator coincides with the temperature necessary for the chosen washing programme.
3) ON-OFF button
By selecting this button, the machine starts working.
4) Load push button
It reduces the amount of water and power. The amount of detergent can be decreased.
5) Spin speed control
When the button is out the machine spins at 650 rpm.
6) 1000 rpm operation light
The light indicates that the machine is psinning at this speed.
7) Operational light
Indicates that the machine has been switched on.
8) Energy saving push button (E)
natural_image
Diagram of a curved object with an arrow pointing to it, surrounded by parallel lines (no text or symbols)Saves energy. For wash programmes where a water temperature of 95^ C is used. When the button is depressed the water temperature is decreased while the wash time is increase. This reduces energy costs while giving excellent wash results.
Porthole door opening
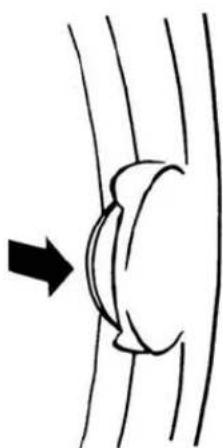
When the washing machine is on and at the end of the washing cycle the pothole cannot be opened thanks to an electrical safety device. In order to open the porthole, please press first the on-off switch, wait for about one minute, then turn the handle following the direction of the arrow.

Detergent dispenser
The detergent dispenser is divided into four compartments:
1) pour washing detergent in this compartment for the prewash cycle (MAX 45 gr.)
2) washing detergent in this compartment for the wash cycle (MAX 130 gr.).
3) pour bleaching liquid into this compartment following the advice on the packing (do not exceed in quantity over the filter grid)
4) pour softener into this compartment following the advice on the packing (max 60 ml - do not exceed in quantity over the filetr grid).
Close the dispenser after the detergent compartments have been filled. It is recommended to use non-foaming detergents and a softener in case of hard water. It is recommended to completely remove the dispenser frequently, to take off the cover of the siphon in compartment 3/4, and to wash the entire unit under running water.
Also make sure that there are no residues.
Cleaning of the dispenser
It is advisable to clean the compartment regularly, as explained below:
- press lever (A) ans slide the compartment out of its housing;
- remove the siphon cover of compartment 3-4;
- wash everything with running water;
- replace the siphon cover in the compartment making sure it its perfectly in its housing;
- replace the compartment in its housing.
Caution! Soft bleaching liquids can be used in their appropriate compartment for all the programs;
Warning!
In order to use liquid detergent you must insert the special dispenser (placed in a plastic bag at the inner of the drum) in the compartment n. 2.
Working instructions
Before using the washing machine it is advisable to run it for a complete cycle with detergent and hot water but without clothing to greasy residues and to determine that the machine is working properly. The washing machine should be stable and reasonably quiet. If during use unusual movements are noticed, make sure that it is level by altering the adjustable feet.
Preliminary checks
Before starting the machine ensure that:
- the machine is plugged in;
– the water supply hose is connected to the tap and that this is turned on: - the waste water hose is properly booked over the sink and the outlet not blocked.
If the door is not properly closed, the machine will not work. It should always be remembered that the washing machine is made to wash up to 5 kg (11 lb) of dry linen and before putting the linen inside.
Everything must be removed from the pockets. In addition please remove anything that can come loose, ex collar stays and bra bones.
Sorting the clothes
● Whites and strong colours;
● Non resistant coloureds:
● Delicate materials (silk, rayon, etc.).
It should be remembered that each of these groups must be washed separately, as they all require different water temperatures and different amounts of washing powder.
It is however essential to remove all persistent fruit, ink, lipstik stains etc. with the usual cleaning methods before putting the linen into the machine.
Washing instructions
Washing with the machine is very simple. Just remember these points: sort the clothes, put them into the machine, put the detergents in the respective chambers and choose the programme most suitable for the type of linen to be washed, by setting it on the basis of the suggestions given in the chapter «Controls», then push the on-off button to start the programme.
The knob must always be turned clockwise it is necessary to make a complete turn of the knob in order to return to the chosen position, whenever the desired one is passed by mistake.
Wash programme chart
In programmes for synthetic fibre fabrics and delicate linen the cycles ends without spinning and no water draining, so that the linen remains immersed avoiding creasing.
Before removing the clothes from the machine the water can be drained and clothes spun for a short time. To do so:
- Push the on-off button, turn the knob until the indicator corresponds to position (short spin) and then push the on-off button once again.
Choosing the correct programme
The wash symbols given on the programme selector correspond the wash care labels on your clothes. The wash tub symbol on its own represents maximum wash. The tub with a line below 📋 represents medium wash. The broken line 📋 means minimum wash. Some programmes have a normal (N) drum movement, intermediate and final spins. Other programmes will leave the clothes in the final rinse water. These programmes also have a reduced (R) drum movement.
Water can be spun away by choosing a normal (©) spin or a delicate short spin (©)
Warning.
It is important to remember, when the washing is finished, to push the on-off button, turn off the taps and disconnect the plug.
| Knob position | PROGRAMME | Energy saving swetch | Energy saving swetch | Detergent box | Pre-Wash °C | Main-Wash °C | Drum movement | Wash level | Rinses level | Number rinses | Intermed. spin | Final spin |
 | Heavily soiled white cotton & linen | —/ yes | 95 | 1-2 (3-4) | 38 | 95-60 | N | I | II | 3 | YES | YES |
 | Heavily soiled cotton linen, rayon coloureds | — | 60 | 1-2 (3-4) | 38 | 60 | N | I | II | 3 | YES | YES |
| Heavily soiled delicate coloureds | — | 40 | 1-2 (3-4) | 38 | 40 | N | I | II | 3 | YES | YES | |
 | Normally soiled white cotton & linen | —/ yes | 95 | 2 (3-4) | — | 95-60 | N | I | II | 3 | YES | YES |
 | Normally soiled, cotton linen, rayon coloureds * | — | 60 | 2 (3-4) | — | 60 | N | I | II | 3 | YES | YES |
| Normally soiled, delicate coloureds | — | 40 | 2 (3-4) | — | 40 | N | I | II | 3 | YES | YES | |
 | Normally soiled, cotton linen, rayon coloureds | — | 60 | 2 (3-4) | — | 60 | N | I | II | 3 | YES | YES |
| Normally soiled, cotton delicate coloureds | — | 40 | 2 (3-4) | -- | 40 | N | I | II | 3 | YES | YES | |
 | Normally soiled, cotton linen, rayon coloureds | — | 40 | 2 (4) | — | 40 | N | I | II | 3 | YES | YES |
 | Rinses with spin | — | — | (3) | — | — | N | — | II | 3 | YES | YES |
 | Conditioning with spin cotton linen | — | — | 4 | — | — | N | — | II | 1 | — | YES |
 | Spin | — | — | — | — | — | — | — | — | — | — | YES |
 | Normally synthetic fibres non iron | — | 60 | 2 (4) | — | 60 | R | I | II | 3 | — | — |
| Normally soiled, coloureds synthetic fibres non iron | — | 50 | 2 (4) | — | 50 | R | I | II | 3 | — | — | |
 | Normally soiled, coloureds synthetic fibres non iron | — | 40 | 2 (4) | — | 40 | R | I | II | 3 | — | — |
 | Rinses without spin | — | — | (4) | — | — | R | — | II | 3 | — | — |
 | Conditioning without spin | — | 4 | — | — | R | — | II | 1 | — | — | |
 | Short spin, delicates | — | — | — | — | — | — | — | — | — | — | YES |
| [D4ST] | Water draining | — | — | — | — | — | — | — | — | — | — | — |
| [CHXS] | Pure wood warm wash | — | 30 | 2 (4) | — | 30 | R | II | II | 3 | — | — |
| Wool, cold wash | — | — | 2 (4) | — | — | R | II | II | 3 | — | — | |
 | Rinses without spin | — | — | (4) | — | — | R | — | II | 3 | — | — |
 | Conditioning without spin | — | 4 | — | — | R | — | II | 1 | — | — | |
 | Short spin, delicates | — | — | — | — | — | — | — | — | — | — | YES |
 | Water draining | — | — | — | — | — | — | — | — | — | — | — |
N.B.: The use of the compartments, the reference number of which is bracketed, is optional
* EN 60456 PROGRAM 60°C

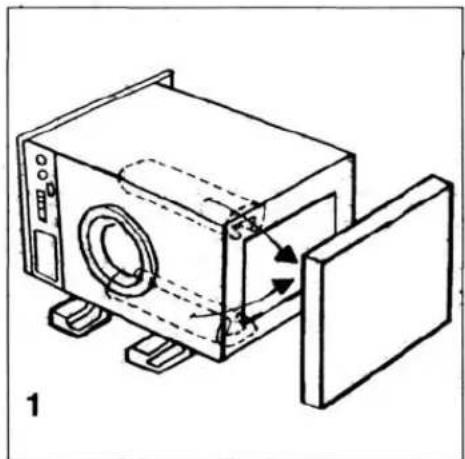
— Make holes on the wooden door according to the instructions overleaf.
— take hinges (A) out of the bag and fix them to the door.
— Take jack (B); its support (C) and fix one to the other by means of screws (G).
— Install hinges (A), jack (B) and separator (E) to the door.
— Fix stopping hook (D) to front panel of the washing machine by means of screws (F).
— Insert caps (H) into the holes, as shown in the figure.
— Make holes into the base and fix magnets (L).
DOOR OPENING REVERSAL
To open the door from left to right, follow the instructions by turning the position of the holes.


- CE
- THIS APPLIANCE COMPLIES WITH EUROPEAN DIRECTIVES
- INSTRUCTIONS FOR THE INSTALLATION
- CLEANING AND MAINTENANCE
- Removing and cleaning filter
- BEFORE CALLING THE TECNICHAL SERVICE CENTER:
- Positioning
- Water connection
- Electrical Connection
- Controls
- Porthole door opening
- Detergent dispenser
- Cleaning of the dispenser
- Warning!
- Working instructions
- Preliminary checks
- Sorting the clothes
- Washing instructions
- Wash programme chart
- Choosing the correct programme
- Warning.
- DOOR OPENING REVERSAL
Brand : CDA
Model : CI392
Category : Washing machine