
LGV65 - Cooker LEISURE - Free user manual and instructions
Find the device manual for free LGV65 LEISURE in PDF.


| Product Type | Freestanding Cooker |
| Brand | Leisure |
| Model | LGV65 |
| Overall Dimensions (H x W x D) | 90 cm x 60 cm x 60 cm |
| Weight | 55 kg |
| Energy Supply | Gas (Natural or LPG) for hob; 220-240 V AC for electric oven |
| Hob Type | 4 Gas Burners (including triple-ring wok burner) |
| Oven Type | Electric Multifunction Oven with Fan |
| Oven Capacity | 65 Liters |
| Oven Functions | Conventional, Fan-forced, Grill, Base heat, Defrost |
| Hob Ignition | Automatic electronic ignition |
| Safety Features | Flame failure safety device on all gas burners, automatic oven shut-off timer, child lock |
| Cleaning | Enamel interior with catalytic liners (self-cleaning) for oven; removable hob grates |
| Oven Door | Removable double-glazed door for easy cleaning |
| Control Type | Rotary knobs for hob and oven functions with integrated digital timer |
| Energy Efficiency Class (Oven) | A |
| Installation | Freestanding, requires gas connection and dedicated electrical socket |
| Spare Parts Availability | Standard parts (grates, burner caps, oven elements, knobs) available from authorized dealers |
| Warranty | 2 years limited warranty |
| Accessories Included | Oven shelf, baking tray, grill pan with handle |
Frequently Asked Questions - LGV65 LEISURE
User questions about LGV65 LEISURE
0 question about this device. Answer the ones you know or ask your own.
Ask a new question about this device
Download the instructions for your Cooker in PDF format for free! Find your manual LGV65 - LEISURE and take your electronic device back in hand. On this page are published all the documents necessary for the use of your device. LGV65 by LEISURE.
USER MANUAL LGV65 LEISURE
Users Guide & Installation
DOUBLE OVEN
GAS COOKER

natural_image
Two identical circular mechanical components with reflective surfaces, no visible text or symbolsLGV65

Leisure Consumer Products
36-38 Caxton Way
Watford
Herts WD18 8UF
Tel: 0845 6004916
Facsimile: 0845 6004922
www.Leisurecp.co.uk
Dear customer
Congratulations on your choice of a quality cooker which has been designed to give you lasting service.
The cooker must be installed by a qualified person in accordance with current regulations and used in a well ventilated space.
Please read these instructions thoroughly before installing or using and keep for handy reference. Make sure you understand the controls prior to using your appliance. This cooker must only be used for its intended purpose, ie the cooking of food in the home. Failure to observe these instructions may invalidate your right to free service during the guarantee period.
If you have any questions, or if you are not sure about any information contained in this booklet please contact us - details are on the back cover.
Your Consumer Products
safety symbols
The use of any appliance and cookers in particular (which use gas and high temperatures) require the following of basic common sense safety rules.
There is a danger of injury to the person and of damage to the cooker, the kitchen and your home.
These are itemised in the first section 'Safety in the home'. Where accidents are most common, we repeat these warnings in the main text using the following symbols:
Where you, other people, toddlers and children are at risk

Where there is a danger of damage to the cooker, utensils, surrounding areas and property
Please note them for your own safety.
Part no. 285.9205.21
rev.B-08.04.2008
contents

Introduction
Welcome/Safety symbols 2
Safety in the home 4
Installation
Know your cooker/Specification 6
Location/Ventilation 7
Installation 8
Electrical connection 9
Gas connection 10
Gas conversion 11
For the very first time
Preparation and burning off 12
Operating
Operating the hob 13
Saucepans/Deep fat frying 14
Operating the grill 15
Operating the top oven 17
Operating the main oven 18
Operating the clock/programmer 19
Cooker care
Care & cleaning 20
Trouble shooting 21
Replacing the oven lamp 21
Future transportation 21
Guarantee/Service 22

natural_image
Simple line drawing of a kitchen interior with a person standing near the oven (no text or symbols)
Look after yourself, family and friends
- Ensure that children are kept away whilst the cooker is in use and until it has cooled as parts become very hot. Don't leave them unsupervised.
- During use surfaces get hot. Don't touch hot surfaces during use.
- Close supervision while cooking is essential at all times.
- Never use when judgement or co-ordination is impaired by the use of alcohol and/or drugs.
- Don't use aerosol sprays near the cooker as most are highly inflammable.
- Special care should be taken when cooking oily and fatty food as overheating of such food can cause them to catch fire.
• Always use good quality oven gloves when removing hot utensils and the grill pan from the oven.
- Ensure handles of pans can not accidentally be caught or knocked and do not get heated by adjacent burners.
- Check all controls on the appliance are switched off after use.
• Take care when opening the door. Let steam and hot air escape before removing the food.
- Select the correct shelf position before turning the oven or grill on - don't move oven shelves when hot.
- Don't use water to extinguish oil or fat fires.
- Don't heat up unopened food containers as pressure can build up causing the container to burst.
- Don't use round-bottomed traditional woks. Use flat-bottomed types.
- Don't store items above the cooker that children may try to reach.

natural_image
Simple diagram showing four circular objects with sun rays and a black X mark, no text or symbols present.This appliance is not intended for use by person with reduced physical, sensory or mental capabilities or lack of experience and knowledge unless they have been given supervision or instruction concerning use of the appliance by a person responsible for their safety. Children should be supervised to ensure that they do not play with the appliance.
safety in the home

Look after your cooker and home
Clean your cooker regularly, ideally after each use. Always turn off the mains electricity supply and make sure pan supports, burners and other surfaces are cool before touching them.
- Spillage should be dealt with as soon as it occurs, taking due care as the hob surface may be hot. Any spillage left on the surface after peaking should be cleaned off before
after cooking should be cleaned on before the hob is turned on again to prevent baking on. - Don't use biological washing powder or bleach products, harsh abrasives or chemical cleaners for cleaning the oven inner panels.
- Don't allow anyone to sit or stand on the cooker or door.
- Don't move the cooker by pulling by the door and/or handle.
- Ensure that no flammable materials are adjacent to the cooker as the sides become hot during use.
- Don't store flammable materials, aerosols etc in adjacent cabinets.
- Don't place flammable or plastic items on or near the hob, and never place wet cloths etc. on the hob to dry.
- Keep all ventilation slots clear of obstructions.
- Don't leave a burner on for long periods when not covered by a pan.
- Don't cover shelves with metal foil as the air circulation in the oven will be disrupted.
- Don't place dishes, pans, trays directly on the oven compartment base.
- Don't line the grill pan with aluminium foil this will result in an increase in temperature and could result in damage to your cooker or increased risk of fire.
- Don't use the cooker with glass windows removed.
Don't use the cooker for
- Hanging towels and dish cloths etc on the handles.
- Warming plates under the grill.
• Heating the kitchen. - Drying.
Food hygiene
- Ensure meat and poultry is thoroughly defrosted before cooking.
- Check food is thoroughly cooked and is piping hot.
• Always refer servicing to a qualified appliance service engineer.

natural_image
Simple line drawing of a person sitting at a desk with a cross symbol on the desk (no text or labels)guarantee
Your Cooker is guaranteed against the cost of breakdown repairs for twelve months from the date of the original purchase.
What is covered?
- Repairs necessary as a result of faulty materials, defective components or manufacturing defects.
- The cost of functional replacement parts, but excluding consumable items.
- The labour cost of a Leisure Consumer Products approved repairer to carry out the repair. What is not covered?
- Transit, delivery or accidental damage or misuse and abuse.
- Cabinet or appearance parts, including knobs, flaps, handles or container lids.
- Accessories or consumable items including but not limited to filters and light bulbs.
- Repairs required as a result of unauthorized repair or inexpert installation that fails to meet the requirements contained in the user instruction book.
- Repairs to products used on commercial or non-residential household premises.
Important notes
- Your Leisure Consumer Product is designed and built for domestic household use only.
- The guarantee will be void if the product is installed or used in commercial or non-residential domestic household premises.
- The product must be correctly installed, located and operated in accordance with the instructions contained in the User Instruction Booklet provided.
- Professional installation by a qualified Electrical Domestic Appliance Installer is recommended for all Washing Machines, Dishwashers, Electric Cookers and Cooker Hoods.
- Gas Cookers must only be installed by a CORGI (or BORD GAIS) registered Gas Installer.
- The guarantee is given only within the boundaries of the United Kingdom and the Republic of Ireland.
- The guarantee is applicable only to new products and is not transferable if the product is resold.
- Leisure Consumer Products disclaims any liability for incidental or consequential damages.
- The guarantee does not diminish your statutory or legal rights.
Please keep your purchase receipt or other proof of purchase in a safe place; you will need to have it should the product require attention under guarantee.
You should also complete the details below; it will help us assist you when requesting service. (The model is printed on the Instruction Booklet and Serial Number is printed on the Rating Label affixed to the appliance)
Model No:
Retailer:
Serial No:
Date of purchase:
For service under guarantee simply telephone the appropriate number below
UK Mainland & Northern Ireland
| Fridges & Freezers | 0845 600 4903 |
| Electric Cookers | 0845 600 4921 |
| Gas & Dual Fuel Cookers | 0845 600 4921 |
| Washing Machines & Dishwashers | 0845 600 4906 |
Republic of Ireland
| All Refrigeration, All Cookers, Washing Machines & Dishwashers | 01862 34 11 |
Before requesting service please check the trouble-shooting guide in the Operating
Instructions as a charge may be levied where no fault is found even though
your product may still be under guarantee.
Service once the manufacturer's guarantee has expired
If you have purchased an extended guarantee please refer to the instructions contained within the extended guarantee agreement document. Otherwise please call the appropriate number above where service can be obtained at a charge.
Should you experience any difficulty in obtaining service please contact the Leisure Consumer Products Customer Help-Line.
Tel: 0845 600 4918 e-mail: service@leisurecp.co.uk
trouble shooting
know your cooker
If the cooker does not work
If the appliance does not operate check whether:
• The power and gas supply are on.
- The fuse has blown/circuit breaker has tripped/main distribution switch has been turned off.
• The temperature control has been set correctly.
- The main oven will not light has the clock been set.
- If the clock programmed for auto cooking, The ignition is operating continuously. Check your electric power supply earthing system. This cooker must be earthed if in doubt consult a qualified electrician.
If the appliance is still not operating after the above checks, please refer to the section on how to obtain service.
Please ensure that the above checks have been made as a charge will be made if no fault is found.
Performance characteristics when in use
- When using your appliance for the first few times, an odour and/or smoke may be emitted which is normal - see page 12.
- It is normal for the metal parts to produce noise when in use, this is due to expansion and contraction.
- When in use, steam may be produced which is normal and not a fault of the cooker.
- At the end of a cooking session, it is normal to have a momentary puff of steam when the oven door is opened. This should disperse in a few seconds.
- If, whilst cooking, steam produced comes in to contact with cool surface's on the outside of the appliance, it will condense and produce water droplets. This is quite normal and is not a fault.
replacing the oven lamp
Switch off at the mains.
1 Remove the glass cover of the lamp by turning it anti-clockwise.
2 Remove the bulb by turning it anti-clockwise.
3 After installing the correct bulb, reinstall the glass cover.
Replacement light bulbs can be easily obtained from a good local electrical or DIY store.
Warning!
Ensure the appliance is switched off at the mains before replacing the lamp to avoid the possibility of electric shock.
future transportation
Keep the original carton and other packaging material in a safe place. Transport the cooker in its original carton. Follow the instructions that are printed on the carton.
To prevent the accessories inside the oven from damaging the oven door, tape a strip of cardboard onto the inside of the oven door that lines up with the position of the trays. Tape the oven door to the side walls.
If you do not have the original carton
Take the necessary precautions in order to prevent the exterior panels, and the glass surfaces of the oven from being damaged.
Pack the oven in bubble wrap or thick cardboard and tape it securely in order to prevent damage during transportation.
The oven must be transported upright. Do not place other items on the top of the cooker.

Some of the illustrated details may vary
specification
| External dimensions width x depth x height600mm x 600mm x 900mm | |
| Cooker height with glass lid raised 14805mm. | |
| Net weight | 63.5 kg |
| Gross weight | 71.3 kg |
| Front-right rapid burner capacityNominal rate | 2.9 kW |
| Rear-left semi-rapid burner capacityNominal rate | 2.0 kW |
| Rear-right auxiliary burner capacityNominal rate | 1.0 kW |
| Front-left semi-rapid burner capacityNominal rate | 2.0 kW |
| Supply voltage | 230V~ 50Hz |
| Top oven burnerNominal rate | 2.0 kW |
| Main oven burnerNominal rate | 2.5 kW |
| Grill burner | 2.3 kW |
| Lamp | 25 W | |
| Total power (gas) | 12.7 kW | |
| Ignition | Auto electric on all burners | |
| Safety device | Gas valves are lockable- flame failure device | |
| Gas | Supply Pressure | Destination Countries |
| G20 | 20mbar | GB |
| G30 | 28 - 30 mbar | |
| G 31 | 37 mbar | |
| cat II 2H3+ | ||
| For Cooker set up condition please refer to rating label | ||
| Because we continually strive to improve our products, we may change our specifications and designs without prior notice. | ||
Accuracy
Note that times and temperatures in this book are for guidance only.
location
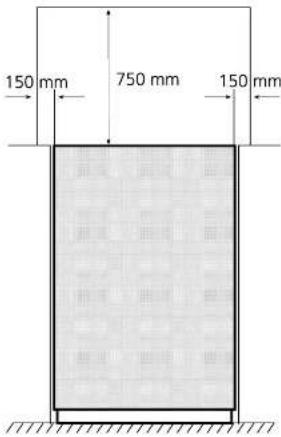
- The cooker is designed to fit between kitchen cabinets spaced over 600 mm apart. The space either side of the cooker need only be sufficient to allow withdrawal of the cooker for servicing. It can be used with cabinets on one side or both sides as well as in a corner setting. It can also be used free-standing.
- Adjacent side walls above the appliance must not be nearer to the cooker than 150mm and should be of heat resistant material. Leave at least 750 mm clearance above the hob.
- Excess steam from the oven is expelled at the rear of the appliance therefore the wall behind the cooker needs to be protected against grease and moisture.
ventilation

Natural ventilation is important for the correct functioning of the appliance and your own safety.
Prolonged intensive use of the appliance may call for additional ventilation, for example the opening of a window, or the use of permanent fixed mechanical ventilation system, for example, an extractor fan or cooker hood that ventilates to the outside.
Room considerations and built-in ventilation
The appliance must not be installed in a room without a window or other controllable opening. If it is installed in a room without a door which opens directly to the outside, a permanent opening is required. The size of the free area of a permanent opening must be as follows:
| Room volume | Opening |
| Up to 5m3 | 100cm2 |
| 5m3 to 10m3 | 50cm2 |
| Above 10m3 | None |
| In cellar or basement | 65cm2 |
These requirements apply for a full cooker equivalent, however if there are other fuel burning appliances in the same room. The regulations in force for the UK and Ireland should be consulted.
care & cleaning

Turn OFF at the mains before cleaning.
- Before switching on again ensure that all gas controls are in the OFF position.
- Make sure that the oven, grill and burners are sufficiently cool before you start cleaning.
- A residual heat will remain after you switch off the cooker so take care not to touch hot surfaces.
Exterior
Use a damp cloth to clean the outside. Never use any sharp instruments, abrasive household cleaner, or detergents for cleaning. For hard stains use suitable washing liquid.
Burners
The pan supports can be removed and the top burner plate can be cleaned with soapy water and rinsed with a dry cloth.
Wash and rinse the gas burner caps and the pan supports with soapy water. Never wash them in a dishwasher. For the dirt and stains on the burner heads that does not wash off, use a proprietary metal surface cleaner.
Hob surround
Clean with a cloth wrung out in soapy water. Stubborn stains can be removed with a cream, paste or liquid cleaner. Check that the cleaning agent used is approved by the Vitreous Enamel Development Council.
Control panel
Wipe over the control panel with a damp cloth and polish with a dry cloth. Do not use oven cleaners or aerosol sprays, scouring pads or abrasive powder for cleaning the plastic knobs or end caps as damage will occur. Take extreme care when removing and re-fitting control knobs. Never operate the appliance without all control knobs fitted. The correct control knob must be fitted to the corresponding control.
Grill and oven interiors
Take out all trays and pans. Clean out the interior with a piece of moist, soapy cloth. Then, clean it once more with a wet piece of cloth and leave it to dry.
We recommend that grill elements be wiped with a damp cloth to remove any fat splashes. This will prevent fumes from any fat being burned off when the cooker is next used.
Never clean the inside of the grill or oven and trays with hard brushes, steel pads or knives.
Do not use cleaning agents containing acid or chlorine on the handle. Cleaning can be performed using a soft piece of cloth and soapy water or commercially available special surface cleaners.
Oven interior
Remove the rod shelves for washing in the sink. Use a fine steel wool soap pad for removing stubborn stains from the rod shelves and

floor of the oven. Take care during cleaning not to damage, bend or dislodge from the surrounding clips the thermostat sensor which is located at the top right hand side of the oven.
Catalytic liners should never require cleaning if very hot temperatures are used regularly.
Grill / Oven doors
Wipe over the door outer panels with a cloth wrung out in hot soapy water, then after wiping with a cloth wrung out in clean water, dry with a soft clean cloth. Do not use scouring pads or abrasive powder which may scratch the surface. Take care during cleaning not to damage or distort the door seal. Ensure that the door seal is dry after cleaning. Do not lift the door seal.
The inner glass door panels can be removed for cleaning. Open the door fully and gently lift out the glass using extreme care to ensure that the edges of glass are protected. Clean as above, but do not use household detergents, bleach, scouring pads or rust removers. Reinstall the glass panels carefully preventing sudden shocks.
Over time...
- Slight discolouration of liners and other surfaces may occur in time. This does not affect the functioning of the appliance.
* Model dependant.
operating the clock/minute minder
installation
To set the time of day
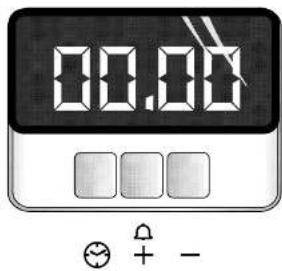
The clock display uses the 24 hour system, ie 8:30pm = 20:30.
1 Check that the electricity supply is switched on.
2 When switched on the display will show 0.00 flashing.
3 Press 🕒 and then press either "+" or "-" to set the correct time of day.
- If the electricity supply has been off, "+" must be pressed once before "-", if it is required to reduce the time of day.
4 Hold the 🕒 button until the hours display will flash. Change the hours only by using the "+" or "-" button. The minutes and hidden seconds will not be affected.
To set the minute minder
1 Press "+" until the required time is set. A bell symbol will light up.
- During setting the time adjusts in 10 second intervals up to a maximum of 99 minutes 50 seconds.
- It can also be adjusted by pressing -
2 At the end of the set time, a bleeping sound will be heard and the bell symbol will disappear.
- The bleeper can be cancelled by pressing "+".
- If necessary the minute minder can be cancelled before the bleeper sounds by pressing "-" until 0.00 appears.
Bleeper sound
To adjust the pitch of the bleeper, press -while the bleeper is sounding as follows.
1 Press "+" and set 10 seconds.
2 When the bleeper sounds, press and release "-" until the preferred pitch is set.
3 Press and release "+" to cancel the bleeper.

Unpacking
All packing materials, protective film and transit protectors must be removed.
Installers
The appliance must only be installed by a competent person.
In the UK, CORGI registered installers (including the Regions of British Gas) undertake to work to safe and satisfactory standards.
Regulations
The cooker must be installed in accordance with the Gas Safety (Installation and Use) Regulations and the relevant Building Regulations in force.
Levelling
The appliance should be located on a level surface. The two front and rear feet can be adjusted as required. To ensure that your appliance is standing level adjust the two front or rear feet by turning clockwise or anticlockwise until the product is in firm contact with the floor.
Stability Chain
The cooker must be secured by the security chain to the wall or partition behind the cooker.

Moving your cooker
If your cooker is fitted with a flexible hose the cooker can be moved for cleaning. Make sure that the floor covering is firmly fixed or removed to prevent it being disturbed.
TAKE CARE NOT TO STRAIN OR DAMAGE THE GAS HOSE (OR ELECTRICITY SUPPLY CABLE) WHEN MOVING THE COOKER.

Release the stability chain as you ease the cooker out. Don't forget to refit it when you replace the cooker.
Lift the front feet clear off the floor by lifting at the ends of the hotplate fascia. Do not move by pulling the door handle or knobs.
Move the cooker a bit at a time, checking behind it to make sure that the gas hose has sufficient slack to allow the cooker to move forward as you go along.
When you replace the cooker, again check behind to make sure that the gas hose or cable are not caught or trapped. Take care not to twist it within the gap between the kitchen units as damage may occur to the cooker or the units.
Check that the cooker stability chain has been reconnected.
electrical connection
operating the bottom oven
Electrical requirements
Before you insert the plug into the wall socket make sure that the voltage and the frequency shown in the rating label corresponds to your electricity supply.
We recommend that this appliance be connected to the mains supply via a suitable switched and fused socket in a readily accessible position.
Should the mains lead of the appliance become damaged or need replacing at any time, it must be replaced by a special purpose made mains lead which can only be obtained from a Leisure consumer products Authorised Service Agent.

Warning
This appliance must be earthed
If the fitted moulded plug is not suitable for your socket, then the plug should be cut off and an appropriate plug fitted.
Destroy the old plug, which is cut off as a plug with a bared cord could cause a shock hazard if inserted into a socket elsewhere in the house.
The moulded plug on this appliance incorporates a 13A fuse. Should the fuse need to be replaced an ASTA approved BS1362 fuse of the same rating must be used. Do not forget to refit the fuse cover. In the event of losing the fuse cover, the plug must not be used until a replacement fuse cover has been fitted. Colour of the replacement fuse cover must be the same colour as that visible on the pin face of the plug. Fuse covers are available from any good electrical store.
Ignition
The ignition system is reliant on the cooker being plugged in to suitable mains power supply which is switched on.

Important
Fitting a different plug
As the colours of the wires in the mains lead of this appliance may not correspond with the coloured markings identifying the terminals on your plug, proceed as follows:
1 Connect the green - yellow or green (earth) wire to the terminal in the plug marked 'E' or with the symbol # or coloured green and yellow or green.
2 Connect the blue (neutral) wire to the terminal in the plug marked 'N' or coloured black.
3 Connect the brown (live) wire to the terminal in the plug marked 'L' or coloured red.
With the alternative plugs a 13A fuse must be fitted either in the plug or adaptor or in the main fuse box. If in doubt contact a qualified electrician.
Green and yellow
or green

Mains cable routing
The mains cable should be routed away from the appliance, the ventilation slots and the vent outlet. It should not be obstructed when pushed in to position between the appliance and the wall.

The clock must be set to the current time
before oven can be operated (see page 21)
Parts may become hot when the oven is in use, children must be kept away.
There is a safety device that prevents the build-up of gas inside the cavity if the burner doesn't light or goes out for any reason.
1 Open the door
2 Adjust the shelves to the positions required.
3 Press and turn the control anti-clockwise to gas mark 7.
4 There is an automatic ignition system which starts clicking when the oven is turned on and stops when the oven burner lights.
Please note the main oven will not work until the clock has been set to the current time.
5 Close the door.
6 Allow 10 minutes for pre-heating.
7 Set the knob as required or as recommended in the chart.
8 To switch off turn the knob clockwise to the "●" off position.
- If the burner doesn't light the first time, restart the ignition once or twice again by turning off and on the knob. If it still doesn't light, turn off and wait for 1 minute to allow gas to disperse before trying again.
- Ensure you stand back from the appliance when opening the oven door to allow any build up of steam or heat to escape.
- Check food is thoroughly cooked and is piping hot.
- Do not heat an unopened glass or metal container in the oven.
- Do not allow spillovers to accumulate as these may present a fire hazard.
- The oven has several openings and vents designed in. They must not be blocked or covered.
- Do not use aluminium foil on the oven bottom.
Light button
Switches the oven light on or off.
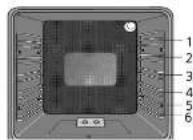
Shelf levels
Oven temperature chart
This chart is for guidance only, follow food manufacturers recommendations whenever available.
| Food | Gas mark | Cooking time | Shelf position | Preheat | Gas mark |
| Beef | 4 - 5 | 25-30 mins per 450g + 30 mins | 4 | 10 mins | 7 |
| Lamb | 4 - 5 | 25-30 mins per 450g + 30 mins | 4 | 10 mins | 7 |
| Pork | 4 - 5 | 30-35 mins per 450g + 30 mins | 4 | 10 mins | 7 |
| Poultry | 4 - 5 | 25-30 mins per 450g + 25 mins | 4 | 10 mins | 7 |
| Casseroles | 2 - 3 | 1.5-2 hours, dependant on quantity | 3-4 | No | |
| Fruit cake | 2 - 3 | Dependent on size | 2-3 | 10 mins | 7 |
| Small cakes | 4 - 5 | 15-20 minutes | 2-3 | No | |
| Victoria sandwich | 4 - 5 | 22-28 minutes | 4 | 10 mins | 7 |
operating the top oven
gas connection
Using as an oven
1 Open the door.
2 Position the shelf in a suitable position.
3 Press and turn the control anti-clockwise to gas mark 7.
4 While keeping it depressed, press the ignition button to light the burner.
5 Keep the control depressed for 15 seconds after the burner has lit to over-ride the safety device.
Rotation of the tray may be required to obtain even cooking.
6 Allow the top oven to preheat for 10 minutes.
7 Set the knob as required or as recommended in the chart
8 To switch off turn the knob clockwise to the "●" off position.

Top oven temperature chart
This chart is for guidance only, follow food manufacturers recommendations whenever available.
| Food | Gas mark | Cooking time | Shelf position | Preheat | Gas mark |
| Beef | 4 - 6 | 25-30 mins per 450g + 30 mins | 2 | 10 mins | 7 |
| Lamb | 4 - 6 | 25-30 mins per 450g + 30 mins | 2 | 10 mins | 7 |
| Pork | 4 - 6 | 30-35 mins per 450g + 30 mins | 2 | 10 mins | 7 |
| Poultry | 4 - 6 | 25-30 mins per 450g + 25 mins | 2 | 10 mins | 7 |
| Casseroles | 2 - 3 | 1.5-2 hours, dependant on quantity | 2 | 10 mins | 7 |
| Fruit cake | 2 - 3 | Dependent on size | 2 | No | |
| Small cakes | 3 - 4 | 10-15 minutes | 2 | 10 mins | 7 |
| Victoria sandwich | 4 - 5 | 20-25 minutes | 2 | No |
'S' (Slow) cooking
The 'S' setting is a low temperature setting. You can cook on 'S' throughout, or use a 30 minute 'boost' period at gas mark 6 and then 'S' cook.
When roasting joints, poultry or pot roasting, always cook at Mark 6 for 30 minutes at the beginning of the cooking period.
Guide to thermostat settings
Because there are different ways of recording oven temperatures no direct conversion can be given from Gas Mark to temperature measured in the oven. The following chart shows the relationship between Gas Mark and the commonly used temperatures.
| Gas Mark | Oven heat | Temperature |
| S,1/4,1/2 | Very cool | 105°C - 120°C225°F - 250°F |
| 1 | Cool or slow | 135°C275°F |
| 2 | Cool or slow | 150°C300°F |
| 3 | Warm oven | 160°C325°F |
| 4 | Moderate | 175°C350°F |
| 5 | Fairly hot oven | 190°C375°F |
| 6 | Hot oven | 200°C400°F |
| 7 | Hot oven | 220°C425°F |
| 8 | Very hot oven | 230°C450°F |
| 9 | Very hot oven | 240°C460°F |
Gas supply
Your oven must only be used on natural gas or LP gas.
Natural Gas
The cooker is designed for UK installation using a flexible connection with tubing in accordance with the regulations in force. Length of 900mm is recommended.
LP Gas
For flexible connections use a bayonet type hose, suitable for use on LP Gas up to 50 mbar pressure rise. The flexible hose should be coloured black with a red stripe, band or label.
Gas flexible hose
If a flexible hose is used it must not come into contact with the top 150mm/6 inches (the shaded area on the diagram) of the rear of the appliance.
Do not pass the hose through the hot region behind the oven.
Connection
Connect the flexible gas hose to the oven as follows.
1 Use nonsetting gas sealant on the connection to the cooker.
2 Connect to the gas supply pipe at the rear of the cooker (1/2 in BSP).
3 Assemble burner caps and rings fit pan supports in position (left and right sides).
4 Turn on the gas supply and check for soundness.
5 Light two burners and check that the pressure is correct.

Gas leaks
If you smell gas, turn off all gas controls and extinguish any open flame. Open a window to ventilate the room. Don't touch any electrical switches. Contact your local Gas Supplier immediately.


gas conversion
Ensure that the local distribution and adjustment conditions are compatible.
Check the rating plate to identify cooker preset condition.
Conversion from natural gas to LPG The conversion must only be implemented by a qualified engineer.
- Replace the natural gas orifices by the LPG equivalents.
- Check gas soundness.
- Take out the top lid, remove the burners' plate and remove the control panel as explained on the previous page.
- Ignite the burner that should be adjusted, turn the knob to the reduced position, pull and take the knob off.
- Adjust the reduced rates of the burners.
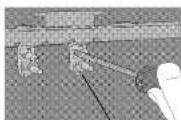
A: Hob
A. Hob burners
* Adjust screw "A"
1-1 1/2 turns
clockwise to obtain
flame length of
about 5 mm
* Adjust each
hurnes separately
burner tap
Barrel separately.
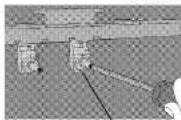
A: Hob
burner top
A. Hob burners
* Adjust screw "A"
1-1 1/2 turns
clockwise to obtain
flame length of
about 5 mm
* Adjust each
burner separately
B. Oven burner
* Adjust screw "B" 1/2 turn clockwise.
* Set oven thermostat to "1".
* Ignite oven burner.
* Close oven door and wait for thermostat to
operate 10-15 minutes (reduced rate)
* Adjust screw "B" to obtain a flame length of
2-3 mm (rotation of screw "B" clockwise will
2.5 min (rotation of screw) - clockwise will decrease, anti-clockwise will increase the flame length).

B: Oven
thermostat
3
6. Apply the following labels;
* Overstick current rating plate with modified cut out label ensuring serial number is still visible. * Tick appropriate LPG gas box and fix adjacent to the rating plate label.
Conversion from LPG gas to NG
The conversion must only be implemented by a qualified engineer.
1. Replace the gas orifices by the NG equivalents.
2. Check gas soundness.
3. Take out the top lid, remove the burners'
plate and remove the control panel as explained
on the previous page.
4. Ignite the burner that should be adjusted, turn
the knob to the reduced position, pull and take
the knob off.
5. Adjust the reduced rates of the burners.
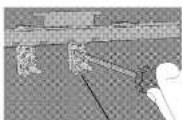
A: Hob
burner tap
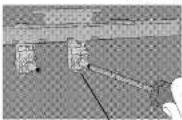
A: Hob
burner top
A. Hob burners
* Adjust screw "A"
1-1 1/2 turns anti
clearwise to obtain
clockwise to obtain flame length of
name length about 5 mm
about 5 mm.
Adjust each
burner separately
A. Hob burners
* Adjust screw "A"
1-1 1/2 turns anti
clockwise to obtain
flame length of
about 5 mm
* Adjust each
burner separately
B. Oven burner
* Adjust screw "B" 1/2 turn anticlockwise.
* Set oven thermostat to "1".
* Ignite oven burner.
* Close oven door and wait for thermostat to
operate 10-15 minutes (reduced rate).
* Adjust screw "B" to obtain a flame length of
2-3 mm (rotation of screw "B" clockwise will
2.5 min (rotation of screw - 30 clockwise will decrease, anti-clockwise will increase the flame length).

B: Oven
thermostat
6. Apply the following labels;
* Overstick current rating plate with modified cut out label ensuring serial number is still visible.
* Tick appropriate NG gas box and fix adjacent to the rating plate label.
operating the grill

Use of grill pan handle
Warning! Always use an oven glove to protect your hand when using the grill as all metal parts can become very hot.
The grill pan has a detachable handle. Make sure the handle is securely located between the raised profiles across the front of the grill pan. See the diagrams for fitting the handle. To remove the handle, reverse the sequence of operations.
Always take care not to touch hot surfaces when using the grill pan handle. Ensure when using the grill pan handle that it is centralised and secure. If the handle is left in position when grilling, it will get very hot.

Grilling guidelines
Use the following chart for guidelines. For thicker foods requiring longer cooking, turn the control to a lower setting after the initial sealing on both sides. The thicker the food, the lower the control should be set. When grilling thicker food, the grill rack should be turned over to its lowest position.

natural_image
Illustration showing two hands using a tool to cut or adjust a component, with no visible text or symbols.| Food | Grill setting | Approximate cooking time |
| Toasting of Bread products | Full on | 3-10 mins |
| Small cuts of meat, sausages, bacon, etc. | High to Full | 15-20 mins |
| Chops etc.Gammon steaksChicken pieces | Medium | 20-25 mins. Wire rack used in upturned position for chicken. |
| Fish:FingersWhole Fillets | Medium | 10-20 mins. Whole fish and fillets placed in the base of the grill pan. |
| Fish in breadcrumbs | Medium | 15-20 mins. |
| Pre-Cooked potato products | Medium | 15-20 mins. |
| Pizzas | Medium | 12-15 mins. in the base of the grill pan. |
| Browning of food | Full on | 8-10 mins. Dish placed directly on the base of the grill compartment. |
operating the grill


Parts may become hot when the grill/top oven is in use, children must be kept away.
When the door is fully open, it remains tilted slightly, so that any spillage will be directed away from you.
There is a safety device that prevents the build-up of gas inside the cavity if the burner doesn't light or goes out for any reason.
The control knob operates the top cavity as a grill or as an oven depending on whether you turn it clockwise or anti-clockwise.
Using as a grill
The door must be kept open during grilling at all times.
1 Open the door.
2 Position the shelf in a suitable position.
3 Press and turn the control clockwise to the large flame symbol.
4 While keeping it depressed, press the ignition button to light the burner.
5 Keep the control depressed for 15 seconds after the burner has lit to over-ride the safety device.
6 Allow the grill to preheat for 5 minutes.
7 The grill can be operated at the max setting.
8 To switch off turn the knob anti-clockwise to the "●" off position.

natural_image
Interior view of a microwave oven with grating and tray (no text or symbols visible)- If the burner doesn't light the first time, press the ignition button once or twice again. If it still doesn't light, turn off and wait for 1 minute to allow gas to disperse before trying again.
- Do not hold the control in for more than 15 seconds.
- Ensure the food is correctly positioned on the grill pan under the grill burner.
- Oiling the grill rack prevents meat sticking on the wires.
- Do not line the grill pan with aluminium foil. This will result in an increase in temperatures and could result in damage to your cooker or increased risk of fire.
- Always remove the grill pan from the compartment as soon as you have finished grilling, it makes the pan much easier to clean. When grilling, if meat is placed too near the grill burner, the fat may ignite.
preparation and burning off

Important for asthmatic sufferers
Before using for the first time, protective coatings need to be burnt off. Fumes will be emitted but this is quite normal.
Ensure the room is very well ventilated during the burning off process. Avoid directly inhaling the fumes during this process.
Grill
Open the grill door. Remove grill tray, wire rack and detachable handle and operate the grill for about 15 minutes.
Oven
Remove tray and shelf racks and operate the oven at gas mark 8 for 30 minutes.
Cleaning
Before you start using your cooker, clean the appliance as recommended under Care and cleaning on page 23.
Shelf racks
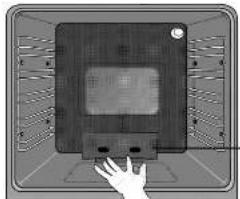
The shelf racks with a heat deflection sheet should be positioned with the heat deflection sheet at the rear of the oven.
Oven burner heat shield positioning
Before you start using your cooker please ensure the main oven burner heatshield is positioned as shown.
natural_image
Illustration of a hand pressing a button on a grid-patterned device (no text or symbols visible)Oven heatshield
To locate press in the direction indicated above.

Turning on and off
Flame Failure Device
All burners are protected by flame failure devices, if the flames are extinguished for any reason the gas will automatically be cut off.

The burner control knobs have a safety feature.
1 Push the appropriate knob in slightly and turn anti-clockwise to the required setting.
2 While keeping the knob depressed press the ignition button.
3 Keep the Knob depressed for 15 seconds after the burner has lit to override the safety device.
If still no ignition occurs, wait for 1 minute and repeat again.
Warning: Do not keep the knob in pressed position more than 15 seconds.
4 To switch a burner off turn the corresponding knob to ●.
- Turning the control knob fully anti-clockwise to the small flame symbol enables you to simmer without accidentally switching off.
Ignition button
- Pressing this button provides a spark at all burners, only the one turned on will light.
- If a hob burner doesn't light, press again until it does.
Flame control
- When turning on a hotplate burner, stay and make sure that it has lit, and adjust the flame immediately.
- Selection of the correct flame height is especially important to safety. Adjust the burner flame so that it does not extend beyond the bottom of the pan, any higher and the flame becomes inefficient and can be a potential fire hazard.
- To make sure that the cooker is operating safely, periodic checks are advised.
- At low settings, do not leave the burners unattended for long periods of time.
- The burner flames should burn with a visible bluish cone within the main flame, and with no sign of yellowness. If at the first lighting they are very noisy and yellow, turn out at once and check that the burner cap has been correctly replaced. If on re-lighting there is no improvement, ask your supplier to check them. The inner portions of the flames as described above may not be very clear, but this is not detrimental in anyway.
The pan supports are not interchangeable.
Bottom and top oven light
- Pressing this button will turn the light on. - Press again to turn the light off.
Pan choice
In choosing pans, look for pan handles that can be held easily and will stay cool. Avoid pans that are unstable and easily tipped. Pans that are too heavy to move easily when filled can also be a hazard. Only use flat bottomed pots or pans.
Pan size
For maximum efficiency and safety, use the recommended pan sizes for each burner.
- Use pans which have sufficient capacity for the amount of food being cooked so they don't boil over and cause unnecessary cleaning.
• Do not place lids on the burners.
Always position pans centrally over the burners. When transferring pans from one burner to another always lift the pans do not slide them.

Glass lid
- The glass lid must be in a fully raised position before the hob burners can be used.
- The glass lid is fitted with a safety device which cuts off the gas supply to the hob burners when the lid is closed. The gas supply is restored when the lid is raised.
- Do not use the safety device to control the hob burners.
• Prior to closing the glass lid make sure:
• Hob controls are off
• Cooking utensils have been removed
• The hob burners have been allowed to cool
- Always raise the lid during oven or grill operation. The toughened glass lid is not intended as a work surface, as it becomes hot when any part of the cooker is in use and the surface may be scratched if items with rough or sharp edges are placed on it.
deep fat frying

- Never fill the pan more than the one-third full of fat or oil.
- Never leave unattended during heating or cooking.
- Do not fry too much food at the same time especially frozen food. This only lowers the temperature of the oil or fat too much resulting in greasy food.
- Always dry food thoroughly before frying and lower it slowly into the hot oil or fat. Frozen foods in particular will cause frothing and spitting if added too quickly.
- Never heat fat or fry with a lid on the pan.
- Keep the outside of the pan clean and free from streaks of oil or fat.
In the event of a chip pan or other pan fire
1 Turn off the cooker.
2 Smother flames with a fire blanket or damp cloth.
3 Do not try to remove a burning pan from the hob.
Burns and injuries are caused almost invariably by picking up the burning pan and rushing outside with it.

Do not use water on the fire.
Leave the pan to cool for at least 30 minutes.


- Users Guide & Installation
- contents
- Introduction
- Installation
- For the very first time
- Operating
- Cooker care
- Look after yourself, family and friends
- safety in the home
- Look after your cooker and home
- Don't use the cooker for
- Food hygiene
- guarantee
- What is covered?
- Important notes
- For service under guarantee simply telephone the appropriate number below
- Before requesting service please check the trouble-shooting guide in the Operating
- Instructions as a charge may be levied where no fault is found even though
- your product may still be under guarantee.
- Service once the manufacturer's guarantee has expired
- trouble shooting
- know your cooker
- If the cooker does not work
- Performance characteristics when in use
- replacing the oven lamp
- future transportation
- If you do not have the original carton
- specification
- Accuracy
- location
- ventilation
- Room considerations and built-in ventilation
- care & cleaning
- Exterior
- Burners
- Hob surround
- Control panel
- Grill and oven interiors
- Oven interior
- Grill / Oven doors
- Over time...
- operating the clock/minute minder
- To set the time of day
- To set the minute minder
- Bleeper sound
- Unpacking
- Installers
- Regulations
- Levelling
- Stability Chain
- Moving your cooker
- electrical connection
- operating the bottom oven
- Electrical requirements
- Warning
- This appliance must be earthed
- Ignition
- Important
- Fitting a different plug
- Mains cable routing
- Parts may become hot when the oven is in use, children must be kept away.
- Light button
- Oven temperature chart
- operating the top oven
- gas connection
- Using as an oven
- Top oven temperature chart
- 'S' (Slow) cooking
- Guide to thermostat settings
- Gas supply
- Natural Gas
- LP Gas
- Gas flexible hose
- Connection
- Gas leaks
- gas conversion
- Oven burner
- Apply the following labels;
- Conversion from LPG gas to NG
- operating the grill
- Use of grill pan handle
- Grilling guidelines
- Using as a grill
- preparation and burning off
- Important for asthmatic sufferers
- Grill
- Oven
- Cleaning
- Shelf racks
- Oven burner heat shield positioning
- Turning on and off
- Flame Failure Device
- Ignition button
- Flame control
- Bottom and top oven light
- Pan choice
- Pan size
- Glass lid
- deep fat frying
- In the event of a chip pan or other pan fire
Brand : LEISURE
Model : LGV65
Category : Cooker