
FW880 - Freezer CDA - Free user manual and instructions
Find the device manual for free FW880 CDA in PDF.


| Product Type | Freezer |
| Brand | CDA |
| Model | FW880 |
| Net Volume | 230 liters |
| Dimensions (H x W x D) | 1600 x 595 x 630 mm |
| Weight | 65 kg |
| Energy Efficiency Class | E (old A+) |
| Annual Energy Consumption | 260 kWh |
| Freezing Capacity | 12 kg per 24 hours |
| Noise Level | 41 dB(A) |
| Climate Class | SN-N-ST |
| Temperature Control | Mechanical dial with 5 settings |
| Fast Freeze Function | Yes, via switch |
| Door Lock | Yes, with key |
| Door Alarm | Yes, visual and audible |
| Defrost Type | Manual defrost |
| Interior Light | LED |
| Shelves | 3 wire shelves, 1 box shelf |
| Freezer Drawers | 4 transparent drawers |
| Ice Cube Tray | 2 included |
| Power Supply | 220-240 V, 50 Hz |
| Power Input | 1.0 A |
| Spare Parts Available | Shelves, drawers, door gasket, thermostat, ice trays |
| Repairability Index | 6.5 / 10 |
Frequently Asked Questions - FW880 CDA
User questions about FW880 CDA
0 question about this device. Answer the ones you know or ask your own.
Ask a new question about this device
Download the instructions for your Freezer in PDF format for free! Find your manual FW880 - CDA and take your electronic device back in hand. On this page are published all the documents necessary for the use of your device. FW880 by CDA.
USER MANUAL FW880 CDA
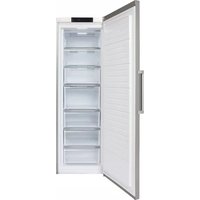
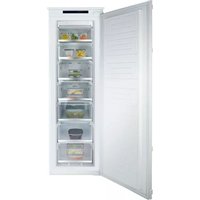
FW880 extra large integrated freezer
Manual for Installation, Use and Maintenance

C|D|A|

Important
The CDA Group Ltd cannot be held responsible for injuries or losses caused by incorrect use or installation of this product. Please note that CDA reserve the right to invalidate the guarantee supplied with this product following incorrect installation or misuse of the appliance.
This appliance is not designed to be used by people (including children) with reduced physical, sensorial or mental capacity, or who lack experience or knowledge about it, unless they have had supervision or instructions on how to use the appliance by someone who is responsible for their safety.
Under no circumstances should any external covers be removed for servicing or maintenance except by suitably qualified personnel.
Appliance information:
Please enter the details on the appliance rating plate below for reference, to assist CDA Customer Care in the event of a fault with your appliance and to register your appliance for guarantee purposes.
Appliance Model
Serial Number
CE Declarations of Conformity:
This appliance has been designed, constructed and marketed in compliance with safety requirements of EEC Directive 2006/95/EEC (Low voltage) and requirements of EMC Directive 2004/108/EEC.
This appliance has been manufactured to the strictest standards and complies with all applicable legislation, including Electrical safety (LVD) and Electromagnetic interference compatibility (EMC). Parts intended to come into contact with food conform to EEC/89/109.4
IMPORTANT INFORMATION FOR CORRECT DISPOSAL OF THE PRODUCT IN ACCORDANCE WITH EC DIRECTIVE 2002/96/EC.
At the end of its working life, the product must not be disposed of as urban waste. The refrigeration system contains insulating gases and refrigerants, which require specialised waste disposal. The valuable materials contained in this appliance can be recycle. It must be taken to a special local authority differentiated waste collection centre or to a dealer providing this service.
Before disposing of an old appliance, remove the latch or bolt lock to avoid the risk of child entrapment.
Disposing of a household appliance separately avoids possible negative consequences for the environment and health deriving from inappropriate disposal and enables the constituent materials to be recovered to obtain significant savings in energy and resources. As a reminder of the need to dispose of household appliances separately, the product is marked with a crossed-out wheeled dustbin.
Before first use
You must allow the freezer to settle for at least twenty four hours prior to switching the power on.
It is recommended that you clean the interior of the appliance prior to first use, using a solution of bicarbonate of soda and warm water and then thoroughly drying the interior.
The freezer may have an odour to it at first use. This will disappear as the appliance cools.
Please note:
- The appliance will work continuously until it comes down to the correct temperature.
- If the appliance is switched off, you should allow five minutes before switching it on again to prevent unnecessary damage to the compressor.
Controls and Use

fig. 1
1. Thermostat dial
The thermostat automatically keeps the internal temperature at a constant level. The temperature is regulated by the thermostat dial, located on the freezer control panel. To change the temperature, turn the dial anti-clockwise from 1 (highest temperature) to 5 (coldest temperature). We recommend that you start with the appliance set to position 3.
Don not turn the dial beyond the maximum. To switch the freezer off, turn the dial anticlockwise to the minimum position.
2. Super freeze switch
This freezer is equipped with a super freeze function. This allows the freezer compressor to run continuously and so freezes food more quickly. To select this function, push the switch across until the super freeze indicator light (5) illuminates. To switch the function off, then push the switch back across until the indicator light goes out again.
Note that this should not be used for more than 24 hours.
3. Power indicator light
This green light will illuminate when the freezer is switched on.
4. Over temperature indicator light
This red light will illuminate when the temperature inside the freezer is too high. This may illuminate after the door has been opened, or when fresh food is added and should switch off again once the temperature within the freezer has stabilised.
5. Super freeze indicator light
This yellow light will illuminate when the super freeze function has been switched on with the super freeze switch (2).
Use
• The freezer compartments are designer to store only frozen food.
- Never put hot or warm foods in the freezer, allow them to cool fully before putting them into the freezer.
- Follow the instructions on the packaging for storage of frozen food. If no information is provided, foods should not be stored for more than three months after the purchase date.
- Never put carbonated drinks into the freezer as the carbon dioxide may expand, causing and explosion.
Defrosting the freezer
Do not use heaters or defrosting sprays in this appliance.
- Never use any metallic or sharp objects to remove the ice as this could damage the lining
- The freezer compartment should be defrosted regularly to ensure the most efficient running of the freezer.
- Once the ice is more than 5mm thick, the freezer should be defrosted.
- First remove the freezer drawers.
• To speed up the process, place a bowl of warm water in the base of the freezer compartment.
Once defrosting is complete, dry the inside of the freezer compartment with a sponge or clean cloth thoroughly. Then re-connect the mains power supply.
- Clean the drawers separately by hand using soap and water. Do not put them in a dishwasher.
Troubleshooting
If you have any problems with your appliance, you should check the troubleshooting prior to calling CDA Customer Care to prevent unnecessary service calls and potential cost.
If the appliance is not working
- Check there is power to the appliance.
- The house fuses are intact and the fuse in the plug has not blown.
• The thermostat is not set to 0 (off position). - The plug socket is functioning fine. To check this, plug another electrical appliance in to see if the socket is working.
• The temperature of the room is adequate (10 °C or above).
If the appliance is working, but not very well
• The appliance is not overloaded.
- The thermostat is set to an appropriate temperature.
• The door is closing properly.
- The cooling system at the rear of the appliance is clean and free of dust, and not touching the rear wall.
• There is enough ventilation at the side and rear walls.
- The temperature of the room is adequate (10 °C or above).
If the appliance is noisy
• The appliance is level and stable.
- The side and rear walls are clear, and there is nothing resting on the appliance.
- The cooling gas in the refrigerator will make a slight bubbling noise, even when the compressor is not running.
If there is water in the lower part of the refrigerator compartment
- The drain hole in the channel at the back of the compartment is clear.
Installation And Ventilation
This appliance must never be installed close to heat sources i.e. heating elements, cookers or in damp places
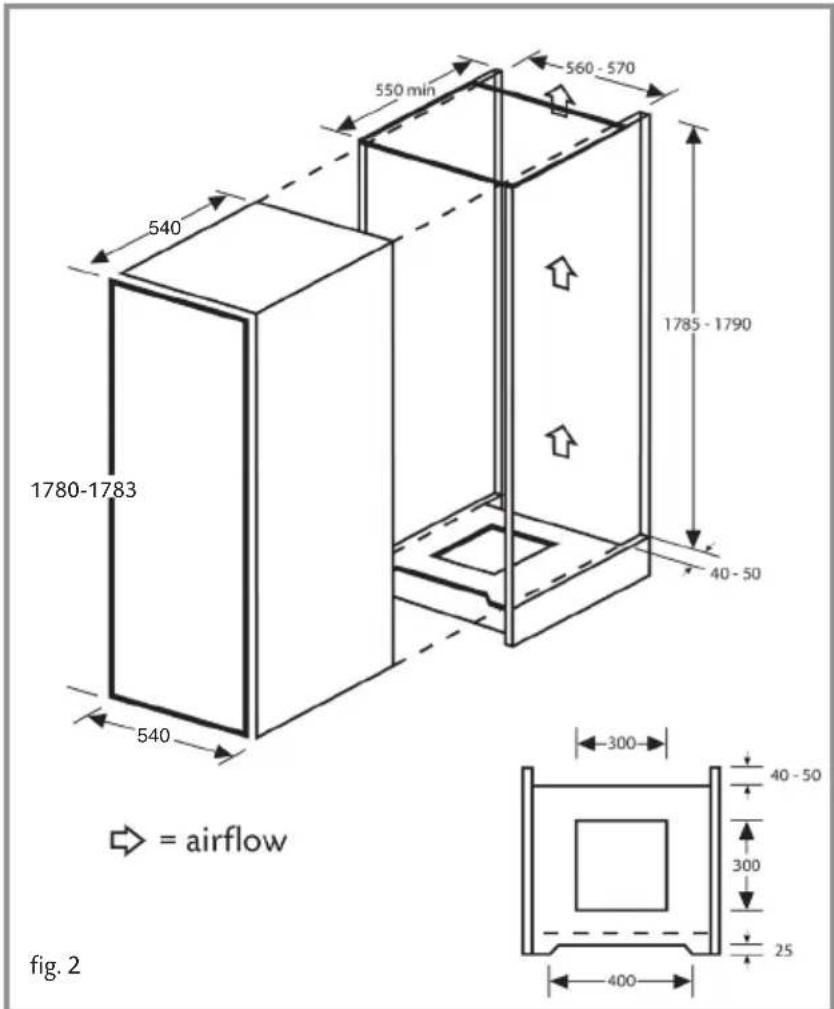
The diagram shows the ventilation requirements for your product.
Failure to provide adequate ventilation can lead to increased running costs and premature failure and may invalidate the warranty provided with the product.
Reversing the door
It is possible to reverse the door on this appliance, if required. To do so, follow the steps below:
- Loosen the top hinge fixing screws and remove the top hinge, taking care to support the weight of the door.
- Lift the door from the bottom hinge and place on a soft surface to protect the door from damage.
- Refit the hinge taken from the top to the opposite lower corner, as in figure 3.
- Replace the door and refit the hinge taken from the lower corner to the opposite top corner.
- Adjust the hinges to ensure the door is aligned correctly.

Mounting the Fascia Door
• Using a screwdriver, fix the mounting brackets to the appliance door, as shown in figure 4.
- Position the appliance within the unit. Ensure that there is a gap of 3 to 4 mm between the non-hinged side and the cabinet wall.
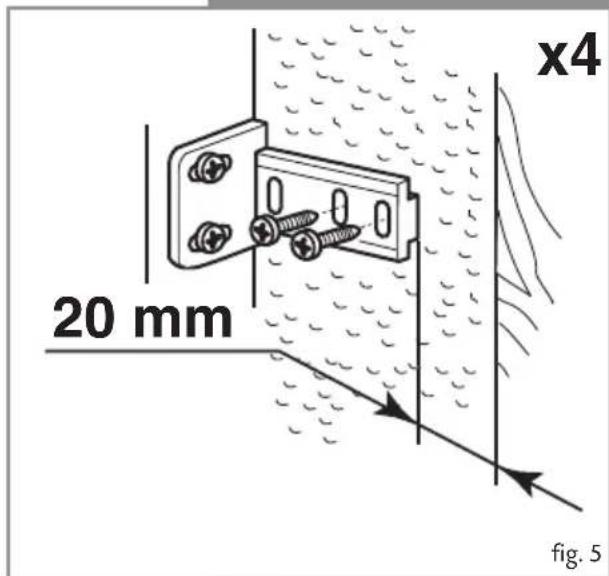
- Locate the slider in the bracket and fix the slider to the fascia door 20 to 22 mm from the edge of the fascia as shown in figure 5, ensuring that the slider is positioned centrally and horizontally within the bracket. Tighten securely by hand.
- Fill the gap on the non-hinged side with the seal strip provided, as shown in figure 6.


Warning! This appliance must be earthed.
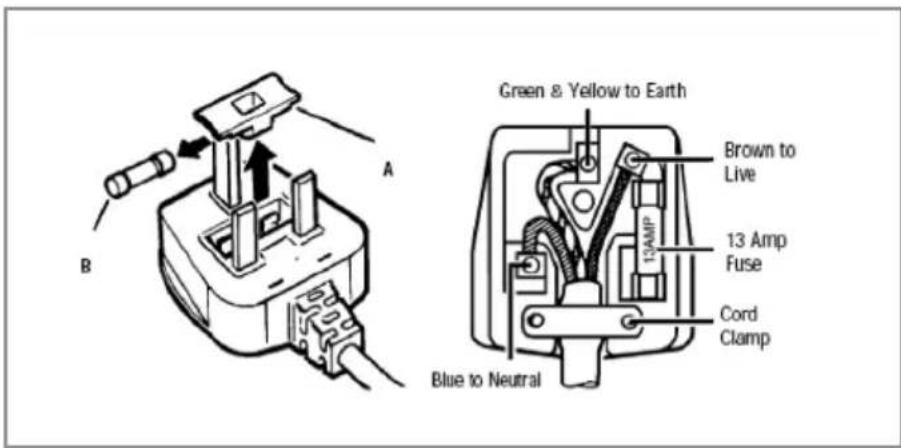
The mains lead of this appliance has been fitted with a BS 1363A 13 amp fused plug. To change a fuse in this type of plug, follow the steps below:
- Remove the fuse cover and fuse.
- Fit replacement 13A fuse, ASTA approved to BS 1362 type, into the fuse cover.
- Replace fuse cover.
Important: Do not use the appliance without the fuse cover in position.
How to connect an alternative plug
If the fitted plug is not suitable for your socket outlet, then it should be cut off and disposed of safely to avoid possible shock hazard. A suitable alternative plug of at least 13 Amp rating to BS 1363 should be used.
As the colours of the wires in the mains lead of this appliance may not correspond with the coloured markings identifying the terminals in your plug, proceed as follows:-
- The wire which is coloured GREEN and YELLOW must be connected to the terminal which is marked with letter (E) or by the Earth symbol 1/2 or coloured GREEN and YELLOW.
- The wire which is coloured BLUE must be connected to the terminal which is marked with the letter (N), or coloured BLACK.
- The wire which is coloured BROWN must be connected to the terminal which is marked with the letter (L) or coloured RED.
If in doubt regarding the electrical connection of this appliance, consult a qualified electrician. Do not shorten the supply cable, the appliance may require removing for servicing.
N.B. Ensure that the plug socket is situated in an easily accessible place.


|C|D|A
To contact our Customer Care Department, or for Service, please contact us on the details below.

- FW880 EXTRA LARGE INTEGRATED FREEZER
- C|D|A
- IMPORTANT
- APPLIANCE INFORMATION
- CE DECLARATIONS OF CONFORMITY
- IMPORTANT INFORMATION FOR CORRECT DISPOSAL OF THE PRODUCT IN ACCORDANCE WITH EC DIRECTIVE 2002/96/EC
- BEFORE FIRST USE
- PLEASE NOTE
- CONTROLS AND USE
- THERMOSTAT DIAL
- SUPER FREEZE SWITCH
- POWER INDICATOR LIGHT
- OVER TEMPERATURE INDICATOR LIGHT
- SUPER FREEZE INDICATOR LIGHT
- USE
- DEFROSTING THE FREEZER
- DO NOT USE HEATERS OR DEFROSTING SPRAYS IN THIS APPLIANCE
- TROUBLESHOOTING
- IF THE APPLIANCE IS NOT WORKING
- IF THE APPLIANCE IS WORKING, BUT NOT VERY WELL
- IF THE APPLIANCE IS NOISY
- IF THERE IS WATER IN THE LOWER PART OF THE REFRIGERATOR COMPARTMENT
- INSTALLATION AND VENTILATION
- REVERSING THE DOOR
- MOUNTING THE FASCIA DOOR
- HOW TO CONNECT AN ALTERNATIVE PLUG
Brand : CDA
Model : FW880
Category : Freezer