
CI920 - Tumble dryer CDA - Free user manual and instructions
Find the device manual for free CI920 CDA in PDF.


| Product Type | Tumble Dryer |
| Brand | CDA |
| Model | CI920 |
| Height | 85 cm |
| Width | 60 cm |
| Depth | 60 cm |
| Weight | 40 kg |
| Power Supply | 230 V, 50 Hz |
| Power Consumption | 2500 W |
| Capacity | 8 kg |
| Drying Type | Condenser (Self-condensing) |
| Energy Efficiency Class | B |
| Noise Level | 65 dB |
| Control Type | Electronic with LED Display |
| Number of Programs | 15 |
| Key Programs | Cotton, Synthetics, Delicates, Wool, Mix, Timed Drying |
| Features | Reverse Tumbling, Anti-crease, Child Lock, Delay Start |
| Filter Type | Lint Filter with Easy-clean Design |
| Water Tank Capacity | 5 L |
| Drain Hose | Optional Direct Drain with Included Hose |
| Installation | Freestanding or Stackable (with kit) |
| Warranty | 2 Years |
Frequently Asked Questions - CI920 CDA
User questions about CI920 CDA
0 question about this device. Answer the ones you know or ask your own.
Ask a new question about this device
Download the instructions for your Tumble dryer in PDF format for free! Find your manual CI920 - CDA and take your electronic device back in hand. On this page are published all the documents necessary for the use of your device. CI920 by CDA.
USER MANUAL CI920 CDA
CI920 integrated tumble dryer Manual for Installation, Use and Maintenance
C|D|A|

natural_image
Front view of a white CDA washing machine with circular vent and control panel (no visible text or symbols on the device itself)
Guarantee
CDA appliance carry a five-year parts and one-year labour guarantee.
CDA will repair or replace any defect or part attributable to faulty material or workmanship. Within the first year this will be free of both labour and parts charges. After the first year and within five years, the parts will be supplied free of charge provided that the repair is carried out by an agent authorised by CDA and the labour will be charged at the commercial rate applicable at the time of repair.
The appliance must have been installed by a suitably qualified person and in accordance with the manufacturers instructions and current legislation. The guarantee does not cover faults caused by the incorrect fitting of the appliance.
Limit of Cover
- The guarantee does not cover cosmetic damages e.g. discolouration or oxidisation.
- Proof of purchase or installation date must be produced before a service call will be booked.
- The appliance must be used for domestic purposes only. Appliances used for commercial or professional purposes are not covered by this guarantee.
- The appliance must not be modified or tampered with or repair attempted by any unauthorised person.
- The guarantee does not cover damage caused by transit or by misuse, accident, abuse or neglect.
- The guarantee does not cover routine maintenance.
- Use of parts not supplied or recommended by CDA will invalidate the warranty.
- Rubber seals, filters, removable glass parts, control knobs and buttons, fuses and light bulbs which need replacing periodically are not covered by the guarantee.
- Second hand or reconditioned appliances are not covered by the guarantee.
The conditions under which this guarantee is offered are in addition to the statutory rights of the domestic purchaser and these rights are not affected by this guarantee.
CDA reserve the right to change specification without prior notice.
CONTENTS 2
PAGE
1 Guarantee
2 Contents
3 User information
4 Installation
5 The filter
6 Control panel
7 Operation
8 Door reversal
9 Decor door reversal
10 Problem guide
IMPORTANT USER INFORMATION
These notes are provided in the interest of safety. You must read them carefully before installing or using the appliance.
- Children should not be allowed to tamper with the controls.
- This tumble dryer is intended for domestic use only.
- Any electrical work required to install the appliance should be carried out by a qualified person.
- This tumble dryer should be serviced by an appointed service organisation and only genuine spare parts used.
- It is dangerous to alter or modify the product in any way, other than fitting authorised accessories.
- It is important to clean the lint filter after each drying cycle.
- Under no circumstances should anything other than the recommended articles be placed in the tumble dryer.
- Do not place articles which have been in contact with dry cleaning fluid or other inflammable substances in the tumble dryer.
- Do not attempt to dry dripping wet articles or items containing foam rubber or rubber-like materials.
- Do not use the tumble dryer if you suspect that it is damaged in any way. Under no circumstances should you attempt to repair the appliance yourself. Repairs carried out by inexperienced persons may cause serious injury.
- The appliance must not be installed behind a lockable door, a sliding door or a door with hinges on the opposite side to that of the tumble dryer.
- We recommend that the appliance is switched off each time after use. It should be disconnected from the electricity supply if it is to be unattended for long periods, (i.e weekends or holidays etc).
- The special mains cable and plug assembly must only be replaced with a genuine part available from the manufacturer or his service
natural_image
Illustration of two children sitting on the ground, one reading a book and the other using a smartphone (no text or symbols present)INSTALLATION
The tumble dryer is fully compatible with any 600mm deep kitchen units and complies with stringent EEC regulations.
Your dryer is provided with a vent hose which will extend to approx 2.4m (8ft). We strongly recommend that this is vented through the wall with the attachment provided.
The position of the hole (100mm diameter) for the vent directly behind the tumble dryer is shown in the diagram.

If the through the wall vent is to be positioned other than behind the dryer, the vent hose should be positioned at floor level and through adjacent side panel to a relevant position.
The plinth must be cut-out to accommodate the air vent grill at the bottom front of the tumble dryer.

IMPORTANT
The air vent at the front of the appliance must never be covered or blocked in any way as this will cause the dryer to overheat.
THE FILTER
ELECTRICAL CONNECTIONS
We strongly recommend that any electrical work is carried out by a qualified person complying with the IEE 16th addition of the electrical regulations.
IMPORTANT
Please remember that the tumble dryer must be capable of being switched off, (disconnected from the supply), when fitted in position.
FILTER
The filter is found, as can be seen from the diagram, by opening the door and must always be in position when drying items in the appliance. To allow the dryer to operate efficiently it should be cleaned after each drying circle. Do not be alarmed by the amount of fluff deposited on the mesh. It is not due to excessive wear caused by the dryer but more an indication of its efficient operation. All fabric loses fluff when drying but it goes unnoticed into the air. In a tumble dryer it simply collects in the filter.

natural_image
Diagram of a ceiling-mounted air duct system with circular components and a mesh panel (no text or symbols)CONTROL PANEL GUIDE
1
2
3
TIME SETTINGS
| COTTON DRY - 80 - 120 mins COTTON DAMP DRY - 80 - 100 mins HEAVY SYNTHETICS - 30 - 40 mins LIGHT SYNTHETICS - 30 - 40 mins LINENS - 80 - 120 mins POLYESTER COTTON - 40 - 60 mins |
1) THE TIMER:
Select the drying time from the recommendations shown on the control panel (2). Turn the timer knob clockwise until the setting required appears at the top.
3) CONTROL PANEL: See below.
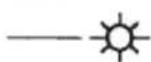
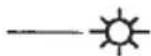
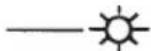
2) HEAT SETTING: Select half 🚗 or full heat ⚙ as recommended on the control panel.
COTTON DRY
80 - 120 mins
COTTON DAMP DRY
60 - 100 mins
HEAVY SYNTHETICS
20 - 40 mins
LIGHT SYNTHETICS
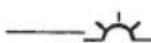
20 - 40 mins
LINENS

80 - 120 mins
POLYESTER COTTON

40 - 60 mins
OPERATION
Roll dripping wet articles in a towel to remove excess water.
Sort out the clothes into groups of similar fabrics and colours. Check the care label inside the garment.
We suggest that a fabric conditioner be used to reduce static electricity.
Delicate articles e.g tights should be placed inside a pillowcase. It is better to dry small and large articles together.
Open the door.
Load clothes loosely into the drum.
Load sheets first starting with one corner.
Close the door.
Dry your hands.
Check the timer is in the 'o' position.
Switch on the machine at the switched spur.
Select correct heat position (See programme chart on facia panel).
Set the timer to the correct position (See programme chart on facia panel). The drum will now begin to rotate and stop when the timer automatically reaches the 'O' position.
Should the clothes become dry before the cycle has finished the thermostat will automatically switch off the heater and prevent overdrying and save energy although the drum will still rotate.
When drying large items such as sheets, we suggest you stop the dryer to redistribute the load.
To stop the machine during the middle of a programme simply open the door; the drum will stop rotating automatically and reset when you close the door. To lengthen or shorten the programme, turn the timer knob.
After removing the dried clothes clean the filter as follows:
Pull the filter upwards.
Remove any thread or fluff by hand or with a soft brush.
Slide the filter back.
Wash the filter occasionally in detergent solution and with a soft brush remove small particles.
Switch off the electric supply.
CARE LABELS YOU MAY FIND ON YOUR FABRICS
| 'Tumble drying beneficial' | |
| 'Do not tumble dry' | |
| 'Dry flat' |
DOOR REVERSING
APPLIANCE DOOR
The door on the dryer can be positioned either with left or right hand hinging. Please follow the instructions below to change the door position.

Pull the hinge cover (F) forwards to remove it. Remove two outer screws (G). Remove door. Fit latch plate (D) with screws (C).
Open the door. Undo screw (A) remove switch strike (B) and replace screw. Remove screws (C) and latch plate (D). Remove hinge cover screw (E). Close the door.


Reverse door and fit to dryer in closed position. Refit screws (G) and hinge cover (F). Open the door.
Fit screw (E) to secure hinge cover. Remove screw (A) at top of door and refit strike (B) as shown.

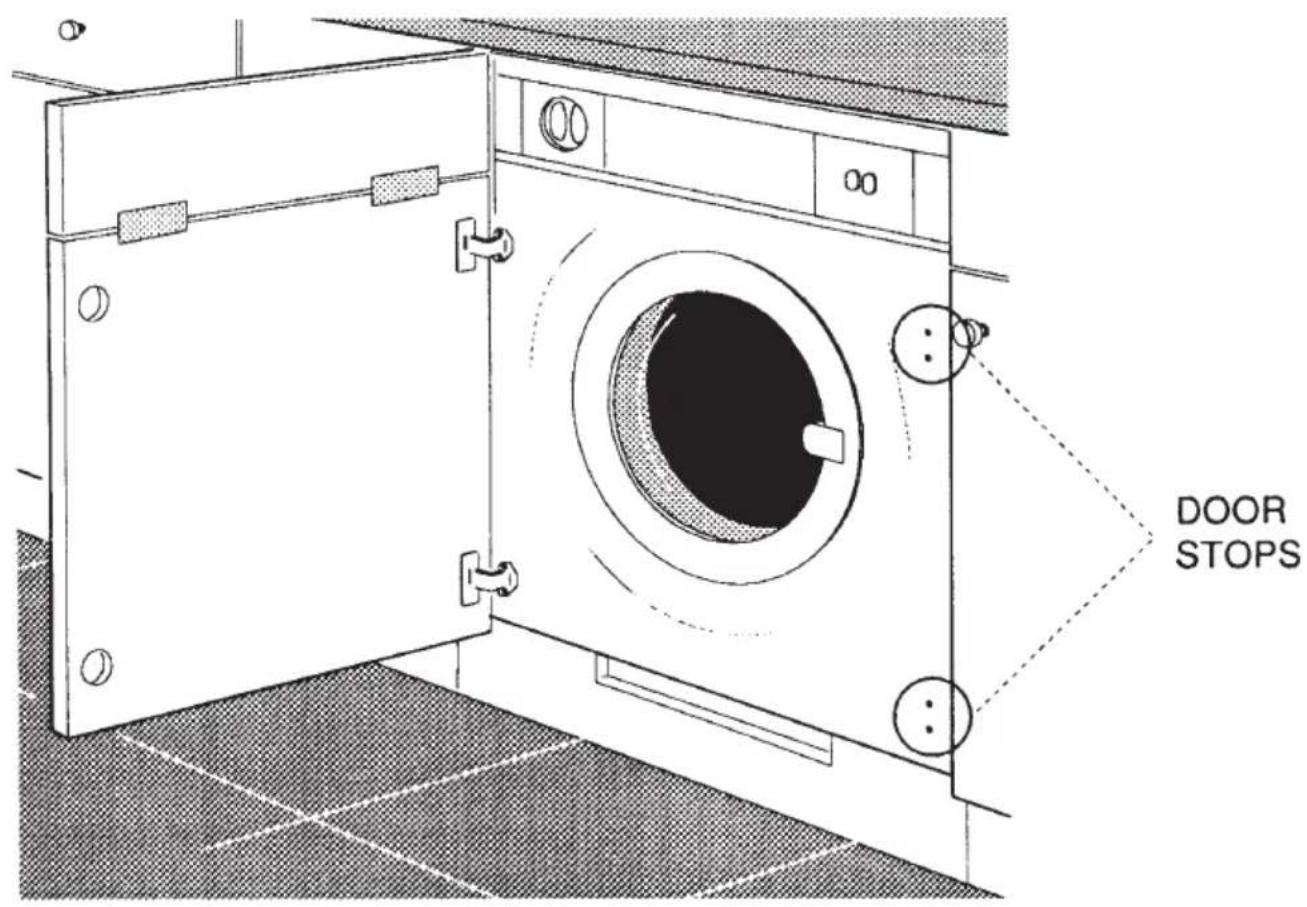
THE DECOR DOOR
The hinges can be fastened through the pre-drilled holes on either the left or right hand side with the door stops being fitted on the other side.
TECHNICAL DATA
Overall dimensions: height 89cm width 59.5cm depth 53cm.
Maximum dry weight of cotton, linen 6.0kg synthetics 2.0kg.
For electrical ratings see plate on rear of machine.
This product is manufactured to comply with the radio interference requirements of the Council directive 82/499/EEC.
Fuse rating: 13 amp.
Do not - Overload the dryer.
Do not - Dry articles singly as they tend to roll up and so increase drying time.
Do not - Dry woollen or wool mixture articles unless the article is labelled as suitable
Do not - Allow venting hose (where applicable) or filter to become blocked.
Do not - Allow fluff to accumulate around the tumble dryer.
ANY PROBLEMS
If the clothes are not dry after normal drying time:
- Check that the filter is clean.
- Check that you used the correct heater setting.
- Check that the venting hose is not blocked (sometimes a strong wind may cause a back pressure).
- Check that you have not set the timer within a cool down period.
If your machine does not work, check the following points before contacting the Free-phone service number.
- Check that there is a supply of electricity.
- Check that the machine is switched on and the door properly closed.
- Some machines are fitted with a resetable cut-out. Check that this has not operated. If your dryer has a red button on the right hand side at the back of your dryer, press it. If it has operated the a sharp "click" will be heard. This cut-out only operates if the airflow is severely restricted so make sure the filter is clean and that all other restrictions are removed before restarting.

CAUTION-HOT SURFACE
This label, positioned on the rear of your dryer, indicates the surface is hot when in operation - avoid touching
Appliance servicing
CDA provide a quality and effective after-sales service to cover all your servicing needs.
Please attach your receipt to this page for safekeeping. Please help us to help you by having the following information available when booking a service call.
- Model type, make and model – see the front of this manual
• Evidence of installation/purchase date
• Retailer where the appliance was purchased
• Clear and concise details of the fault
• Full address including postcode and any contact phone numbers
|C|D|A|
To contact our Customer Care Department, or for Service, please contact us on the details below.


- CI920 integrated tumble dryer Manual for Installation, Use and Maintenance
- C|D|A|
- Guarantee
- Limit of Cover
- CONTENTS 2
- PAGE
- IMPORTANT USER INFORMATION
- These notes are provided in the interest of safety. You must read them carefully before installing or using the appliance.
- INSTALLATION
- IMPORTANT
- THE FILTER
- ELECTRICAL CONNECTIONS
- FILTER
- CONTROL PANEL GUIDE
- OPERATION
- DOOR REVERSING
- APPLIANCE DOOR
- THE DECOR DOOR
- TECHNICAL DATA
- ANY PROBLEMS
- Appliance servicing
- |C|D|A|
Brand : CDA
Model : CI920
Category : Tumble dryer