
SP-M220 - Video projector SAMSUNG - Free user manual and instructions
Find the device manual for free SP-M220 SAMSUNG in PDF.


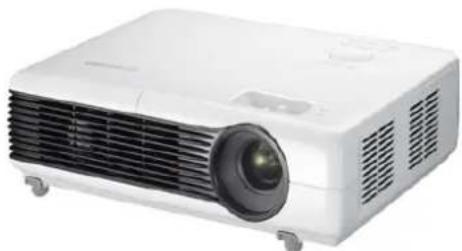
| Product Type | Video Projector |
| Model | Samsung SP-M220 |
| Display Technology | 3LCD, 0.63 inch panel |
| Native Resolution | XGA (1024 x 768) |
| Brightness | 2200 ANSI Lumens |
| Contrast Ratio | 500:1 |
| Aspect Ratio | 4:3 |
| Lamp Power | 180W NSHA180SS |
| Lamp Life | 3000 hours (Eco: 5000 hours) |
| Zoom Ratio | 1:1.2 (Manual) |
| Focus Adjustment | Manual |
| Keystone Correction | Vertical ±20° (Manual & Auto) |
| Projection Distance | 1 m to 14 m |
| Screen Size (Diagonal) | 30 to 400 inches |
| Speaker | 7W (Mono) |
| Dimensions (W x D x H) | 279 x 229 x 79 mm (10.98 x 9.02 x 3.11 in) |
| Weight | 2.5 kg (5.5 lbs) |
| Power Consumption | 240W (Typical) |
| Power Supply | AC 100-240V, 50/60Hz |
| Input Connectors | D-Sub 15pin, HDMI, Composite Video (RCA), Audio (L/R) |
| Output Connectors | Audio Out (3.5mm), RS232C |
| Security | Kensington Lock slot, Password Protection |
| Accessories Included | Remote Control, Power Cord, D-Sub Cable, Lens Cover, Cleaning Cloth |
Frequently Asked Questions - SP-M220 SAMSUNG
User questions about SP-M220 SAMSUNG
0 question about this device. Answer the ones you know or ask your own.
Ask a new question about this device
Download the instructions for your Video projector in PDF format for free! Find your manual SP-M220 - SAMSUNG and take your electronic device back in hand. On this page are published all the documents necessary for the use of your device. SP-M220 by SAMSUNG.
USER MANUAL SP-M220 SAMSUNG
Owner's Instructions
The color and the appearance of the product may differ from the illustrations in this manual. The specifications are subject to change without prior notice to improve performance.
MAJOR SAFETY PRECAUTIONS
Before You Start 1-1
Care and Maintenance 1-2
Safety Precautions 1-3
INSTALLATION AND CONNECTION
Package Contents 2-1
Installing the Projector 2-2
Leveling with Adjustable Feet 2-3
Zoom and Focus Adjustment 2-4
Screen Size and Projection Distance 2-5
Lamp Replacement 2-6
Rear Side 2-7
Supported Display Modes 2-8
Connecting the Power 2-9
Connecting with a PC and Setting up the PC 2-10
Connecting a PC using an HDMI/DVI cable 2-11
Connecting an HDMI-Compatible Device 2-12
Connecting an AV device using a D-Sub cable 2-13
Connecting an AV device with component output 2-14
Connecting using a Video cable 2-15
Connecting an External Speaker 2-16
Kensington Lock slot 2-17
USING
Product Features 3-1
Front, Upper 3-2
Remote Control 3-3
LED Indications 3-4
Using the Screen Adjustment Menu (OSD: On Screen Display) .... 3-5
TROUBLESHOOTING
Before Requesting Service 4-1
MORE INFORMATION
Specifications 5-1
RS232C Command Table 5-2
Contact SAMSUNG WORLDWIDE 5-3
Correct Disposal - Europe only 5-4
1 Major Safety Precautions
1-1 Before You Start
Icons used in this manual
| ICON NAME MEANING | ||
 | Caution Indicates | cases where the function may not work or the setting may be canceled. |
 | Note Indicates a hint or tip to operate a function. | |
Using this Manual
• Make yourself fully aware of the safety precautions before using this product.
- If a problem occurs, refer to the 'Troubleshooting' section.
Copyright Notice
The contents of this manual are subject to change without prior notice for performance improvement.
Copyright © 2010 Samsung Electronics Co., Ltd. All rights reserved.
The copyright of this manual is reserved by Samsung Electronics, Co., Ltd.
The contents of this manual may not be partially or in whole reproduced, distributed or used in any form without the written permission of Samsung Electronics, Co., Ltd.
Cleaning the Surface and the Lens
Clean the projector using a soft dry cloth.
- Avoid cleaning the product with a flammable substance such as benzene or thinner.
- Avoid scratching the lense with your fingernails or a sharp object.
This may result in scratches or damage to the product.
- Avoid cleaning the product with a wet cloth or by directly spraying water onto the product.
If water enters the product, it may result in fire, electric shock, or a problem with the product.
- A white stain may appear on the surface of the projector if water gets on it.
The appearance and the color may differ depending on models.
Cleaning Inside the Projector
For cleaning the interior of the projector, contact an authorized Samsung Service Center.
- Contact a Service Center if dust or other substances are inside the projector.
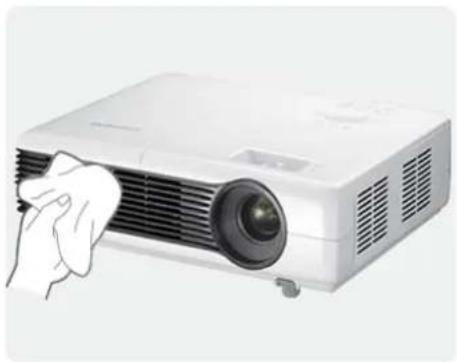
natural_image
Illustration of a projector with a hand cleaning the lens (no text or symbols visible)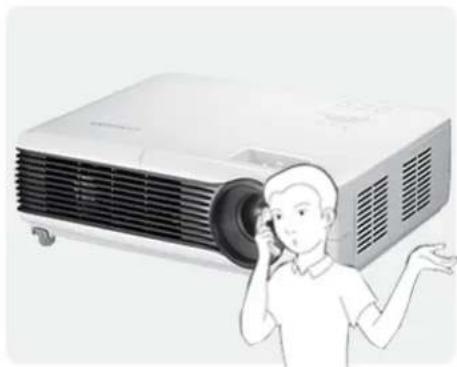
natural_image
Illustration of a person looking through a large projector with a phone to listen (no text or symbols visible)Icons used for safety precautions
| ICON NAME MEANING | ||
 | Warning | Failing to follow the precautions marked with this sign may result in a serious injury or even a fatality. |
 | Caution | Failing to follow the precautions marked with this sign may result in a personal injury or property damage. |
Meaning of Signs

Do not perform. Must be followed.


Do not disassemble.

The power plug must be unplugged from the wall outlet.

Do not touch. Must be grounded to prevent electric shock.

Power Related
The following images are for your reference and may differ depending on models and countries.
The appearance and the color may differ depending on models.

Warning
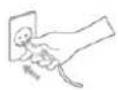
Plug the power plug in firmly.
- Otherwise, it may result in fire.
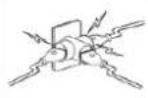
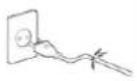
Avoid using a damaged power cord or plug or a loose power outlet.
- Otherwise, it may result in electric shock or fire.
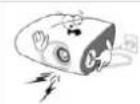
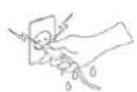
Avoid plugging in or unplugging the power supply with wet hands.
- Otherwise, it may result in electric shock.
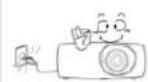
Avoid connecting multiple electric appliances to a single wall outlet.
- Otherwise, it may result in fire due to overheating of the wall outlet.
Avoid bending or twisting the power cord excessively and avoid placing heavy objects on the cord.
- Otherwise, it may result in electric shock or fire due to a damaged power cord.
To move the product, turn the power off and unplug the power cord and any other wires connected to the product.
- Otherwise, it may result in electric shock or fire due to the damaged power cord.
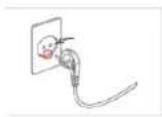
Make sure to connect the power cord to a grounded wall outlet (for insulation class 1 equipment only).
• Otherwise, it may result in electric shock or injury.

Caution
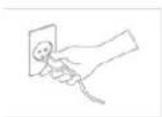
When unplugging the power plug from the wall outlet, make sure to hold the power plug by the plug and not by the cord.
- Failing to do so may result in electric shock or fire.
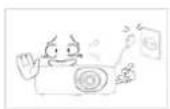
Do not turn the product on or off by plugging or unplugging the power plug. (Do not use the power plug as a power switch.)
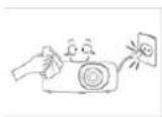
Unplug the power plug before cleaning the product.
• There is a danger of electric shock or fire.
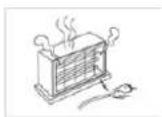
Keep the power cord away from sources of heat.
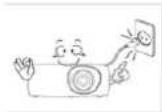
Connect the power plug to a wall outlet that can be easily reached.
- When a problem occurs with the product, you must unplug the power plug to cut the power off completely. You cannot cut the power off completely using only the power button on the product.
Installation Related

Warning
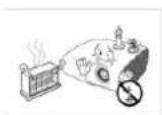
Avoid installing the product in a location exposed to direct sunlight and installing the product near a heat source such as a fire or heater.
• This may shorten the product life cycle or cause fire.
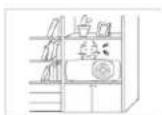
Avoid installing the product in a badly-ventilated location such as inside a bookshelf or closet.
- Otherwise, it may result in fire due to internal overheating.
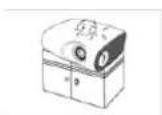
When installing the product in a cabinet or shelf, take care so that the front end of the product is completely supported by the cabinet or shelf.
- Failing to do so may result in the product falling and resulting in damage to the product or injury.
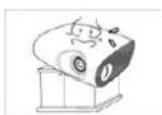
When installing the product on a console or shelf, make sure that the front of the product does not protrude out of the console or shelf.
- Otherwise, this may cause the product to fall off and result in a malfunction or injury.
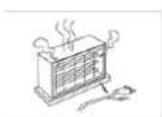
Keep the power cord away from heaters.
• The coating of the power cord may melt and cause electric shock or fire.
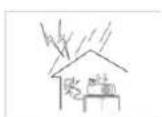
When thunder or lighting occurs, unplug the power cord.
- Failing to do so may result in electric shock or fire.
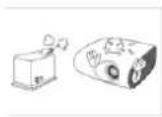
Do not install the product in a location exposed to dust, moisture (sauna), oil, smoke or water (rain drops) and do not install it in a vehicle.
• This may result in electric shock or fire.
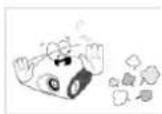
Do not install the product in areas with heavy dust.

Caution
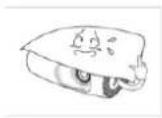
Take care not to block the vent with a table cloth or curtain.
- Otherwise, it may result in fire due to internal overheating.
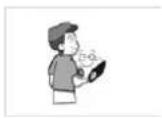
Do not let the product drop while moving it.
• This may result in a problem with the product or injury.
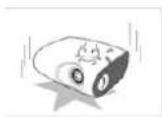
When putting the product down, place it gently.
- Failing to do so may result in a problem with the product or injury.
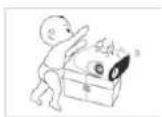
Do not install the product at a height where children may reach it.
- If a child touches the product, the product may fall and this may result in injury.
Usage Related
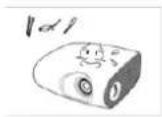
Avoid inserting metal objects such as a chopsticks, coins or hairpins, or inflammable objects into the product (the vents, ports, etc).
- If water or an alien substance enters the product, turn the power off, unplug the power cord and contact a service center.
• Otherwise, it may result in a problem with the product, electric shock or fire.
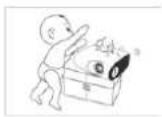
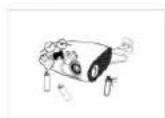
Do not let children place objects such as toys or cookies on the product.
- If a child tries to reach for any of these objects, the product may fall and cause harm.
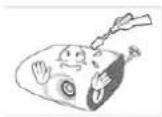
Do not disassemble, or attempt to fix or modify the product.
- When the product requires repairs, contact a Service Center.
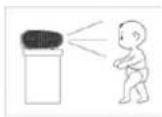
Do not look directly at the light of the lamp nor project the picture into someone's eyes.
• This is dangerous, especially for children.
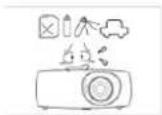
Avoid using or placing inflammable spray or objects near the product.
• This may result in an explosion or fire.
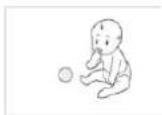
When you remove batteries from the remote, be careful that they are not swallowed by children. Keep batteries out of the reach of children.
• If swallowed, see a doctor immediately.
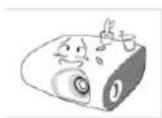
Avoid placing a liquid container such as a vase, flowerpot, beverage, cosmetics or drugs, or a metal object over the product.
- If water or an alien substance enters the product, turn the power off, unplug the power cord and contact a service center.
- Otherwise, it may result in a problem with the product, electric shock or fire.
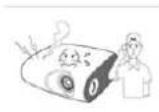
If the product generates a strange noise, a burning smell, or smoke, unplug the power plug immediately and contact a service center.
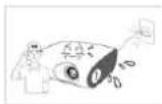
If water or a foreign substance enters the product, turn the product off, unplug the power cord from a wall outlet, and contact a Service Center.
- Failing to do so may result in electric shock or fire.
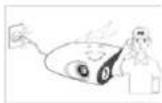
Do not use the product while it indicates a malfunction, such as no sound or no picture.
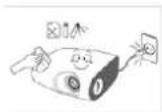
If the power plug pin or jack is exposed to dust, water or alien substances, clean it thoroughly.
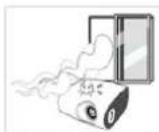
- Turn the product off immediately, unplug the power cord from a wall outlet, and contact a Service Center.
• There is a danger of electric shock or fire.
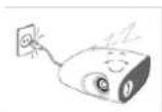
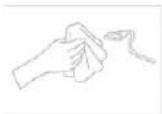
When cleaning the product, disconnect the power cord and clean the product with a soft dry cloth.
- Avoid using chemicals such as wax, benzene, alcohol, thinner, mosquito-repellent, fragrance, lubrication or cleansing agent when cleaning the product.
When a gas leak occurs, do not touch the product or the power plug and ventilate immediately.
This may result in the exterior being deformed or the print being removed.
• A spark may result in an explosion or fire.
When not using the product for a long time, such as leaving your home, unplug the power cord from the wall outlet.
- During a thunder or lighting storm, do not touch the power cord or antenna cable
- Otherwise, it may cause dust accumulation and result in fire caused by overheating or a short circuit or result in an electric shock.
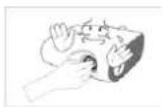
Do not touch the lens on the product.
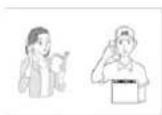
If the product is installed in a location where the operating conditions vary considerably, a serious quality problem may occur due to the surrounding environment. In this case, install the product only after consulting our Call Center.
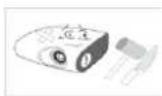
Do not touch any outer part of the product with tools such as a knife or a hammer.
- Places exposed to microscopic dust, chemicals, too high or low temperature, high humidity, such as airports or stations where the product is continuously used for a long time etc..
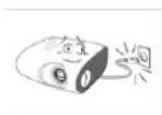
If you drop the product or the case is damaged, turn the power off and unplug the power cord. Contact a service center.
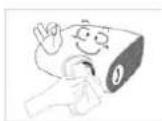
To clean dirt or stains on the front projection lens, use spray or a wet cloth dampened with neutral detergent and water.
- Failing to do so may result in fire or electric shock.
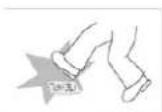
Make sure to place your remote control on a table or desk.
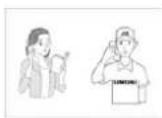
Ask a Service Center to clean the interior of the projector at least once per year.
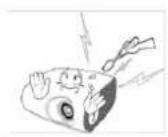
To avoid burning yourself, do not touch the vents or lamp cover while operating or right after turning off the product.
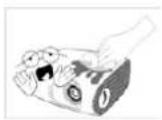
Do not clean the product using water spray or a wet cloth. Avoid using any chemicals such as detergents, industrial or automotive polish, abrasive, wax, benzene, alcohol on any plastic part of the product such as projector case, since this may cause damage.
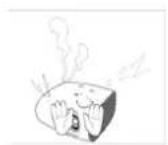
Do not open any cover on the product.
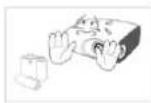
Do not use any undesignated battery.
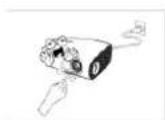
• This would prove hazardous because of high-voltage current inside the product.
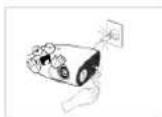
The ventilation hole is hot for some time though the projector is turned off. Keep you hands or body off the ventilation hole.
Be careful not to touch the ventilation hole while the projector is on as hot air comes out.
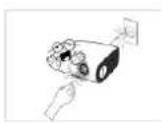
Be careful to keep your body away from the projector lamp. The lamp is hot.
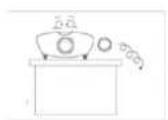
Do not place objects vulnerable to heat near the projector.
(Children and those who have sensitive skin should be more careful.)
Take care not to lose the lens cover of the product.
• The lens could get damaged.
2 Installation and Connection
2-1 Package Contents
- Unpack the product and check if all of the contents listed below have been included.
- Store the packaging box in case you need to move the product at a later date.
natural_image
White projector with black ventilation grille and projection lens (no visible text or symbols)Projector
CONTENTS

Quick Installation Guide Warranty Card / Registration Card (Not available in all locations)

User Manual Power Cord
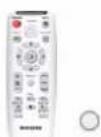
Remote Control / 1 Battery (Not available in all locations)
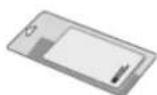
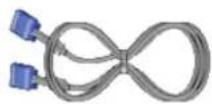
Cleaning Cloth D-Sub Cable Lens cover

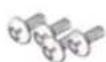
4 Screws (For bracket of ceiling mount.)
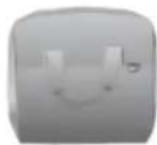
Projector case
A ceiling mount is not included and must be purchased separately. Use the included screws to attach the projector to the ceiling mount bracket.
Install the projector so that the beam from the projector is perpendicular to the screen.
- Place the projector so that the lens aims at the center of the screen. If the screen is not vertical, the picture on the screen may not appear rectangular.
- Do not install the screen in bright surroundings. If the surroundings are too bright, the picture on the screen will be washed out and not display clearly.
- When using the projector in bright surroundings, use curtains to block the light.
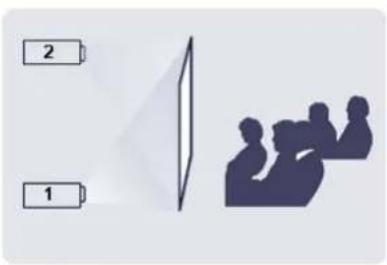
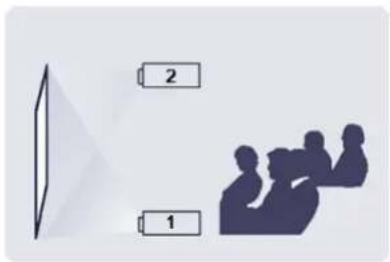
- You can install the projector in the following locations relative to the screen: Front-Floor / Front-Ceiling / Rear-Floor / Rear-Ceiling. To view the installation position settings, see below.
To adjust the picture when you install the projector behind the screen
natural_image
Silhouette of people inside a room with a vertical panel and numbered labels (2 and 1) on the left, no text or symbols present.Installing behind a semi-transparent screen.
When you install the projector behind a semi-transparent screen, you can use the menu to adjust the picture so that it displays correctly, depending on where you've located the projector, rear-floor (or low) or rear-ceiling.
- For rear-floor, press: Menu > Setup > Install > Rear-Floor
- For rear-ceiling, press: Menu > Setup > Install > Rear-Ceiling
To adjust the picture when you install the projector in the front of the screen
natural_image
Silhouettes of people in a meeting or presentation setting, with two labeled boxes (1 and 2) above them, no readable text or symbols present.Installing the projector in front of the screen.
When you install the projector in front of a screen, you can use the menu to adjust the picture so that it displays correctly, depending on where you've located the projector, front-floor (or low) or front-ceiling.
- For front-floor, press: Menu > Setup > Install > Front-Floor
- For front-ceiling, press: Menu > Setup > Install > Front-Ceiling
natural_image
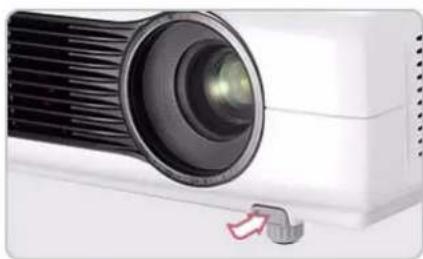
Close-up of a projector with a lens and a small button (no visible text or symbols)Press the PUSH buttons, as shown, to adjust the legs and level the projector.
The projector can be adjusted to a height of up to 30 mm (about 12 °) from the reference point. If
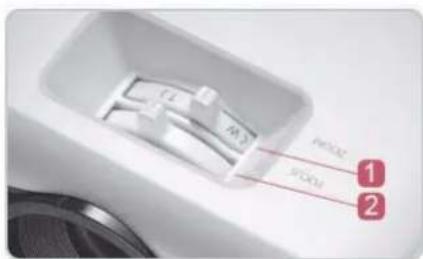
Zoom Knob : You can adjust the size of the image within the zoom range by manipulating the Zoom Knob.
2 Focus Ring : Focus the picture on the screen using the Focus Ring.
The size of your screen determines the distance you set your projector from the screen.
If you do not install your projector at the projection distance specified in the Screen Size and Projection Distance table in Section 2-5, you will not be able to adjust the focus correctly.
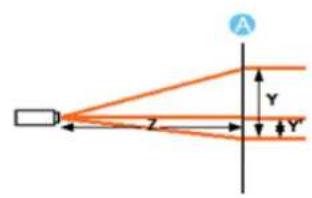
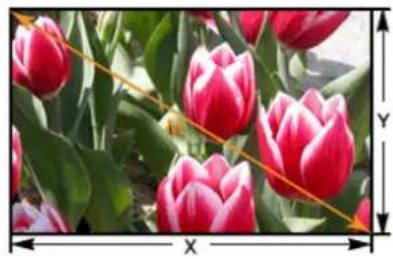
natural_image
Close-up of pink tulips in a garden setting with visible petals and green leaves, overlaid with a diagonal measurement line and X-Y axis (no text or symbols on the flower itself)A. Screen / Z. Throw Distance / Y'. Distance from Lens Center to Image Bottom
Install the projector on a flat, even surface and level the projector using the adjustable feet to obtain optimal picture quality. If images are not clear, adjust them using the Zoom Knob or Focus Ring, or move the projector forward and backward.
| SCREEN SIZE THROW DISTANCE OFFSET | |||||||||||
| M (DIAGONAL) | X (HORIZONTAL) | Y (VERTICAL) | Z (TELE) | Z (WIDE) | Y' | ||||||
| INCHES | CM | INCHES | CM | INCHES | CM | INCHES | CM | INCHES | CM | INCHES | CM |
| 30 76.2 24 | 60.9 18 | 45.7 42.7 108 | 4 35.5 90 | 0.1 2.6 | 6.3 | ||||||
| 40 | 101.6 | 32 | 81.3 | 24 | 61.0 | 57.0 | 144.7 | 47.4 | 120.3 | 3.3 | 8.4 |
| 50 | 127.0 | 40 | 101.6 | 30 | 76.2 | 71.2 | 180.8 | 59.2 | 150.4 | 4.1 | 10.5 |
| 60 | 152.4 | 48 | 121.9 | 36 | 91.4 | 85.4 | 217.0 | 71.0 | 180.4 | 5.0 | 12.6 |
| 70 | 177.8 | 56 | 142.2 | 42 | 106.7 | 99.7 | 253.1 | 82.9 | 210.5 | 5.8 | 14.7 |
| 80 | 203.2 | 64 | 162.6 | 48 | 121.9 | 113.9 | 289.4 | 94.7 | 240.6 | 6.6 | 16.8 |
| 90 | 228.6 | 72 | 182.9 | 54 | 137.2 | 128.2 | 325.6 | 106.6 | 270.7 | 7.4 | 18.9 |
| 100 | 254.0 | 80 | 203.2 | 60 | 152.4 | 142.4 | 361.7 | 118.4 | 300.7 | 8.3 | 21.0 |
| 110 | 279.4 | 88 | 223.5 | 66 | 167.6 | 156.6 | 397.8 | 130.2 | 330.8 | 9.1 | 23.1 |
| 120 | 304.8 | 96 | 243.8 | 72 | 182.9 | 170.9 | 434.0 | 142.1 | 360.8 | 9.9 | 25.2 |
| 130 | 330.2 | 104 | 264.2 | 78 | 198.1 | 185.1 | 470.3 | 153.9 | 391.0 | 10.8 | 27.3 |
| 140 | 355.6 | 112 | 284.5 | 84 | 213.4 | 199.4 | 506.4 | 165.8 | 421.1 | 11.6 | 29.4 |
| 150 | 381.0 | 120 | 304.8 | 90 | 228.6 | 213.6 | 542.5 | 177.6 | 451.1 | 12.4 | 31.5 |
| 160 | 406.4 | 128 | 325.1 | 96 | 243.8 | 227.8 | 578.7 | 189.4 | 481.1 | 13.2 | 33.6 |
| 170 | 431.8 | 136 | 345.4 | 102 | 259.1 | 242.1 | 614.8 | 201.3 | 511.2 | 14.1 | 35.7 |
| 180 | 457.2 | 144 | 365.8 | 108 | 274.3 | 256.3 | 651.1 | 213.1 | 541.4 | 14.9 | 37.8 |
| 190 | 482.6 | 152 | 386.1 | 114 | 289.6 | 270.6 | 687.3 | 225.0 | 571.4 | 15.7 | 39.9 |
| 200 | 508.0 | 160 | 406.4 | 120 | 304.8 | 284.8 | 723.4 | 236.8 | 601.5 | 16.5 | 42.0 |
| 210 | 533.4 | 168 | 426.7 | 126 | 320.0 | 299.0 | 759.5 | 248.6 | 631.5 | 17.4 | 44.1 |
| 220 | 558.8 | 176 | 447.0 | 132 | 335.3 | 313.3 | 795.7 | 260.5 | 661.6 | 18.2 | 46.2 |
| 230 | 584.2 | 184 | 467.4 | 138 | 350.5 | 327.5 | 832.0 | 272.3 | 691.8 | 19.0 | 48.3 |
| 240 | 609.6 | 192 | 487.7 | 144 | 365.8 | 341.8 | 868.1 | 284.2 | 721.8 | 19.9 | 50.4 |
| 250 | 635.0 | 200 | 508.0 | 150 | 381.0 | 356.0 | 904.2 | 296.0 | 751.8 | 20.7 | 52.5 |
| SCREEN SIZE THROW DISTANCE OFFSET | |||||||||||||
| M (DIAGONAL) | X (HORIZONTAL) | Y (VERTICAL) | Z (TELE) | Z (WIDE) | Y' | ||||||||
| INCHES | CM | INCHES | CM | INCHES | CM | INCHES | CM | INCHES | CM | INCHES | CM | INCHES | CM |
| 260 660.4 | 208 528.3 | 156 396.2 3 | 70.2 940 | 4 307.8 781 | 9 21.5 54.6 | ||||||||
| 270 685.8 | 216 548.6 | 162 411.5 3 | 84.5 976 | 5 319.7 811 | 9 22.3 56.7 | ||||||||
| 280 711.2 | 224 569.0 | 168 426.7 3 | 98.7 101 | 2.8 331.5 84 | 2.1 23.2 58.8 | ||||||||
| 290 736.6 | 232 589.3 | 174 442.0 4 | 13.0 104 | 9.0 343.4 87 | 2.2 24.0 60.9 | ||||||||
| 300 762.0 | 240 609.6 | 180 457.2 4 | 27.2 108 | 5.1 355.2 90 | 2.2 24.8 63.0 | ||||||||
| 310 787.4 | 248 629.9 | 186 472.4 4 | 41.4 112 | 1.2 367.0 93 | 2.3 25.6 65.1 | ||||||||
| 320 812 | 8 256 | 650.2 19 | 2 487.6 | 455.7 | 1157.4 | 378.9 | 962.3 | 26.5 | 67.2 | ||||
| 330 838.2 | 264 670.5 | 198 502.8 4 | 69.9 119 | 3.5 390.7 99 | 2.3 27.3 69.3 | ||||||||
| 340 863.6 | 272 690.8 | 204 518.0 4 | 84.2 122 | 9.6 402.6 10 | 22. | 4 | 28.1 71.4 | ||||||
| 350 889.0 | 280 711.1 | 210 533.2 4 | 98.4 126 | 5.8 414.4 10 | 52. | 4 | 29.0 73.5 | ||||||
| 360 914.4 | 288 731.4 | 216 548.4 5 | 12.6 130 | 1.9 426.2 10 | 82. | 5 | 29.8 75.6 | ||||||
| 370 939.8 | 296 751.7 | 222 563.6 5 | 26.9 133 | 8.0 438.1 11 | 12. | 5 | 30.6 77.7 | ||||||
| 380 965.2 | 304 772.0 | 228 578.8 5 | 41.1 137 | 4.2 449.9 11 | 42. | 6 | 31.4 79.8 | ||||||
| 390 990.6 | 312 792.3 | 234 594.0 5 | 55.4 141 | 0.3 461.8 11 | 72. | 6 | 32.3 81.9 | ||||||
| 400 1016. | 0 | 320 812.6 2 | 40 609.2 | 569.6 1446 | 4 473.6 | 1202. | 6 | 33.1 84.0 | |||||
This projector is designed to show images optimally on a 80 \~ 120 inches sized screen.
Cautions on Lamp Replacement
- The projector lamp is an expendable item. For best operating performance, replace the lamp according to the usage time. You can view the lamp usage time in the Information Display (INFO button).
-
Replace the lamp with the one specified below only.
-
Lamp Model Name : 200W NSHA200SS(SP-M250), 180W NSHA180SS(SP-M220, SP-M200)
- Lamp Manufacturer : Ushio
-
For inquiries on lamp purchase, please see 'Contact SAMSUNG WORLDWIDE' in section 5-3.
-
Check that the power cord is unplugged before replacing the lamp.
- Because the lamp is a high temperature and high voltage product, wait at least one hour from the time you disconnect the power cord before replacing the lamp.
• The projector lamp is on the top of the projector. - Do not leave the old lamp near flammable items or in reach of children. There is a danger of fire, burns, or injury.
- Remove dirt or foreign material around or inside the lamp unit using a proper vacuum device.
- When handling the lamp, avoid touching any part of it except for the handles. If you handle the lamp incorrectly, you can shorten the lamp's lifetime and affect picture quality.
- When you change the lamp, put the projector on a flat surface.
- The projector has been designed so that the projector does not work if the lamp cover is not completely assembled after a lamp replacement. If the projector does not work properly, please check the operating status of the indicator LED.
Lamp contains Mercury. Dispose According to Local, State or Federal Laws.
Lamp Replacement Procedure
Because the lamp is a high temperature and high voltage product, wait at least one hour from the time that the power cord is disconnected before replacing it.
The projector lamp is on the top of the projector.
- Remove the screw shown in the figure below, and then open the cover.
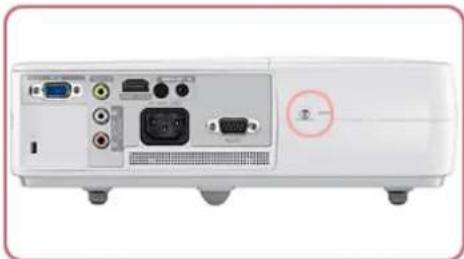
natural_image
Front view of a white projector with ports and a highlighted button (no visible text or symbols)- With the cover open, remove the three (3) screws on the top of the projector as shown in the figure below.
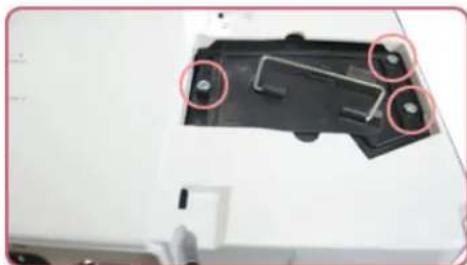
natural_image
Close-up of a mechanical device with three red-circled features on its surface (no visible text or symbols)- To remove the lamp, hold and then pull the lamp handle as shown in the figure below.
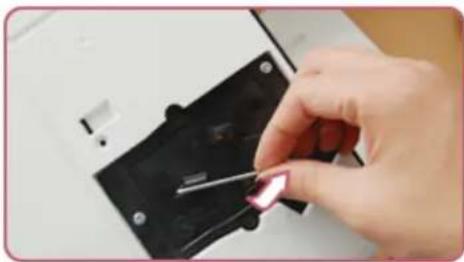
natural_image
Hand holding a small pink object inserted into a black plastic component (no visible text or symbols)
Install a new lamp in the reverse order of removal.
Replacing and Cleaning the Filter
Precautions when replacing the projector filter:
• The filter is on the side of the projector.
- Turn off the power of the projector, and then disconnect the power cord after the projector has cooled sufficiently. Otherwise, its parts may be damaged due to internal heat.
- When you replace the filter, you may release some dust.
• For inquiries on replacement filter purchase, please see 'Contact SAMSUNG WORLDWIDE' in Chapter 5.
To replace or clean the filter, follow these steps:
- Turn off the power of the projector, and then disconnect the power cord after the projector has cooled sufficiently.
- Open the filter cover.
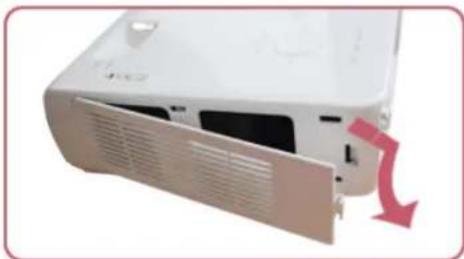
natural_image
White projector with ventilation slots and a red downward arrow indicating airflow (no text or symbols)- Replace or clean the filter.
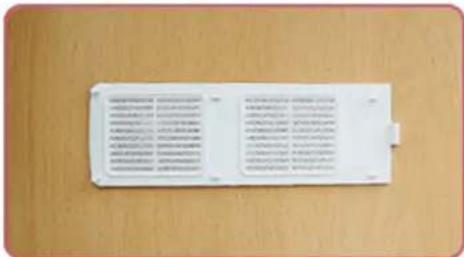
- When cleaning the filter, use a small vacuum cleaner designed for computers and small electronics products, or wash it under running water.
• After washing the filter under running water, make sure to dry it completely. The moisture may cause the filter to corrode.
• If dust cannot be separated from the filter or the filter is torn, it must be replaced.
• After cleaning or replacing the filter, run-> in the menu.
Ventilation openings
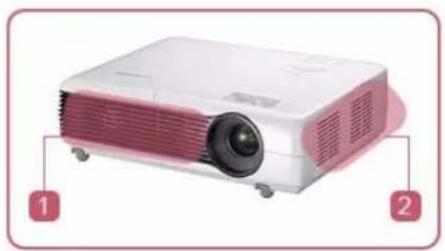
For the location of the ventilation openings, see the picture below:
- Do not block the ventilation openings. Blocking the ventilation openings can cause your projector to overheat and may cause it to fail.
natural_image
White projector with pink ventilation grille and labeled parts 1 and 2 (no text or symbols on device)1 Air outtake vent
2 Air intake vent
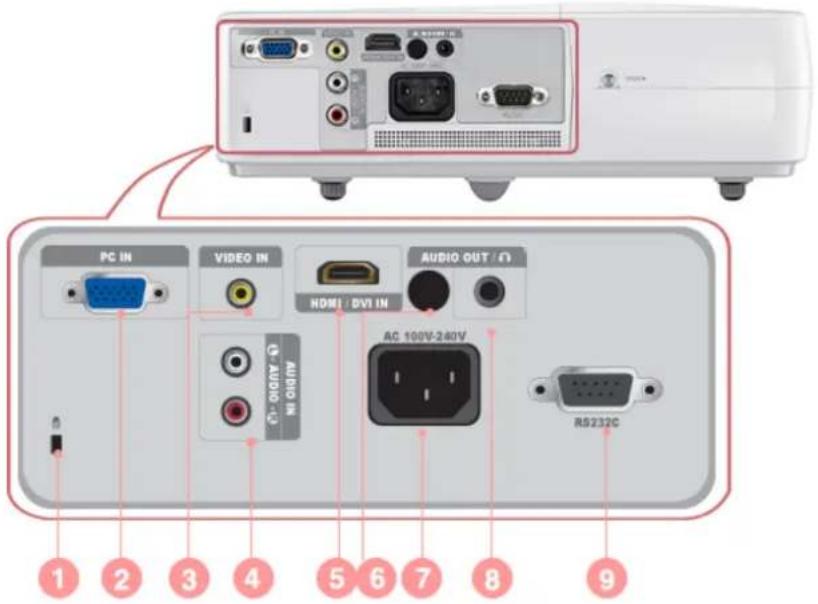
| 1. Kensington Lock slot 6. Remote Control Signal Receiver | |
| 2. PC IN port 7. Power Input port | |
| 3. VIDEO IN port | 8. AUDIO OUT/ port |
| 4. [AUDIO IN] L-AUDIO-R port 9. RS232C port | |
| 5. HDMI/DVI IN port | |
PC Timing (D-Sub/HDMI)
| FORMAT RESOLUTION | HORIZONTAL FREQUENCY (KHZ) | VERTICAL FREQUENCY (HZ) | PIXEL FREQUENCY (MHZ) | ||
| IBM 640 x 350 | 70Hz 31.469 | 70.086 25.175 | |||
| IBM 640 x 480 | 60Hz 31.469 | 59.940 25.175 | |||
| IBM 720 x 400 | 70Hz 31.469 | 70.087 28.322 | |||
| VESA 640 x 480 | 60Hz 31.469 | 59.940 25.175 | |||
| MAC 640 x 480 | 67Hz 35.000 | 66.667 30.240 | |||
| VESA 640 x 480 | 70Hz 35.000 | 70.000 28.560 | |||
| VESA 640 x 480 | 72Hz 37.861 | 72.809 31.500 | |||
| VESA 640 x 480 | 75Hz 37.500 | 75.000 31.500 | |||
| VESA 720 x 576 | 60Hz 35.910 | 59.950 32.750 | |||
| VESA 800 x 600 | 56Hz 35.156 | 56.250 36.000 | |||
| VESA 800 x 600 | 60Hz 37.879 | 60.317 40.000 | |||
| VESA 800 x 600 | 70Hz 43.750 | 70.000 45.500 | |||
| VESA 800 x 600 | 72Hz 48.077 | 72.188 50.000 | |||
| VESA 800 x 600 | 75Hz 46.875 | 75.000 49.500 | |||
| MAC 832 x 624 | 75Hz 49.726 | 74.551 57.284 | |||
| VESA 1024 x | 768 | 60Hz 48.363 | 60.004 65 | 000 | |
| VESA 1024 x | 768 | 70Hz 56.476 | 70.069 75 | 000 | |
| VESA 1024 x | 768 | 72Hz 57.672 | 72.000 78 | 434 | |
| VESA 1024 x | 768 | 75Hz 60.023 | 75.029 78 | 750 | |
| VESA 1152 x | 864 | 60Hz 53.783 | 59.959 81 | 750 | |
| VESA 1152 x | 864 | 70Hz 63.000 | 70.000 96 | 768 | |
| VESA 1152 x | 864 | 72Hz 64.872 | 72.000 99 | 643 | |
| VESA 1152 x | 864 | 75Hz 67.500 | 75.000 108 | 000 | |
| VESA 1280 x | 720 | 60Hz 44.772 | 59.855 74 | 500 | |
| VESA 1280 x | 720 | 70Hz 52.500 | 70.000 89 | 040 | |
| VESA 1280 x | 720 | 72Hz 54.072 | 72.000 91 | 706 | |
| VESA 1280 x | 720 | 75Hz 56.456 | 74.777 95 | 750 | |
| VESA 1280 x | 768 | 60Hz 47.776 | 59.870 79 | 500 | |
| VESA 1280 x | 768 | 75Hz 60.289 | 74.893 102 | 2.250 | |
| VESA 1280 x | 800 | 60Hz 49.702 | 59.810 83 | 500 | |
| VESA 1280 x | 800 | 75Hz 62.795 | 74.934 106 | 500 | |
| VESA 1280 x | 960 | 60Hz 60.000 | 60.000 108 | 000 | |
| VESA 1280 x | 960 | 70Hz 69.930 | 70.000 120 | 839 | |
| FORMAT | RESOLUTION | HORIZONTAL FREQUENCY (KHZ) | VERTICAL FREQUENCY (HZ) | PIXEL FREQUENCY (MHZ) | |
| VESA 1280 x | 960 72Hz 72.072 72.000 124.540 | ||||
| VESA 1280 x | 960 75Hz 75.231 74.857 130.000 | ||||
| VESA 1280 x | 1024 60Hz 63.981 60.020 108.000 | ||||
| VESA 1280 x | 1024 70Hz 74.620 70.000 128.943 | ||||
| VESA 1280 x | 1024 72Hz 76.824 72.000 132.752 | ||||
| VESA 1280 x | 1024 75Hz 79.976 75.025 135.000 | ||||
| VESA 1400 x | 1050 60Hz 65.317 59.978 121.750 | ||||
| VESA 1440 x | 900 60Hz 55.935 59.887 106.500 | ||||
| VESA 1440 x | 900 75Hz 70.635 74.984 136.750 | ||||
| VESA 1600 x | 1200 60Hz 75.000 60.000 162.000 | ||||
All resolutions higher or lower than 1024x768 are converted to 1024x768 by the Scaler chip inside the projector. If the resolution of the signal output by the PC matches the real resolution (1024x768) of the projector, the screen quality is optimal.
AV Timing (D-Sub)
| FORMAT RESOLUTION SCAN | |||
| BT.601 SMPTE 267M 480i 59.94Hz Interlaced | |||
| BT.1358 SMPTE 293M 480p 59.94Hz | Progressive | ||
| BT.601 | 576i | 50Hz | Interlaced |
| BT.1358 | 576p | 50Hz | Progressive |
| SMPTE 296M | 720p | 59.94Hz/60Hz Progressive | |
| 720p | 50Hz | Progressive | |
| BT.709 SMPTE 274M | 1080i | 59.94Hz/60Hz Interlaced | |
| 1080i | 50Hz | Interlaced | |
AV Timing (HDMI)
| FORMAT | RESOLUTION | SCAN | HORIZONTAL FREQUENCY (KHZ) | VERTICAL FREQUENCY (HZ) | PIXEL FREQUENCY (MHZ) | |
| EIA-861 | Format1 | 640 x 480 | Progressive | 59.940 | 31.469 | 25.175 |
| EIA-861 | Format1 | 640 x 480 | Progressive | 60.000 | 31.500 | 25.200 |
| EIA-861 | Format2,3 | 720 x 480 | Progressive | 59.940 | 31.469 | 27.000 |
| EIA-861 | Format2,3 | 720 x 480 | Progressive | 60.000 | 31.500 | 27.027 |
| EIA-861 | Format4 | 1280 x 720 | Progressive | 59.939 | 44.955 | 74.175 |
| EIA-861 | Format4 | 1280 x 720 | Progressive | 60.000 | 45.000 | 74.250 |
| EIA-861 | Format5 | 1920 x 1080 | Interlaced | 59.939 | 33.716 | 74.175 |
| FORMAT RESOLUTION | SCAN | HORIZONTAL FREQUENCY (KHZ) | VERTICAL FREQUENCY (HZ) | PIXEL FREQUENCY (MHZ) | ||
| EIA-861 Format5 1920 x 1080 Interlaced 60.000 | 33.750 74.250 | |||||
| EIA-861 Format17,18 720 x 576 Progressive 50.000 31.250 27.000 | ||||||
| EIA-861 Format19 1280 x 720 Progressive 50.000 37.500 74.250 | ||||||
| EIA-861 Format20 1920 x 1080 Interlaced 50.000 28.125 74.250 | ||||||
AV Timing (VIDEO)
NTSC, NTSC 4.43, PAL, PAL60, PAL-N, PAL-M, SECAM
Your projector supports the standard video formats listed above through its video inputs. No adjustments are necessary.
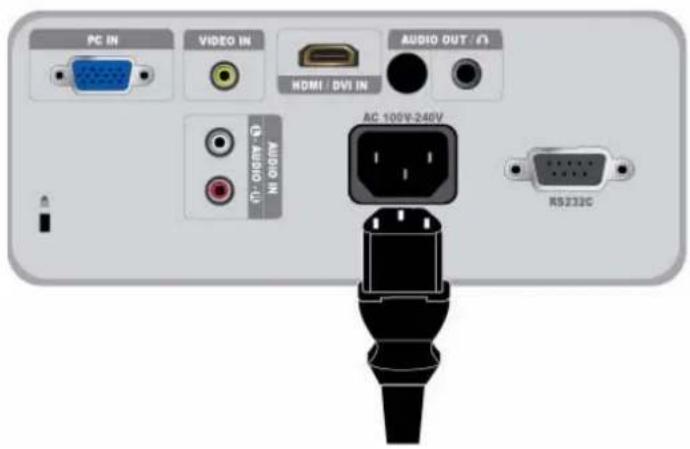
- Plug the power cord into the power terminal on the rear side of the projector.
2-10-1. Setting up the PC Environment
Check the following items before connecting your PC to your projector.
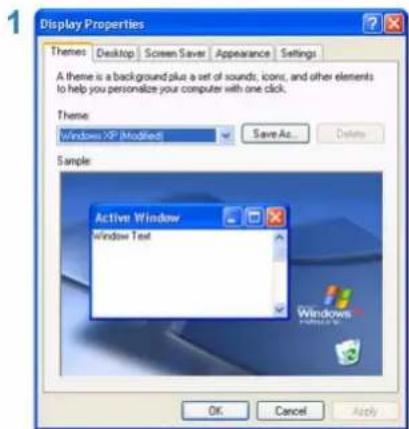
- Click the right mouse button on the Windows desktop, and then click [Properties]. The
dialog appears.
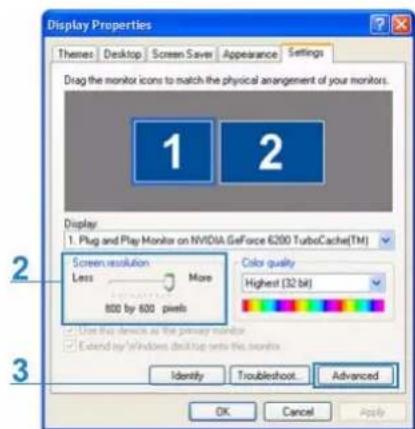
- Click the [Settings] tab, and then set the
. The optimal resolution for the projector is 1024 x 768. For other resolutions supported by the projector, see the PC Timing Display Mode table in section 2-8.
You do not have to change the
- Press the [Advanced] button. Another property window appears.
- Click the [Monitor] tab and set the
. For the refresh rate that matches the resolution you've chosen, see the refresh rate (60 Hz, 70 Hz, etc.) next to your selected resolution in the PC Timing Display Mode table in section 2-8.
Setting the refresh rate sets both the vertical and horizontal frequencies.
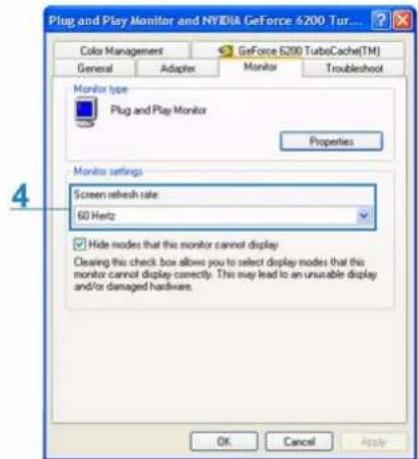
- Click the [OK] button to close the window, and then click the [OK] button on the
window to close that window. - Shut down the PC and connect it to the projector.
The setup process might vary depending on your type of computer or version of Windows.
(For example, [Properties] appears instead of [Properties (R)] as shown in 1.)
This projector supports 32 bit color quality (per pixel) when it is used as a PC monitor.
Projected images may differ from the images on your monitor depending on the monitor manufacturer or Windows version.
When connecting the projector to a PC, make sure that the PC setup complies with the display settings supported by this projector. If it does not, you may have signal problems.
2-10-2. Connecting with a PC
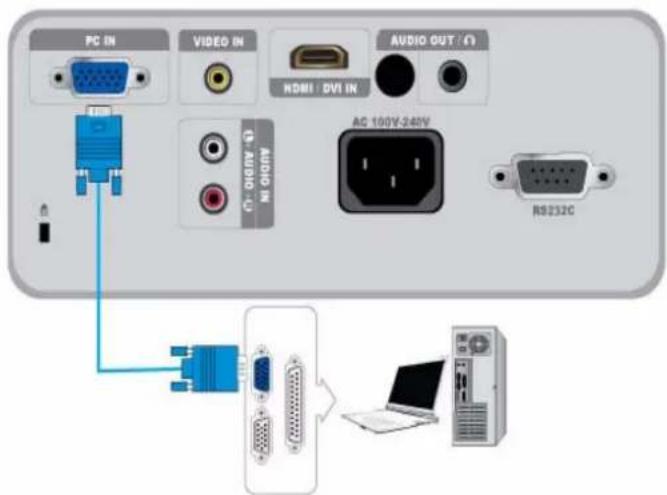
Make sure that your PC and projector are turned off.
- Connect the [PC IN] port on the rear side of the projector to the PC video out (D-sub) port of the PC using a PC video cable.
- Plug in the power cords of the projector and the PC.
This product supports plug and play. If you use Windows XP, you do not need to set up the driver on your PC.
Using the Projector
- Turn on the projector, and then press the [SOURCE] button to select
. If the Mode is not available, make sure the PC video cable is properly connected. - Turn on the PC, and then set the PC Environment (screen resolution, etc.) if necessary.
- Adjust the screen.
flowchart
graph TD
    A[" HDMI OUT "] --> B[" HDMI / DVI IN "]
    B --> C[" PC IN "]
    B --> D[" VIDEO IN "]
    B --> E[" AC 100V-240V "]
    B --> F[" RB232C "]
    G[" Laptop "] --> A
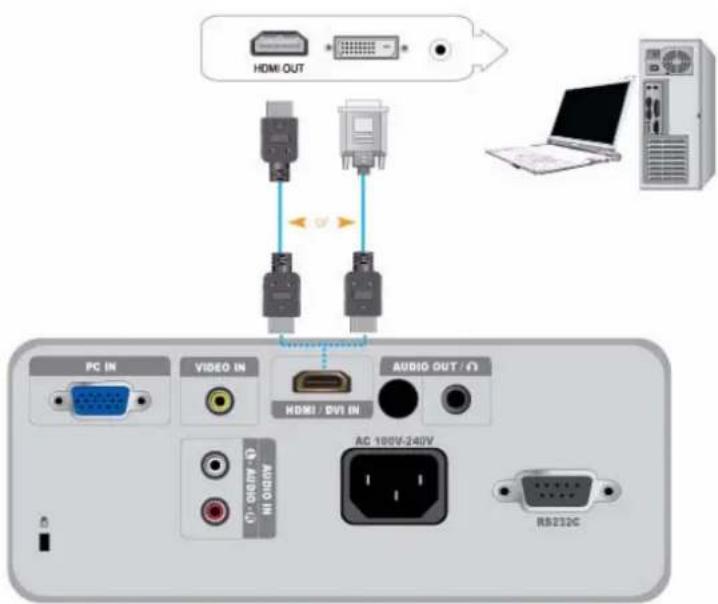
Make sure that your PC and projector are turned off.
- Connect the [HDMI/DVI IN] terminal of the projector to the HDMI or DVI terminal of your PC using a HDMI/HDMI or HDMI/DVI cable (Not supplied).
- If you are connecting to the HDMI terminal of your PC, use an HDMI/HDMI cable (Not supplied).
- For the supported resolutions and refresh rates, see PC Timing (D-Sub/HDMI) in Section 2-8, "Supported Display Modes".
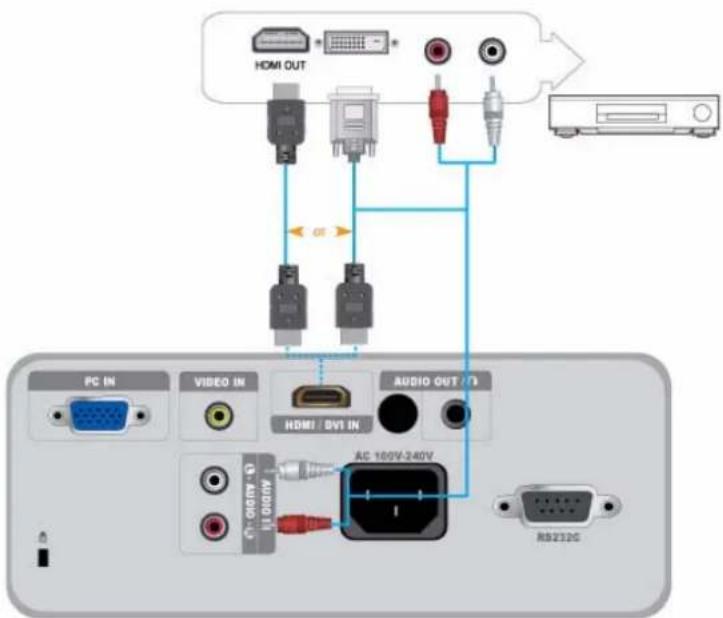
Make sure that the AV device and your projector are turned off.
- Connect the [HDMI/DVI IN] terminal at the back of the projector to the HDMI or HDMI/DVI output terminal of the digital output device using an HDMI/DVI or HDMI/HDMI cable.
- If you are connecting to the HDMI output terminal on the digital output device, use an HDMI/HDMI cable. - For supported input signal formats, resolutions, and frequencies, see AV Timing(HDMI) in Section 2-8, "Supported Display Modes".
- If you connected using a HDMI/DVI cable, connect the [AUDIO IN (L-AUDIO-R)] terminal on the projector to the Audio out terminal on your digital output device using an audio cable (Not supplied).
- If you connected with a HDMI/HDMI cable, you do not need an audio cable.
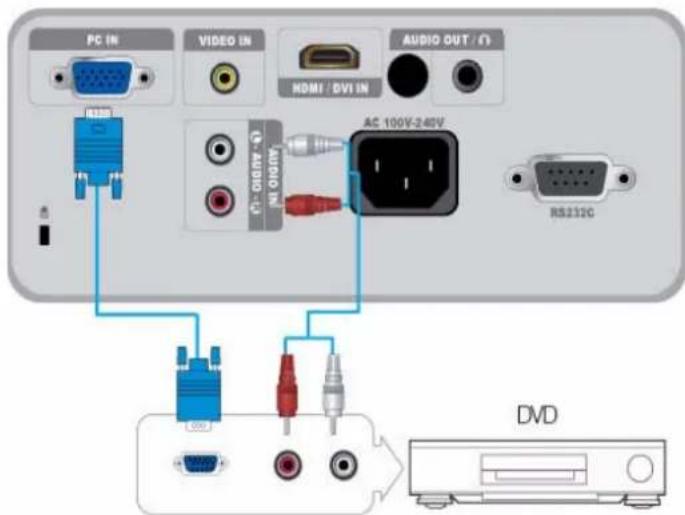
Make sure that the AV device and your projector are turned off.
- Connect the [PC IN] terminal at the back of the projector to the D-Sub terminal of your AV device using a D-Sub cable.
- For supported input signal formats, resolutions, and frequencies, see AV Timing (D-Sub) in Section 2-8, "Supported Display Modes".
- Connect the [AUDIO IN (L-AUDIO-R)] terminal at the back of the projector to the Audio out terminal of your AV device using an audio cable (Not supplied).
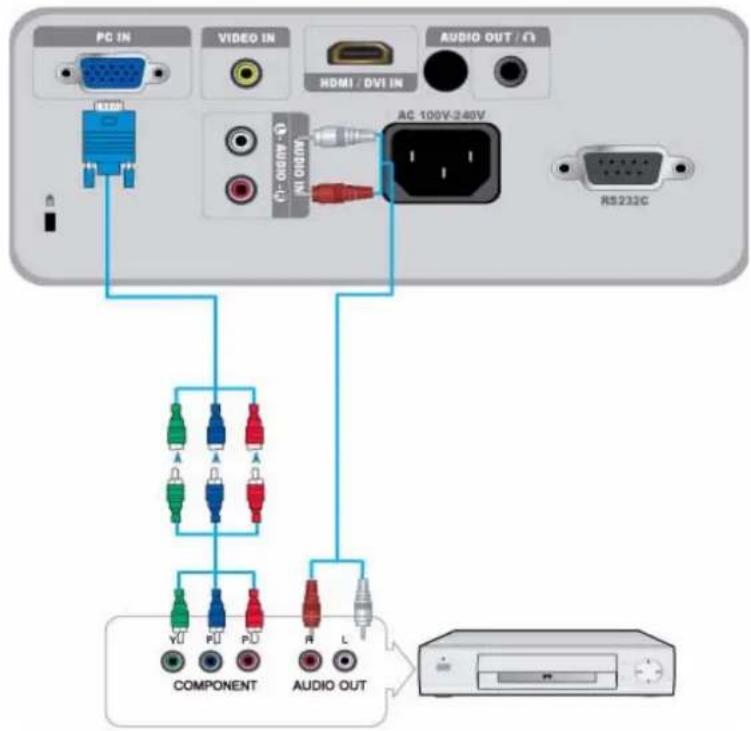
Make sure that the AV device and your projector are turned off.
- Connect the [PC IN] terminal on the back of the projector to the Component terminal on your AV device using a D-Sub to Component cable (Not supplied). This cable has a D-Sub connector on one end and three RCA jacks on the other.
- For supported input signal formats, resolutions, and frequencies, see AV Timing (D-Sub) in Section 2-8, "Supported Display Modes".
- Connect the [AUDIO IN (L-AUDIO-R)] terminal on the back of the projector and the Audio out terminal on your AV device using an audio cable (Not supplied).
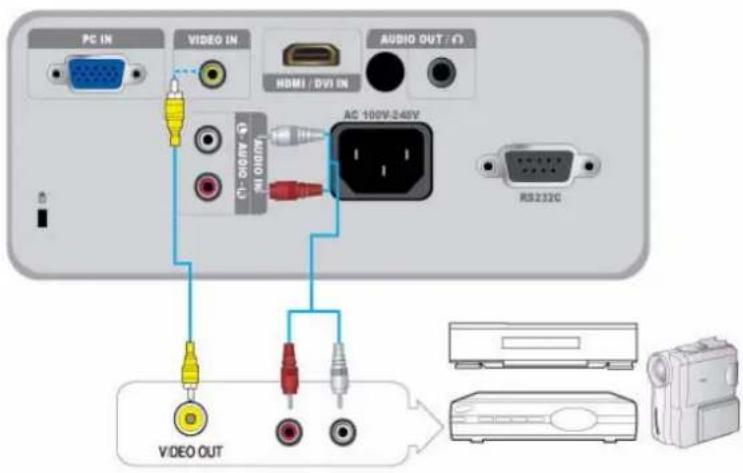
Make sure that the AV device and your projector are turned off.
- Connect the AV device to the [VIDEO] port using a VIDEO cable (not supplied).
- For supported input signal formats, see AV Timing (VIDEO) in section 2-8, "Supported Display Modes".
- Connect the [AUDIO IN (L-AUDIO-R)] terminal on the back of the projector and the Audio out terminal on your AV device using an audio cable (Not supplied).
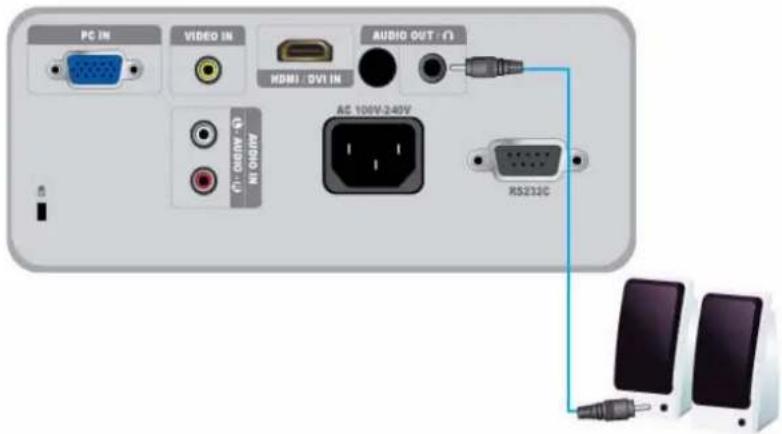
You can hear sound through an external speaker instead of the internal speakers built into the projector.
- Obtain an audio cable (Not supplied) suitable for your external speaker.
- Connect the [AUDIO OUT/Ω] terminal of the projector to the external speaker using an audio cable.
- When using an external speaker, the internal speaker does not operate but you can adjust the volume of the external speaker using the Volume button or the remote control of the projector.
- The [AUDIO OUT/] terminal can output all audio signals.
The Kensington Lock slot allows you to lock your projector, providing a sense of security when you use it in a public place. Because the shape and usage of the lock may differ depending on the model and the manufacturer, see the User Manual supplied with the locking device for more information.
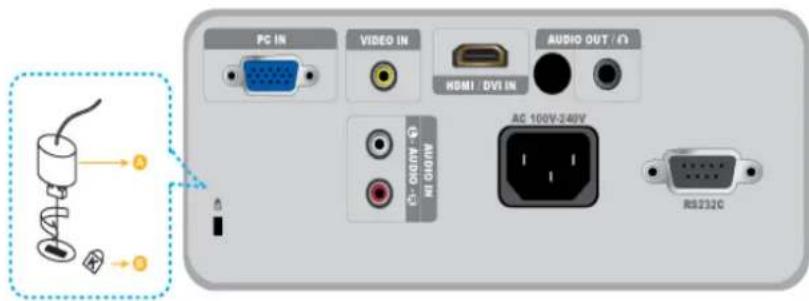
Locking the product
- Loop the Kensington lock cable around an immovable part of desk or heavy object as directed in the Kensington lock user manual.
- Insert the locking part of the locking device into the Kensington lock hole in the projector.
- Insert the Kensington lock key into the locking mechanism and turn it in the locking direction.
You can purchase a locking device from an electronics store or an online shop.
3-1 Product Features
-
An optical engine adopting new LCD technology
-
1024 x 768 resolution.
- 3P-LCD panel.
- SP-M200 : Provides a bright, 2000 lumen screen.
- SP-M220 : Provides a bright, 2200 lumen screen.
-
SP-M250 : Provides a bright, 2500 lumen screen.
-
Minimized fan noise
- Minimizes fan noise through optimized internal air flow and the fan installation structure.
- Multiple input terminals
• Increases the connectivity to peripheral devices such as D-Sub 15P (supporting DTV signal), Video, HDMI, etc.
- Audio Output
- Equipped with an internal 7W (mono) speaker.
-
User adjustments
-
Allows adjustment of each input port.
- Equipped with an internal Test Pattern that can be used to install and adjust the projector.
- Compact size, lightweight, and portable.
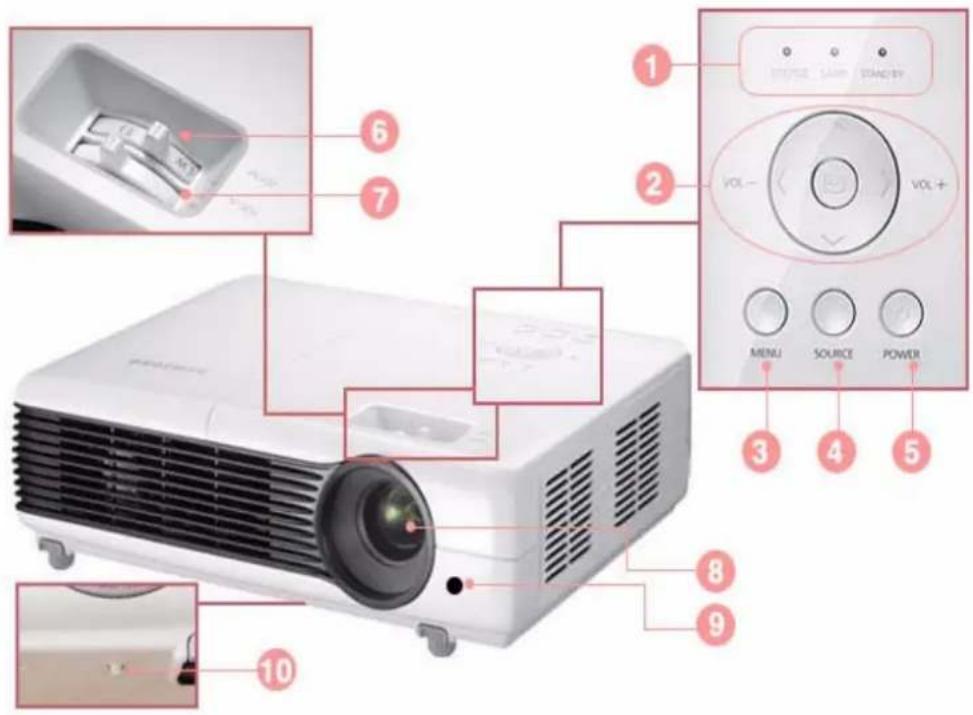
| NAME DESCRIPTION | |
| 1.Indicators - STAND BY (Blue LED) | LED)- LAMP (Blue LED)- STATUS (Green/Red/Yellow LED)Refer to the LED Indications. |
| 2. Move / Select / Volume < > / button | ∧V <> / ☑ Use to move or to select an item within a menu.<> : Use to adjust the volume. |
| 3. MENU button Use to display the Menu Screen. | |
| 4. SOURCE button Use to select the external device signal. | |
| 5. ⏻ POWER button | Use to turn the projector on or off. |
| 6. Zoom Knob Use to enlarge or reduce image size. | |
| 7. Focus Ring Use for Focus Adjustment. | |
| 8. Lens - | |
| 9. Remote Control Signal Receiver | - |
| 10. Hole for attaching lens cap string | - |
Using your projector with another remote control device nearby may result in improper functioning due to remote control code (frequency) interference.
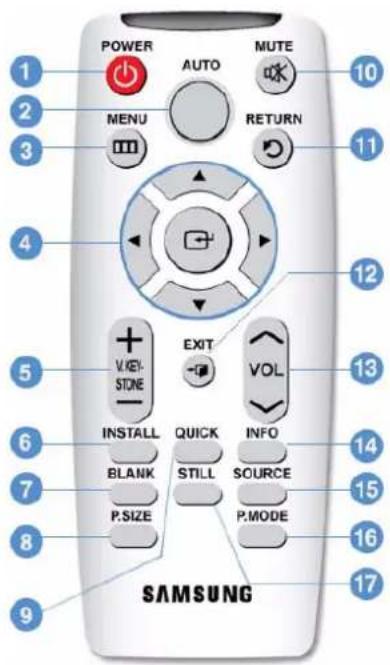
- POWER ( ⏻ ) Button
Use this button for turning the product on and off.
- AUTO Button
Adjusts the Picture automatically. (Available in
- MENU ( ) Button
Use to display the Menu Screen.
- Move ( ) ▼ Buttons
Used to move to or select each menu item.
- V. KEYSTONE Button ()+-
Use this when the screen is displayed in a trapezoid shape.
- INSTALL Button
Use to adjust the image so that it is appropriate for the projector's installation location (In front of the screen and hanging from the ceiling, behind the screen and hanging from the ceiling, etc.)
- BLANK Button
Use to turn off the screen and sound temporarily. The video and audio will come back on when any button other than the [POWER] button is pressed.
- P.SIZE Button
Use to adjust the size of picture screen.
- QUICK Button
Use to return to the last menu used quickly.
- MUTE ( ) Button
Press to mute the sound temporarily. Press the MUTE button again or the VOL button ( ) when the sound is muted to hear sound again.
- RETURN ( ) Button
Returns to the previous menu.
- EXIT (→) Button
Use to make the Menu Screen disappear.
- VOL ( ) Button
Use to control the volume.
- INFO Button
Use to check source signals, picture setup, PC screen adjustment, and lamp lifespan.
- SOURCE Button
Use to check or select the connection status of external devices.
- P.MODE Button
Use to select Picture Mode.
- STILL Button
Use to see still images.
Make sure to place your remote control on a table or desk.
If you step on the remote control, you may fall and hurt yourself or damage the remote.
You can use the remote control up to a distance of about 32.8 feet (10 m) from the product.
LED Indications
●:Light is On Light is Blinking :Light is Off
| STATUS LAMP STAND BY STATUS | |||
| ○ | ○ | ● | If you press the [POWER] button on the remote control or projector, the screen appears within 30 seconds. |
| ○ | ● | ● | The projector is operating normally. |
| ○ | ○ | ● | The projector is preparing an operation after the [POWER] button on the projector or the remote control has been pressed. |
| ○ | ○ | ○ | The [POWER] button has been pressed to turn off the projector, and the cooling system is in operation to cool off the inside of the projector. (Operates for about 3 seconds.) |
| ● | ○ | ● | The cooling fan inside the projector is not operating normally. Refer to Action 1 in Clearing Indicator Problems below. |
| ○ | ○ | ● | The lamp cover protecting the lamp unit is not closed properly. Refer to Action 2 in Clearing Indicator Problems below. |
| ○ | ○ | ● | The projector has changed to Cooling mode because its internal temperature has increased beyond the maintenance limit.Refer to Action 4 in Clearing Indicator Problems below. |
| ● | ○ | ● | The projector has turned itself off automatically because its internal temperature has increased beyond the maintenance limit. Refer to Action 5 in Clearing Indicator Problems below. |
| ○ | ○ | ○ | A problem has occurred with the operation of the lamp. Refer to Action 6 below. |
Clearing Indicator Problems
| CLASSIFICATION | STATE MEASURES | |
| Action 1 | The cooling fan system is not operating normally. | If the symptom remains even after disconnecting and then reconnecting the power cord and turning the projector on again, contact your product provider or our service center. |
| Action 2 | The lamp cover protecting the lamp unit is not properly closed or the sensor system is not operating normally. | Check if the screws on the side of the projector are securely tightened. If they are and the indicators are still lit, contact your product distributor or a service center. |
| Action 3 | The lens cover has not opened completely. | Open the lens cover completely. |
| Action 4 | The projector has changed to the Cooling mode because the internal temperature of the projector has increased beyond the maintenance limit. | If the internal temperature of the projector has increased beyond the maintenance limit, the projector changes to the Cooling mode before turning off automatically.In Cooling mode, the fan speed is increased and the projector's lamp is changed tomode.Check whether the ventilation hole of the projector is blocked.Check the air filter and clean if blocked.Check whether the surrounding temperature of the projector is higher than the standard temperature range of the projector.Cool the projector sufficiently and operate it again. |
| Action 5 | The internal temperature of the projector has risen higher than the limit, and the projector has turned off automatically. | Check whether the ventilation hole of the projector is blocked.Check the air filter and clean if blocked.Check whether the surrounding temperature of the projector is higher than the standard temperature range of the projector.Cool the projector sufficiently and operate it again.If the same problem occurs continually, contact your product distributor or service center. |
| Action 6 | The lamp has malfunctioned after power turns off abnormally or after the projector is powered on right after turning off. | Turn the power off, wait for a sufficient amount of cooling time and then turn the power on to operate. If the same problem occurs continually, contact your product distributor or service center. |
This Projector uses a cooling fan system to keep the unit from overheating. Operation of the cooling fan may produce noise, This does not affect product performance and is part of normal operation.
3-5 Using the Screen Adjustment Menu (OSD: On Screen Display)
The Screen Adjustment Menu (OSD: On Screen Display) Structure
To access the Menu, press the Menu button on the product or on the remote. To move in the menu, press the arrow buttons. Menu selections with an arrow on the far right have sub-menus. Press the right arrow button to access the sub-menu. Directions for navigating and selecting items in a menu are at the bottom of each menu screen.
| MENU SUB-MENU | |||||
| Input | Source List Edit Name | ||||
| Picture | Mode Size Position Digital NR Black Level | ||||
| Overscan Film Mode PC Zoom | |||||
| Setup | Install Lamp Mode Auto Keystone V-Keystone Background | ||||
| Test Pattern | Video Type | Caption | Reset | ||
| Option | Language | Menu Option | Sound | Filter Check Time | Auto Power On |
| Sleep Timer | Security | Panel Lock | Information | ||

3-5-1. Input
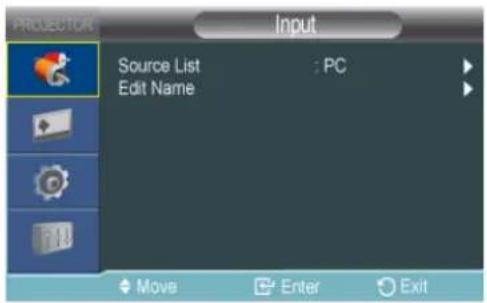
| MENU | DESCRIPTION |
| Source List You can select a device connected to the projector to display.·- | |
| Edit Name You can edit the names of devices connected to the projector.·- | |

3-5-2. Picture
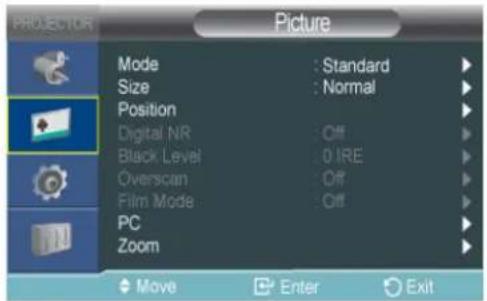
| MENU DESCRIPTION | |
| Mode | Select a screen mode to match the environment, the kind of images you are projecting, or select a customized mode you have created based on your requirements. |
| · : Selects the picture for increased definition in a bright room.· : Selects the picture for the optimum display in a normal environment.· : This mode is suitable for presentations.· : This mode is suitable for text work.· : This mode is suitable for viewing a movie.· : This picture mode is optimized for playing games. In mode, the text in still pictures will appear unnatural.· : This is a customized mode you create using the→function.· and modes are only enabled if the input signal is a PC Timing (D-Sub/HDMI) signal.· Each mode has separate controls for,,, etc.When you access a mode and change (for example) the, you are changing the contrast for that mode only.: Used to adjust the contrast between the object and the background.: Used to adjust the brightness of the entire picture.: Used to adjust the sharpness of the picture.· When the input signal is a PC Timing (D-Sub/HDMI) signal, thecannot be adjusted.: Used to adjust color lighter or darker.· When the input signal is a PC Timing (D-Sub/HDMI) signal, the cannot be adjusted.: Used to obtain more natural color by enhancing the amount of green or red in images.· When the input signal is a PC Timing (D-Sub/HDMI) signal or PAL and SECAM signal in the [AV] modes, the cannot be adjusted.: The tone of the color can be changed.· Factory defaults:,,· You can select the color temperature for the items below according to your preferences.,: Adjusts the color temperature of the White level.,: Adjusts the color temperature of the Black level.-: Changes the brightness characteristic for each color tone of an image.· The larger (+) the value, the greater the contrast of the bright and dark parts.The smaller (-) the value, the darker the dark parts.· Adjustable range: -3 to +3: You can save the status of a screen you adjusted according to your preferences using the→OSD.: Restores the mode settings to the factory defaults. | |
| Size Using this function, you select a screen size. | · When the input signal is a PC Timing (D-Sub/HDMI) signal,//is not supported.·:-<Zoom1>-<Zoom2>-<16:9> |
| Position | Using this function, you can adjust the screen position if it is not aligned.To adjust, select the direction you want to move the screen, and then press the arrow button pointing in that direction repeatedly. |
| Digital NR | If dotted lines appear in an image or the screen shakes, enabling Digital NR (Noise Reduction) can improve the quality of the picture.When the input signal is a PC Timing (D-Sub/HDMI) signal,does not operate. |
| Black Level | If the black level is unsuitable for the input signal, the dark parts of an image may look unclear or dim. Using this function, you can select a black level that can improve the visibility of the dark parts.Thecan only be set for the 480i and 576i RGB signals in the [AV], and AV Timing (D-Sub) modes.For [AV], and the 480i and 576i signals of AV Timing (D-Sub).<0 IRE>: Sets the black level to <0 IRE>.<7.5 IRE>: Sets the black level to <7.5 IRE>.For the RGB signal ofmode.: Used in a normal environment.: Used when the dark parts of an image are too bright. |
| Overscan | Using this function, you can cut off edge of the a picture when unnecessary information or images appear on the edge of the picture.Overscan is not supported in [AV] modes.Overscan is supported only when the input signal is an AV Timing (D-Sub) or AV Timing (HDMI) signal.Ifis turned off, unnecessary extra parts at the edges of an image may be shown. In this case, turnon. |
| Film Mode Using | this function, you can set the display mode so that it is optimized for playing movies.-:is only be supported for the [AV], 480i, and 576i of AV Timing (D-Sub) signals. |
| PC | For PC signals, the four PC functions eliminate or reduce noise that causes unstable screen quality, such as screen shaking. If the noise is not removed using Fine Adjustment, adjust the frequency to the maximum and then perform Fine Adjustment again.These functions are only enabled for the PC Timing (D-Sub/HDMI) input of the D-Sub terminal.Refer to PC Timing (D-Sub/HDMI):Used to adjust the frequency and phase of PC screen automatically.: Used to adjust the frequency when vertical lines appear on the PC screen.: Used to fine tune the PC screen.: Using this function, you can reset the PC menu settings to the factory default settings. |
| Zoom You can | magnify the screen to a size you want.-:This function is only enabled when the input signal is a PC Timing (D-Sub/HDMI) signal. |
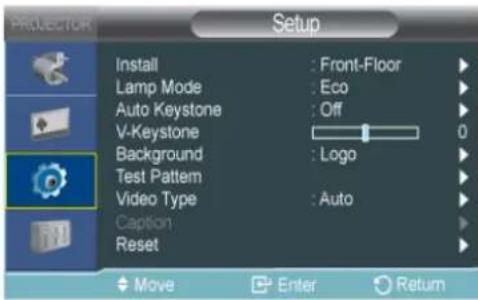
| MENU DESCRIPTION | ||||
| Install | To tailor the picture to the installation location, (for example, behind a semi-transparent screen, hanging from the ceiling), you can invert the projected images vertically / horizontally.: Normal Image: Horizontal/Vertical Reversed Image: Horizontally Reversed Image: Vertically Reversed Image | |||
| Lamp Mode | Using this function, you can set the image brightness by adjusting the amount of light generated by the lamp.: This mode is optimized for screens smaller than 100 inches.This mode decreases the lamp brightness and power consumption in order to extend the lamp lifetime and reduce noise and power consumption.: This mode maximizes the lamp brightness when the ambient illumination is bright. As the brightness of the lamp increases, the lamp lifetime can be reduced and the noise and power consumption may increase. | |||
| Auto Keystone | If video scenes are distorted or tilted, you can compensate for this by setting thefunction toso that thefunction automatically starts.- | |||
| V-Keystone | If video scenes are distorted or tilted, you can compensate for this using the vertical Keystone function.The sound output of your projector is temporarily stopped while the keystone is being changed.Keystone does not compensate for distortion in the On Screen Display (OSD) menu. | |||
| Background | You can select an image or screen which will appear when there is no signal from the external device connected to the projector.- | |||
| Test Pattern | A default test pattern built into the projector. You can use it as a reference picture to optimize the installation of the projector and to optimize images.: You can check whether the picture is distorted or not.: You can reference and display picture format sizes such as 1.33 : 1 or 1.78 : 1. | |||
| Video Type | If the screen quality is abnormal as a result of the projector not identifying the input signal type automatically inormode, Video Type lets you manually set the input signal.Inmode, the menu is only enabled for AV Timing (D-Sub) input signals. For separate H/V sync, it is only enabled for a 1280 x 720p 59.94Hz/60Hz signal.-YPbPr(AV)>Inmode,is only enabled for the 640x480p 59.94Hz/60 Hz and 1280x720p 59.94Hz/60 Hz signals.- | |||
| Usage | Color,Sharpness,Tint | PC menu and zoom | ||
| RGB(PC) | When connecting the RGB output of a PC to the D-Sub terminal | Disabled | Enabled | |
| RGB(AV) | When connecting the RGB output of an AV device (STB, DVD, etc...) to the D-Sub terminal | Enabled | Enabled | |
| YPbPr(AV) | When connecting the YPbPr output of an AV device (STB, DVD, etc...) to the D-Sub terminal | Enabled | Disabled | |
| PC | When connecting a PC to the HDMI terminal | Disabled | Disabled | |
| AV | When connecting an AV device (STB, DVD, etc...) to the HDMI terminal | Enabled | Disabled | |
| Auto | Auto settings | - | - | |
| Caption | Thefunction is supported when the external analog signal from either the Video input contains subtitles.::<1>-<2>:<1>-<2>Thefunction will not operate in(including components) ormode.Depending on the external signal, a change to the channel orsettings may be required.Eachandcontains different information.<2>carries additional information to supplement information contained in.(e.g. If English subtitles are provided on<1>, Spanish subtitles will be provided on<2).) | |||
| Reset Using this function, you can reset various settings to the factory default settings.:Changes the settings to the factory defaults.: Resets the filter time. | ||||
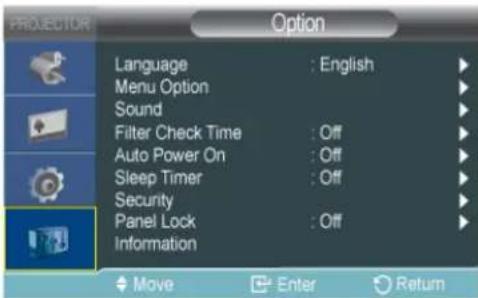
| MENU DESCRIPTION | |
| Language Using this function, you can select the language used for the menu screen. | |
| Menu Option: You can move Menu Position up/down/left/right.·: You can set the translucency of the menu.-<Low>-<Opaque>·: You can set the display time of the menu.-<5 sec>-<10 sec>-<30 sec>-<60 sec>-<90 sec>-<120 sec>-<Stay On> | |
| Sound | The projector comes with an internal 7W (mono) speaker.-<100Hz>-<300Hz>-<1kHz>-<3kHz>-<10kHz> |
| Filter Check Time Sets the check period for the filter. (Unit: hours)·-<100>-<200>-<400>-<800>If the filter usage time is larger than the filter check period, the filter check message is displayed for 1 minute whenever the projector is turned on.Filter check message: "-". | |
| Auto Power On | With Auto Power On, if power is supplied to the projector, it turns on automatically without your pressing the Power button.-<On> |
| Sleep Timer With Sleep Timer on, if there is no input signal for the specified time, the projector turns off automatically.(There must be no button input from the remote control or the top of the projector for the specified time)-<10 min>-<20 min>-<30 min> | |
| Security | To deter theft, you can set a password that users must enter when the projector powers on. When you set a password, the projector will not work without it.-<Power On Protection>: Enter your current password and set the protection function to off.-<On>: Enter a new password and set the protection function to on.-<Change Password>: Change your current password.Use the displayed number keys to enter or change the password. |
| Panel Lock | You can disable the buttons on the projector body so that the projector can only be operated by the remote control.-<On> |
| Information You can check external source signals, picture setup, and PC picture adjustment. | |
4-1 Before Requesting Service
Please check the following before requesting After-Sales service. If the problem continues, please contact your nearest Samsung Electronics Service Center.
| Symptoms Troubleshooting | ||
| Installation and Connection | No Power. Check the power cable connections. | |
| I want to install my projector on the ceiling. | The ceiling installation bracket is sold separately. Contact your local product distributor. | |
| External Source can not be selected. | Be sure that the video cable or cables are properly connected to the correct jack or jacks on both ends. If the device is not connected properly, it can not be selected. | |
| Menu and Remote Control | Remote control does not work. Be sure that the | proper external source is selected.Check the battery in the remote. If there is something wrong with it, replace it with a new battery of the recommended size.Be sure to aim the remote at sensor on the back of the unit and at a distance of no more than approximately 32.8 feet(10 m).Remove any obstacles between your remote control and the product.Direct light from 3-way light bulbs or other lighting devices on the remote sensor of the projector may affect the sensitivity and cause the remote control to malfunction.Check if the remote control battery compartment is empty.Check whether the LED indicator on the top of the projector is turned on. |
| I cannot select a menu. Check if the menu is dis | played in gray. A gray-colored menu is unavailable. | |
| Screen and External Source | Cannot see picture images. Be sure that the power cord of the projector is connected.Be sure that the proper input source is selected.Check that the connectors are properly connected to the ports at the back of the projector.Check the Remote Control batteries.Be sure that theandsettings are not at their lower limit. | |
| Poor color. Adjust theand. | ||
| Images are not clear. Adjust the focus. | Check if the projector is too far from or too near to the screen. | |
| Strange noise. If a strange sound continues, contact your Service Center. | ||
| An operating LED is lit. Refer to Corrective Actions According to LED Indications. | ||
| Lines appear on screen. On-screen noise may occur when using your PC. Adjust the frequency (refresh rate) of the screen. | ||
| No external device screen is displayed. Check the operating status for the external device and check whether the adjustable menu items, such asandhave been changed correctly in thecommand screen of the Projector menu. | ||
| Only a blue screen appears. Be sure to properly connect the external devices. Check the connection cables again. | ||
| Screen appears in black and white or in an odd color or screen is too dark or bright. | As mentioned above, check the adjustable items such as, orin the menu.If you want to restore various settings to their factory defaults, runfrom the menu. |
5-1 Specifications
| MODEL SP-M200 SP-M220 SP-M250 | ||||
| Panel Size 0.63 inches 3P LCD | ||||
| Resolution XGA (1024 x 768) | ||||
| Aspect ratio 4:3 | ||||
| Power Power Consumption 240 W 240 W 260 W | ||||
| Voltage | 100~240V AC, 50/60Hz | |||
| Lamp Power Consumption 180 W 180 W 200 W | ||||
| Life Time | 3,000 Hours (Eco : 5,000 Hours ) | |||
| Dimension | 279 x 229 x 79 mm / 10.98 x 9.02 x 3.11 inches | |||
| Weight | 2.5 Kg / 5.5 lbs | |||
| Key Features | Brightness | 2,000 ANSI | 2,200 ANSI | 2,500 ANSI |
| Contrast | 500:1 | |||
| Projection Range | 1 m ~ 14 m / 39.37 inches ~ 551.18 inches | |||
| Keystone | Vertical(±20°) | |||
| Zoom Adjustment ff | Manual | |||
| Focus Adjustment | Manual | |||
| Screen Size (Diagonal) | Diagonal 30 inches ~ 400 inches | |||
| Lens | F=1.7 ~ 1.87, f=19.2mm ~ 23 mm | |||
| Zoom Ratio | 1:1.2 | |||
| Input signal | D-Sub 15p | Analog RGB, analog YPbPr | ||
| HDMI | Digital RGB, digital YPbPr | |||
| RCA x 1 | Composite video | |||
| Speaker | 7 W (Mono) | |||
| User Environment | Temperature and Humidity | Operating : Temperature 41 °F ~ 95 °F (5 °C ~ 35 °C), Humidity 20 % ~ 80 % (Non-condensing) | ||
| Storage : Temperature 14 °F ~ 140 °F (-10 °C ~ 60 °C), Humidity 10 % ~ 90 % (Non-condensing) | ||||
| Noise | Eco : 31dB, Bright : 36dB | |||
This Class B equipment is designed for home and office use. The equipment has been registered regarding EMI for residential use. It may be used in all areas. Class A is for office use. Class A is for business while class B emits less electromagnetic waves than class A.
The LCD panel used in the LCD projector consists of hundreds of thousands of fine pixels. Like other video display devices, the LCD panel may contain bad pixels which do not operate. When shipping a product, the conditions for identifying bad pixels and the number of bad pixels that a LCD panel is allowed to contain are strictly managed in accordance with the relevant specified standards by the LCD panel manufacturer and our company. Though a screen may have some dead pixels, this does not affect the overall screen quality and the lifetime of the product.
Communication Format (Complies with the RS232C Standard)
- Baud rate : 9,600 bps
- parity : None
• Data bits : 8, stop bit : 1 - Flow Control: None
Serial Communication Protocol
1. Command Packet Structure [7bytes]
| 0x08 0x22 cmd1 | cmd2 cmd3 value | CS |
- A command packet consists of 7 bytes in total.
- The two bytes 0x08 and 0x22 signify that the packet is for serial communication.
- The following 4 bytes represent a pre-defined command that can be defined by the user.
- The last byte is the checksum which checks the validity of the current packet.
- Header [2 Byte]: Pre-defined values fixed to 0x08 and 0x22.
- Cmd1 [1 Byte]: The first value of the code defined in the command list (Hexadecimal)
- Cmd2 [1 Byte]: The second value of the code defined in the command list (Hexadecimal)
- Cmd3 [1 Byte]: The third value of the code defined in the command list (Hexadecimal)
- Value [1 Byte]: Input parameter for the command (Default: 0) (Hexadecimal)
- CS [1 Byte]: Checksum (the 2's complement of the sum of all the values except for the CS value.)
2. Response Packet Structure [3 Bytes]
1. Success
| 0x03 0x0C 0xF1 |
2. Fail
| 0x03 0x0C 0xFF |
- When the received packet from an external device has a valid value, a Success packet is sent. Otherwise, a Fail packet is sent.
-
A Fail packet is sent if:
-
The received packet length is not equal to 7 bytes.
- The 2 byte packet header value is not equal to 0x08, 0x22.
• The check sum is incorrect.
- Failure detection by an external device
- An external device classifies the packet as Fail if it does not receive a Success packet within 100ms.
Command Table
| CONTROL ITEM CMD1 CMD2 CMD3 VALUE | |||||||
| General Power | Power Display | OSD | / Power On | 0x00 0x00 0x00 0 | |||
| OK | 1 | ||||||
| Cancel 2 | |||||||
| Direct Power Off | 3 | ||||||
| Volume Direct | Vol-ume | 0x01 0x00 0x00 (0~100) | |||||
| Continuous Up | 0x01 0 | ||||||
| Down 0x02 0 | |||||||
| Mute On 0x02 | 0x00 0x00 0 | ||||||
| Off 1 | |||||||
| Blank On 0x03 | 0x00 0x00 0 | ||||||
| Off 1 | |||||||
| Still | On 0x04 0x00 | 0x00 0 | |||||
| Off 1 | |||||||
| Power On Protection | (0~9) | 0x05 0x00 0x00 (0~9) | |||||
| Input | Source List | AV | AV | 0x0A | 0x00 | 0x01 | 0 |
| PC | PC | 0x03 0 | |||||
| HDMI | HDMI 0x04 0 | ||||||
| CONTROL ITEM | CMD1 | CMD2 | CMD3 | VALUE | |||
| Picture Mode Dynamic 0x0B 0x00 0x00 0 | |||||||
| Standard 1 | |||||||
| Presentation 2 | |||||||
| Text 3 | |||||||
| Movie 4 | |||||||
| Game 5 | |||||||
| User 6 | |||||||
| Contrast 0~100 0X02 0x00 (0~100) | |||||||
| Brightness 0~100 0X03 0x00 (0~100) | |||||||
| Sharpness | 0~100 0X04 0x00 (0~100) | ||||||
| Color | 0~100 0X05 0x00 (0~100) | ||||||
| Tint (G/R) | G50 / R50 | 0x06 0x00 (0~100) | |||||
| Color Tone | Cool2 | 0x0A 0x00 1 | |||||
| Cool1 | 2 | ||||||
| Warm1 | 3 | ||||||
| Warm2 | 4 | ||||||
| WB | R offset | 0x0B 0x00 (0~100) | |||||
| G offset | 0x01 (0~100) | ||||||
| B offset | 0x02 (0~100) | ||||||
| R gain | 0x03 (0~100) | ||||||
| G gain | 0x04 (0~100) | ||||||
| B gain | 0x05 (0~100) | ||||||
| Picture Gamma -3~3 0x0B 0x0C 0x00 (0~6) | |||||||
| Save Display O | OSD 0x0D 0x00 0 | ||||||
| OK | 1 | ||||||
| Cancel 2 | |||||||
| Direct Save 3 | |||||||
| Reset 0x0E 0x00 0 | |||||||
| Size Normal 0x0F 0x00 0 | |||||||
| Zoom1 1 | |||||||
| Zoom2 2 | |||||||
| 16:9 | 3 | ||||||
| Digital NR | Off | 0x10 0x00 0 | |||||
| On | |||||||
| Black Level | 0 IRE/NOR-MAL | 0x11 0x00 0 | |||||
| 7.5 IRE/LOW | |||||||
| Overscan | Off | 0x12 0x00 0 | |||||
| On | |||||||
| Film Mode | Off | 0x13 0x00 0 | |||||
| Auto | |||||||
| PC | Auto adjustment | 0x14 0x00 0 | |||||
| Coarse | UP | 0x15 0x00 0 | |||||
| DOWN | |||||||
| fine | Up | 0x16 0x00 0 | |||||
| DOWN | |||||||
| Reset | Display OSD | 0x17 0x00 0 | |||||
| OK | |||||||
| Cancel | |||||||
| Direct Reset | |||||||
| Zoom | x1 | 0x18 0x00 0 | |||||
| x2 | |||||||
| x4 | |||||||
| x8 | |||||||
| LEFT | 0x19 0x00 0 | ||||||
| RIGHT 1 | |||||||
| Up | |||||||
| Down | |||||||
| CONTROL ITEM CMD1 CMD2 CMD3 VALUE | ||||||||
| Picture Horizontal Position | Continuous LEFT 0x0B 0x1A 0x00 0 | |||||||
| 1 | ||||||||
| CONTROL ITEM | CMD1 | CMD2 | CMD3 | VALUE | ||||
| Setup | Install | Front-Floor | 0x0C | 0x00 | ||||
| Front-Ceiling 1 | ||||||||
| Rear-Floor | 2 | |||||||
| Rear-Ceiling 3 | ||||||||
| Lamp Mode ECO 0x01 0x00 0 | ||||||||
| Bright 2 | ||||||||
| Keystone V-Keystone -50~50 0x02 0x00 (0~100) | ||||||||
| Auto Keystone | Off 0x02 0 | |||||||
| On | 1 | |||||||
| Background Logo 0x03 0x00 0 | ||||||||
| Blue | 1 | |||||||
| Black | 2 | |||||||
| Test Pattern | Crosshatch | 0x04 0x00 0 | ||||||
| Screen size | 1 | |||||||
| Pattern Off | 2 | |||||||
| Video Type | Auto | 0x05 0x00 0 | ||||||
| RGB(PC) | 1 | |||||||
| RGB(AV) | 2 | |||||||
| YPbPr(AV) | 3 | |||||||
| PC | 4 | |||||||
| AV | 5 | |||||||
| Reset Factory | Default | Display OSD | 0x06 0x00 0 | |||||
| Ok | 1 | |||||||
| Cancel | 2 | |||||||
| Direct Fac-tory Default | 3 | |||||||
| Reset Filter Time | Display OSD | 0x01 0 | ||||||
| Ok | 1 | |||||||
| Cancel | 2 | |||||||
| Direct Reset Filter Time | 3 | |||||||
| Caption | Caption | Off | 0x07 0x00 0 | |||||
| On | 1 | |||||||
| Mode | Caption | 0x01 0 | ||||||
| Text | 1 | |||||||
| Channel | 1 | 0x02 0 | ||||||
| 2 | 1 | |||||||
| Field 1 | 0x03 0 | |||||||
| 2 | 1 | |||||||
| Option Language English 0x0D | 0x00 0x00 0 | |||||||
| Deutsch 1 | ||||||||
| Nederlands 2 | ||||||||
| Español 3 | ||||||||
| Français 4 | ||||||||
| Italiano 5 | ||||||||
| Svenska 6 | ||||||||
| Português 7 | ||||||||
| Русский 8 | ||||||||
| 中国语 | 9 | |||||||
| 한국어 | 10 | |||||||
| Türkçe 11 | ||||||||
| ไทย 12 | ||||||||
| Menu Option Position LEFT | 0x01 0x00 0 | |||||||
| RIGHT | 1 | |||||||
| UP | 2 | |||||||
| DOWN | 3 | |||||||
| Transparency | High | 0x02 0x00 0 | ||||||
| Medium | 1 | |||||||
| Low | 2 | |||||||
| Opaque | 3 | |||||||
| Display Time | 5 sec | 0x03 0x00 0 | ||||||
| 10 sec | 1 | |||||||
| 30 sec | 2 | |||||||
| 60 sec | 3 | |||||||
| 90 sec | 4 | |||||||
| 120 sec | 5 | |||||||
| Stay On | 6 | |||||||
| Option Sound | 100Hz Up 0x0D | 0x04 0x01 0 | ||||||
| Down 1 | ||||||||
| 300Hz Up 0x02 | 0 | |||||||
| Down 1 | ||||||||
| 1KHz Up 0x03 | 0 | |||||||
| Down 1 | ||||||||
| 3KHz Up 0x04 | 0 | |||||||
| Down 1 | ||||||||
| 10KHz Up 0x05 | 0 | |||||||
| Down 1 | ||||||||
| Filter Check Time | Off 0x05 0x00 | 0 | ||||||
| 100 1 | ||||||||
| 200 2 | ||||||||
| 400 3 | ||||||||
| 800 4 | ||||||||
| Auto Power ON | Off 0x06 0x00 | 0 | ||||||
| On | 1 | |||||||
| Sleep Timer Off | 0x07 0x00 0 | |||||||
| 10 min 1 | ||||||||
| 20 min 2 | ||||||||
| 30 min 3 | ||||||||
| Information 0x08 0x00 0 | ||||||||
| Panel Lock | Off 0x0A | 0x00 0 | ||||||
| On | 1 | |||||||
- If you have any questions or comments relating to Samsung products, please contact the SAMSUNG customer care center.
| NORTH AMERICA | ||
| U.S.A 1-800-SAMSUNG(726-7864) http://www.samsung.com/us | ||
| CANADA 1-800-SAMSUNG(726-7864) http://www.samsung.com/ca | ||
| MEXICO 01-800-SAMSUNG(726-7864) http://www.samsung.com/mx | ||
| LATIN AMERICA | ||
| ARGENTINA 0800-333-3733 http://www.samsung.com/ar | ||
| BRAZIL 0800-124-421 | 4004-0000 | http://www.samsung.com/br |
| CHILE 800-SAMSUNG(726-7864) http://www.samsung.com/cl | ||
| COLOMBIA 01-8000112112 | http://www.samsung.com/co | |
| COSTA RICA 0-800-507-7267 | http://www.samsung.com/latin | |
| ECUADOR | 1-800-10-7267 | http://www.samsung.com/latin |
| EL SALVADOR | 800-6225 | http://www.samsung.com/latin |
| GUATEMALA | 1-800-299-0013 | http://www.samsung.com/latin |
| HONDURAS | 800-7919267 | http://www.samsung.com/latin |
| JAMAICA | 1-800-234-7267 | http://www.samsung.com/latin |
| NICARAGUA | 00-1800-5077267 | http://www.samsung.com/latin |
| PANAMA | 800-7267 | http://www.samsung.com/latin |
| PUERTO RICO | 1-800-682-3180 | http://www.samsung.com/latin |
| REP. DOMINICA | 1-800-751-2676 | http://www.samsung.com/latin |
| TRINIDAD & TOBAGO | 1-800-SAMSUNG(726-7864) | http://www.samsung.com/latin |
| VENEZUELA | 0-800-100-5303 | http://www.samsung.com/latin |
| EUROPE | ||
| AUSTRIA | 0810 - SAMSUNG(7267864,€ 0.07/min) | http://www.samsung.com/at |
| BELGIUM | 02 201 2418 | http://www.samsung.com/be (Dutch)http://www.samsung.com/be_fr(French) |
| CZECH REPUBLIC | 800 - SAMSUNG (800-726786) | http://www.samsung.com/cz |
| Distributor pro Českou republiku:Samsung Zrt., Česká organizační složka, Oasis Florenc, Sokolov ská394/17, 180 00, Praha 8 | ||
| DENMARK | 8 - SAMSUNG (7267864) | http://www.samsung.com/dk |
| EIRE | 0818 717 100 | http://www.samsung.com/ie |
| FINLAND | 30 - 6227 515 | http://www.samsung.com/fi |
| FRANCE | 01 4863 0000 | http://www.samsung.com/fr |
| EUROPE | ||
| GERMANY 01805 - SAMSUNG (7267864) | € 0.14/Min) | http://www.samsung.de |
| HUNGARY 06-80-SAMSUNG(726-7864) | http://www.samsung.com/hu | |
| ITALIA 800-SAMSUNG(726-7864) http://www.samsung.com/it | ||
| LUXEMBURG 02 261 03 710 http://www.samsung.com/lu | ||
| NETHERLANDS 0900 - SAMSUNG (0900-7267864) (€ 0,10/Min) | http://www.samsung.com/nl | |
| NORWAY 3 - SAMSUNG (7267864) http://www.samsung.com/no | ||
| POLAND 0 801 1SAMSUNG (172678) | 022 - 607 - 93 - 33 | http://www.samsung.com/pl |
| PORTUGAL 808 20 - SAMSUNG (7267864) http://www.samsung.com/pt | ||
| SLOVAKIA | 0800-SAMSUNG(726-7864) | http://www.samsung.com/sk |
| SPAIN | 902 - 1 - SAMSUNG (902 172 678) | http://www.samsung.com/es |
| SWEDEN | 0771 726 7864 (SAMSUNG) | http://www.samsung.com/se |
| SWITZERLAND | 0848-SAMSUNG(7267864, CHF 0.08/min) | http://www.samsung.com/ch |
| U.K | 0845 SAMSUNG (7267864) | http://www.samsung.com/uk |
| CIS | ||
| BELARUS | 810-800-500-55-500 | |
| ESTONIA | 800-7267 http://www.samsung.com/ee | |
| LATVIA | 8000-7267 http://www.samsung.com/lv | |
| LITHUANIA | 8-800-77777 | http://www.samsung.com/lt |
| MOLDOVA 00-800-500-55-500 | ||
| KAZAKHSTAN | 8-10-800-500-55-500 | http://www.samsung.com/kz_ru |
| KYRGYZSTAN | 00-800-500-55-500 | |
| RUSSIA | 8-800-555-55-55 | http://www.samsung.ru |
| TADJIKISTAN | 8-10-800-500-55-500 | |
| UKRAINE | 8-800-502-0000 | http://www.samsung.com/uahttp://www.samsung.com/ua_ru |
| UZBEKISTAN | 8-10-800-500-55-500 | http://www.samsung.com/kz_ru |
| ASIA PACIFIC | ||
| AUSTRALIA | 1300 362 603 http://www.samsung.com/au | |
| CHINA | 400-810-5858010-6475 1880 | http://www.samsung.com/cn |
| HONG KONG | 3698 - 4698 | http://www.samsung.com/hkhttp://www.samsung.com/hk_en/ |
| INDIA | 3030 82821-800-3000-82821800 110011 | http://www.samsung.com/in |
| ASIA PACIFIC | ||
| INDONESIA 0800-112-8888 http://www.samsung.com/id | ||
| JAPAN 0120-327-527 http://www.samsung.com/jp | ||
| MALAYSIA 1800-88-9999 http://www.samsung.com/my | ||
| NEW ZEALAND 0800 SAMSUNG (0800 726 786) http://www.samsung.com/nz | ||
| PHILIPPINES 1-800-10-SAMSUNG(726-7864)1-800-3-SAMSUNG(726-7864)1-800-8-SAMSUNG(726-7864)02-5805777 | http://www.samsung.com/ph | |
| SINGAPORE 1800-SAMSUNG(726-7864) http://www.samsung.com/sg | ||
| THAILAND 1800-29-3232, 02-689-3232 http://www.samsung.com/th | ||
| TAIWAN 0800-329-999 http://www.samsung.com/tw | ||
| VIETNAM 1 800 588 889 http://www.samsung.com/vn | ||
| MIDDLE EAST & AFRICA | ||
| SOUTH AFRICA | 0860-SAMSUNG(726-7864) | http://www.samsung.com/za |
| TURKEY | 444 77 11 | http://www.samsung.com/tr |
| U.A.E | 800-SAMSUNG(726-7864)8000-4726 | http://www.samsung.com/ae |
Correct Disposal of This Product (Waste Electrical & Electronic Equipment) - Europe only
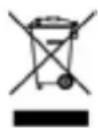
(Applicable in the European Union and other European countries with separate collection systems)
This marking on the product, accessories or literature indicates that the product and its electronic accessories (e.g. charger, headset, USB cable) should not be disposed of with other household waste at the end of their working life. To prevent possible harm to the environment or human health from uncontrolled waste disposal, please separate these items from other types of waste and recycle them responsibly to promote the sustainable reuse of material resources.
Household users should contact either the retailer where they purchased this product, or their local government office, for details of where and how they can take these items for environmentally safe recycling.
Business users should contact their supplier and check the terms and conditions of the purchase contract. This product and its electronic accessories should not be mixed with other commercial wastes for disposal.
Correct disposal of batteries in this product - Europe only

(Applicable in the European Union and other European countries with separate battery return systems.)
This marking on the battery, manual or packaging indicates that the batteries in this product should not be disposed of with other household waste at the end of their working life. Where marked, the chemical symbols Hg, Cd or Pb indicate that the battery contains mercury, cadmium or lead above the reference levels in EC Directive 2006/66. If batteries are not properly disposed of, these substances can cause harm to human health or the environment.
To protect natural resources and to promote material reuse, please separate batteries from other types of waste and recycle them through your local, free battery return system.
- Owner's Instructions
- MAJOR SAFETY PRECAUTIONS
- INSTALLATION AND CONNECTION
- USING
- TROUBLESHOOTING
- MORE INFORMATION
- Major Safety Precautions
- 1-1 Before You Start
- Icons used in this manual
- Using this Manual
- Copyright Notice
- Cleaning the Surface and the Lens
- Cleaning Inside the Projector
- Icons used for safety precautions
- Meaning of Signs
- Power Related
- Warning
- Caution
- Installation Related
- Usage Related
- Installation and Connection
- 2-1 Package Contents
- CONTENTS
- To adjust the picture when you install the projector behind the screen
- To adjust the picture when you install the projector in the front of the screen
- Cautions on Lamp Replacement
- Lamp Replacement Procedure
- Replacing and Cleaning the Filter
- Ventilation openings
- AV Timing (VIDEO)
- 2-10-1. Setting up the PC Environment
- 2-10-2. Connecting with a PC
- Locking the product
- 3-1 Product Features
- LED Indications
- Clearing Indicator Problems
- 3-5 Using the Screen Adjustment Menu (OSD: On Screen Display)
- The Screen Adjustment Menu (OSD: On Screen Display) Structure
- 3-5-1. Input
- 3-5-2. Picture
- 4-1 Before Requesting Service
- Communication Format (Complies with the RS232C Standard)
- Serial Communication Protocol
- Command Packet Structure [7bytes]
- Response Packet Structure [3 Bytes]
- Success
- Fail
- Correct Disposal of This Product (Waste Electrical & Electronic Equipment) - Europe only
- Correct disposal of batteries in this product - Europe only
Brand : SAMSUNG
Model : SP-M220
Category : Video projector