
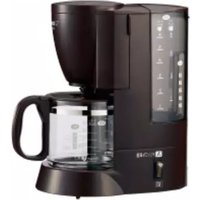
Fresh Brew Plus EC-YTC100 - Coffee maker Zojirushi - Free user manual and instructions
Find the device manual for free Fresh Brew Plus EC-YTC100 Zojirushi in PDF.


| Product Type | Coffee Maker |
| Brand | Zojirushi |
| Model | Fresh Brew Plus EC-YTC100 |
| Capacity | Max 51 oz. (1.5 L) |
| Brewing System | Automatic Drip |
| Power Consumption | 1200 W |
| Voltage / Frequency | AC 120 V, 60 Hz |
| Dimensions (W x D x H) | 10-5/8 x 8 x 14-7/8 in (27 x 20 x 37.5 cm) |
| Weight | Approx. 10 lbs (4.1 kg) |
| Cord Length | 2 ft 11 in (0.9 m) |
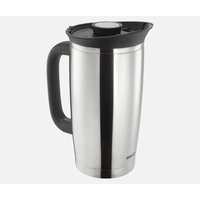
| Carafe Material | Stainless steel vacuum insulated |
| TIMER Function | Yes, up to 24 hours in advance |
| Time Saver Mode | Yes, shortens brewing time (louder operation) |
| Sound Signal | Selectable beep or mute |
| Automatic Shut-Off | Yes, engages if water is low or brewing consecutively |
| Descaling Indicator | "CLEAN" display; citric acid cleaning recommended every 4 weeks |
| Permanent Coffee Filter | Included (basket type) |
| Paper Filter Compatible | Yes, standard 8–12 cup basket filters |
| Water Tank | Removable, with HOT and ICED scale markings |
| Iced Coffee Brewing | Yes, with dedicated water line and ice guidelines |
| Safety Features | Polarized plug, short cord, steam vent warnings, automatic shut-off |
| Cleaning Instructions | Hand wash parts; do not immerse carafe or main body; no dishwasher |
| Replacement Parts Available | Stainless Carafe Set, Carafe Lid Set, Measuring Spoon, Citric Acid Cleaner |
Frequently Asked Questions - Fresh Brew Plus EC-YTC100 Zojirushi
User questions about Fresh Brew Plus EC-YTC100 Zojirushi
0 question about this device. Answer the ones you know or ask your own.
Ask a new question about this device
Download the instructions for your Coffee maker in PDF format for free! Find your manual Fresh Brew Plus EC-YTC100 - Zojirushi and take your electronic device back in hand. On this page are published all the documents necessary for the use of your device. Fresh Brew Plus EC-YTC100 by Zojirushi.
USER MANUAL Fresh Brew Plus EC-YTC100 Zojirushi
FRESH BREW PLUS THERMAL CARAFE COFFEE MAKER OPERATING INSTRUCTIONS
EC-YTC100
Always follow basic safety precautions when using electrical appliances.
Read all instructions carefully.
Please keep these Operating Instructions at hand for easy reference.
INDEX
IMPORTANT SAFEGUARDS....2
SPECIFICATIONS 5
PARTS NAMES 6
HOW TO ATTACH AND REMOVE EACH PART ..... 7
HOW TO SET THE CLOCK 9
SOUND SIGNALS AND HOW TO CHANGE THEM ..... 9
HOW TO USE 10
● BREWING ICED COFFEE 13
HOW TO SET THE TIMER 14
CLEANING AND MAINTENANCE .... 15
● HOW TO PERFORM CITRIC ACID CLEANING .... 18
TROUBLESHOOTING GUIDE ...... 19
REPLACEMENT PARTS 20
To reduce the risk of fire, electric shock, and / or injury to persons, when using electrical appliances, basic safety precautions should always be followed, including the following:
- Read all instructions.
- Do not touch hot surfaces. Use handles or knobs. Do not close or clog the steam vent opening under any circumstances.
- To protect against fire, electric shock and other injury to persons, do not immerse cord, plugs or the appliance in water or other liquids.
- Close supervision is necessary when any appliance is used by or near children.
- Unplug from outlet when either the appliance or display clock is not in use, and before cleaning. Allow to cool before adding or removing parts other than the Carafe, and before cleaning the appliance.
- Do not operate any appliance with a damaged cord or plug, or after the appliance malfunctions or has been damaged in any manner. Return appliance to the nearest authorized service facility for examination, repair or adjustment.
- The use of accessory attachments not recommended by the appliance manufacturer may result in fire, electric shock or other injury to persons.
- Do not use outdoors.
- Keep the power cord away from hot surfaces and do not let the cord hang over the edge of tables or counters.
- Do not place on or near a hot gas or electric burner, or in a heated oven.
- To disconnect, turn the power off by pressing the CANCEL button, then remove plug from wall outlet.
- Do not use appliance for other than intended use.
- To protect against electrical hazards, unplug the cord at all times before cleaning.
- Scalding may occur if the Swing Basket or Filter Basket is removed during the brewing cycles.
NOTE: This appliance has a polarized plug (one blade is wider than the other). To reduce the risk of electric shock, this plug is intended to fit into a polarized outlet only one way. If the plug does not fit fully into the outlet, reverse the plug. If it still does not fit, contact a qualified electrician. Do not attempt to modify the plug in any way.
SAVE THESE INSTRUCTIONS
THIS APPLIANCE IS FOR HOUSEHOLD USE ONLY.
A. A short power-supply cord is provided to reduce risks resulting from becoming entangled in or tripping over a longer cord.
B. Extension cords may be used if care is exercised in their use.
C. If an extension cord is used, (1) the marked electrical rating of the extension cord should be at least as great as the electrical rating of the appliance, (2) if the appliance is of the grounded type, the extension cord should be a grounding-type 3-wire cord, and (3) the longer cord should be arranged so that it will not drape over the counter top or table top where it can be pulled on by children or tripped over.

| The lightning flash with arrowhead symbol, within an equilateral triangle, is intended to alert the user to the presence of uninsulated "dangerous voltage" within the product's enclosure that may be of sufficient magnitude to constitute a risk of fire or electric shock to persons. | |
| The exclamation point within an equilateral triangle is intended to alert the user to the presence of important operating and maintenance (servicing) instructions in this literature. |
IMPORTANT SAFEGUARDS (cont.)
These WARNINGS and CAUTIONS are intended to prevent property damage or personal injury to you and others.

WARNINGS
 | Do not modify the product. Only a repair technician may disassemble or repair this unit.Attempting to do so may cause fire, electric shock or injury. Make any repair inquiries to Zojirushi Customer Service. | Insert the Power Plug completely and securely into the electrical outlet.A loosely inserted Power Plug may cause electric shock, short circuit, smoke or fire.Use only an electrical outlet rated at 15 amperes minimum, and do not plug other devices into the same outlet.Plugging other devices into the same outlet may cause the electrical outlet to overheat, resulting in fire.If the blades or surface of the Power Plug become soiled, wipe them clean.A dirty Power Plug may cause fire.Stop using immediately if you notice any of the following symptoms indicating a malfunction or breakdown.Continued use of the product may cause smoke, fire, electric shock or injury.The Power Plug or Power Cord has become very hot.The Power Cord is deeply damaged or deformed.There is a burning smell.Some part of the product is cracked, unstable or loose.The electricity turns on and off when the Power Cord is touched or moved.The product does not operate even though it is turned on.Water leaks from the Main Body.Water or steam leaks from parts of the Main Body other than the Steam Vent.The Main Body is deformed or has become very hot. If any of the above occurs, unplug the product immediately and return to Zojirushi Customer Service for check-ups and/or repairs.This appliance is not intended for use by persons (including children) with reduced physical, sensory or mental capabilities, or lack of experience and knowledge, unless they have been given supervision or instruction concerning use of the appliance by a person responsible for their safety. Children should be supervised to ensure that they do not play with the appliance. |
 | Do not immerse the product in water or splash it with water.Doing so may cause short circuit or electric shock. | |
| Do not allow liquid to come in contact with the Power Plug or Power Cord.Doing so may cause short circuit or electric shock. | ||
 | Do not plug or unplug the Power Plug if your hands are wet.Doing so may cause electric shock or injury. | |
 | Do not touch the Steam Vent or bring your hands or face near the Steam Vent.Doing so may cause burns or scalding. Take special precautions with children and infants. | |
 | Do not allow children to use the product unsupervised. Keep it out of the reach of infants.Children are at risk of burns, electric shock or injury. | |
| Do not use a power source other than 120V AC.Use of any other power supply voltage may cause fire or electric shock. | ||
| Do not use this product without the Stainless Carafe.Doing so may cause scalding. | ||
| Do not use the product if the Power Plug or Power Cord is damaged or if the Power Plug isloosely inserted intothe electrical outlet.Doing so may cause electricshock, shott circuit or fire. | ||
| Do not damage the Power Cord. Do not bend,pull, twist, fold, or attempt to modify the Power Cord. Do not place it on or near high temperature surfaces or appliances, under heavy items or between objects.A damaged Power Cord can cause fire or electric shock. |
● The illustrations used in these Operating Instructions may vary from the actual product you have purchased.
IMPORTANT SAFEGUARDS (cont.)

CAUTIONS

Do not touch hot surfaces (Steam Vent, Swing Basket, Shower Head, etc.) while using the product or for some time after the product has been used.
Doing so may cause bums or injury.
Do not use the product on surfaces that are vulnerable to heat.
Doing so may cause fire.
Do not use the product on unstable surfaces.
Doing so may cause scalding or injury.
Do not move the product when the Stainless Carafe is in place.
Doing so may cause scalding or other injury.
Do not remove the Stainless Carafe while brewing.
Doing so may cause scalding.
Do not use the product near walls or furniture.
Steam or heat may damage, discolor or deform walls or furniture.
Do not use near an open flame.
Doing so may cause fire.

Do not refill the Water Tank while coffee is brewing.
Coffee may overflow and cause scalding.
After the Water Tank is attached to the Main Body, do not move or remove it from the Main Body.
Doing so may cause scalding, water leaks, or malfunction.

Unplug the Power Plug from the electrical outlet when the product is not in use.
Leaving the Power Plug in an outlet may cause the insulation to become damaged, resulting in electric shock, short circuit or fire.

Please allow the product to cool down before cleaning.
Touching hot surfaces may cause burns.
Always unplug the product by holding the Power Plug, not by pulling the Power Cord.
Pulling the Power Cord to unplug the product may cause electric shock, short circuit or fire.
If the Power Cord is damaged, it must be replaced by the manufacturer, its service agent or similarly qualified persons to avoid hazards.
IMPORTANT
■Do not heat the Stainless Carafe in a microwave oven or place it on top of direct flames (such as a gas stove top), or electric or induction heating (IH) stove tops.
Doing so may cause smoke or fire. The Handle of the Carafe may deform or sparks may be emitted from the metal parts.
■Do not fill the Water Tank with anything other than water, such as milk, alcohol, coffee, or hot water.
Doing so may cause malfunction.
■Do not use the product where its steam may come into contact with other electrical appliances.
The steam may cause fire, malfunction, discoloration or deformation to other electrical appliances.
■When brewing coffee consecutively, wait at least 5 minutes after the START light turns off.
Be careful when adding water or moving the product while it is still hot as steam or hot water may come out from the Shower Head and may cause scalding.
■Do not drop the Stainless Carafe or hit it against a hard surface or object.
Such an impact may damage the plastic parts or dent the surface of the Carafe and degrade its performance in keeping the coffee hot.
■Do not operate the product without filling the Water Tank with water.
Doing so may cause malfunction.
■Do not use the product in outdoor locations.
Doing so may cause malfunction.
■Do not put your hand under the Swing Basket while you are using the product, or for a while after you have used the product.
Hot water may drip and cause scalding.
■Do not use the product on a carpet or fabric tablecloth.
The carpet or tablecloth may be stained if the coffee splashes out.
■Be sure to carry the Main Body only by the Grips on the side and not by other parts.
■Do not use or place the product on wet surfaces.
Doing so may cause electric shock.
Do not carry the Stainless Carafe in a tilted position or while pressing down on the Carafe Button.
Doing so may cause the contents of the Carafe to spill and cause burns.
■Do not use finely-ground coffee.
Doing so may cause the coffee to overflow and cause scalding.
■Do not use more than 10 leveled Measuring Spoons (approx. 1.8 oz./51g) of ground coffee.
Doing so may cause the coffee to overflow and cause scalding.
■Do not leave the Water Tank filled with water.
Doing so may cause malfunction, discoloration, odor, or deterioration in water quality.
IMPORTANT SAFEGUARDS (cont.)
IMPORTANT
| ■Do not use a coffee carafe other than the Stainless Carafe specifically designed for use with this product.Using any other coffee carafe may cause scalding as the coffee may overflow from the carafe. | ■Make sure that the entire product is placed squarely on a table and does not protrude.Doing so may cause scalding or other injury. |
| ■Do not immerse the Stainless Carafe in water.Water can collect in gaps within the Carafe and cause rusting or deformation. | ■Do not use the Stainless Carafe for purposes other than filling it with coffee. In particular, do not under any circumstances fill the Carafe with the following liquids or foods.● Dry ice and carbonated drinks:Contents may spill out or the pressure may cause the Cafafe Lid Set to burst, causing injuries.● Liquids high in sodium such as soup and Kobu-cha:Although the liner is made of 18/8 stainless steel, salt may cause rust resulting in loss of thermal insulation.● Dairy products and fruit juice:If left inside for a long period of time, contents may spoil and produce gas that may cause the Carafe Lid Set to burst, causing injuries.● Fruit pulp and tea leaves:May become caught in the Carafe Lid Set and cause contents to spoil. |
| ■Unplug the Power Plug from the electrical outlet soon after use.Leaving the Power Plug continuously inserted in an electrical outlet for long periods may cause a malfunction, resulting in overheating or smoke. | |
■Do not peel off the label affixed to the bottom of the Stainless Carafe.Doing so may cause damage, such as rusting or pinholes.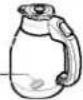 Label Label | |
| ■Do not touch the Permanent Coffee Filter or Filter Basket immediately after brewing completes.Doing so may cause scalding. | ■This appliance is intended for household use and similar applications listed below:Staff (employee) kitchen areas in shops, offices and other working environments.* This appliance is not intended for use by many unspecified people for a long period of time.This appliance must not be used in the following areas:Farm houses.By clients in hotels, motels and other residential type environments.Bed and breakfast type environments. |
| ■Do not open the Swing Basket while you are using the product.Doing so may cause scalding. |
SPECIFICATIONS
| Model No. | EC-YTC100 | |
| Rating | AC 120V 60Hz | |
| Electric Consumption | 1200W | |
| Capacity | Max. 51 oz. (1.5L) | |
| Coffee Brewing System | Automatic Drip | |
| Length of the Power Cord | 2' 11" (0.9m) | |
| External Dimensions | (approx. inches) | 10-5/8 (W) × 8 (D) × 14-7/8 (H) |
| (approx. cm) | 27 (W) × 20 (D) × 37.5 (H) | |
| Weight | Approx. 10 lbs. (4.1kg) | |
● External dimensions are measured without the handle of the Stainless Carafe.
- In high altitudes or severely cold areas, the product may not perform as specified. Avoid using the product in such areas or in other extreme conditions.
● This product is not suitable for use in countries or regions with different power supply voltages or frequencies.
PARTS NAMES

Control Panel

flowchart
graph TD
    A["The illustration is for reference only. Actual display will not show all functions simultaneously during use."] --> B["Display"]
    B --> C["CANCEL button"]
    C --> D["TIME SAVER light"]
    D --> E["TIME SAVER button"]
    E --> F["TIMER light"]
    F --> G["TIMER button"]
    B --> H["AM 18:88"]
    H --> I["CANCEL START"]
    I --> J["START light"]
    I --> K["START button"]
    B --> L["TIME SETTING button"]
    L --> M["TIMER"]
Accessory

HOW TO ATTACH AND REMOVE EACH PART
Filter Basket
How to Remove
① Open the Swing Basket.
② Remove the Filter Basket.
How to Attach
Align the slot on the Swing Basket with the tabs on the Filter Basket to attach.

HOW TO ATTACH AND REMOVE EACH PART (cont)
Swing Basket
- Remove the Permanent Coffee Filter, Filter Basket, and Stainless Carafe before removing the Swing Basket.
How to Remove
① Open the Swing Basket wide and lift to undo the bottom tab.
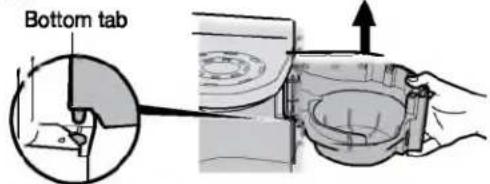
② Slide the Swing Basket in the direction of the arrow and remove the Basket in a downward direction.

natural_image
Diagram of a hand holding a mechanical component with an arrow indicating motion (no text or symbols present)How to Attach
Insert the upper tab of the Swing Basket into the upper slot of the Main Body and then align the lower tab with the lower slot to insert.
Attach the upper tab of the Swing Basket to the position of the "▼" on the top of Main Body.

natural_image
Simple line drawing of a door with an arrow pointing to the lid (no text or symbols)
Shower Head
How to Remove
Turn the Shower Head in the direction of the arrow to remove.
● Wait at least 5 minutes after the START light has switched off before removing the Shower Head. (Not doing so may cause burns.)
- Remove the Shower Head carefully as water may leak from it.

natural_image
Illustration of a hand pressing down on a curved surface with a magnified inset showing the contact area (no text or symbols)● This illustration shows the view from below.
How to Attach
Align the tabs on the Shower Head with the slots on the Main Body and turn the Shower Head in the direction of the arrow.
● Make sure to set the Shower Head securely.

Carafe Lid Packing
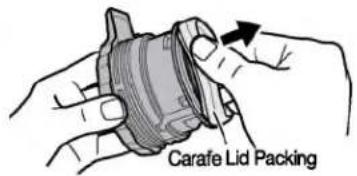
After removing the Carafe Lid Packing for cleaning or other maintenance work, reattach it carefully as shown in the illustration below.
The flat surface should be on top
* Avoid putting the Packing on upside-down (doing so may cause the beverage to leak out).

Press the Carafe Lid Packing toward the center from the outside using your fingers.
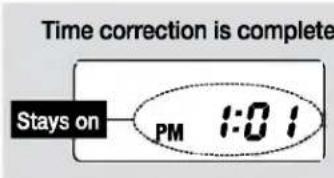
e.g.: If the current time is PM1:01 but displays PM12:58.
1 Insert the Power Plug into an electrical outlet.
The current time appears on the Display.
2 Press the TIME SETTING button (▲▼) to set the current time on the display.
The time display will start to blink.
▲ button: Each press advances the time in 1-minute increments. ▼ button: Each press moves the clock in reverse by 1 minute.
- Press and hold either button to quickly adjust in 10-minute increments.

3 The time display will stop blinking after 5 seconds, indicating the Time Setting is completed.
If the time display still does not show the current time, repeat Step 2 to readjust the time.
- If the display shows a blinking "AM7:00" when the Power Plug is inserted, the built-in lithium battery is out. You may continue using the product and readjust the clock each time the Power Plug is plugged in. (To replace the battery → P.19)
SOUND SIGNALS AND HOW TO CHANGE THEM
This product is equipped with a Sound Signal function, which will inform you when brewing has completed. The product is designed to Beep by default. To change to Mute:
Types of Sound Signals:
| Indication\Types of Sound Signals | Beepc: | Mute: |
| Brewing has started. | a beep | no sound |
| Timer setting is complete. | a beep | no sound |
| Brewing is complete. | 5 long beeps | no sound |
| Citric acid cleaning process is completed. | 5 long beeps | no sound |
| The Automatic Shut-Off function has been activated. | 10 short beeps | |
How to change the Sound Signal:
1 Insert the Power Plug into an electrical outlet.
- The selected Sound Signal is stored and will remain even if the product is unplugged.
2 Hold the CANCEL button for more than 3 seconds.
Each time the CANCEL button is held for more than 3 seconds, the Sound Signal will change.
① Beep:
A short beep means the Beep setting has been selected.
② Mute:
A long beep means the Mute setting has been selected.
3 The setting is completed when the desired Sound Signal is heard.
HOW TO USE
- Prior to initial use or when using the product after a long period of storage: Wash parts such as the Permanent Coffee Filter, Filter Basket, Shower Head, and the Stainless Carafe. Next, operate the product once or twice using only water in order to clean the inside of the Main Body.
● This product is intended for household use only and not for commercial use.
- This product has been designed for brewing coffee only. Do not use it for any other purpose. Do not fill the Water Tank with anything other than water (such as milk, alcohol, coffee, or hot water), as doing so may cause malfunction.
- The first time you use the product you may notice the smell of plastic. This is normal and will gradually fade away.
- Do not carry the product by the Swing Basket or Water Tank. Doing so may cause the product to fall.
1 Add ground coffee.
① Open the Swing Basket and place the Permanent Coffee Filter into the Filter Basket.

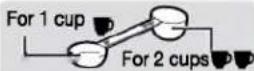
② Measure ground coffee using the provided Measuring Spoon, place in the Permanent Coffee Filter and level off the top.
③ Close the Swing Basket until it clicks.

| Add the ground coffee in the Permanent Coffee Filter and level off the top. | |
| ○ | × |
Permanent Coffee Filter Ground coffee Ground coffee |  |
■ Hot Coffee Brewing Guidelines
※When using the Measuring Spoon for 1 cup ( ▼).
| Cups Brewed | 3 | 4 | 5 | 6 | 7 | 8 | 9 | 10 | |
| Ground Coffee | In Leveled Measuring Spoon * | 3 | 4 | 5 | 6 | 7 | 8 | 9 | 10 |
| Weight (Approx. oz.) | 0.54 | 0.72 | 0.9 | 1.08 | 1.26 | 1.44 | 1.62 | 1.8 | |
| Weight (Approx. g) | 15.3 | 20.4 | 25.5 | 30.6 | 35.7 | 40.8 | 45.9 | 51 | |
- When brewing just a few cups of coffee, the coffee may turn out weaker than expected. Add or reduce the amount of ground coffee in accordance with your preferred strength.
- The number of cups brewed may vary depending on the amount, type, and fineness of the ground coffee that you use.
- Use only ground coffee in the Permanent Coffee Filter. Using anything other than ground coffee may cause coffee to overflow from the Swing Basket, or the product may malfunction.
- Do not use finely-ground coffee. Doing so may clog the Permanent Coffee Filter and coffee may overflow from the Swing Basket.
- Do not use more than 10 leveled Measuring Spoons (approx. 1.8 oz./51g) of ground coffee. Ground coffee may overflow.
- Do not brew less than 3 cups.
- When opening and closing the Swing Basket, make sure that the Main Body does not tip over.
Paper coffee filters (basket type) sold in stores may also be used. Please use the standard 8-12 cup size. Additionally, please note the following.

- Certain types of ground coffee (such as decaf, light roast or flavored coffee) may overflow. If this happens, use the Permanent Coffee Filter instead, or reduce the amount of coffee.
- Do not use the paper coffee filter with the Permanent Coffee Filter.
- Make sure not to use 2 or more sheets of paper coffee filters.
- Make sure the paper coffee filter fits into the Filter Basket correctly. If the filter is not placed properly, ground coffee may overflow from the filter.
- Coffee brewed using the Permanent Coffee Filter may taste differently from coffee brewed using paper coffee filters.
2 Fill the Water Tank with water.
① Remove the Water Tank from the Main Body.
- Hold down the Main Body and carefully remove the Water Tank. If you are not careful, the Main Body may lift with the Tank and fall. (Do not touch the Steam Vent.)
② Use the Scale on the Water Tank and fill to the line corresponding to the number of cups of coffee being brewed, and then close the Water Tank Lid.
Be sure to follow the instructions below to prevent a malfunction, water leak, or overflowing of coffee.
- Do not add water above the MAX line (level HOT 10) on the Water Tank.
● Do not refill the Water Tank while coffee is brewing.
● Do not fill the Water Tank with hot water. - Do not fill the Water Tank while it is attached to the Main Body. Doing so may cause water to flow into the pipes inside the product and the amount of water brewed will increase.
Precautions When Using Hard Water:
Do not use water with 400ppm or more total dissolved solids.
Scale (formed from minerals contained in water) may build up inside the pipes of the product and hinder the brewing performance. For example, brewing may take longer or water may not drip properly.
We recommend using water with 200ppm or less total dissolved solids.
If brewing takes longer than usual, please clean the product using citric acid. (→ P.18)
3 Preheat the Stainless Carafe.
① To improve the heat-retention ability of the Stainless Carafe, fill with a small amount of hot water and preheat for about 1 minute.
② After preheating, discard the hot water.
4 Set the Water Tank and the Stainless Carafe in the Main Body.
① Be sure that the Water Tank is securely attached onto the Main Body with the bottom firmly seated.
② Make sure that the Stainless Carafe is empty. Close the Carafe Lid Set and place the Carafe in the Main Body.
- If the Stainless Carafe contains hot water or coffee when you begin brewing, coffee may overflow from the Carafe.
- When placing the Stainless Carafe, do not apply excessive force to the Drip Prevention Valve.
- After the Water Tank is attached to the Main Body, do not move or remove it from the Main Body.
Doing so may cause steam or hot water to suddenly emit from the Main Body and cause scalding. Doing so may also cause the water in the Main Body to flow backward, and leak or cause a malfunction.
Turn the Carafe Lid Set clockwise securely.
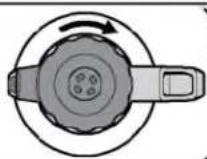
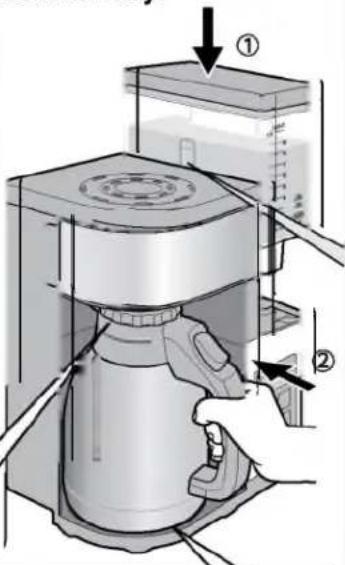
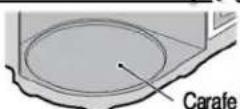
● The Stainless Carafe should fit in the Carafe Holder securely.

The Scale on the Water Tank

natural_image
Illustration of a hand pouring liquid into a mug with steam rising (no text or symbols)
5 Insert the Power Plug into the electrical outlet, and use the TIME SAVER button to select the mode.
TIME SAVER Mode:
Shortens the brewing time compared to Normal mode. Brewing will be louder.
TIME SAVER light OFF: Normal mode TIME SAVER light ON: TIME SAVER mode
- The selected mode is stored and will remain even if the product is unplugged.
6 Press the START button.
The START light will turn on and brewing will begin. The Display will look like the illustration on the right during brewing.
- Do not use or place the product on wet surfaces. Doing so may cause electric shock.

flowchart
graph TD
    A["The position of moves on the Display."] --> B["Start Button"]
    B --> C["CANCEL"]
    B --> D["START"]
    D --> E["Tums on"]
■Estimated Time Until Completion:
(Based on water and room temperature of 68°F/20°C.)
- Estimated time until completion and temperature of the coffee may vary depending on the room temperature, amount of water, amount of ground coffee, and voltage.
① When brewing is finished, a beep will sound, the START light will turn off, and the current time will appear on the Display.
② Remove the Stainless Carafe and press and hold the Carafe Button to pour coffee.
- Some coffee will be left in the Filter Basket immediately after the START light turns off. Wait until coffee is no longer dripping from the Filter Basket and then remove the Stainless Carafe.
- When tilting the Stainless Carafe, a small amount of coffee may drip from the Spout or from the holes of the Carafe Lid.
- Unplug the Power Plug from the electrical outlet after use.

Follow these cautions when handling the Stainless Carafe, as hot coffee may spill.
- Do not tilt the Carafe more than necessary to pour coffee.
- Do not tilt or hold the Carafe under your arm when carrying.
- Do not tip over the Carafe.

flowchart
graph LR
    A["Press"] --> B["After pouring coffee from the Stainless Carafe, continue pressing the Carafe Button and place the Stainless Carafe on a flat surface, then release the Carafe Button."]
    B --> C["Important"]
Automatic Shut-Off Function
Beeps will sound, the START light and TIMER light turn on and "HH" will appear on the Display.

The Automatic Shut-Off function activates to shut off power to the heater in order to prevent damage from overheating. The Display will show "HH" to alert you that the Automatic Shut-Off has been activated. The following conditions may cause activation:
- When the START button is pressed without filling the Water Tank with water, or the water level is lower.
- When brewing coffee consecutively without allowing the Main Body to cool.

Remedy
Press the CANCEL button. Allow the product to cool. Fill the Water Tank with water and press the START button.
How to Cancel Brewing in the Middle of the Process
① Press the CANCEL button.
② Make sure coffee is no longer dripping from the Filter Basket, then remove the Stainless Carafe and the Filter Basket.
(3) After the Main Body has cooled down, discard the remaining water in the Water Tank.
• Water may drip when removing the Water Tank.
- Press the CANCEL button only to cancel during brewing. If the CANCEL button is pressed accidentally, press the START button to continue brewing.
When Brewing Coffee Consecutively
* To brew your next pot of coffee, be sure to wait at least 5 minutes after the START light turns off, and then follow "HOW TO USE" from step 1.
Do not add water or move the product while it is still hot.
Steam or hot water may suddenly emit from the Main Body and cause scalding.
When Keeping Coffee Warm
Although the Stainless Carafe can keep coffee warm using vacuum insulation, the coffee temperature will gradually drop.
• Firmly close the Carafe Lid Set.
If the Stainless Carafe contains small amounts of coffee or the room temperature is low, the Carafe absorbs the heat of the coffee and the coffee temperature will drop faster.
* Be sure to enjoy the coffee immediately. The aroma and flavor of the coffee will deteriorate if left in the Stainless Carafe for a long time.
BREWING ICED COFFEE
Required items
◆ Ground coffee for iced coffee
◆ Ice cubes
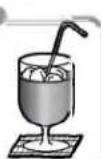
• Do not put ice cubes in the Stainless Carafe before brewing coffee. (Doing so may cause coffee to overflow and cause scalding.)
4–5 cups of iced coffee may be brewed at once.
Leave at least 12 inch (1cm) below Part A (see illustration on the right) when filling with ice cubes, to prevent coffee from overflowing when the Carafe Lid Set is closed.

How to Brew Iced Coffee
① Follow the instructions under "HOW TO USE" from steps 1 to 6 to brew the coffee.
- Do not preheat the Stainless Carafe.
- Fill the Water Tank with water up to the ICED mark on the Water Tank, depending on the number of cups you want to make.
Iced Coffee Brewing Guidelines and Estimated Time Until Completion
| Cups Brewed | 4 | 5 | |
| Ground Coffee | In Leveled Measuring Spoon*1 | 7 | 9 |
| Weight (Approx. oz.) | 1.26 | 1.62 | |
| Weight (Approx. g) | 35.7 | 45.9 | |
| Estimated Time*2 | Normal mode | 6.5 min. | 7 min. |
| TIME SAVER mode | 5.5 min. | 6 min. | |
※1 When using the Measuring Spoon for 1 cup(√).

※2 Based on water and room temperature of 68°F (20°C).
② Remove the Carafe Lid Set, put ice cubes in the Stainless Carafe, and stir the coffee to cool it down.
Ice Amount Guidelines
| Cups Brewed | 4 | 5 | |
| Amount of ice | Approx. number of ice cubes* | 15 | 18 |
| Weight (Approx. oz.) | 7.8 | 9.7 | |
| Weight (Approx. g) | 220 | 275 | |
※ Based on ice cubes measuring approx. 1 inch (2.5cm). The number of ice cubes to put in the Stainless Carafe varies depending on the size of the cubes. Make adjustments in accordance with your preferences.
③ Close the Carafe Lid Set and pour coffee into a glass while pressing the Carafe Button.
HOW TO SET THE TIMER
The Timer allows you to delay the time to begin brewing.
● The Timer can be set from the current time until 24 hours in advance.
- Do not set the timer too far in advance if the room temperature is high, such as during summer. Doing so may cause water quality to deteriorate or the aroma and flavor of the coffee to be lost.
- Press the TIME SETTING button ( ▲▼ ) to check the current time during Timer setting.
e.g.: To set the Timer for AM7:00 when the current time is PM11:00.
1 Prepare the product for brewing and use the TIME SAVER button to select the node.
TIME SAVER light OFF: Normal mode TIME SAVER light ON: TIME SAVER mode
- Brewing will be louder when the TIME SAVER mode is ON.
2 Press the ○ TIMER button.
The current time on the Display and the TIMER light will begin to blink.

3 Press the TIME SETTING button (▲▼) to select the time you want to begin brewing.
▲ button: Advances the clock in 10-minute increments.
▼ button: Moves the clock in reverse in 10-minute increments.

4 Press the START button.
When the time on the Display and the TIMER light stop blinking and stay on, the TIMER setting is complete.
The Display will indicate the time at which brewing will begin.
- The START button must be pressed for the product to being brewing automatically.

To Cancel the Timer Setting
- Press the CANCEL button. (The TIMER light will turn off and the Display will show the current time.)
CLEANING AND MAINTENANCE
Always unplug the product from the electrical outlet and allow it to cool completely before cleaning.
- Be sure to clean the product after every use.
- Do not splash the Main Body, Power Cord and Power Plug with water or immerse them in water. Doing so may cause electric shock or malfunction.
- Do not use hot water to wash the product or parts as they may deform or break.
● Do not use the following:
- Detergents other than mild kitchen detergent, such as thinner and bleach. Doing so may cause discoloration, cracks, degradation or corrosion.
- Polishing powder, nylon brushes, scrub brushes, anything made with metal, eraser pads, hard nylon sponges and abrasive cleaners. Doing so may cause corrosion.
- When using chemically treated cloths, do not rub too hard or leave them on the product for a long time as the surface of the product may become damaged from chemical reactions.
● Do not use a dishwasher or a dish-dryer. Doing so may cause deformation.
Permanent Coffee Filter
① Wash with a sponge or soft material with diluted mild kitchen detergent.
② Rinse with water.
② Wipe dry with a soft dry cloth.
Filter Basket
① Wash with a sponge or soft material with diluted mild kitchen detergent.
② Rinse with water.
③ Pour water in the Filter Basket, press the Drip Prevention Valve two or three times and wash.
④ Wipe dry with a soft dry cloth.
- If coffee grounds clog the Drip Prevention Valve, it may not seal properly and coffee may overflow. Be sure to wash it after each use.
- Be sure to fully drain water from the Filter Basket. Otherwise, this water may drip into your coffee during brewing.
● Handle the Drip Prevention Valve carefully. Pulling on it may cause it to come off.

Drip Prevention Valve
Do not disassemble the Drip Prevention Valve.
If it comes off, reattach correctly as shown below.
① Place the spring on the Filter Basket.
② Insert the Drip Prevention Valve through the spring and into the opening of the Filter Basket.
② Hold the Drip Prevention Valve in and attach the Rubber Gasket to the groove from the inside.


Be sure that the Rubber Gasket is attached securely. Water may leak if it is attached twisted or is loose.
| ○ | Attached correctly | |
| × | Loose | Water may leak from gaps |
CLEANING AND MAINTENANCE (cont.)
Water Tank, Water Tank Lid, Swing Basket, Shower Head
① Wash with a sponge or soft material with diluted mild kitchen detergent.
② Rinse with water.
③ Wipe dry with a soft dry cloth.
● Be sure to fully drain water from the Swing Basket. Otherwise, this water may drip into your coffee during brewing.
Main Body
① Wipe with a soft cloth immersed in diluted mild kitchen detergent and wrung well.
② Wipe with a well-wrung soft damp cloth.
③ Wipe dry with a soft dry cloth.
Power Cord and Power Plug
Wipe with a soft dry cloth.
Stainless Carafe
Stainless Carafe (Exterior)
① Wash the Carafe with a sponge or soft material with diluted mild kitchen detergent.
② Rinse with water and shake several times.
③ Wipe dry with a soft dry cloth.
- Do not immerse the Stainless Carafe in water. Water can collect in gaps within the Carafe and cause rusting or deformation.
Stainless Carafe (Interior)
① Wash the inside of the Carafe with a sponge brush or similar tool (with a handle) with diluted mild kitchen detergent.
- When you press the Carafe Button, a pin will pop out. Make sure to wash this pin as well when you wash the inside of the Carafe.
② Rinse with water and dry.
Protruding Pin

● Cleaning the Carafe on a regular basis will prevent odors and maintain it in spotless condition.
- To remove stains from the Stainless Carafe, a food safe coffee pot cleaner is recommended for cleaning. (When cleaning the Stainless Carafe using a food safe coffee pot cleaner, remove the Carafe Lid Set.)
Carafe Lid Set
① Remove the Carafe Lid Packing.
② Wash the Carafe Lid and Carafe Lid Packing with a sponge or soft material with diluted mild kitchen detergent.
⑧ Rinse with water.
- Clean the part where coffee passes through within the Carafe Lid with water after each use to prevent clogging.
To clean the part where coffee passes through within the Carafe Lid, press and hold the Carafe Lid Valve or Slide Lever and rinse with running water as shown in the illustration below.
Press and hold down the Carafe Lid Valve.

Press and hold the Slide Lever.

④ Shake the Carafe Lid several times while pressing and holding the Carafe Lid Valve or Slide Lever. (Otherwise, the remaining water may drip.)
⑤ Wipe dry with a dry cloth.
⑥ Reattach the Carafe Lid Packing in its original position.
- If the Carafe Lid Packing is damaged, discolored or turns white, replace with a new one. (→ P.20)
Remove and wash the Carafe Lid Valve, Spring, and Brew Valve Gasket if the Carafe Lid Valve does not depress smoothly, parts where coffee flows through within the Carafe Lid is clogged with coffee ground, or about every 1 month of usage.
- Wash with a small brush sold in stores for parts that are difficult to wash.
- Reattach removed parts correctly, as shown below.
How to Remove the Carafe Lid Valve
Press and hold down the Carafe Lid Valve, and remove the Brew Valve Gasket. (The Carafe Lid Valve, Spring and Brew Valve Gasket can now be removed.)

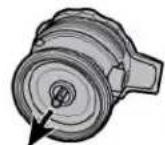
Brew Valve Gasket
How to Attach the Carafe Lid Valve
① Insert the Carafe Lid Valve into the spring and then insert into the opening of the Carafe Lid.
② Attach the Brew Valve Gasket to the Carafe Lid Valve.

● Attach the Brew Valve Gasket correctly as illustrated below.

- Attach the Brew Valve Gasket so that the tip of the Carafe Lid Valve protrudes properly.
| ○ | × |
| The tip does not protrude properly. | The tip protrudes properly. |

If "CLEAN" appears on the Display, or hot water is not dispensed smoothly, clean using citric acid.

- When "CLEAN" appears on the Display, clean using citric acid or hold the TIMER button for more than 3 seconds while the Display shows the current time. After the above operation, the message "CLEAN" will turn off.
Minerals contained in water may build up inside the pipes and other parts with use. These minerals are called "scale".
If scale accumulates, water may not be dispensed smoothly, the amount of coffee brewed may be reduced, or hot water may leak from gaps in the Main Body.
● The amount of scale build-up varies depending on the type and quality of water. More scale may build up if living in areas with hard water or when using mineral-rich water.
● Perform citric acid cleaning about every 4 weeks of usage. (When using water at TDS 400ppm)
Use the following procedure to remove scale.
How to Perform Citric Acid Cleaning
① Put 1 package of the Citric Acid Cleaner CD-K03E-JU in a cup and add warm water to dissolve. Pour it into the Water Tank and fill with water to level HOT-10 on the Water Tank.
② Stir the citric acid solution well.
③ Set the Water Tank, Stainless Carafe (with the Carafe Lid Set attached), Filter Basket, and Swing Basket to the Main Body. (Do not set the Permanent Coffee Filter.)
④ Hold the START button for more than 3 seconds to initiate the citric acid cleaning process.
- To stop the citric acid cleaning process before it finishes, press the CANCEL button. If cleaning was cancelled before it finished, restart the cleaning process from step ①.
- In order to prevent gas bubbles and bubbling-over, the Citric Acid Cleaner for Electric Water Boilers (CD-K03E-JU) is recommended for cleaning. (Available separately) →P.20
Citric acid (100%) is used as a food additive and is harmless from a food sanitation standpoint, but do not consume it.
START: Beeps and the cleaning process begins.
The square shown on the Display rotates. The START light and TIMER light will blink.

flowchart
graph TD
    A["Blinks"] --> B["GREEN"]
    B --> C["CANCEL"]
    C --> D["START"]
    D --> E["TIME SAVES"]
    E --> F["TIME ON/OFF"]
    F --> G["TIME SETTING"]
    G --> H["▼"]

※Cleaning time may vary depending on the amount of water, water temperature and room temperature.
END: Beeps and the cleaning process is completed.
"CLEAN" will disappear from the Display. The Display will show a square as illustrated. The START light and TIMER light will stop blinking and stay on.
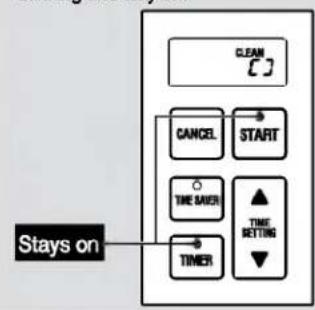
⑥ Press the CANCEL button.
⑥ When brewing completes, pour the citric acid solution from the Glass Carafe to another container to cool, then remove any scale (white crystals, etc.) floating in the solution.
⑦ Allow the Main Body to cool for 5 minutes or more.
⑧ Pour citric acid solution from step ⑥ back into the Water Tank and repeat steps ④ to ⑦ until there are no more scale.
⑨ After the Main Body has cooled completely, rinse the inside of the Stainless Carafe and the Water Tank, and repeat the brewing process using only water a few times in order to remove the citric acid odor.
(When brewing more than one carafe of coffee, wait at least 5 minutes after the START light turns off before starting the next brewing cycle.)
⑩ Unplug the Power Plug from the electrical outlet.
- If hot water is not dispensed smoothly, perform citric acid cleaning again.
TROUBLESHOOTING GUIDE
Please check the following before calling for service.
| Condition | Cause | Remedy |
| The product does not operate even when the START button is pressed. | Is the Power Plug inserted correctly? | Insert the Power Plug into the electrical outlet. |
| Hot water is not dispensed. | Is the Water Tank filled with water? | Pour water into the Water Tank. (→P.11) |
| Hot water is not dispensed smoothly and the brewing speed is slow. | Is the Water Tank set correctly? | Set the Water Tank correctly. (→P.11) |
| When scale accumulates inside the pipes and other parts, hot water may not be dispensed smoothly. In that case, perform citric acid cleaning. (→P.18) | ||
| A noise is heard during brewing. | The microprocessor (MICOM) makes a sound while adjusting the heat power of the product. | |
| There is water left in the Water Tank. | When scale accumulates inside the pipes and other parts, hot water may not be dispensed smoothly and water may be left in the Water Tank. In that case, perform citric acid cleaning. (→P.18) | |
| There are coffee grounds in the coffee.Coffee grounds in the Swing Basket after brewing.Coffee or coffee grounds overflow from the filter. | Is finely-ground coffee being used? | Please do not use finely-ground coffee. |
| Is too much ground coffee being used? | Please reduce the amount of ground coffee. (→P.10) | |
| Is the Swing Basket closed properly? | Close the Swing Basket properly. (→PP.0)0 | |
| Is the Carafe Lid Set attached properly? | Attach the Carafe Lid Set properly. (→P.11) | |
| Is the Stainless Carafe properly set on the Carafe Holder? | Set the Stainless Carafe properly on the Carafe Holder. (→P.11) | |
| Are you using the Permanent Coffee Filter and paper coffee filter together, or are you using two or more layers of paper coffee filter? | Use the Permanent Coffee Filter only or just one paper coffee filter. | |
| Depending on the type of coffee or Basket Coffee Filter being used, coffee grounds may overflow from the Basket Coffee Filter. In that case, use the Permanent Coffee Filter or reduce the amount of coffee (number of cups) to be brewed. | ||
| Depending on the type of paper filter being used, coffee grounds may overflow from the Basket Coffee Filter. In this case, reduce the amount of coffee grounds. If coffee grounds continue to overflow, please contact Zojirushi Customer Service or visit www.zojirushi.com/coffeefilter | ||
| The coffee is not hot (the Carafe is not retaining heat properly). | Has the coffee been left in the Stainless Carafe for a long time? | The coffee temperature will gradually drop as time passes. |
| When the Stainless Carafe contains small amounts of coffee or the room temperature is low, the temperature of the coffee will drop. | ||
| When the Carafe Button is pressed, it makes a sound.The Carafe Button does not go down smoothly. | Does the pin that pops out when you press the Carafe Button look clean? | Clean the inside of the Stainless Carafe (protruding pin). (→P.16) |
| “AM7:00” is blinking on the Display when the Power Plug is inserted. | The built-in lithium battery is out.Readjust the clock to use the product in a normal manner. To replace the lithium battery, contact the store where you purchased the product or Zojirushi Customer Service. (There will be a charge for the service.) | |
TROUBLESHOOTING GUIDE (cont.)

flowchart
graph TD
    A["Beeps sounds, lights turn on and HH appears on the Display."] --> B["Turns on"]
    B --> C{Is the Water Tank filled with water? Is the Water Tank low on water? Did you try to brew coffee consecutively without allowing the Main Body to cool?}
    C --> D["The Automatic Shut-Off function has been engaged. (→ P.13) Press the CANCEL button and wait until the product cools down. Fill with water and press the START button."]
    E["E4 is displayed."] --> F{Scale may have accumulated inside the pipes and other parts. Perform citric acid cleaning. (→ P.18) If this error code continues to be displayed even after you perform citric acid cleaning, please contact Zojirushi Customer Service.}
    G["E2, E3 or ES is displayed."] --> H{Indicates malfunction. Please contact Zojirushi Customer Service.}
    I["The Power Cord becomes hot."] --> J{The Power Cord may become hot while the product is turned on. This is not a malfunction.}
REPLACEMENT PARTS
● Replacement parts may be available for an additional charge. Please replace damaged parts only with new parts.
- When replacing parts, please record the model number and part name beforehand. Parts can be purchased through Zojirushi.com, by contacting Zojirushi Customer Service, or the store where you purchased the product.
Zojirushi Customer Service
1-800-733-6270 www.zojirushi.com
| Parts Names | Parts Number |
| Stainless Carafe Set(Stainless Carafe and Carafe Lid Set) | SERECYSC-XB |
| Carafe Lid Set | BX155818A-01 |
| Measuring Spoon | BX155054L-01 |
| Citric Acid Cleaner for Electric Water Boilers(1 oz./30g × 4 packets) | CD-K03E-JU |

ZOJIRUSHI
www.zojirushi.com
- FRESH BREW PLUS THERMAL CARAFE COFFEE MAKER OPERATING INSTRUCTIONS
- EC-YTC100
- INDEX
- SAVE THESE INSTRUCTIONS
- THIS APPLIANCE IS FOR HOUSEHOLD USE ONLY.
- IMPORTANT SAFEGUARDS (cont.)
- WARNINGS
- CAUTIONS
- IMPORTANT
- PARTS NAMES
- Control Panel
- Accessory
- HOW TO ATTACH AND REMOVE EACH PART
- Filter Basket
- How to Remove
- How to Attach
- HOW TO ATTACH AND REMOVE EACH PART (cont)
- Swing Basket
- Shower Head
- Carafe Lid Packing
- SOUND SIGNALS AND HOW TO CHANGE THEM
- How to change the Sound Signal:
- HOW TO USE
- Add ground coffee.
- Fill the Water Tank with water.
- Precautions When Using Hard Water:
- Preheat the Stainless Carafe.
- Set the Water Tank and the Stainless Carafe in the Main Body.
- Insert the Power Plug into the electrical outlet, and use the TIME SAVER button to select the mode.
- TIME SAVER Mode:
- Press the START button.
- Automatic Shut-Off Function
- How to Cancel Brewing in the Middle of the Process
- When Brewing Coffee Consecutively
- When Keeping Coffee Warm
- BREWING ICED COFFEE
- Required items
- How to Brew Iced Coffee
- HOW TO SET THE TIMER
- To Cancel the Timer Setting
- CLEANING AND MAINTENANCE
- Permanent Coffee Filter
- Do not disassemble the Drip Prevention Valve.
- CLEANING AND MAINTENANCE (cont.)
- Water Tank, Water Tank Lid, Swing Basket, Shower Head
- Main Body
- Power Cord and Power Plug
- Stainless Carafe
- Stainless Carafe (Exterior)
- Stainless Carafe (Interior)
- Carafe Lid Set
- How to Remove the Carafe Lid Valve
- How to Attach the Carafe Lid Valve
- If "CLEAN" appears on the Display, or hot water is not dispensed smoothly, clean using citric acid.
- How to Perform Citric Acid Cleaning
- START: Beeps and the cleaning process begins.
- END: Beeps and the cleaning process is completed.
- TROUBLESHOOTING GUIDE
- TROUBLESHOOTING GUIDE (cont.)
- REPLACEMENT PARTS
- ZOJIRUSHI
Brand : Zojirushi
Model : Fresh Brew Plus EC-YTC100
Category : Coffee maker