
KP-DEMO-BOX-HZ2 - Electronics Crestron - Free user manual and instructions
Find the device manual for free KP-DEMO-BOX-HZ2 Crestron in PDF.


| Product Type | Demonstration Box |
| Brand | Crestron |
| Model | KP-DEMO-BOX-HZ2 |
| Compatible Keypad | Horizon 2 HZ2-KPCN (sold separately) |
| Power Source | Two 9V batteries (not included) |
| Height | 3.07 in (78 mm) |
| Width | 4.56 in (116 mm) |
| Depth | 6.22 in (158 mm) |
| Weight | 1.20 lb (0.54 kg) |
| Box Contents | 1 KP-DEMO-BOX-HZ2, 2 metal contacts |
| Keypad Mounting | Magnetic hold; requires two Philips screws |
| Demo Modes | Preprogrammed: RGB color cycling, tunable light coloring, button feedback |
| Carrying Case Option | KP-DEMO-CASE (sold separately) holds up to six HZ2-KPCN units |
| Operation | Open lid to power keypad; close lid to remove power |
| Installation | Install batteries, attach metal contacts to keypad, place on mount |
| Manual Language | English (original) |
| Warranty | See Crestron website: www.crestron.com/warranty |
| Patents | See Crestron website: www.crestron.com/legal/patents |
Frequently Asked Questions - KP-DEMO-BOX-HZ2 Crestron
User questions about KP-DEMO-BOX-HZ2 Crestron
0 question about this device. Answer the ones you know or ask your own.
Ask a new question about this device
Download the instructions for your Electronics in PDF format for free! Find your manual KP-DEMO-BOX-HZ2 - Crestron and take your electronic device back in hand. On this page are published all the documents necessary for the use of your device. KP-DEMO-BOX-HZ2 by Crestron.
USER MANUAL KP-DEMO-BOX-HZ2 Crestron
The original language version of this document is U.S. English.
All other languages are a translation of the original document.
Crestron product development software is licensed to Crestron dealers and Crestron Service Providers (CSPs) under a limited nonexclusive, nontransferable Software Development Tools License Agreement. Crestron product operating system software is licensed to Crestron dealers, CSPs, and end-users under a separate End-User License Agreement. Both of these Agreements can be found on the Crestron website at www.crestron.com/legal/software_license_agreement.
The product warranty can be found at www.crestron.com/warranty.
The specific patents that cover Crestron products are listed online at www.crestron.com/legal/patents.
Certain Crestron products contain open source software. For specific information, please visit www.crestron.com/opensource.
Crestron, the Crestron logo, and Horizon are either trademarks or registered trademarks of Crestron Electronics, Inc. in the United States and/or other countries. Other trademarks, registered trademarks, and trade names may be used in this document to refer to either the entities claiming the marks and names or their products. Crestron disclaims any proprietary interest in the marks and names of others. Crestron is not responsible for errors in typography or photography.
©2024 Crestron Electronics, Inc.
Contents
Overview 4
Features ..5.
Specifications ..6
Dimension Drawings...7
Installation 8
In the Box...9.
Install the Batteries...10
Prepare the HZ2-KPCN...11
Operation ...12
Demo Mode...12
Resources 13
Crestron Support and Training....13
Programmer and Developer Resources...13
Product Certificates...13
Overview
The KP-DEMO-BOX-HZ2 provides a stylish and convenient way to showcase Horizon® 2 keypad and capabilities. The box accommodates one HZ2-KPCN that can be outfitted with a variety of faceplates and button assemblies.
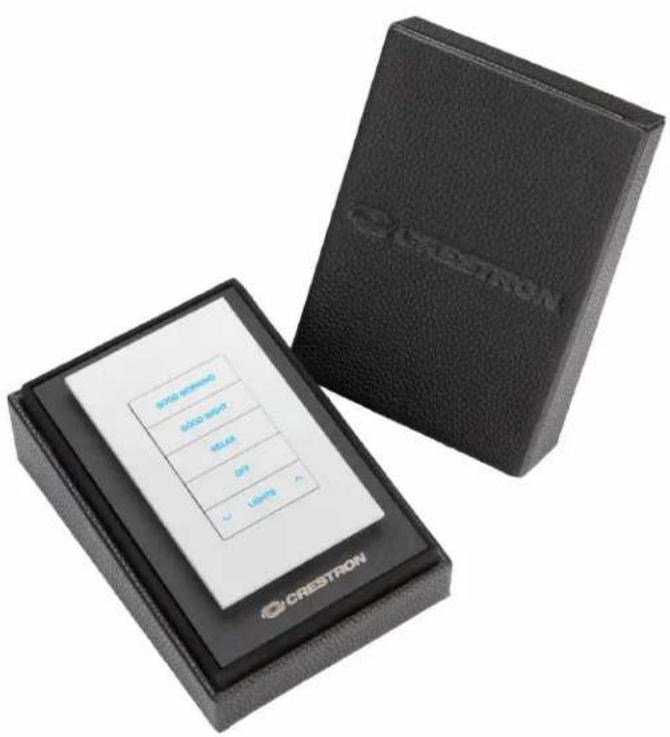
Shown with HZ2-KPCN (not included)
Features
- Attractive box showcases Horizon 2 keypad at a perfect angle
- Powers keypad for full-featured demonstrations
- Accommodates one HZ2-KPCN (not included)
Demo Mode
Preprogrammed demo modes highlight the functionality of the HZ2-KPCN. Demonstrate RGB color cycling, attunable light coloring, and button feedback for system statuses.
Simple Installation
The HZ2-KPCN is held in place with magnets. Easily swap out one keypad for another to sh different button style or color finishes. Two 9V batteries (not included) power the connected HZ
Carrying Case
The KP-DEMO-CASE (sold separately) holds up to six HZ2-KPCN units. Prepare multiple keypads variety of finishes and button styles to present options to clients.
Specifications
Power Requirements
Power (2) 9V batteries (not included)
Dimensions
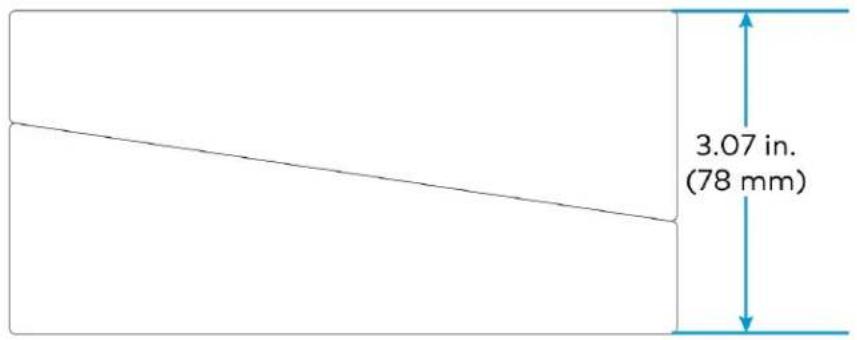
Height 3.07 in. (78 mm)
Width 4.56 in. (116 mm)
Depth 6.22 in. (158 mm)
Weight
1.20 lb (.54 kg)
Dimension Drawings

Installation
This section provides the following information:
• In the Box on page 9
• Install the Batteries on page 10
• Prepare the HZ2-KPCN on page 11
In the Box
Qty. Description
1 KP-DEMO-BOX-HZ2
Additional Items
2 Metal contact (2063647)
Install the Batteries
Follow the instructions below to install batteries in the KP-DEMO-BOX-HZ2. Two 9V batteries c required (not included).
-
Open the lid of the KP-DEMO-BOX-HZ2.
-
Remove the two Philips screws in the middle of the keypad mount.
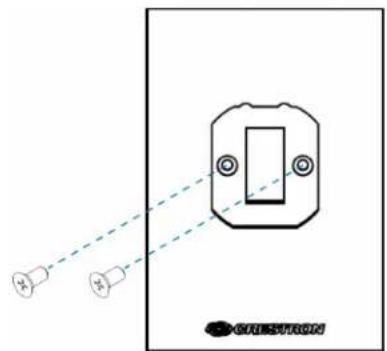
natural_image
Diagram showing two identical mechanical components with dashed alignment lines, no text or symbols present-
Remove the keypad mount to access the battery holder
-
Gently pull on the retaining clips and insert a 9V battery into each side of the holder.
- and - indicators.

-
Snap the battery connectors onto the battery terminals.
-
Screw the keypad mount back into the box with the two Philips screws. Do not over-tig screws.
The KP-DEMO-BOX-HZ2 is now ready for the HZ2-KPCN.
Prepare the HZ2-KPCN
Follow the instructions below to prepare the HZ2-KPCN (sold separately) for mounting in the DEMO-BOX-HZ2. This step requires the included metal contacts.
-
Fully assemble the HZ2-KPCN, including the faceplate and metal bracket. For details, refer Horizon 2 Product Manual.
-
Insert a 4-pin connector (included with the HZ2-KPCN) into the middle NET port.
-
Insert the flat ends of the included metal contacts into the G and 24 terminals. The curved portion of the contacts will protrude from the 4-pin connector.
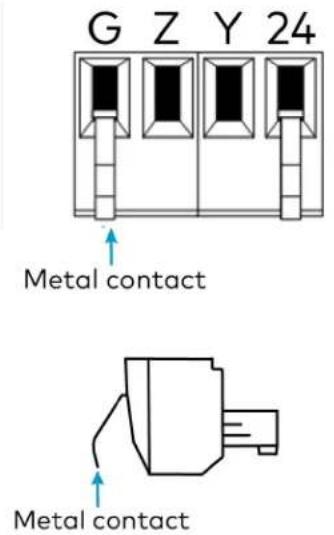
- Place the HZ2-KPCN on the keypad mount of the KP-DEMO-BOX-HZ2. The metal contacts two devices will line up, powering the HZ2-KPCN. The HZ2-KPCN remains held in place by magnets integrated into the KP-DEMO-BOX-HZ2.
The KP-DEMO-BOX-HZ2 is now ready for operation.
Operation
Open the lid of the KP-DEMO-BOX-HZ2 to provide power to the HZ2-KPCN. Closing the lid r power.
Demo Mode
When using the KP-DEMO-BOX-HZ2, utilize the HZ2-KPCN's demo mode to showcase backlight button indicator functionality.
For details, refer to Demo Mode in the Horizon 2 product manual.
Resources
The following resources are provided for Horizon 2 devices.
NOTE: You may need to provide your Crestron.com web account credentials when prompted to access some of the following resources.
Crestron Support and Training
- Crestron True Blue Support
• Crestron Resource Library
• Crestron Online Help (OLH)
• Crestron Training Institute (CTI) Portal
Programmer and Developer Resources
- help.crestron.com: Provides help files for Crestron programming tools such as SIMPL, SIMPL# and Crestron Toolbox™ software
• developer.crestron.com: Provides developer documentation for Crestron APIs, SDKs, and other development tools
Product Certificates
To search for product certificates, refer to support.crestron.com/app/certificates.

- Contents
- Overview 4
- Installation 8
- Operation ...12
- Resources 13
- Overview
- Features
- Demo Mode
- Simple Installation
- Carrying Case
- Specifications
- Power Requirements
- Dimensions
- Weight
- Installation
- In the Box
- Install the Batteries
- Prepare the HZ2-KPCN
- Operation
- Resources
- Crestron Support and Training
- Programmer and Developer Resources
- Product Certificates
Brand : Crestron
Model : KP-DEMO-BOX-HZ2
Category : Electronics