
SUBV12P - Subwoofer Origin Acoustics - Free user manual and instructions
Find the device manual for free SUBV12P Origin Acoustics in PDF.


| Product Type | Powered Subwoofer |
| Model | SUBV12P |
| Woofer | 12" Front-Firing Treated Paper Cone |
| Passive Radiator | 12" Down-Firing |
| Amplifier Type | Class D |
| Power Output (RMS) | 300 Watts |
| Power Output (Peak) | 500 Watts |
| Frequency Response | 21 Hz – 200 Hz |
| Maximum SPL | 101 dB |
| Inputs | Left & Right Line Level, LFE |
| Outputs | Line Level High-Pass |
| Phase Control | 0 – 180° |
| Crossover Frequency | 50 Hz – 150 Hz, with Bypass |
| Power Supply | 110–220 VAC, switchable |
| Auto Power On/Off | Yes (auto/manual/off) |
| USB Output | 5 VDC, 500 mA (accessory power) |
| Dimensions (W × H × D) | 14.75" × 15.625" × 16.75" (375 mm × 396 mm × 423 mm) |
| Weight | 30.3 lbs (13.8 kg) |
| Cleaning Instructions | Clean only with a dry cloth |
| Safety Features | Polarized plug, ventilation openings, do not expose to moisture |
| Parts / Repairability | Refer servicing to qualified personnel; no user-serviceable parts inside |
| Warranty | Limited 2-year warranty for original purchaser from authorized dealer |
Frequently Asked Questions - SUBV12P Origin Acoustics
User questions about SUBV12P Origin Acoustics
0 question about this device. Answer the ones you know or ask your own.
Ask a new question about this device
Download the instructions for your Subwoofer in PDF format for free! Find your manual SUBV12P - Origin Acoustics and take your electronic device back in hand. On this page are published all the documents necessary for the use of your device. SUBV12P by Origin Acoustics.
USER MANUAL SUBV12P Origin Acoustics
natural_image
Abstract black-and-white graphic with a stylized mountain or triangle shape and circular motion (no text or symbols)ORIGIN ACoustics
SUBWOOFER COLLECTION

Table of Contents
Introduction - 1
Important Safety instructions - 2
Specifications - 6
What's Included - 7
General Information - 7
Controls & Connections - 8
Subwoofer Placement - 10
Subwoofer Adjustment - 10
Troubleshooting - 11
Technical Assistance - 12
Warranty - 13
Return Process - 14

ORIGIN ACOUSTICS
Introduction
Thank you for purchasing the SUBVP Subwoofer. At Origin Acoustics, we take pride in providing you with a high quality product. All of Origin Acoustics' speakers are designed to have excellent sound quality, longevity, and a simple installation process.
This instruction booklet covers the necessary information for a smooth installation, including: the tools you will need, step-by-step instructions for installation, troubleshooting tips for any errors that may occur, and all warranty information. If for any reason you experience problems or if you have installation questions please call us at (844) 674-4461. Hours of operation are 8:00am to 5:00pm (Pacific Time), Monday through Friday.
Important Safety Instructions
1) Read these instructions.
2) Keep these instructions.
3) Heed all warnings.
4) Follow all instructions.
5) Do not use this apparatus near water.
6) Clean only with dry cloth.
7) Do not block any ventilation openings. Install in accordance with the manufacturer's instructions.
8) Do not install near any heat sources such as radiators, heat registers, stoves, or other apparatus (including amplifiers) that produce heat.
9) Do not defeat the safety purpose of the polarized plug. A polarized plug has two blades with one wider than the other. The wide bladed is provided for your safety. If the provided plug does not fit into your outlet, consult an electrician for replacement of the obsolete outlet.
10) Protect the power cord from being walked on or pinched particularly at plugs, convenience receptacles, and the point where they exit from the apparatus.
11) Only use attachments/accessories specified by the manufacturer.
12) Use only with the cart, stand, tripod, bracket, or table specified by the manufacturer, or sold with the apparatus. When a cart is used, use caution when moving the cart/apparatus combination to avoid injury from tip-over.
13) Unplug this apparatus during lightning storms or when unused for long periods of time.
14) Refer all servicing to qualified service personnel. Servicing is required when the apparatus has been damaged in any way, such as power-supply cord or plug is damaged, liquid has been spilled or objects have fallen into the apparatus, the apparatus has been exposed to rain or moisture, does not operate normally, or has been dropped.
15) Do not open the equipment to reduce the risk of electrical shock. For safety reasons it is only allow to the opened by qualified service personnel.
16) WARNING: To reduce the risk of fire or electric shock, do not expose this apparatus to rain or moisture. And the apparatus shall not be exposed to dripping or splashing and that no objects filled with liquids, such as vases, shall be placed on the apparatus.
17) The MAINS plug is used as the disconnect device and shall remain readily operable.

natural_image
Symbolic illustration of a person climbing a ladder inside a circle with a diagonal line (no text or symbols)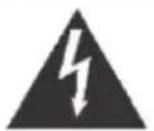


ATTENTION | RISQUE DECHOCI ÉLECTRIQUE PAS OUVRIR |

The lightning flash with arrowhead symbol, within an equilateral triangle, is intended to alert the user to the presence of uninsulated dangerous voltage within the product's enclosure that may be of sufficient magnitude to constitute a risk of electric shock to persons.

The exclamation point within an equilateral triangle is intended to alert the user to the presence of important operating and maintenance (servicing) instructions in the literature accompanying the appliance.
12" Front-Firing Treated Paper Cone Woofer
12" Down-Firing Passive Radiator
300W Class D Amp
Power Rating Continuous: 300 Watts RMS
Power Peak: 500 Watts Peak
Frequency Response: 21Hz-200Hz
Subwoofer Output: 101dB SPL
Outputs: Line Level High-Pass
Inputs: Left & Right Line Level, LFE
Phase Control: 0 - 180°
Crossover: 50Hz - 150Hz; Bypass
Features: Auto/on/off, 5V USB,
110-220V voltage switch
Weight: 30.3 lbs (13.8 kg)
Dimensions W/ Feet: 14 34 " x 15 58 " x 16 34 "
(375mm × 396mm × 423mm)
SUBV10P
10" Front-Firing Treated Paper Cone Woofer
10" Down-Firing Passive Radiator
200W Class D Amp
Power Rating Continuous: 200 Watts RMS
Power Rating Peak: 350 Watts Peak
Frequency Response: 28Hz-200Hz
Subwoofer Output: 99dB SPL
Inputs: Left & Right Line Level, LFE
Outputs: Line Level High-Pass
Phase Control: 0 - 180°
Crossover: 50Hz - 150Hz; Bypass
Features: Auto/on/off, 5V USB,
110-220V voltage switch
Weight: 25.9 lbs (11.8 kg)
Dimensions W/ Feet: 13 14 " x 14 18 " x 15 14 "
(337mm × 358mm × 385mm)
SUBV8P
8" Front-Firing Treated Paper Cone Woofer
8" Down-Firing Passive Radiator
180W Class D Amp
Power Rating Continuous: 180 Watts RMS
Power Rating Peak: 320 Watts Peak
Frequency Response: 32Hz-200Hz
Subwoofer Output: 95dB SPL
Inputs: Left & Right Line Level, LFE
Outputs: Line Level High-Pass
Phase Control: 0 - 180°
Crossover: 50Hz - 150Hz; Bypass
Features: Auto/on/off, 5V USB,
110-220V voltage switch
Weight: 30.3 lbs (13.8 kg)
Dimensions W/ Feet: 11 34 " x 12 58 " x 13 58 "
(298mm × 319mm × 346mm)
What's Included
Subwoofer
Grille
AC Power
Cord
Manual
Extras You'll Need
RCA audio interconnect cables
Sound pressure level meter (or smartphone app)
General Information
- Observe all warnings on the subwoofer and in the manual. Please check the subwoofer for damage before use.
The subwoofer must be in perfect working condition. Damaged parts may lead to personal injury.
- Connect the subwoofer according to the instructions in the manual.
• Install the subwoofer on a level surface only.
- When choosing the location of the subwoofer, do not place it in locations that are:
- In direct sunlight
- Very humid
- Prone to vibrations
- Exceptionally hot or cold
- Close to magnetic cards (since the speakers are not magnetically shielded placing magnetic cards such as credit cards may cause them to fail)
Caution! Origin subwoofers are heavy. Be careful when lifting them to prevent personal injury.
Controls & Connections
Status Light
This light glows when the subwoofer's power is on.
Off/Auto/On Switch
This switch functions only when the power switch (see pg. 10 "Power Switch") is set to "on." When this switch and the power switch are both set to "on," the subwoofer's power will always be on. When this switch is set to "auto," the subwoofer's power will come on automatically when it senses an incoming audio signal. If there is no signal for 15-18 minutes, the subwoofer will automatically shut off.


SUBV8P



Volume
This knob adjusts the subwoofer's volume. Turn it clockwise for full volume. Note that the subwoofer level control in an AV receiver will also affect how loud the subwoofer plays. With most AV receivers, setting this knob at about halfway up (the 12 o'clock position) will provide a volume level that allows the subwoofer's level to be matched with that of the main speakers.
Phase
Use this knob to adjust the phase of the subwoofer relative to the main speakers. This will help achieve a smoother blend of the sound of the subwoofer and the main speakers. To adjust it, sit in the chair or couch where you usually listen, and play some bass-heavy music with the phase knob set to 0. Now play the same music with the knob set to 180. If you hear a difference, experiment with different settings until the bass sounds smoothest from your chair.
Crossover
Use this knob to set the highest bass frequency the subwoofer will play, from 50 to 150Hz . If you're using an AV receiver or surround-sound processor, set this knob at 150 and use the crossover built into the receiver or processor. If the subwoofer is installed in a stereo system, set this knob as close as possible to the lowest rated bass extension of the main left and right speakers.
Inputs
These jacks accept a signal from an AV receiver, a surround-sound processor, a stereo receiver or a stereo preamp. In a surround-sound system, use an RCA audio interconnect cable (not included) to connect the receiver or processor's subwoofer output to the input jack labeled LFE. In a stereo system, connect two RCA cables (not included) from the preamp or the receiver's preamp output to the jacks labeled R and L.
USB 5VDC output
This jack outputs 5-volt DC power, which can be used to power accessories such as a wireless subwoofer receiver/transmitter system.
Power switch
This is the master power switch that turns on the AC power. It must be in the “on” position for the subwoofer to function. If the power switch is on, the on/auto/off switch (see pg. 8 “off/Auto/On Switch”) controls the subwoofer’s power.
AC cord input
This connector accepts a standard two-conductor AC power cord (included). Note that the jack is not polarized, which means the connector can be reversed. Reversing the AC cord in this jack can sometimes fix hum (grounding) problems in the audio system.
Subwoofer Placement
The more walls the subwoofer is near, the louder (and sometimes boomier) the bass will sound. If you want maximum bass output, put the subwoofer in a corner. If this makes the bass too loud or boomy, move the subwoofer out of the corner and closer to the center of the wall. Often, placing the subwoofer near or between the main speakers helps the subwoofer blend better with the speakers, and gives the best compromise between maximum output and smoothest sound. When you listen to evaluate different subwoofer positions, always do it from the chair or couch where most of the listening will take place.
A simple trick used by many home theater enthusiasts is to place the subwoofer in the primary listening chair, play some music with a melodic bass line (most pop and jazz recordings will work), and crawl around with your head about a foot or two off the ground. Find the spot along the wall where the bass sounds the smoothest and most even from note to note, and put the subwoofer there.
Subwoofer Adjustment
If the subwoofer is installed in a surround-sound system: Use the crossover frequency and level controls in the receiver or surround processor, following the manufacturer's instructions.
If the subwoofer is installed in a stereo system without a built-in subwoofer crossover: Set the subwoofer's crossover control to match the rated bass extension of the speakers as closely as possible—e.g., if you're using tower speakers with 40 Hz rated deep bass response, set the crossover control to 50 Hz.
If you're not sure what the speakers' bass rating is, start with this control set in the middle (about 100 Hz), with the volume control set in the middle. Adjust the volume control until the bass level roughly matches the level of the main speakers. If some bass notes seem to be too quiet, set the crossover control to a higher frequency. If some bass notes seem too loud, set the crossover control to a lower frequency. Do all of your listening tests from the chair or couch where most of the listening will take place.
Troubleshooting
If possible, it's often good to try to isolate the problem first. For example, if you're playing a DVD on a television and there's no sound, try connecting an MP3 player to the system to see if that works. If it does work, then the problem is with the television, DVD player, or the cables connecting them. If it doesn't work, the problem will be with the amplifier, speakers, or those cables.
Problem Possible Cause
| No Sound The volume may be turned down or muted. Check the volume settings on both the amplifier and the television/computer/CD player/etc. | |
| No Sound Make sure the proper source is selected on the amplifier or receiver. | |
| No Sound Check the cord connecting the amplifier with the source. The cord may be damaged or plugged into the wrong input or output. | |
| No Sound Check the wires connecting the amplifier with the speakers. Make sure they're connected properly and not damaged in any way. | |
| Poor Sound Quality | If you hear something like static, or the sound is cutting in and out, check the audio cables. If the problem increases when a cable is being moved, then the cable is most likely faulty or not connected properly. |
| Poor Sound Quality | Today's audio systems may have several places to adjust the volume, for example your MP3 player may have a volume control, and your amplifier may also have one. Check to be certain that the volume isn't turned up past 80% on any device. |
| Poor Sound Quality | Try changing sources to be certain that the selection you've chosen is a good quality recording. |
Technical Assistance
If you have any questions or concerns about installing or using this product, you can reach us through one of the following methods:
Phone: (844) 674-4461
Hours of operation: 8:00am - 5:00pm (Pacific Time), Mon - Fri
Email: techsupport@originacoustics.com
If you are having technical trouble, please include the model number and briefly explain what steps you took to resolve the problem in your email, or be prepared to answer these questions over the phone. If you are considering returning the product, it's required that you contact Origin Acoustics prior to any return attempts. This way we can determine if the issue can be resolved without returning the product, or if needed we can provide instructions and support for the return process.
Limited 2-Year Warranty
Origin Acoustics warrants to the original retail purchaser only that this Origin Acoustics product will be free from defects in materials and workmanship, provided the speaker was purchased from an Origin Acoustics authorized dealer.
If the product is determined to be defective, it will be repaired or replaced at Origin Acoustics' discretion. If the product must be replaced yet it is no longer manufactured, it will be replaced with a model of equal to or greater value that is the most similar to the original. If this is the case, installing the replacement model may require mounting modifications; Origin Acoustics will not be responsible for any such related costs.
Requirements & Warranty Coverage
This warranty may not be valid if the product was purchased through an unauthorized dealer. This warranty only applies to the individual that made the original purchase, and it cannot be applied to other purchases. The purchaser must be prepared to provide proof of purchase (receipt). This warranty will not be valid if the identifying number or serial number has been removed, defaced, or altered.
Not Covered by Warranty
- Accidental damage
- Damage caused by abuse or misuse
- Damage caused by attempted repairs/modifications by anyone other than Origin Acoustics or an authorized dealer
- Damage caused by improper installation
• Normal wear, maintenance, and environmental issues - Damage caused by voltage inputs in excess of the rated maximum of the unit
• Damage inflicted during the return shipment
Return Process
Before making any return attempts, it is required that you first contact Origin Acoustics. Return product to Origin Acoustics or your dealer, either in person or by mail. It's preferable if the product is returned in the original packaging. If this isn't possible, the customer is responsible for insuring the shipment for the full value of the product.
This warranty is in lieu of all other expressed or implied warranties. Some states do not allow limitations on implied warranties, so this may not apply depending on the customer's location. (For more information, see Magnuson-Moss Warranty Act.)
NOTES

natural_image
Abstract black-and-white graphic with a stylized arrow or symbol inside a circular frame (no text or symbols present)ORIGIN
ACOUSTICS


- SUBWOOFER COLLECTION
- Table of Contents
- Introduction
- Important Safety Instructions
- SUBV10P
- SUBV8P
- What's Included
- Extras You'll Need
- General Information
- Controls & Connections
- Status Light
- Off/Auto/On Switch
- Volume
- Phase
- Crossover
- Inputs
- USB 5VDC output
- Power switch
- AC cord input
- Subwoofer Placement
- Subwoofer Adjustment
- Troubleshooting
- Technical Assistance
- Limited 2-Year Warranty
- Requirements & Warranty Coverage
- Not Covered by Warranty
- Return Process
- NOTES
Brand : Origin Acoustics
Model : SUBV12P
Category : Subwoofer