
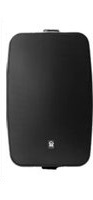
OS50W - Loudspeaker Origin Acoustics - Free user manual and instructions
Find the device manual for free OS50W Origin Acoustics in PDF.


| Product Type | Outdoor Surface Mount Speaker |
| Brand | Origin Acoustics |
| Model | OS50W |
| Woofer Size | 5.25" (133 mm) IMPP |
| Tweeter Size | 1" (25 mm) Aluminum |
| Power Handling (Program) | 60 Watts |
| Power Handling (Continuous Pink Noise) | 30 Watts |
| Frequency Response (-10dB) | 60 Hz – 20 kHz |
| Frequency Response (+/-3dB) | 84 Hz – 20 kHz |
| Nominal Coverage Angle (Horizontal x Vertical) | 100° x 50° |
| Sensitivity (1W/1m) | 84 dB |
| Rated Maximum SPL | 103 dB |
| Impedance | 8 ohms |
| Dimensions (W x H x D) | 8.3" x 11" x 7" (171 x 279 x 178 mm) |
| Height Without Bracket | 10" (254 mm) |
| Color | White (also available in Black) |
| Ingress Protection Rating | IPX66 (IEC 60529) |
| Connector Type | 2-Pin Phoenix Connector |
| Mounting Options | Wall, ceiling, pole (U-bolt required for pole) |
| Included Accessories (per pair) | Mounting templates, C-brackets, wall brackets, screws, anchors, Phoenix connectors, eyelet hooks, grilles, grille removal key, Allen key, T20 Torx TR wrench |
| Warranty | Limited 5-Year Warranty |
Frequently Asked Questions - OS50W Origin Acoustics
User questions about OS50W Origin Acoustics
0 question about this device. Answer the ones you know or ask your own.
Ask a new question about this device
Download the instructions for your Loudspeaker in PDF format for free! Find your manual OS50W - Origin Acoustics and take your electronic device back in hand. On this page are published all the documents necessary for the use of your device. OS50W by Origin Acoustics.
USER MANUAL OS50W Origin Acoustics
ORIGIN
ACOUSTICS
OUTDOOR COLLECTION
SURFACE MOUNT SPEAKERS



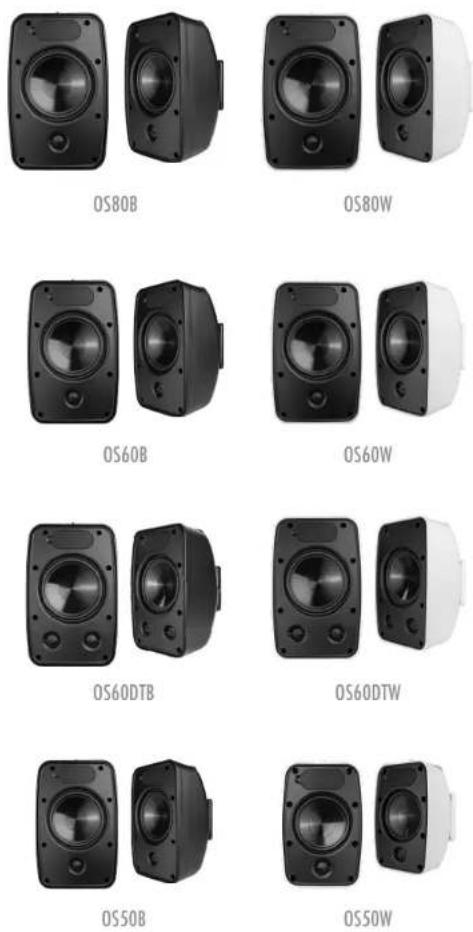
OS80B | OS80W OS50B | OS50WOS60DTB | OS60DTW OS60B | OS60W
Outdoor Collection Manual
Table of Contents
- Introduction 1
- Certifications 1
- Specifications 2
- What's Included 4
- Product Features 5
- Speaker Wire 7
- Wire Routing 7
- Wiring Diagram 8
- Speaker Placement 8
- Installation 9
- Pivoting The Speaker 14
- Certification Compliance 15
- Troubleshooting 17
- Technical Assistance 18
- Limited 5-Year Warranty 18
- Return Process 19

ORIGIN ACoustics
1. Introduction
Thank you for purchasing an Outdoor Collection Surface Mount Speaker. All of Origin Acoustics' speakers are designed to have excellent sound quality, longevity, and a simple installation process.
This instruction booklet covers the necessary information for a smooth installation, including: the tools you will need, step-by-step instructions for installation, troubleshooting tips for any errors that may occur, and all warranty information. If for any reason you experience problems or if you have installation questions please call us at (844) 674-4461. Hours of operation are 8:00am to 5:00pm (Pacific Time), Monday through Friday.
2. Certifications
Origin Acoustics Outdoor Collection Surface Mount Speaker models OS80B/OS80W, OS60DTB/OS60DTW, OS60B/OS60W, OS50B/OS50W meet the following standards:
IEC 60529: IPX66 Rated
*All product information is subject to change. Please refer to www.originacoustics.com for the latest information.
- Specifications
| OS80B | OS80W | OS60DTB | OS60DTW | |
| Part | SOS80000B, SOS80000W | SOS600DTB, SOS600DTW |
| Woofer | 8" IMPP | 6 1/2" IMPP |
| Tweeter | 1" Aluminum | Dual 1" Aluminum |
| Power Handling (Program Power) | 120 Watts | 80 Watts |
| Power Handling (Cont. Pink Noise) | 60 Watts | 40 Watts |
| Frequency Response | (-10dB) 41Hz-20kHz(1/3dB) 60Hz 20kHz | (-10dB) 49Hz-20kHz(1/3dB) 72Hz 20kHz |
| Nominal Coverage Angle | 70° Horizontal, 70° Vertical | 100° Horizontal, 50° Vertical |
| Sensitivity @1m | 87dB | 88dB |
| Rated Maximum SPL | 108dB | 106dB |
| Impedance | 8 ohm | 8 ohm |
| Dimensions | 9 1/2"W x 15" I x 3 5/8" D | 7 7/8"W x 13 1/2" I x 8 3/8" D |
| 241 W x 381 H x 245 D mm | (200 W x 336 H x 208 D mm) | |
| Colors | 1" H (350 mm) without bracketBlack | White | 12 1/4" H (311 mm) without bracketBlack | White |
OS60B | OS60W
| Part | SOS60000B, SOS60000W | SOS50000B, SOS50000W |
| Woofer | 6 1/2" IMPP | 5 1/4" IMPP |
| Tweeter | 1" Aluminum | 1" Aluminum |
| Power Handling (Program Power) | 80 Watts | 60 Watts |
| Power Handling (Cont. Pink Noise) | 40 Watts | 30 Watts |
| Frequency Response | (-10dB) 48Hz-20kHz(+/- 3dB) 0Hz 20kHz | (-10dB) 60Hz-20kHz(+/- 3dB) 84Hz 20kHz |
| Nominal Coverage Angle | 100° Horizontal, 50° Vertical | 100° Horizontal, 50° Vertical |
| Sensitivity @1m | 85dB | 84dB |
| Rated Maximum SPL | 104dB | 103dB |
| Impedance | 8 ohm | 8 ohm |
| Dimensions | 7 1/8" W x 13 1/2" H x 8 3/10" D(200 W x 336 H x 208 D mm) | 8 3/10" W x 11" H x 7" D(171 W x 279 H x 178 D mm) |
| Colors | 12 1/8" H (311 mm) without bracketBlack | White | 10" H (254 mm) without bracketBlack | White |
OS50B | OS50W
*All product information is subject to change. Please refer to www.originacoustics.com for the latest information.
4. What's Included (per Speaker Pair)
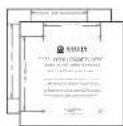
A • 2 x Wall Bracket Mounting Hole Templates
B·2×C Brackets
C·2×Mounting Brackets
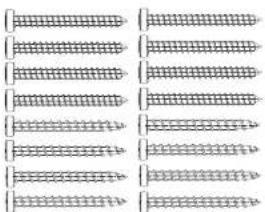
D1·16 x T20 Stainless Steel Torx TR Screws
(8 x Coarse / 8 x Fine, 15% Length)
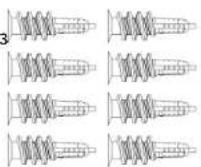
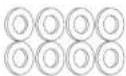
D2 • 8 x Wall Anchors D3 • 8 x Washers
E • 4 x T20 Stainless Steel Torx TS Screws (M5 x 3/8" Length)
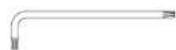
F·1xT20 Torx TR Wrench
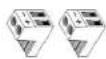
G·Z×ZP Phoenix connectors
H·2×Eyelet Hooks
1 • 2 x Powder Coated Aluminum Grilles [Black or White]
J·1x Grille Removal Key
K • Grille Adhesives
L·4×Grille Screws (Not shown)
M·1 x Allen Key for grille screws (Not shown)
N • 2 x Speakers (Illustrated in Section 5)
·D1
·D2
• |

·J·K

·A

·E

·F
·G
•H


5. Product Features
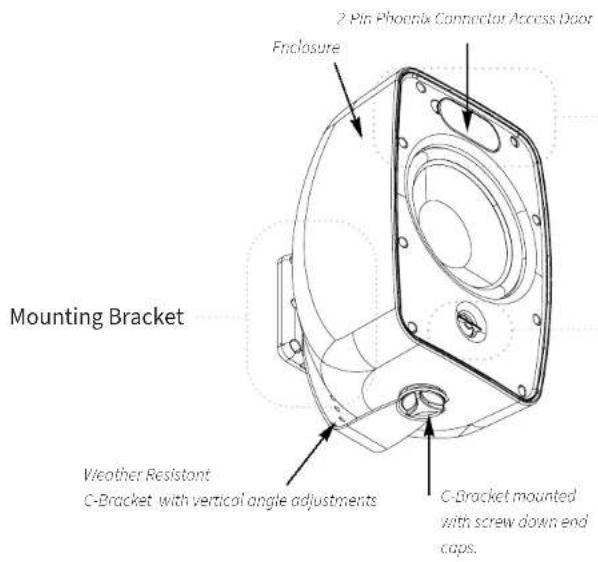
2-Pin Phoenix Connector Access Point


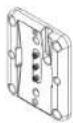
Mounting Bracket
with 3 Rubber Mounting
Dimples
Mounting Bracket

石
7. Speaker Wire
The gauge of wire used can have an impact on the performance of your speakers. Generally, speaker wire is determined by the length of the run and wattage utilized. The longer your run is, the smaller the wire gauge must be.
In residential systems, for relatively short runs (less than 50 feet) to 8 ohm speakers, 16 gauge wire will be usually suitable.
| Wire Length Wire Gauge System | ||
| 0-50' (0-15m) 16 | 8 Ohm | |
| 50-100' (15-45m) | 48 Ohm | |
| Over 100' (30m) 12 | 8 Ohm | |
8. Wire Routing
Plan how you will route the wire to the desired speaker location. There are several methods for routing the wire, and you may need to combine several of them.
Behind the Baseboard The wire can be routed behind the baseboard by cutting a groove out of the back of the baseboard, or by buying special baseboard designed for concealing wires.
Attic or Basement When available, you can route the wire through an attic or crawlspace.
Through Walls When running wires through a wall, be sure to avoid all obstacles such as AC wiring, pipes, and ducts.
Under the Carpet One option is to lift up the carpet and route "tape wire" under the carpet.
For New Construction if these speakers are being installed in a new home during construction, the installation process will be a bit different (although much simpler). For these situations, it is recommended you purchase a bracket. Instructions on how to install the speakers are provided with the bracket, or can be found on our website. Visit www.originacoustics.com for more information.
7
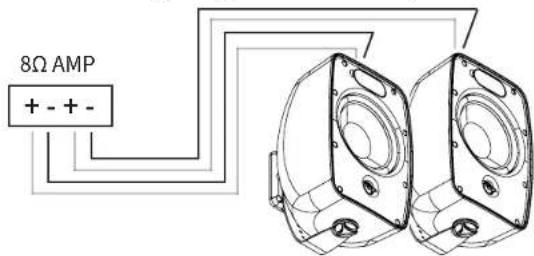
9. Wiring Diagram
Wiring Diagram for 8Ω system
10. Speaker Placement
Speaker placement is determined by several factors like desired SPL, coverage requirements, variance in SPL by location, etc. When the objective is to fill a large area with very little variance (-/- 2dB), then a larger number of speakers is required. Typically, once the number of speakers has been determined, placing them equidistant from the listener and from each other will deliver the best result. However, due to other factors this may not be possible. The further the speaker is from the listener, the lower the SPL. As the speaker is placed closer to the wall, bass frequencies will be enhanced. This may or may not be the desired effect but certainly needs to be considered. The mounting system makes it easy to mount the speakers in a variety of positions and locations.
10a. Wall/Ceiling Mounting It is important that the bracket is securely mounted onto a structurally sound surface, capable of withstanding the weight of the product and any vibration created by the operation of the speaker. A screw size of 18 × 2" length or M4 x 50mm length is recommended. When mounting onto drywall or plasterboard, the bracket should be affixed to a joist or stud. When mounting onto brick or concrete, wall plugs or concrete anchors should be used. Can also be mounted directly onto a single or dual Gang Wall Junction Box.
10b. Pole Mounting To mount the speaker on a pole, U bolt and nuts should be used to clamp around the pole and bolt through the holes on the back of the bracket. Spring washers or blue threadlocker are recommended to ensure the nuts do not work loose through the vibration of the speaker.
11. Installation
The speakers should be placed facing the listeners; and the best performance is obtained by ensuring the left and right speakers are 6 - 10 feet apart, at ear level. If the speakers will be mounted above or below ear level, pivot them upwards or downwards to direct the sound towards the listeners.

- Run the speaker wires from the amplifier to the speaker location. Be sure to leave enough wire at the speaker location to feed through the hole in the speaker enclosure and wire to the terminal connector on the front.

- Attach the mount bracket to the mounting surface using the 4 supplied screws, using studs or anchors, that are appropriate for the type of surface. Use the supplied T20 Torx TR Wrench tool to screw in these screws.

- If the installation requires that the speakers be mounted on poles, you can attach the bracket to poles using U-bolt (not included).

- Pull the speaker wire through the indicated wire feed hole on wall mount bracket. Then feed the wire from this mount bracket into the wire entry hole on the back of the speaker, and out through the front panel opening on the speaker. Make sure there is enough slack in the wire that will allow the speaker to pivot vertically or rotate horizontally on the C bracket.

- Attach the C-Bracket to the wall mount, after locating correct vertical angle. Screw down using the Security Torx 120 Wrench for the included screws and attach securely to wall mount.

10
- Attach the speaker to the C-Bracket, using the screw down caps and adjust correct horizontal angle.
A.

B.

C.

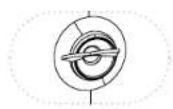
D. At each end of the C Bracket, there is a Torx Security Screw, found inside the center of each cap end. Use a T25 Wrench tool (not supplied) to screw down the cap ends, via this screw.
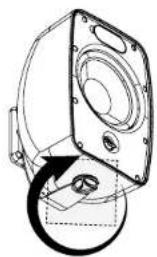

11
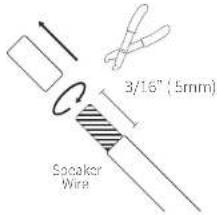
- Make sure the wire is correctly routed: [eg: the left speaker output will be routed to the left speaker, right output to right speaker, etc], from the amplifier to the speaker. Then, to connect the amplifier wire to the phoenix connector on the front speaker baffle; follow the following steps:
A. Take the wire from the wire feed hole on the speaker front panel. Strip approximately 1/2 s" (5mm) of the insulation off each wire, and to avoid stray strands, twist them at the end.
B. Insert the wire into the correct square opening on the Phoenix Connector. Use a small flat head screwdriver to tighten the corresponding screw to secure the wire.
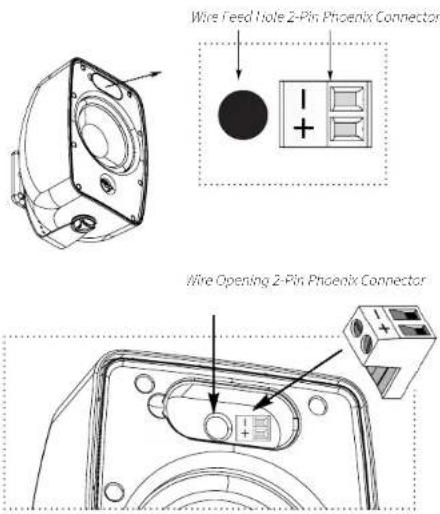
12
C. After securing the wire into the the Phoenix Connector, you can then fit the wiring terminal cover in the speaker front panel.
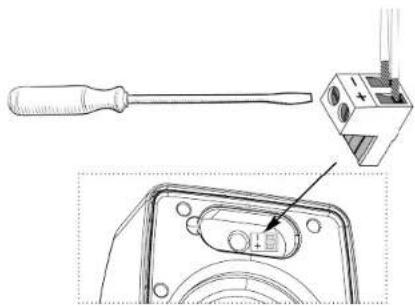
D. Lastly, after closing the Phoenix Connector Access "door," you can add the grille adhesives around the grille gap, fit the grille onto the speaker, and secure the grille into place using the allen key.

13
12. Pivoting The Speaker
The speaker features a Weather Resistant Bracket with vertical angle adjustments.
You can rotate the speaker between the two screw-cap ends of the C-Bracket, to reach the desired horizontal angle (See A). You can also adjust the vertical position when you connect the vertical C-Bracket to the wall mount (See B).
This allows the sound to be aimed towards the listeners as required.

13. Certification Compliance
15B. IEC 60529: IPX66 Rated
This standard applies to the classification of degrees of protection provided by enclosures for electrical equipment with a rated voltage not exceeding 72.5 kV.
Object: The object of this standard is to give:
a) Definitions for degrees of protection provided by enclosures of electrical equipment as regards:
1) protection of persons against access to hazardous parts inside the enclosure;
2) protection of the equipment inside the enclosure against ingress of solid foreign objects;
3) protection of the equipment inside the enclosure against harmful effects due to the ingress of water.
b) Designations for these degrees of protection.
c) Requirements for each designation.
d) Tests to be performed to verify that the enclosure meets the requirements of this standard.
It will remain the responsibility of individual technical committees to decide on the extent and manner in which, the classification is used in their standards and to define "enclosure" as it applies to their equipment. However, it is recommended that for a given classification the tests do not differ from those specified in this standard. If necessary, complementary requirements may be included in the relevant product standard. A guide for the details to be specified in relevant product standards is given in annex B.
For a particular type of equipment, a technical committee may specify different requirements provided that at least the same level of safety is ensured.
This standard deals only with enclosures that are in all other respects suitable for their intended use as specified in the relevant product standard and which from the point of view of materials and workmanship ensure that the claimed degrees of protection are maintained under the normal conditions of use.
This standard is also applicable to empty enclosures provided that the general test requirements are met and that the selected degree of protection is suitable for the type of equipment to be protected.
Measures to protect both the enclosure and the equipment inside the enclosure against external influences or conditions such as,
- mechanical impacts
- corrosion
- corrosive solvents (for example, cutting liquids)
- fungus
- vermin
- solar radiation
- icing
- moisture (for example, produced by condensation)
- explosive atmospheres,
and the protection against contact with hazardous moving parts external to the enclosure (such as fans), are matters for the relevant product standard to be protected.
Barriers external to the enclosure and not attached to it and obstacles which have been provided solely for the safety of personnel are not considered as a part of the enclosure and are not dealt with in this standard.
14. Troubleshooting
If you have a problem, try isolating it first. For example, if you're playing a DVD and there is no sound, try replacing the DVD with another audio source to see if you get sound. If it does work, then the problem is with the television, DVD player, or the cables connecting them. If it doesn't work, the problem will be with the amplifier, speakers, or those cables.
Problem Possible Cause
| No Sound The volume may be turned down or muted. Check the volume settings on both the amplifier and the television/computer/CD player/etc. | |
| No Sound Make sure the proper source is selected on the amplifier or receiver. | |
| No Sound Check the cord connecting the amplifier with the source. The cord may be damaged or plugged into the wrong input or output. | |
| No Sound Check the wires connecting the amplifier with the speakers. Make sure they're connected properly and not damaged in any way. | |
| Poor Sound Quality | If you hear something like static, or the sound is cutting in and out, check the audio cables. If the problem increases when a cable is being moved, then the cable is most likely faulty or not connected properly. |
| Poor Sound Quality | Today's audio systems may have several places to adjust the volume, for example your MP3 player may have a volume control, and your amplifier may also have one. Check to be certain that the volume isn't turned up past 80% on any device. |
| Poor Sound Quality | Try changing sources to be certain that the selection you've chosen is a good quality recording. |
15. Technical Assistance
If you have any questions or concerns about installing or using this product, you can reach us through one of the following methods:
Phone: (844) 674-4461
Hours of operation: 8:00am - 5:00pm (Pacific Time), Mon - Fri
Email: sales@originacoustics.com
If you are having technical trouble, please include the model number and briefly explain what steps you took to resolve the problem in your email, or be prepared to answer these questions over the phone.
If you are considering returning the product, it's required that you contact Origin Acoustics prior to any return attempts. This way we can determine if the issue can be resolved without returning the product, or if needed we can provide instructions and support for the return process.
16. Limited 5-Year Warranty
Origin Acoustics warrants to the original retail purchaser only that this Origin Acoustics product will be free from defects in materials and workmanship, provided the speaker was purchased from an Origin Acoustics authorized dealer. If the product is determined to be defective, it will be repaired or replaced at Origin Acoustics' discretion. If the product must be replaced yet it is no longer manufactured, it will be replaced with a model of equal to or greater value that is the most similar to the original. If this is the case, installing the replacement model may require mounting modifications; Origin Acoustics will not be responsible for any such related costs.
Requirements & Warranty Coverage
This warranty may not be valid if the product was purchased through an unauthorized dealer. This warranty only applies to the individual that made the original purchase, and it cannot be applied to other purchases. The purchaser must be prepared to provide proof of purchase (receipt). This warranty will not be valid if the identifying number or serial number has been removed, defaced, or altered.
Not Covered by Warranty
- Accidental damage
• Damage caused by abuse or misuse - Damage caused by attempted repairs/modifications by anyone other than Origin Acoustics or an authorized dealer
• Damage caused by improper installation
• Normal wear, maintenance, and environmental issues - Damage caused by voltage inputs in excess of the rated maximum of the unit
• Damage inflicted during the return shipment
All warranties and warranty conditions are subject to change. Please refer to www.originacoustics.com for the latest information.
17. Return Process
Before making any return attempts, it is required that you first contact Origin Acoustics. Return product to Origin Acoustics or your dealer, either in person or by mail. It's preferable if the product is returned in the original packaging. If this is not possible, the customer is responsible for insuring the shipment for the full value of the product. This warranty is in lieu of all other expressed or implied warranties. Some states do not allow limitations on implied warranties, so this may not apply depending on the customer's location. (For more information, see Magnuson-Moss Warranty Act.)

ORIGIN ACOUSTICS
05 01 24
6975 S Decatur Blvd, Las Vegas, NY 89118 • www.originacoustics.com • 844-674-4461
©2024 Origin Acoustics. All copyrighted, trademarked and patented elements mentioned herein are the sole property of Origin Acoustics.

- OUTDOOR COLLECTION
- SURFACE MOUNT SPEAKERS
- TABLE OF CONTENTS
- INTRODUCTION
- CERTIFICATIONS
- WHAT'S INCLUDED (PER SPEAKER PAIR)
- PRODUCT FEATURES
- SPEAKER WIRE
- WIRE ROUTING
- WIRING DIAGRAM
- SPEAKER PLACEMENT
- INSTALLATION
- PIVOTING THE SPEAKER
- CERTIFICATION COMPLIANCE
- TROUBLESHOOTING
- TECHNICAL ASSISTANCE
- EMAIL: SALES@ORIGINACOUSTICS.COM
- LIMITED 5-YEAR WARRANTY
- REQUIREMENTS & WARRANTY COVERAGE
- NOT COVERED BY WARRANTY
- RETURN PROCESS
Brand : Origin Acoustics
Model : OS50W
Category : Loudspeaker