
Syntorus 2 - Audio software D16 Group - Free user manual and instructions
Find the device manual for free Syntorus 2 D16 Group in PDF.


| Product Type | Audio software plug-in (triple BBD analog chorus) |
| Platform Compatibility | Windows 7 or newer (32/64-bit), macOS 10.13 or newer (64-bit) |
| Plug-in Formats | VST2, VST3, AU, AAX |
| Minimum CPU | 2.5 GHz SSE (multi-core 2.8 GHz recommended) |
| Minimum RAM | 8 GB (16 GB recommended) |
| Number of Delay Lines | 3 independent BBD delay lines |
| Number of LFOs | 3 configurable LFOs |
| LFO Waveforms | Sine, Triangle, Hyper Triangle, Ramp Down, Square, Sample & Hold |
| LFO Sync | Full, Dotted, Triplet note values |
| Modulation Routing | Independent, Summed, Mixed |
| Analog BBD Emulation | Switchable for warmer analog sound |
| Delay Time Range | 0 – 20 ms (offset + depth) |
| Built-in Effects | Tremolo, filter (Low Pass, High Pass, Band Pass) per delay line |
| Preset Management | Browser with groups, tags, favorites, pins; import/export |
| MIDI Learn | Assign any parameter to MIDI CC; save/load maps |
| Quality Settings | Real-time and offline modes with adjustable quality |
| GUI Customization | Resizable, system scale, multiple themes |
| Default State Saving | Save current settings as default for new instances |
| Manual Language | English (33 pages) |
Frequently Asked Questions - Syntorus 2 D16 Group
User questions about Syntorus 2 D16 Group
0 question about this device. Answer the ones you know or ask your own.
Ask a new question about this device
Download the instructions for your Audio software in PDF format for free! Find your manual Syntorus 2 - D16 Group and take your electronic device back in hand. On this page are published all the documents necessary for the use of your device. Syntorus 2 by D16 Group.
USER MANUAL Syntorus 2 D16 Group
Preliminary information....4
Overview 5
Signal flow 6
Basic modules....6
Delay Line section 6
LFO section....7
Delay line mixer 8
Master section......9
Path of the signal's flow 10
Preset Management 9
Preset storage....9
Browsing presets....10
Sources 11
Filter 11
Groups and tags....11
Results 12
Preset filtering using Groups and Tags 13
Basic Actions 13
Group operator....13
Filter enable / disable 14
Other types of filtering 14
Searching by name 14
Filtering Favorite presets....14
Filtering Pinned presets....15
Info pane....16
Browser's visual adjustments....17
Folding sections....17
Resizing columns....17
Editing presets....18
Preset selection for Edit....18
Preset renaming 18
Preset deletion 19
Tags editing 19
Author editing 21
Description editing 21
Setting presets as Favorites 22
Pinning presets....22
Preset exchange....23
Export 23
Import 24
Importing Patterns 24
Creating custom Tags and Groups structure....24
Adding custom Tags 24
Editing custom Tags....25
Adding custom Groups 25
Editing custom Groups 26
Unassigned Tags 26
Configuration....27
MIDI Learn....27
Linking a parameter to MIDI CC 27
Unlinking a parameter from MIDI CC 28
Loading / Saving a MIDI CC Map....28
Quality settings 28
GUI 29
Size 29
System Scale 29
Theme 29
Default Settings 29
Changing default settings....29
Restoring factory defaults 30
Requirements
Software and hardware requirements of the product

Windows PC
OS version Windows 7 or newer
CPU 2.5 GHz SSE (Multicore 2.8 GHz recommended)
RAM 8 GB (16 GB Recommended)
Software VST2 / VST3 /AAX compatible host application (32bit or 64bit)

Apple Mac
OS version OS X 10.13 or newer
CPU Intel based 2.5 GHz (2.8 GHz recommended), Apple M1
RAM 8 GB (16 GB Recommended)
Software AU / VST2 / VST3 / AAX compatible host application (64bit!)
Hardware requirements / recommendations are based on estimates performed on available computers at D16 Group HQ, and therefore cannot cover all possible configurations available on the market. CPU usage may vary widely depending on the manner in which the product is used. Factors that may contribute to variance in CPU usage include particular patch and its complexity, the global quality setting, project sample rate. In order to form a better understanding of how a plug-in will behave within your current setup, we highly recommend downloading the demo and giving it a try.
Preliminary information
This chapter contains general advice for using the plug-in's interface.
To do a right-click on macOS with single button mice:
Either use your mouse click while holding the CTRL key on your keyboard or use two fingers on your touchpad.
Checking the value of a parameter
Right-click on any parameter to check its value in its context menu:

A parameter's context menu
Note: It's currently not possible to enter a precise value in the input box; it's just to check the value.
Fine-tuning continuous parameters
Tweak a control (knob) while holding the CTRL key (on Windows) or Apple CMD key (on macOS) - this will make the tweaking more precise while moving the mouse pointer up and down.
Double-click to reset a continuous parameter's value
Double-clicking on a parameter restores its value to the initial state, either default (right after loading the plug-in / loading it along a project file) or from the most recently loaded preset.
Overview
Syntorus 2 is an analogue-style chorus effect based on a triple BBD (Bucket Brigade Device) delay line, and featuring three freely configurable LFOs. Upon loading the plug-in in any VST, Audio Units or AAX host application, the GUI appears:

Syntorus 2's graphical interface
The interface comprises two main sections:
- Configuration and preset management (the top-most section)

The configuration and preset management section
• Signal processing (all other controls)
Signal flow
In this chapter, we'll describe the signal path through Syntorus 2, and explain each component and its controls along the way.
Basic modules
Each of the four modules that make up Syntorus 2 is housed within its own section in the GUI:
• Line – Controls for the three Delay Lines.
- LFO – Controls for the three LFOs.
- Mixer – Controls for blending and panning the three Delay lines.
• Master – Controls for routing the LFOs to the Delay Lines, activating BBD mode, and adjusting the Dry/Wet mix and final output level.
Delay Line section
Syntorus 2 features three BBD Delay lines, the parameters of which are adjusted in the Line section of the interface.

The Line section
To switch the visible controls to any of the three delay lines, click the Line 1, 2 or 3 LED in the section's header bar.

Click the Line 1, 2 and 3 LEDs to switch between Delay Lines
A single delay line is governed by the following parameters:

The Delay Line parameters
- Offset – The base (minimum) time by which the input signal is delayed, expressed in milliseconds, from 0 – 20 ms.
- Depth – The maximum amount of delay time modulation applied by the assigned LFO(s), expressed in milliseconds, from 0 – 20 ms. Therefore, delay time modulation ranges from Offset (minimum) to Offset + Depth (maximum).
• Tremolo - Applies a tremolo effect (amplitude modulation) to the Delay Line's output.
• Filter – Select the type of filter inserted into the Delay Line's output. - Off – Disables the filter
- Low Pass – Attenuates all frequencies above the cutoff frequency
- High Pass – Attenuates all frequencies below the cutoff frequency
• Band Pass – Attenuates all frequencies above and below a narrow range centred on the cutoff frequency - Cutoff – Controls the filter cutoff frequency.
- Modulation – Sets the depth of cutoff frequency modulation by the assigned LFO(s).
The Depth, Tremolo and Modulation parameters determine the amount of delay time (Depth), filter cutoff (Modulation) and amplitude (Tremolo) modulation applied by the LFO or LFOs assigned in the Configuration panel, described later.
The diagram below shows the signal flow through a single Delay Line:

flowchart
graph LR
    A["MODIN"] --> B["×"]
    C["AUDIOINAUD"] --> B
    B --> D["DELAYTIME IN OUT"]
    D --> E["TREMOLO"]
    E --> F["×"]
    G["TREMOLO"] --> H["×"]
    I["TREMOLO"] --> J["×"]
    K["FILTER"] --> L["TYPE CUTOFF IN OUT"]
    M["MODUL."] --> N["×"]
    O["CUTOFF"] --> P["×"]
    Q["FILTER"] --> R["×"]
    S["DEPTH"] --> T["×"]
    U["OFFSET"] --> T
    T --> V["-1"]
The signal flow through a single Delay line
LFO section
Syntorus 2's three LFOs are used to modulate each Delay Line's delay time, filter cutoff and amplitude.
They're individually adjusted in the LFO section.

The LFO section
To select an LFO generator for editing, click the LFO 1, 2 or 3 LEDs in top bar of the section.

Switch between LFOs by clicking the LFO 1, 2 and 3 LEDs
All three LFOs share the same set of parameters:
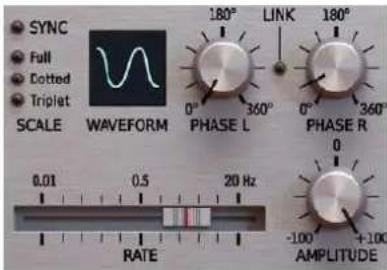
Parameters for a single LFO
• Rate – Controls the cycle frequency of the LFO, from 0.01 – 20 Hz.
- Waveform – Selects the LFO waveform: Sine, Triangle, Hyper Triangle, Ramp Down (sawtooth), Square or sample + hold.
• Amplitude – Governs the amplitude of the oscillations. When set in the negative range, the waveform is inverted.
• Phase L / Phase R – Shift the oscillator phase for the Left and Right channels independently.
- Sync – Activate to sync the LFO to the clock/tempo of the host application. The Rate slider scale will change from Hz to musical note values, and three note type modifiers are available:
Full – The LFO's cyclical period length is equal to the full note value set by the Rate slider at the host tempo.
- Dotted – The LFO's cyclical period length is equal to the dotted note value set by the Rate slider at the host tempo.
- Triplet – The LFO's cyclical period length is equal to the triplet note value set by the Rate slider at the host tempo. A Dotted note is 3/2 longer than the equivalent Full note; and a Triplet note is 2/3 the length of the equivalent Full note:

The relative lengths of Full, Dotted and Triplet notes
Delay line mixer
This section enables mixing of the signals output by the three Delay lines.

The Mixer section
Each channel / column in the mixer represents a single Delay line, and all three channels share the same controls:
• VU Meter – Shows the output signal level for the Delay Line.
• Pan – Controls the left / right balance of the Delay Line.
- Vol – Controls the output volume level of the Delay Line.
Master section
The final stage governs the Output Volume and Dry/Wet mix, LFO routing and BBD Emulation mode.

Master section
- Configuration – Sets the routing scheme for assigning the three LFOs to the three delay lines. Three topologies are available:
- Independent – Each LFO is assigned to its respective delay line (LF01 to BBD1, LF02 to BBD2, and LF03 to BBD3)

flowchart
graph LR
    A["LFO1"] --> B["LINE1"]
    C["LFO2"] --> D["LINE2"]
    E["LFO3"] --> F["LINE3"]
• Summed – The three LFO output signals are summed and routed to all three delay lines
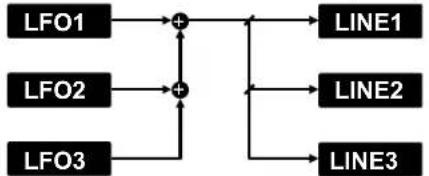
flowchart
graph TD
    LFO1["LFO1"] --> +
    + --> LINE1["LINE1"]
    LFO2["LFO2"] --> +
    + --> LINE2["LINE2"]
    LFO3["LFO3"] --> +
    + --> LINE3["LINE3"]
    + --> LINE1
    + --> LINE2
    + --> LINE3
• Mixed – the signals from LFOs 1 and 2 are summed and routed to Lines 1 and 2. LFO 3 is routed to Line 3

flowchart
graph LR
    LFO1 --> +
    + --> LINE1
    LFO2 --> +
    + --> LINE2
    LFO3 --> +
    + --> LINE3
- Analog BBD Emulation – Syntorus 2's discrete-time analogue BBD (Bucket Brigade Device) delay line delivers an „ideal“ clean emulation by default, but activating Analog BBD Emulation delivers a warmer and even more authentic analogue sound, at the expense of greater system overhead.
- FX – Sets the proportional balance of unprocessed and processed signal at the final output.
- Output volume – Controls the final amplification level.
Path of the signal's flow
The diagram below shows the signal flow through Syntorus 2:

flowchart
graph TD
    A["LFO1"] --> B["CONFIGURATIONMIXER"]
    C["LFO2"] --> B
    D["LFO3"] --> B
    B --> E["MOD 2 OUT"]
    B --> F["MOD 3 OUT"]
    E --> G["MODIN"]
    E --> H["AUDIOIN"]
    F --> I["MODIN"]
    F --> J["AUDIOIN"]
    G --> K["DELAYLINE1"]
    H --> L["DELAYLINE2"]
    I --> M["DELAYLINE3"]
    J --> N["MODIN"]
    J --> O["AUDIOIN"]
    K --> P["AUDIOOUT"]
    L --> Q["AUDIOOUT"]
    M --> R["AUDIOOUT"]
    N --> S["AUDIOOUT"]
    T["FX"] --> U["IN 1"]
    T --> V["IN 2"]
    W["AUDIOOUT"] --> X["OUTPUT"]
    Y["IN 1"] --> Z["OUTPUT"]
    AA["IN 2"] --> AB["OUTPUT"]
Syntorus 2 signal flow
Preset Management
Preset storage
Presets, both from Factory content and user ones, are stored as files in proper locations on the disc. Each time a plug-in instance is loaded into a project, these locations are scanned and the presets found there are consolidated into a single linear structure (list) in the Preset Browser.
Browsing presets
The Preset management section (no matter what kind of preset it concerns) enables quick navigation and browsing of the preset structure:

The Preset management section
- PRESET - Displays the name of the currently loaded preset. Clicking the display opens the Preset Browser panel, allowing you to browse factory / user presets.
• Prev / Next - Hovering over right side of the Preset display exposes the Prev / Next buttons: They allow for linear browsing of the presets list (depending on currently set filters - see sections below). - Save ▶ - Saves current parameters as a new preset or allows for overwriting of the existing one (see sections below).
Right-clicking over the Preset display opens a context menu with two or three additional options:
- Init - Restores initial settings of plug-in parameters.
- Reload - Reloads the most recently loaded preset.
- Save - See description above.
The Preset Browser looks as follows:

The Preset Browser
There are four main parts:
- Sources - Situated in the left column, filter content Sources for displayed presets.
• Filter - Below Sources, a preset Filter that uses the Tags system.
• Results - List of presets (shown in the middle column) from Sources that meet criteria set in the Filter.
• Info pane - The right column shows information about the currently selected preset(s), divided into several subsections.
If available - For some preset types this button can be hidden and accessible from the contextual menu (accessible via right mouse-click on Preset display)
If available
Sources
In this section, you can choose a Source / Source(s) that you want to browse presets from.
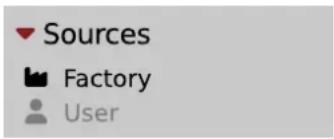
Preset Sources
There are two resources to choose from:
- Factory - Delivered together with the plug-in and cannot be modified (read-only).
- User - Created by the user and can be freely modified or shared with other users.
Choosing any of them will cause the results to narrow to the presets from one resource.
Filter
The section below is the Filter, which represents a preset filtering system using Groups and Tags to browse the content.

The Filter section
Groups and tags
Each Preset is described by a few common Groups. Within each of them there may be one or more Tags from a particular set.

The Filter group
Presets from the Factory resource were assigned Groups and Tags when they were created.
Groups and Tags describe the content clearly, taking into account the plug-in's purpose.
Editing of the Groups and Tags for Factory content is limited. User presets can be described with the same Groups and Tags as Factory content, or you may define additional Tags within factory Groups and even create your own Groups with your own Tags to describe your own presets.
The only limitation is that a user cannot remove factory Groups or Tags from Factory content.
Results
This is a list of presets from chosen Sources that meet the filtering criteria. The basic function of this section is to browse and load presets. It can also be used for editing, which is described later.
| Preset 1 | Preset 20 | Preset 38 | Preset 56 |
| Preset 2 | Preset 21 | Preset 39 | Preset 57 |
| Preset 3 | Preset 22 | Preset 40 | Preset 58 |
| Preset 4 | Preset 23 | Preset 41 | Preset 59 |
| Preset 5 | Preset 24 | Preset 42 | Preset 60 |
| Preset 6 | Preset 25 | Preset 43 | |
| Preset 7 | Preset 26 | Preset 44 | |
| Preset 8 | Preset 27 | Preset 45 | |
| Preset 9 | Preset 28 | Preset 46 | |
| Preset 10 | Preset 29 | Preset 47 | |
| Preset 11 | Preset 30 | Preset 48 | |
| Preset 12 | Preset 31 | Preset 49 | |
| Preset 13 | Preset 32 | Preset 50 | |
| Preset 14 | Preset 33 | Preset 51 | |
| Preset 15 | Preset 34 | Preset 52 | |
| Preset 16 | Preset 35 | Preset 53 | |
| Preset 18 | Preset 36 | Preset 54 | |
| Preset 19 | Preset 37 | Preset 55 |
The Results list
- Click any name to choose and load the preset.
- Double-click the name to choose, load the preset and close the browser.
Hitting the OK button confirms loading a preset and closes the browser. Using Cancel closes the browser but reverts all parameter changes that loading a new preset might have caused.

The OK and Cancel buttons in the browser
Using the X icon has the same effect as the OK button:

Close Browser window
Preset filtering using Groups and Tags
The Filter section contains Groups of Tags. Each Group is represented by a rectangle with the Group name + set of Tags inside.

Group 2 with two tags set (Tag 2 and Tag 3)
The filtering process cascades from top to bottom. This means that all presets available in the selected Sources are filtered by selected Tags from the first Group (uppermost one), then the Group below and so on, until filtered by the last active Group (the bottom one).

flowchart
graph LR
    A["SOURCES"] --> B["GROUP 1"]
    B --> C["..."]
    C --> D["GROUP M"]
    D --> E["RESULTS"]
    B --> F["TAG 1"]
    B --> G["TAG 2"]
    B --> H["TAG 3"]
    B --> I["TAG N"]
    D --> J["TAG 1"]
    D --> K["TAG 2"]
    D --> L["TAG 3"]
    D --> M["TAG N"]
Preset Filtering with the use of Groups
The result of the cascade filtering process is listed in the middle column, the Results / presets list section. You can also consider the Results list as an intersection of preset sets, found by filtering through every individual Group.
Basic Actions
Tags work as toggle buttons. Click to activate / deactivate a Tag; a gray background color means that the Tag is inactive, and orange means that the Tag is active.

Group 2 with two tags set (Tag 2 and Tag 3)
If at least one Tag in a Group is active, then the Group (filter) also becomes active, otherwise the Group chosen doesn't affect the filtering process at all.
Group operator
When a single Tag is active in a Group, only presets having that Tag set are displayed in the Results.
If two or more Tags in a Group are active, the Results depend on the Operator chosen for the Group:

A Group operator
The Operator button works in toggle mode and offers a choice of two alternative Operators for the Group:
- Any ▶- Means that a preset is shown in the Results when the preset includes at least one of the active Tags from the Group.
• All ▶ - Means that a preset is shown in the Results only when the preset includes all active Tags from the Group.
Filter enable / disable
You can quickly enable / disable the Filter using the toggle switch in the top-most section of the Filter:

An On/Off switch for a Group Filter
Other types of filtering
Searching by name
Alternatively, you can look for a preset by entering its name or just a piece of its name into the Find preset field:

The Find preset input
The Results are refreshed on-the-fly and they work together with the other filters.
Using the X icon clears the entire field:

Clearing the search field
Filtering Favorite presets
You can mark presets as a Favorite by clicking the Heart icon while hovering on preset name ▶. You can unmark presets by clicking the icon again (toggle mode):

Setting a preset as a Favorite on the list
Logical OR between Tags in the Group
Logical AND between Tags in the Group
It's allowed for every source (factory or user)
The flag is stored globally, meaning that a Favorite preset will be accessible as such from every other instance of the plug-in ▶
Once you have your Favorite presets flagged, you can quickly filter them using the toggle button with a Heart icon on it:
Find preset ...



Favorite presets filtering
If the button is active, then only Favorite presets will be shown (considering all remaining filters).
Filtering Pinned presets
You can Pin one or more presets using the Pin icon while hovering over a preset name ☐. You can unpin a preset by clicking the icon again (toggle mode):
Preset 6


Pinning a preset on the list
Unlike Favorites, this flag works locally and it's stored with the project file (not global config), so Pins are stored individually for every instance (with total recall, so a plug-in state is recalled if saved in the context of a project).
But, similarly to Favorites, you can easily filter presets using the toggle button with the Pin symbol on it:
Find preset ...


Pinned presets filtering
If the button is active, then only Pinned presets will be shown (considering all remaining filters).
Info pane
The column to the right shows information about the selected preset or presets. It also provides access to some of the preset editing functions.
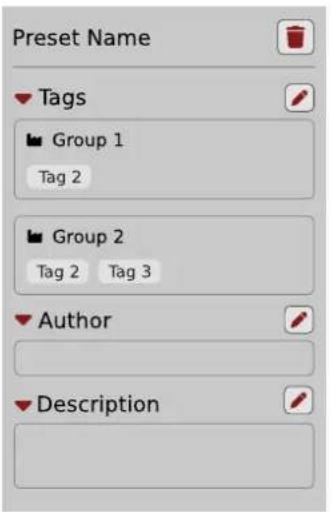
The Info pane
There's a preset name at the top.
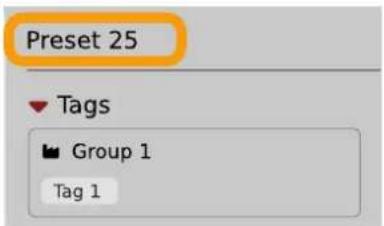
The Preset name in the Info pane
Additionally, if you've selected more than one preset there's information about how many more have been selected:
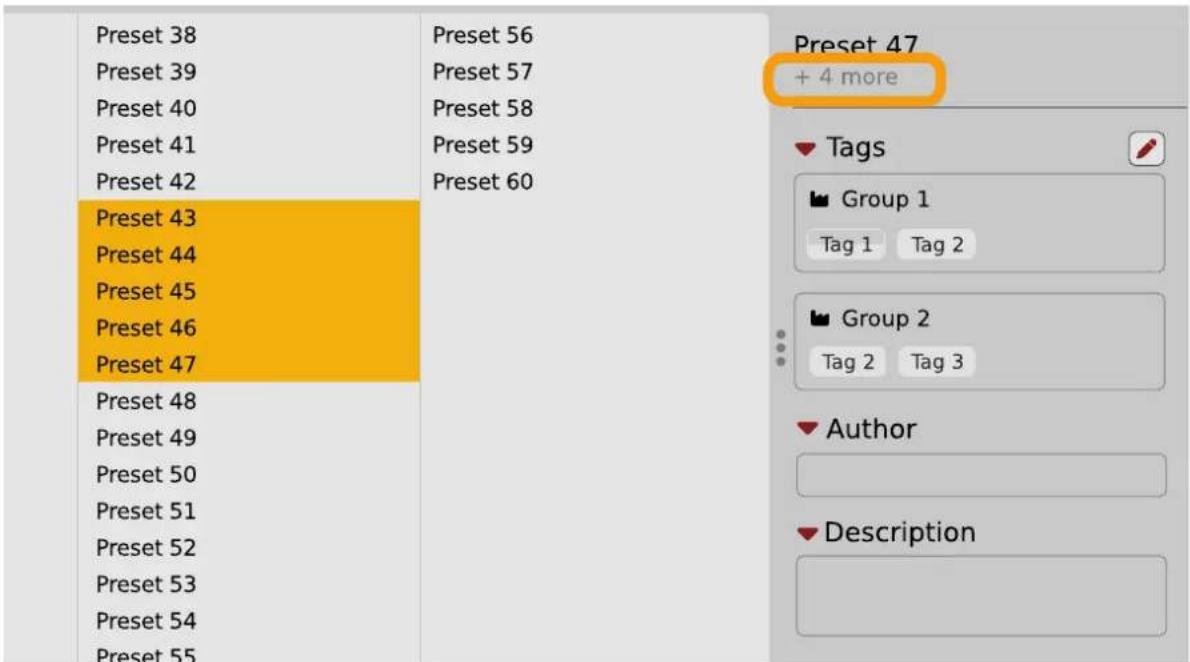
Selecting more than one preset
Below the preset(s) name there are few common sections describing selected presets:
- Tags
• Author - Description
Browser's visual adjustments
Folding sections
If you don't need to see the contents of every section / subsection, you can fold some of them up using the Caret icons:

Sections folded up
Resizing columns
You can use the three-dotted handles to change a column's width to your preference.

Resizing Browser columns
Editing presets
You can perform certain actions on presets, such as adjusting Groups and Tags, deletion, renaming the presets as well as their export or import. One should bear in mind, however, that some operations are only allowed on user presets but not on Factory content.
Preset selection for Edit
Some operations can be done on more than one preset, so you're allowed to select more than one preset at once; in the Results section, you can choose a preset or a set of presets in the following ways:
- Click a preset - Selects (and loads) one preset from the list.
- Win ( Ctrl + Click the preset ), Mac ( Cmd + Click the preset ) - Adds another preset to an already chosen preset or a set of presets.
- Shift + Click the preset - Selects a range of presets from the last chosen preset to the preset clicked with the Shift key.
• Right-Click on any Preset in the Results section and choose the Select All option - this selects all presets:
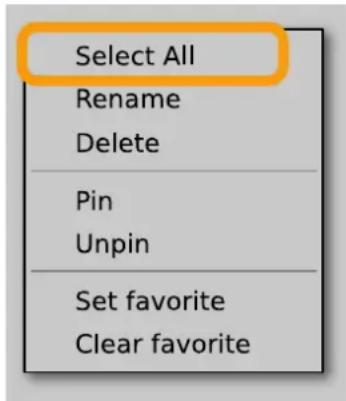
Selecting all presets
Preset renaming
On a selected preset ▶, right-click to open the context menu and select the Rename option:

Preset renaming
Preset deletion
Once you have selected one or more presets, right-click to open the context menu and select the Delete items ▶ option:
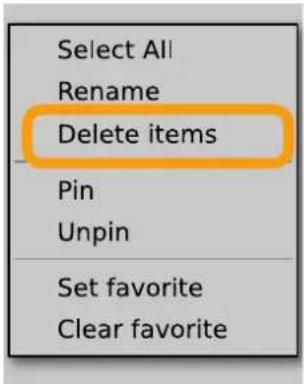
Deleting presets
Alternatively, you can use the Trash bin button in the Info pane to delete selected presets:

The Trash bin button
Tags editing
When you select a preset or presets to change their tags, click the Pencil button next the Tags section in the Info pane to enter Edit mode for the Tags:

Entering the Tag edit mode
With the Edit mode enabled, you will see all possible Groups and Tags available for the preset(s):
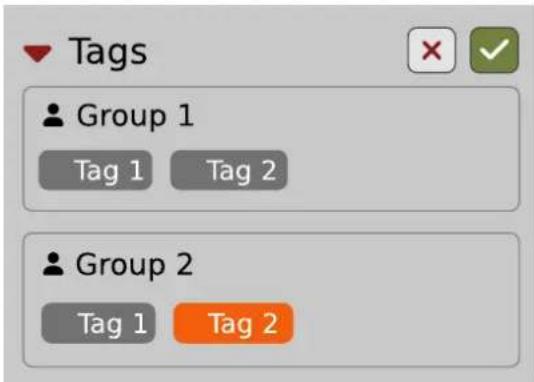
The Tag Edit mode
Tag buttons work in toggle mode, much like filtering. Clicking them either sets or erases a Tag for a chosen preset. If a Tag is set for a preset, it is indicated by an orange background color, whereas if a Tag is not set, it has a gray background color.
If you choose multiple presets with existing tags, Tag buttons will appear orange if a specific Tag appears in all selected presets, and gray if it appears in none.
When a specific Tag is set only for a few of the selected presets, it appears as half-gray and half-orange.

Tags appearing only in part of selection
Changing the Tag status for one or more chosen presets sets or erases this Tag in all these presets. A status change is signaled by an Asterisk to the left of a Tag.

A Tag with a status change
Tag buttons highlighted in half-gray and half-orange color (where Tag values across the highlighted presets aren't all the same) work in a three-state system when switching between states; they turn gray if you erase the Tag for all selected presets, orange if you set the Tag for all selected presets, and return to half-gray and half-orange if the selected items remain unchanged or are returned to their initial state.
Potential changes have to be confirmed using the OK / Cancel buttons at the top part of the Tags section:

Confirmation buttons in the Tags section
Author editing
When you select a preset or presets to change the Author, click the Pencil button next the Author section in the Info pane to enter the Edit mode for the Author field:
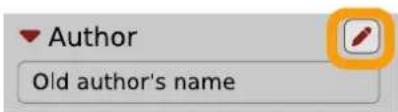
Editing Author
Once you've finished editing the field, confirm the operation using the OK / Cancel buttons:

Confirming Author editing
This operation is possible for user content only.
Description editing
When you select a preset or presets to change the Description, click the Pencil button next the Description section in the Info pane to enter the Edit mode for the Description field:
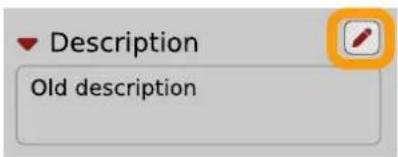
Editing Description
Once you've finished editing the field, confirm the operation using the OK / Cancel buttons:

Confirming Description editing
This operation is possible for user content only.
Setting presets as Favorites
As described in the chapters above, you can mark a preset as a Favorite by clicking the Heart icon while hovering over the preset name:
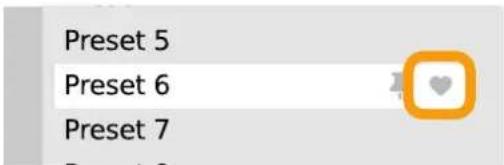
Setting a preset as a Favorite
The flag is stored globally, meaning that a Favorite preset will be accessible as such from every other instance of the plug-in.
It's also possible to perform the operation for a selection of presets. After you select the desired presets in the Results window, right-click on the presets to open a context menu:
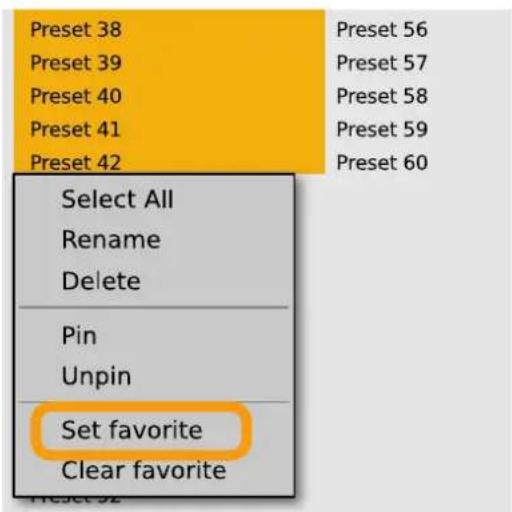
Setting Favorite presets from the context menu
And select the Set favorite option.
To clear Favorite flags for the selection of presets, use the Clear favorite option instead.
Pinning presets
You can Pin one or more presets using the Pin icon while hovering over the preset name:

Pinning a preset
Unlike Favorites, this flag works locally and it's stored with the project file (not globally). This means the Pins are stored individually for every instance (with total recall, so a plug-in state is recalled if saved in the context of a project).
It's also possible to perform the operation for a selection of presets. After selecting the desired presets in the Results window, right-click on the presets list to open the context menu:

Pinning presets from selection
And select the Pin option.
To clear the Pin flag for a selection of presets, use the Unpin option instead.
Preset exchange
If you want to make a backup, or exchange a preset with a collaborator, you can export / import selected presets.
Export
Select a preset or presets that you're going to export and drag-and-drop them outside your DAW into a location you'd like to store them:

Exporting presets
The presets will be saved as individual files (one per preset) in the plug-in's native format.
Import
If you'd like to import preset files, you can drag-and-drop preset files from where they're stored, into the preset browser:

Importing presets
They will be automatically imported as user presets.
Importing Patterns
Specifically within the Pattern browser, it's possible to import:
• Native Phoscyon 2 patterns.
- Banks from legacy versions of the plug-in (Phoscyon 1.x) - which will be accessible as alternative Sources, after you drag-and-drop them into the Browser.
• Patterns from Audiorealism ABL 2 or 3 instruments - which will be included in User patterns after import.
Creating custom Tags and Groups structure
Adding custom Tags
Users are allowed to add their own custom Tags to both their own content and factory content. To add a new Tag to an existing filter Group, click over the Group's name to pull down a menu and select the Add Tag option ▶:

Adding a new Tag
You can do this either in the Info Pane (right column, while the Tag edit mode is enabled) or Filter (left column).
Editing custom Tags
There are a few edit options available for a user to perform on their own Tags, which are available by right-clicking a Tag's name in the Filter section:

The Filter section
You will see a context menu with all the available options:

Editing options for a user Tag
- Rename - Changes the name of a Tag.
• Move to - Moves a Tag to another Group. - Remove - Deletes a Tag.
The menu is accessible only for a user's own Tags.
Adding custom Groups
You can add a custom filter to Groups by clicking the Filter label and selecting the Add Group option from the pull-down menu:

Adding a user Group
From here, you can add Tags to that newly created Group (see above), or move ▶ Tags from other Groups.
You can also add a custom filter to Groups in the Info Pane (right column) or Filter (left column).
Editing custom Groups
There are a few edit options available for a user to perform on their own Groups. Click on a Group's name in the Filter section:

The Filter section
You will see a context menu with the following options:

Edit options for a user Group
- Add Tag - Adds a new tag to the Group (described earlier).
- Rename - Changes the Group's name.
- Remove - Deletes the Group, possible only when all Tags in the Group have also been removed.
- Move up - Moves a Group up in the Filter. Possible unless the Group is already the topmost one.
- Move down - Moves a Group down in the Filter. Possible unless the Group is the last one.
These operations are possible only on user Groups.
Groups in the Filter are ordered with Groups from Factory content first, then user groups below.
You can edit user Groups in either the Info Pane (right column, while Edit mode for Tags is enabled) or Filter (left column).
Unassigned Tags
When you receive content from a collaborator who uses different Tags and Groups, some Tags may show as Unassigned. This happens if the filter structure made by a preset's author is different.

Unassigned Tags
You can move the Tags across your Groups to make them fit your scheme, or re-tag the collaborator content entirely.
Configuration
MIDI Learn
Right-click any plug-in parameter to open the context menu:
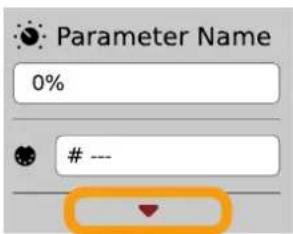
A context menu
Left-clicking outside the menu area closes it automatically.
Clicking the bottom arrow expands the menu and displays all available options:
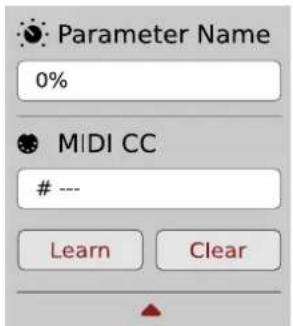
An expanded context menu
Linking a parameter to MIDI CC
The Learn function enables a quick assignment of physical controllers (from a MIDI controller) to plug-in parameters.
- Click the Learn button to put the plug-in into a pending state before moving any MIDI CC controller.
- Once the CC is recognized, click OK to save the change or click the Cancel button to restore the previous setting.

Linking a parameter to MIDI CC
Unlinking a parameter from MIDI CC
You can also delete a MIDI CC code attributed to a parameter from the context menu:
- From the context menu, click the Clear button:
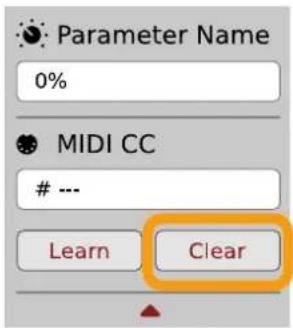
The Clear MIDI CC button
- Then confirm using the OK button.
Loading / Saving a MIDI CC Map
These options are available in the MIDI submenu, accessible under Cog icon in the left-upper corner:
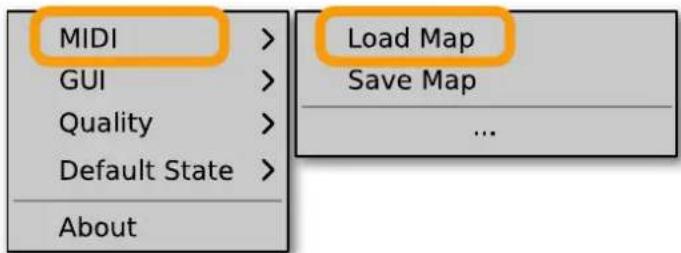
The Load Map and Save Map options
- Save Map - Saves the current MIDI CC map to a file.
- Load Map - Loads a MIDI CC map from a stored file.
Quality settings
The Quality submenu under Cog icon in upper-left corner allows to choose sound quality for Real-time or Offline modes.

Quality settings
The higher the quality, the bigger the impact on the CPU.
GUI
The Size, System Scale and Theme options are accessible from GUI submenu under Cog icon in upper-left corner of the plug-in. With these, you can adjust look of the plug-in, according to the pixel density and resolution of your screen:

The GUI Size and System Scale options
Size
This option lets you choose one of several default skin sizes to best match the plugin to the resolution of your computer monitor.
System Scale
System Scale controls the rescale factor for the whole plug-in. For the best visual results, you should set it to the exact value from your system settings (screen properties).
Theme
The Theme allows you to choose skin color variant according to your preference
Default Settings
You can save your current settings so that the plug-in will default to them for each new instance, or restore the plug-in to load with its factory settings.
Changing default settings
- Click the Cog icon in the left-upper corner of the plugin.
- Go to the Default State submenu and choose the Save current option.
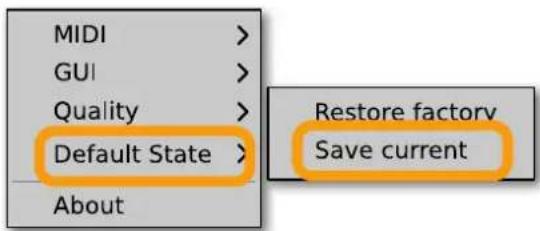
Changing the default state of the plug-in
With this option, the current plug-in state will be saved as the default / initial state for when you insert a new instance of the plug-in.
The plug-in state includes: sound parameters (default preset), views, preset filters, sound quality settings, loaded / created MIDI CC map and GUI settings.
Restoring factory defaults
To return the default state for new instances to factory settings:
- Click the Cog icon in the left-upper corner of the plugin.
- Go to the Default State submenu and choose the Restore factory option.


- Requirements
- Preliminary information
- Checking the value of a parameter
- ---
- Fine-tuning continuous parameters
- Double-click to reset a continuous parameter's value
- Overview
- Signal flow
- Basic modules
- Delay Line section
- LFO section
- Delay line mixer
- Master section
- Path of the signal's flow
- Preset Management
- Preset storage
- Browsing presets
- Sources
- Filter
- Groups and tags
- Results
- Preset filtering using Groups and Tags
- Basic Actions
- Group operator
- Filter enable / disable
- Other types of filtering
- Searching by name
- Filtering Favorite presets
- Filtering Pinned presets
- Preset 6
- Info pane
- Browser's visual adjustments
- Folding sections
- Resizing columns
- Editing presets
- Preset selection for Edit
- Preset renaming
- Preset deletion
- Tags editing
- Author editing
- Description editing
- Setting presets as Favorites
- Pinning presets
- Preset exchange
- Export
- Import
- Importing Patterns
- Creating custom Tags and Groups structure
- Adding custom Tags
- Editing custom Tags
- Adding custom Groups
- Editing custom Groups
- Unassigned Tags
- Configuration
- MIDI Learn
- Linking a parameter to MIDI CC
- Unlinking a parameter from MIDI CC
- Loading / Saving a MIDI CC Map
- Quality settings
- GUI
- Size
- System Scale
- Theme
- Default Settings
- Changing default settings
- Restoring factory defaults
Brand : D16 Group
Model : Syntorus 2
Category : Audio software