
DS-SDNV - Docking Station Sabrent - Free user manual and instructions
Find the device manual for free DS-SDNV Sabrent in PDF.


| Product Type | USB-C Docking Station |
| Brand | Sabrent |
| Model | DS-SDNV |
| Dimensions (W x D x H) | Approx. 120 mm x 60 mm x 25 mm |
| Weight | Approx. 150 g |
| Power Supply | USB-C Power Delivery (up to 100W) |
| Host Connection | USB-C 3.2 Gen 2 (10 Gbps) |
| Video Output Ports | 1 x HDMI 2.0, 1 x DisplayPort 1.4 |
| USB Ports | 2 x USB-A 3.2 Gen 2, 1 x USB-C 3.2 Gen 2 |
| Ethernet | 1 x Gigabit Ethernet (RJ45) |
| Audio | 1 x 3.5 mm Combo Audio Jack |
| Card Reader | SD/TF Card Slot |
| Data Transfer Speed | Up to 10 Gbps |
| Charging | Supports PD 3.0 pass-through charging |
| Operating System Support | Windows, macOS, Linux, Chrome OS |
| Maintenance | Wipe with dry cloth; avoid liquids |
| Safety Precautions | Keep dry; do not disassemble; avoid heat sources |
| Spare Parts & Repairability | Contact Sabrent support for replacement |
| General Information | Compatible with most USB-C laptops and tablets |
Frequently Asked Questions - DS-SDNV Sabrent
User questions about DS-SDNV Sabrent
0 question about this device. Answer the ones you know or ask your own.
Ask a new question about this device
Download the instructions for your Docking Station in PDF format for free! Find your manual DS-SDNV - Sabrent and take your electronic device back in hand. On this page are published all the documents necessary for the use of your device. DS-SDNV by Sabrent.
USER MANUAL DS-SDNV Sabrent
USB-C 6-PORT DOCKING STATION WITH M.2 SLOT
natural_image
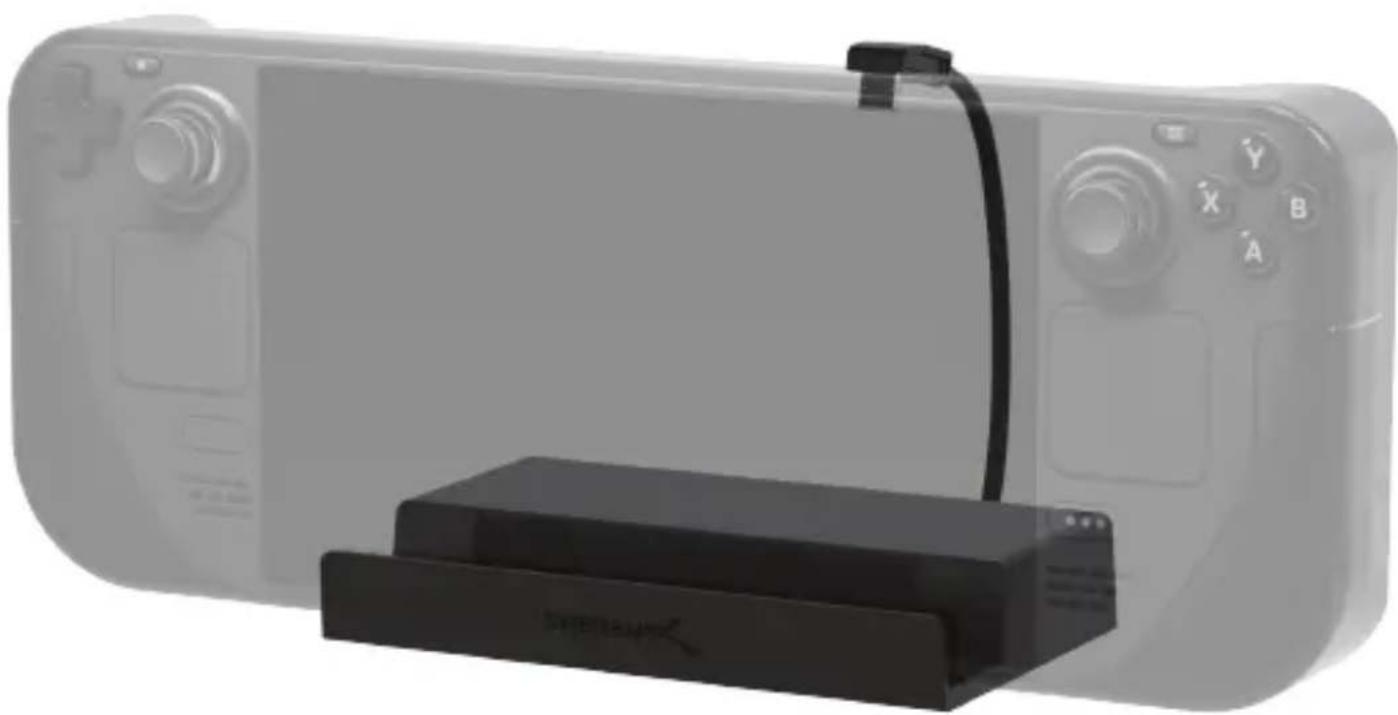
Exterior view of a gaming controller with a black rectangular device attached (no visible text or symbols)DS-SDNV / USER MANUAL
FEATURES:
- USB-C device docking station with a high-quality aluminum body optimized for heat dissipation and durability
• Lightweight with a compact, travel-friendly design and a clear power status LED - Integrated 6" USB-C cable for the host upstream connection at up to 10Gbps (USB 3.2 Gen 2x2)
- 1x M.2 2242/2260/2280 slot for M.2 SATA and NVMe SSDs with up to 5Gbps (USB 3.2 Gen 1x1) transfer speeds
- 3x USB Type-A ports - 1x 2.0 and 2x 3.0 with 5V/900mA charging - for input devices, accessories, external storage, and more
- 1x HDMI 2.0 port for an extended or mirrored external display at up to 4K/60Hz for devices with DP Alternate Mode (DP Alt Mode) support
• 1x RJ45 1GbE Ethernet port for network and Internet connectivity at up to 1000Mbps - Bus-powered with PD3.0 bypass charging support for laptops and other devices at up to 90W via USB-C
PACKAGE CONTENT
• USB-C 6-Port Docking Station with M.2 Slot
• Rubber M.2 SSD fastener
- User manual
SYSTEM SUPPORT
- Windows
- macOS
- Linux
PRODUCT OVERVIEW
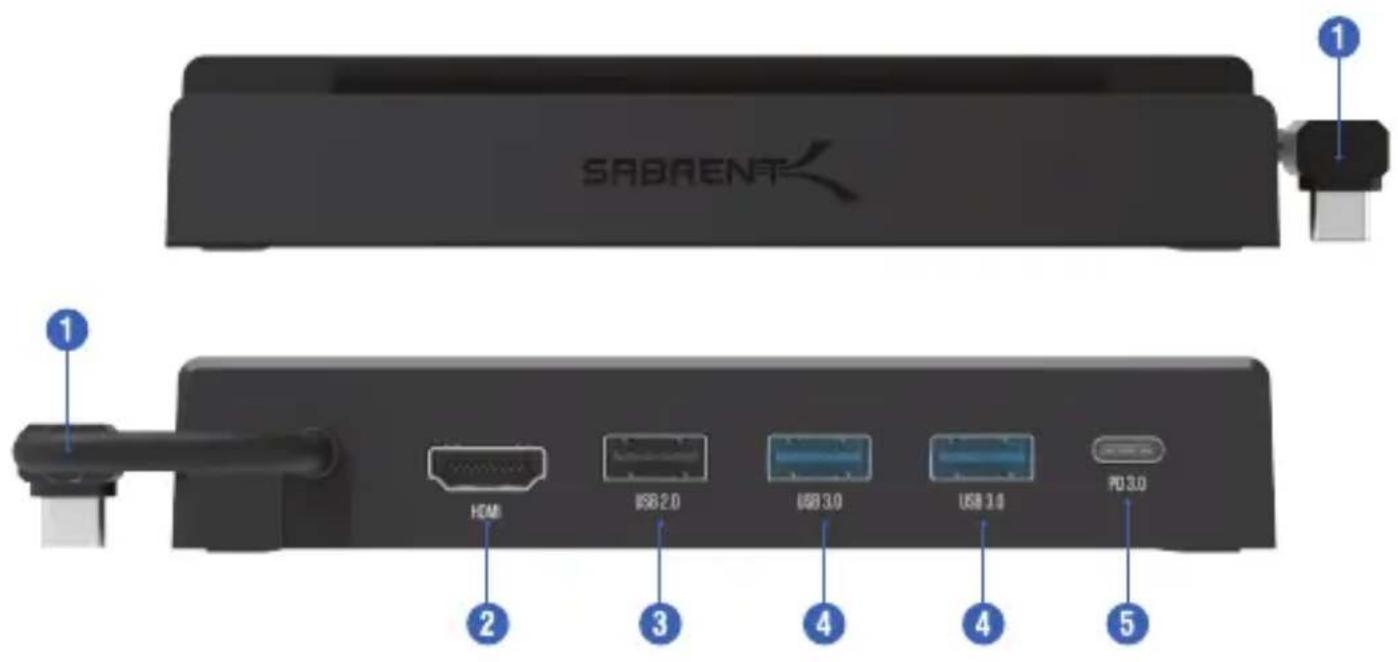
1- Integrated 6" USB-C cable
Connect a laptop, Steam Deck, or other compatible
2- HDMI 2.0 port
Display output at up to 4K/60Hz device
3- USB 2.0 Type-A downstream port
Connect external storage, mice, keyboards, and more
4- USB 3.2 Gen 2x1 Type-A ports
Connect external storage, mice, keyboards, and more. Transfer speeds at up to 10Gbps with up to 5V/900mA charging
5- USB-C Power Delivery 3.0 (PD3.0)
Pass-through laptop and USB-C device charging
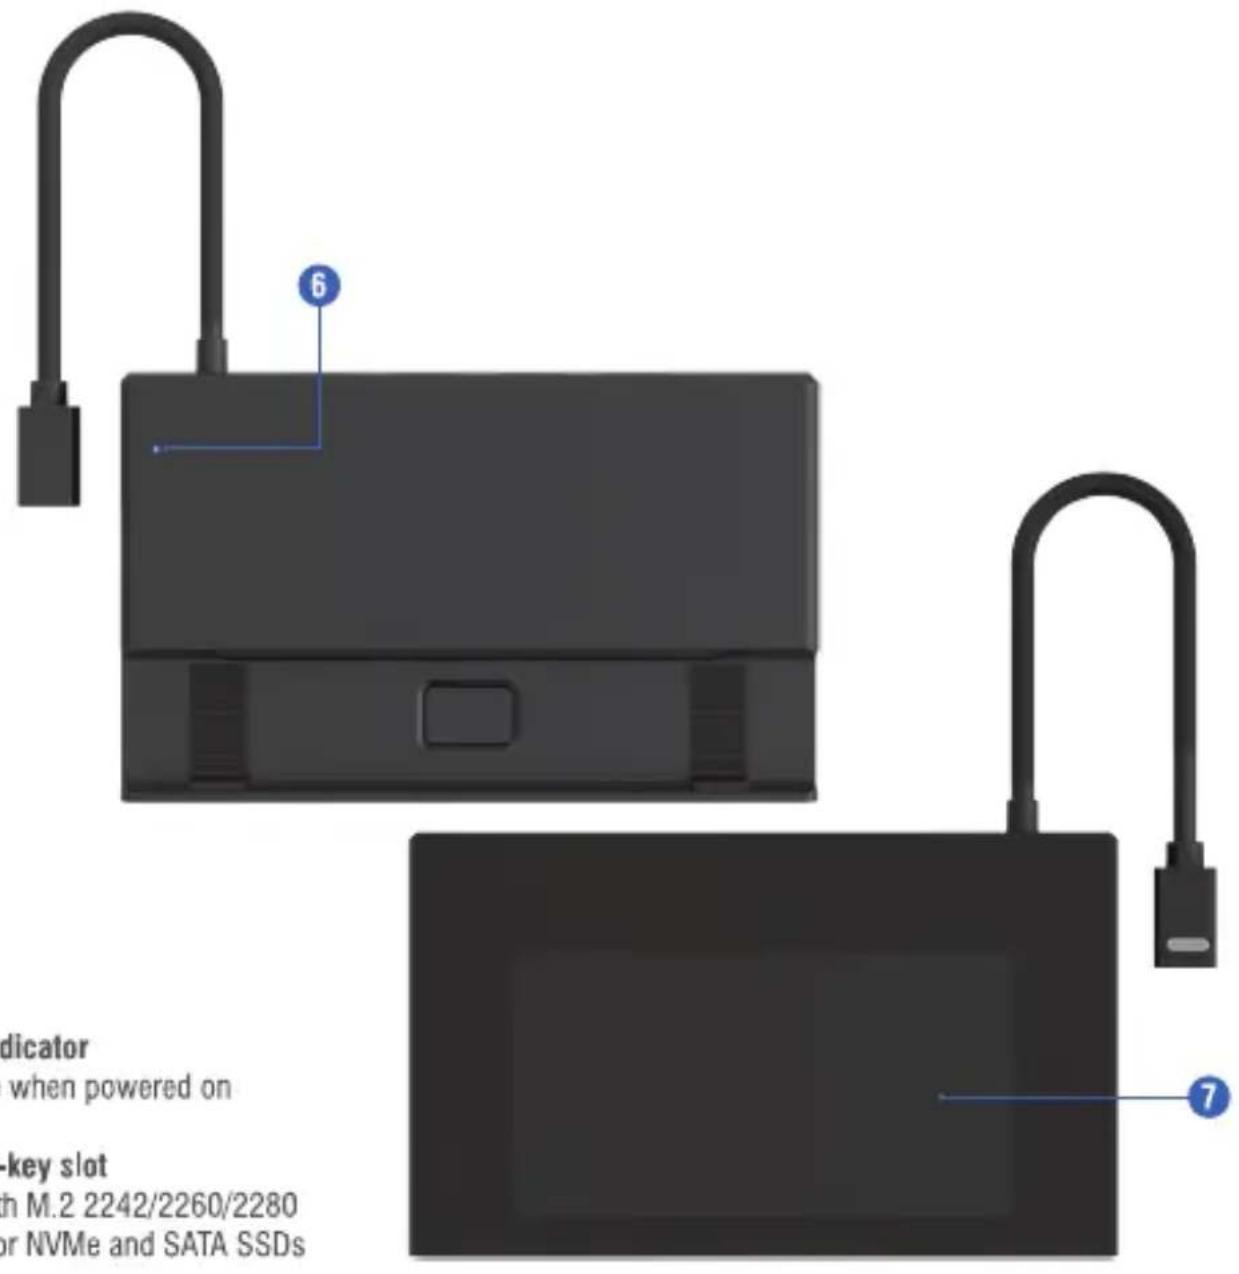
6- LED Indicator
Solid blue when powered on
7-M.2 M-key slot
Works with M.2 2242/2260/2280
form factor NVMe and SATA SSDs
natural_image
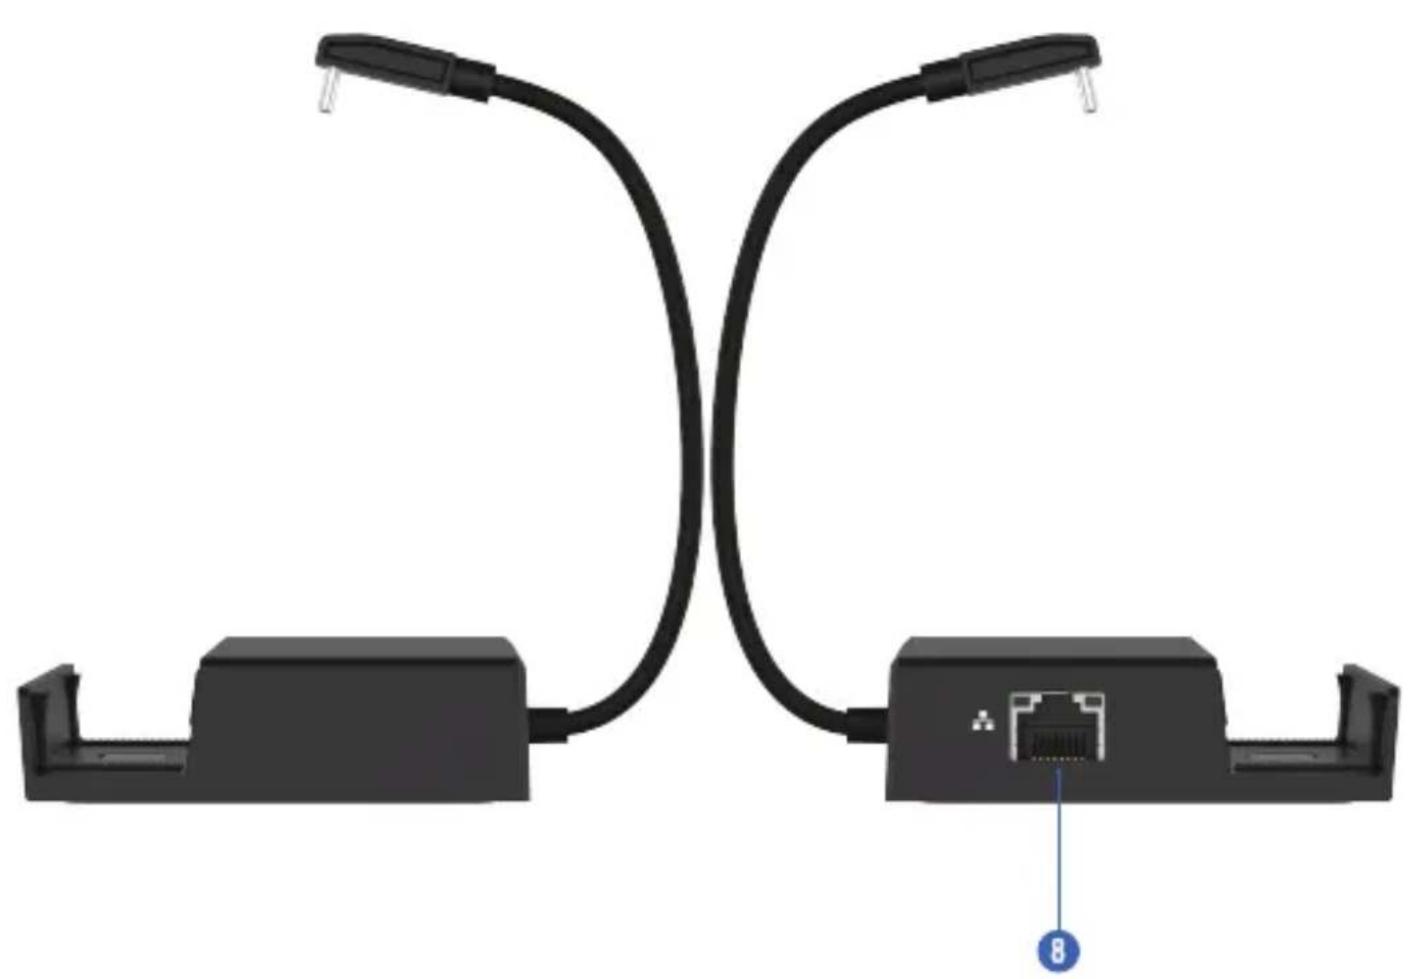
Diagram of two black cable connectors with a central port, showing wiring topology (no text or symbols)8- Gigabit Ethernet (1GbE) RJ45 port
Support for 10/100/1000Mbps network and Internet bandwidth
M.2 SSD INSTALLATION
natural_image
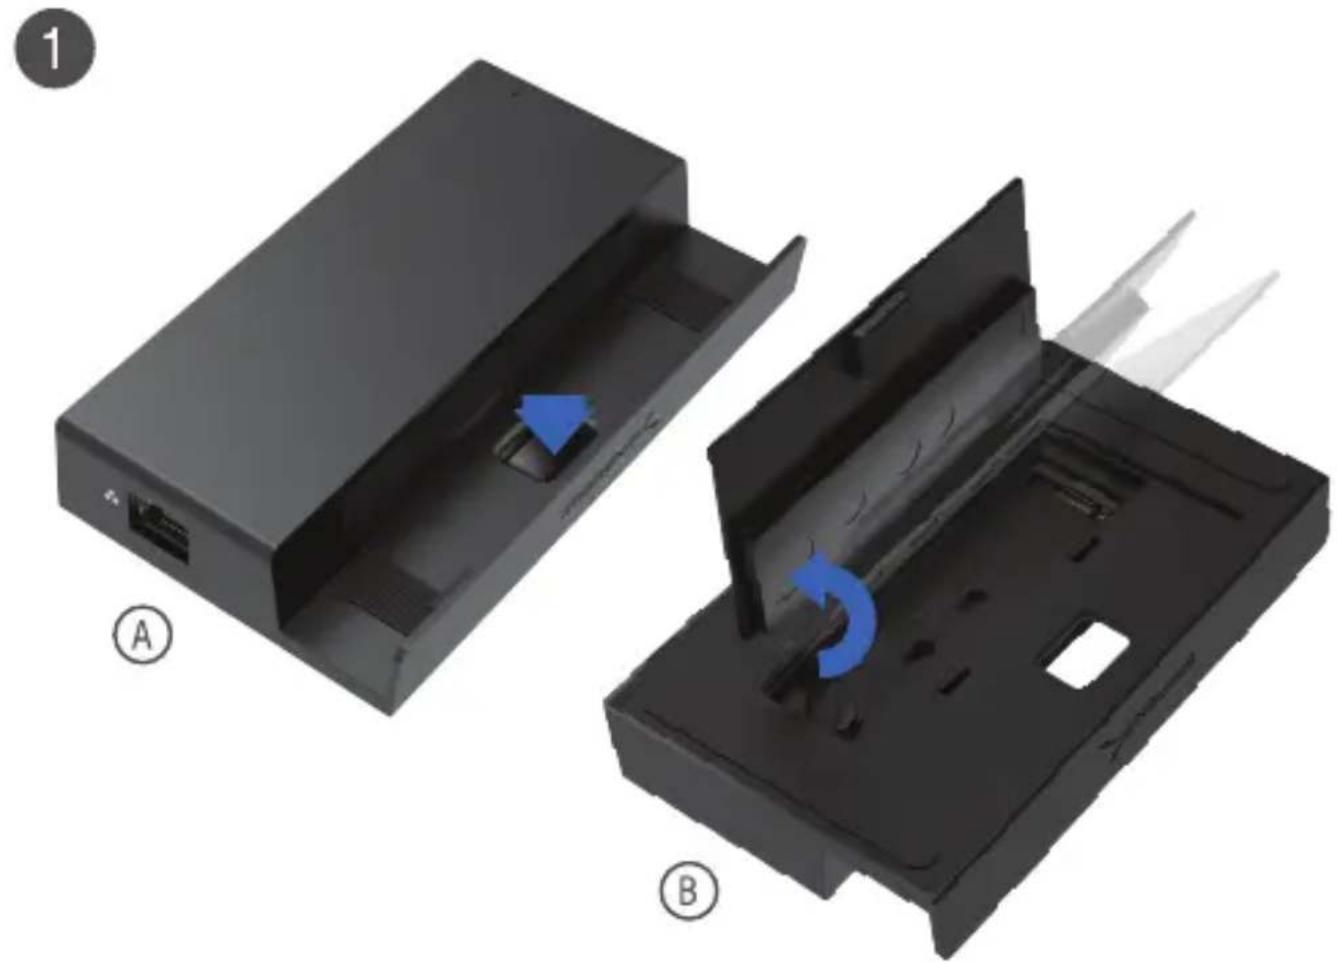
Two views of a black plastic electronic device casing, labeled A and B, showing internal components and a blue arrow indicating a component (no text or symbols on the main diagram)Remove the aluminum heatsink covering the M.2 SSD slot.
A- Press the square area indicated by the arrow and detach the retention clip of the heatsink.
B- Remove the heatsink by following the arrow's direction and lift it off as indicated.
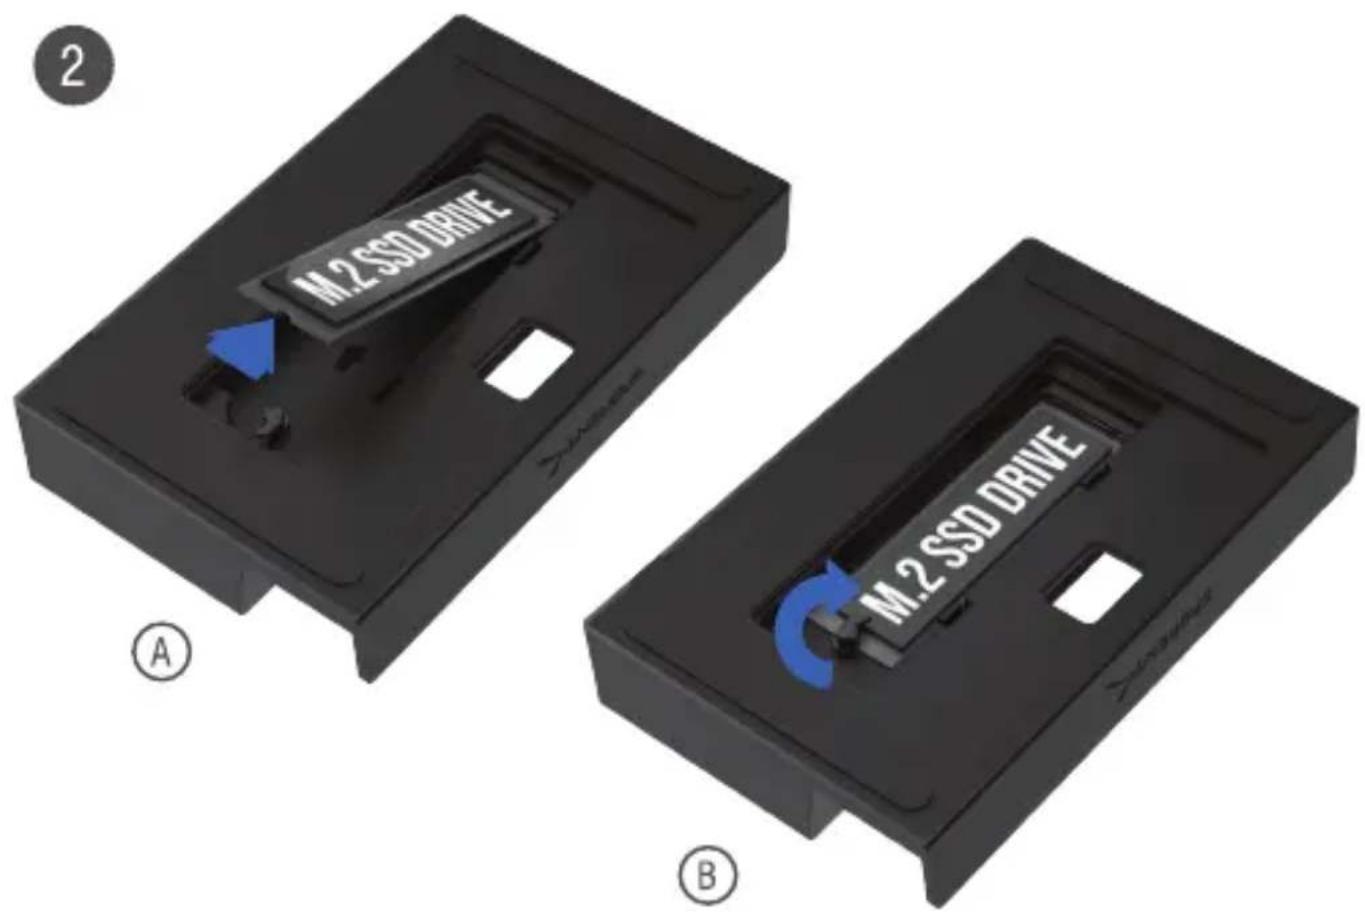
Install your M.2 SSD into the M.2 slot and secure it in place.
A- Insert the M.2 SSD into the M-key connector at around a 15-degree angle and press down until horizontal.
B- Rotate the plastic fastener to secure the SSD in place.
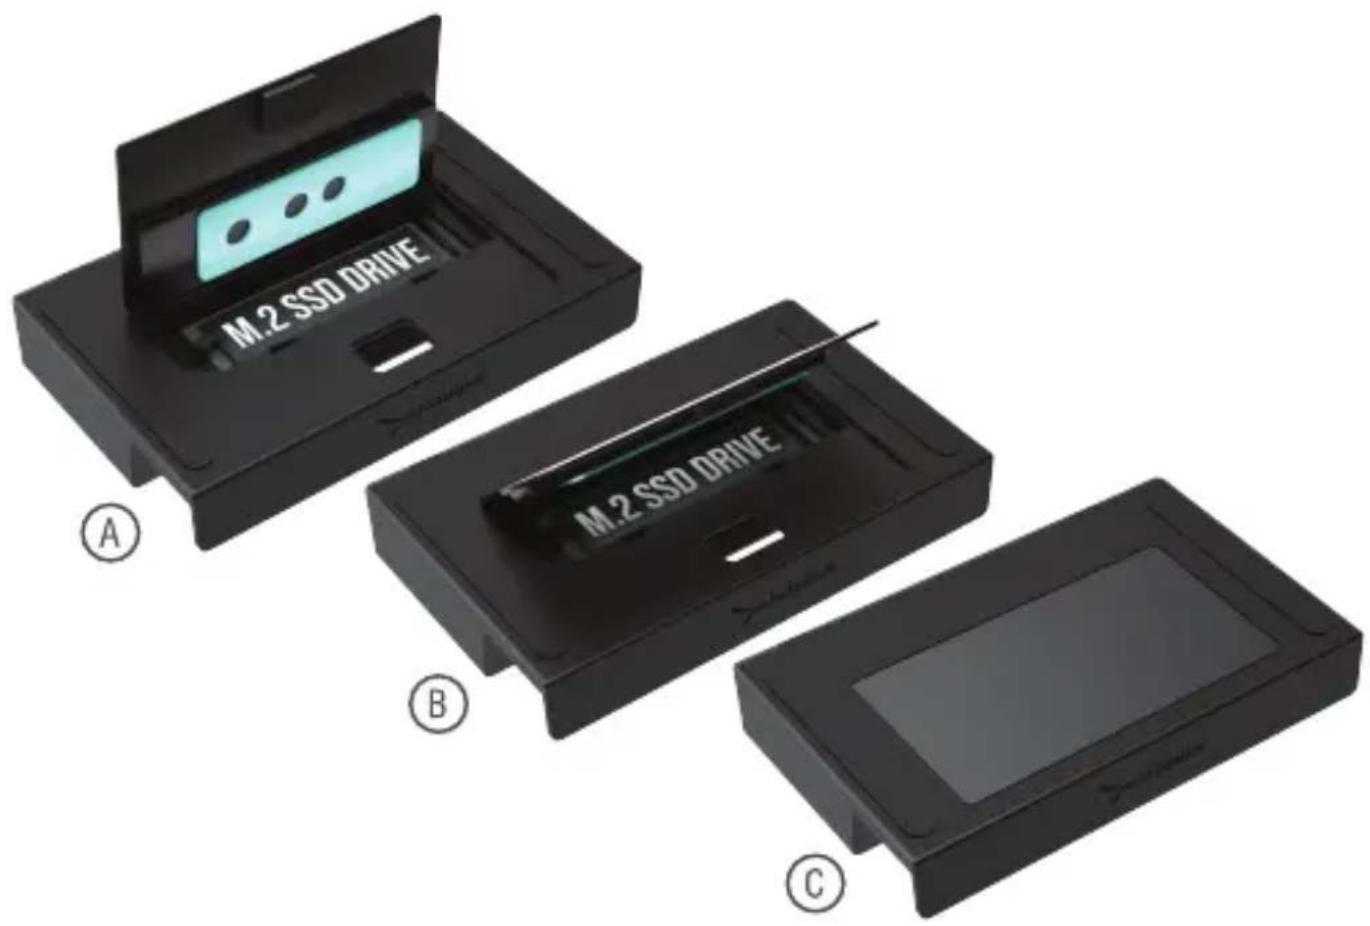
Reinstall the aluminum heatsink.
A- Peel the protective film away and fix the thermal pad in place.
B- Insert the heatsink into the fixed guide slot at a 45-degree angle.
C- Gently press down the heatsink until it is flat, ensuring that the heatsink is securely fastened to the bottom cover using the retention clip.
DOCKING YOUR IPAD, TABLET PC, STEAM DECK, OR OTHER PORTABLE DEVICES
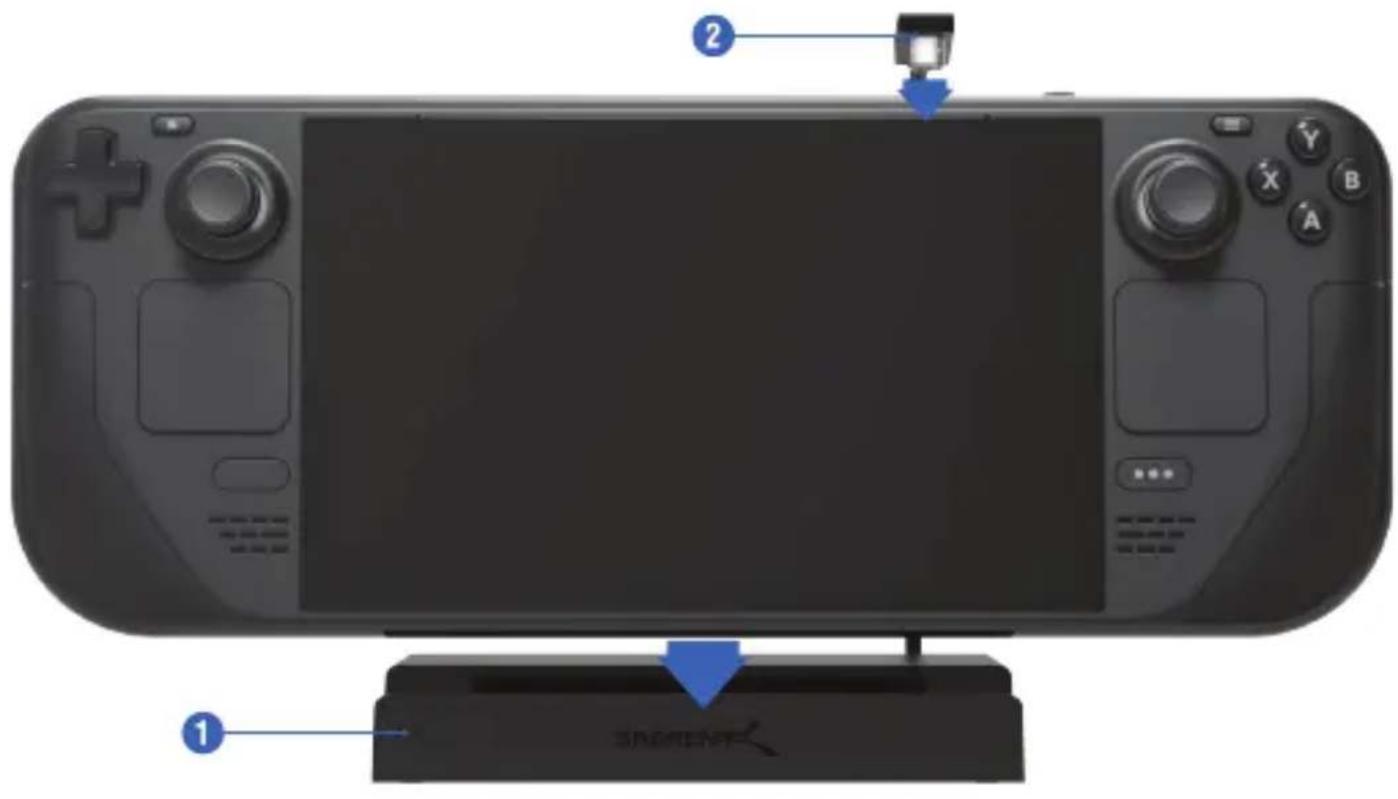
- Place your device into the base of the Sabrent 6-port Docking Station and connect the integrated USB Type-C cable into your compatible device's USB Type-C port.
- Insert the cable end from your USB-C charger into the USB-C PD3.0 port to power and charge your devices, then connect Ethernet, HDMI, and other peripherals to the dock as desired.
SABRENT
FOR HELP, COMMENTS, QUESTIONS OR CONCERNS PLEASE CONTACT OUR TECH SUPPORT TEAM VIA OUR WEBSITE WWW.SABRENT.COM
- USB-C 6-PORT DOCKING STATION WITH M.2 SLOT
- FEATURES:
- PACKAGE CONTENT
- SYSTEM SUPPORT
- 6- LED Indicator
- 7-M.2 M-key slot
- M.2 SSD INSTALLATION
- Remove the aluminum heatsink covering the M.2 SSD slot.
- Reinstall the aluminum heatsink.
- DOCKING YOUR IPAD, TABLET PC, STEAM DECK, OR OTHER PORTABLE DEVICES
- SABRENT
Brand : Sabrent
Model : DS-SDNV
Category : Docking Station