XDVDMK4 - DVD player Hamlet - Free user manual and instructions
Find the device manual for free XDVDMK4 Hamlet in PDF.


| Product Type | DVD Player |
| Brand | Hamlet |
| Model | XDVDMK4 |
| Dimensions (W x D x H) | 360 x 240 x 45 mm |
| Weight | 1.2 kg |
| Power Supply | AC 100-240V, 50/60Hz |
| Power Consumption | 12 W |
| Playback Disc Formats | DVD, DVD-R/RW, CD, CD-R/RW, MP3 CD |
| Video Output | HDMI, Composite (RCA) |
| Audio Output | Stereo RCA, Digital Coaxial |
| Region Code | Region 2 (adjustable) |
| Remote Control | Included (batteries not included) |
| Playback Features | Zoom, Repeat, Shuffle, Program Play |
| Parental Control | Yes (password-protected) |
| Languages | English, French, German, Spanish |
| Cleaning | Wipe with soft dry cloth; do not use liquids |
| Safety | Class 1 laser; do not open casing |
| Warranty | 1 year |
Frequently Asked Questions - XDVDMK4 Hamlet
User questions about XDVDMK4 Hamlet
0 question about this device. Answer the ones you know or ask your own.
Ask a new question about this device
Download the instructions for your DVD player in PDF format for free! Find your manual XDVDMK4 - Hamlet and take your electronic device back in hand. On this page are published all the documents necessary for the use of your device. XDVDMK4 by Hamlet.
USER MANUAL XDVDMK4 Hamlet
natural_image
Black Hamlet Smart DVD Maker device with USB port and three audio/video cables (red, yellow, black) attached to its side (no visible text or symbols on device body)USER MANUAL
XDVDMK4
www.hamletcom.com
Contents
1. Hardware Installation .... 3
1.1 Package Contents.... 3
1.2 System Requirements.... 3
1.3 Hardware Installation 3
2. Driver Installation .... 4
3. FAQ (Frequently Asked Questions)...... 5
3.1 How to check if the driver has been installed successfully or not.... 5
3.2 How to uninstall device driver 5
Dear Customer,
thanks for choosing an Hamlet product. Please carefully follow the instructions for its use and maintenance and, once this item has run its life span, we kindly ask You to dispose of it in an environmentally friendly way, by putting it in the separate bins for electrical/electronic waste, or to bring it back to your retailer who will collect it for free.
We inform You this product is manufactured with materials and components in compliance with ROHS Directive 2011/65/EU, with WEEE Directive 2002/96/CE, 2003/108/CE Italian Legislative Decree 2005/151 and EMC Directive 2014/30/EU for the following standards:
EN 55032: 2015, EN 61000-3-2: 2014, EN 61000-3-3: 2013, AS/NZS CIS32: 2015, EN 55024: 2010 + A1: 2015, IEC 61000-4-2: 2008, IEC 61000-4-3: 2006 + A1: 2007 + A2: 2010, IEC 61000-4-4: 2012, IEC 61000-4-5: 2014, IEC 61000-4-6: 2013, IEC 61000-4-8: 2009, IEC 61000-4-11: 2004.
CE
The complete CE declaration of conformity of the product can be obtained by contacting Hamlet at info@hamletcom.com.
Visit www.hamletcom.com for complete information on all Hamlet products and to access downloads and technical support.
Imported by: CARECA ITALIA SPA - Scandiano (RE) . Italy.
Trademarks and Changes
All trademarks and company names mentioned in this manual are used for description purpose only and remain property of their respective owners.
The material in this document is for information only and subject to change without notice.
Specifications and appearance of the product are subject to change without prior notice.
1. Hardware Installation
1.1 Package Contents
Unpack your Smart DVD Maker package and make sure that all items are included. The following items should be included in your package:
• Smart DVD Maker device
• Audio/Video multi-cable
• External USB cable
- Quick Installation Guide
• Installation DVD-ROM with driver, user manual and CyberLink PowerDirector 15 software
1.2 System Requirements
• Pentium 4 3.0GHz or above
• 1 GB RAM of system memory or above
• One available USB 2.0 port
- Graphics card (must support Microsoft DirectX 9.0c or above)
• Sound card (AC97 compatible)
• 2 GB free HDD space
- DVD-ROM drive
• Microsoft Windows 7, 8 and 10
1.3 Hardware Installation
Please follow the steps shown below for installation of your Smart DVD Maker.
- Connect the Audio/Video input cable into the Smart DVD Maker connector.
- Plug Smart DVD Maker dongle into the USB 2.0 port of your system.
- Insert the Installation DVD into your computer and follow the setup wizard for driver and software installation.
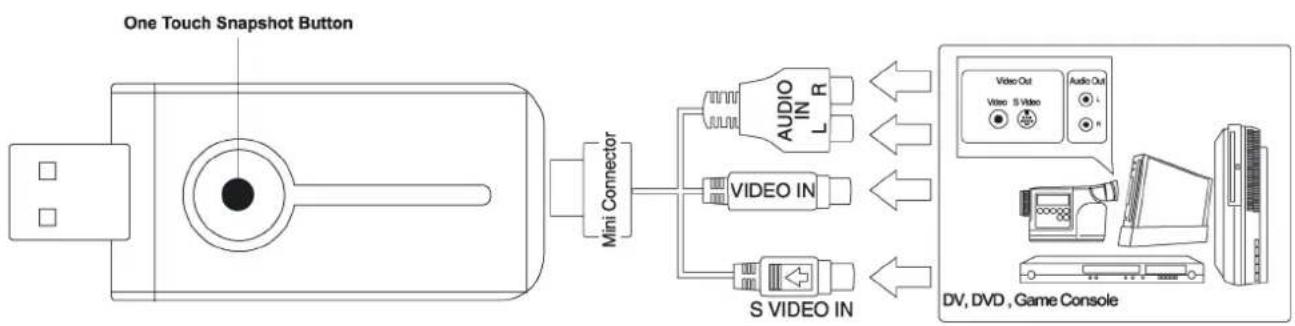
flowchart
graph LR
    A["One Touch Snapshot Button"] --> B["Mini Connector"]
    B --> C["Audio IN L R"]
    B --> D["VIDEO IN"]
    B --> E["S VIDEO IN"]
    C --> F["DV, DVD, Game Console"]
    D --> F
    E --> F
2. Driver Installation
The Smart DVD Maker package comes with complete Windows software utilities. These utilities can be found on the CD-ROM in this package. During installation, it is highly recommended to disable any sub-programs. These include applications such as antivirus software and system monitoring applications.
- Insert the installation DVD into the DVD drive. The autorun page will appear as image. Please choose "Quick Installation". Note: Your Smart DVD Maker device must be plugged into the USB 2.0 port before installation.
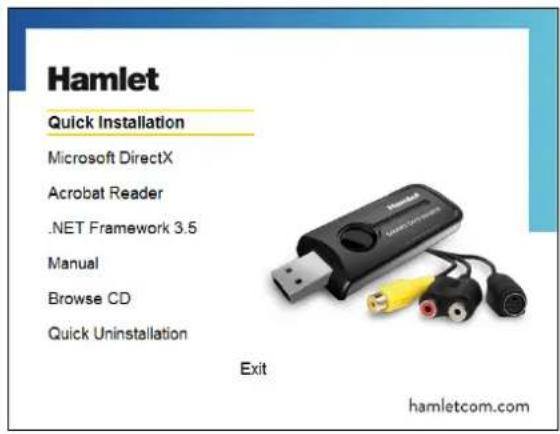
- In the "Quick Installation" window you can also select the installation of the additional software. The following steps show only the driver installation.
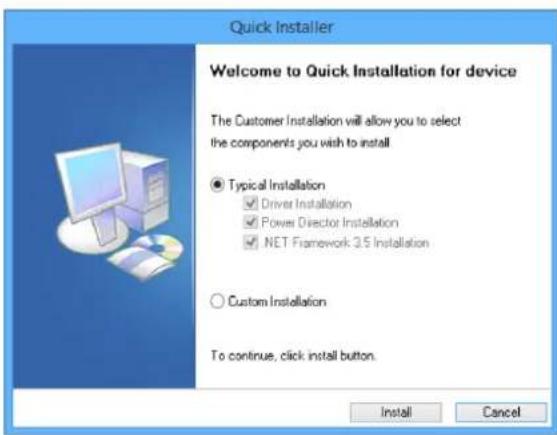
- Press "Start" to install the driver and/or software.
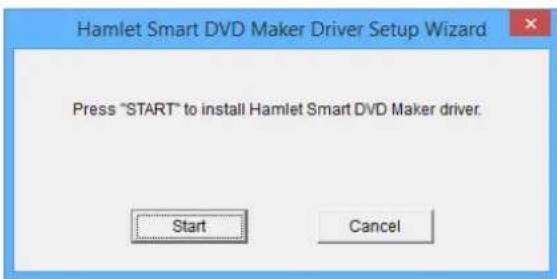
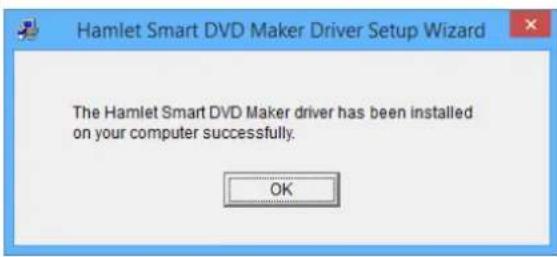
- When driver installation is complete, click "OK".
3. FAQ (Frequently Asked Questions)
3.1 How to check if the driver has been installed successfully or not
Open "Control Panel" window and click on "Device Manager". Click on the arrow icon next to "Sound, video and game controllers" item to expand the device list. Smart DVD Maker will appear as "USB Capture Device".
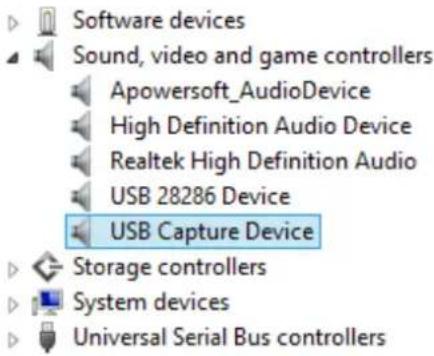
3.2 How to uninstall device driver
Please follow below steps to remove the device driver.
- Insert the installation DVD into the DVD drive. The autorun page will appear as image. Please choose "Quick Uninstallation".
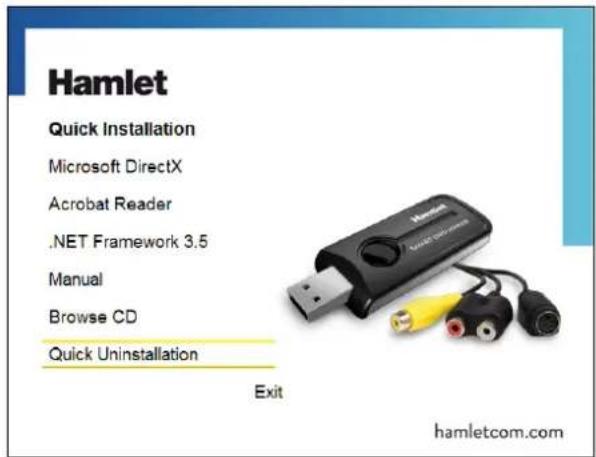
- In the "Quick Uninstallation" window select the "Driver uninstallation" option and press the "Uninstall" button to proceed.
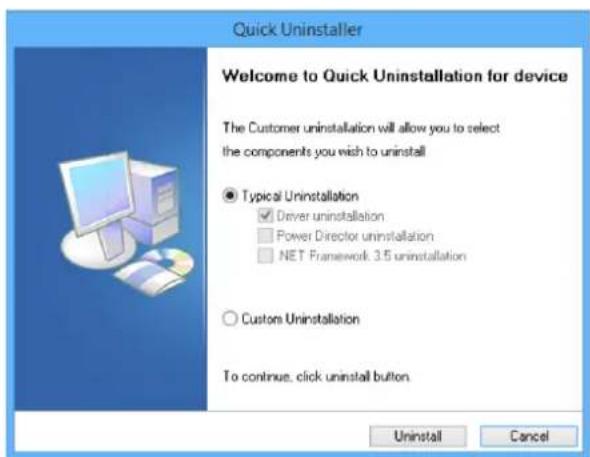
- Press "OK" to uninstall the Smart DVD Maker driver.
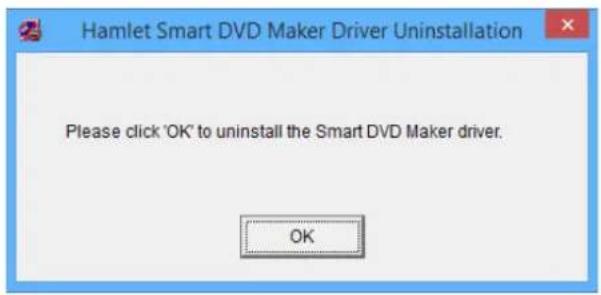
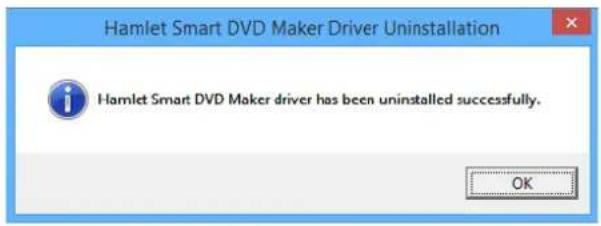
- Click "OK".
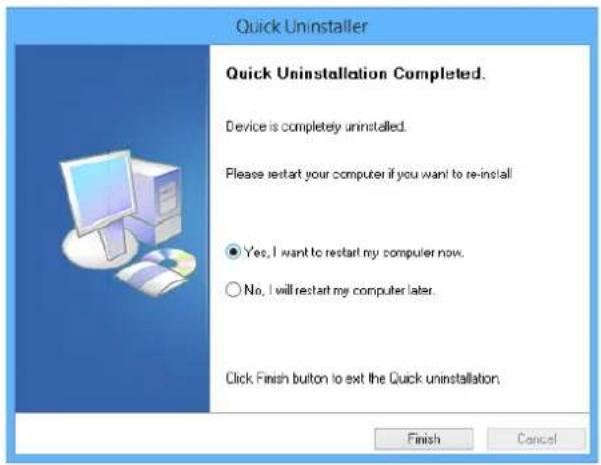
- Once uninstallation is complete, press "Finish" to exit and restart the computer.
- Contents
- Hardware Installation .... 3
- Driver Installation .... 4
- FAQ (Frequently Asked Questions)...... 5
- Dear Customer,
- CE
- Trademarks and Changes
- Hardware Installation
- Package Contents
- System Requirements
- Hardware Installation
- Driver Installation
- FAQ (Frequently Asked Questions)
- How to check if the driver has been installed successfully or not
- How to uninstall device driver
Brand : Hamlet
Model : XDVDMK4
Category : DVD player