
SLTLR560W - Uncategorized SereneLife - Free user manual and instructions
Find the device manual for free SLTLR560W SereneLife in PDF.


| Product Type | Portable Bluetooth Speaker |
| Model | SLTLR560W |
| Brand | SereneLife |
| Dimensions | 12.2 x 12.2 x 23.6 inches |
| Weight | 10.1 lbs (4.6 kg) |
| Power Source | AC adapter (100-240V) & Built-in rechargeable battery |
| Battery Life | Up to 8 hours at medium volume |
| Bluetooth Version | 5.0 |
| Wireless Range | Up to 33 ft (10 m) |
| Speaker Configuration | 2-way stereo with dual 3.5" full-range drivers and 1" tweeter |
| Total Output Power | 50W RMS |
| Frequency Response | 40 Hz – 20 kHz |
| Audio Inputs | Bluetooth, AUX 3.5mm, USB, MicroSD |
| FM Radio | Yes, built-in |
| LED Lighting | Multi-color dynamic LED party lights |
| Microphone | Built-in for hands-free calls |
| Charge Time | Approx. 4-5 hours |
| Mounting | Integrated carry handle, can be placed on floor or table |
| Water Resistance | IPX5 splash-proof |
| Included Accessories | AC adapter, AUX cable, remote control, user manual |
Frequently Asked Questions - SLTLR560W SereneLife
User questions about SLTLR560W SereneLife
0 question about this device. Answer the ones you know or ask your own.
Ask a new question about this device
Download the instructions for your Uncategorized in PDF format for free! Find your manual SLTLR560W - SereneLife and take your electronic device back in hand. On this page are published all the documents necessary for the use of your device. SLTLR560W by SereneLife.
USER MANUAL SLTLR560W SereneLife
IMPORTANT SAFETY INSTRUCTIONS 5
FCC INFORMATION 6
LOCATION OF PARTS AND CONTROLS 7
LED SCREEN 8
DISPLAY INSTRUCTIONS 9
FRAGRANCE DISC INSTRUCTIONS 9
SET UP 9
USING THE TOWEL & BLANKET WARMER 10
- Perfectly Size for Two Large Bath Towels
- Holds 2 Large Bath Towels or a Personal Throw Blanket
- Simple Single-Touch Control
- On/Off Button
• Automatically Turns Off After Time Duration - Lid Keeps Hands Free when Filling and Emptying the Towel and Blanket Warmer
- Double-walled Insulated Lid Keeps Heat in While Staying Cool to the Touch
• Overheat Protection and Water-Resistant Design
• Built-in Indicator Light - Convenient for Transporting Towel Warmer Bucket
- Designed to conserve Power and Energy Consumption
- Can Warm Towels, Robes, Blankets, or Other Fabric Items
What's in the Box:
- Towel Warmer
- Aromatherapy Tablet
- Desiccant
Technical Specs:
- Construction Material: Stainless Sheet
• Power Supply: 450W
• Power Output: 120V AC
• Frequency Response: 60Hz
• Volume: 20L
• Time Duration: 20, 40, 60 minutes
• Power Cord Length: 5.91 ft.
• Weight Capacity: 110.2 Lbs.
- Item Weight: 8.1 Lbs.
• Temperature Range: Adjustable from 90°F to 140°F (32°C to 135°C)
- Product Dimensions (L x W x H): 15.35" x 8.86" x 18.31" -inches
CAUTION
To reduce the risk of serious injury, please note that this is not a toy. Do not allow children to operate or play near the towel & blanket warmer.
TO REDUCE THE RISK OF FIRE OR ELECTRIC SHOCK, DO NOT EXPOSE THIS UNIT TO RAIN OR MOISTURE.
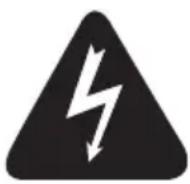
The lightning flash with arrow-head symbol within an equilateral triangle is intended to alert the user to the presence of uninsulated “dangerous voltage” within the unit’s enclosure that may be of sufficient magnitude to constitute a risk of electric shock.

The exclamation point within an equilateral triangle is intended to alert the user to the presence of important operating and maintenance (servicing) instructions in the literature accompanying the unit.
IMPORTANT SAFETY INSTRUCTIONS
ALL OF THE SAFETY AND OPERATING INSTRUCTIONS SHOULD BE READ, ADHERED TO AND FOLLOWED BEFORE THE UNIT IS OPERATED.
• FOR HOUSEHOLD USE ONLY
• FOR ADULT USE ONLY
• FOR DRY FABRIC ITEMS ONLY
California Prop 65 Warning
! WARNING:
This product contains Cadmium which is known to the state of California to cause cancer birth defects and other reproductive harm. Do not ingest.
For more info go to: www.P65warnings.ca.gov
Important Safety Instructions
WARNING:
TO REDUCE RISK OF FIRE, ELECTRIC SHOCK, OR SERIOUS INJURY TO PERSONS WHEN USING THE APPLIANCE, FOLLOW BASIC PRECAUTIONS INCLUDING THE FOLLOWING:
- Read all instructions before using the appliance.
• Always unplug the unit from the electrical outlet immediately after using.
- Do not use appliance for anything other than its intended use.
- Do not place or store the unit where it can fall or be pulled into a tub or sink.
- Do not place in or drop into water or other liquid.
- Do not reach for a unit that has fallen into water. Unplug it immediately.
- Care should be taken so that objects do not fall into and/or liquids are not spilled onto the unit.
- This unit should never be left unattended when plugged in.
- Close supervision is necessary when this unit is used near children or disabled persons.
- Use this unit for its intended use as described in this manual.
- Never operate this unit if it has a damaged cord or plug, if it is not working properly, or if it has been dropped, damaged, or dropped in water.
- Keep cords away from heated surfaces. Do not wrap the cord around the exterior of the appliance or let the cord hang over a table or counter edge.
- Do not use outdoors.
- Do not alter the safety plug or use an extension cord with this device.
- Do not operate with a voltage converter.
- Do not touch hot surfaces.
- Do not use accessory attachments not recommended by the manufacturer as this may case injuries.
SAVE THESE INSTRUCTIONS
FCC INFORMATION
CAUTION: Changes or modifications not expressly approved by the party responsible for compliance could void the user's authority to operate the equipment.
This device complies with Part 15 of the FCC Rules.
Operation is subject to the following two conditions:
- This device may not cause harmful interference.
- This device must accept any interference received including interference that may cause undesired operation.
WARNING:
Changes or modifications to this unit not expressly approved by the party responsible for compliance could void the user's authority to operate the equipment.
Note:
This equipment has been tested and found to comply with the limits for a Class B digital device, pursuant to Part 15 of the FCC Rules. These limits are designed to provide reasonable protection against harmful interference in a residential installation. This unit generates, uses and can radiate radio frequency energy and if not installed and used in accordance with the instructions, may cause harmful interference to radio communications. However, there is no guarantee that interference will not occur in a particular installation. If this equipment does cause harmful interference to radio or television reception, which can be determined by turning the equipment off and on, the user is encouraged to try and correct the interference by one or more of the following measures:
- Reorient or relocate the receiving antenna.
- Increase the separation between the equipment and receiver.
- Connect the equipment to an outlet on a circuit different from that to which the receiver is connected.
- Consult the dealer or an experienced radio/TV technician for help.
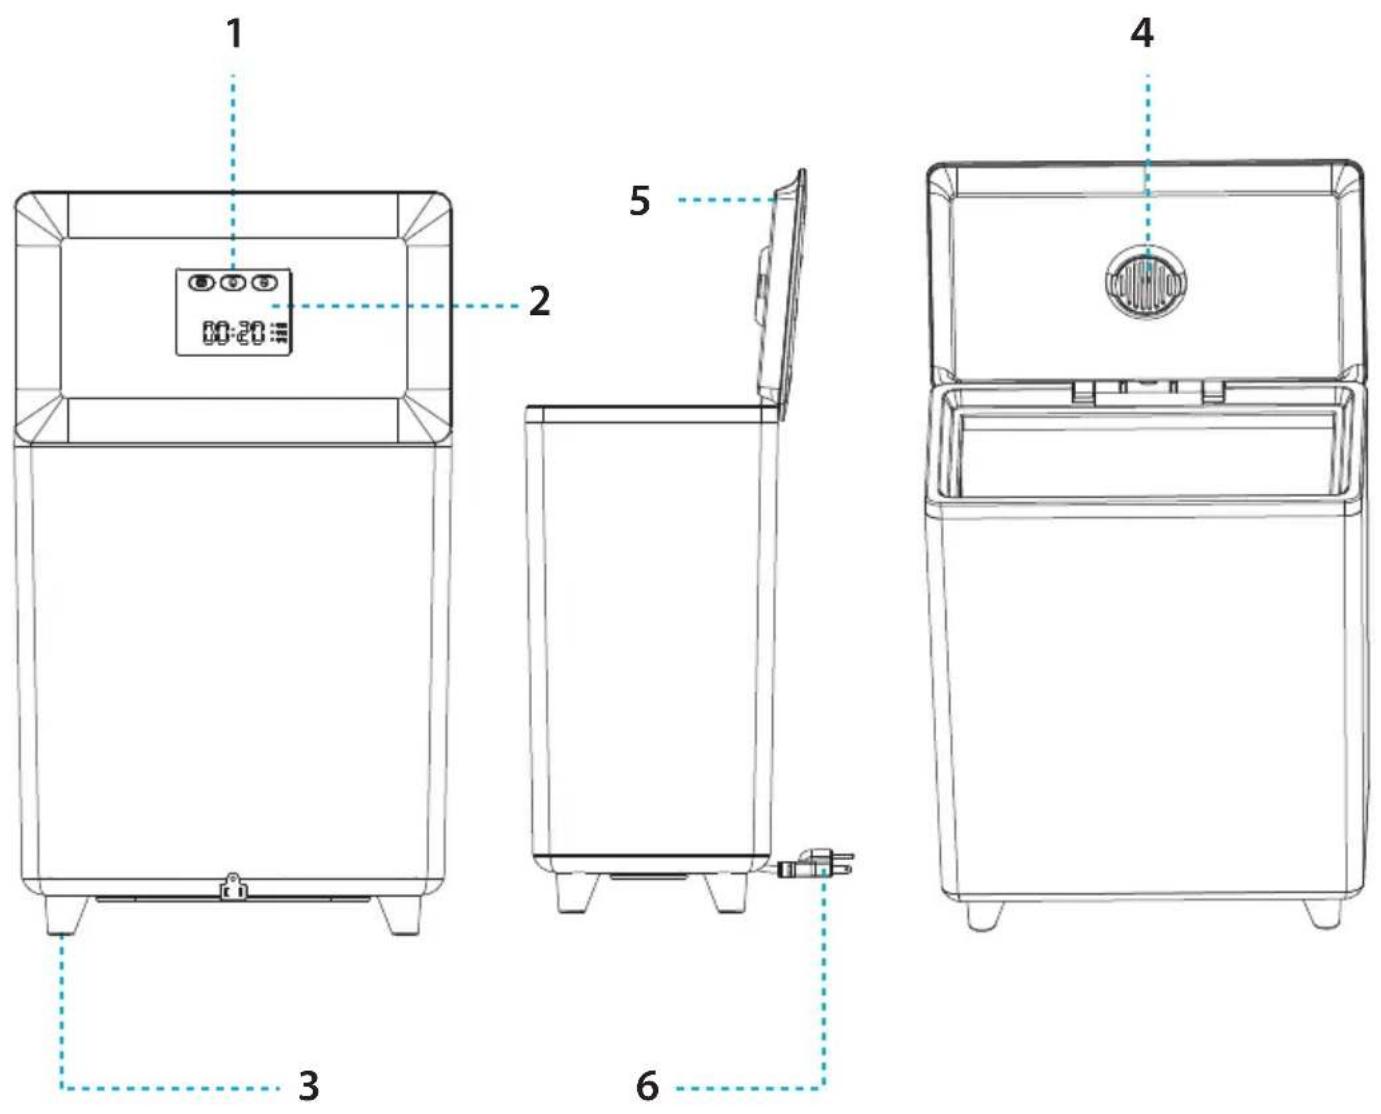
LOCATION OF PARTS AND CONTROLS
| No. | PART NAME |
| 1 | On/Off Button |
| 2 | LED Light |
| 3 | Feet |
| 4 | Fragrance disc |
| 5 | Lid |
| 6 | Power cord |
LED SCREEN
-
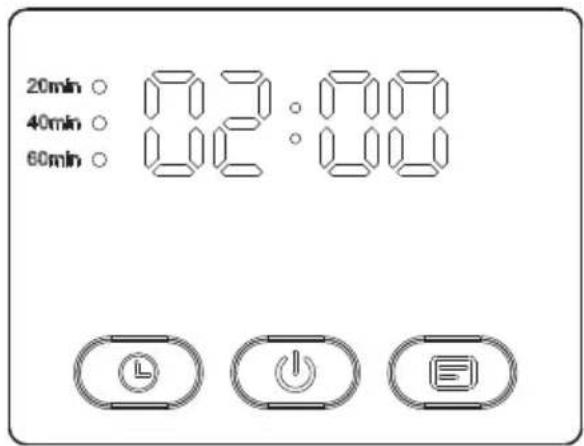
Symbol 00:00 flashes for 1 minute to dim into standby mode.
-
Press the 'On' key. 00:00 slowly flashes 5 times. When there's no operation, the machine starts to work. The working time options are 20 minutes, 40 minutes, and 60 minutes, cycling through in that order.
Press the 'Time' key to add 20 minutes each time.
The corresponding time next to the dot will flash 5 times.
If there's no further action, the towel warmer will start automatically, and the small circle indicator will remain lit. The display shows the countdown time.
The background light of the time button is illuminated.
- Press the 'Switch' key. 00:00 slowly flashes, indicating appointment time.
Press the right 'DELAY' key once to delay for 30 minutes; the 'DELAY' key background flashes. Press twice to delay for 60 minutes. The display will show the appointment time flashing. The 00:00 symbol will continue to slowly flash, allowing you to set the working time after the start.
The machine defaults to 20 minutes. Press the second time for 40 minutes and the third time for 60 minutes. Each press increases by 20 minutes (same as in step 2). When the set time is over, the display shows the countdown of the working appointment, and the appointment light stays on.
- The 'Switch' symbol light is red, indicating a high internal temperature during operation. This serves as a reminder not to touch the internal metal parts due to the risk of burns.
DISPLAY INSTRUCTIONS
- Appointment light: It flashes when the appointment is being selected, remains continuously lit during the appointment, and turns off at the end of the appointment time.
- Time light: It flashes when selecting the time, stays on while in operation, and turns off at the end of the working period.
- Screen display instructions: Press the time button to cycle between 20, 40, and 60, with the corresponding small round light flashing. The small round light remains on during operation and turns off when the work is complete. When not selecting an appointment, choose TIME. The screen will display the time and flash when not in operation. During normal work, it stays ON continuously while counting down. To make an appointment, first select the appointment and then choose the time. Click on the appointment, and the screen will display the appointment time, blinking at first. After confirmation, the light remains on, counting down the appointment time. Once the appointment time ends, the appointment light turns off, the time light stays on, and the screen displays the countdown to the selected heating time.
FRAGRANCE DISC INSTRUCTIONS
This fragrance disc additionally design is for some users who like to use aromatherapy tablets or essential oils when warming towels.
- Remove the Fragrance Disc from its sealed plastic bag.
- Slide it into the Fragrance Disc Holder located on the underside of the lid.
SET UP
- Open the Lid and remove any packaging contents.
- Place the Towel Warmer on a dry, level, hard surface.
- Insert Plug into a standard 120V outlet.
NOTE: This Towel & Blanket Warmer has a 3-prong grounding plug. To reduce the risk of electric shock, plug the power cord into a groundedv (earthed) electrical outlet that is easily accessible.
USING THE TOWEL & BLANKET WARMER
The Towel & Blanket Warmer can comfortably warm up two large cotton bath towels or a personal throw blanket.
- Insert the power cord into an electrical outlet.
- Open the LID and place ONLY DRY towel(s) or a blanket inside.
NOTE: Placing damp or wet towels inside the towel warmer can damage the unit and pose serious safety risks. - Close the LID.
- Press the ON/OFF BUTTON.
- Please do not touch the inner wall of the product; otherwise, there is a risk of scalding. The temperature of the barrel can reach 130+/- 8°C/46.4°F in about 5 minutes, and it can maintain this temperature for about 15 minutes.
At this point, the temperature of the towel can reach more than 50^ C/122°F, which is a relatively warm and comfortable temperature for human contact. The towel bucket is indirectly heated to keep the towel temperature around 55^ C/131°F. The work indicator light goes out 80 minutes after starting the machine, indicating that the product has completed a work cycle. - With 30 seconds of fast heating, 15 minutes is typically sufficient for heating two bath towels.
- Open the LID to remove the towel(s) or blanket. Press down on the handle of the lid and then pull up to open the lid of the product.
Note: To avoid damaging the unit, gently raise the lid when removing items. - Press the ON/OFF BUTTON at any time to stop or start the heating cycle.
- Open the App Store and search for "tuya" Tuya Smart." Before using the app, you will need to register an account.
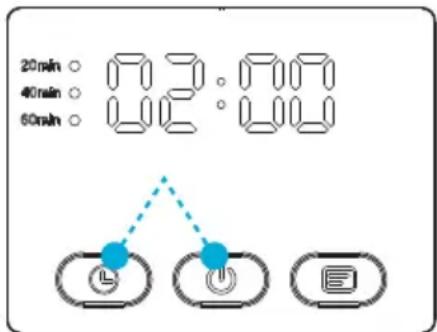
- Press and hold the two buttons at the same time for 3 seconds to connect to Wi-Fi. The LED display will show "COnf".
-
Open the Tuya Smart app on your mobile device and add the towel warmer. Once your phone is successfully connected to the towel warmer, the LED display will show "SUCC".
-
You can now use your mobile device to adjust the timer and to turn the towel warmer ON or OFF.
TIPS FOR BEST RESULTS
- Use cotton or cotton blend towels or fabrics.
-
For fast and even heating, loosely pile 1 towel into the Towel & Blanket Warmer.
Tightly rolled or folded towels will take longer to heat thoroughly.
Two towels will take longer to heat than one. -
Use only with DRY fabrics.
Note: DO NOT use with damp or wet particles.
- Avoid using delicate fabrics that cannot withstand high heat.
Any fabric indicating that a cool iron must be used may not be able to withstand the heat of the towel warmer, resulting in damage to the fabric and the Towel & Blanket Warmer.
- Once the heating cycle has begun, keep the lid closed.
This will prevent heat from escaping. Opening the lid mid-cycle may result in slower heating times.
Note: Condensation on the lid and Interior of the unit Is normal.
CARE AND MAINTENANCE
REMOVE THE POWER CORD FROM THE ELECTRICAL OUTLET BEFORE CLEANING. WIPE WITH A DRY CLOTH ONLY WHEN UNIT IS COOL TO THE TOUCH.
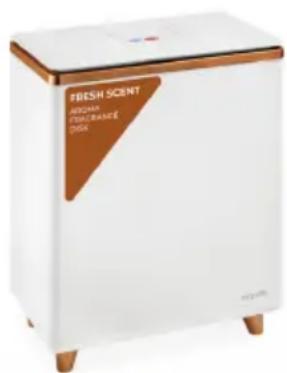
SLTLR460W
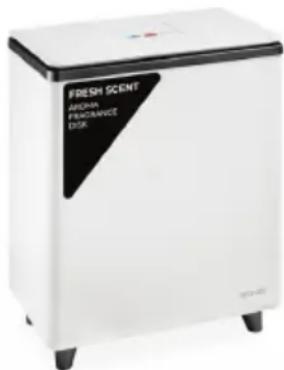
SLTLR560W
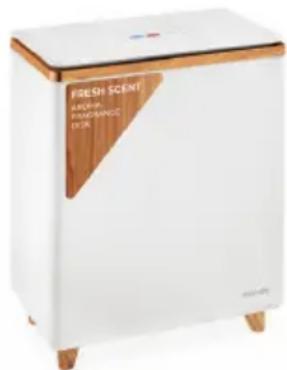
SLTLR660W
Register Product
Thank you for choosing SereneLife. By registering your product, you ensure that you receive the full benefits of our exclusive warranty and personalized customer support. Complete the form to access expert support and to keep your SereneLife purchase in perfect condition.
Serenelifehome.com/ register
serenelife™
Questions or Comments?
We are here to help!
Phone: 1.718.535.1800
Serenelifehome.com/ContactUs
- What's in the Box:
- Technical Specs:
- CAUTION
- IMPORTANT SAFETY INSTRUCTIONS
- California Prop 65 Warning
- ! WARNING:
- WARNING:
- SAVE THESE INSTRUCTIONS
- FCC INFORMATION
- This device complies with Part 15 of the FCC Rules.
- Operation is subject to the following two conditions:
- Note:
- LOCATION OF PARTS AND CONTROLS
- LED SCREEN
- DISPLAY INSTRUCTIONS
- FRAGRANCE DISC INSTRUCTIONS
- SET UP
- USING THE TOWEL & BLANKET WARMER
- The Towel & Blanket Warmer can comfortably warm up two large cotton bath towels or a personal throw blanket.
- TIPS FOR BEST RESULTS
- CARE AND MAINTENANCE
- Register Product
- serenelife™
Brand : SereneLife
Model : SLTLR560W
Category : Uncategorized