
TTM7882BEKW - Oven Summit - Free user manual and instructions
Find the device manual for free TTM7882BEKW Summit in PDF.


| Product Type | Built-in Wall Oven (Gas and Electric versions) |
| Brand | Summit |
| Model | TTM7882BEKW |
| Installation Type | Recessed cabinet installation (not below work counter) |
| Overall Dimensions (Approx) | 23.75 x 23.5 x 22 inches (width x height x depth) |
| Cabinet Cutout Width | 23.75 inches |
| Cabinet Cutout Height (Minimum) | 18 inches |
| Cabinet Cutout Height (Suggested) | 26 inches |
| Weight (Approx) | 100 lbs |
| Power Supply - Gas | Natural gas or LP, 1/2" NPT connection, manual shut-off valve required |
| Power Supply - Electric | 240V, 60Hz, 3-prong grounding plug, dedicated circuit |
| Oven Capacity (Approx) | 3.0 cu ft |
| Oven Racks | 2 |
| Oven Interior Light | Yes, oven lamp with switch |
| Ignition Type (Gas) | Electronic ignition via ignition module |
| Control Type | Oven thermostat, clock with timer, top burner ignition switches (if applicable) |
| Safety Features | Manual gas valve, grounding instructions, cabinet spacers for anti-tip, three-prong plug for shock protection |
| Cleaning | Manual cleaning; do not allow cleaners to contact flexible gas connectors |
| Compliance - Gas | ANSI Z21.24 (flexible connectors), National Fuel Gas Code Z223.1 |
| Compliance - Electric | National Electric Code NFPA70, local codes |
| Warranty | Standard 1-year (manufacturer's warranty) |
Frequently Asked Questions - TTM7882BEKW Summit
User questions about TTM7882BEKW Summit
0 question about this device. Answer the ones you know or ask your own.
Ask a new question about this device
Download the instructions for your Oven in PDF format for free! Find your manual TTM7882BEKW - Summit and take your electronic device back in hand. On this page are published all the documents necessary for the use of your device. TTM7882BEKW by Summit.
USER MANUAL TTM7882BEKW Summit
INSTALLATION INSTRUCTIONS BUILT-IN GAS AND ELECTRIC RECESSED WALL OVENES
700 SERIES PIPING AND INSTALLATION NOTE: DO NOT INSTALL BELOW WORK COUNTER

SAVE THESE INSTRUCTIONS
GAS RECESSED WALL OVEN
Slide the oven unit into the cabinet recess as shown in the diagram. Secure the oven unit to the cabinet with wood screws. Be sure to use the cabinet spacer with the wood screw as a "washer" between the wood cabinet and the oven front frame.
The recess in which the oven is installed shall be constructed so as to provide a complete closure around the recessed portion of the unit and any openings around gas and electrical service outlets MUST be closed at time of installation. The installation must conform with local codes. In the absence of local codes, the National Fuel Gas Code Z223.1 latest edition.
A MANUAL GAS VALVE MUST BE INSTALLED IN AN ACCESSIBLE LOCATION IN THE GAS LINE EXTERNAL TO THE UNIT FOR THE PURPOSE OF TURNING ON OR SHUTTING OFF GAS TO THE UNIT.
WARNING
ELECTRICAL GROUNDING
INSTRUCTIONS
This appliance is equipped with a three prong grounding plug for your protection against shock hazard and should be plugged directly into a properly grounded receptacle. Do not cut or remove the grounding prong from this plug.


INSURE PROPER GROUND EXISTS BEFORE USE.
ELECTRIC RECESSED WALL OVEN
With the oven positioned in front of the cabinet opening, connect the leads extending from the conduit to the junction box.
Check all connections to see that they are tight and have not become loosened during transit.
After the above mentioned wire connections have been made at the junction box, secure the oven unit to the cabinet with wood screws. Be sure to use the cabinet spacer with the wood screw as a "washer" between the wood cabinet and the oven front frame.
POWER CONNECTIONS TO APPLIANCES
We suggest that you have the dealer where you purchased your new oven unit install it or have him arrange installation by a qualified electrician. Installation must conform with local codes. In addition, installation must conform with the National Electric Code NFPA70 latest edition.
WARNING-Be sure electric power is OFF at the fuse (breaker) box until the unit is installed and ready to operate. See appliance rating plate for maximum K.W. and amperage ratings.
INSTALLATION
It is the responsibility of your installer to make certain that your oven unit is properly installed. Situations caused by improper installations are not covered under the warranty. Any expenses incurred due to such situations will not be paid by the manufacturer of the appliance.
WIRING DIAGRAM FOR GAS SURFACE UNITS AND WALL OVENS

flowchart
graph TD
    A["Top Burner Ignition Switches"] --> B["BL"]
    B --> C["IGNITION Module"]
    C --> D["R"]
    D --> E["Rear IGNITION LEAD"]
    D --> F["FRONT IGNITION LEAD"]
    D --> G["IGNITION Module"]
    G --> H["R"]
    H --> I["N"]
    I --> J["W"]
    K["OVEN T'STAT"] --> L["BK"]
    L --> M["CLOCK WITH TIME"]
    M --> N["BK"]
    N --> O["OVEN LAMP SWITCH"]
    O --> P["BK"]
    P --> Q["WALL PLUG"]
    Q --> R["H"]
    S["OVEN IGNITOR"] --> T["R"]
    T --> U["W"]
    V["SAFETY VALVE"] --> W["R"]
    X["BL"] --> Y["BL"]
    Y --> Z["BL"]
REFER ONLY TO FEATURES WHICH ARE EQUIPPED ON YOUR RANGE
WARNING-ELECTRICAL GROUNDING INSTRUCTIONS:
THIS APPLIANCE IS EQUIPPED WITH A THREE-PRONG GROUNDING PLUG FOR YOUR PROTECTION AGAINST SHOCK HAZARD AND SHOULD BE PLUGGED DIRECTLY INTO A PROPERLY GROUNDED THREE-PRONG RECEPTACLE. DO NOT CUT OR REMOVE THE GROUNDING PRONG FROM THE PLUG.
180-6C89 REV. 1
FLEXIBLE CONNECTORS - If the gas range/oven is connected to a gas supply with a metal flexible connector, move the range/oven with CAUTION for service or cleaning. Flexible connectors are not intended for repeated bending. Do not allow cleaners to make contact with flexible connectors.
The connector and its fittings are designed for use only on the original installation and are not to be reused for another appliance or at another location. Connectors must comply with ANSI Z21.24.
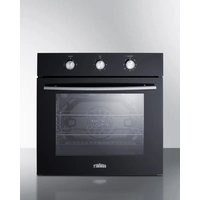
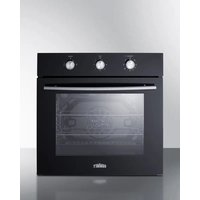
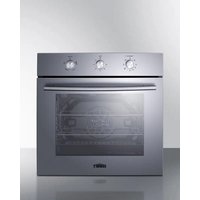

Brand : Summit
Model : TTM7882BEKW
Category : Oven