M400 - Sprayer Maruyama - Free user manual and instructions
Find the device manual for free M400 Maruyama in PDF.


| Product Type | Backpack Sprayer |
| Brand | Maruyama |
| Model | M400 |
| Tank Capacity | 4 gallons (15 liters) |
| Material | High-density polyethylene (HDPE) |
| Pump Type | Piston pump |
| Maximum Pressure | 100 psi (6.9 bar) |
| Hose Length | 48 inches (1.2 meters) |
| Weight (empty) | 10.5 lbs (4.8 kg) |
| Dimensions (L x W x H) | 18 x 14 x 24 inches (46 x 36 x 61 cm) |
| Power Source | Manual (hand pump) |
| Spray Pattern | Adjustable cone and fan |
| Nozzle Type | Brass adjustable nozzle |
| Filter | In-tank strainer and inline filter |
| Maintenance | Rinse after each use, lubricate pump seals regularly |
| Cleaning | Flush with water and mild detergent |
| Safety Features | Pressure relief valve, locking trigger |
| Spare Parts Available | Seals, gaskets, nozzle, pump rebuild kit |
| Reparability | User-serviceable with common tools |
| Warranty | Limited 2 years |
Frequently Asked Questions - M400 Maruyama
User questions about M400 Maruyama
0 question about this device. Answer the ones you know or ask your own.
Ask a new question about this device
Download the instructions for your Sprayer in PDF format for free! Find your manual M400 - Maruyama and take your electronic device back in hand. On this page are published all the documents necessary for the use of your device. M400 by Maruyama.
USER MANUAL M400 Maruyama
Manufacturing quality equipment since 1895.
INSTRUCTION MANUAL
Model
M400
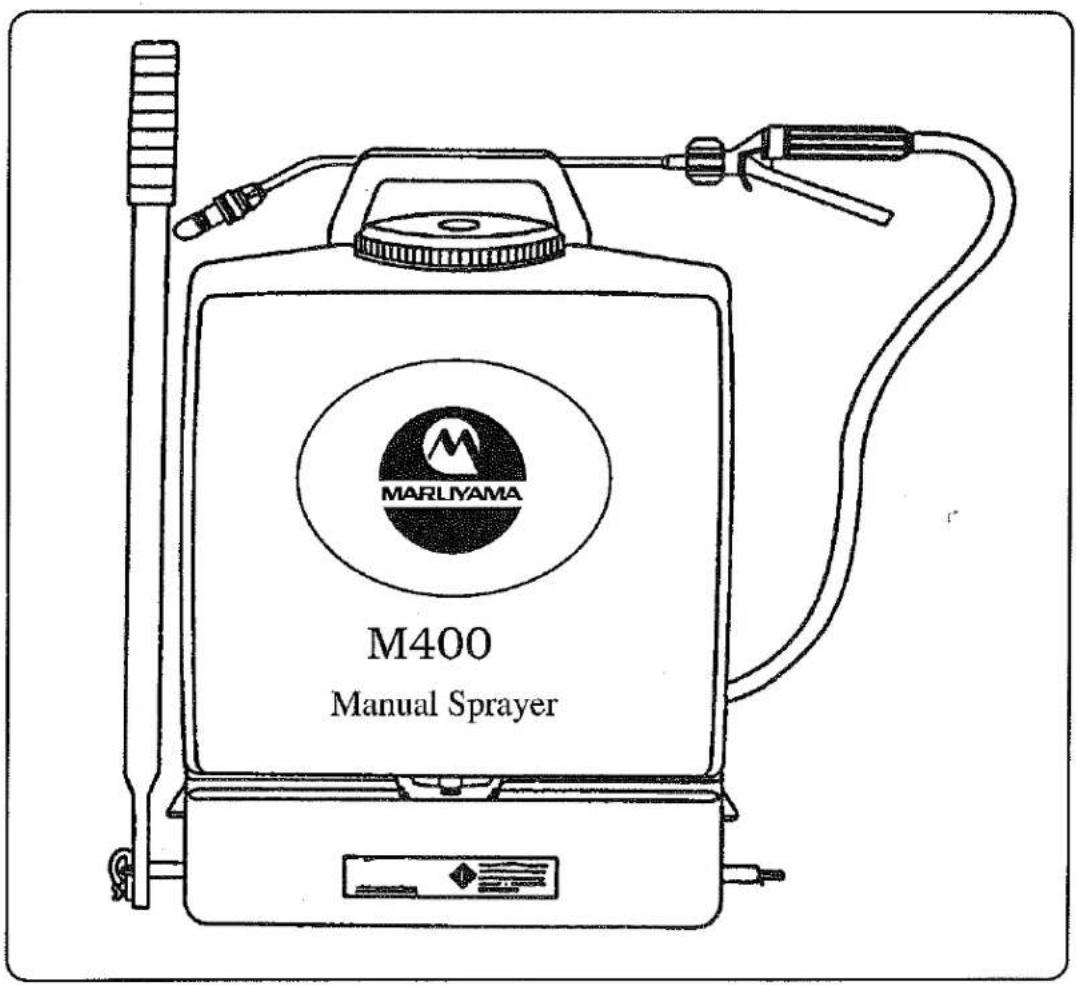
12/1/93
BEFORE USING READ THIS FIRST!
P/N 840316
Before using the Maruyama Manual Sprayer, read this Instruction Manual carefully and acquaint yourself thoroughly with the equipment. Special attention should be given to the Safety Instructions identified by this symbol For additional assistance, contact any local authorized Maruyama dealer, or Maruyama U.S., Inc., 15436 N.E. 95th St., Redmond, Washington 98052-2547.
SAFETY INSTRUCTIONS
DANGER: This sprayer operates with liquid under pressure. Failure to exercise CAUTION and to follow the manufacturers instructions for operation and maintenance can cause damage to the sprayer and/or any of the sprayer components. A rupture under pressure can cause serious injury resulting from a high pressure discharge of liquids or sprayer parts.
Keep sprayer and spray materials away from children. Never allow children to operate the sprayers.
Read and understand the manufacturers directions for any spray materials to be used with Maruyama sprayers.
Do not use caustics or acids that may damage any sprayer parts.
Do not use flammable materials with Maruyama sprayers. Serious injury may result from ignition or explosion.
Do not use any heated materials (over 100°) with Maruyama sprayers.
Do not expose the sprayer to excessive heat or store in direct sunlight.
Do not operate the sprayer if any components are damaged or abnormal in appearance.
Never fill the sprayer if any components are damaged or abnormal in appearance.
Pressurize the sprayer only with the standard pump provided by the sprayer manufacturer. Excessive pressure within the sprayer can cause an explosion.
Always protect the face and body while pressurizing the sprayer or releasing pressure.
Spray only during calm days when there are no wind conditions.
Never leave a charged sprayer unattended.
ASSEMBLY INSTRUCTIONS - Model M400
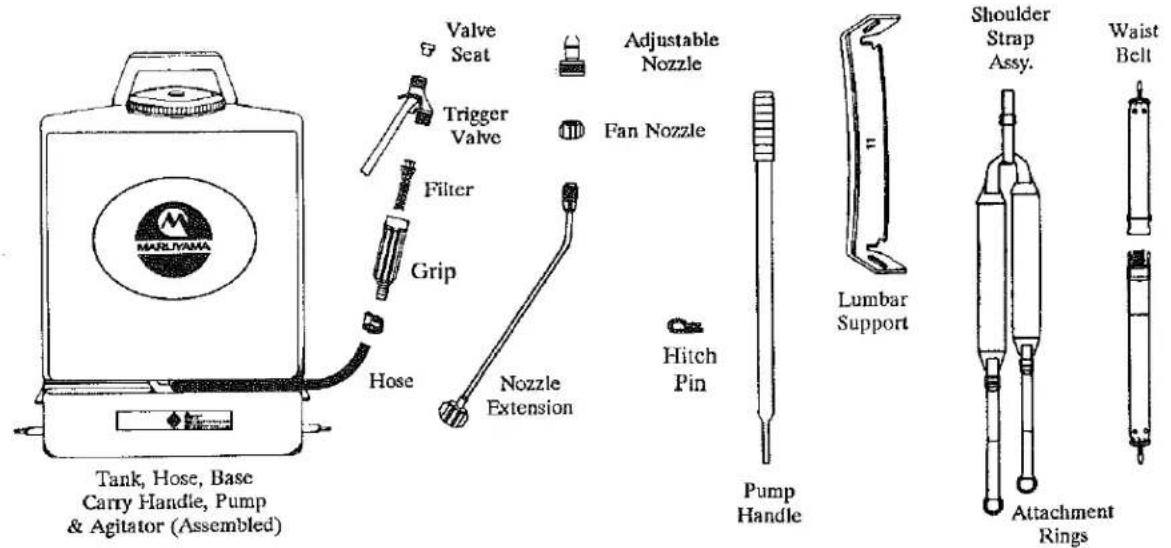
NOTE: The Maruyama Manual Sprayer is packed in the carton partially assembled. Before attempting to assemble the sprayer for operation, refer to the sketch below and be certain all components are present.
ASSEMBLY PROCEDURE - Model M400
I. Installing the trigger valve and nozzle.
a) Insert the filter into the grip end of the sprayer hose.
Note: When correctly positioned, the entire filter is located inside the grip.
b) Screw the trigger valve into the grip.
c) The valve seat must be installed into the trigger valve before attaching the nozzle extension onto the trigger valve.
d) Screw the nozzle onto the nozzle extension.
II. Installing the lumbar support, shoulder straps, and waist belt.
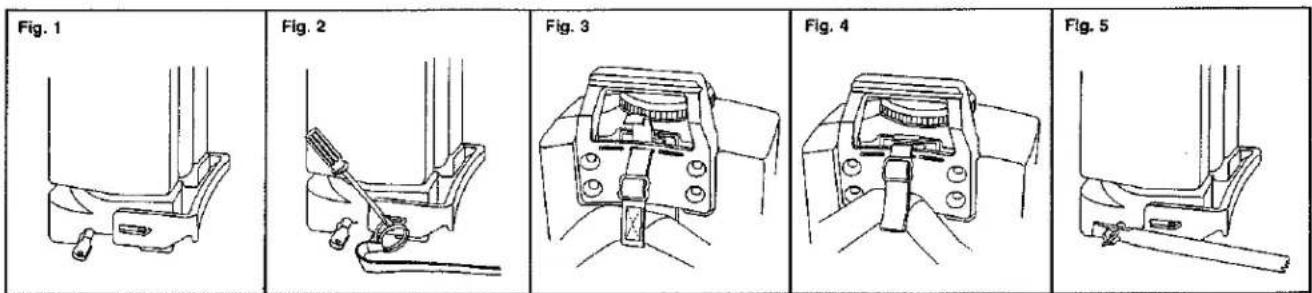
a) Refer to fig. 1 and position the lumbar support slots over the mounting extensions located on opposite ends of the sprayer base.
b) Locate the attachment rings secured to the ends of the shoulder straps. Refer to fig. 2 and open one end of the split ring. Insert the end of the split ring into the hole of the mounting extension. Turn the ring through the hole until it is completely installed. Note: Installation of the shoulder strap attachment rings secures the lumbar support to the sprayer base.
c) Refer to fig. 3 and locate the top attachment strap for the shoulder strap assembly. Insert the strap through the center slot of the carrying handle as shown. Route the strap back through the handle (see fig. 4) and secure the strap with the buckle.
Note: The strap and buckle arrangement allows adjustment of the shoulder strap assembly for the most suitable fit.
d) The snap-hooks attached to the ends of the waist belt clip onto the shoulder strap attachment rings.
III. Installing the pump handle.
Note: The pump handle can attach at either side of the sprayer.
a) Locate the flattened end of the drive rod protruding from either side of the sprayer. Position the slot in the pump handle onto the drive rod.
b) Secure the pump handle onto the drive rod by installing a hitch pin into the drive rod (see fig. 5).
OPERATING INSTRUCTIONS - Model M400
Be sure the sprayer is correctly assembled and all fasteners and fittings are properly secured.
Always test a new sprayer for correct assembly and operation before attempting to apply any chemicals.
Only clean water should be used for testing the operation of a sprayer.
Be sure all pressure is released from the sprayer before filling tank.
Note: Always mix chemicals according to instructions provided by the chemical manufacturer. Do not mix chemicals in the sprayer tank.
a) Be sure the trigger valve is in the "OFF" position.
b) Remove the cap and fill the sprayer tank. Note: Always use the filter screen when filling the sprayer tank. Do not over-fill the tank beyond the "FULL" level indicated on the tank.
c) Replace the tank cap, tightly.
d) Remove any spilled chemical material from the sprayer.
II. Spraying
Note: Basic adjustments of the shoulder straps, waist belt, and pump handle are best accomplished when the sprayer is empty or contains only water.
Note: The brass-colored cone nozzle can be adjusted from a mist to a solid stream. The fan-spray nozzle is non-adjustable.
II. Spraying (cont.)
a) To initiate spraying, work the pump handle up and down several times to create pressure.
Note: As pressure increases, more effort is required to work the pump handle.
b) Point the nozzle at the objects to be sprayed and gently squeeze the valve trigger towards the grip. For continuous spraying, a lever lock will hold the valve in an open position.
Note: Occasional pumping of the handle will be required for pressure to maintain the spray pattern.
III. Cleaning and storing
Note: Always drain, clean, and dry the sprayer after each use. Failure to follow this procedure may cause some sprayer components to become damaged and/or weakened. Serious injury can result if damaged or weakened parts burst when the sprayer is pressurized.
a) Remove any left-over spray materials from the sprayer. Note: Left-over spray materials must be deposited into containers that allow proper and lawful disposal.
b) With cool, clean water, flush the sprayer tank and components. To flush the sprayer hose, valve, and nozzle parts, operate the sprayer using cool, clean water.
c) Remove all moisture from the sprayer components.
d) Store the sprayer in a dry place with the filler cap removed.
Never use hot water for cleaning the sprayer.
Never store a pressurized sprayer.
OPTIONAL ACCESSORIES
| PART NUMBER | |
| 5' EXT. | Twin Nozzle Assy. - 6 in. 841070 |
| Twin Nozzle Assy. - 11 in. 841071 | |
| 6" Twin Nozzle 11" Twin Nozzle | Dual Swivel Nozzle 841082 |
| 60" (5ft.) Extension | 841084 |
| Weed Shield | 841085 |
| 16 in. Curved Extension * | 841091 |
| Spray Boom | 841093 |
| 24 in. Curved Extension ** | 841094 |
| Pressure Regulator | 841427 |
| WEED SHIELD PRESSURE REGULATOR | |
 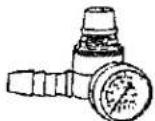 | * Standard With Models M175 & M300 ** Standard With Model M400 |
TROUBLE SHOOTING
CAUTION: Always release all pressure and remove all chemicals from the sprayer before attempting any troubleshooting, service, or maintenance. (see fig. 7)
| PROBLEM | POSSIBLE CAUSE | SOLUTION |
| Sprayer will not develop pressure | a) Loose fittingsb) O-Rings worn or damagedc) Check valve dirty or damagedd) Pressure relief valve damaged(Model M175 & M300)e) Piston cup not sealing(Model M175 & M300)f) Pump worn or damaged | a) Tighten all fittings.Lubricate if required.b) Replace O-Ringsc) Clean or replace check valved) Replace pressurerelief valvee) Lubricate cupf) Replace pump |
| Sprayer will not spray (Pressure O.K.) | a) Nozzle, extension, filter or hose is plugged | a) Clean or replace plugged components |
| Sprayer leaks from tank | a) Loose fittingsb) Seal/o-Rings wornor damagedc) Tank is damaged | a) Tighten all fittingsLubricate if requiredb) Repair seals/O-Ringsc) Replace tank |
| Leaks from hose - nozzle components | a) Loose fittingsb) Seals/O-Rings wornor damagedc) Lever valve or valve seatworn or damagedd) Hose damaged | a) Tighten all fittingsLubricate if requiredb) Replace seals/O-Ringsc) Replace damaged partsd) Replace hose |
Limited Warranty Statement
All Maruyama products are warranted to the original purchaser to be free from defects in material and workmanship from the date of purchase for the time periods listed as follows:
3 years for residential, non-institutional, non-income producing use.
2 years for industrial, commercial, institutional and income producing use.
1 year for rental use.
Any part of a Maruyama product found to be defective within the applicable warranty period shall, at Maruyama's option, be repaired or replaced without charge. Warranty consideration is obtained by delivering any Maruyama product believed to be defective to an Authorized Maruyama Service Dealer within the applicable warranty period.
This warranty does not cover the following:
- Maintenance items (excluding defects in materials and workmanship) including hoses.
- Extra expenses including shipping and handling, travel, payment for lost time or pay and for any inconvenience and storage.
- Alterations or modifications including aftermarket parts not authorized by Maruyama.
- Wear, accident, abuse, neglect, misuse, negligence, improper fluids, lubricants, mixtures (when applicable), or failure to operate or maintain the product in accordance with instructions approved by Maruyama.
Repair or replacement as provided under this warranty is the exclusive remedy of the consumer. Maruyama shall not be liable for any incidental or consequential damages for breach of any express or implied warranty on these products except to the extent prohibited by applicable law. Any implied warranty of merchantability or fitness for a particular purpose on these products is limited in duration to the warranty period as defined in the limited warranty statement. Maruyama reserves the right to change or improve the design of the product without notice and does not assume obligation to update previously manufactured products.
This warranty provides you with specific legal rights which may vary from state to state.
It is the Owner's and Dealer's responsibility to make sure the Warranty Registration Card is properly filled out and mailed to Maruyama U.S., Inc. Proof of purchase and registration will be required in order to obtain warranty service.
- INSTRUCTION MANUAL
- SAFETY INSTRUCTIONS
- ASSEMBLY INSTRUCTIONS - Model M400
- ASSEMBLY PROCEDURE - Model M400
- Installing the pump handle.
- OPERATING INSTRUCTIONS - Model M400
- Spraying
- Spraying (cont.)
- Cleaning and storing
- TROUBLE SHOOTING
- Limited Warranty Statement
- This warranty does not cover the following:
Brand : Maruyama
Model : M400
Category : Sprayer