HT241 - Hedge Trimmer Maruyama - Free user manual and instructions
Find the device manual for free HT241 Maruyama in PDF.


| Product Type | Hedge Trimmer |
| Brand | Maruyama |
| Model | HT241 |
| Dimensions (L×W×H) | 40.0 × 9.6 × 9.5 in (1,016 × 245 × 241 mm) |
| Dry Weight | 11.0 lbs (5.0 kg) |
| Engine Type | 2-stroke, air-cooled, Mitsubishi |
| Displacement | 24.1 cc |
| Ignition | Electronic |
| Carburetor | Diaphragm |
| Fuel Tank Capacity | 17.0 oz (0.5 L) |
| Fuel Mixture Ratio | 25:1 (gasoline to 2-cycle oil) |
| Blade Type | Single-edge, dual action |
| Blade Length | 30 in (750 mm) |
| Tooth Pitch | 1.37 in (35 mm) |
| Transmission | Centrifugal clutch, cam drive |
| Maximum Cutting Thickness | 14 mm diameter branches |
| Lubrication | Grease nipple on gear case; oil blades periodically |
| Safety Features | Stop switch, throttle lock, blade guard |
| Recommended Maintenance | Adjust blade gap; clean plug, air cleaner, muffler; sharpen teeth |
Frequently Asked Questions - HT241 Maruyama
User questions about HT241 Maruyama
0 question about this device. Answer the ones you know or ask your own.
Ask a new question about this device
Download the instructions for your Hedge Trimmer in PDF format for free! Find your manual HT241 - Maruyama and take your electronic device back in hand. On this page are published all the documents necessary for the use of your device. HT241 by Maruyama.
USER MANUAL HT241 Maruyama
natural_image
Illustration of a mechanical tool with a long rod and cylindrical component (no text or symbols visible)
MARUYAMA U.S., INC.
IMPORTANT SAFETY INSTRUCTIONS

Safe Operation Practices for Hedge Trimmer
TRAINING
- Read the Operating and Service Instruction Manual carefully. Be thoroughly familiar with the controls and proper use of the equipment.
- Never allow children to operate trimmer.
- Keep area of operation clear of all persons, particularly small children and pets.
- Regard your unit as a piece of power equipment and teach this regard to all who operate the equipment.
PREPARATION
- Thoroughly inspect the area where trimmer is to be used, and remove all ,wire,string and other foreign objects which might jam the blades.
- Do not operate trimmer without gloves, head and ear protection. Always wear substantial foot wear, safety glasses, and pants or slacks that cover your legs when operating trimmer.
- Check the fuel before starting the engine. Do Not fill the fuel tank indoors, when the engine is running, while smoking, or while the engine is still hot. Replace fuel cap securely and wipe up spilled fuel. Dispose of gas saturated rags properly, in a well ventilated area to avoid possibility of spontaneous combustion. Never use fuel as a cleaner.
4.Do Not use trimmer unless your hands are protected.
-
Use only in daylight or in good artificial light.
-
Never operate equipment in wet grass. Always be sure of your footing: keep a firm hold on the handle and walk, never run.
-
Do not attempt to fill fuel tank from fuel container unless the container spout or funnel fits INSIDE the fuel tank filler neck. The use of too large a spout or funnel, or no funnel, may result in spilled fuel, creating highly flammable vapors. This could result in fire and/or explosion, causing severe bodily injury.
OPERATION
- Start the engine carefully. Keep hands and feet well away from cutting edge.
2.Do not change engine governor setting or overspeed engine.
3. Never swing blades toward bystanders, nor allow anyone near machine while it is in operation.
4. If blades become jammed, stop the engine and inspect trimmer for damage: repair damage before starting engine.
5. If trimmer should start to vibrate abnormally, stop the engine and check for the cause. Vibration is generally a warning of trouble.
6. Stop the engine whenever you leave the trimmer, and when making repairs or inspections.
7. When repairing or inspecting, make certain all moving parts have stopped. Disconnect spark plug wire and keep wire away from plug to prevent accidental starting.
8.Do Not run engine indoors.
9.Shut engine off and wait until blade comes to a complete stop before removing branches that made blade jam.
10.Watch out for traffic when working near roadways.
11. Stay alert for uneven sidewalks, holes in terrain or other hidden hazards when operating.
MAINTENANCE AND STORAGE
- Keep all nuts, bolts and screws tight to be sure equipment is in safe working condition.
- Never store trimmer with fuel in the tank in a building where fumes may reach an open flame or spark. Be sure engine has cooled before storing in any enclosure.
- To reduce fire hazard, keep engine free of cutting, leaves or excessive grease.
- After operating engine, never touch exhaust muffter until it has cooled completely.
- Keep trimmer in good operating condition and keep safety devices in place.
FOREWORD

We would like to express our sincere thanks to you for purchasing our Hedge Trimmer Model HT241. For your safety when operating and for optimum performance, please read this manual very carefully to understand the operation and correct handling of the trimmer. Be particularly careful about safety.
EXTERIOR VIEW OF TRIMMER AND NAMES OF PARTS

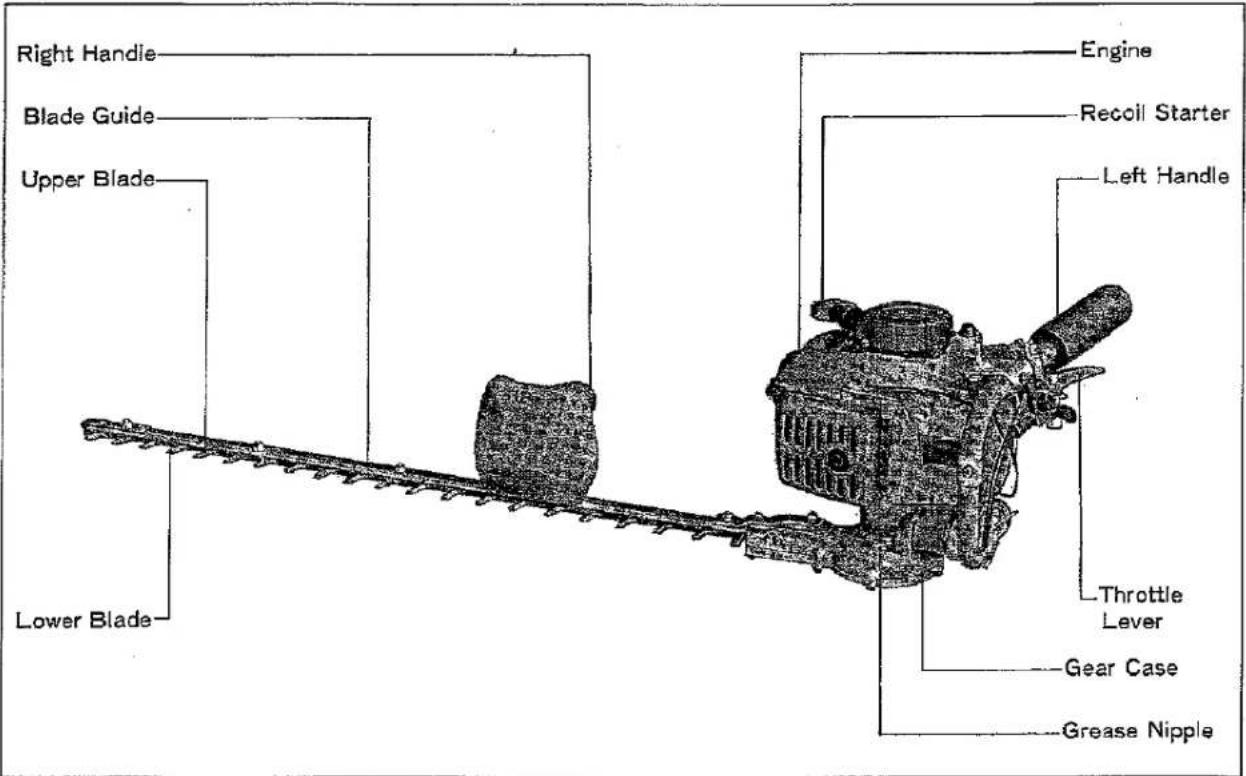
SPECIFICATIONS

| DIMENSIONS | L×W×H in.(mm) | 40.0×9.6×9.5(1,016×245×241) |
| DRY WEIGHT | 1bs.(kg) | 11.0(5.0) |
| ENGINE | TypeDisplacementElectronic IngnitionDiaphragm CarburetorFuel Tank Capacity OZ.(l) | 2-stroke/air-cooled Mitsubishi24.1ccStandardStandard17.0(0.5) |
| BLADES | TypeLength in.(mm)Tooth Pitch in.(mm) | Single-edge, Dual action30(750)1.37(35) |
| TRANSMISSION | Clutch-Dry TypeTow Series Cam Drive | CentrifugalStandard |
*Specifications subject to change without notice or liability.
HOW TO ASSEMBLE MAIN PARTS
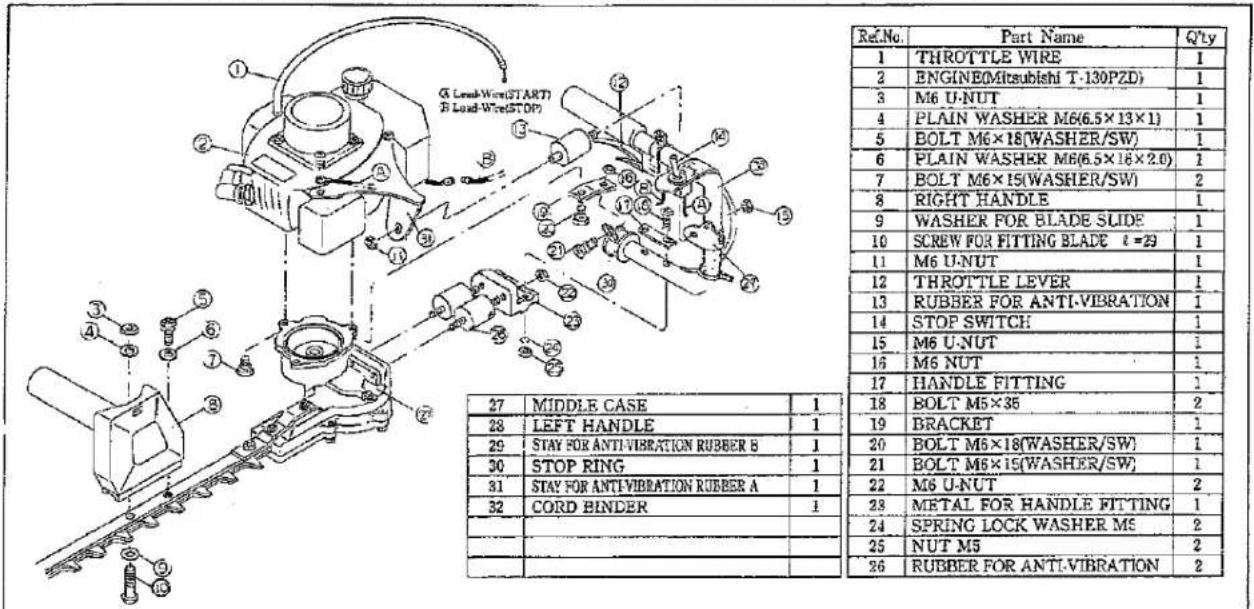
When unpacked, please assemble the trimmer using the above illustration.
How to Assemble
A) Right Handle
- Temporarily locate ⑧ Right Handle by means of ⑩ Screw for Fitting Blade, ④ Plain Washer and ③ U-Nut (M6).
- Secure ⑧ Right Handle to another hole by means of ⑥ Plain Washer and ⑤ Bolt (M6×15).
- Turn ⑩ Screw to the full and turn it back half a rotation. Secure ③ U-Nut (M6).
- Make sure that ⑨ Washer for Blade Slide moves a little by a finger. If not, repeat the same procedure of 3 so that it may move.
5.Secure ⑧ Right Handle that was temporarily fixed in the procedure of 1.
B) Left Handle
- Secure ② Rubber for Anti-Vibration to ② Middle Case. (2-place) Secure ③ Metal for Handle Fitting to ② Rubber for Anti-Vibration by means of ② Nut (M6).
- Secure ② Left Handle along with ⑰ Handle Fitting to ⑲ Metal for Handle Fitting by means of ⑳ Bolt (M5×35), inserting ㉑ Spring Lock Washer (M5) and ㉒ Nut (M5). (2-place)
- Temporarily locate ⑬ Rubber for Anti-Vibration to ⑳ Stay for Anti-Vibration Rubber B by means of ⑮ Nut (M6).
- Insert ⑩ Stop-Ring as shown illustrated and temporarily locate ⑲ Bracket·by means of ⑳ Bolt (M6×15) and ⑮ Nut (M6).
C) Engine
- Temporarily locate ② Engine in the direction as shown illustrated by means of ⑦ Bolt (M6×15) onto ⑳ Middle Case. (2-place) Secure ⑮ Rubber for Anti-Vibration to ⑳ Stay for Anti-Vibration Rubber A by means of ⑰ U-Nut (M6).
2.Secure ⑲ Bracket along with ⑳ Middle Case to ② Engine by means of ⑳ Bolt (M6×18).
3.Secure bolts and nuts that were temporarily located in the procedures of C-1, B-4 and B-3. - Connect ① Throttle Wire to ⑫ Throttle Lever and secure it to ⑳ Left Handle by means of ⑴ Cord Binder.
- Connect ① and ⑧ Wires of ⑭ Stop Switch respectively to ② Engine.
IMPORTANT
- To protect the operator from any accidents, be sure the connector of the stop-switch at the left handle side to the lead-wire of the engine side is securely attached.
- To connect the throttle wire to the lever, please use the throttle wire adjuster to set moderate tension for the throttle lever.
HOW TO OPERATE
A Before operation
Check if any of the bolts and nuts need to be tightened.
B Procedures for operation
- Fill the fuel tank with mixed oil (25:1 ratio) using 2 cycle oil.
- With the tickler button pushed up, work the primer pump until fuel comes out from the overflow pipe.
- Fully close choke lever and pull throttle lever. Push lock button and release throttle lever until lock button is engaged. (Make sure the throttle lever is locked.)
- When engine is started, open choke lever and grip throttle lever again to release lock button. (Confirm blades stop moving when throttle back engine.)
- To stop engine: Throttle back and idle engine then turn Engine Stop Switch to STOP(OFF) position.
C Instructions on operation
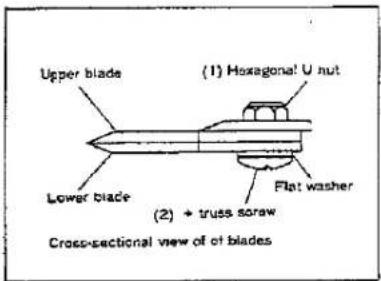
- Adjustment of blades
The blades loosen with long use. When you find that you no longer have a clean cut, adjust the blades in the following ways:
(1)Turn nut (1) loose.
(2)Screw (2) in with the driver lightly till it stops turning, and then screw it back one-fourth to a half turn.
(3)Turn nut (1) tight.
(4)Lubricate the blades after the adjustments above.
(5) Start the engine and operate the blades at the highest speed of motor revolution for a minute or so.
(6)Stop the engine and touch the blades with your hand. If they are just warm enough for you to keep your hand on them, you have made the proper adjustments, but if they are too hot for you to keep touching them, give screw (2) a little more turnback and repeat (5) to see if they are properly adjusted.
Note: Always stop the engine before making the adjustments. The blades have a slot around screw (2). In case you find the dust on the ends of the slots, remove it and clean.
- Inject grease into the gear case before operation, and once in every 10 to 20 hours of operation.
- Stop the teeth bar while operating and lubricate the teeth occasionally.
natural_image
Black-and-white photo of a person in motion, possibly a warrior or fighter, with no visible text or symbols.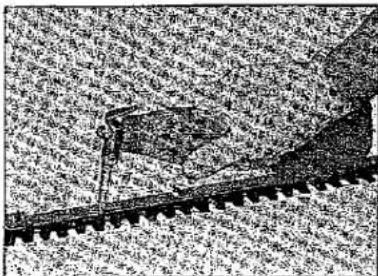
natural_image
Black-and-white illustration of a saw cutting through a metal frame, no text or symbols visibleHOW TO CONDUCT OPERATIONS
natural_image
Silhouette of a person in military-style attire standing with a long object on the ground (no text or symbols visible)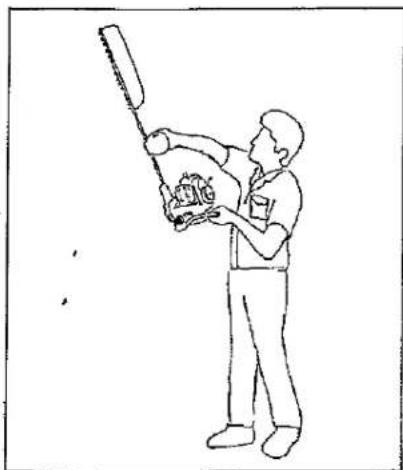
natural_image
Line drawing of a person holding a baton, no text or symbols present
natural_image
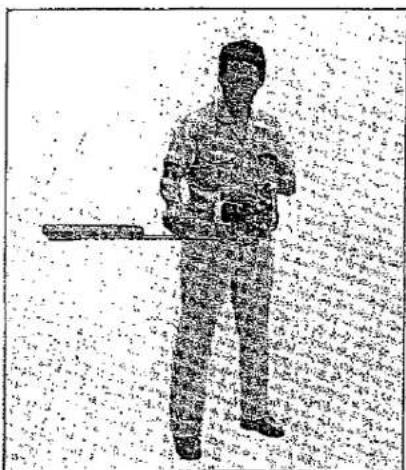
Black-and-white photo of a soldier standing in a field, holding a rifle (no visible text or symbols)A High-speed operation, consumes more fuel and shorten the life of the machine. Don't operate the trimmer at a higher speed than is necessary.
B To trim easily, maintain a slight cutting angle while moving the blades.
☐ Whitim 7 mm of branches, tips are for right trimming. Cutting of 14 inch diameter branches is easy for these trimmers. While larger diameter branches may be cut, this will proportionally increase the wear and tear of the machine.
MAINTENANCE AND PRESERVATION

Maintenance and Preservation
- Make sure that all the nuts are secure.
- Clean the following parts at regular intervals :
a.the plug
b.the air cleaner
c.the exhaust port and the muffler
d.the fuel filter
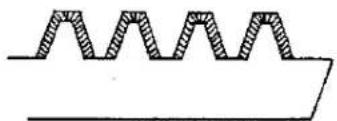
3.Teeth whetting :
When you sharpen the teeth on a whetstone, whet only the parts of the blade corresponding to the ones filled with slanting lines in the figure below. do not try to sharpen the other parts.
natural_image
Pure zigzag line pattern without any text, numbers, or symbols- To preserve the trimmer :
a. Empty the fuel tank and the carburetor.
b.Sweep the dust off the cutter.
c. Keep it in a dry place.
d. Keep the teeth bar well-oiled.

MARUYAMA U.S., INC.
301 - 30 ^th St. NE, Suite 118, Auburn, WA 98002.
1-253-735-7368
- IMPORTANT SAFETY INSTRUCTIONS
- Safe Operation Practices for Hedge Trimmer
- TRAINING
- PREPARATION
- OPERATION
- MAINTENANCE AND STORAGE
- FOREWORD
- HOW TO ASSEMBLE MAIN PARTS
- How to Assemble
- A) Right Handle
- B) Left Handle
- C) Engine
- IMPORTANT
- HOW TO OPERATE
- A Before operation
- B Procedures for operation
- C Instructions on operation
- HOW TO CONDUCT OPERATIONS
- MAINTENANCE AND PRESERVATION
- MARUYAMA U.S., INC.
Brand : Maruyama
Model : HT241
Category : Hedge Trimmer